Let’s be honest – Grandma already has everything she needs. What she doesn’t have is a gift made by the tiny hands that light up her world. These Mother’s Day craft ideas for Grandma go way beyond a store-bought card. They’re the kind of keepsakes she’ll show every single visitor who walks through her door, probably with tears in her eyes.
Whether you’re a parent setting up a craft afternoon at home or a teacher organizing a classroom project, every idea here is designed to be simple, budget-friendly, and – most importantly – unforgettable. No fancy supplies, no special skills required. Just a little paint, a lot of love, and maybe one tiny set of hands that keeps touching everything.

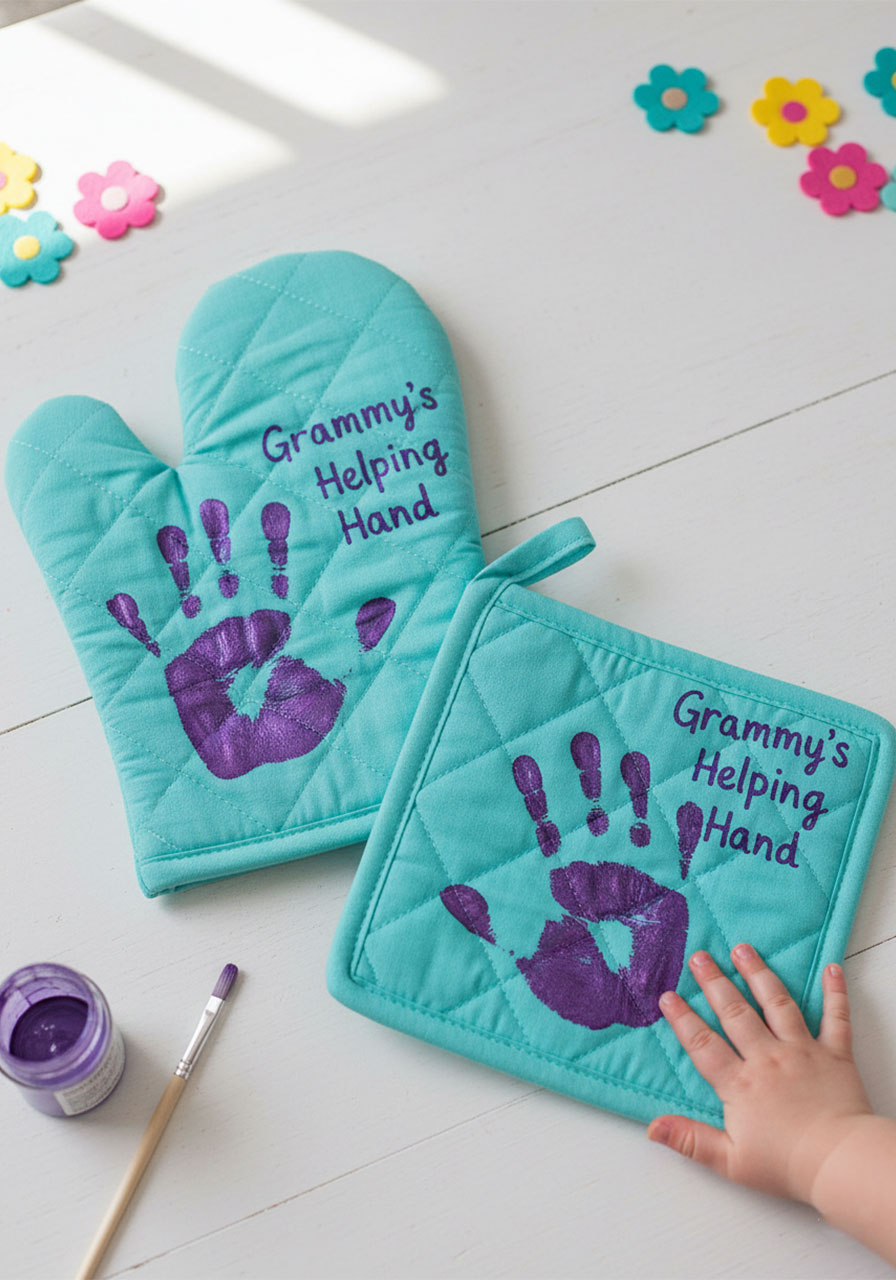
1. Toddler Handprint Potholders – “Grammy’s Helping Hand”
✅ Great for toddlers & preschoolers
Best for: Kids ages 1–5 | Time to Make: 30 minutes + overnight drying | Budget: Under $5
This one is a guaranteed tearjerker. There is something about a grandchild’s tiny handprint that turns a simple kitchen item into a family heirloom. The best part? You can grab everything you need at the Dollar Tree, keep your budget low, and still deliver a gift that feels priceless.
What You’ll Need:
1 oven mitt and 1 potholder (Dollar Tree works perfectly)
Fabric paint in your chosen color (metallic or glitter fabric paint adds a wow factor)
A paintbrush
Paper towels and a drop cloth or old newspaper
A marker or fabric pen for writing the label (optional)
How to Make It:
1. Lay the oven mitt and potholder flat on your protected work surface.
2. Using the paintbrush, apply an even layer of fabric paint directly onto your child’s palm and fingers. Make sure every part of the hand is coated – no missed spots!
3. Press your child’s hand firmly onto the center of the potholder, then carefully lift straight up. Repeat on the mitt.
4. While the paint is still wet, use the brush to touch up any faint spots or fill in gaps so the handprint is nice and clear.
5. Let it air-dry completely overnight – do not rush this step!
6. Once dry, heat-set the paint by placing a thin cloth over the handprint and pressing with a warm iron for 30 seconds. This locks the design in permanently so it holds up through washing.
7. Optional but adorable: write “Grammy’s Helping Hand” next to the print with a fabric marker.
💡 Pro Tip: Do a test print on a piece of paper first so your child gets the feel of pressing and lifting their hand – it keeps the actual potholder looking crisp. Also, darker or metallic paint colors (like purple or rose gold) show up beautifully against teal or green fabric.


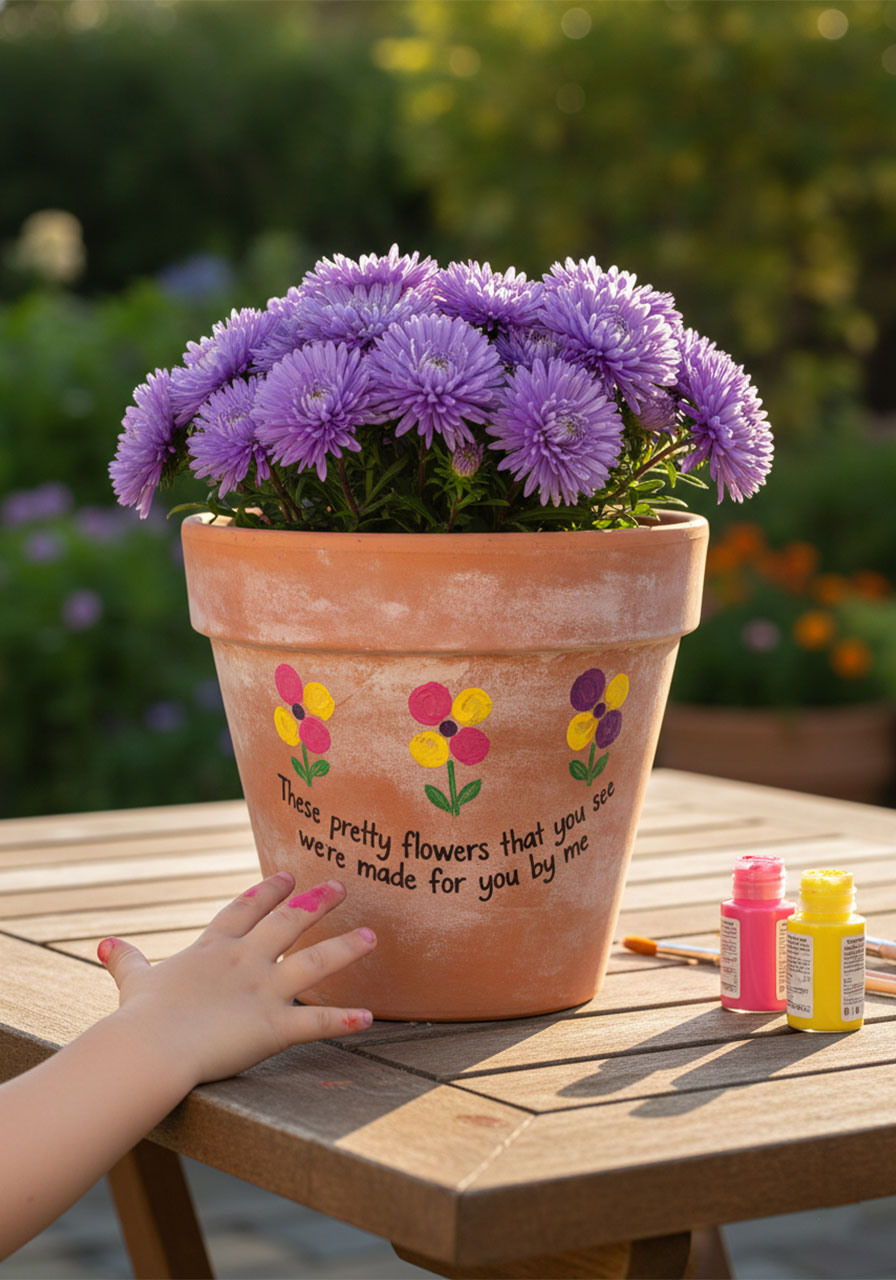
2. Thumbprint Flower Pot – “Made for You by Me”
✅ Great for toddlers, preschoolers & elementary kids
Best for: All ages | Time to Make: 45 minutes + drying time | Budget: Under $10
Grandmas love flowers – and this gift gives her flowers that will never wilt. A plain terra cotta pot transforms into a colorful, personal keepsake when your little one stamps their tiny thumbprints into petals. It’s simple enough for a two-year-old, and sweet enough to make a grandma cry (happy tears, we promise).
What You’ll Need:
A plain terra cotta pot (any size – small or medium works great)
Acrylic craft paint in 2–3 bright colors for the flowers
Green acrylic paint for stems and leaves
A fine-tip paint marker or thin brush for writing the message
Clear waterproof spray sealant (like Mod Podge Spray or Krylon Crystal Clear)
Paper towels and a drop cloth
How to Make It:
1. Start with a clean, dry terra cotta pot. If you’d like a white base so the colors pop, brush on a light coat of white acrylic paint and let it dry fully first.
2. Dip your child’s thumb into the first flower color and press it firmly onto the pot, then lift. This is one petal! Repeat 4–5 times in a circle to form a full flower. Make as many flowers as you’d like around the pot.
3. Switch colors for each flower to make the design lively and cheerful.
4. Once the flower prints are dry, use a thin brush and green paint to add a simple stem and two small leaf shapes beneath each flower.
5. Let everything dry completely – at least 1–2 hours.
6. Using the paint marker or a thin brush, write the message on the pot: “These pretty flowers that you see were made for you by me.”
7. Finish with 2 light coats of clear waterproof spray sealant outdoors or in a well-ventilated area. This step is what makes the pot outdoor-safe so Grandma can display her flowers in the garden.
💡 Pro Tip: Grab a pot with a slightly wider, flatter surface area so there’s more room for thumbprint flowers. If you’re making this in a classroom, have each child make one flower in a different color – a pot covered in flowers from the whole class is extra special for a grandma who loves her grandkids’ school community.
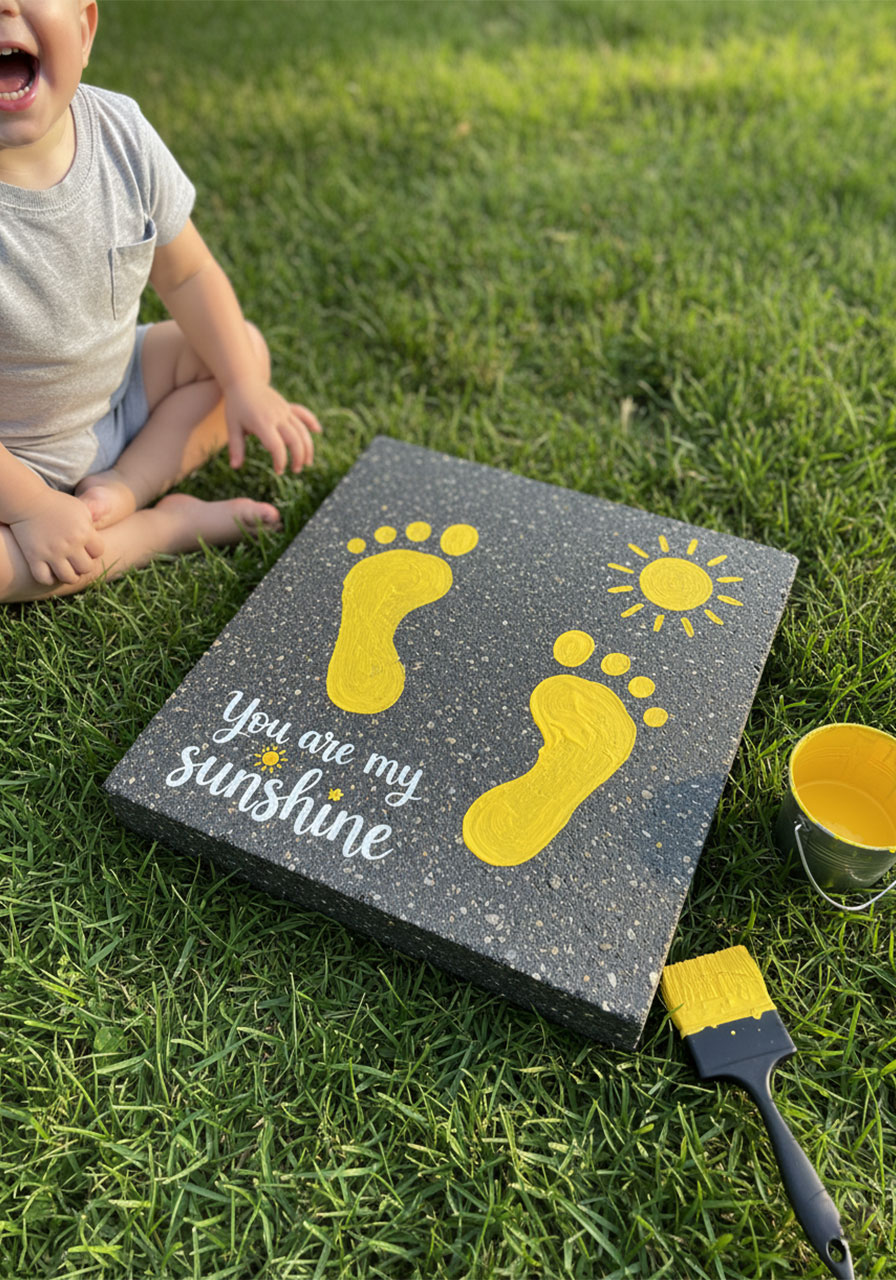
3. Footprint Stepping Stone – “You Are My Sunshine”
✅ Great for toddlers & preschoolers
Best for: Kids ages 1–4 | Time to Make: 1 hour + curing time | Budget: $10–$20
Every grandma with a garden needs a stepping stone – but not just any stepping stone. This one is made with her grandchild’s footprints and the sweetest message: “You are my sunshine.” She’ll place it in her garden and smile every single time she walks past it. This is the gift that lives outdoors for years and never gets old.
What You’ll Need:
1 stepping stone kit (available at craft stores) OR a square mold and quick-setting concrete mix
Yellow acrylic craft paint (outdoor-safe or mixed into the concrete)
A paintbrush or sponge brush
A paint pen or permanent marker for the text
Baby wipes for quick foot cleanup
Clear outdoor sealant spray
How to Make It:
1. If using a stepping stone kit, follow the package directions to mix and pour the concrete into the mold. Let it set until it is firm but not fully hardened – usually about 20–30 minutes. Check the package instructions for your specific kit.
2. At the right moment, paint the bottoms of your child’s feet with yellow paint and press them firmly onto the stone surface. Hold steady for 5 seconds, then lift straight up carefully.
3. Press a yellow-painted sun shape in one corner using a sponge or brush – a simple circle with short lines around it works perfectly.
4. Let the stone cure and harden fully according to the kit instructions – usually 24 hours.
5. Once completely hardened, use the paint pen to write “You are my sunshine” on the stone. Add a small sun doodle next to the text if you like.
6. Seal with 2 coats of clear outdoor spray sealant to protect the design through rain and sun.
💡 Pro Tip: For a classroom project, have each child make a mini stepping stone and present them together as a set. Grandma gets an entire “path of sunshine” for her garden – one from each grandchild! Also, bright yellow paint shows up especially well against the gray concrete, which is why it’s the perfect color choice here.
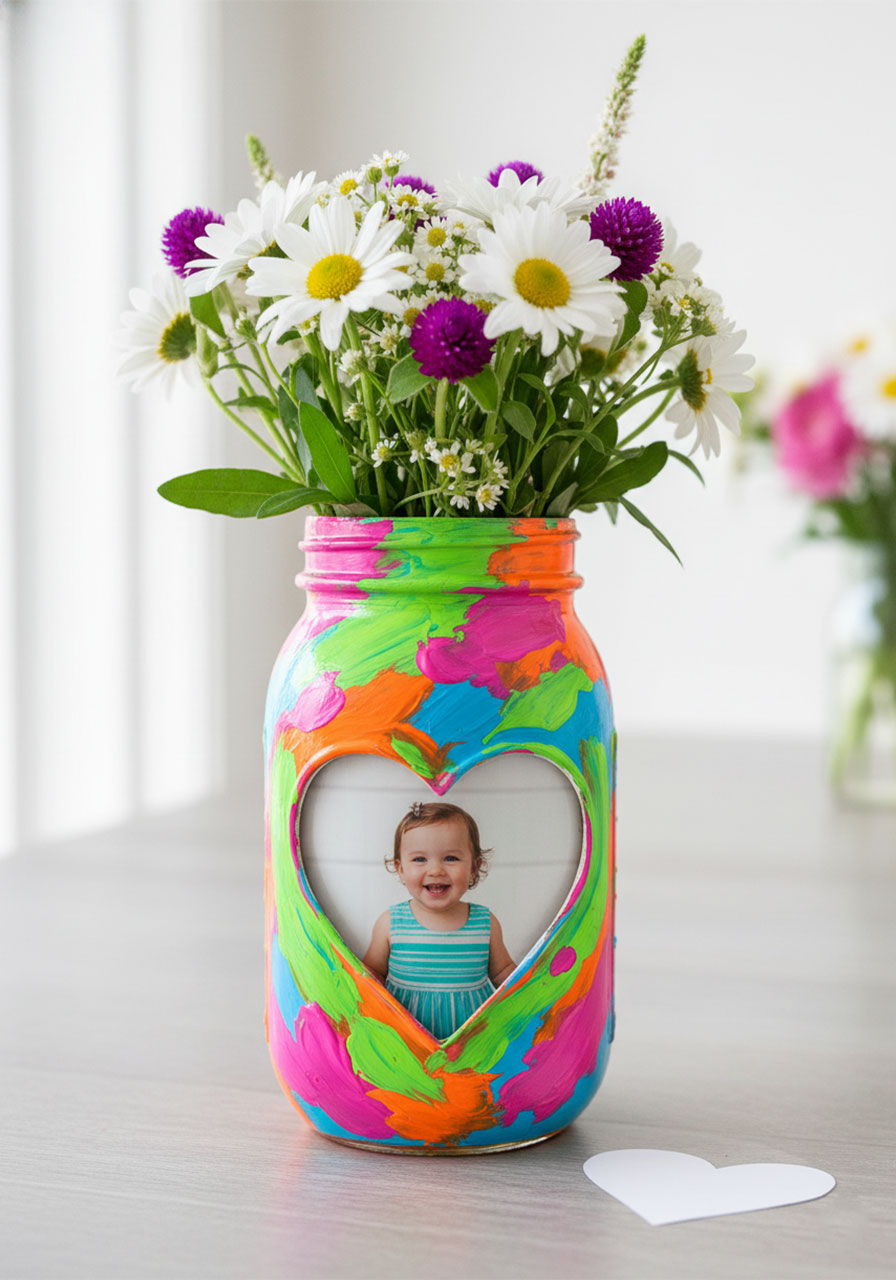
4. Painted Photo Vase – A Bouquet & a Baby in One
✅ Great for older kids with parent help
Best for: Kids ages 3 and up (with adult help) | Time to Make: 1–2 hours + drying | Budget: Under $15
This one is a showstopper. Imagine Grandma unwrapping a bright, colorful vase bursting with flowers – and then spotting her grandchild’s face smiling at her through a little heart-shaped window on the side. Her reaction? Priceless. This gift combines a fun painting project with a personal photo for a truly one-of-a-kind display piece she will keep forever.
What You’ll Need:
A clean glass jar or wide-mouth vase (Mason jars work great)
White spray primer
Acrylic craft paint in 3–4 bright colors
A heart-shaped paper cutout (trace and cut a heart from cardstock)
Tape or adhesive putty
Clear spray sealant
A small plastic cup (to hold the photo inside the jar)
A printed photo of your child
Scissors and tape
How to Make It:
1. Cut out a heart shape from cardstock. Tape or stick it firmly onto the side of the clean, dry jar – this is your photo window.
2. In a well-ventilated area, spray the entire jar with white primer. Let it dry completely (about 30 minutes).
3. Let your child go wild painting the jar with bright, bold acrylic colors using their fingers or a brush. Stripes, swirls, splatters – anything goes! This is the most fun step and kids absolutely love it.
4. Before the paint fully dries, carefully peel off the heart-shaped cutout. You’ll be left with a clean white heart window on the side of the jar. If you wait too long, the paper can stick – so watch your timing.
5. Let the paint dry fully (1–2 hours), then spray the outside of the jar with clear sealant.
6. Cut your child’s photo to fit inside a small plastic cup and place the cup inside the jar so the photo faces outward through the heart window. Secure with tape if needed – this also makes it easy to swap photos as the child grows!
7. Fill with fresh or faux flowers and wrap with a bow for the full wow effect.
💡 Pro Tip: Choose a photo where your child is smiling directly at the camera – it shows through the heart perfectly and makes the gift that much more personal. For a classroom version, each child makes their own mini jar vase using a small Mason jar. Line them all up and they make the most adorable display!
5. Painted Photo Blocks – A Tower of Tiny Faces
✅ Great for school projects & multi-grandchild gifts
Best for: All ages | Time to Make: 1–2 hours + drying | Budget: $15–$25
Photos are a great gift on their own, but these DIY photo blocks take things to a whole new level. Each block holds one photo, and you stack them together into a beautiful little display tower. Grandma can rearrange them, add new photos over time, and show them off on her mantle like the proudest grandparent on the planet – because she is.
What You’ll Need:
2x4x4-inch wooden blocks (one per grandchild or photo – available at craft stores)
Spray paint in a coordinating color (teal, white, or soft green all look beautiful)
Fine-grit sandpaper
Printed photos (one per block)
Mod Podge (matte finish works great)
A foam brush or paintbrush
Faux flowers or small decorative flowers (one per block)
Strong craft glue or a hot glue gun (adult use only)

How to Make It:
1. Prep your photos first. For extra charm, have each child hold one hand up and out as if they’re holding something. Take the photo from that angle so their raised hand becomes the focal point – you’ll see why in the last step!
2. Lightly sand all sides of each wooden block to smooth any rough edges. Wipe away the dust.
3. In a well-ventilated area, spray paint the blocks in thin, even coats. Let each coat dry before adding the next – 2 coats is usually enough for good coverage.
4. Once the blocks are completely dry, tear the edges of each printed photo to create a soft, rustic border instead of a sharp cut edge. This gives the blocks a charming handmade feel.
5. Brush a layer of Mod Podge onto the front face of the block, press the torn photo on top, and smooth it down firmly. Let it dry for 30 minutes.
6. Brush a final sealing coat of Mod Podge over the top of the photo. Let it dry completely – about 2 hours.
7. Using craft glue or a hot glue gun (adults only for this step), attach one faux flower to the block so it appears to be right in the child’s raised hand – as if they’re holding out a flower as a gift. Stack the blocks into a pyramid and the effect is absolutely gorgeous.
💡 Pro Tip: This is a wonderful classroom project! Each student makes one block with their own photo, and the teacher assembles all the blocks as a group gift for a teacher’s grandparent or as individual gifts to take home. Use the same spray paint color across all blocks so the tower looks cohesive when displayed together.
With any one of these crafts, Grandma isn’t just getting a gift – she’s getting a memory she can hold, display, and treasure for years. And the best part? You made it happen. Now go get those tiny hands painted and get crafting! 🎨💜
More Mother’s Day Ideas to Keep the Fun Rolling:
30+ Mother’s Day Crafts for Kids of All Ages
How to Make a DIY Pop-Up Tulip Card for Mom
Easy Cotton Pad Tulip Craft for Kids
The Sweetest Mother’s Day Coffee Cup Craft
This Sweet Mother’s Day Handprint Flower Craft Will Make Mom Cry Happy Tears (The Best Kind)
How to Make an Adorable Mother’s Day Heart Card (That Folds Into a Surprise!)
The Sweetest Mother’s Day Card Idea: Baby Handprint with a Heart
100 DIY Mother’s Day Gift Ideas Mom Will Love (Handmade From the Heart)
Handprint Paper Lilies: The Sweetest Homemade Mother’s Day Gift Kids Can Actually Make