
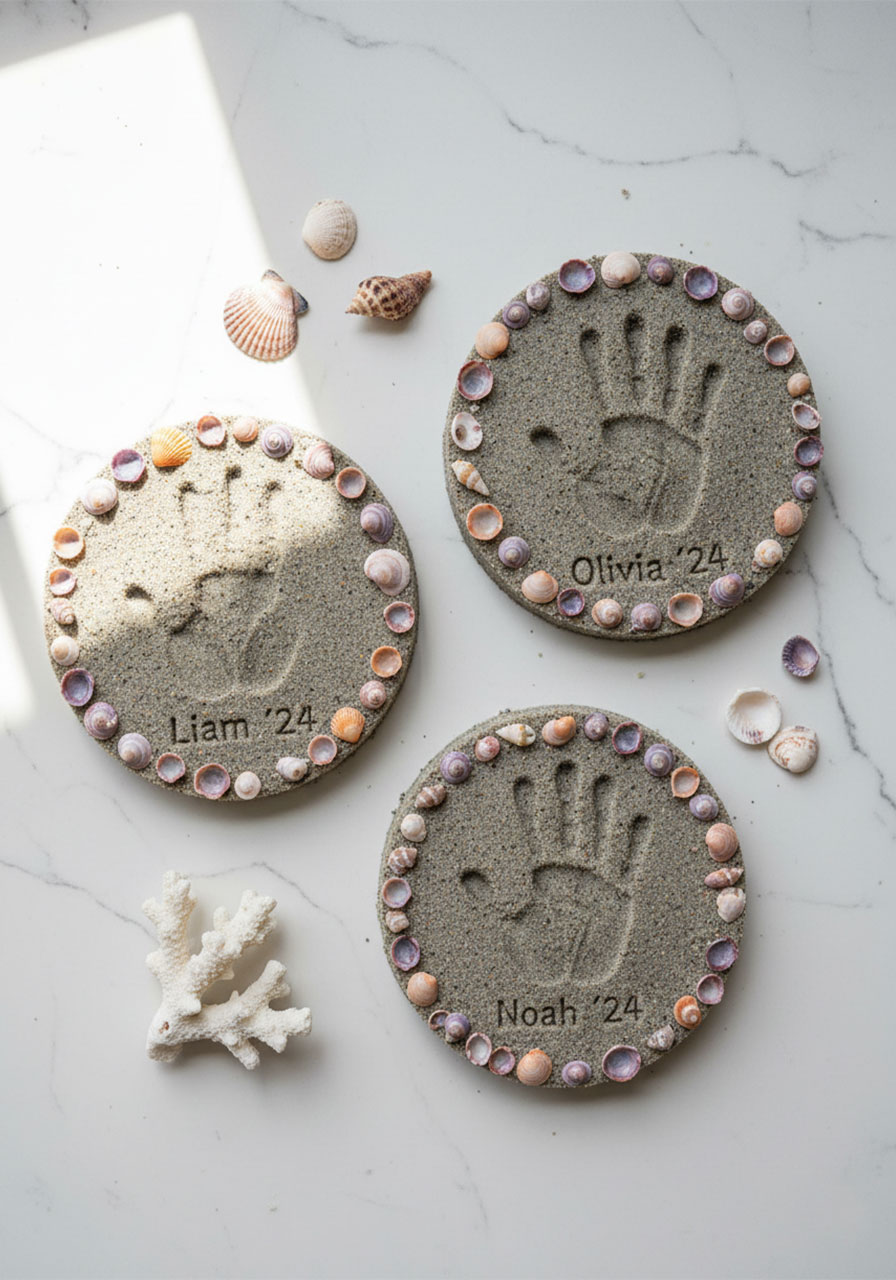
If you’re a parent or teacher looking for a meaningful, easy craft that kids absolutely love – you’ve just found your new favorite project.
This DIY Beach Sand Handprint Keepsake is one of those crafts that checks every single box. It’s simple to make, requires only a handful of inexpensive ingredients, and produces something so genuinely beautiful that you’ll want to display it on a shelf forever.
The best part? You can make it right on the beach using sand you scoop up yourself – or at home with sand from a craft store or backyard sandbox. Either way, the result is stunning.
Picture this: a perfectly round, stone-like disc embedded with real seashells, stamped with your child’s tiny handprint, and dated with their name underneath. Twenty years from now, you’ll pull it off a shelf and tear up a little. That’s what this keepsake does.
Let’s get into it.
Why Parents and Teachers Love This Craft
As a parent, I’m always hunting for activities that are more than just “something to do.” This one delivers on every level.
It’s a real sensory experience for little ones – mixing the gritty sand dough with their hands, pressing their palm into the soft dough, and carefully placing shells around the border. Kids feel proud of what they made. And they should – it looks incredible.
For teachers, this is a perfect end-of-year keepsake project, a summer send-off activity, or a fun classroom craft tied to an ocean or beach unit. Make one for each student, and you’ve just given families a gift they’ll treasure.
And for parents on a beach vacation – this is the ultimate rainy-day or “we need a break from the sun” activity. It keeps kids entertained for a good chunk of the afternoon, and the souvenir they take home beats any gift shop trinket by a mile.

What You’ll Need
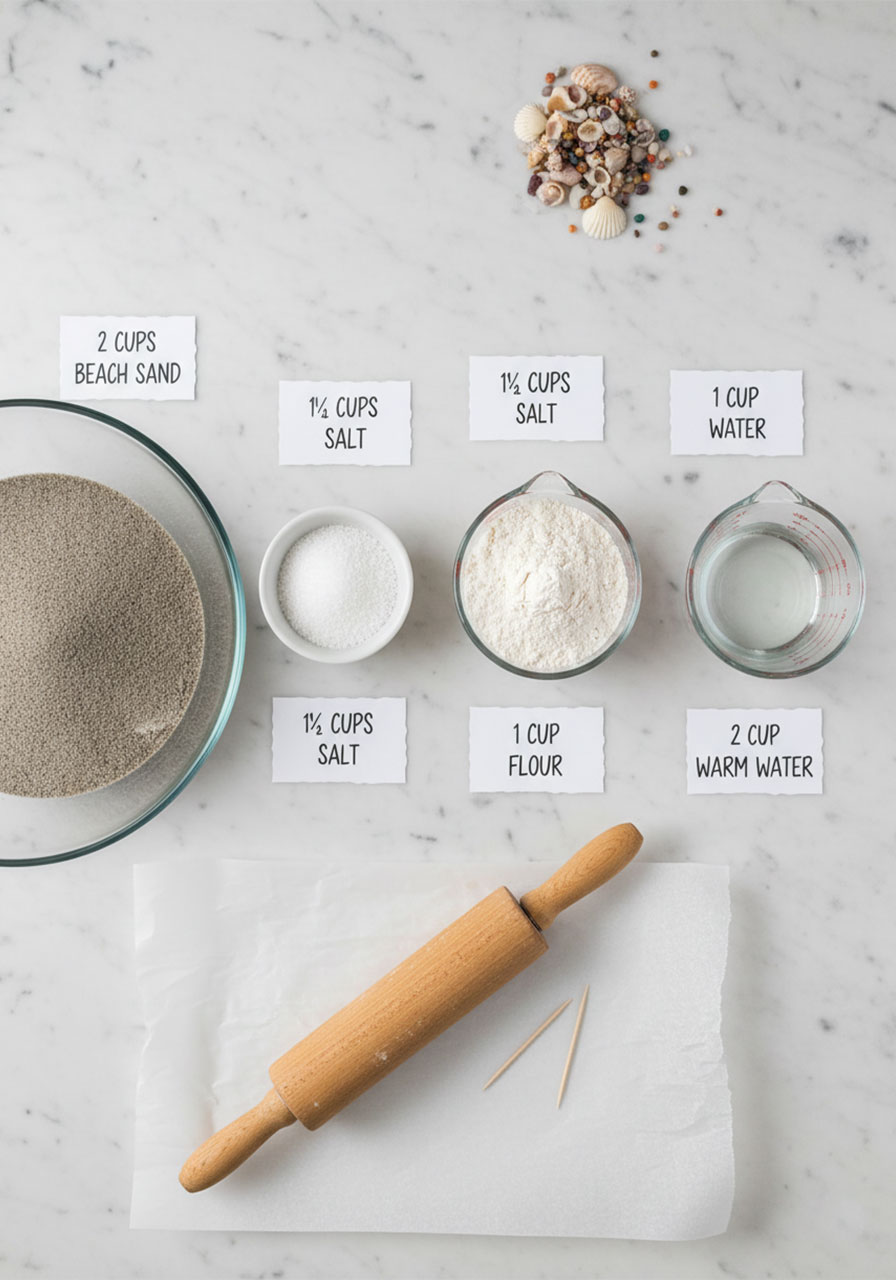
Sand Dough Ingredients
This recipe makes enough dough for 4 small handprints. See the half-batch option below if you need less.
Full Batch (4 handprints)
2 cups sifted beach sand
1 cup warm water
1¼ cups Morton Iodized Salt
1½ cups all-purpose flour
Half Batch (2 handprints)
1 cup sifted beach sand
½ cup warm water
⅝ cup Morton Iodized Salt
¾ cup all-purpose flour
Supplies
Seashells – collected from the beach, or craft store shells work great too
Parchment paper
A rolling pin (or a smooth water bottle in a pinch – more on that below!)
A baking sheet
A toothpick or skewer for writing names
Mod Podge (optional, for sealing)
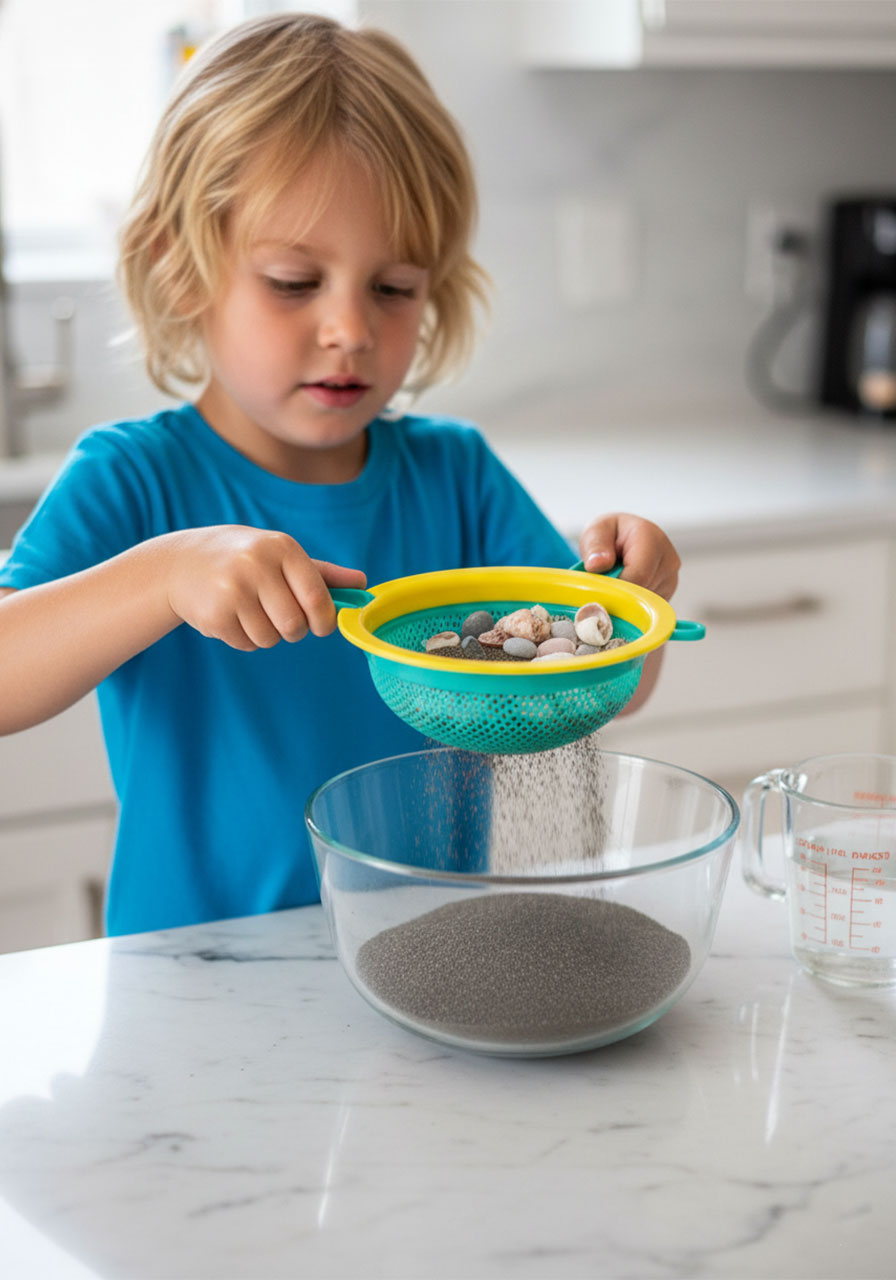
🌊 Pro Tip: Sift Your Sand First. Before you measure your sand, run it through a sieve or colander to remove any shells, pebbles, or debris. This gives your dough a smoother, more workable texture – and means you won’t get a surprise rock poking through your child’s handprint!
How to Make Your DIY Beach Sand Handprint Keepsake
Step 1: Preheat the Oven and Mix the Dry Ingredients
Set your oven to 250°F – low and slow is the secret to a rock-hard keepsake.
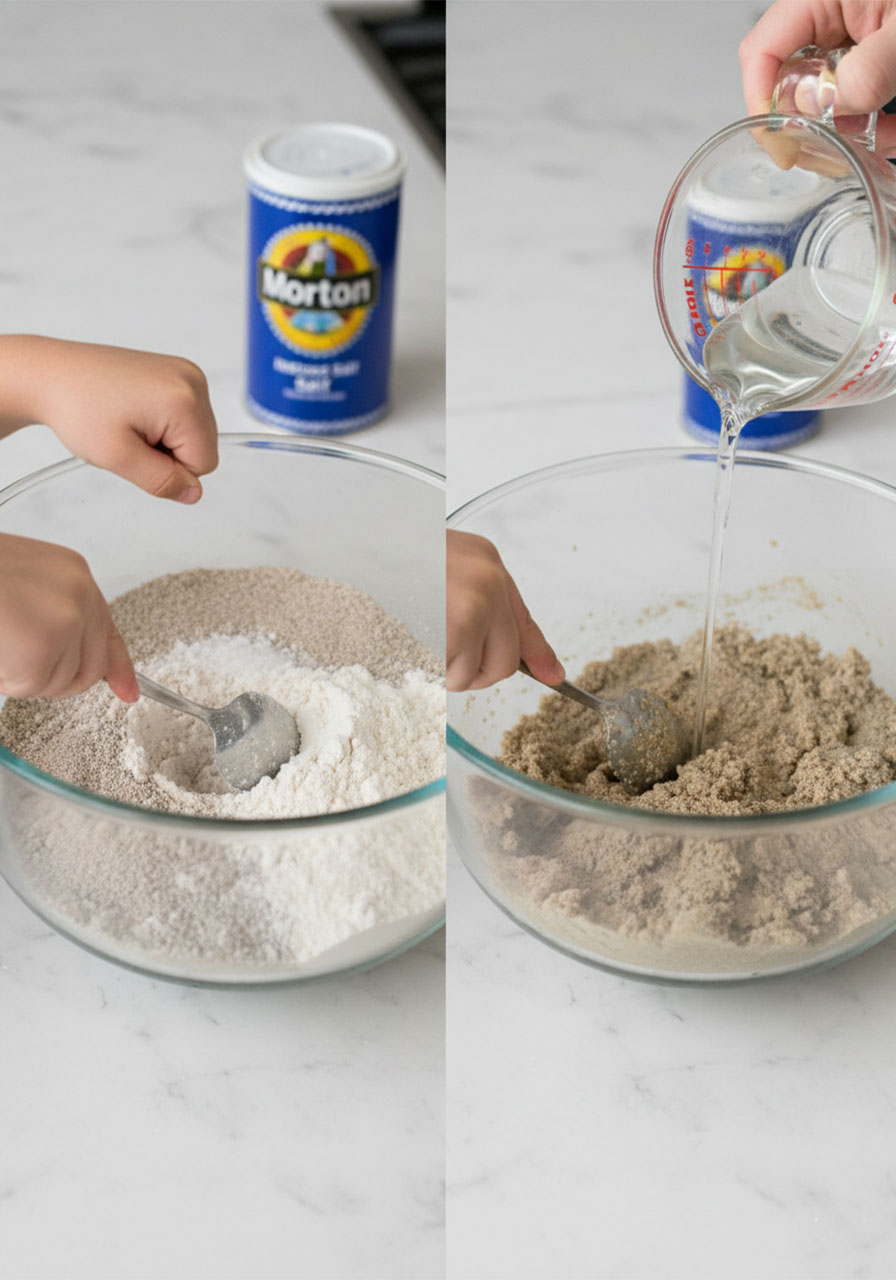
In a large mixing bowl, combine your sifted sand, flour, and salt. Give it a good stir until everything is evenly mixed. This is a great step to hand off to the kids – they love getting their hands in the dry mix!
Step 2: Add the Warm Water
Slowly pour in the warm water a little at a time, stirring as you go.
You’re aiming for a dough that holds its shape – think thick, slightly crumbly play dough. If you accidentally add too much water and the mixture gets sticky, just add a little more flour and sand to balance it out.
Don’t worry if it looks a bit rough at first. Once it comes together, it’ll feel sturdy and workable.
👧 Kid-Friendly Moment. Let the kids help pour the water in! This is the messiest and most exciting part for little hands. Put a towel down first and just embrace the chaos – that’s half the fun.
Step 3: Divide and Roll Out the Dough
Separate your dough into 4 equal balls (or 2 balls if you made the half batch).
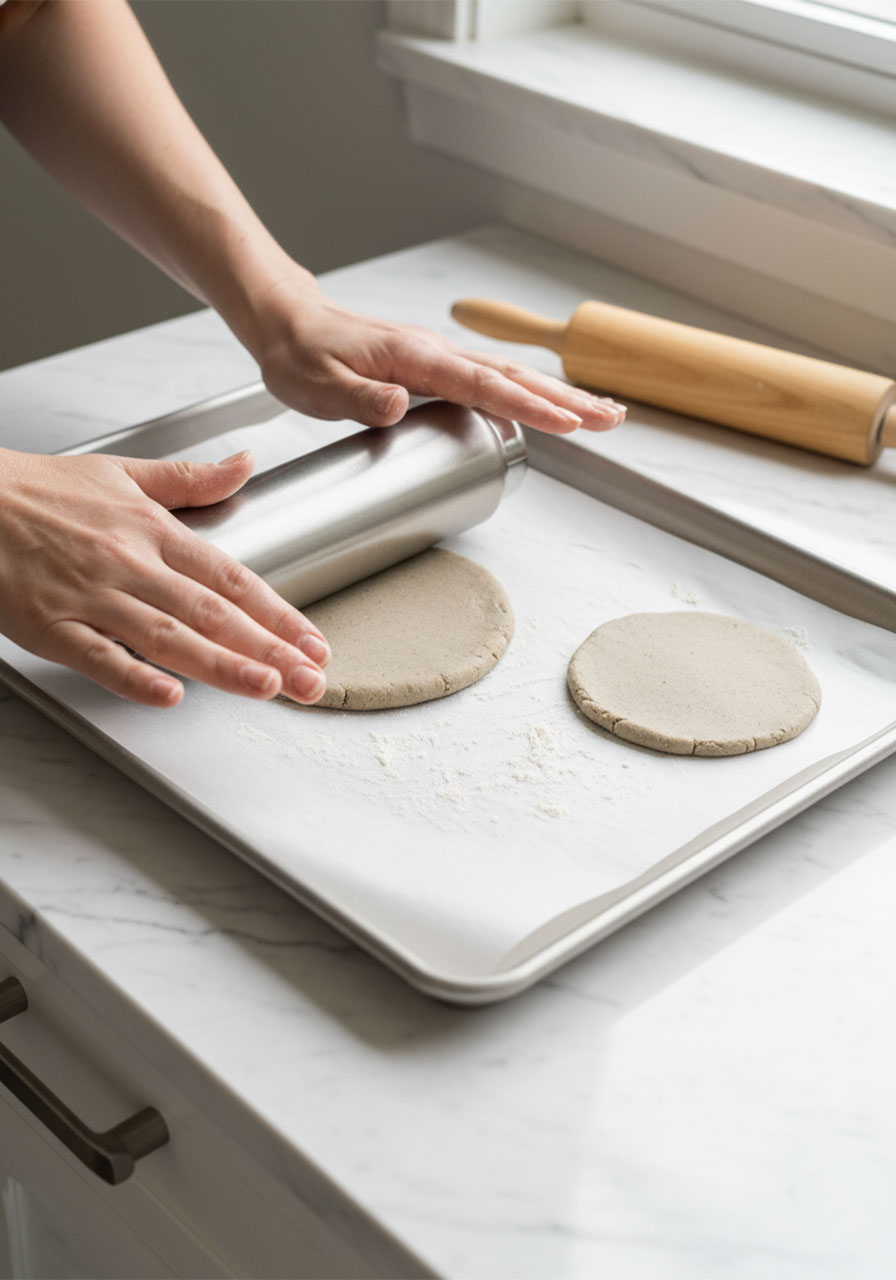
Line your baking sheet with parchment paper and lightly dust it with flour. Place one dough ball on the sheet and roll it out to about ½ inch thick. You want it thick enough that it won’t crack when you press a handprint in, but not so thick that the center won’t bake through.
Aim for a roughly circular shape – it doesn’t need to be perfect. In fact, the slightly organic, imperfect shape makes it look more like a real piece of driftwood art.
🎯 Pro Tip: No Rolling Pin? No Problem. When we made these on vacation, I didn’t have a rolling pin with me. A smooth, refillable water bottle worked perfectly. A smooth drinking glass works too. Use what you’ve got!
Step 4: Press in the Handprint
This is the magical step – and the one that requires a tiny bit of patience.
Have your child spread their fingers wide, then gently – but firmly – press their hand straight down into the center of the dough. Press evenly across the palm and all the fingers, then lift straight up without dragging.
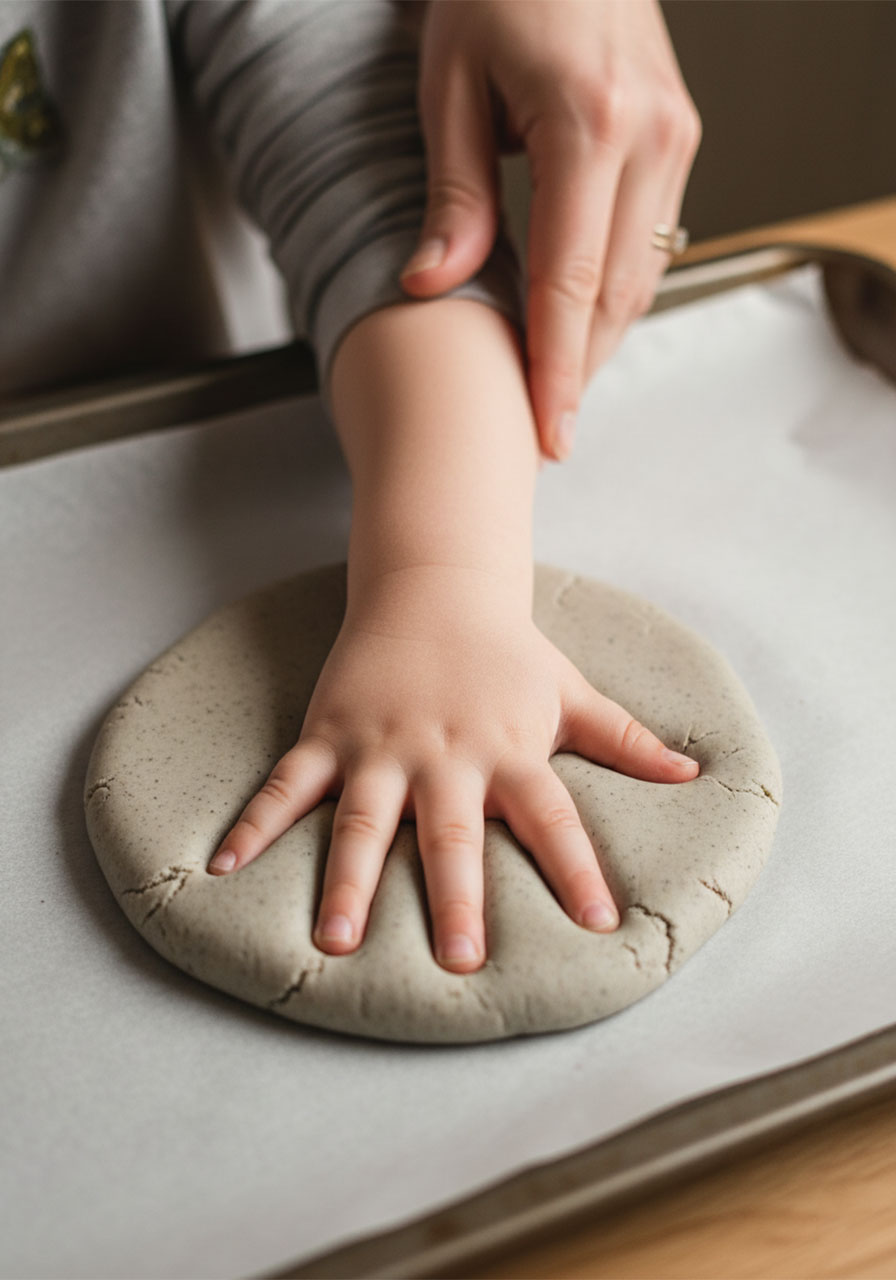
You want a clean, clear impression. If it doesn’t come out perfectly, simply smooth the dough back out and try again. The dough is very forgiving at this stage.
Leave enough room around the handprint border to place your seashells – that’s the decorative frame that makes the whole piece look polished and intentional.
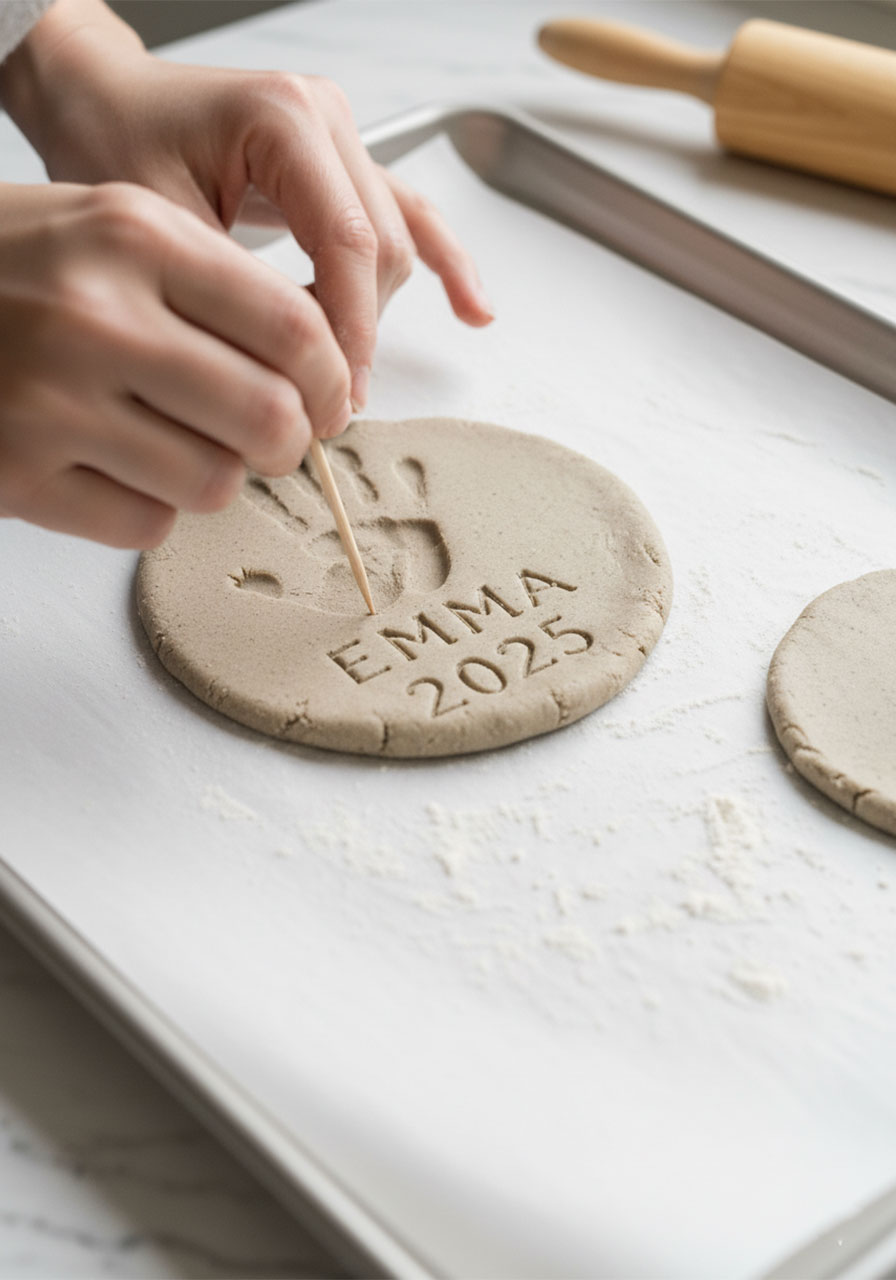
📝 Pro Tip: Add a Name and Date. While the dough is still soft, use a toothpick to carefully write your child’s name and the year underneath the handprint. Press gently – you’re etching, not digging. This tiny detail transforms a cute craft into a true time capsule.
Step 5: Decorate with Seashells
Now for the fun part – decorating!
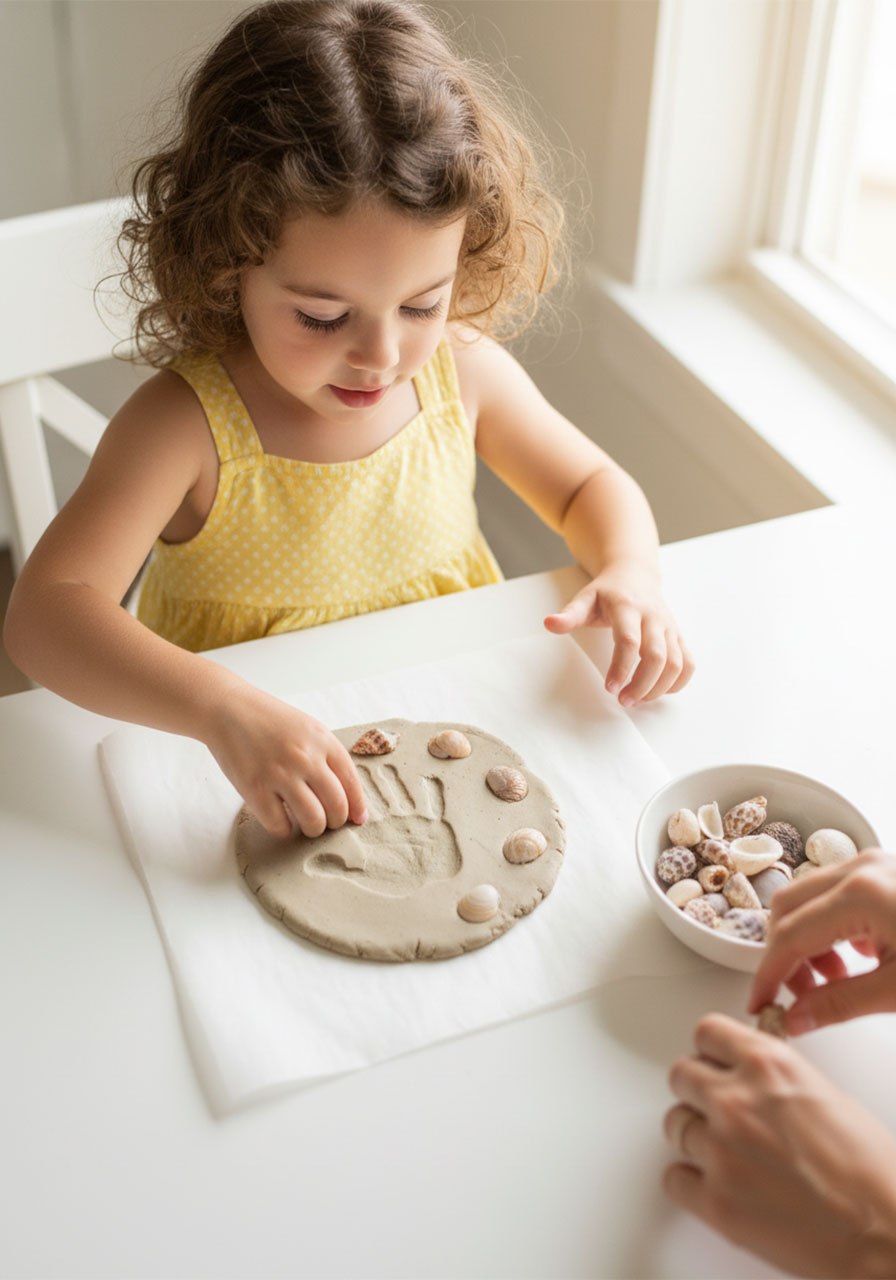
Press your seashells into the dough around the border of the handprint. Space them out evenly to create a frame, or cluster them however feels right to your child. Let them choose the shells and place them themselves. This is where their little personality really shows up in the finished piece.
Here’s a great trick: instead of pressing the pretty side of the shell in, try pressing the rough underside of a shell into the dough to leave a textured impression. The result looks like delicate fossil-like patterns surrounding the handprint. So cool.
Step 6: Bake Until Rock Hard
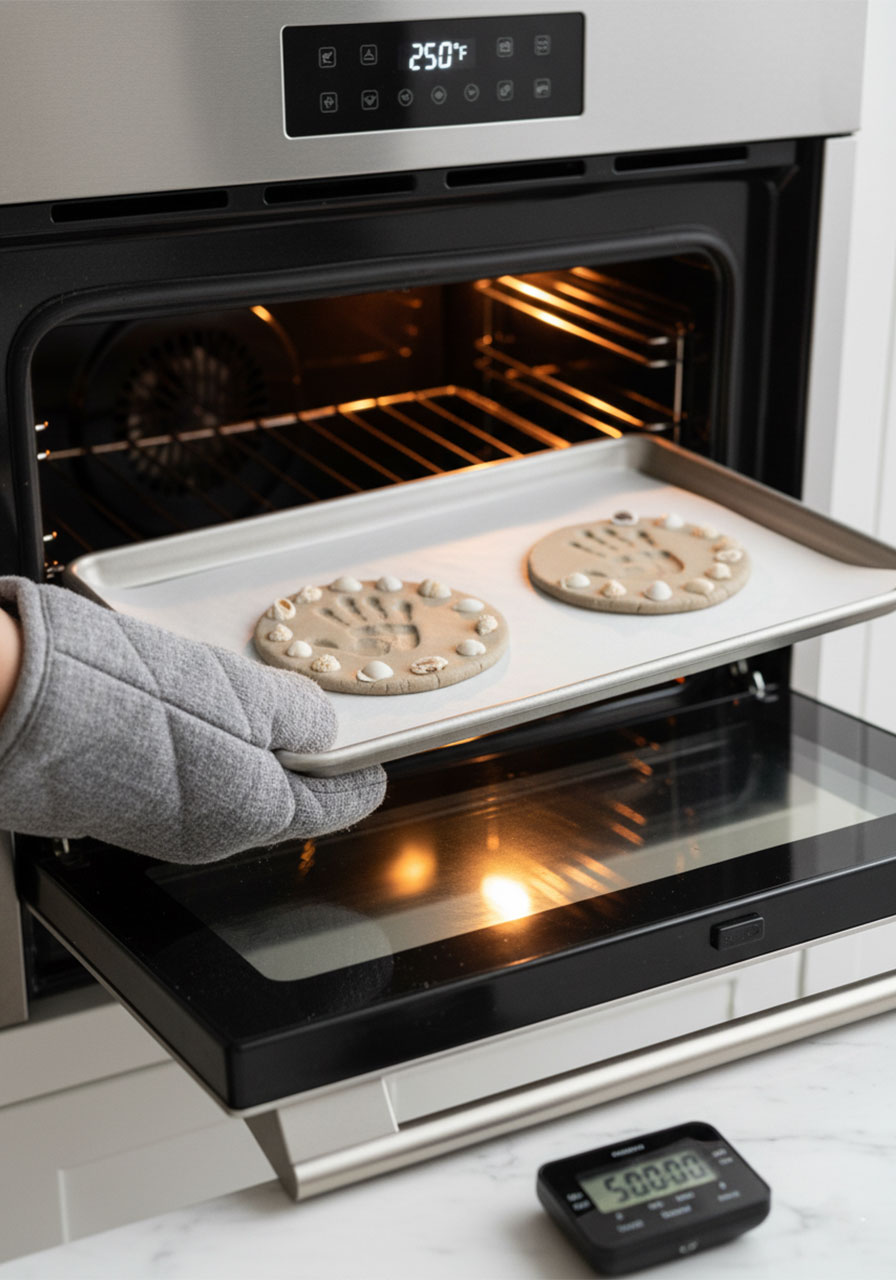
Place your baking sheet in the oven and bake at 250°F for 5 hours.
Yes, 5 hours! Low and slow is absolutely the key here. You want every bit of moisture baked out so the finished keepsake is as hard as a stone and won’t crumble or crack over time.
After 5 hours, carefully check the bottom of each piece. If the underside feels soft or slightly spongy, use a spatula to flip them over and bake for another 2 hours.
The goal is a keepsake that is completely solid – tap it with your finger and it should feel like a rock, not a cracker.
⏰ Timing Tip for Teachers & Busy Parents. Make the handprints in the morning, pop them in the oven, and they’ll be ready to decorate (or seal) by dinnertime. Perfect for a lazy beach day or a full day at home.
Step 7 (Optional): Seal with Mod Podge
Once your keepsakes are completely cool, you have a choice to make.
If you love the natural, matte, sandy look – just leave them as is. They look authentically beautiful without any coating.
If you want a little extra durability and a slight sheen, brush on a coat of Mod Podge with a foam brush and let it dry completely. This seals the surface, makes the shells pop a little more, and gives the whole piece a slightly polished finish.
Both versions look gorgeous. It really comes down to personal preference.
Fun Ways to Use Your Beach Sand Handprint Keepsake
These aren’t just crafts – they’re meaningful objects. Here are some of our favorite ways to use them:
Hang them on the Christmas tree. Add a small loop of twine or ribbon before baking (press it into the top of the dough) and you’ve got the most personal ornament imaginable.
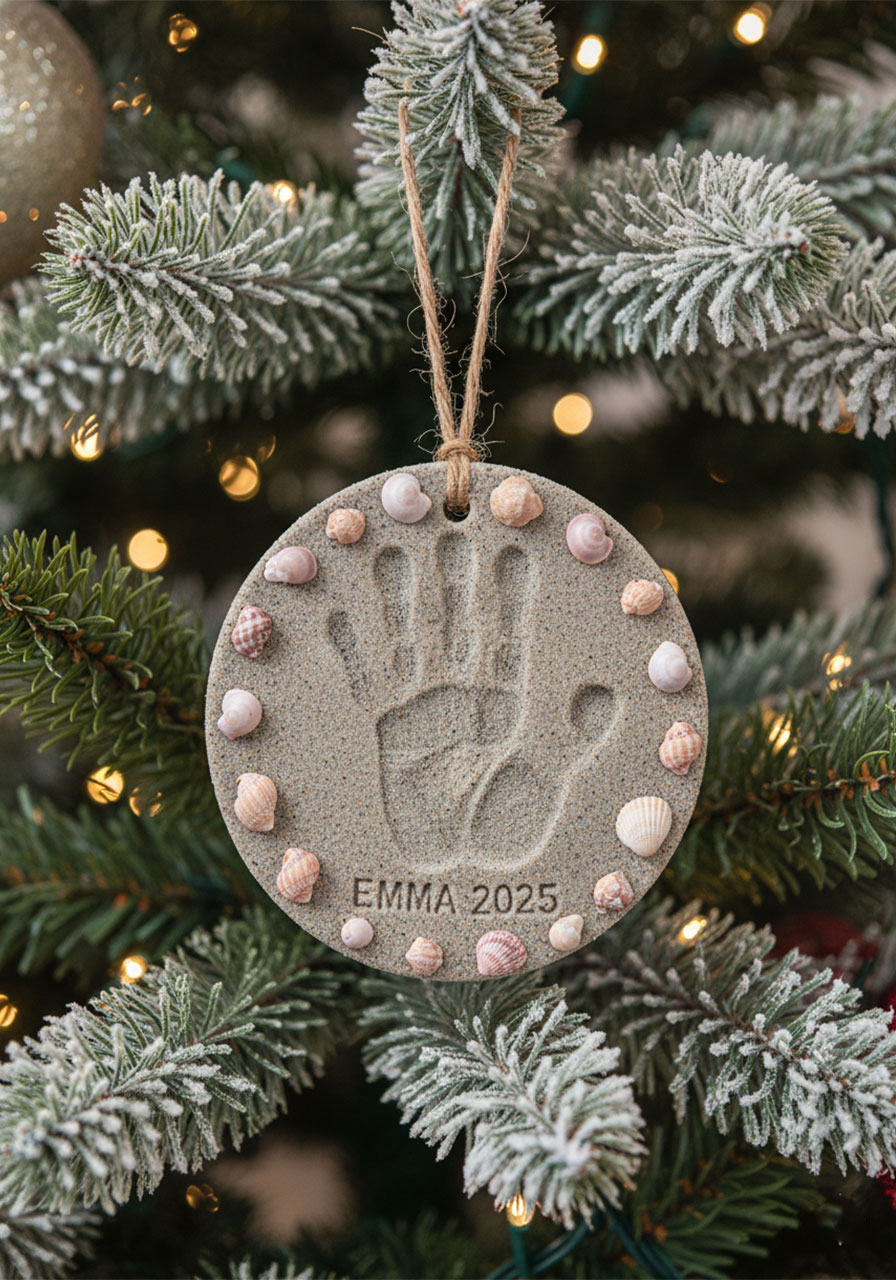
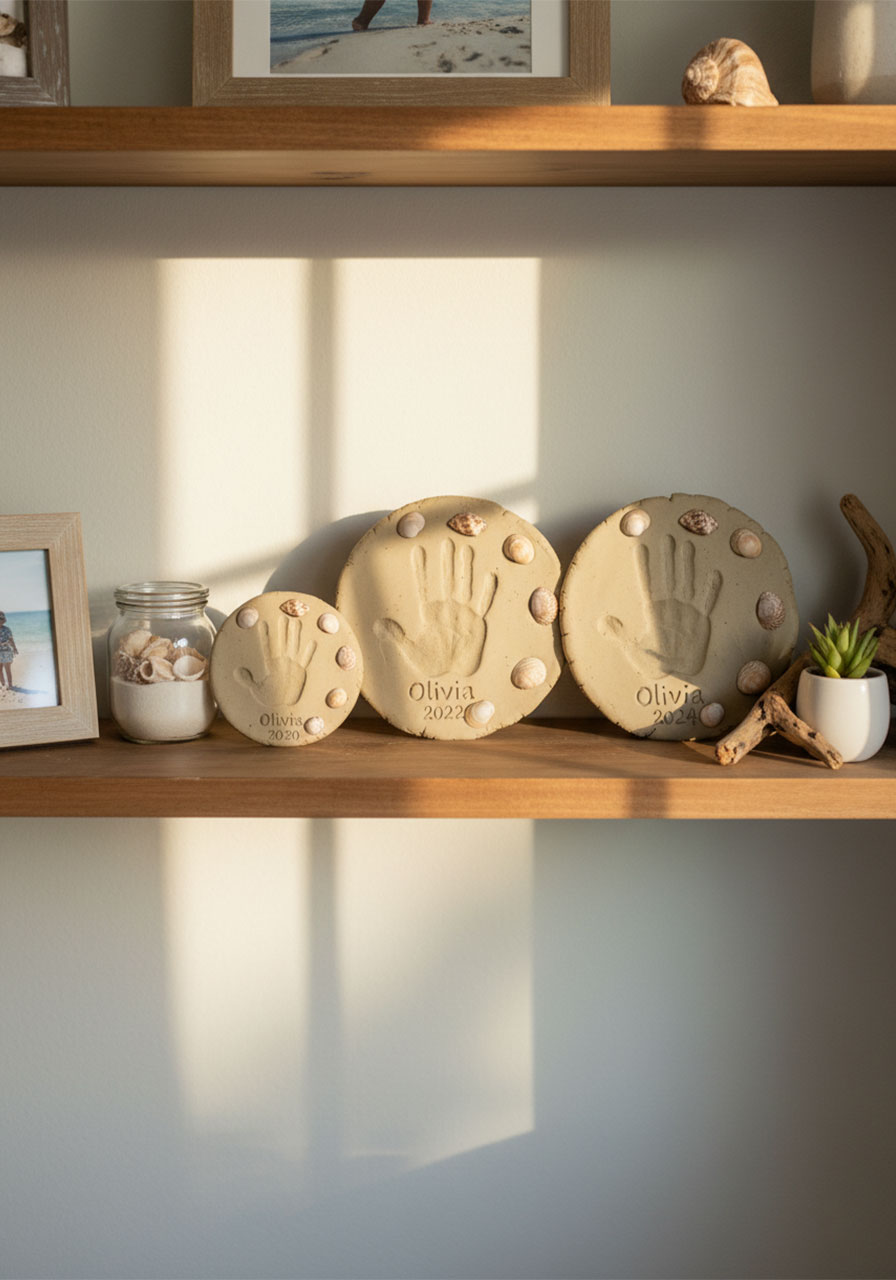
Display on a shelf or mantel. Stack a few from different years side by side and watch how your child’s handprint grows over time. You’ll cry happy tears – consider yourself warned.
Gift them to grandparents. Grandparents go absolutely wild for these. Wrap one up with a sweet card for an unforgettable birthday or holiday gift.
Frame them in a shadowbox. Pair the keepsake with a small photo from the beach vacation, some extra shells, and a handwritten label. Instant heirloom.
Use as a classroom send-off gift. Teachers: make one per student at the end of the year and send it home with a little note. Families will keep these forever.
Tips for Making These With a Whole Group of Kids
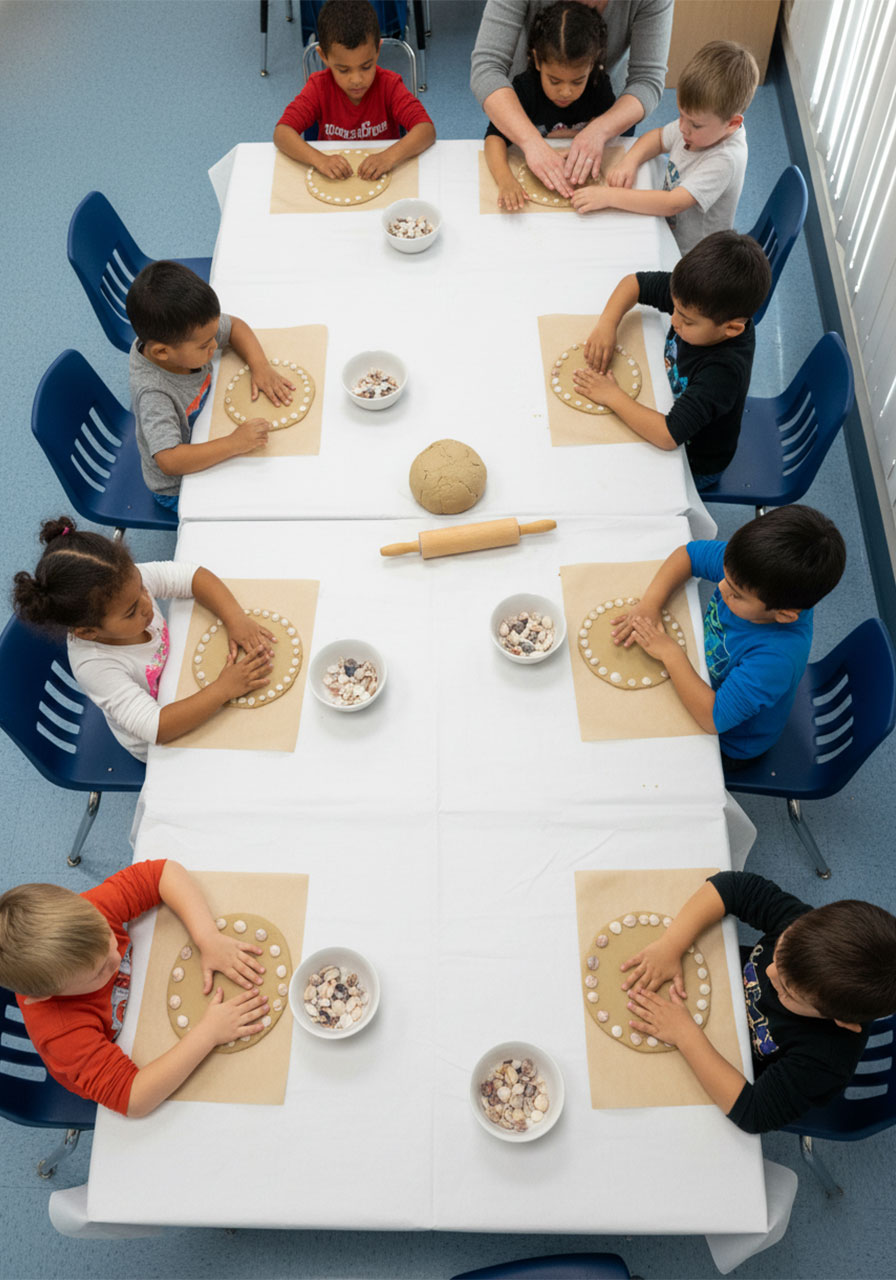
Planning a beach party, classroom activity, or playdate? You can absolutely scale this up. Here’s how to make it smooth:
Prep the dough in advance. Mix the dough balls ahead of time and keep them covered with a damp cloth so they don’t dry out while you’re working with each child.
Set up an assembly line. One station for rolling, one for handprints, one for shell decorating. Kids love moving through stations.
Label each keepsake right away. As soon as the handprint is pressed, etch the child’s name in while the dough is still soft. Don’t wait – it gets confusing fast when you have multiple pieces!
Bake in batches. Most standard baking sheets fit 2 keepsakes comfortably. Use multiple sheets if you have a big group.
Let kids pick their own shells. If you’re doing this at a beach, send kids on a shell-collecting mission beforehand. They’ll be more invested in the craft when they picked the shells themselves.
🏫 Teacher Hack: Make these during the last week of school as a “this year flew by” project. Send each student home with their keepsake in a small cellophane bag tied with a ribbon and a card that reads: “These hands did so much learning this year.” Cue parent tears at pickup.
Can You Use Craft Store Sand Instead of Beach Sand?
Absolutely, yes! You don’t need to be at the beach to make these.
Craft sand – the kind sold at Michael’s, Hobby Lobby, or on Amazon – works beautifully. It’s pre-sifted, which is actually a bonus since it means less prep work for you.
The finished color will vary slightly depending on the sand you use. Beach sand tends to have a more natural, gray-speckled look (because it contains bits of shells and mineral flecks). Craft sand is often a more uniform tan or beige.
Both look wonderful. Go with what you have access to.
🏠 At-Home Version: No beach? No problem. Use craft sand, grab a bag of decorative shells from the dollar store or a craft store, and you’ve got everything you need for a rainy afternoon project that feels just as special.
Common Questions About Sand Clay Keepsakes
Will the handprint keepsake crack?
If you bake it long enough, it should come out solid and crack-resistant. The most common cause of cracking is underbaking. If you see cracks forming, it usually means the piece dried too quickly or wasn’t fully baked through. Make sure to go the full 5 hours, and flip if the bottom is still soft.
How long do these last?
When sealed with Mod Podge and kept indoors, these keepsakes can last for many, many years. Keep them away from moisture and direct sunlight for the longest life. We’ve had ours for years and they look just as good as the day they came out of the oven.
Can babies do this craft?
Yes! Babies and toddlers make the most adorable handprints of all. You’ll need to press their hand in for them – hold the wrist steady, press the palm down flat, then gently lift. The tiny little fingers captured in the dough are truly precious.
Can you do footprints instead?
Absolutely. Just make a slightly larger and thicker disc of dough to accommodate the foot. Baby footprints are especially sweet.
Do you have to use iodized salt specifically?
The original recipe calls for Morton Iodized Salt, and it works really well. In a pinch, regular table salt will work fine too. Avoid coarse salts like sea salt or kosher salt – the larger crystals don’t integrate as smoothly into the dough.
Quick Recap: The Full Recipe at a Glance
Sand Dough Recipe (Full Batch – 4 handprints)
- 2 cups sifted beach sand
- 1¼ cups Morton Iodized Salt
- 1½ cups all-purpose flour
- 1 cup warm water
Steps at a Glance
1. Preheat oven to 250°F.
2. Mix dry ingredients (sand, salt, flour) in a bowl.
3. Slowly add warm water and mix into a dough.
4. Divide into 4 balls, roll each out to ½ inch thick on parchment-lined baking sheet.
5. Press child’s hand firmly into the center of each disc.
6. Etch name and date with a toothpick.
7. Decorate the border with seashells.
8. Bake for 5 hours at 250°F. Flip and bake another 2 hours if bottom is still soft.
9. Cool completely. Seal with Mod Podge if desired.
The Memory Is the Point
When my son and I made our first batch of these during our beach vacation in Captiva Island, Florida, I genuinely didn’t expect to feel so emotional looking at the finished result.
But there it was – his little hand, frozen in sand and salt, surrounded by shells we’d collected together on the beach that morning. His name scratched underneath, the year etched next to it.
It took an afternoon and cost almost nothing. And it’s one of the most meaningful things we’ve ever made together.
That’s the magic of handprint crafts. They’re not just art. They’re time machines.
Whether you make these at the beach, in your backyard, or on a rainy Tuesday in your kitchen – your kids are going to love every messy, sandy, shell-pressing minute of it.
And years from now, when those little hands have grown big? You’ll be so glad you made this.
Happy crafting! 🐚
More Summer Craft & Activity Ideas to Keep the Fun Rolling:
How to Make a DIY Paper Spinner: The Easiest Kids Craft for Endless Outdoor Fun
Beaded Pipe Cleaner Butterflies (Easy Step-by-Step Craft for Kids!)
How to Make Moon Sand With Only 2 Ingredients (Kids Go Absolutely Wild for This!)
Easy Jellyfish Suncatcher Craft for Kids (That Looks Stunning in a Window!)
Paper Loop Pufferfish Craft: The Cutest 3D Summer Activity for Kids
