There are certain foods that just feel like a warm hug – and apple fritters are absolutely one of them.
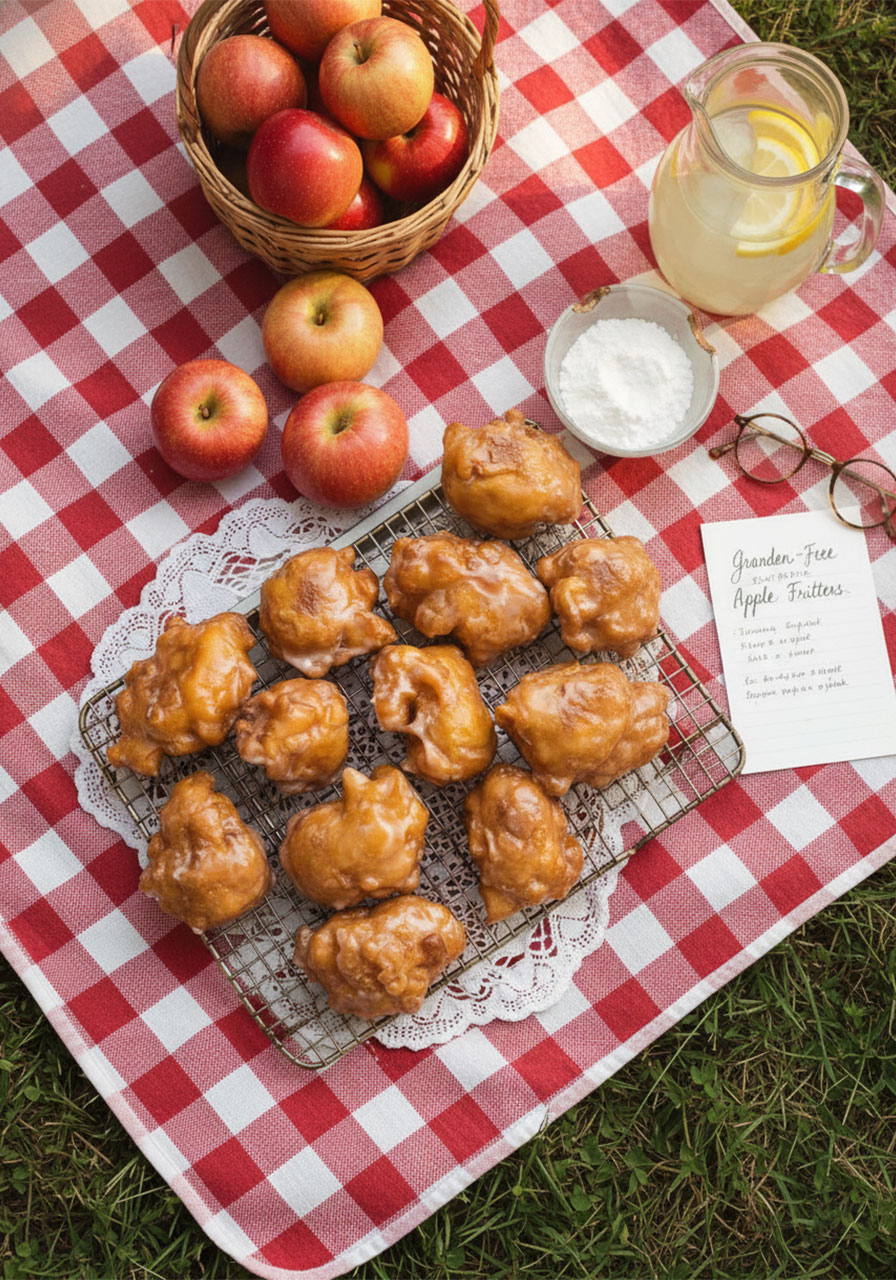
Golden on the outside. Soft, spiced, and apple-studded on the inside. Finished with a sweet vanilla glaze that sets into that gorgeous crackly shell.
And guess what? You don’t need gluten to pull them off.
These Gluten Free Apple Fritters are the real deal – crispy, indulgent, and so delicious that nobody at the table will suspect a thing. Whether you’re gluten-free by necessity or by choice, this recipe is here to make sure you never miss out on one of fall’s greatest pleasures.
Best of all? From mixing bowl to plate, you’re looking at just 30 minutes.
Let’s make something wonderful.
Why You’ll Love This Recipe
Life is too short for disappointing gluten-free food. These fritters don’t taste like a consolation prize – they taste like the real thing, because they practically are.
Here’s why this recipe is a keeper:
They’re quick. No yeast. No rising time. Just a simple batter, a hot pan of oil, and about 30 minutes of your life.
They’re budget-friendly. A couple of apples, pantry staples, and a bag of gluten-free flour. That’s it.
They’re family-approved. Kids love them. Husbands steal them off the cooling rack. Guests ask for the recipe.
They’re flexible. Dairy-free? Use your favorite plant milk. Egg-free? Aquafaba to the rescue (more on that below).
This is the kind of recipe that becomes a staple – the one you make on a quiet Saturday morning, or pull out when you want to bless someone with something homemade and heartfelt.


What Goes Into These Fritters
Nothing complicated here. Just good, honest ingredients that come together into something truly special.
Gluten Free All-Purpose Flour – Most GF blends work great. Bob’s Red Mill 1:1 is a fantastic option if you need a recommendation.
Xanthan Gum – Only needed if your flour blend doesn’t already include it. It acts as the “glue” that holds everything together.
Baking Powder – Your lift. This is what gives the fritters that airy, tender bite on the inside.
Cinnamon, Nutmeg & a pinch of Ginger – That warm, cozy spice blend that makes every bite taste like autumn.
Brown Sugar – Just a little. It adds a subtle caramel undertone to the batter without making things overly sweet.
Milk – Dairy or non-dairy, your choice. Oat milk, almond milk, and regular whole milk all work beautifully.
Eggs (or Aquafaba) – Eggs give structure and richness. If you’re egg-free, 6 tablespoons of chickpea water (aquafaba) is your best friend.
Vanilla Extract – Don’t skip this. It rounds out all the flavors in the most delicious way.
Fresh Apples – Peeled and finely diced. Granny Smith, Honeycrisp, or Golden Delicious are your best bets. Avoid Red Delicious – it gets mushy.
For the Glaze: Powdered sugar + milk + vanilla. Simple, shiny, perfect.

The Best Apples for Fritters
This little detail makes a big difference, so let’s talk apples for a second.
You want a variety that holds its shape when it hits the hot oil. Soft apples break down too quickly and turn to mush inside the fritter – and no one wants that.
Top picks:
Granny Smith – Tart and firm. Gives a lovely contrast to the sweet glaze.
Honeycrisp – Sweet, crisp, and absolutely delicious in fritters.
Golden Delicious – A classic choice. Sweet, tender (but not mushy), and widely available.
Skip: Red Delicious. It sounds promising, but it goes soft fast and won’t hold up to frying.
Whatever you have on hand from those top picks will work. Use what’s in season, or whatever is already sitting in your fruit bowl.
How to Make Gluten Free Apple Fritters (Step by Step)
This recipe is straightforward enough for a weeknight but impressive enough to serve to guests. Here’s exactly how it’s done.
Step 1: Mix Your Dry Ingredients
In a large mixing bowl, whisk together your gluten-free flour, xanthan gum (if using), baking powder, salt, cinnamon, nutmeg, and brown sugar.
Give it a good whisk so everything is evenly distributed. You don’t want pockets of baking powder hiding anywhere.
Step 2: Add the Wet Ingredients
Pour in your milk, oil, eggs (or aquafaba), and vanilla extract.
Whisk until you have a thick, smooth batter with no lumps. It should look like a thick pancake batter – not too runny, not too stiff.

Step 3: Fold in the Apples
Add your peeled, finely diced apples and stir until they’re evenly mixed throughout the batter.
Take a moment to smell this batter. Honestly, it’s heavenly.
Step 4: Heat Your Oil
In a large pot or skillet, add enough neutral oil so it’s about 1.5 to 2 inches deep.
Heat over medium-high until it reaches 360–375°F (180–190°C). This is the sweet spot. Too cool and your fritters absorb oil and turn greasy. Too hot and the outside burns before the inside cooks through.
A cooking thermometer is worth every penny here. If you don’t have one yet, put it on your kitchen wishlist – it takes the guesswork out of frying entirely.
Step 5: Fry in Batches
Using a large spoon, carefully drop scoops of batter (about 1–2 tablespoons each) into the hot oil.
Don’t overcrowd the pan. Leave space between fritters – 3 to 4 at a time is usually right, depending on your pot size.
Fry for about 3 minutes on the first side, then flip and fry another 2–3 minutes until deeply golden brown and cooked through.
Pro tip: Not sure if they’re done inside? Use metal tongs to gently squeeze one open. If the batter looks cooked and fluffy, you’re good. If it still looks wet and doughy, give them another minute. Don’t be shy about checking – fritters are rustic and a little break won’t hurt them one bit.
Step 6: Cool on a Wire Rack
Transfer your finished fritters to a wire cooling rack – not paper towels.
The rack lets air circulate underneath, which keeps the bottoms crispy instead of soggy. It’s a small step that makes a big difference.
Step 7: Make the Glaze
While your fritters cool, whisk together powdered sugar, milk, and vanilla extract in a small bowl.
Adjust as needed: more sugar for a thicker glaze, more milk for a thinner, drippier one.

Step 8: Dip and Enjoy
Once the fritters have cooled just slightly (not completely – you want them still a little warm), dip each one into the glaze and set back on the rack to let the excess drip off.
Watch the glaze set into that beautiful, crackly shell and try very hard not to eat them all immediately.
You’ve earned this.
Tips for the Crispiest, Most Delicious Fritters
A few things I’ve learned from making these that will save you time and set you up for success:
Get that oil temperature right. 360–375°F is your target. Too low = greasy. Too high = burnt outside, raw inside. Use a thermometer if you can.
Dice your apples small. Finely diced pieces distribute evenly through the batter and cook quickly. Large chunks can stay raw in the center while the outside is done.
Don’t skip the wire rack. Cooling on paper towels traps steam and makes the bottoms soft. The rack keeps them crispy all the way around.
Fry in small batches. Each new batch of fritters drops the oil temperature. Give it a minute to come back up between rounds so every fritter gets that perfect sizzle.
Dip while still slightly warm. The glaze sets beautifully on a fritter that’s still a little warm. Wait until they’re completely cold and the glaze just slides off.
Egg-Free Option (Yes, It Works!)
If you’re baking for someone with an egg allergy – or if you’re fully vegan – this recipe has you covered.
Replace the 2 eggs with 6 tablespoons of aquafaba. That’s the liquid from a can of chickpeas (yes, the stuff you usually drain down the sink).
It sounds a little wild, I know. But aquafaba has a magical ability to mimic eggs in baked goods, and these fritters come out just as crispy and delicious. Just make sure you’re using unsalted chickpeas so you don’t accidentally add a salty edge to your batter.
This is one of those tips that feels like a small miracle the first time you try it.
Glaze or Powdered Sugar? Here’s How to Decide
Both options are delicious. Here’s when to pick each one:
Go for the glaze when you want that classic apple fritter look – the kind with the gorgeous crackly coating that glistens under the light. It takes a few extra minutes but it’s completely worth it for presentation and flavor.
Go for powdered sugar when you’re short on time or just want something a little more rustic and casual. Dust it over the warm fritters and you’ll get a funnel-cake-style finish that’s just as satisfying. Honestly? There’s something deeply charming about it.
Either way, you win.
What Oil to Use for Frying
The type of oil you choose matters more than you might think.
You need an oil with a high smoke point and a neutral flavor – one that won’t interfere with the spiced apple taste of your fritters.
Best options: Vegetable oil, rapeseed oil, canola oil, or peanut oil.
Avoid: Extra virgin olive oil and coconut oil. Both have low smoke points and will burn before your oil even reaches the right temperature. They’ll also add a flavor that competes with the fritters rather than letting them shine.
Make-Ahead & Storage Tips
Let’s be honest – fritters are best eaten fresh, warm, and right off the rack. That first hour after frying? Pure magic.
That said, life happens. Here’s how to handle leftovers:
Store: Keep cooled fritters in an airtight container at room temperature for up to 2 days, or in the refrigerator for up to 4 days.
Reheat: Skip the microwave – it makes them soft and sad. Instead, pop them in a 350°F oven or air fryer for 5–8 minutes to bring back that crispy exterior.
Freeze: Fritters freeze surprisingly well. Lay them flat on a baking sheet to freeze first, then transfer to a freezer bag for up to 2 months. Reheat in the oven straight from frozen.
Serving Ideas to Make These Extra Special
These fritters are delicious completely on their own. But if you want to dress them up a little, here are some ideas:
Serve alongside a warm mug of apple cider or chai tea for the coziest autumn breakfast imaginable.
Stack them on a wooden board with a small dish of extra glaze for dipping – it makes a stunning centerpiece for a brunch table.
Dust with cinnamon sugar instead of glaze for a churro-inspired twist that’s wildly addictive.
Add a scoop of vanilla ice cream alongside for a simple, showstopping dessert.
Drizzle with salted caramel sauce and a sprinkle of flaky sea salt for a next-level fall treat.
However you serve them, don’t be surprised when people ask for seconds. And thirds.

A Little Something for the Soul
There’s something sacred about cooking for the people you love.
It doesn’t have to be elaborate. It doesn’t have to be perfect. It just has to be made with intention – a little care, a little time, and a whole lot of heart.
These fritters are exactly that kind of food. They’re the kind of thing you make on a slow Saturday morning, when the house is quiet and the kitchen smells like cinnamon and warm oil and something good is happening.
They’re the kind of thing you bring to a friend who’s had a hard week, or set out for your family after church, or surprise your kids with just because.
“She is like the merchant ships; she brings her food from afar.” – Proverbs 31:14
The woman who feeds her people well – whether it’s a crowd or just herself – is doing something beautiful. Don’t underestimate that.
So go make these fritters. Nourish your body. Bless your table. And enjoy every single bite.
Frequently Asked Questions
Can I make these fritters ahead of time?
Yes! Fry them ahead and reheat in the oven or air fryer at 350°F for about 5–8 minutes to bring back the crispiness. Add the glaze after reheating for best results.
Can I bake these instead of frying?
Frying is really what makes a fritter a fritter – it’s what creates that crispy, irregular exterior. Baking will give you more of a muffin texture. Totally tasty, but a different experience!
What gluten free flour blend works best?
Bob’s Red Mill 1:1 Gluten Free Baking Flour is a widely available and reliable option. Most all-purpose GF blends will work in this recipe.
My fritters are turning out greasy. What went wrong?
This usually means the oil wasn’t hot enough when you added the batter. Make sure the oil reaches 360–375°F before you begin frying, and let it come back to temperature between each batch.
Can I use frozen apples?
Fresh is best here. Frozen apples release a lot of water when they thaw, which can thin out your batter and make it harder to fry properly.
How do I know when the fritters are cooked through?
Use metal tongs to gently squeeze one open. The inside should look cooked and fluffy – not wet or doughy. If it’s still raw inside, give them another minute and check again.
Did you make these? Drop a comment below and let me know how they turned out! And if you shared a batch with someone who needed a little love today – that’s the best thing I’ve heard all week.
Gluten Free Apple Fritters
Ingredients
For the Fritter Batter:
- 1 1/2 cups gluten free all-purpose flour blend (210g)
- 3/4 teaspoon xanthan gum (only if your flour blend does not already contain it)
- 2 teaspoons baking powder
- 1/2 teaspoon salt
- 1 teaspoon ground cinnamon
- 1/4 teaspoon ground nutmeg
- 2 tablespoons light brown sugar (28g)
- 2/3 cup milk, dairy or non-dairy (160ml)
- 1 tablespoon neutral oil (15ml)
- 2 large eggs OR 6 tablespoons aquafaba (chickpea brine)
- 2 teaspoons vanilla extract
- 2 medium apples, peeled and finely diced (Granny Smith, Honeycrisp, or Golden Delicious recommended)
For the Vanilla Glaze:
- 3 cups powdered/icing sugar (375g)
- 3 tablespoons milk, dairy or non-dairy (45ml)
- 1/2 teaspoon vanilla extract
For Frying:
- Neutral, high-smoke-point oil (vegetable, rapeseed, canola, or peanut), enough to fill your pot 1.5–2 inches deep
Instructions
- In a large mixing bowl, whisk together the gluten free flour, xanthan gum (if using), baking powder, salt, cinnamon, nutmeg, and brown sugar until well combined.
- Add the milk, oil, eggs (or aquafaba), and vanilla extract. Whisk until you have a thick, smooth batter with no lumps.
- Stir in the diced apples until evenly distributed throughout the batter.
- Pour frying oil into a large pot or skillet until it is 1.5 to 2 inches deep. Heat over medium-high until the oil reaches 360-375°F (180–190°C). Use a thermometer for accuracy.
- Using a large spoon, carefully drop scoops of batter (1-2 tablespoons each) into the hot oil, 3 to 4 fritters at a time. Do not overcrowd the pot.
- Fry for about 3 minutes on the first side, then flip and fry for another 2–3 minutes, until deeply golden brown on both sides. To check doneness, use metal tongs to gently squeeze one open – the inside should look fluffy and cooked through, not wet or doughy.
- Remove from oil using a slotted spoon or metal tongs and transfer to a wire cooling rack. Repeat with remaining batter, allowing oil to return to temperature between batches.
- While fritters cool, make the glaze: whisk together powdered sugar, milk, and vanilla extract until smooth. Add more sugar for a thicker glaze or more milk for a thinner glaze.
- While fritters are still slightly warm, dip each one into the glaze and return to the wire rack. Let the excess glaze drip off and allow to set for a few minutes before serving.