
You know that moment when you’re craving orange chicken but trying to keep things clean and gluten-free? Yeah – we’ve been there too.
The good news? You don’t have to give it up. This Gluten Free Orange Chicken delivers everything you love about the takeout classic – that glossy, sticky-sweet citrus sauce, impossibly crispy chicken bites, and bold garlic-ginger depth – without a single drop of gluten.
And here’s the best part: it’s ready in under 30 minutes. Weeknight dinner just got a serious upgrade.
Whether you’re eating gluten-free by necessity or just choosing to fuel your body better, this recipe is the kind of meal that makes you feel good – nourished, satisfied, and honestly a little proud of yourself for skipping the drive-through.
Let’s make it.
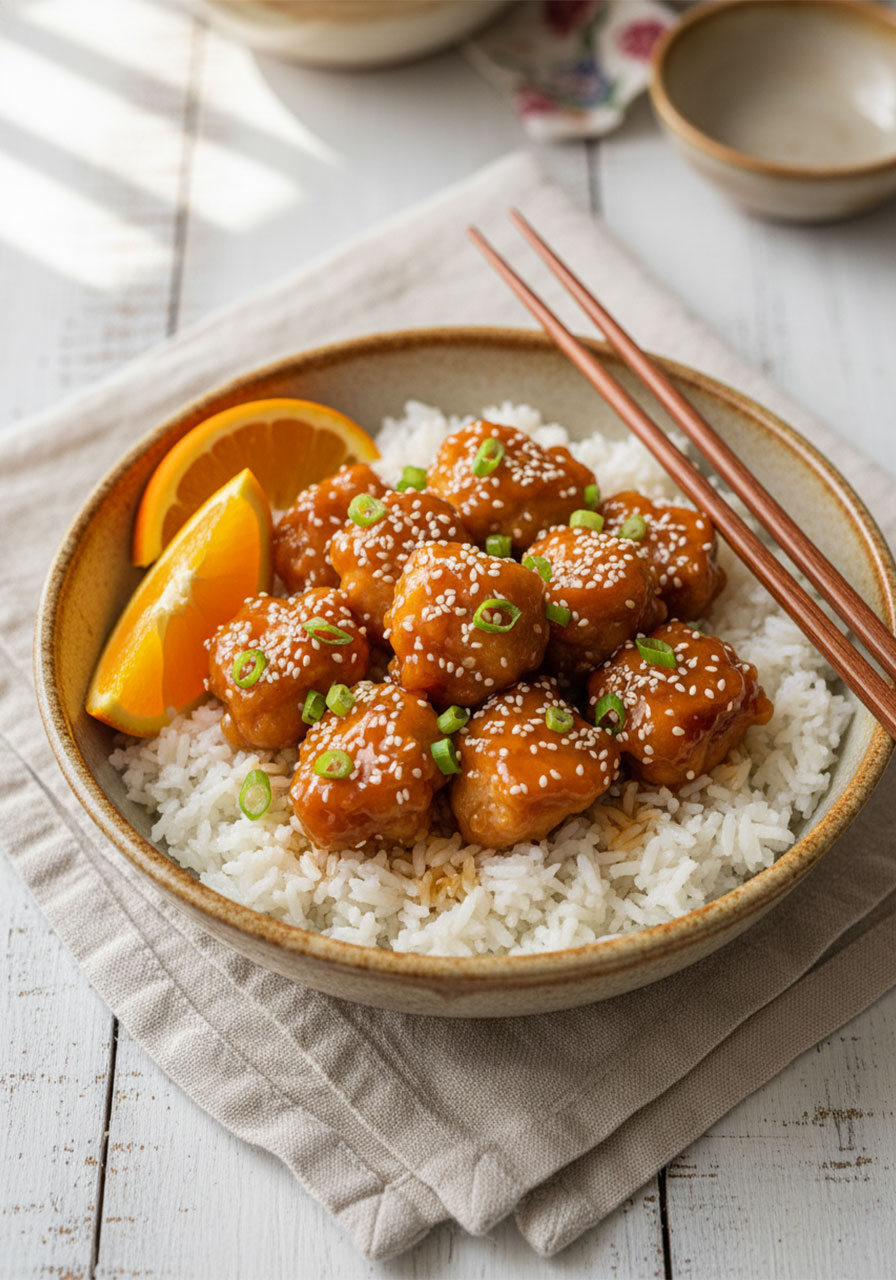
Why You’re Going to Absolutely Love This Recipe
This isn’t just a “good for gluten-free” recipe. This is a legitimately delicious recipe that happens to be gluten-free.
Here’s why it earns a permanent spot in your rotation:
Ready in 25 minutes flat. From fridge to table faster than delivery.
Crispy. Actually crispy. The gluten-free flour coating gives you that satisfying crunch with every single bite.
That sauce though. Bright, zesty orange juice + honey + garlic + ginger = pure magic in a pan.
Clean, simple ingredients. Nothing weird. Everything you can find at a regular grocery store.
Totally customizable. Spicy, low-sugar, vegetarian – we’ll cover all your options below.
Works for the whole family. Gluten-free eaters and non-gluten-free eaters alike will be going back for seconds.
This is comfort food that actually loves you back. And that’s the kind of dinner we’re here for.

What You’ll Need
Simple, wholesome ingredients – nothing complicated. Here’s your full list:
For the Chicken
1 lb boneless, skinless chicken breasts, cut into bite-sized pieces
3/4 cup gluten-free flour blend (almond flour or rice flour also work)
2 large eggs, beaten
Vegetable oil for frying (about 2 cups – choose one with a high smoke point)
For the Orange Sauce
3/4 cup freshly squeezed orange juice
1 tablespoon orange zest
3 tablespoons gluten-free soy sauce
2 tablespoons honey or maple syrup
2 cloves garlic, minced
1 tablespoon fresh ginger, minced
1 tablespoon cornstarch or tapioca starch
2 tablespoons water (to make your cornstarch slurry)
A note on the orange juice: Please, please use fresh. The flavor difference between fresh-squeezed and bottled is night and day in this sauce. It takes two minutes and it’s 100% worth it.

How to Make Gluten Free Orange Chicken (Step by Step)
This is genuinely one of the easier weeknight dinners you’ll ever make. Five steps. Let’s go.
Step 1: Prep Your Chicken
Cut your chicken breasts into bite-sized pieces – roughly 1 to 1.5 inches each so they cook evenly.
Then, and this step matters more than you’d think: pat them completely dry with paper towels.
Moisture is the enemy of crispy. Dry chicken = coating that actually sticks = that gorgeous golden crust you’re after. Don’t skip this.
Step 2: Coat the Chicken
Set up your little coating station: one bowl with your beaten eggs, one bowl with your gluten-free flour.
Dip each piece of chicken into the egg first, let the excess drip off, then toss it in the flour and press to coat well on all sides.
Work in batches so you’re not rushing. The more evenly coated each piece is, the better that crunch will be.

Step 3: Fry Until Golden and Gorgeous
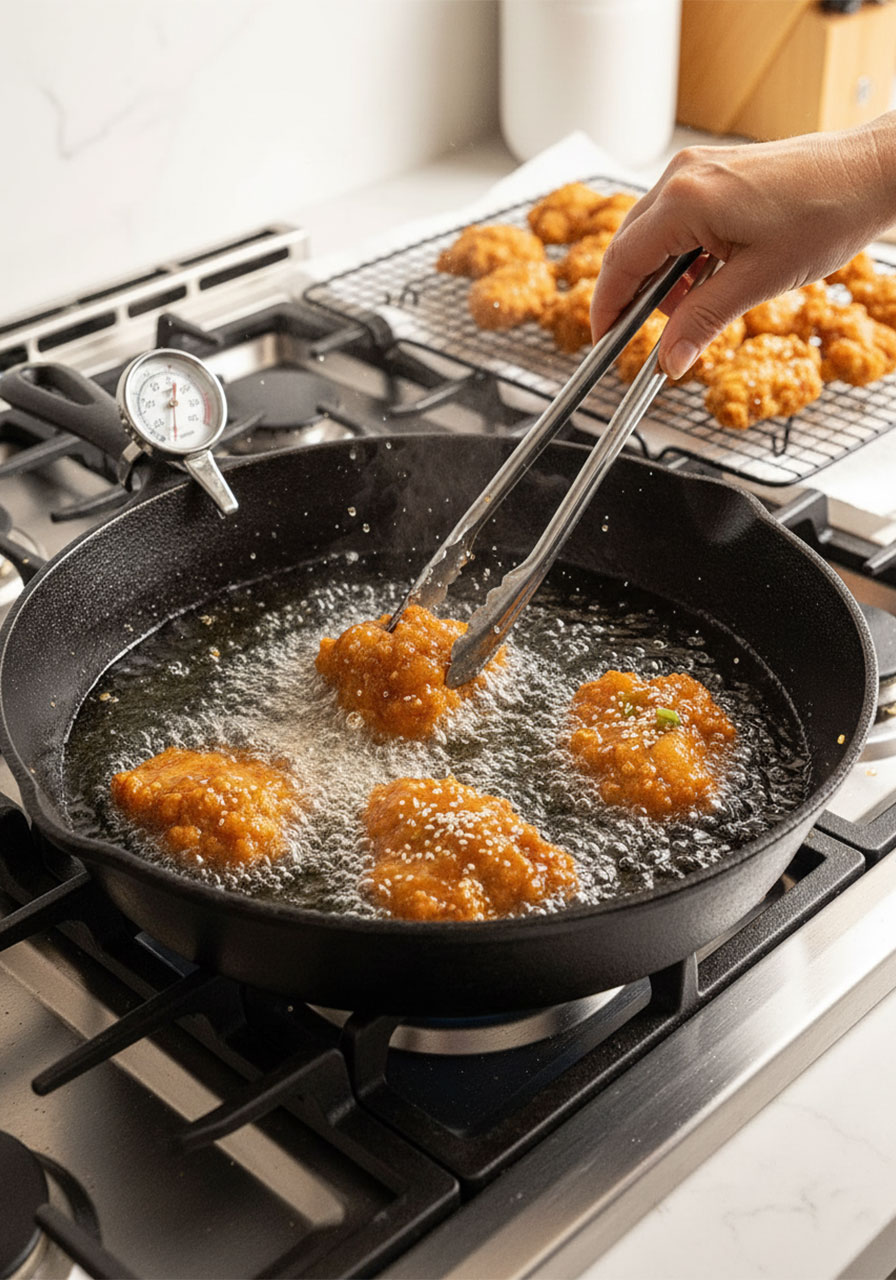
Heat your vegetable oil in a deep skillet over medium-high heat. You want it to reach 350–375°F – use a thermometer if you have one, or drop a tiny pinch of flour in: if it sizzles immediately, you’re good.
Fry the chicken in small batches, about 4–5 minutes per batch, turning as needed until golden brown and cooked through.
Do not overcrowd the pan. This is the #1 mistake people make. Too much chicken at once drops the oil temperature and you end up with soggy instead of crispy. Patience here = big reward.
Set each cooked batch on a wire rack or paper towel-lined plate while you finish the rest.
Step 4: Build That Dreamy Orange Sauce
While your last batch of chicken fries, start the sauce. In a small saucepan over medium heat, combine:
- Orange juice and zest
- Gluten-free soy sauce
- Honey
- Garlic and ginger
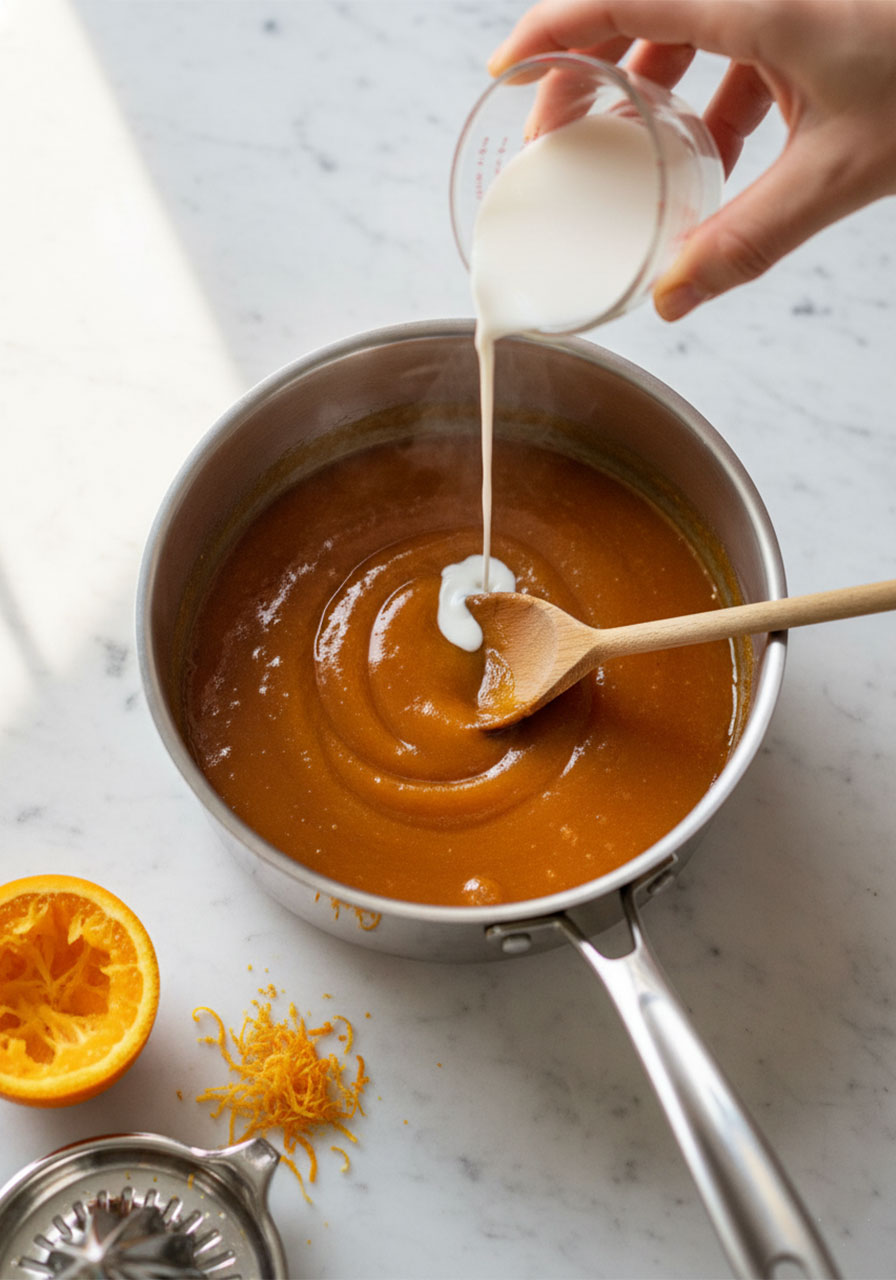
Stir it together and let it warm up. In a small bowl, whisk together your cornstarch and water until smooth – that’s your slurry.
Slowly pour the slurry into the warm sauce, stirring constantly. Watch it transform in real time: within about a minute, it’ll thicken into a glossy, silky sauce that clings to everything it touches.
Taste it. Adjust honey if you want more sweetness, or add a tiny splash of soy sauce for more depth. Make it yours.
Step 5: Toss, Plate, and Devour
Pour the warm sauce over your crispy chicken and toss gently to coat every piece.
Serve immediately. Right now. Do not wait.
The longer you let it sit, the softer the coating gets. Crispy + saucy is the goal, and the window for perfection is short and glorious.

Pro Tips for the Crispiest, Most Flavorful Result
These are the little things that take this dish from “pretty good” to “I cannot stop eating this.”
Fresh orange juice only. Bottled juice is too sweet and lacks that bright, alive citrus flavor. Two oranges, juiced. That’s all it takes.
Dry that chicken. We said it once, we’ll say it again – dry chicken is crispy chicken. Wet chicken is sad chicken.
Oil temperature is everything. Keep it between 350–375°F throughout. Too cool = greasy. Too hot = burnt outside, raw inside.
Fry in small batches. Aim for no more than a single layer of pieces in the pan at a time.
Add the cornstarch slurry slowly. Pour, stir, pause, repeat. You can always add more to thicken, but you can’t un-thicken an over-gelled sauce.
Sauce the chicken right before you eat. If you’re meal prepping or serving in stages, keep the sauce and chicken separate until serving time.
Make It Your Own: Fun Variations to Try
One of the best things about this recipe is how easily it bends to your mood, your diet, or what’s in your fridge.
Turn up the heat. Stir in a teaspoon of sriracha or a good pinch of red pepper flakes to the sauce. The sweetness balances the heat beautifully.
Keep it low-sugar. Swap the honey for monk fruit sweetener or a few drops of liquid stevia. The sauce still thickens and coats perfectly.
Go plant-based. Swap the chicken for crispy baked or air-fried tofu, or try roasted cauliflower florets. Both hold the sauce incredibly well.

Add some crunch. After tossing in the sauce, finish with a sprinkle of toasted sesame seeds or even chopped cashews for extra texture.
Fresh herb finish. A handful of chopped cilantro or thinly sliced green onions right before serving adds brightness that makes the whole dish pop.
How to Serve It
The classic move? Pile it over a bowl of fluffy steamed jasmine rice and call it the best dinner you’ve had all week.
But there are so many fun ways to serve this:
Over quinoa for extra protein and a nuttier flavor base
With stir-fried vegetables – broccoli, snap peas, and bell peppers are all amazing here
In lettuce wraps for a light, fresh presentation that feels almost restaurant-worthy
Over zucchini noodles if you’re keeping things extra light and low-carb
Garnish with chopped green onions, sesame seeds, and a few wedges of fresh orange on the side. The presentation goes from “home-cooked” to “wow, did you make this?” instantly.

Meal Prep & Storage
This recipe is weeknight gold, but it also makes for a great meal prep option – with one small trick.
Storing Leftovers
Store the cooked chicken and the sauce separately in airtight containers in the fridge. They’ll stay fresh for up to 3 days.
When you’re ready to eat, reheat the chicken in a skillet or air fryer to bring back the crisp, then warm the sauce and toss just before serving.
Freezing
Yes, this freezes well! Again – freeze the chicken and sauce separately. They’ll keep for up to 2 months.
Thaw overnight in the fridge, then reheat as above. It’s genuinely impressive how well this holds up.
Reheating
The microwave works in a pinch, but for crispy results, a dry skillet or air fryer at 375°F for 5–6 minutes is the move. Your future self will thank you.

Frequently Asked Questions
Is this safe for people with celiac disease?
Yes – as long as you use certified gluten-free versions of all ingredients (especially the soy sauce and flour blend) and take care to avoid cross-contamination in your kitchen, this recipe is celiac-friendly.
Is this recipe dairy-free too?
It is! There’s no butter, cream, or cheese anywhere in this dish. It’s naturally dairy-free as written.
What if I don’t have gluten-free flour?
Rice flour or almond flour both work as substitutes. The texture will vary slightly – rice flour gives a lighter, crispier coat; almond flour gives a nuttier, slightly denser crust. Both are delicious.
Can I use chicken thighs instead of breasts?
Absolutely. Thighs are juicier and more forgiving if you accidentally overcook them slightly. Just add a minute or two to the frying time and make sure they reach an internal temperature of 165°F.
How do I keep the chicken crispy after adding the sauce?
Toss in the sauce right before you serve – not a minute before that. The coating softens quickly once it meets the sauce, so timing is key.
Can I make this in an air fryer?
Yes! Air fry the coated chicken at 400°F for 12–14 minutes, flipping halfway through. You’ll get a slightly lighter result but still a satisfying crunch, and no oil splatters to clean up.

The Bottom Line
There’s something genuinely empowering about making a meal like this at home.
You know exactly what’s in it. You control the ingredients. You’re nourishing your body with real food that tastes like a treat – not a compromise.
That’s what this Gluten Free Orange Chicken is all about. It’s the kind of recipe that fits your life: quick enough for a Tuesday, delicious enough for a dinner party, and clean enough to feel great about after.
Make it once and it will be in your weekly rotation forever. We promise.
Now go squeeze those oranges. Dinner is calling.
Gluten Free Orange Chicken
Ingredients
Chicken and Coating
- 1 lb boneless, skinless chicken breasts, cut into bite-sized pieces
- 3/4 cup gluten-free flour blend (almond flour or rice flour also work)
- 2 large eggs, beaten
- Vegetable oil for frying (about 2 cups)
Orange Sauce
- 3/4 cup freshly squeezed orange juice
- 1 tablespoon orange zest
- 3 tablespoons gluten-free soy sauce
- 2 tablespoons honey or maple syrup
- 2 cloves garlic, minced
- 1 tablespoon fresh ginger, minced
- 1 tablespoon cornstarch or tapioca starch
- 2 tablespoons water
Instructions
- Prep the chicken. Cut chicken breasts into bite-sized pieces and pat completely dry with paper towels.
- Coat the chicken. Beat eggs in one bowl and place gluten-free flour in another. Dip each piece in egg, then coat thoroughly in flour.
- Fry the chicken. Heat vegetable oil in a deep skillet to 350–375°F. Fry chicken in small batches for 4–5 minutes per batch until golden brown and cooked through. Do not overcrowd the pan. Transfer to a wire rack.
- Make the orange sauce. In a small saucepan over medium heat, combine orange juice, orange zest, soy sauce, honey, garlic, and ginger. Whisk cornstarch and water together to make a slurry. Slowly add slurry to the warm sauce, stirring constantly, until glossy and thickened.
- Toss and serve. Pour sauce over fried chicken and toss gently to coat. Serve immediately for best crunch.
Notes
- Always use freshly squeezed orange juice for the brightest flavor.
- Pat chicken dry before coating – this is key to a crispy crust.
- Maintain oil at 350–375°F throughout frying. Use a thermometer for accuracy.
- Fry in small batches to keep oil temperature consistent.
- Add cornstarch slurry gradually – you can always add more, but you can’t thin an over-thickened sauce easily.
- Sauce the chicken right before serving to keep the coating crispy.
- Optional garnishes: chopped green onions, toasted sesame seeds, fresh cilantro, orange wedges.
- Air fryer option: Cook coated chicken at 400°F for 12–14 minutes, flipping halfway.
