There is something deeply nourishing about a beautifully set tea table.
The delicate clinking of china. The soft curl of steam rising from a freshly poured cup. Tiny, lovingly made treats arranged on a tiered stand. A moment that feels like the world just… slowed down.
A vintage tea party is more than just a pretty gathering. It is a chance to pause, breathe, and celebrate the women in your life – including yourself.
Whether you are planning a bridal shower, a birthday brunch, a spring garden party, or simply a Sunday afternoon with your closest girlfriends, these vintage tea party ideas will help you create a gathering that feels as beautiful on the inside as it looks on the outside.
We are talking elegant handmade food, dreamy drinks, timeless details, and an atmosphere that lifts the spirit. Let’s set the table.
Why a Vintage Tea Party Is the Perfect Gathering for Women
In a world that moves fast, a tea party is an act of intentional slowness. It says: we matter, this moment matters, and we deserve something beautiful.
A vintage-inspired tea party taps into something timeless. The soft florals, the mismatched china, the homemade treats – it all creates an atmosphere that feels both nostalgic and deeply comforting.
It is the kind of gathering that nourishes body, mind, and spirit all at once.
Best of all? You do not need to be a professional baker or event planner to pull this off. Every recipe and idea in this guide is designed to be achievable, joyful, and absolutely worth it.


Setting the Vintage Scene: Quick Styling Tips Before We Dive In
Before we get to the food (and oh, the food!), here are a few simple touches that will instantly set a vintage mood.
Use mismatched china. Thrift stores, estate sales, and your grandmother’s cabinet are goldmines. Mixing floral patterns adds instant charm and character.
Layer your linens. Think lace tablecloths, embroidered napkins, and soft pastel runners. Imperfection is part of the beauty.
Bring in fresh flowers. Roses, lavender, peonies, and sweet peas in small bud vases scattered across the table look effortlessly romantic.
Use a tiered stand. This is the non-negotiable centerpiece of any proper tea party spread. Fill it with your sweet treats, savory bites, and scones.
Write handwritten place cards. A small personal touch that makes every guest feel like the guest of honor.
Now – let’s talk about what goes on that tiered stand.
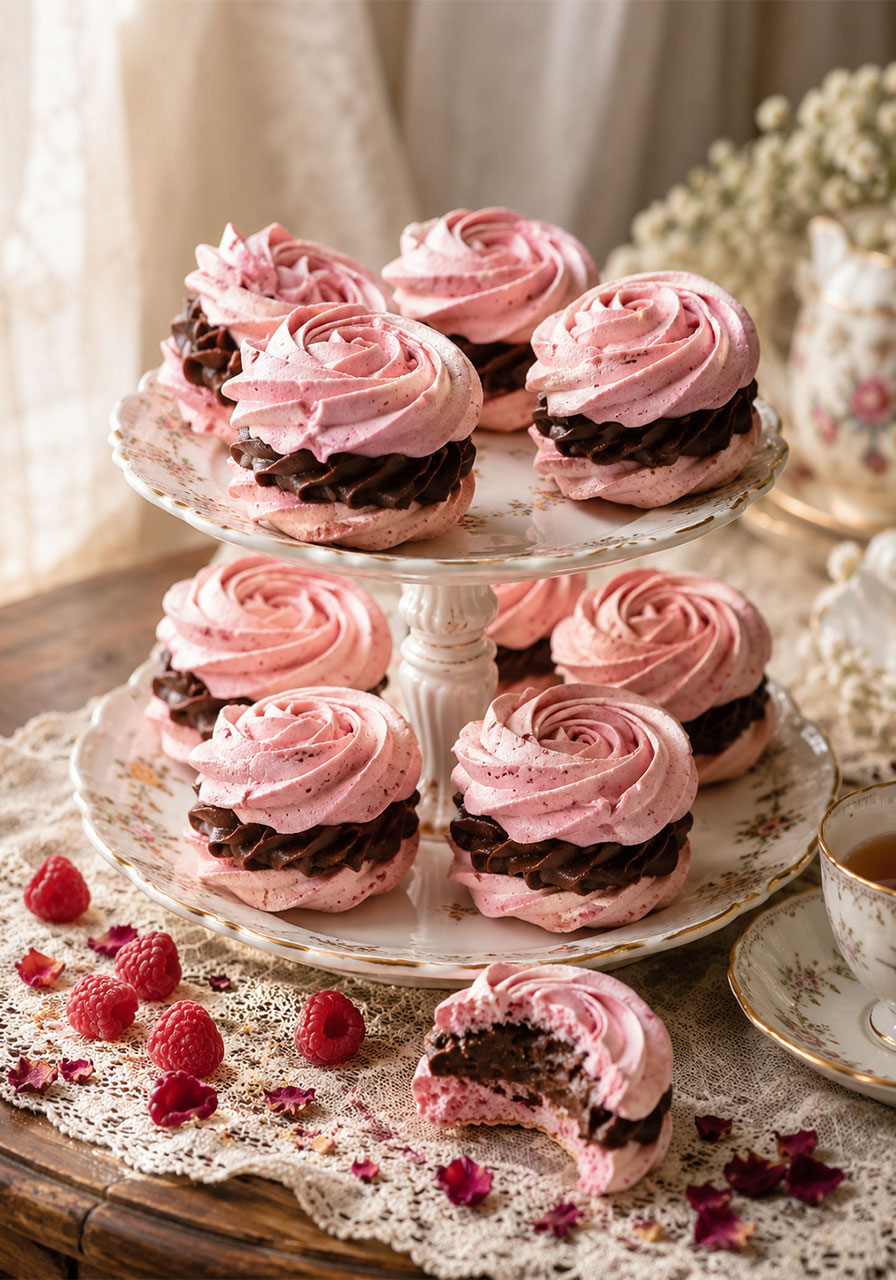
1. Raspberry Meringue Dark Chocolate Sandwiches
These are the showstoppers. The ones that make guests go completely silent for a moment before asking, “Wait, did you actually make these?”
Airy, rose-tinted meringue rosettes spiked with tart raspberry jam, sandwiched around the silkiest whipped dark chocolate ganache you have ever tasted. They look like they belong in a Parisian patisserie. They taste even better than they look.
This is the recipe you make when you want to feel like an absolute queen in your own kitchen.
Best for: Centerpiece dessert, bridal showers, birthday teas
Makes: 12 sandwich cookies
Prep Time: 45 minutes | Cook Time: 2 hours | Total Time: 3 hours 15 minutes
What You’ll Need
For the Filling:
- 10 oz (283.5 g) bittersweet chocolate chips
- 1 cup (236.59 ml) heavy cream
For the Meringues:
- 4 large egg whites (120 g)
- ¾ cup (150 g) granulated sugar
- 3 tablespoons seedless raspberry jam
- A few drops pink gel food coloring (optional)
How to Make It
Make the Filling:
- Place the chocolate chips in a mixing bowl.
- Heat the cream to simmering, then pour it over the chips all at once. Let it stand for 3 minutes without stirring.
- Use a wire whisk to stir until smooth and completely combined. Cover and set aside to cool completely.
- Once the ganache has cooled and solidified, whip it on high speed with an electric mixer until fluffy and spreadable – it should look like silky cake frosting.
Make the Meringues:
- Preheat your oven to 170°F.
- Whip the egg whites on high speed until stiff peaks form.
- Gradually and very slowly add the sugar while continuing to whip. The mixture should become very stiff and glossy – this takes patience, but it’s worth it.
- In a small bowl, combine the raspberry jam and food coloring (if using). Fold in about 1 cup of meringue to lighten the mixture.
- Transfer the jam mixture back into the full meringue bowl and fold gently to combine. You want beautiful swirls of pink, not a fully blended color.
- Pipe rosettes onto parchment-lined baking sheets and bake for 2 hours, or until the meringues are completely dry and peel off the parchment easily.
Assemble:
- Pipe or spread about 1 tablespoon of whipped ganache over the flat sides of half the meringues.
- Gently press another meringue rosette on top to form a sandwich.
- Store in an airtight container.
Pro Tip: Make the ganache the night before. Letting it chill overnight means it whips up extra fluffy and light the next day.
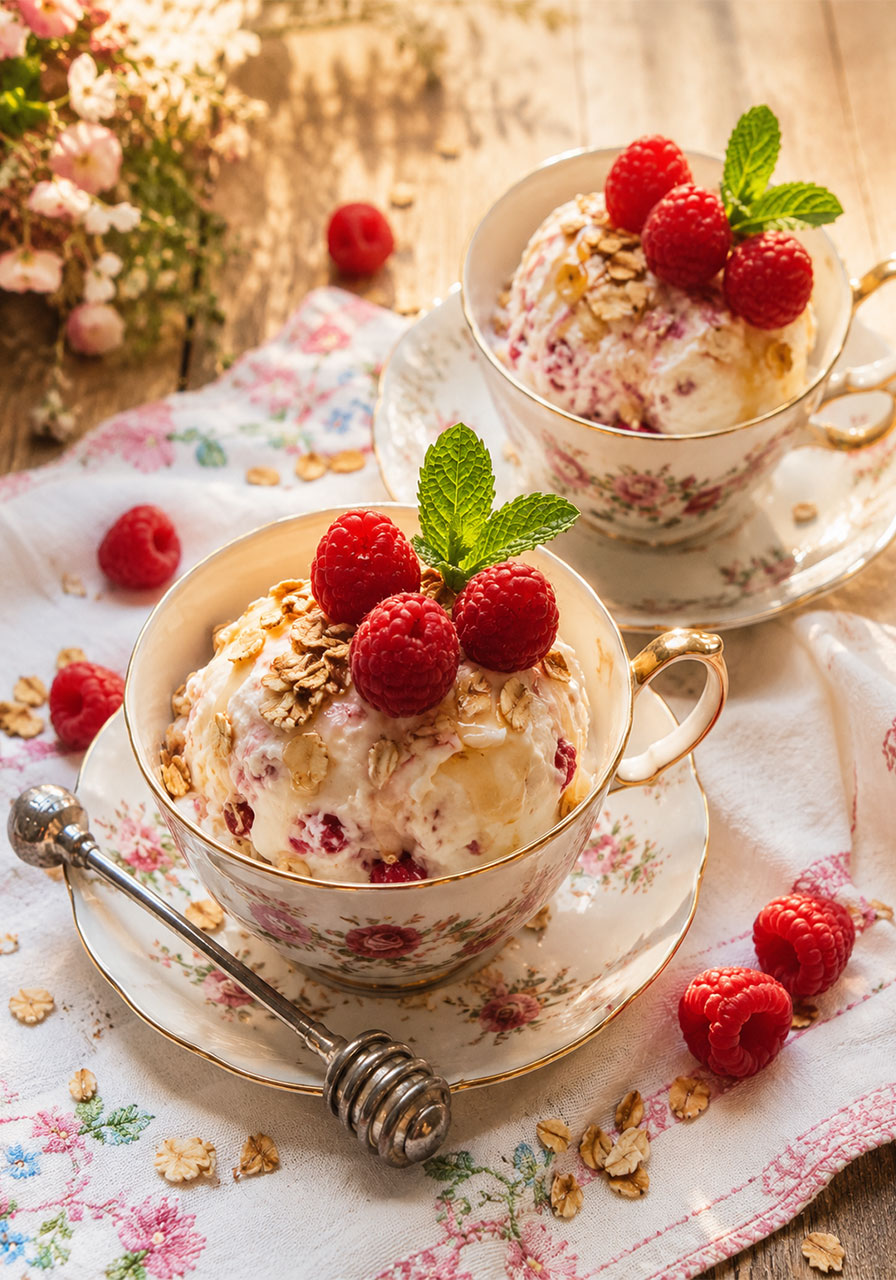
2. Cranachan Ice Cream
This one is a little unexpected – and that’s exactly why it belongs at your tea party.
Cranachan is a beloved Scottish dessert of whipped cream, raspberries, toasted oats, and honey. This version churns it into the creamiest, most indulgent ice cream you can imagine. It is rich, it is fruity, it is a little rustic and completely magical.
Serve it in small vintage teacups or glass dishes for the most charming presentation.
Best for: Summer tea parties, something a little different on the dessert table
Makes: 8 servings
Prep Time: 30 minutes | Cook Time: 10 minutes | Total Time: 4 hours 40 minutes
What You’ll Need
- 2 cups fresh raspberries
- ½ cup honey
- 1 cup rolled oats
- 3 cups heavy cream
- 1 can sweetened condensed milk
- 1 teaspoon vanilla extract
- Extra raspberries and mint leaves for garnish
How to Make It
- Prepare the raspberries. Gently crush the raspberries by hand or with a fork, leaving some chunks for texture. Set aside.
- Toast the oats. Spread rolled oats in a dry skillet over medium heat. Stir frequently for 5–7 minutes until golden and fragrant. Remove from heat and cool completely.
- Make the honey drizzle. Warm the honey gently until it becomes runny and easy to pour. Set aside.
- Whip the cream. In a large bowl, whip the heavy cream until soft peaks form.
- Combine. Gently fold the sweetened condensed milk and vanilla extract into the whipped cream until smooth.
- Add raspberries and oats. Fold in the crushed raspberries and toasted oats. Drizzle in the honey and fold just a few times to create beautiful swirls – don’t fully mix.
- Freeze. Pour the mixture into a freezer-safe container. Cover and freeze for at least 4 hours, or overnight.
- Serve. Scoop into vintage teacups, garnish with fresh raspberries and mint, and drizzle with a little extra honey right before serving.
Pro Tip: Press a sheet of plastic wrap directly onto the surface of the ice cream before putting on the lid. This prevents ice crystals from forming and keeps it silky smooth.
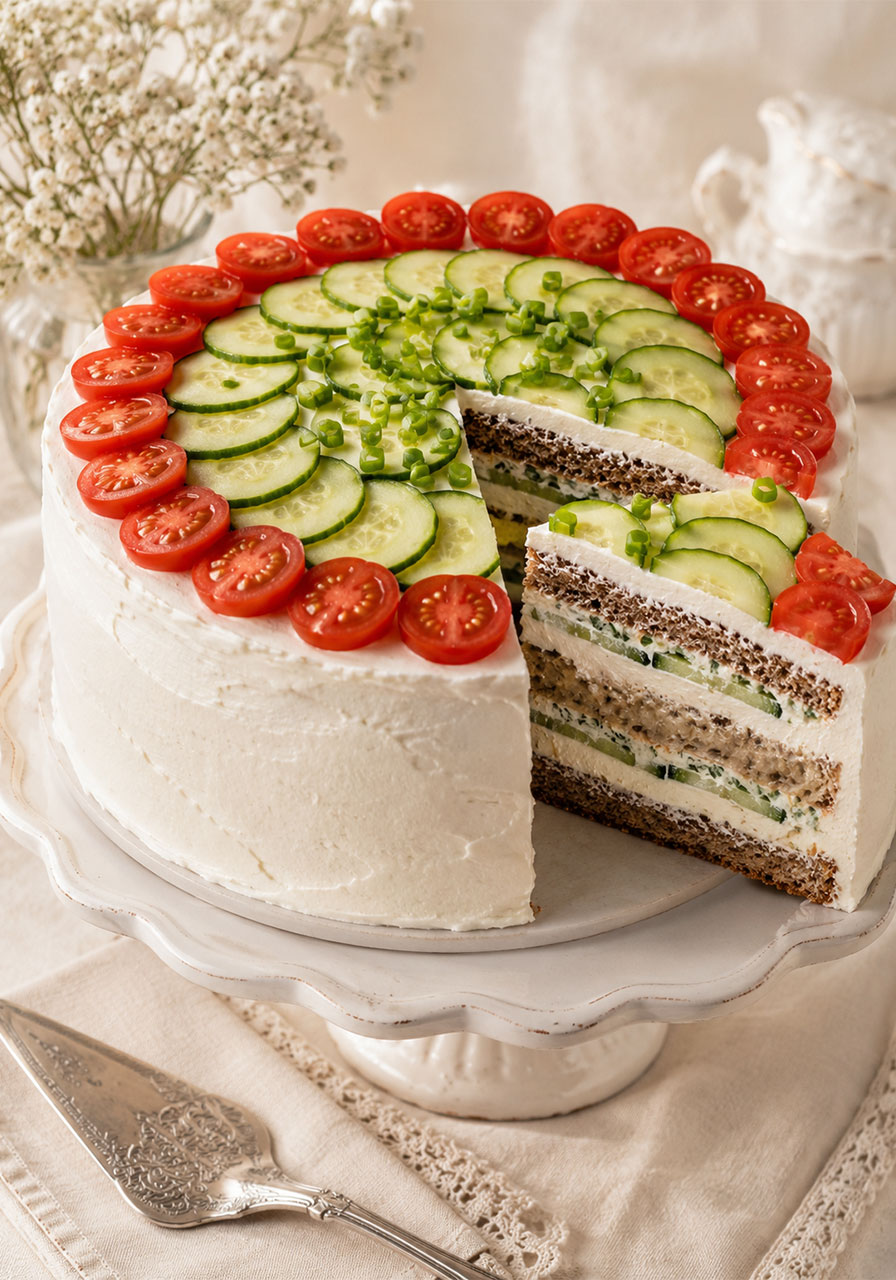
3. Swedish Sandwich Cake (Smörgåstårta)
The sandwich cake. The conversation starter. The thing that will make every single guest say “Wait – is that a CAKE?”
Yes. And no. The Swedish Smörgåstårta is a savory layered sandwich loaf “frosted” with cream cheese and decorated with colorful toppings. It looks like a celebration cake, but inside it is stacked with herby fillings and fresh vegetables. It is elegant, surprising, and deeply satisfying.
This is the vintage tea party move that says you are not afraid to be a little creative.
Best for: Savory showpiece, bridal showers, afternoon tea centerpiece
Makes: 12 servings
Total Time: 30 minutes
What You’ll Need
For the Layers:
- 3 slices bread (whole grain works beautifully)
For Filling 1:
- 2 tablespoons baba ghanoush (roasted eggplant blended with tahini, lemon juice, garlic, salt, and pepper)
- 4–5 thin cucumber slices
For Filling 2:
- 2 tablespoons softened cream cheese (store-bought veggie cream cheese works great)
- A few lettuce or arugula leaves
For the “Frosting” and Toppings:
- 2 tablespoons softened cream cheese
- 1 tablespoon sour cream
- Salt and white pepper, to taste
- Thinly sliced cucumber, for decorating
- Grape tomatoes, halved
- Finely chopped onion or green onion
How to Make It
- Cut the crusts off all three bread slices for a clean, tidy look.
- Build the first layer: Spread baba ghanoush on one side of the first bread slice. Top with cucumber slices.
- Build the second layer: Spread baba ghanoush on one side of the second slice and place it baba ghanoush-side down onto the cucumbers, pressing lightly. Spread cream cheese on the top of this slice, then add your lettuce or arugula leaves.
- Add the third layer: Spread cream cheese on one side of the third slice and place it cream cheese-side down onto the lettuce. Press gently.
- Make the frosting: Combine softened cream cheese and sour cream in a small bowl. Season with salt and white pepper. Use an offset spatula or butter knife to spread it smoothly over the top and sides of the sandwich stack, just like frosting a cake.
- Decorate: Arrange cucumber slices, halved tomatoes, and chopped herbs on top as beautifully as you like. Refrigerate until ready to serve.
Pro Tip: Make this the night before and refrigerate it. The flavors meld beautifully overnight, and it slices much more cleanly when fully chilled.
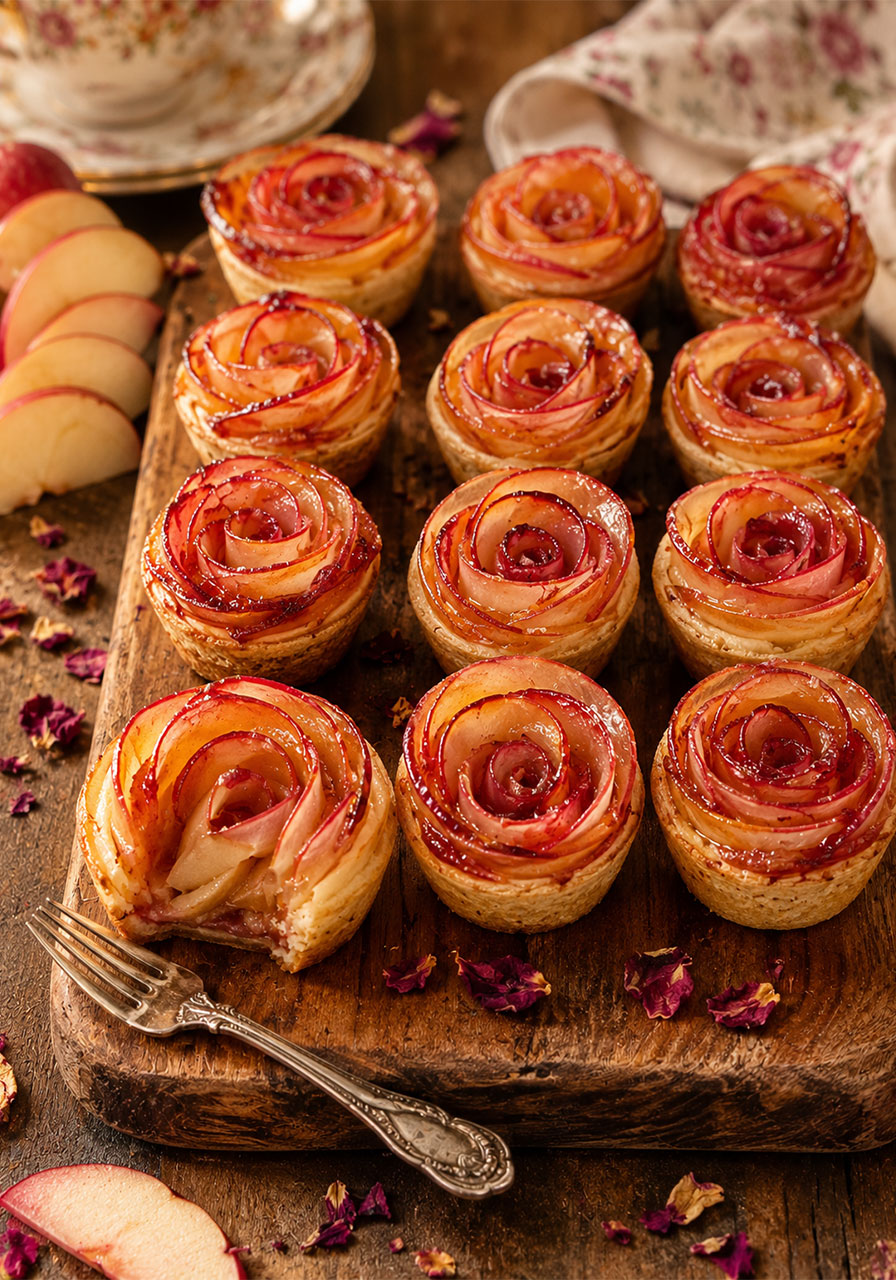
4. Mini Apple Rose Pies
These are the definition of “worth every minute.” Thinly sliced apples coaxed into the shape of blooming roses, nestled inside buttery mini pie shells, glazed with a raspberry-brown sugar sauce that makes them shine like jewels.
They are delicate. They are impressive. And once you learn the technique, you’ll want to make them for every occasion from here on out.
Best for: Autumn teas, elegant dessert displays, gifting
Makes: 16 mini pies
What You’ll Need
- 1 batch perfectly flaky pie crust dough
- 6 Honeycrisp apples, thinly sliced
- ¼ cup freshly squeezed lemon juice
- 3 tablespoons butter
- ½ cup packed brown sugar
- 5 tablespoons seedless raspberry jam
- 1–2 small drops red food coloring (optional)
How to Make It
- Chill a mini muffin tin in the refrigerator while you prepare the dough. Roll out the pie dough on a lightly floured surface and cut into rounds using a 3-inch cookie cutter. Gently press each round into the muffin tin wells. Return the lined tin to the refrigerator while you make the filling.
- Core the apples. Using a mandoline or a very sharp knife, slice them into thin half-moon shapes, about 1/16-inch thick. Place them in a large bowl, add the lemon juice, and toss to coat.
- In a small saucepan over medium-low heat, combine the brown sugar, raspberry jam, and butter. Stir and cook until everything is melted and combined. Remove from heat. Add food coloring if desired. Pour the mixture over the apple slices and toss gently to coat.
- Set the coated apples aside for 5–10 minutes to soften and become pliable. If they are still stiff, microwave in 15-second bursts until flexible. Strain the apples and discard the excess liquid.
- Form the roses: Arrange about 8 apple slices in a straight row, each slice overlapping the previous, to create a 12-inch line. Starting from one end, gently and carefully roll the apples into a rose shape. Transfer the rolled rose into one of the pie crust wells. Repeat until all wells are filled.
- Refrigerate while you preheat the oven to 350°F with a rack in the middle.
- Bake until the crust is golden and the apple petals are caramelized. Watch them carefully – they are precious!
Pro Tip: The thinner the apple slices, the more beautifully they roll. If you have a mandoline, now is the time to use it.
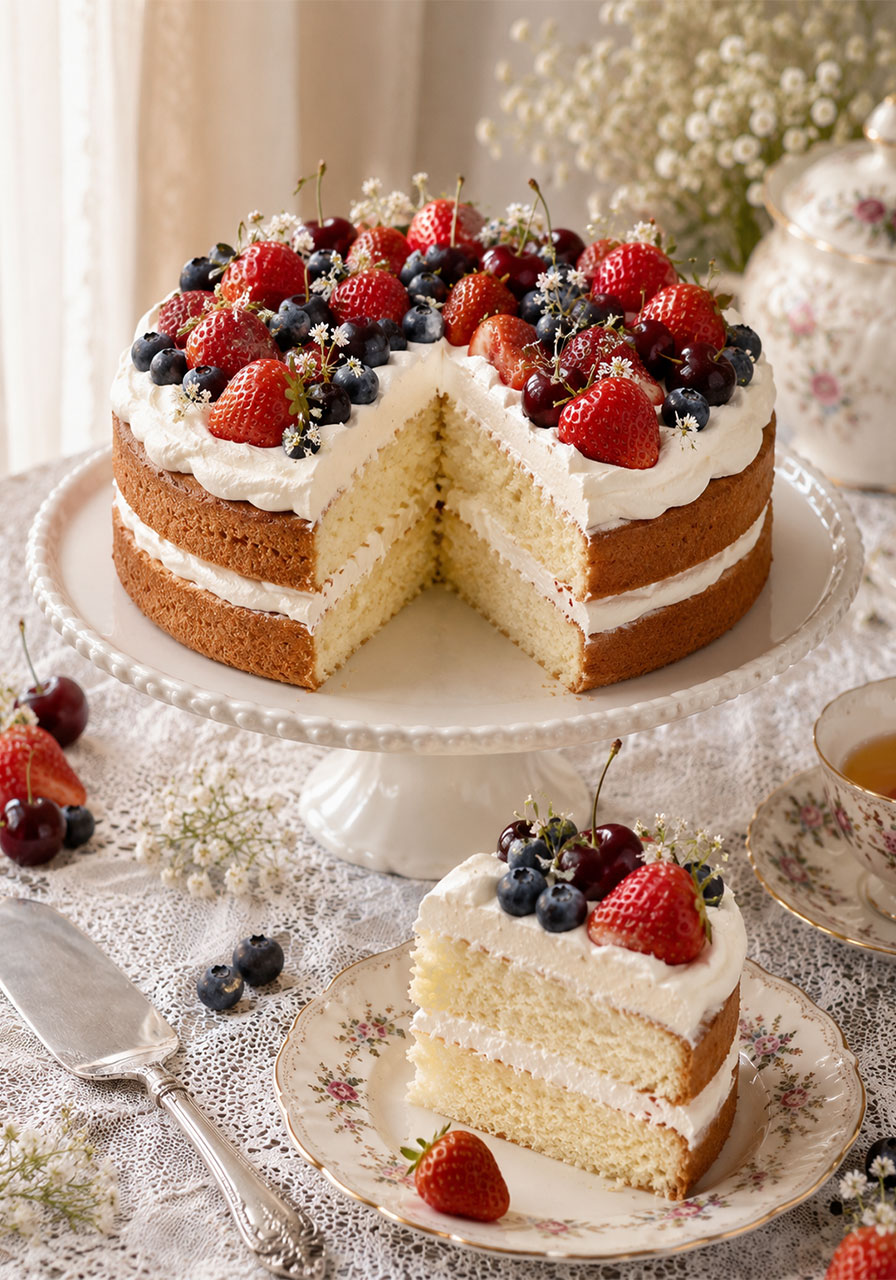
5. Sponge Cake with Berries and Cherries
Every vintage tea party deserves a proper sponge cake. Light, cloudlike layers held together with billowy whipped cream, crowned with strawberries, blueberries, and cherries in full summer glory.
This is the cake your grandmother would have been proud of. Simple, beautiful, and deeply satisfying in every bite.
Best for: Centerpiece cake, summer teas, celebrations
Makes: 8–10 servings
What You’ll Need
- 3 large eggs
- ½ cup sugar (caster, regular, or raw)
- ¾ cup cornflour (cornstarch)
- 1 teaspoon cream of tartar
- ½ teaspoon bicarbonate of soda (baking soda)
- 1 heaped tablespoon plain flour
- 500 ml (about 2 cups) thickened (heavy) cream
- ⅓ cup powdered (icing) sugar
- 1 punnet (about 1 cup) fresh strawberries
- ½ punnet (about ½ cup) blueberries
- 120 g (about 2 handfuls) fresh cherries
- Coriander flowers or similar small edible flowers for garnish (optional but gorgeous)
How to Make It
- Preheat oven to 190°C (375°F). Grease or spray two 20 cm (8-inch) round cake tins.
- Beat eggs and sugar together for a full 10 minutes until the mixture is very pale, thick, and tripled in volume. Do not skip this step – this is what gives the sponge its lift.
- Sift the cornflour, cream of tartar, baking soda, and flour together into a bowl. Sift at least once, but three times is best for maximum airiness.
- Using the beaters, very gently fold the sifted dry ingredients into the egg and sugar mixture, being careful to preserve as much air as possible. Think of it as coaxing them together, not stirring.
- Divide the batter evenly between the two prepared tins.
- Bake for 18–20 minutes until the tops are springy to the touch and the sides are pulling away from the pan.
- Let the cakes cool in the tins for 10 minutes, then remove and place on a tea towel on the counter. Cover with the upturned cake tins and leave to cool completely – this helps prevent them from drying out.
- Whip the cream with the powdered sugar to your desired consistency.
- Place one cake layer on a serving plate. Spread half the whipped cream over it. Gently place the second layer on top and spread the remaining cream over it.
- Decorate generously with strawberries, blueberries, cherries, and edible flowers.
Pro Tip: For an extra layer of flavor, spread a thin coat of berry jam on the bottom cake layer before adding the cream. Raspberry or strawberry jam works beautifully here. This cake is best eaten the day it is baked.
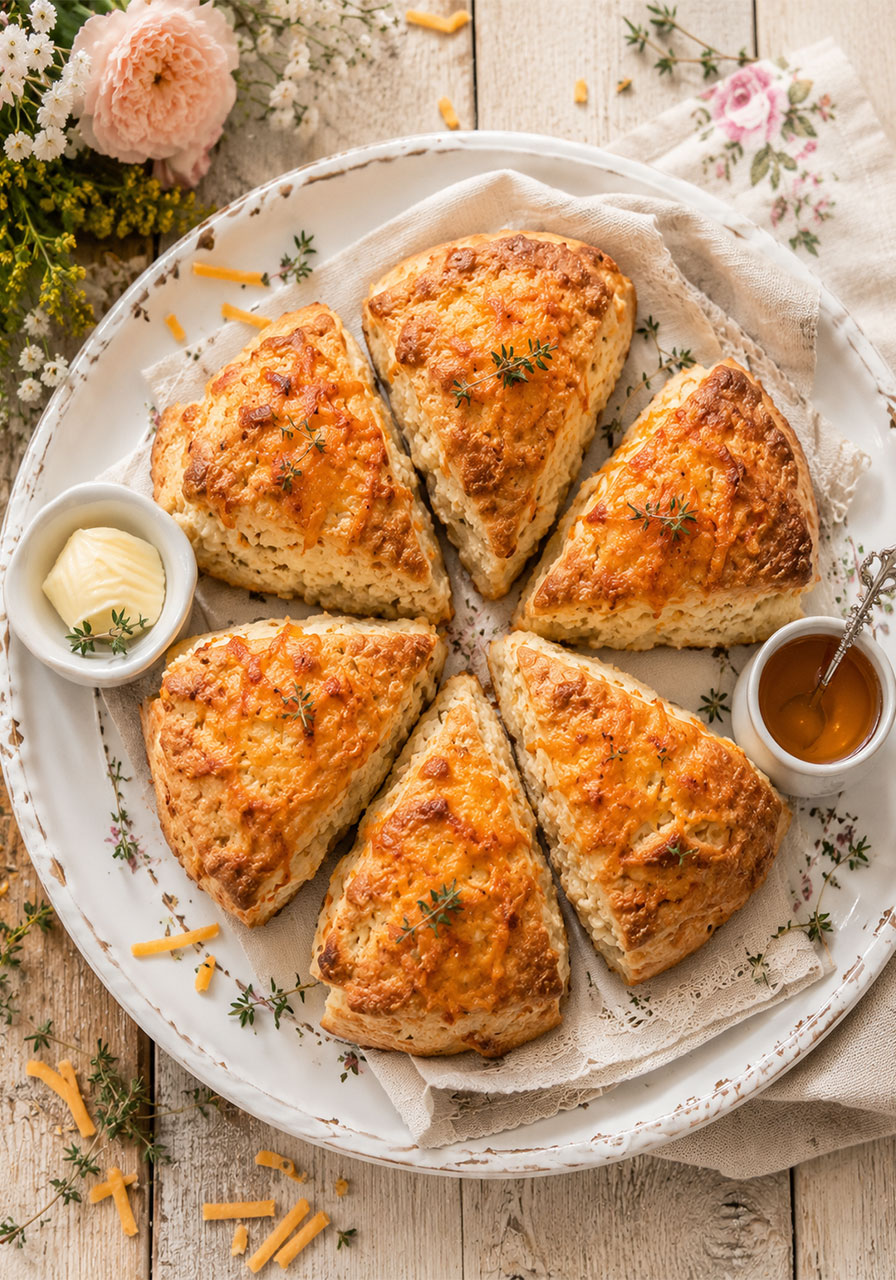
6. Cheese Scones
Not all scones need to be sweet. These golden, extra-cheesy savory scones are the kind of thing that disappears from the plate before you even finish setting it down.
Warm from the oven, with a smear of good butter melting into every crumb – honestly, is there anything better?
They balance out all the sweet treats on your tea table and give guests something satisfying and a little unexpected.
Best for: Savory balance on the tea table, make-ahead ease
Makes: 6 scones
Prep Time: 15 minutes | Cook Time: 20 minutes
What You’ll Need
- 1¾ cups plain (all-purpose) flour
- 1½ cups shredded cheddar cheese, tightly packed (plus extra for topping)
- 3 teaspoons baking powder
- ½ teaspoon cooking salt
- 100 g (7 tablespoons) cold unsalted butter, cut into 1 cm cubes
- ¾ cup cold milk, plus a little extra for brushing (full fat preferred)
- Butter, for spreading when serving
How to Make It
- Preheat oven to 200°C / 390°F (180°C fan).
- Place the flour, baking powder, and salt in a food processor with an S-blade. Pulse once to combine.
- Add the cold butter and pulse 4–5 times until the largest pieces of butter are about the size of a pea. (To do this by hand, rub the butter into the flour with your fingertips.)
- Add the shredded cheese and pulse once to just barely mix it through.
- With the food processor running on pulse, pour the cold milk through the feeding tube. Pulse 8–10 times until the flour is just incorporated. The dough will look shaggy and a little sticky – that is perfect. Do not overmix.
- Turn the dough out onto a very lightly floured surface and gently bring it together into a ball with your hands. Pat and shape it into a round disc about 3 cm (1.2 inches) thick on a sheet of baking paper.
- Brush the top and sides with a little milk. Sprinkle generously with extra shredded cheese and lightly press it in.
- Cut into 6 wedges. Transfer to a baking tray, pulling each wedge apart slightly so there is about 5 cm (2 inches) of space between them.
- Bake for 20 minutes until the tops are beautifully golden.
- Rest on the tray for 5 minutes, then serve warm with a generous smear of butter.
Pro Tip: For the boldest flavor, use a sharp vintage cheddar. For something more luxurious, try gruyere. These keep for 3–4 days, but they are absolutely best eaten warm on the day they are baked.
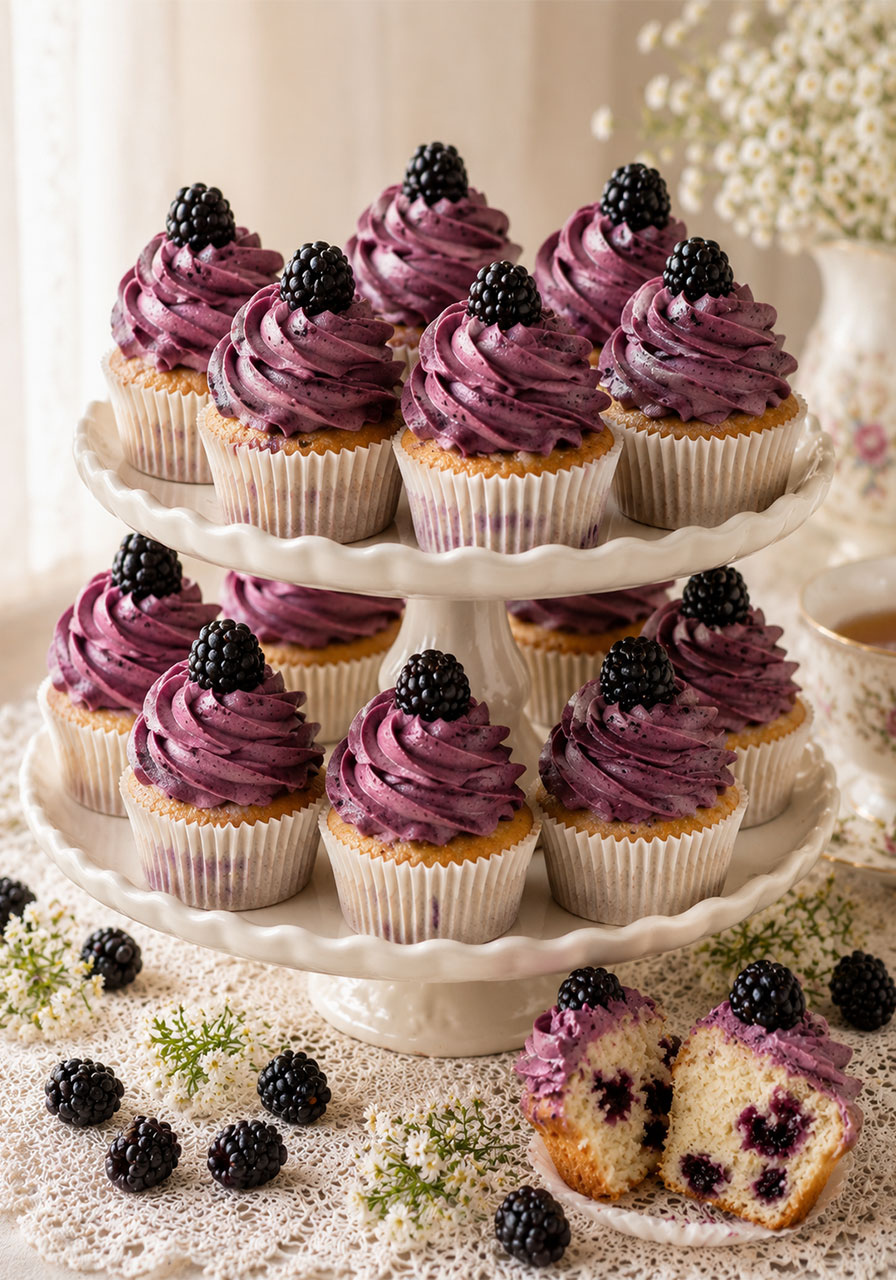
7. Blackberry Cupcakes (Gluten Free!)
Tender vanilla cupcakes hiding a pocket of fresh blackberries inside, crowned with a lush, naturally purple blackberry buttercream frosting. The color alone is utterly stunning against a vintage tea table.
And yes – these are gluten free, which means everyone at your table can enjoy them. That little detail matters more than you might think.
Best for: Inclusive tea parties, beautiful dessert displays
Makes: 12 cupcakes
Prep Time: 20 minutes | Cook Time: 20 minutes
What You’ll Need
For the Cupcakes:
- 170 g gluten free plain flour (such as Doves Farm)
- ½ teaspoon xanthan gum (omit if your flour blend already contains it)
- 1¾ teaspoons baking powder
- ¼ teaspoon salt
- 165 g unsalted butter, at room temperature
- 190 g caster sugar
- 3 large eggs, at room temperature
- 1½ teaspoons vanilla extract
- 3 tablespoons Greek yogurt
- 24 large fresh blackberries (2 per cupcake)
For the Frosting:
- 160 g fresh blackberries
- 140 g unsalted butter
- 560 g powdered (icing) sugar
- 12 extra blackberries for decoration (optional)
How to Make It
Make the Cupcakes:
- Preheat oven to 170°C / 150°C fan. Line a 12-cup cupcake tray with paper cases.
- Chop the 24 blackberries into quarters and set aside.
- Sieve the gluten free flour into a large mixing bowl. Add the xanthan gum, baking powder, and salt and whisk together until well combined.
- In a stand mixer, beat the butter and sugar together on high speed for about 4 minutes until very pale and fluffy.
- Add one egg followed by 1 tablespoon of the flour mixture and mix on medium until combined. Repeat with the remaining two eggs, adding a spoon of flour with each one.
- Add the Greek yogurt and vanilla extract and mix again.
- Add the remaining flour mixture and mix on low speed until just combined, scraping down the sides as needed.
- Divide the batter evenly into the 12 cupcake cases, filling each about ¾ full.
- Push 8 blackberry pieces (equaling 2 whole blackberries) into each cupcake, distributing them throughout the batter with some closer to the top and some to the bottom. Use a small spoon or knife to make pockets if needed.
- Bake for about 20 minutes, or until a skewer inserted into the center comes out clean or with just a few moist crumbs. Cool completely before frosting.
Make the Frosting:
- Blitz the 160 g of blackberries in a blender or food processor until pureed. Push the puree through a fine sieve, discarding the seeds and keeping the juice only.
- Beat the butter in a large mixing bowl until smooth.
- Sieve in the icing sugar about a quarter at a time, beating after each addition. When you have added about three-quarters of the sugar, pour in the blackberry juice and beat well. Add the remaining sugar and mix until smooth, fluffy, and fully combined.
- Pipe swirls of frosting onto each cooled cupcake. Top each one with a fresh blackberry.
Pro Tip: If the frosting feels too stiff, add a teaspoon of milk at a time. If it is too soft, add a little more sifted icing sugar. You want it firm enough to hold a beautiful swirl.
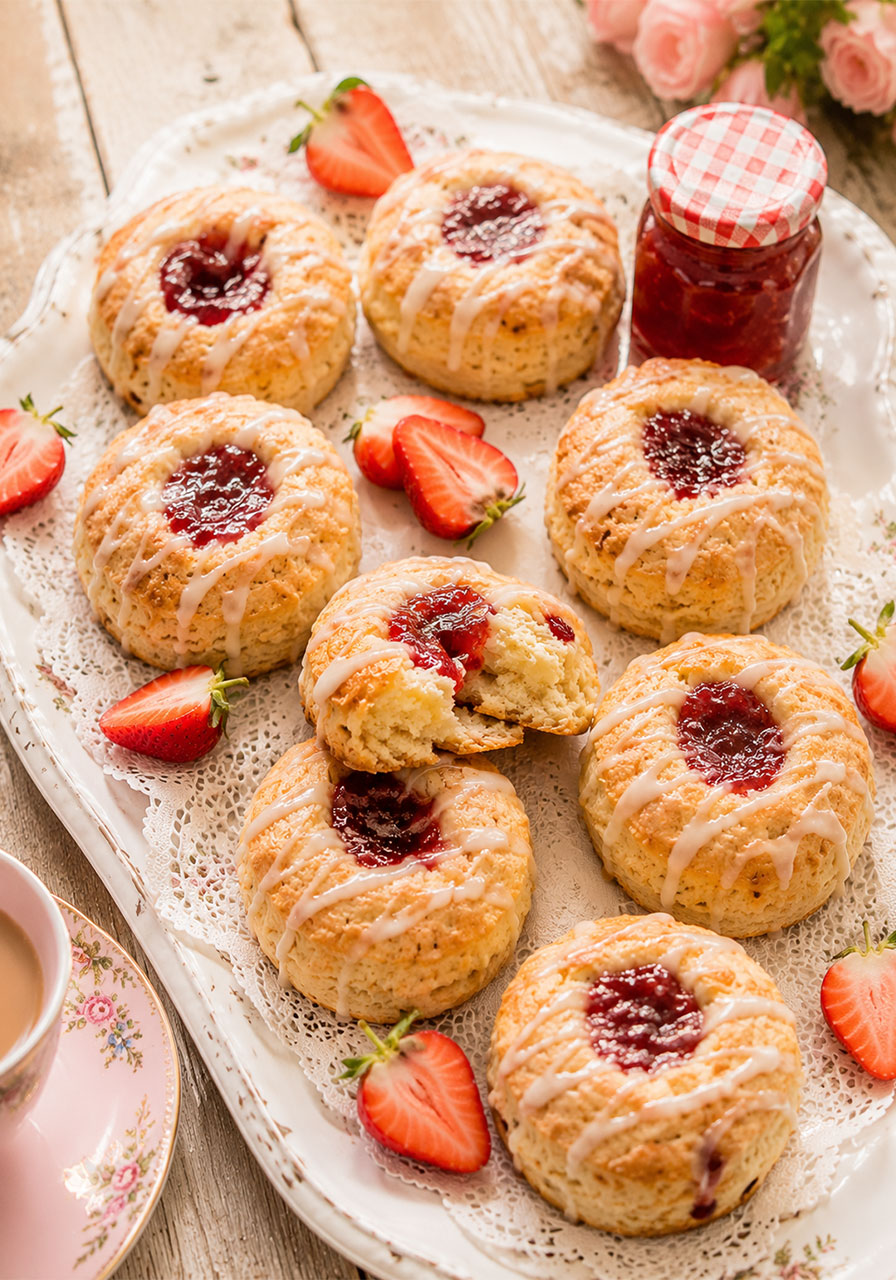
8. Jam Scones with Glaze
If there is one non-negotiable at a proper vintage tea party, it is scones with jam. This recipe gives you soft, tender scones with a pocket of jam baked right inside and a sweet glaze drizzled over the top.
They are simple, nostalgic, and completely irresistible. Have extras ready – they will go fast.
Best for: Tea party essential, easy crowd-pleaser
Prep Time: 15 minutes | Bake Time: 20 minutes
What You’ll Need
- 2 cups all-purpose flour
- ¼ cup granulated sugar
- 1 tablespoon baking powder
- ¼ teaspoon salt
- 1 egg
- ½ cup cold butter, cut into small pieces
- ⅔ to ¾ cup whipping cream
- ½ cup jam (strawberry, raspberry, or any favorite)
For the Glaze:
- 1 cup powdered sugar
- Enough whipping cream to reach a drizzleable consistency
How to Make It
- Preheat oven to 375°F. Line a baking sheet with parchment paper.
- In a large bowl, combine the flour, sugar, baking powder, and salt.
- Cut in the cold butter using a pastry blender or your fingertips until the mixture resembles coarse, sandy crumbs.
- Add the whipping cream and egg and stir just until the dough comes together. Do not overmix.
- Turn the dough onto a lightly floured surface and knead gently just a few times. Shape into a 7-inch circle and cut into 2½-inch rounds using a cookie cutter or the rim of a glass.
- Make a small indent in the center of each scone with your thumb. Fill each indent generously with jam.
- Bake for 20 minutes or until golden brown.
- Let cool slightly. Make the glaze by whisking together the powdered sugar and enough whipping cream to achieve a smooth, drizzle-able consistency. Drizzle over the scones and allow to set.
Pro Tip: Keep the butter as cold as possible throughout the process. Cold butter = flaky, tender scones. If your kitchen is warm, pop the cut butter back in the freezer for 10 minutes before using.
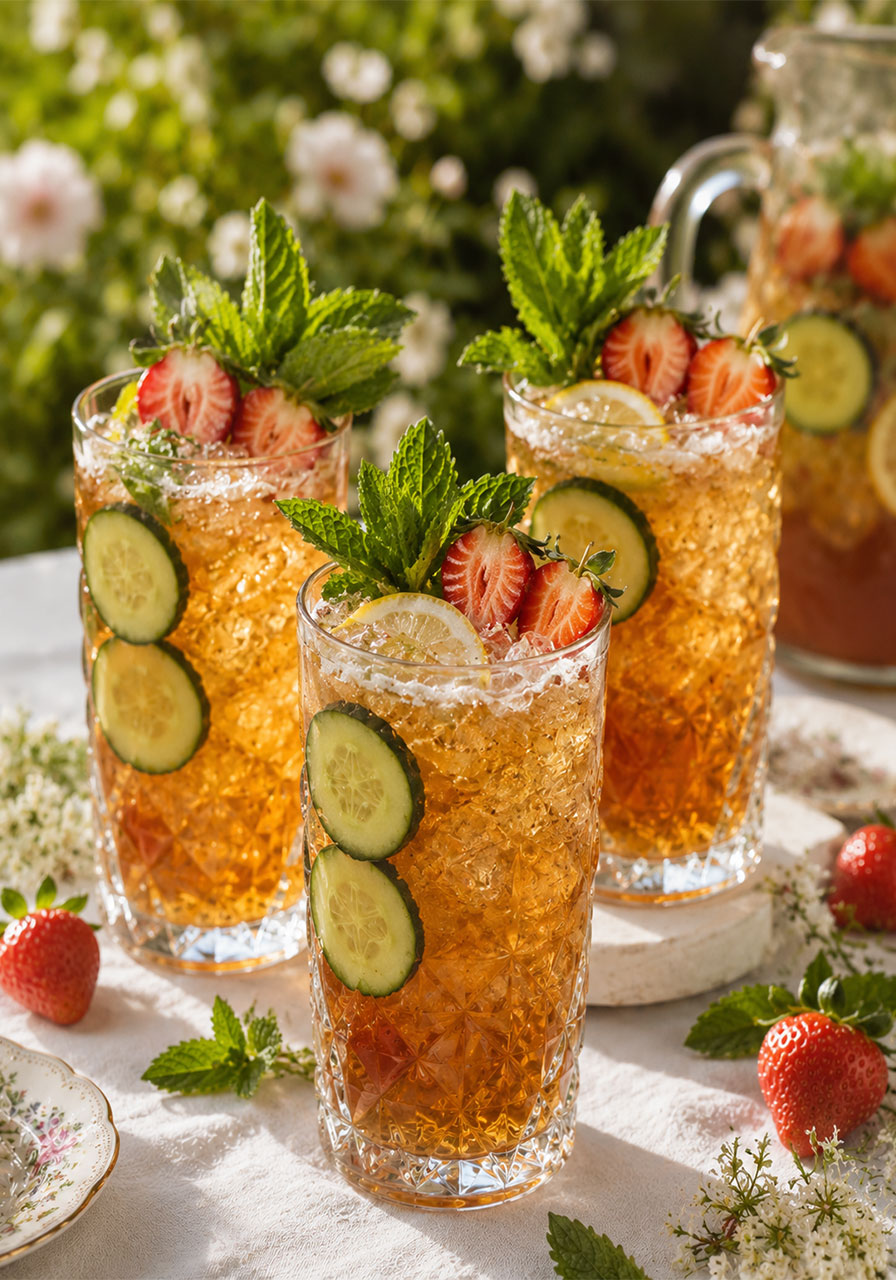
9. Pimm’s Strawberry Cups
Now, let’s talk drinks.
A vintage tea party does not have to mean only tea – though of course a beautiful pot of Earl Grey or English Breakfast is always on the table. The Pimm’s Cup is a quintessentially British warm-weather drink, and it is the perfect thing to put in guests’ hands the moment they arrive.
Fruity, refreshing, a little floral, and festive without being overwhelming. Serve it in tall glasses with plenty of ice, cucumber, and fresh strawberries, and it becomes part of the décor.
Best for: Welcome drinks, outdoor garden parties, warm days
Prep Time: 10 minutes
Makes: As many as you need – simply scale up!
What You’ll Need (Per Serving)
- 1 part Pimm’s No. 1
- A splash of bourbon or gin (optional but lovely)
- ¼ oz fresh lemon juice
- ⅛ teaspoon orange blossom water
- 3 parts ginger beer, ginger ale, or lemon-lime soda
- Fresh strawberries, cucumber slices, and mint for garnish
How to Make It
- In a large pitcher, combine the Pimm’s, bourbon or gin (if using), and fresh lemon juice.
- Top with the ginger beer and stir gently to combine.
- Fill glasses with ice. Pour the Pimm’s mixture over and garnish generously with mint sprigs, cucumber slices, and fresh strawberries.
- Serve immediately and enjoy.
Pro Tip: Make the Pimm’s base (minus the ginger beer) in a pitcher several hours ahead and keep it chilled. Add the ginger beer and ice right before serving for maximum sparkle.
10. Rose Petal Jelly
This is the recipe that feels almost like magic.
Whole rose petals, steeped into a soft pink tea, set into the most delicate, jewel-toned jelly you have ever seen. It tastes like a garden in bloom. Spread it on warm scones. Spoon it onto a cheese board. Gift little jars of it to your guests as a favor.
This recipe is a labor of love that rewards you tenfold.
Best for: Scone accompaniment, party favors, edible gift
Makes: About 5 half-pint jars

What You’ll Need
- 4 cups clean, unsprayed rose petals
- 4 cups water
- 2 tablespoons lemon juice
- 1 to 4 cups sugar (see notes below)
- 1 box (1.75 oz / 6 tablespoons) powdered pectin, regular or low-sugar
How to Make It
- Place the rose petals in a heat-proof container – a quart jar or a large glass Pyrex measuring cup works well.
- Pour 4 cups of boiling water over the petals and let them steep for 10–15 minutes. The water will turn a beautiful pink or gold depending on your roses.
- Carefully strain the rose tea through a fine mesh sieve into a saucepan, pressing gently on the petals to extract all the liquid. Discard the petals.
- Add the lemon juice to the rose tea in the saucepan. Bring to a boil over medium-high heat.
- Stir in the powdered pectin until fully dissolved. Boil for 1 full minute. Important: Do not add sugar yet – the jelly will not set properly if pectin and sugar are added at the same time.
- Stir in the sugar. Bring the mixture back up to a full boil and boil for 1 minute more.
- Carefully ladle the jelly into clean ½-pint jars, leaving ¼-inch headspace at the top.
- To store without canning: Apply lids, let cool to room temperature, then refrigerate for up to 1 month or freeze for up to 6 months.
- To can: Apply 2-part lids until fingertip-tight, process in a prepared hot water bath canner for 10 minutes, and store in a cool, dry place for up to 18 months.
A Note on Sugar and Pectin: If using standard pectin (like regular Sure-Jell), you’ll need a 1:1 ratio of liquid to sugar – so 4 cups rose tea requires at least 4 cups sugar. This makes a very sweet, old-fashioned jelly. To use less sugar and still get a proper set, use low-sugar pectin (Sure-Jell low sugar or Pomona’s Universal Pectin are both excellent options). Avoid liquid pectin for this recipe as it requires very high sugar quantities to set.
Pro Tip: Only use rose petals that are completely free of pesticides and chemical sprays. Roses from florists are often sprayed. Use petals from your own garden or a trusted organic source.
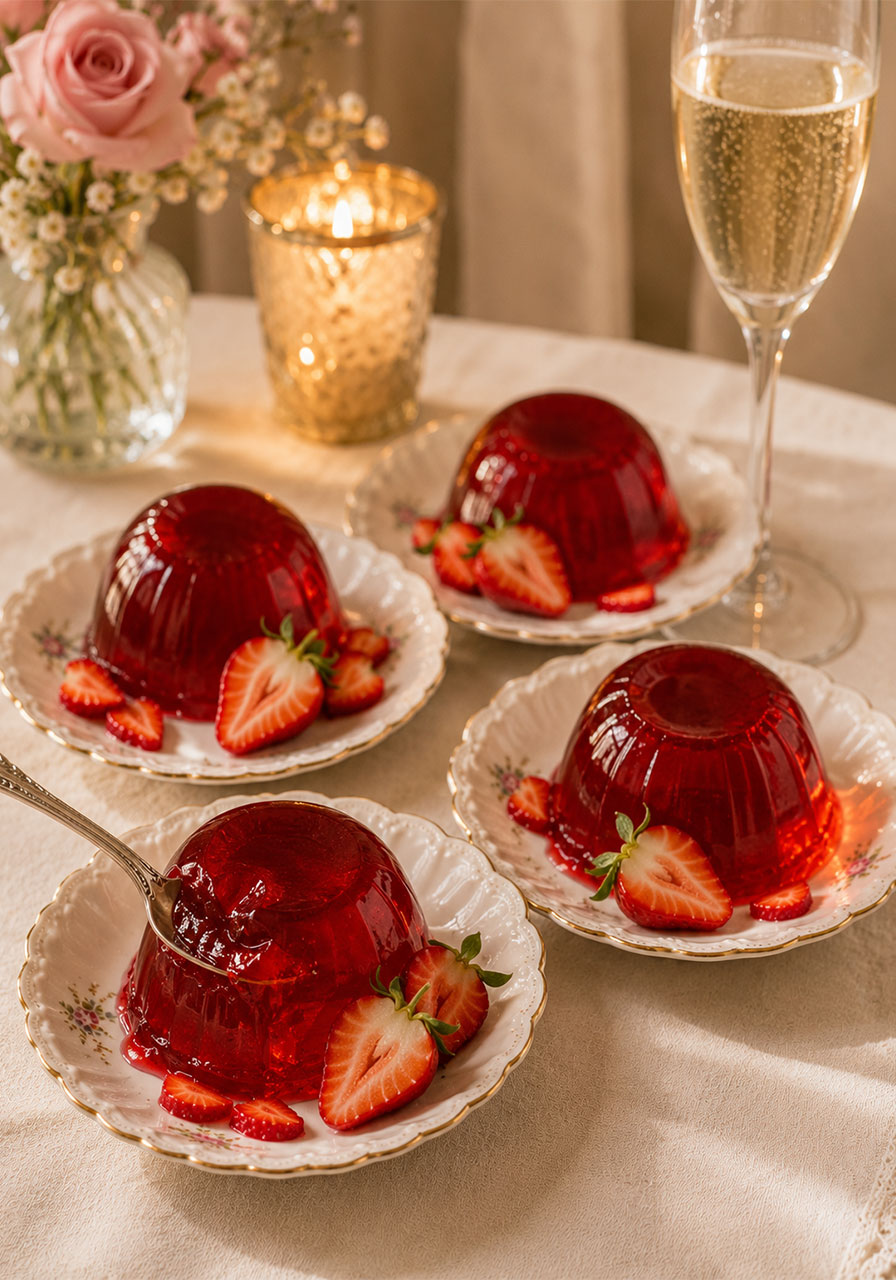
11. Champagne Strawberry Jellies
Delicate, jewel-bright, and utterly elegant. These individual strawberry and champagne jellies are the kind of dessert that makes guests feel truly celebrated.
The sweet intensity of slow-cooked strawberry juice suspended in sparkling champagne – it is simple in its ingredients but stunning in its effect. Make them the day before, unmold them just before serving, and watch your guests light up.
Best for: Milestone celebrations, bridal showers, dinner party ending
Makes: 4 servings
Note: Must be made the day before serving to allow the jelly to set fully.
What You’ll Need
- 500 g (about 1 lb) fresh strawberries, hulled and halved
- 75 g (about ⅓ cup) sugar
- 250 ml (about 1 cup) Champagne or sparkling wine
- 5 leaves gelatin
- Extra fresh strawberries to garnish
How to Make It
- Place the strawberries and sugar in a saucepan and stir gently. Cover the pan with plastic wrap (clingfilm) and cook over very low heat for 20 minutes. The strawberries will release a beautiful deep red juice – try not to rush this step.
- After 20 minutes, pour the strawberries and juice through a sieve into a jug. Let it drain for a few minutes to collect all the juice. You need only the liquid for this recipe – save the cooked berries for stirring into yogurt or porridge later. Measure out exactly 250 ml (1 cup) of juice.
- Soften the gelatin leaves in a bowl of cold water for 5 minutes.
- Set aside 50 ml of the strawberry juice in a small saucepan. Gently stir the remaining 200 ml of juice together with the 250 ml of champagne in a bowl. Set aside.
- Heat the reserved 50 ml of juice in the small saucepan to just under boiling. Squeeze the softened gelatin leaves to remove excess water, then stir them into the hot juice until completely dissolved.
- Pass the gelatin mixture through a sieve, then stir it gently into the strawberry and champagne mixture.
- Carefully pour into four metal dariole moulds. Refrigerate overnight to set fully.
- To unmold: Briefly dip each mould into a bowl of very hot water, then invert onto serving plates. Garnish with halved fresh strawberries and serve immediately.
Pro Tip: Metal dariole moulds release more easily than glass or ceramic. If you do not have dariole moulds, small ramekins or even teacups work beautifully – and serving them in the cup directly skips the unmolding step entirely.
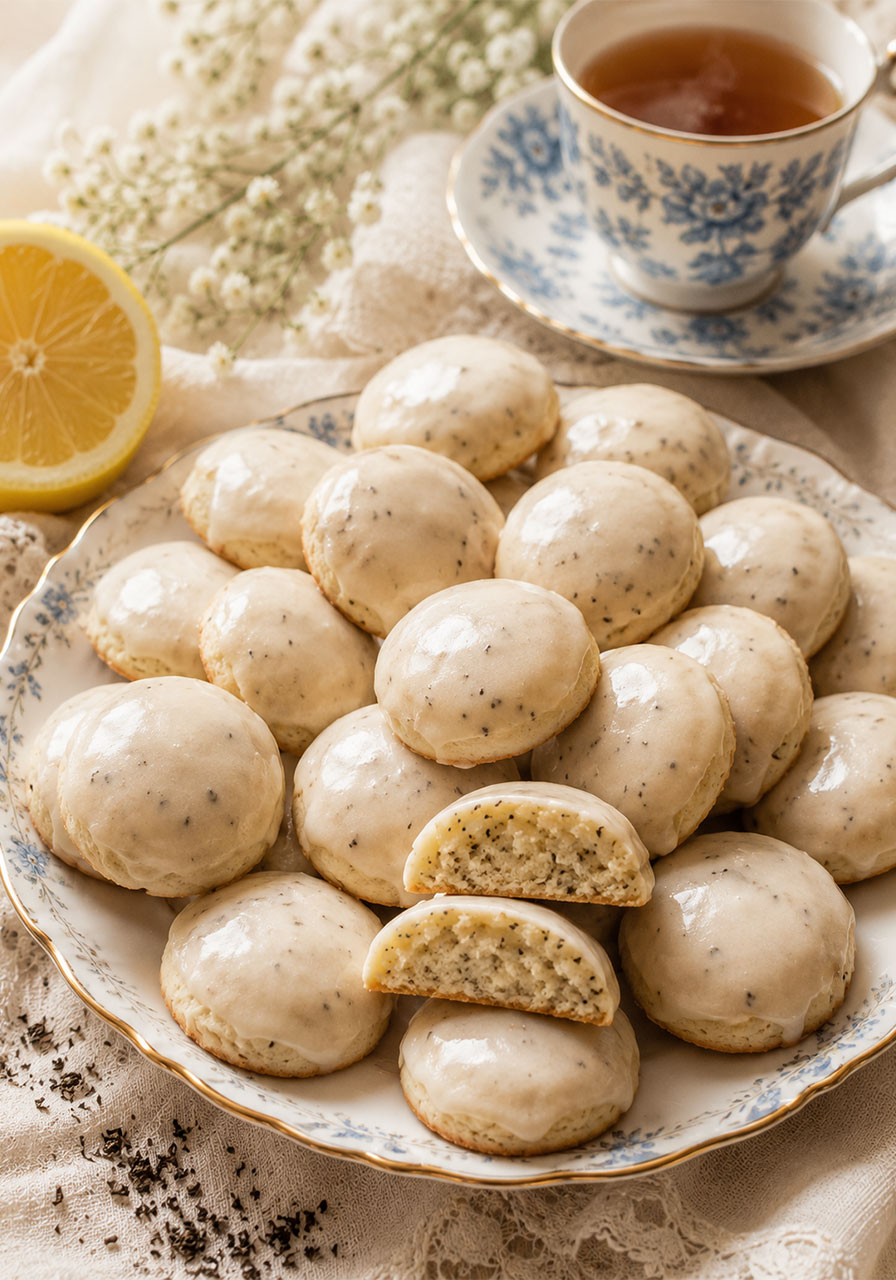
12. Earl Grey Cookies with Lemon Glaze
End with these. They are soft, subtly fragrant with Earl Grey tea, and finished with a bright, glossy lemon glaze that makes every bite feel like sunshine.
This is the cookie version of your favorite afternoon cup of tea, and it is the most fitting way to close a tea party spread.
Best for: Cookie favors, gifting, the cookie plate on your tiered stand
Makes: 36 cookies
Prep Time: 20 minutes | Bake Time: 10–12 minutes
What You’ll Need
For the Cookies:
- 1 cup (2 sticks) unsalted butter, softened
- 1½ cups granulated sugar
- 2 large eggs
- 1 tablespoon vanilla extract
- 1½ teaspoons baking powder
- ½ teaspoon salt
- 3 cups all-purpose flour
- 1 tablespoon Earl Grey tea leaves (from about 3 bags)
For the Lemon Glaze:
- 1 cup powdered sugar
- 4 teaspoons lemon juice
How to Make It
- Preheat oven to 350°F. Line several baking sheets with parchment paper.
- In a stand mixer, beat the softened butter and sugar together on high speed for 3–5 minutes until extremely light and fluffy. Take your time here – this step is what gives the cookies their beautiful tender texture.
- Scrape down the bowl. Turn the mixer to low and beat in the eggs, vanilla extract, baking powder, and salt.
- Scrape the bowl again. With the mixer on low, add the flour ½ cup at a time. Add the Earl Grey tea leaves with the last portion of flour. Stop mixing as soon as the flour is fully incorporated – do not overmix.
- Using a cookie scoop, measure out 1½-tablespoon portions of dough. Roll each portion into a smooth ball and place on the prepared baking sheets, 2 inches apart.
- Bake for 10–12 minutes until the centers are just puffy and the edges are barely golden. They will continue to set as they cool, so do not overbake. Allow to cool completely on the baking sheets.
- Make the glaze: Whisk together the powdered sugar and lemon juice until perfectly smooth. Dip the top of each cooled cookie into the glaze and set them back on the parchment to dry.
Pro Tip: Open the tea bags and measure the leaves carefully – you want exactly 1 tablespoon. Too little and you lose that beautiful floral tea flavor. Too much and it can turn bitter. This is the kind of cookie that improves with each day it sits, so bake a day ahead if you can. Store in an airtight container at room temperature for up to a week.
Putting It All Together: Your Tea Party Menu Plan
Feeling inspired but slightly overwhelmed? Here is a simple way to think about organizing your spread.
For a classic three-tiered stand:
The bottom tier (savory): Cheese Scones and slices of the Swedish Sandwich Cake.
The middle tier (scones): Jam Scones with glaze, served with the Rose Petal Jelly on the side.
The top tier (sweet): Earl Grey Cookies, Mini Apple Rose Pies, and Blackberry Cupcakes.
For the table: Sponge Cake with Berries and Cherries as a centrepiece cake stand, Raspberry Meringue Sandwiches on a separate platter, and Champagne Strawberry Jellies at individual place settings.
Drinks: A pot of good Earl Grey or English Breakfast tea always. Pimm’s Strawberry Cups for the welcome drink. And if you want something non-alcoholic and special, a pitcher of cold hibiscus iced tea with mint is absolutely beautiful and incredibly fitting for the mood.
A Few Final Thoughts
A vintage tea party is not about perfection. The slightly lopsided scone, the meringue that cracked just a little, the wildflowers that drooped by the second hour – these are the details that make it feel real, warm, and lovingly made.
What matters is the intention behind it. The care you put into the food. The beauty you created in the space. The way you made the people around that table feel cherished and seen.
That is the real magic of a tea party. And you have absolutely everything you need to create it.
Now go brew the kettle, put on something beautiful, and enjoy every single moment.