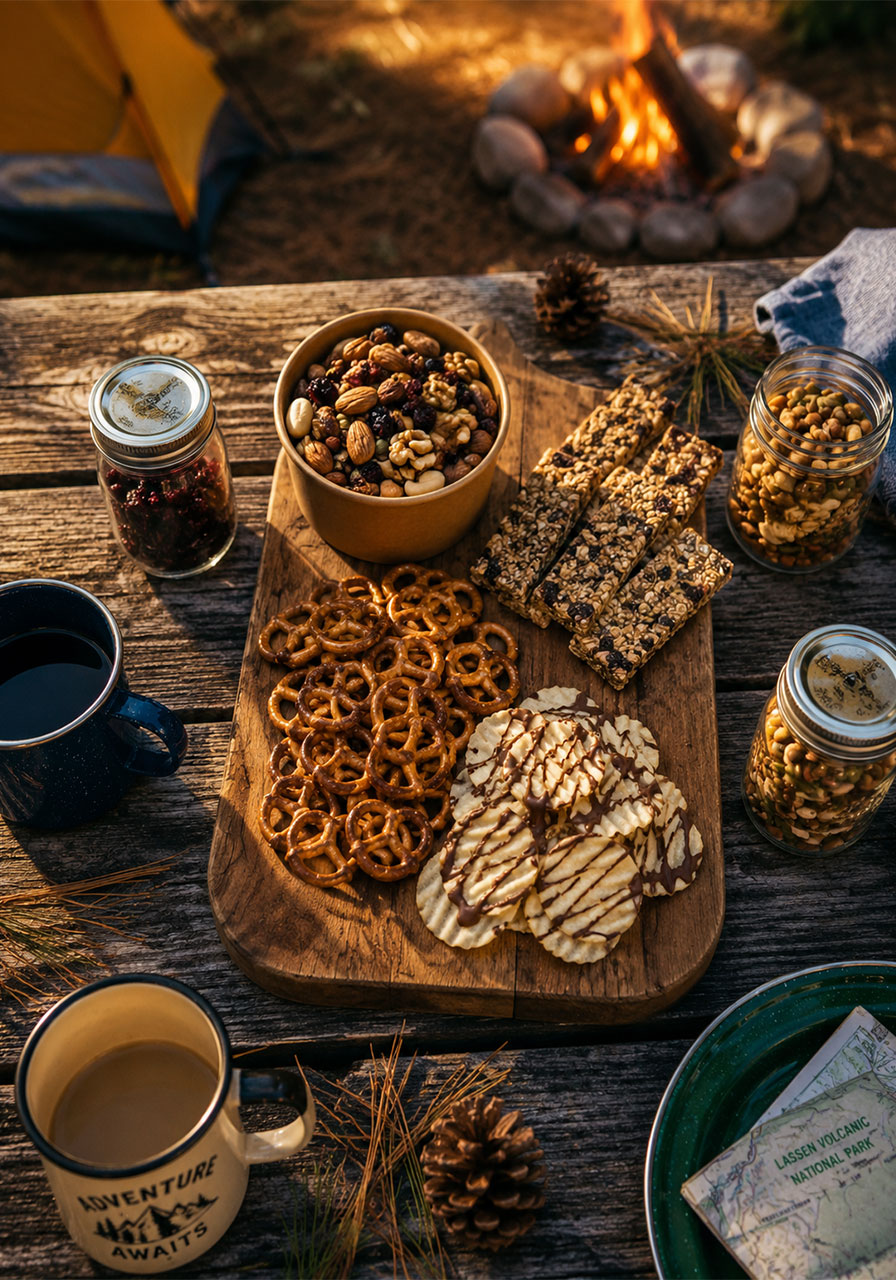
You’ve got the tent, the s’mores ingredients, and the playlist ready. But what about all the snacking that happens between meals? Because let’s be honest – camping basically revolves around food.
Whether you’re hiking a trail, lounging by the fire, or keeping the kids entertained at the campsite, you need snacks that are easy to make, easy to pack, and seriously delicious.
These 25 summer camping snacks are exactly that. No complicated equipment, no fuss. Just good food that makes the outdoors taste even better.
Let’s dig in.
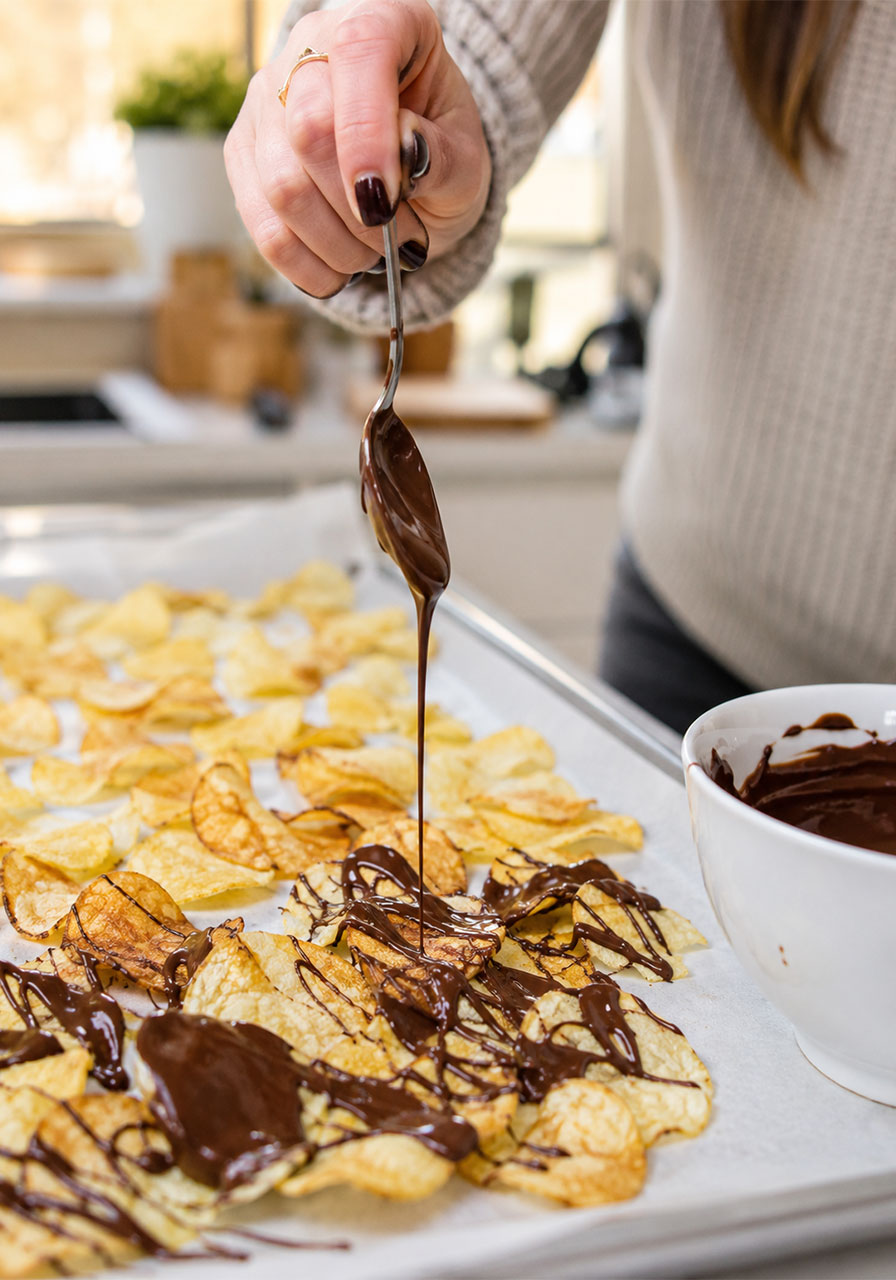
1. Chocolaty Chips
Two words: chocolate. Drizzled. Potato. Chips. This one takes barely any effort and feels like a total treat. It’s sweet, salty, crunchy – the ultimate campfire snack combo.
Yield: 6 servings | Prep: 15 min
What You’ll Need:
- 3 cups regular or kettle-cooked potato chips
- 1/2 cup semisweet chocolate chips
- 1 teaspoon shortening
How to Make It:
- Arrange potato chips in a single layer on a waxed paper-lined baking sheet.
- In a microwave, melt chocolate chips and shortening together. Stir until smooth.
- Drizzle the chocolate mixture over the chips.
- Refrigerate for 5 minutes or until set. Serve immediately.
Pro Tip: Melt the chocolate at home before you leave and pack it in a sealed container. At camp, just drizzle and enjoy – no reheating needed.
Nutrition (per 1/2 cup): 140 calories, 9g fat, 16g carbohydrate, 1g protein


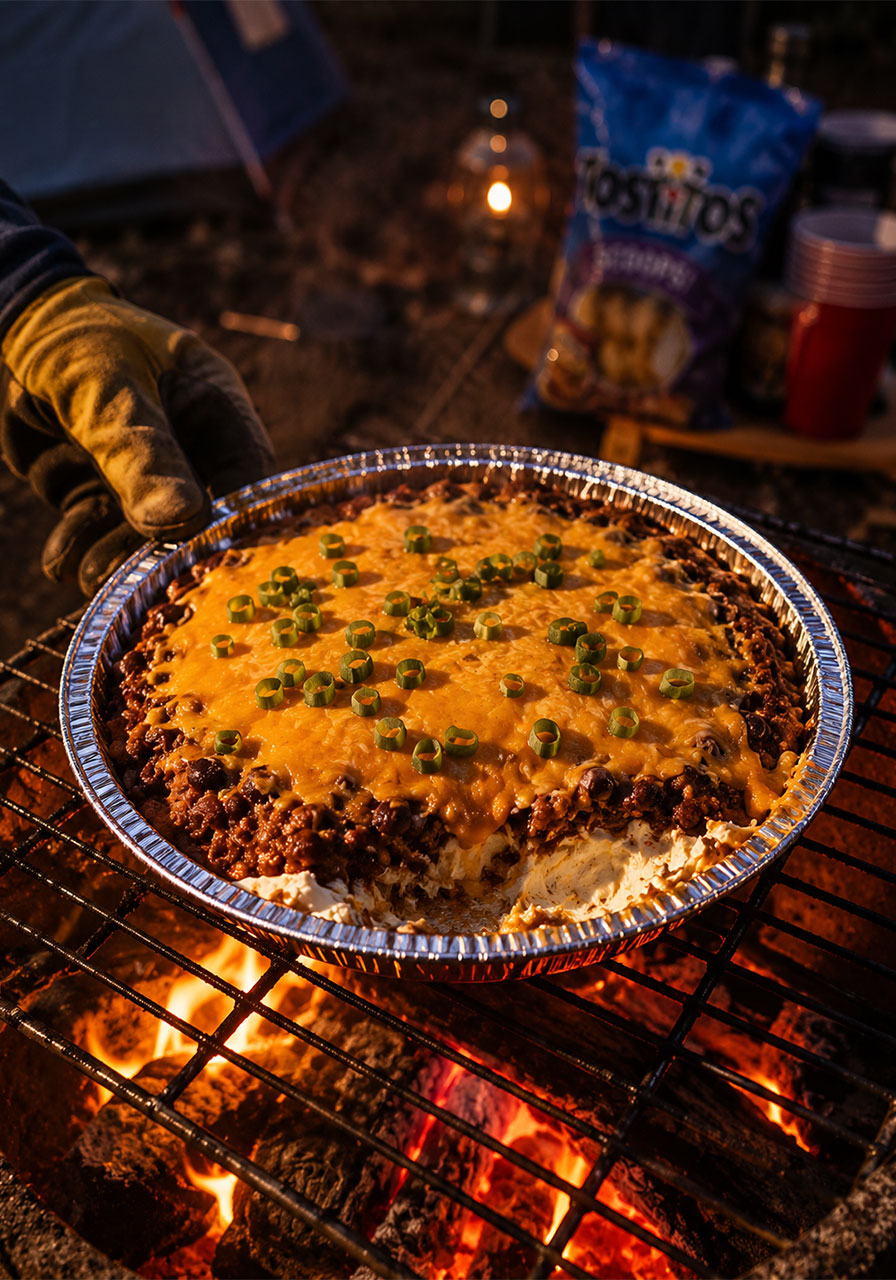
2. Campfire Dip
This is the dip that becomes the legend of the trip. Creamy, cheesy, loaded with chili – and it’s cooked right on the grill or over the campfire. Serve it with a big bag of tortilla scoops and watch it disappear in minutes.
Yield: 3-1/2 cups | Prep: 10 min | Cook: 5 min
What You’ll Need:
- 1 package (8 oz) reduced-fat cream cheese
- 1 can (15 oz) chili with beans
- 2 cups shredded cheddar cheese
- 2 thinly sliced green onions (optional)
- Tortilla chip scoops for serving
How to Make It:
- Prepare your campfire or grill for medium-low heat.
- Spread the cream cheese in an even layer on the bottom of a 9-inch disposable foil pie pan.
- Top with the chili, then sprinkle the shredded cheddar evenly over everything.
- Place the pan on a grill grate over the campfire or on the grill. Heat until the cheese is fully melted, about 5-8 minutes.
- If desired, sprinkle with sliced green onions. Serve hot with tortilla chip scoops.
Pro Tip: Bring the cream cheese in its block form and spread it right into the pan at camp. Fewer dishes, more fun.
Nutrition (per 1/4 cup): 250 calories, 17g fat, 15g carbohydrate, 9g protein
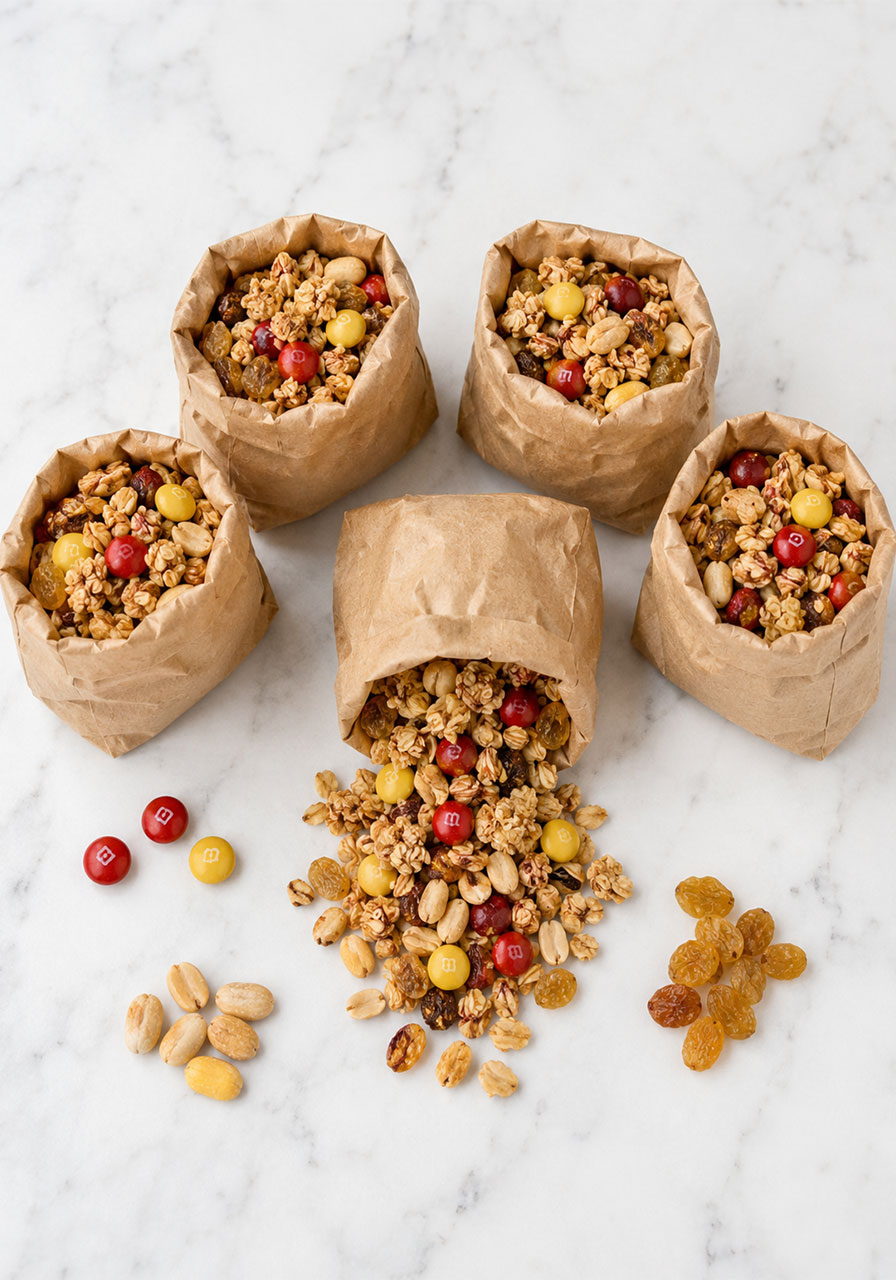
3. Granola Trail Mix
Four ingredients, zero cooking, and a bag big enough to feed the whole campsite. This trail mix is sweet, crunchy, chocolatey, and perfectly packable. Make a big batch before you leave and portion it into zip bags for the trail.
Yield: 11 cups | Prep: 5 min
What You’ll Need:
- 1 package (16 oz) banana-nut granola
- 1 package (15 oz) raisins
- 1 package (12.6 oz) milk chocolate M&M’s
- 1 can (12 oz) honey-roasted peanuts
How to Make It:
- Place all ingredients in a large bowl.
- Toss everything together until evenly combined.
- Store in airtight containers or zip bags until ready to snack.
Pro Tip: Portion into individual snack bags ahead of time so everyone can grab and go without sticky hands in the main container.
Nutrition (per 1/2 cup): 331 calories, 15g fat, 46g carbohydrate, 7g protein
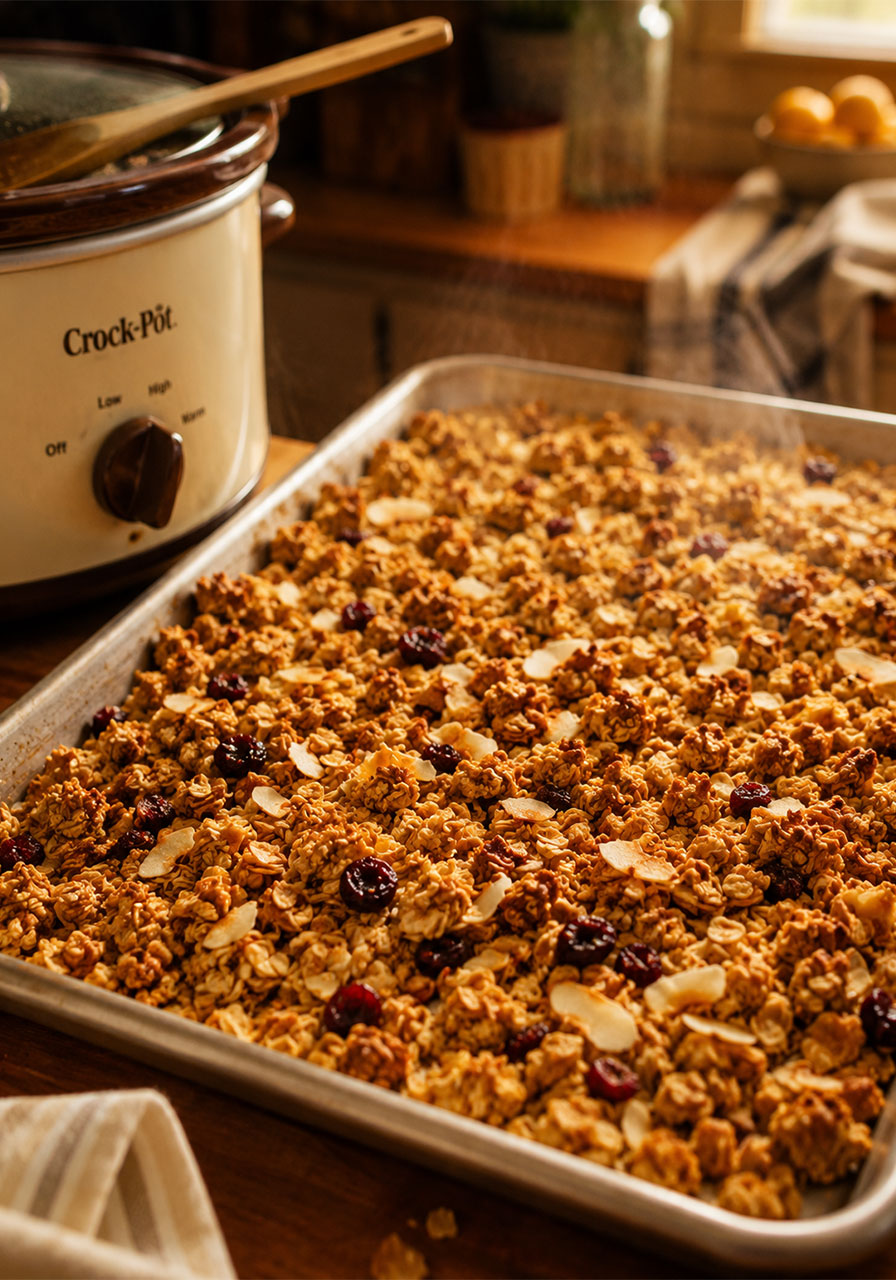
4. Slow-Cooker Coconut Granola
Make this beauty at home the night before your trip and you’ll have the most amazing grab-and-go breakfast OR snack waiting for you. Toasty oats, coconut flakes, almonds, dried cherries – it’s basically a hug in granola form.
Yield: 6 cups | Prep: 15 min | Cook: 3 hours 30 min
What You’ll Need:
- 4 cups old-fashioned oats
- 1 cup sliced almonds
- 1 cup unsweetened coconut flakes
- 1 teaspoon ground cinnamon
- 1 teaspoon ground ginger
- 1/4 teaspoon salt
- 1/2 cup coconut oil, melted
- 1/2 cup maple syrup
- 1 cup dried cherries
How to Make It:
- Combine oats, almonds, coconut flakes, cinnamon, ginger, and salt in a 3-qt. slow cooker.
- In a small bowl, whisk together the melted coconut oil and maple syrup.
- Pour the liquid mixture into the slow cooker and stir to coat everything evenly.
- Cook on low, covered, for 3-1/2 to 4 hours, stirring occasionally.
- Stir in dried cherries during the last few minutes of cooking.
- Transfer to a baking sheet and let cool completely before storing in an airtight container.
Pro Tip: Let it cool completely before sealing – if it’s warm, it’ll steam and get soggy. Once cooled, it stays perfectly crunchy for days.
Nutrition (per 1/2 cup): 343 calories, 19g fat, 41g carbohydrate, 6g protein
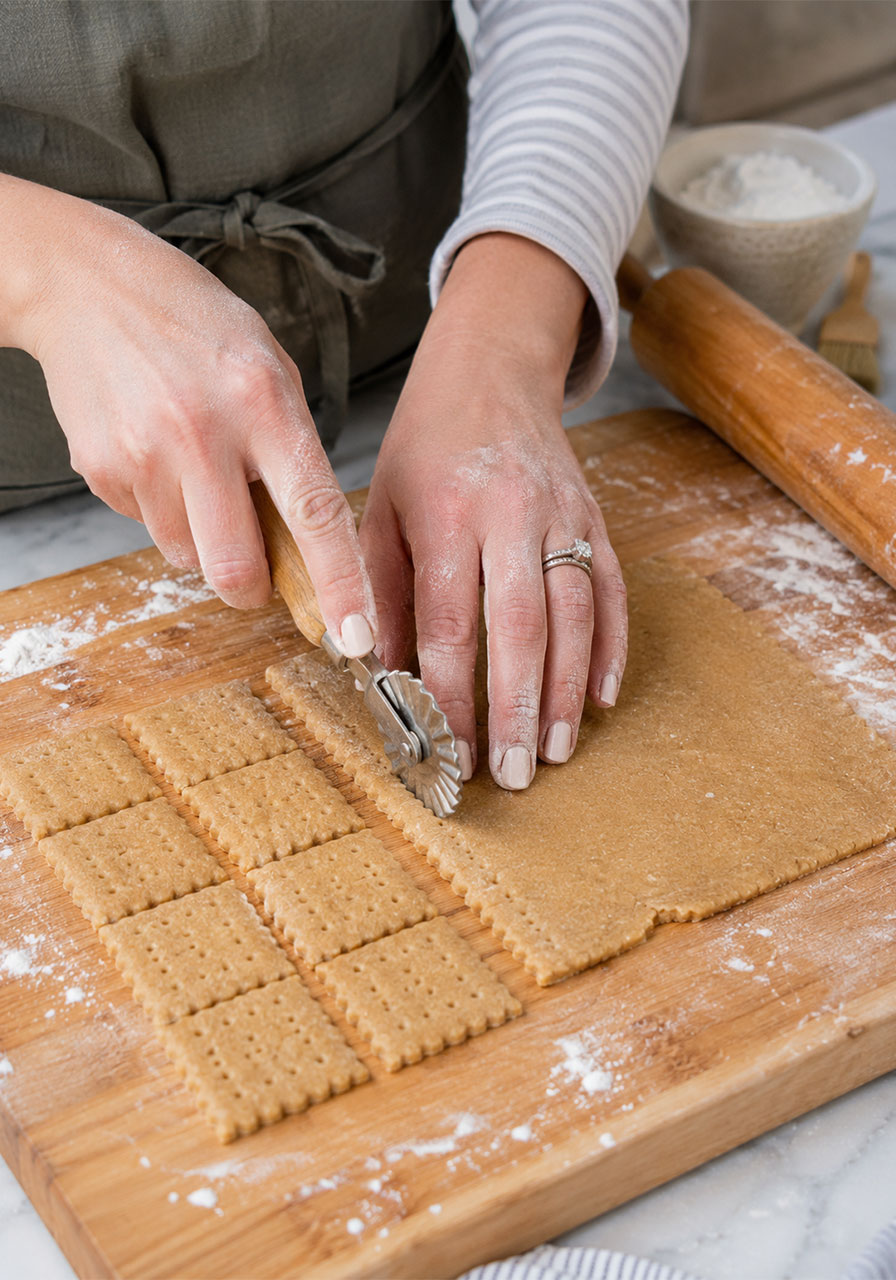
5. Homemade Honey Grahams
Yes, you can make your own graham crackers – and once you do, you’ll never look at the store-bought version the same way. These are slightly sweet, perfectly crisp, and made with whole wheat flour so you can feel good about snacking on them. They’re also incredible for s’mores, by the way.
Yield: 32 crackers | Prep: 15 min | Cook: 10 min
What You’ll Need:
- 1 cup whole wheat flour
- 3/4 cup all-purpose flour
- 1/2 cup toasted wheat germ
- 2 tablespoons dark brown sugar
- 1 teaspoon baking powder
- 1 teaspoon ground cinnamon
- 1/2 teaspoon salt
- 1/2 teaspoon baking soda
- 6 tablespoons cold butter, cubed
- 1/4 cup honey
- 4 tablespoons ice water
How to Make It:
- In a bowl, whisk together both flours, wheat germ, brown sugar, baking powder, cinnamon, salt, and baking soda.
- Cut in the cold butter until the mixture resembles coarse crumbles.
- In a separate bowl, whisk honey and ice water. Gradually add to the dry ingredients, tossing with a fork until the dough holds together when pressed.
- Divide dough in half. Shape each half into a disk, cover, and refrigerate for about 30 minutes until firm enough to roll.
- Preheat oven to 350°. On a lightly floured surface, roll each disk into an 8-inch square.
- Using a knife or pastry wheel, cut each square into sixteen 2-inch squares. Prick holes with a fork if desired. Place 1 inch apart on parchment-lined baking sheets.
- Bake until edges are light brown, 10-12 minutes. Cool on a wire rack. Store in an airtight container.
Pro Tip: Make these the day before your camping trip. They stay fresh in an airtight tin for up to a week – and they hold up beautifully as s’more bases.
Nutrition (per cracker): 60 calories, 2g fat, 9g carbohydrate, 1g protein
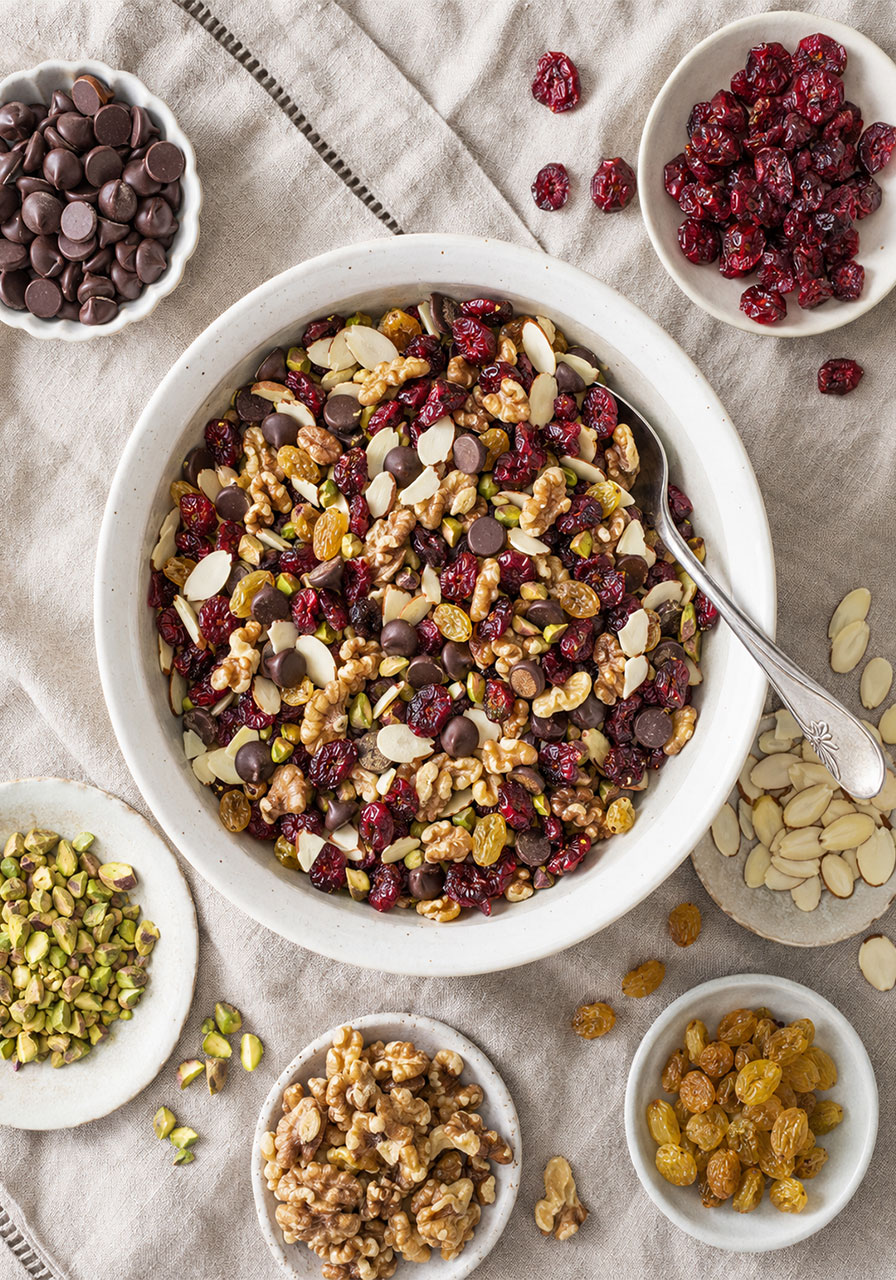
6. Cranberry Dark Chocolate Trail Mix
This trail mix feels fancy but takes all of five minutes to make. Dark chocolate chips, tangy cranberries, crunchy almonds, walnuts, raisins, and pistachios – it’s basically a gourmet gift shop mix, but you made it yourself for a fraction of the price.
Yield: 6 cups | Prep: 5 min
What You’ll Need:
- 1 package (10 oz) dark chocolate chips
- 1-1/2 cups dried cranberries (about 8 oz)
- 1-1/2 cups sliced almonds
- 1 cup raisins
- 1 cup coarsely chopped walnuts
- 1/2 cup pistachios
How to Make It:
- Toss all ingredients together in a large bowl until evenly combined.
- Store in airtight containers or individual zip bags until ready to enjoy.
Pro Tip: If your camping trip is in hot weather, swap dark chocolate chips for dark chocolate M&M’s – they hold their shape much better in the heat.
Nutrition (per 1/4 cup): 176 calories, 11g fat, 21g carbohydrate, 3g protein
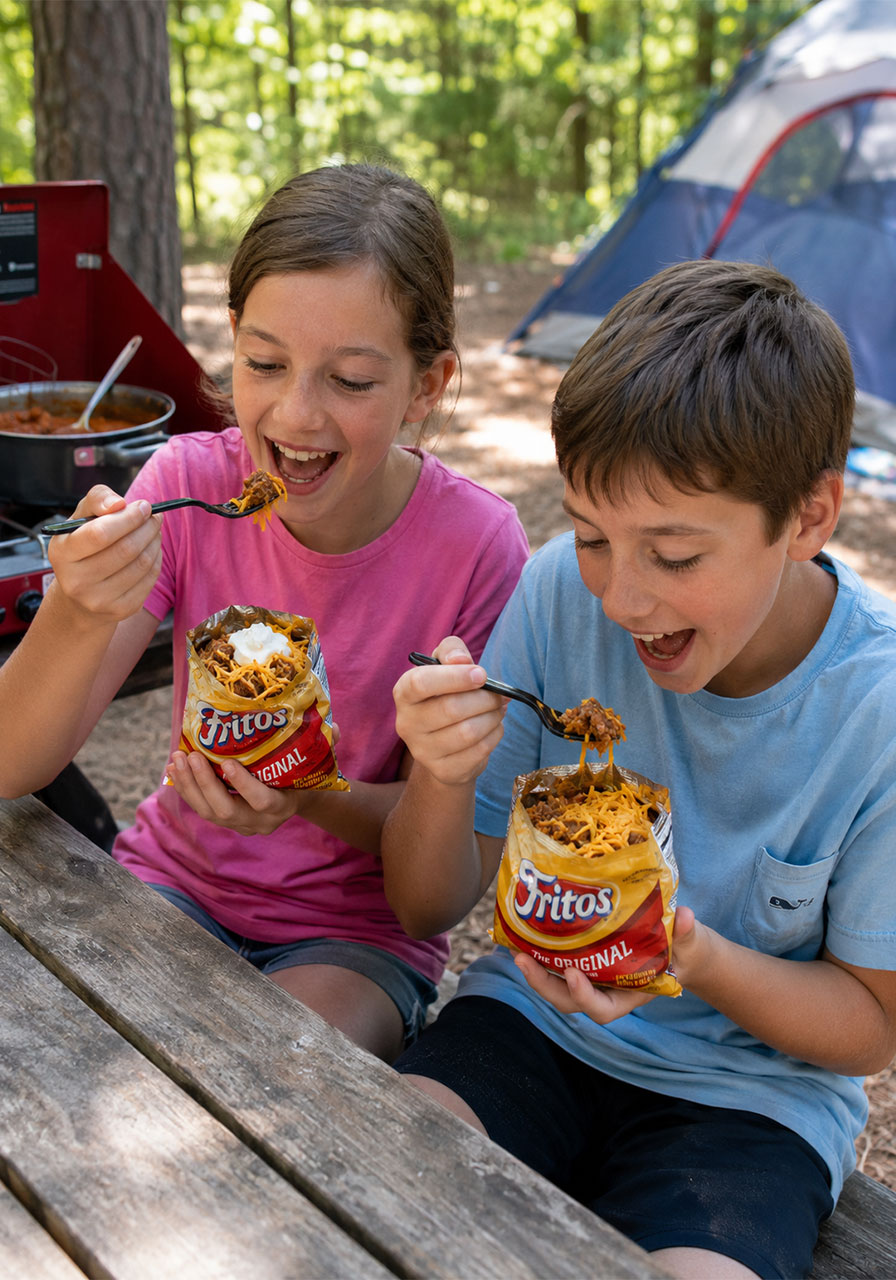
7. Walking Tacos
Walking Tacos are the ultimate camping crowd-pleaser – especially for kids. You cook the chili filling ahead or right at camp, then serve it directly into individual bags of corn chips. No plates, no bowls, no mess. Just pure taco joy eaten with a fork straight from the bag.
Yield: 5 servings | Prep: 10 min | Cook: 30 min
What You’ll Need:
- 1 pound ground beef
- 1 envelope reduced-sodium chili seasoning mix
- 1/4 teaspoon pepper
- 1 can (10 oz) diced tomatoes and green chiles
- 1 can (15 oz) Ranch Style beans (pinto beans in seasoned tomato sauce)
- 5 packages (1 oz each) corn chips
- Toppings: shredded cheddar cheese, sour cream, and sliced green onions
How to Make It:
- In a large skillet, cook the ground beef over medium heat, breaking it into crumbles, until no longer pink – about 6-8 minutes. Drain excess fat.
- Stir in the chili seasoning mix, pepper, diced tomatoes and green chiles, and beans. Bring to a boil.
- Reduce heat and simmer uncovered, stirring occasionally, until the mixture thickens – about 20-25 minutes.
- Just before serving, cut open the top of each corn chip bag (along the side seam works great). Spoon the beef mixture right into the bag, then add your favorite toppings.
- Hand out forks and let everyone dig in directly from their bag.
Pro Tip: Make the beef mixture at home, store it in a sealed container, and reheat it in a camp pot over the fire. Dinner is on the table in under 10 minutes.
Nutrition (per serving, without toppings): 530 calories, 28g fat, 44g carbohydrate, 24g protein
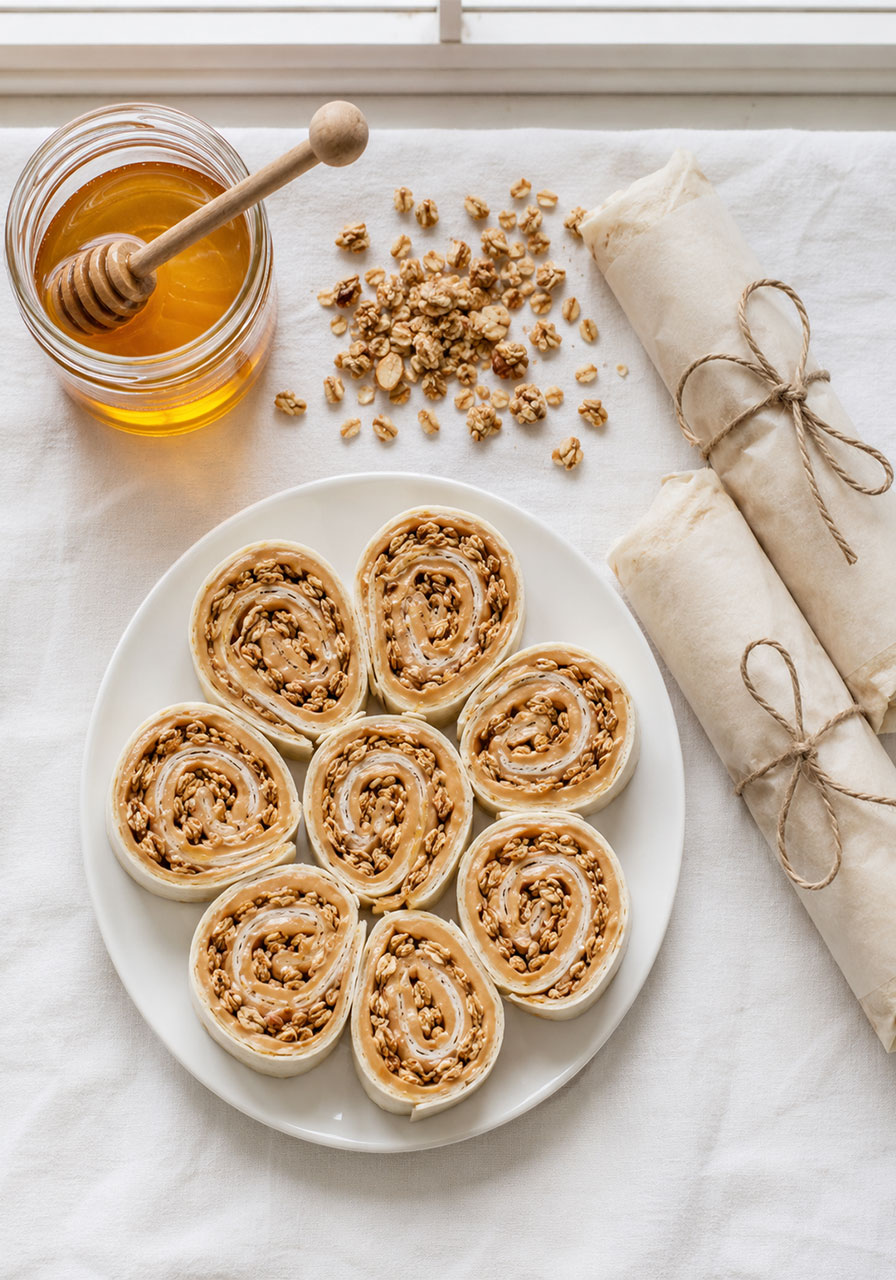
8. Peanut Butter Granola Pinwheels
Four ingredients. No cooking. Ready in 10 minutes. These little pinwheels are the perfect midday snack – satisfying, a little sweet, and loved by kids and adults alike. Roll them up at camp or make them the night before.
Yield: 16 pinwheels | Prep: 10 min
What You’ll Need:
- 4 tablespoons creamy peanut butter
- 2 flour tortillas (8 inches)
- 2 teaspoons honey
- 1/2 cup granola without raisins
How to Make It:
- Spread 2 tablespoons of peanut butter evenly over each tortilla, leaving a small border around the edge.
- Drizzle 1 teaspoon of honey over each tortilla.
- Sprinkle 1/4 cup of granola over each tortilla.
- Roll the tortilla up tightly into a log.
- Cut each roll into 8 slices. Serve immediately or wrap tightly in plastic wrap to take on the trail.
Pro Tip: Wrap the uncut rolls tightly in parchment and pack in a cooler. Slice them right before you eat so they stay fresh and don’t dry out.
Nutrition (per pinwheel): 60 calories, 3g fat, 7g carbohydrate, 2g protein
9. Fruit & Cereal Snack Mix
This one is made for the kids – but honestly, the adults will keep sneaking handfuls too. Cinnamon Toast Crunch cereal mixed with dried cranberries, raisins, cherries, and apple chips? It’s basically a party in a bag.
Yield: 2-1/2 quarts | Prep: 10 min
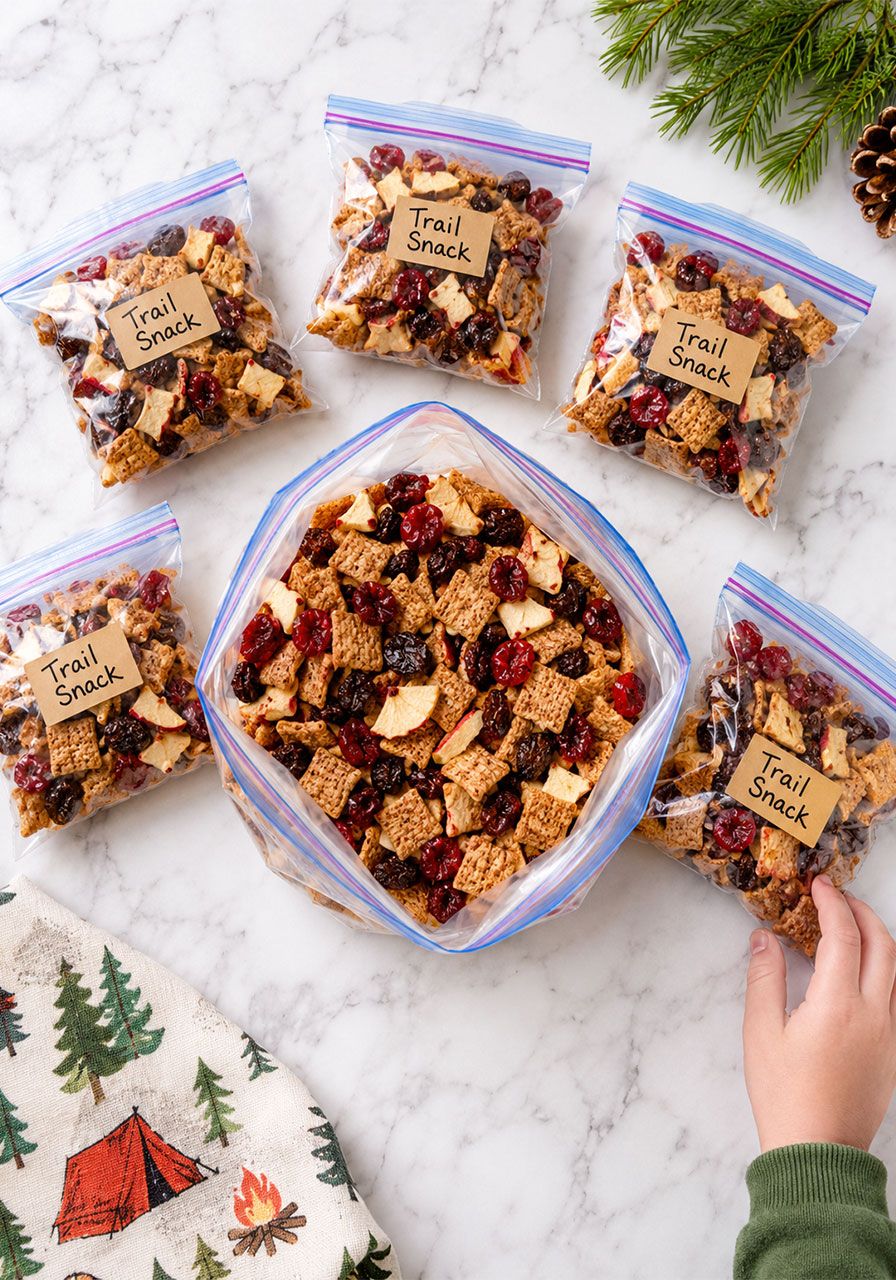
What You’ll Need:
- 8 cups Cinnamon Toast Crunch cereal
- 3/4 cup dried cranberries
- 3/4 cup raisins
- 1/2 cup dried cherries
- 1 package (2-1/2 oz) dried apple chips, broken into large pieces
How to Make It:
- Place all ingredients in a large bowl.
- Toss to combine evenly.
- Store in airtight containers or zip bags until ready to serve.
Pro Tip: Break the apple chips into pieces before mixing so they distribute evenly throughout the mix and every scoop has a little of everything.
Nutrition (per 3/4 cup): 223 calories, 5g fat, 47g carbohydrate, 2g protein
10. Old Bay Crispy Kale Chips
These are the kale chips that actually taste good. The secret? Old Bay seasoning – that classic, slightly spicy, slightly smoky blend that makes everything better. They crisp up beautifully in the oven and pack well in a container for the drive to camp.
Yield: 4 servings | Prep: 10 min | Cook: 25 min
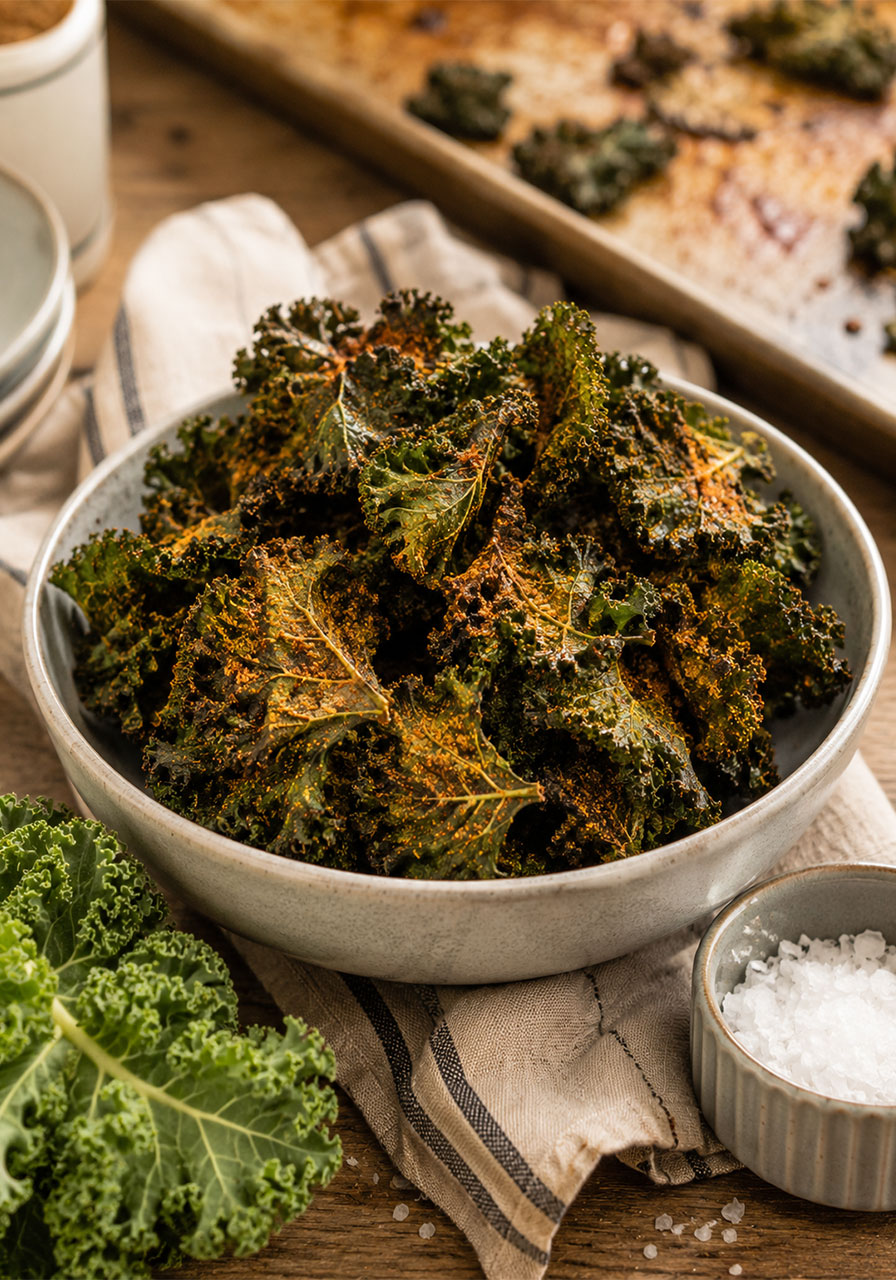
What You’ll Need:
- 1 bunch kale, washed
- 2 tablespoons olive oil
- 1 to 3 teaspoons Old Bay Seasoning
- Sea salt, to taste
How to Make It:
- Preheat oven to 300°.
- Remove the tough stems from the kale and tear the leaves into large pieces.
- Place the kale pieces in a large bowl. Drizzle with olive oil and sprinkle with Old Bay seasoning and sea salt. Toss to coat evenly.
- Arrange leaves in a single layer on greased baking sheets – don’t overlap or they’ll steam instead of crisp.
- Bake for 10 minutes, then rotate the pans.
- Continue baking until crisp and just starting to brown, about 15 more minutes.
- Let stand for at least 5 minutes before serving – they crisp up more as they cool.
Pro Tip: Make sure the kale is completely dry before tossing with oil. Any moisture will prevent crisping. Pat dry with paper towels after washing.
Nutrition (per serving): 101 calories, 7g fat, 8g carbohydrate, 3g protein
11. Snack Crackers
These ranch-dill oyster crackers are dangerously snackable. Mix them up the night before, let them soak in the dressing, and pack them in a zip bag. They’re the kind of snack you keep reaching into the bag for – light, flavorful, and completely addictive.
Yield: 12 cups | Prep: 5 min + 1 hour standing
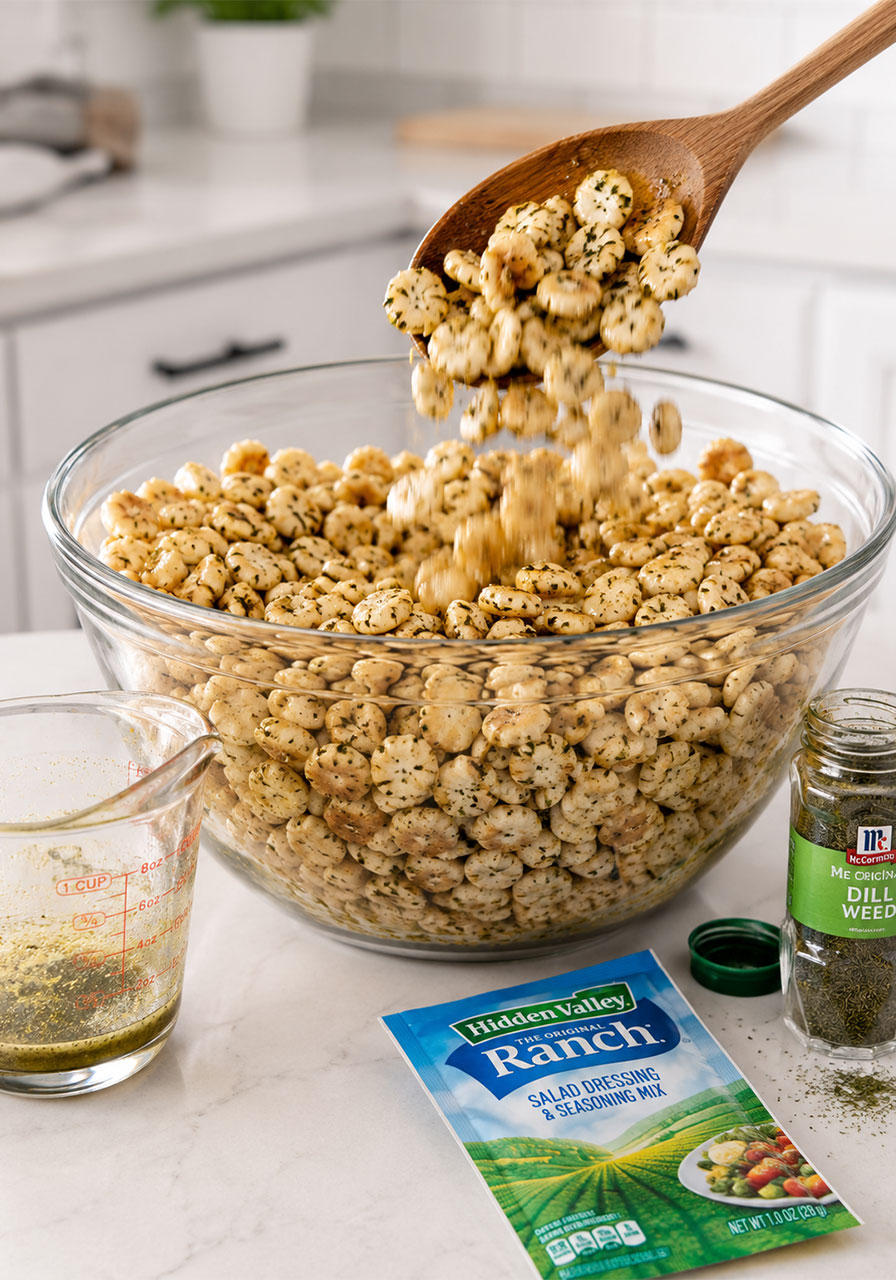
What You’ll Need:
- 3/4 cup canola oil
- 1-1/2 teaspoons dill weed
- 1 envelope (1 oz) ranch salad dressing mix
- 2 packages (10 oz each) oyster crackers
How to Make It:
- In a small bowl, whisk together the oil, dill weed, and ranch dressing mix until combined.
- Place the oyster crackers in a large bowl.
- Pour the dressing mixture over the crackers and toss gently to coat evenly.
- Allow to stand at least 1 hour before serving so the flavors fully absorb into the crackers.
- Store in airtight bags or containers.
Pro Tip: Make these 24 hours before your trip. The longer they sit, the more the ranch flavor soaks in – and they taste even better on day two.
Nutrition (per 1/3 cup): 237 calories, 16g fat, 20g carbohydrate, 2g protein
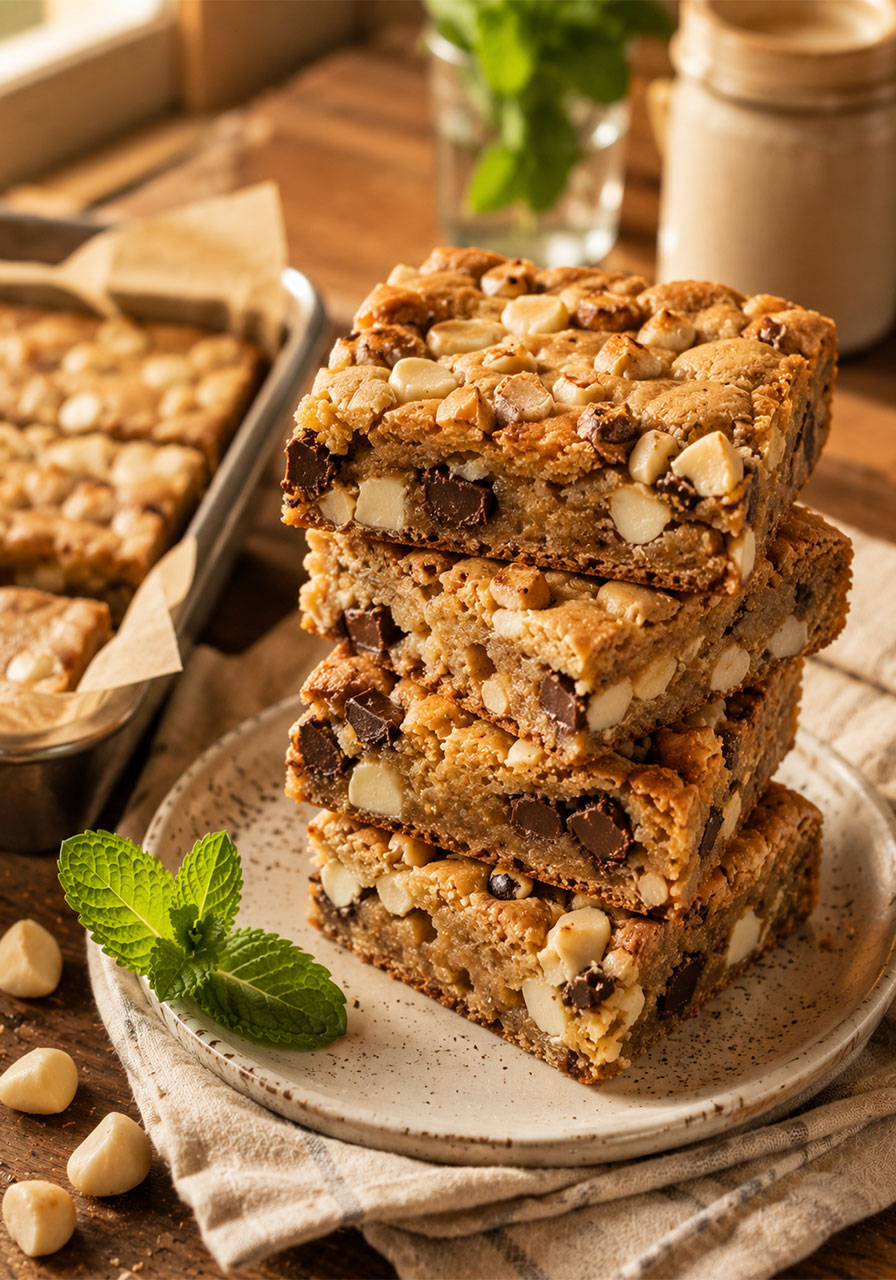
12. Chunky Blond Brownies
These are not your average blondies. White chocolate chips, semisweet chocolate chunks, and macadamia nuts all baked into a golden, chewy bar – these are the kind of camping treat people specifically request at the next trip. Make a pan before you leave and pack them up. They travel like a dream.
Yield: 2 dozen | Prep: 15 min | Cook: 25 min
What You’ll Need:
- 1/2 cup butter, softened
- 3/4 cup sugar
- 3/4 cup packed brown sugar
- 2 large eggs, room temperature
- 2 teaspoons vanilla extract
- 1-1/2 cups all-purpose flour
- 1 teaspoon baking powder
- 1/2 teaspoon salt
- 1 cup white baking chips
- 1 cup semisweet chocolate chunks
- 1 jar (3 oz) macadamia nuts or 3/4 cup blanched almonds, chopped – divided
How to Make It:
- Preheat oven to 350°.
- In a large bowl, cream the butter with both sugars until light and fluffy, about 5-7 minutes. Beat in the eggs and vanilla.
- In a separate bowl, combine the flour, baking powder, and salt. Gradually add to the creamed mixture, mixing well.
- Stir in the white chips, chocolate chunks, and half of the nuts.
- Spoon batter into a greased 13×9-in. baking pan and spread evenly. Sprinkle the remaining nuts on top.
- Bake until the top begins to crack and turns golden brown, 25-30 minutes.
- Cool completely on a wire rack before cutting into bars.
Pro Tip: Don’t skip the cooling step – cutting them while warm makes a crumbly mess. Let them cool fully, then cut and pack into an airtight container layered with parchment.
Nutrition (per bar): 221 calories, 12g fat, 28g carbohydrate, 2g protein
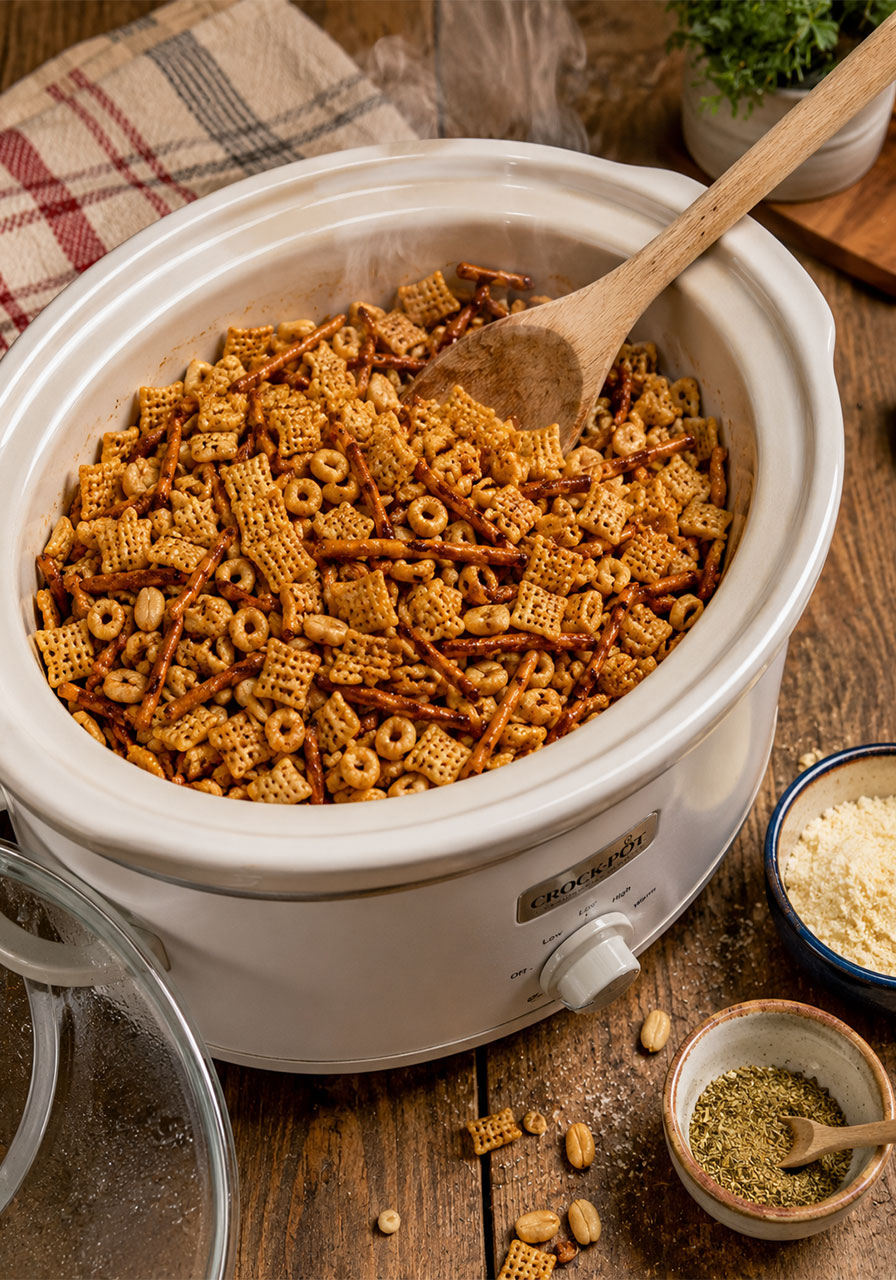
13. Slow Cooker Party Mix
This savory Chex mix is the snack that disappears fastest at every gathering. Wheat Chex, Cheerios, pretzel sticks, and peanuts all tossed in a buttery, cheesy, seasoned coating – then slow-cooked to perfection. Make it at home, store it in a big zip bag, and watch it become the most popular thing you packed.
Yield: About 3 quarts | Prep: 5 min | Cook: 1 hour
What You’ll Need:
- 4 cups Wheat Chex
- 4 cups Cheerios
- 3 cups pretzel sticks
- 1 can (12 oz) salted peanuts
- 1/4 cup butter, melted
- 2 to 3 tablespoons grated Parmesan cheese
- 1 teaspoon celery salt
- 1/2 to 3/4 teaspoon seasoned salt
How to Make It:
- Combine the cereals, pretzels, and peanuts in a 5-qt. slow cooker.
- In a small bowl, mix together the melted butter, Parmesan, celery salt, and seasoned salt.
- Drizzle the butter mixture over the cereal mixture and stir well to coat.
- Cover and cook on low for 1 to 1-1/2 hours, stirring every 20 minutes.
- Serve warm or let cool to room temperature. Store in an airtight container.
Pro Tip: Leave the lid slightly ajar in the last 30 minutes of cooking to let steam escape and help the mix crisp up.
Nutrition (per 3/4 cup): 237 calories, 14g fat, 22g carbohydrate, 8g protein
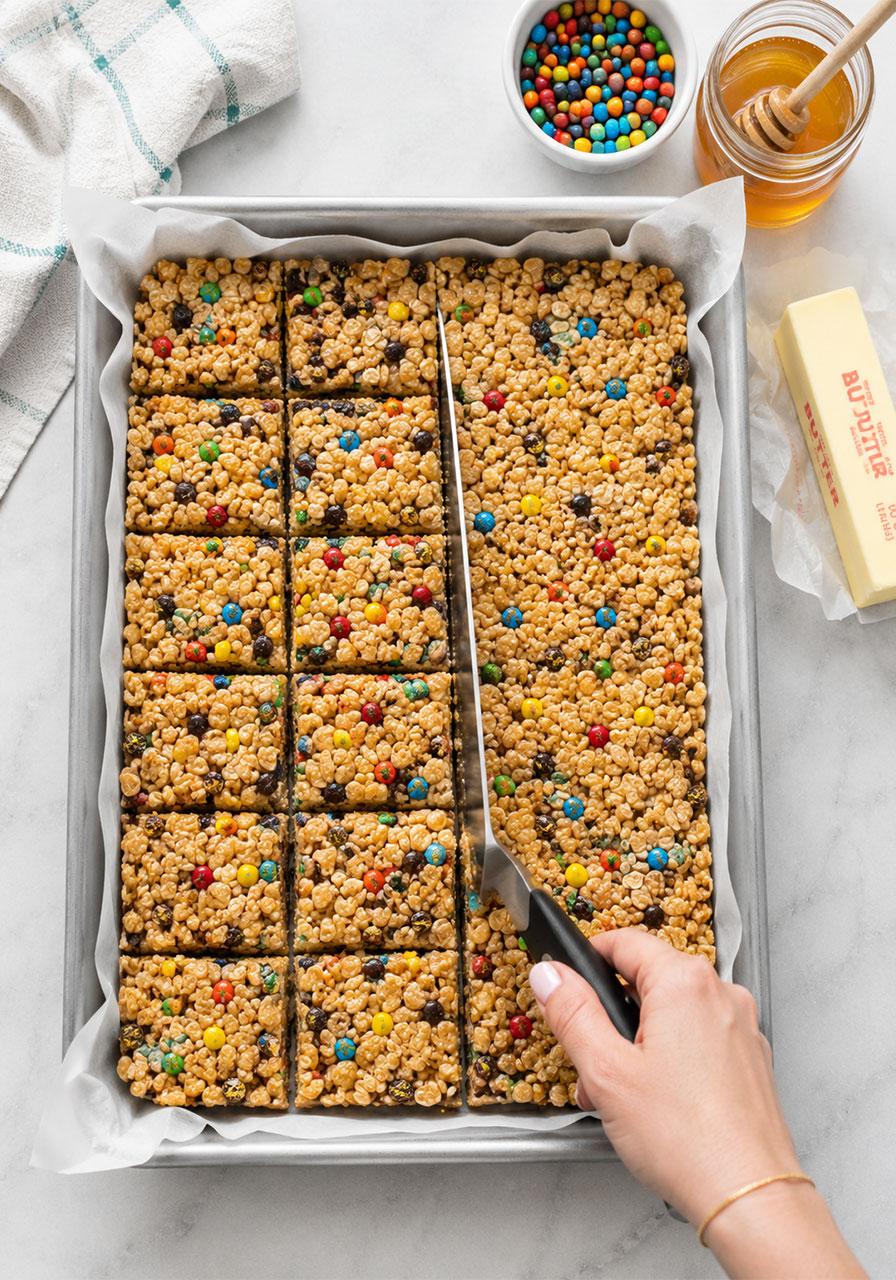
14. No-Bake Cereal Cookie Bars
These bars check every box: no oven needed, easy to make ahead, perfectly chewy, and beloved by literally everyone who tries them. Think Rice Krispie treats leveled up with oats, coconut, M&M’s, and raisins. They’re the ultimate pack-and-go camping sweet.
Yield: 3 dozen | Prep: 10 min | Cook: 15 min
What You’ll Need:
- 4-1/2 cups Rice Krispies
- 3-1/4 cups quick-cooking oats
- 1/2 cup cornflakes
- 1/2 cup sweetened shredded coconut
- 1/2 cup butter, cubed
- 1 package (16 oz) miniature marshmallows
- 1/4 cup honey
- 1/2 cup M&M’s minis
- 1/4 cup raisins
How to Make It:
- Grease a 15x10x1-in. pan.
- In a large bowl, combine the Rice Krispies, oats, cornflakes, and coconut. Set aside.
- In a large saucepan, melt the butter over low heat. Add marshmallows and stir constantly until completely melted.
- Stir in the honey until fully blended.
- Pour the marshmallow mixture over the cereal mixture and stir until everything is evenly coated.
- Let cool for 5 minutes, then stir in the M&M’s and raisins.
- Press the mixture firmly into the prepared pan using a greased spatula.
- Let stand for 30 minutes before cutting. Store between layers of waxed paper in an airtight container.
Pro Tip: Press them down really firmly with the spatula – the tighter they’re packed, the better they hold together when you slice and pack them.
Nutrition (per bar): 137 calories, 4g fat, 24g carbohydrate, 2g protein
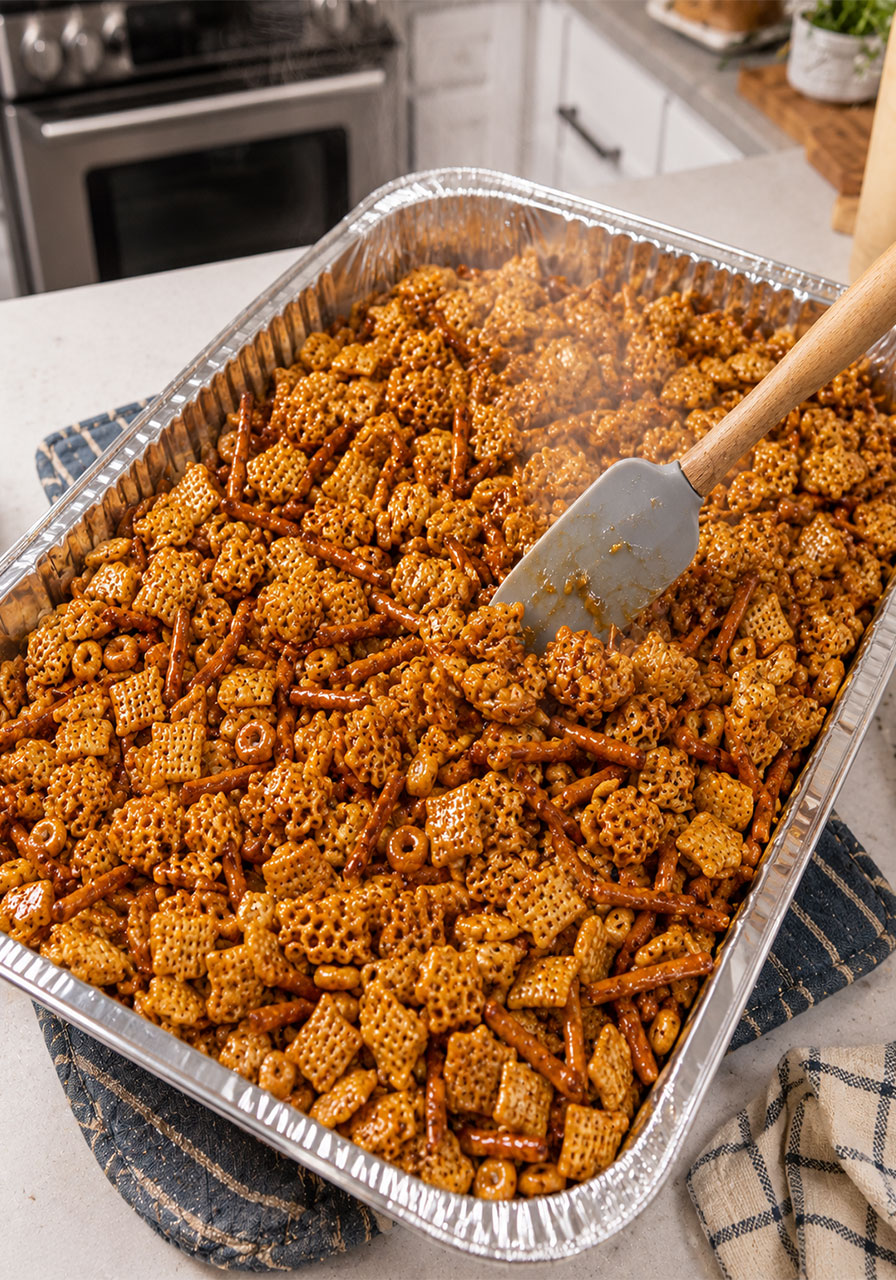
15. Sweet and Salty Chex Mix
This recipe makes a LOT – we’re talking about 10 quarts – which makes it perfect for a big camping group. It’s got that irresistible sweet-and-salty thing going on, with three kinds of cereal, pretzel sticks, and a glossy, caramelized coating. Make it ahead and pack in gallon bags.
Yield: About 10 quarts | Prep: 10 min | Cook: 1 hour 15 min
What You’ll Need:
- 1 package (12 oz) Corn Chex
- 1 package (10 oz) Cheerios
- 1 package (10 oz) Honeycomb cereal
- 1 package (10 oz) pretzel sticks
- 1-3/4 cups sugar
- 1-1/2 cups canola oil
- 1-1/4 cups butter, melted
- 3 tablespoons soy sauce
- 2 tablespoons garlic salt
How to Make It:
- Preheat oven to 275°.
- In a very large bowl, combine all cereals and pretzels.
- In a separate bowl, mix together the sugar, canola oil, melted butter, soy sauce, and garlic salt until the sugar is fully dissolved.
- Pour the liquid mixture over the cereal mixture and toss to coat evenly.
- Transfer to a large roasting pan.
- Bake uncovered for 1-1/4 hours or until the cereal is crisp, stirring every 15 minutes.
- Cool completely before storing in an airtight container.
Pro Tip: Use a roasting pan big enough to stir without spilling – this is a massive batch. A disposable aluminum roasting pan works great and saves cleanup.
Nutrition (per 3/4 cup): 227 calories, 13g fat, 28g carbohydrate, 2g protein
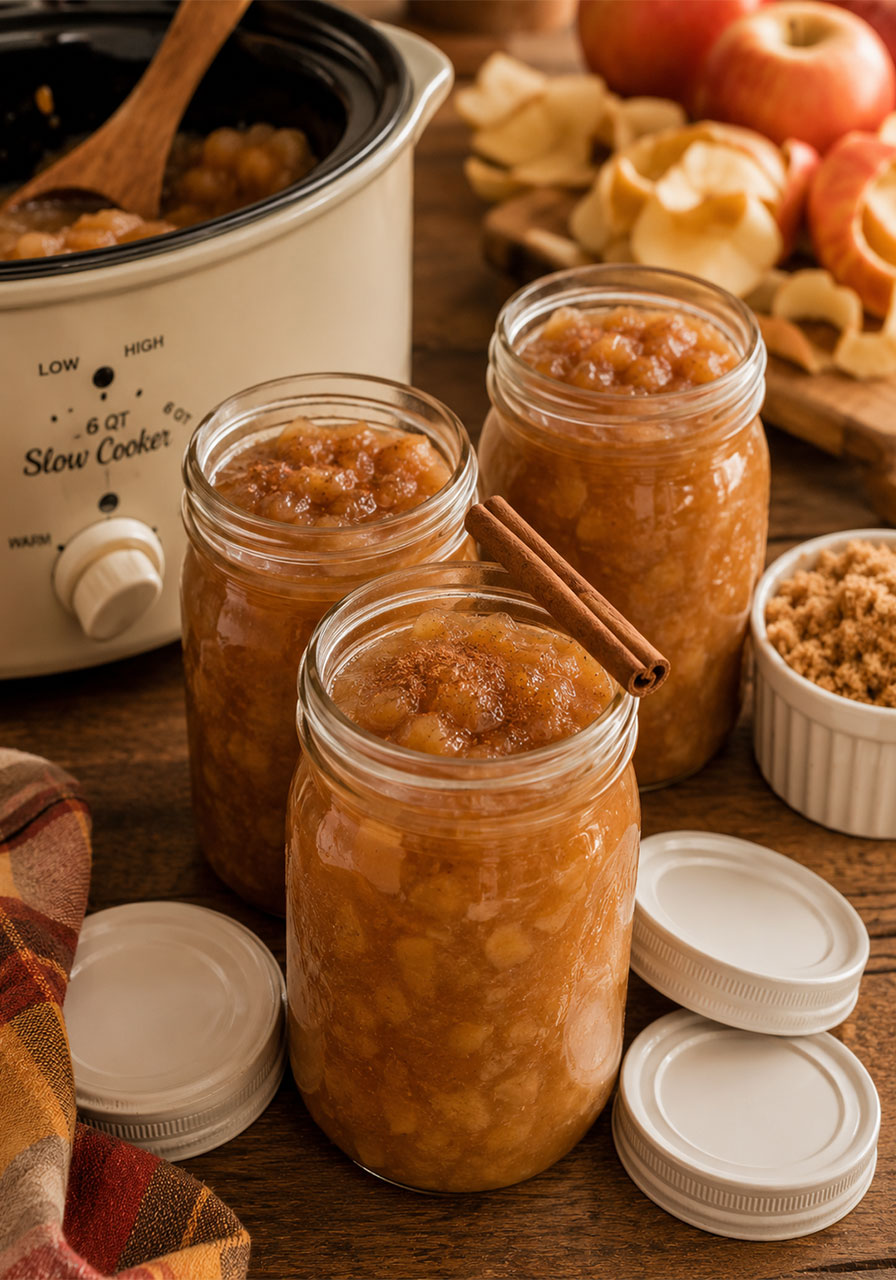
16. Double-Duty Heavenly Applesauce
This slow-cooker applesauce is pure comfort in a cup. Warm, cinnamon-spiced, and made with real apples – it works as a snack, a side, or even a topping for oatmeal or pancakes at camp. Make a big batch at home and bring it in a sealed jar.
Yield: 8 servings plus leftover | Prep: 25 min | Cook: 6 hours
What You’ll Need:
- 5 pounds apples, peeled and sliced (about 13 cups)
- 3/4 cup packed light brown sugar
- 2/3 cup unsweetened apple juice
- 2 teaspoons ground cinnamon
- 1 teaspoon pumpkin pie spice
- 1 tablespoon vanilla extract
How to Make It:
- In a 5- or 6-qt. slow cooker, combine the sliced apples, brown sugar, apple juice, cinnamon, and pumpkin pie spice.
- Cook covered on low for 6-8 hours, or until the apples are completely soft.
- Add vanilla extract and stir to break up the apples to your desired consistency – chunky or smooth, you choose.
- Serve warm, or refrigerate and serve cold. Store in sealed jars or containers.
Pro Tip: Pack it in mason jars. They’re sturdy, seal well, and you can eat straight from the jar at camp – no extra bowls needed.
Nutrition (per 2/3 cup): 211 calories, 1g fat, 54g carbohydrate, 0g protein
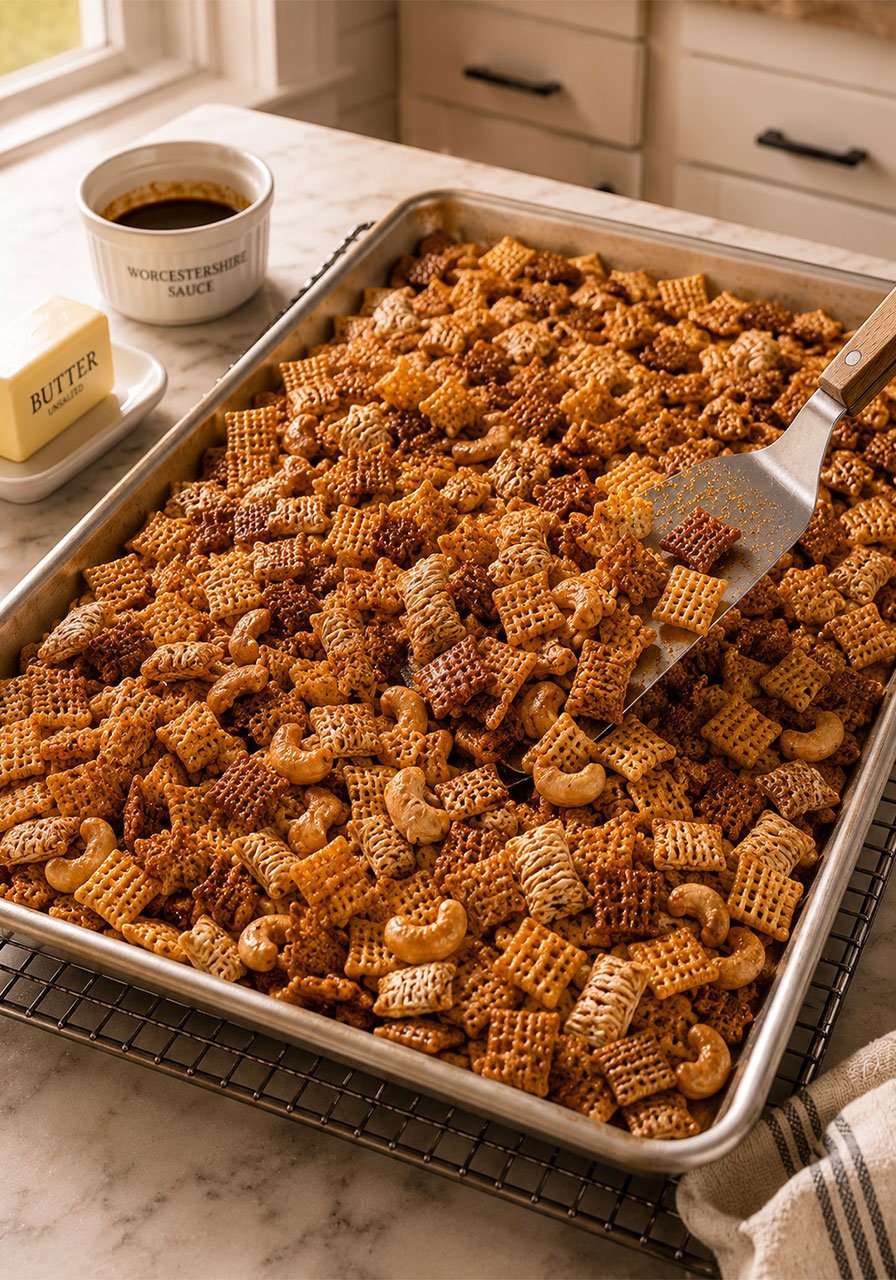
17. Really Good Snack Mix
Don’t let the humble name fool you – this baked snack mix is genuinely, deeply, “I-can’t-stop-eating-this” good. Corn Chex, Crispix, shredded wheat, and cashews all oven-toasted in a savory Worcestershire butter coating. Simple ingredients, big flavor.
Yield: About 7 cups | Prep: 10 min | Cook: 45 min
What You’ll Need:
- 3 tablespoons butter, melted
- 4 teaspoons Worcestershire sauce
- 1 tablespoon canola oil
- 1 teaspoon seasoned salt
- 1/2 teaspoon garlic powder
- 2 cups Corn Chex
- 2 cups Crispix
- 2 cups bite-sized shredded wheat
- 1-1/2 cups salted cashews
How to Make It:
- Preheat oven to 250°.
- In a small bowl, mix together the melted butter, Worcestershire sauce, canola oil, seasoned salt, and garlic powder.
- Combine the cereals and cashews in a large bowl. Pour the butter mixture over the top and toss to coat evenly.
- Spread into a greased 15x10x1-in. baking pan.
- Bake for 45 minutes, stirring every 15 minutes to ensure even toasting.
- Cool completely before storing in airtight containers.
Pro Tip: The low-and-slow oven method is key here – it dries out and crisps the mix without burning. Don’t rush it by cranking up the heat.
Nutrition (per 1/2 cup): 180 calories, 11g fat, 18g carbohydrate, 4g protein
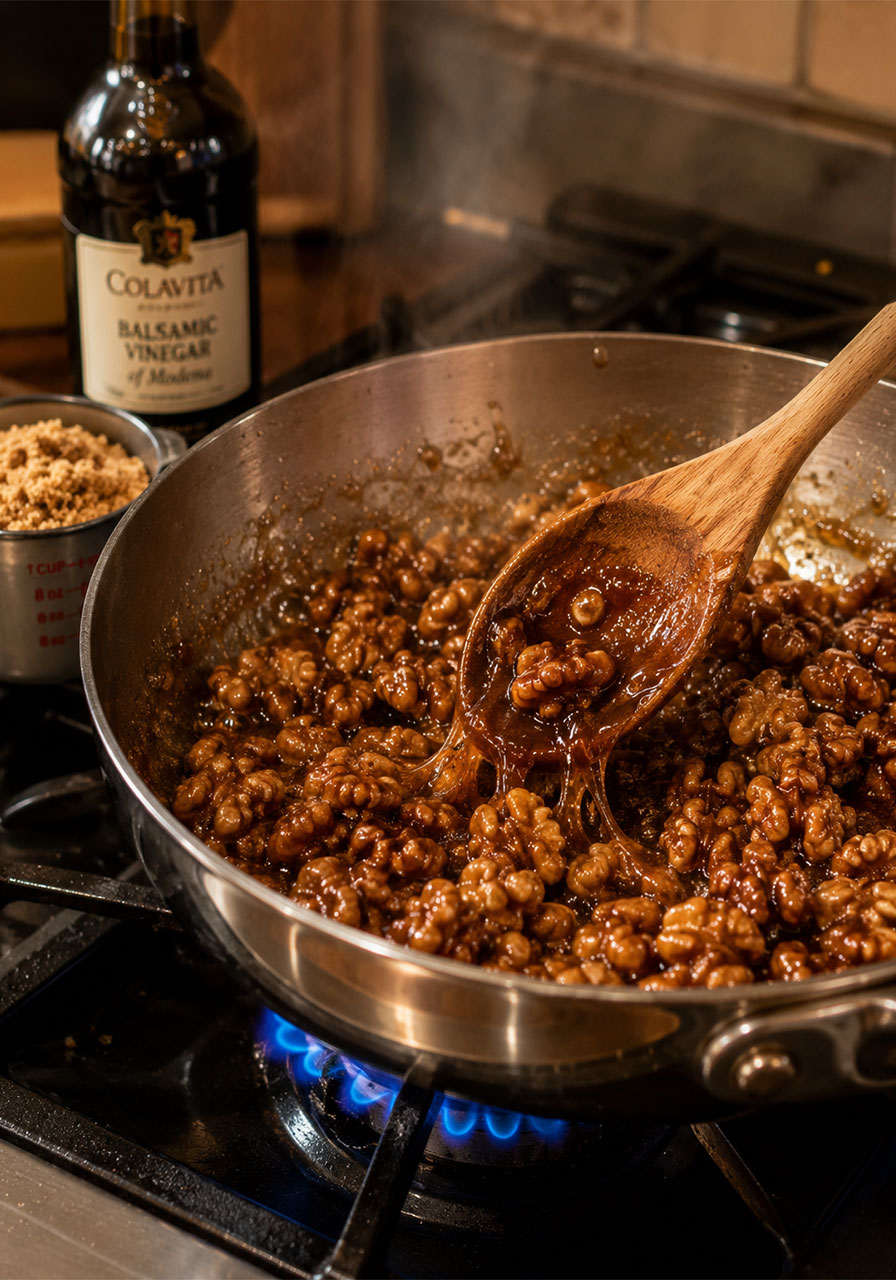
18. Candied Walnuts
These sweet, caramelized walnuts are pure snacking magic. They take about 15 minutes to make, but they taste like something you’d pay $12 for at a fancy market. The balsamic vinegar adds a subtle depth that makes them completely unforgettable.
Yield: 2 cups | Prep: 10 min | Cook: 10 min
What You’ll Need:
- 2 tablespoons canola oil
- 2 tablespoons balsamic vinegar
- 1/8 teaspoon pepper
- 2 cups walnut halves
- 1/2 cup packed brown sugar
How to Make It:
- In a large heavy skillet, combine the oil, balsamic vinegar, and pepper. Cook and stir over medium heat until blended.
- Add walnut halves and cook over medium heat, stirring frequently, until the nuts are toasted – about 4 minutes.
- Sprinkle brown sugar over the walnuts. Continue cooking and stirring until the sugar is fully melted and coats the nuts – about 2-4 more minutes.
- Spread immediately onto foil and let cool completely. Break apart any clumps once cooled. Store in an airtight container.
Pro Tip: Watch these carefully in the last few minutes – sugar goes from perfectly caramelized to burnt very quickly. Stir constantly once you add the sugar.
Nutrition (per 2 tablespoons): 124 calories, 10g fat, 9g carbohydrate, 2g protein
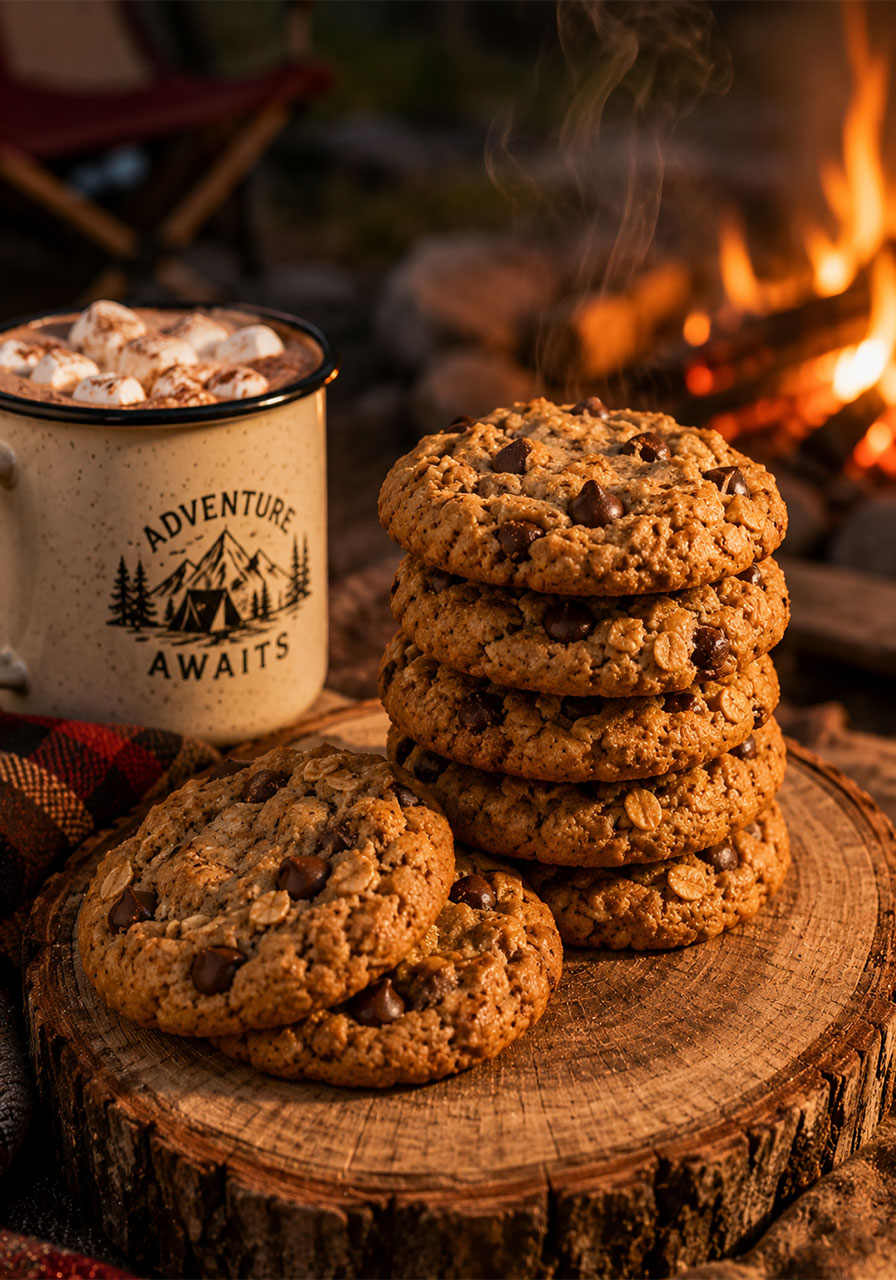
19. Chocolate Chip Peanut Butter Cookies
These aren’t just any cookies – they have oats and chunky peanut butter in the mix, which gives them an incredible chewy texture and staying power. Bake a batch at home, pack them in a tin, and watch them disappear around the campfire.
Yield: 2 dozen | Prep: 20 min | Cook: 10 min
What You’ll Need:
- 1/2 cup butter, softened
- 1/2 cup sugar
- 1/3 cup packed brown sugar
- 1/2 cup chunky peanut butter
- 1 large egg
- 1 teaspoon vanilla extract
- 1 cup all-purpose flour
- 1/2 cup old-fashioned oats
- 1 teaspoon baking soda
- 1/4 teaspoon salt
- 1 cup semisweet chocolate chips
How to Make It:
- In a large bowl, cream the butter and both sugars together until smooth. Beat in peanut butter, egg, and vanilla.
- In a separate bowl, combine the flour, oats, baking soda, and salt. Stir into the creamed mixture until just combined.
- Stir in the chocolate chips.
- Drop by rounded tablespoonfuls onto ungreased baking sheets, spacing about 2 inches apart.
- Bake at 350° until golden brown, 10-12 minutes.
- Cool on the baking sheet for 1 minute, then transfer to a wire rack to cool completely.
Pro Tip: These cookies actually taste even better the next day once they’ve had time to set. Bake them the day before your trip for maximum deliciousness.
Nutrition (per 2 cookies): 310 calories, 18g fat, 36g carbohydrate, 5g protein
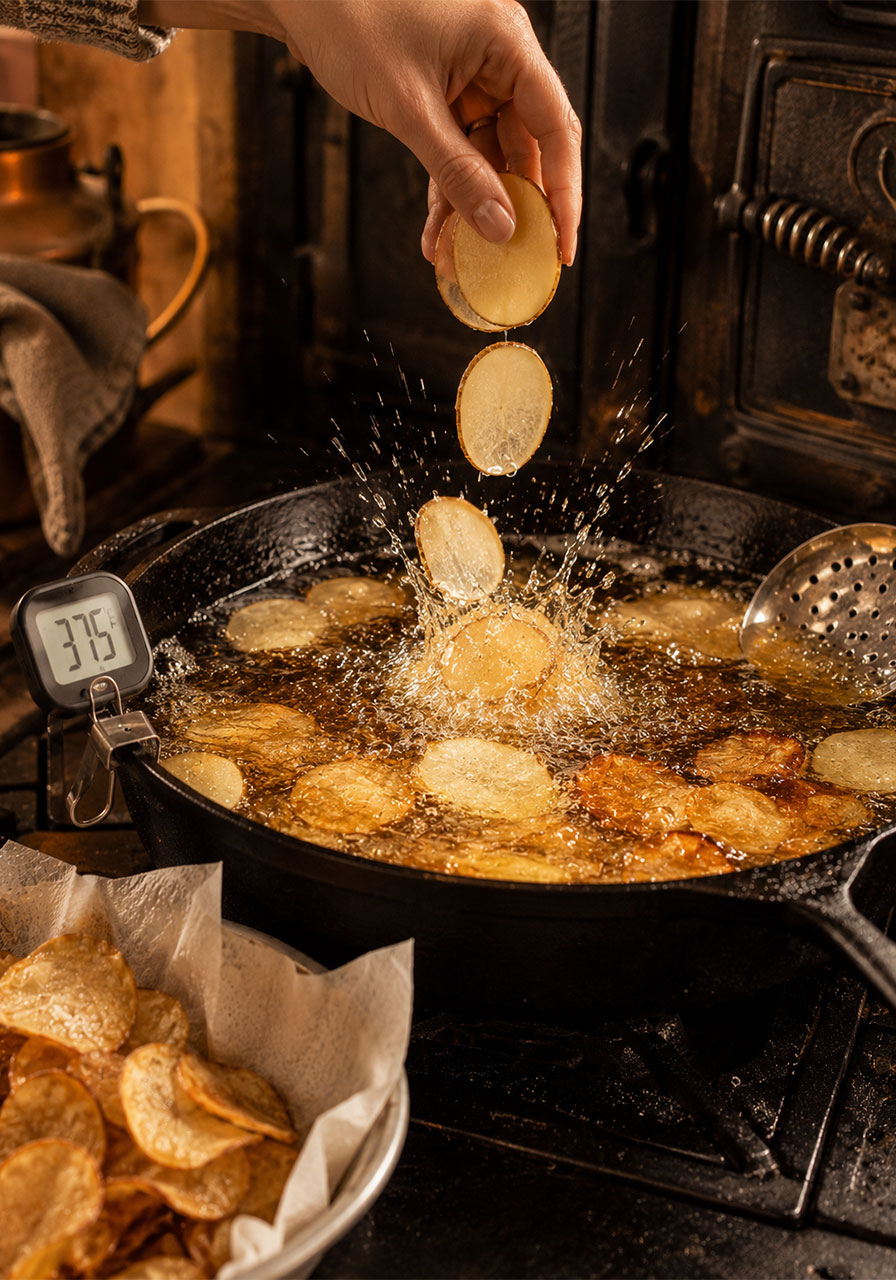
20. Homemade Potato Chips
Yes, you can make potato chips from scratch – and yes, they are absolutely worth it. Thin, golden, ultra-crispy, and seasoned with a homemade garlic-celery-pepper blend. Make these at home the morning of your trip and pack in a large airtight container.
Yield: 8-1/2 cups | Prep: 30 min + 30 min soaking | Cook: 30 min
What You’ll Need:
- 7 unpeeled medium potatoes (about 2 pounds)
- 2 quarts ice water
- 5 teaspoons salt (for soaking)
- 2 teaspoons garlic powder
- 1-1/2 teaspoons celery salt
- 1-1/2 teaspoons pepper
- Oil for deep-fat frying
How to Make It:
- Using a vegetable peeler or mandoline slicer, cut the unpeeled potatoes into very thin, even slices.
- Place the slices in a large bowl. Add ice water and salt. Let soak for 30 minutes – this removes excess starch and helps them crisp up.
- Drain the potatoes and spread them out on paper towels. Pat completely dry.
- In a small bowl, combine garlic powder, celery salt, and pepper. Set aside.
- In a cast-iron or heavy skillet, heat 1-1/2 inches of oil to 375°. Fry the potato slices in batches, stirring frequently, until golden brown – about 3-4 minutes per batch.
- Remove with a slotted spoon and drain on paper towels. Immediately sprinkle with the seasoning mix.
- Let cool, then store in an airtight container.
Pro Tip: A mandoline slicer will give you perfectly even slices that fry evenly. Uneven slices = some burnt, some undercooked. Consistency is the key to great chips.
Nutrition (per 3/4 cup): 176 calories, 8g fat, 24g carbohydrate, 3g protein
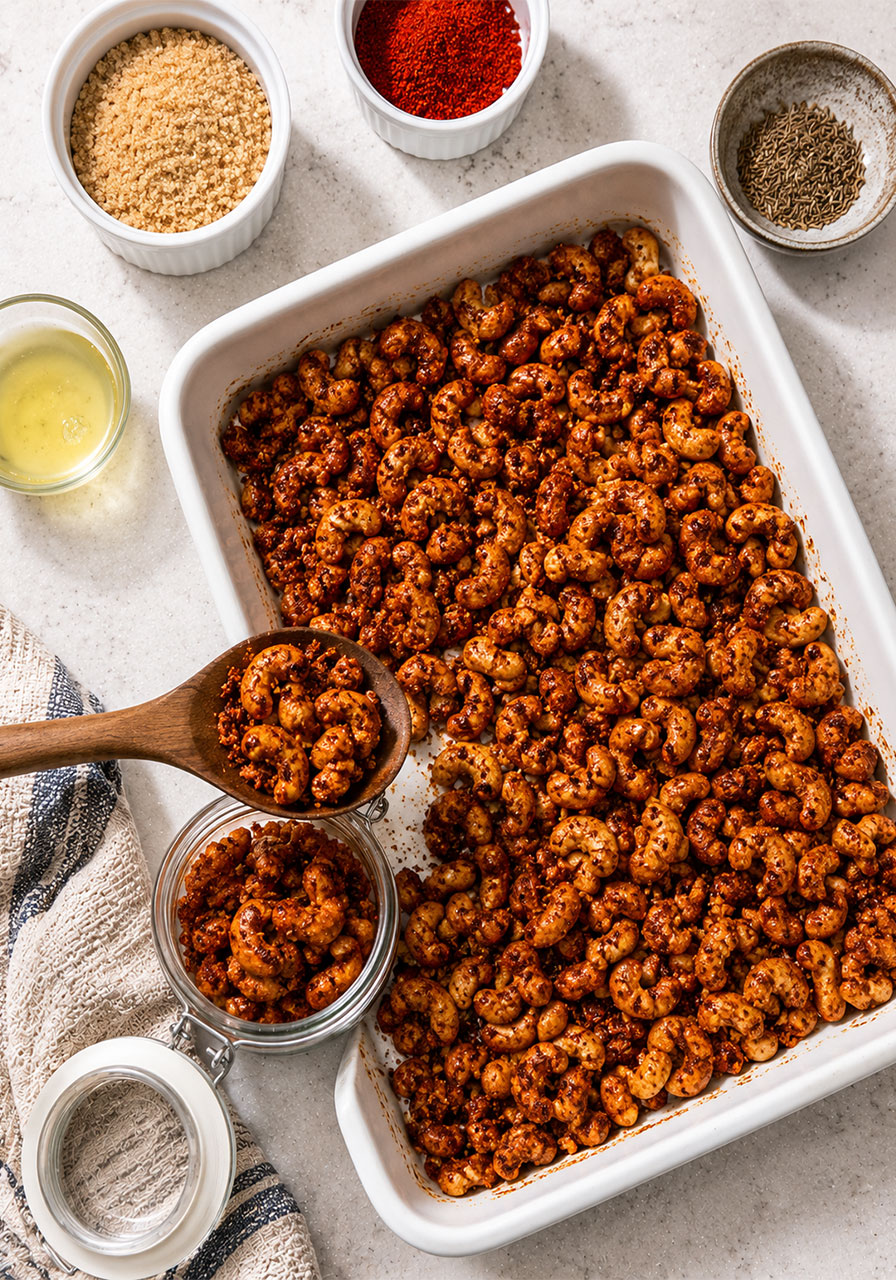
21. Roasted Cumin Cashews
These spiced cashews are the kind of snack you can’t stop at just one handful. A sweet-spicy coating of cumin, chili powder, and cayenne – slow-roasted until perfectly crunchy. They’re sophisticated enough for grown-up gatherings and addictive enough to disappear before you even sit down.
Yield: 3-1/2 cups | Prep: 15 min | Cook: 50 min
What You’ll Need:
- 1 large egg white
- 1 tablespoon water
- 2 cans (9-3/4 oz each) salted whole cashews
- 1/3 cup sugar
- 3 teaspoons chili powder
- 2 teaspoons salt
- 2 teaspoons ground cumin
- 1/2 teaspoon cayenne pepper
How to Make It:
- In a large bowl, whisk together the egg white and water until frothy.
- Add the cashews and toss to coat. Transfer to a colander and drain for 2 minutes.
- In a separate bowl, combine the sugar, chili powder, salt, cumin, and cayenne. Add the drained cashews and toss to coat evenly with the spice mixture.
- Arrange in a single layer on a greased 15x10x1-in. baking pan.
- Bake uncovered at 250° for 50-55 minutes, stirring once halfway through, until the coating is set and the cashews are lightly toasted.
- Cool completely on a wire rack. Break apart any clumps. Store in an airtight container.
Pro Tip: The egg white is the secret to making the spice coating actually stick to the nuts instead of falling off at the bottom of the bag. Don’t skip this step!
Nutrition (per 1/4 cup): 145 calories, 10g fat, 10g carbohydrate, 4g protein
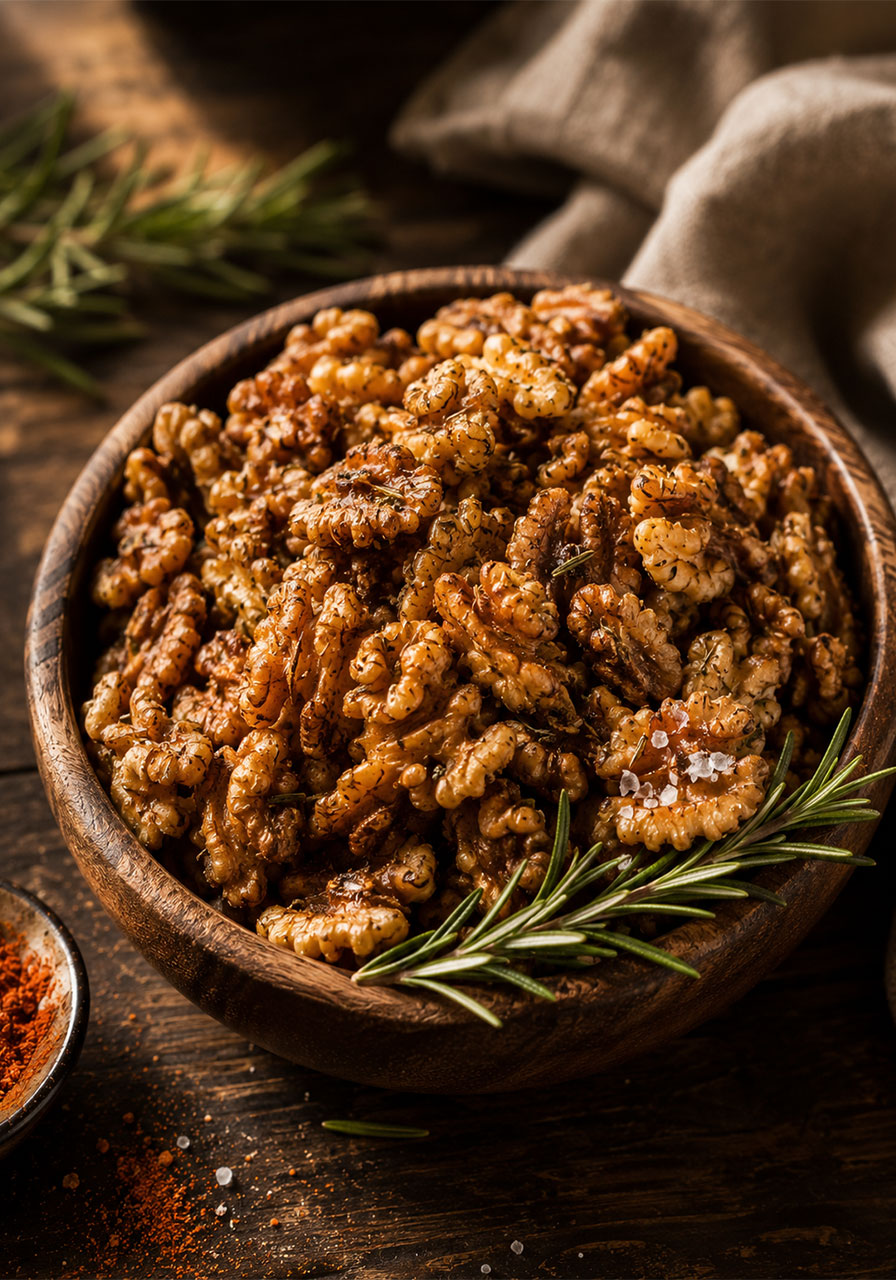
22. Rosemary Walnuts
Elegant, aromatic, and ready in 20 minutes. These rosemary-spiced walnuts have just a hint of cayenne heat that sneaks up on you in the best possible way. They’re a fantastic snack on their own, but they’re also incredible tossed into a salad or nibbled alongside a cheese board at camp.
Yield: 2 cups | Prep: 10 min | Cook: 10 min
What You’ll Need:
- 2 cups walnut halves
- Cooking spray
- 2 teaspoons dried rosemary, crushed
- 1/2 teaspoon kosher salt
- 1/4 to 1/2 teaspoon cayenne pepper
How to Make It:
- Preheat oven to 350°.
- Place walnut halves in a small bowl. Spritz with cooking spray and toss to coat lightly.
- Add the crushed rosemary, kosher salt, and cayenne pepper. Toss to distribute the seasonings evenly.
- Spread in a single layer on a baking sheet.
- Bake for 10 minutes until lightly toasted and fragrant.
- Serve warm, or cool completely before storing in an airtight container.
Pro Tip: Crush the dried rosemary between your fingers before adding it – this releases the oils and makes the flavor much more fragrant and pronounced.
Nutrition (per 1/4 cup): 166 calories, 17g fat, 4g carbohydrate, 4g protein
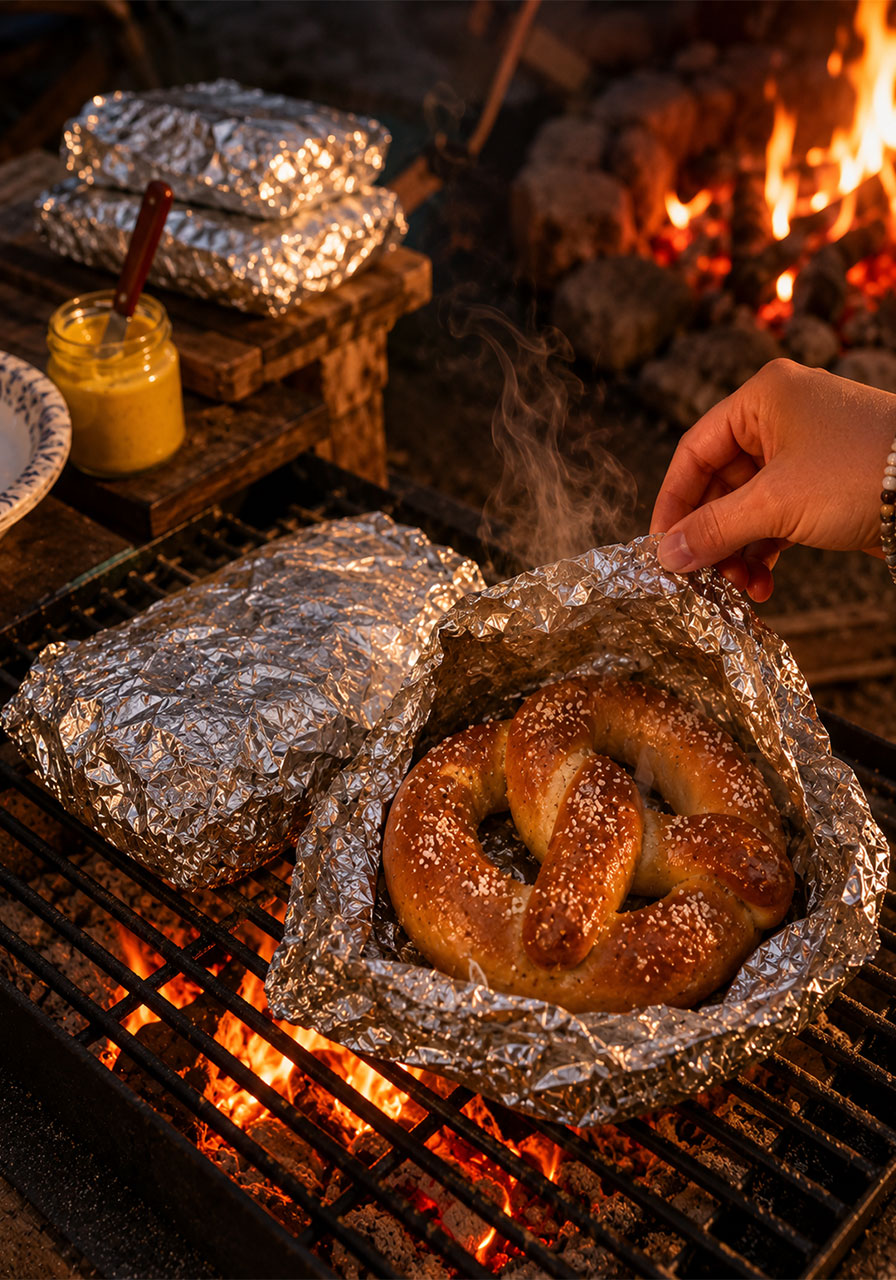
23. Chewy Soft Pretzels
There is nothing quite like a warm, freshly made soft pretzel – and yes, you can absolutely make them yourself before your camping trip. The baking soda bath is the key to that signature chewy, golden exterior. Bring them to camp wrapped in foil and warm them up over the fire. Pure heaven.
Yield: 1 dozen | Prep: 1 hour | Cook: 15 min
What You’ll Need:
- 1 package (1/4 oz) active dry yeast
- 1-1/2 cups warm water (110° to 115°)
- 1 tablespoon sugar
- 2 teaspoons salt
- 4 to 4-1/4 cups all-purpose flour
- 8 cups water (for the boiling bath)
- 1/2 cup baking soda
- 1 large egg, lightly beaten
- Optional toppings: kosher salt, sesame seeds, poppy seeds, grated Parmesan cheese
How to Make It:
- In a small bowl, dissolve the yeast in the warm water. In a large bowl, combine the sugar, salt, yeast mixture, and 2 cups of flour. Beat on medium speed until smooth. Stir in enough remaining flour to form a stiff dough.
- Turn the dough onto a floured surface and knead until smooth and elastic, about 5 minutes. Place in a greased bowl, turning once to grease the top. Cover and let rise in a warm place until doubled in size – about 1 hour.
- Punch down the dough. Divide into 12 equal balls. Roll each ball into a 22-inch rope and shape into a pretzel.
- Preheat oven to 425°. Bring the 8 cups of water and baking soda to a boil in a large saucepan.
- Carefully place pretzels one at a time into the boiling water for 30 seconds each. Remove and drain on paper towels lightly coated with cooking spray.
- Place on greased baking sheets. Brush with beaten egg and add desired toppings.
- Bake until golden brown, 12-14 minutes. Remove and serve warm, or cool and pack for your trip.
Pro Tip: The baking soda bath is non-negotiable – it’s what gives soft pretzels their distinctive chewy crust. Don’t skip it, and don’t let them soak more than 30 seconds or they’ll taste too salty.
Nutrition (per pretzel): 164 calories, 1g fat, 33g carbohydrate, 5g protein
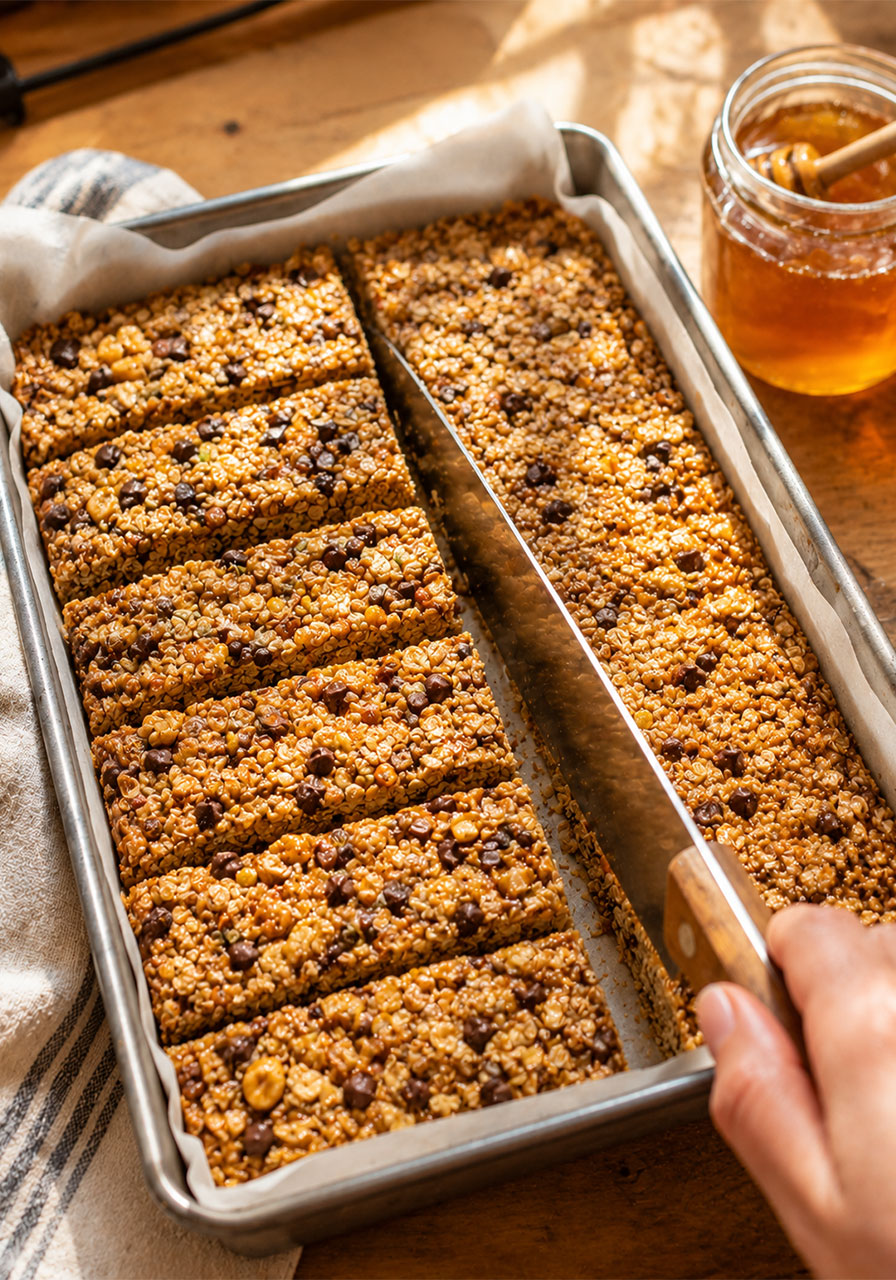
24. Chewy Honey Granola Bars
These homemade granola bars are everything the store-bought ones wish they were. Oats, peanuts, chocolate chips, and sunflower kernels all held together with butter, honey, and vanilla – then baked into perfectly chewy bars. They pack well, they travel well, and they taste incredible.
Yield: 3 dozen | Prep: 15 min | Cook: 15 min
What You’ll Need:
- 4 cups quick-cooking oats
- 1 cup packed brown sugar
- 1 cup chopped salted peanuts
- 1 cup semisweet chocolate chips
- 1/2 cup sunflower kernels
- 3/4 cup butter, melted
- 2/3 cup honey
- 1 teaspoon vanilla extract
How to Make It:
- Preheat oven to 350°.
- In a large bowl, combine the oats, brown sugar, peanuts, chocolate chips, and sunflower kernels.
- Stir in the melted butter, honey, and vanilla until fully combined – the mixture will be crumbly, and that’s totally normal.
- Press the mixture firmly and evenly into a greased, parchment-lined 15x10x1-in. baking pan. Press hard – the more compact, the better they’ll hold together.
- Bake until lightly browned, 15-20 minutes.
- Cool for 15 minutes in the pan on a wire rack, then cut into bars. Cool completely before removing from the pan.
Pro Tip: Use a flat-bottomed measuring cup or glass to press the mixture down really firmly before baking. Loosely packed = crumbly bars. Firmly packed = bars that hold their shape beautifully.
Nutrition (per bar): 167 calories, 9g fat, 21g carbohydrate, 3g protein
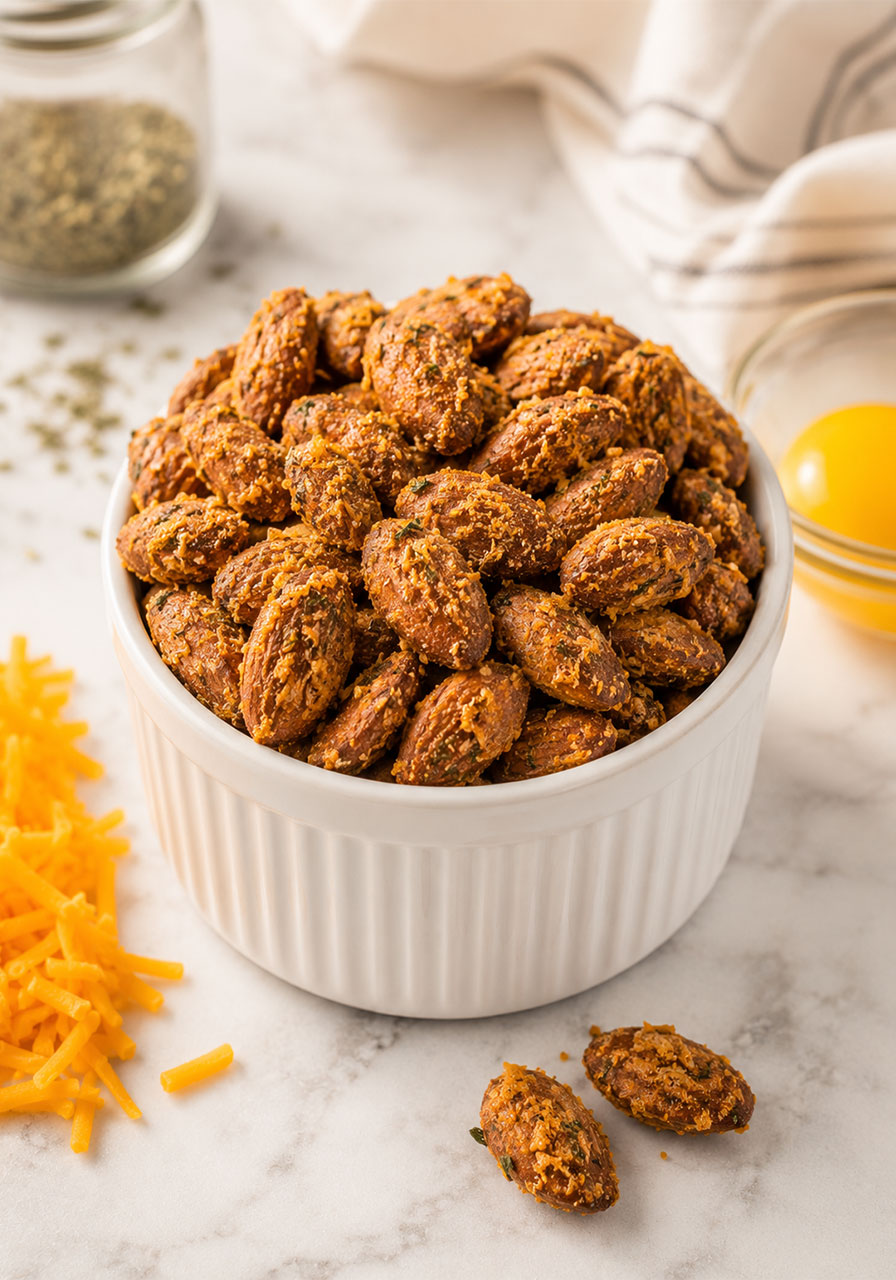
25. Roasted Cheddar Herb Almonds
Last but absolutely not least – these roasted almonds are a total showstopper. Coated in an egg yolk, sharp cheddar, and herb seasoning blend, then oven-roasted until the cheese is golden and crunchy. They taste like something from a specialty nut shop, and they take about 30 minutes to make.
Yield: 2 cups | Prep: 10 min | Cook: 20 min
What You’ll Need:
- 1 large egg yolk
- 2 cups unblanched almonds
- 3/4 cup finely shredded sharp cheddar cheese
- 1 teaspoon salt-free herb seasoning blend
- 3/4 teaspoon salt
- 1/2 teaspoon garlic powder
How to Make It:
- Preheat oven to 325°.
- In a large bowl, whisk the egg yolk. Add the almonds and stir to coat evenly.
- In a small bowl, toss the shredded cheddar with the herb seasoning, salt, and garlic powder.
- Add the cheese mixture to the almonds and toss to combine, making sure the cheese coats the nuts evenly.
- Transfer to a greased 15x10x1-in. baking pan and spread in a single layer.
- Bake for 20-25 minutes, stirring occasionally, until the cheese is golden brown and set.
- Cool completely before storing in an airtight container.
Pro Tip: Finely shredded cheese (not the thick pre-shredded kind from a bag) sticks to the almonds much better and crisps up more evenly. Grab a block of sharp cheddar and shred it yourself for best results.
Nutrition (per 1/4 cup): 264 calories, 23g fat, 7g carbohydrate, 11g protein
Make Your Camping Trip Delicious
The best camping memories always happen around food. Whether you’re snacking on the trail, sharing a bowl of Campfire Dip by the fire, or watching the kids devour Walking Tacos straight from the bag – these snacks are the ones that make the trip feel special.
The great news? Most of these can be made ahead, packed easily, and enjoyed without any fuss at the campsite. That means less time stressing and more time doing exactly what camping is for – laughing, exploring, and making memories.
So grab your favorite recipes from this list, prep them before you hit the road, and get ready for your tastiest camping trip yet.