If you’ve ever spotted those adorable little glazed cakes at a bridal shower or wedding reception and thought, “I could never make those at home” – challenge accepted, and spoiler alert: you absolutely can.
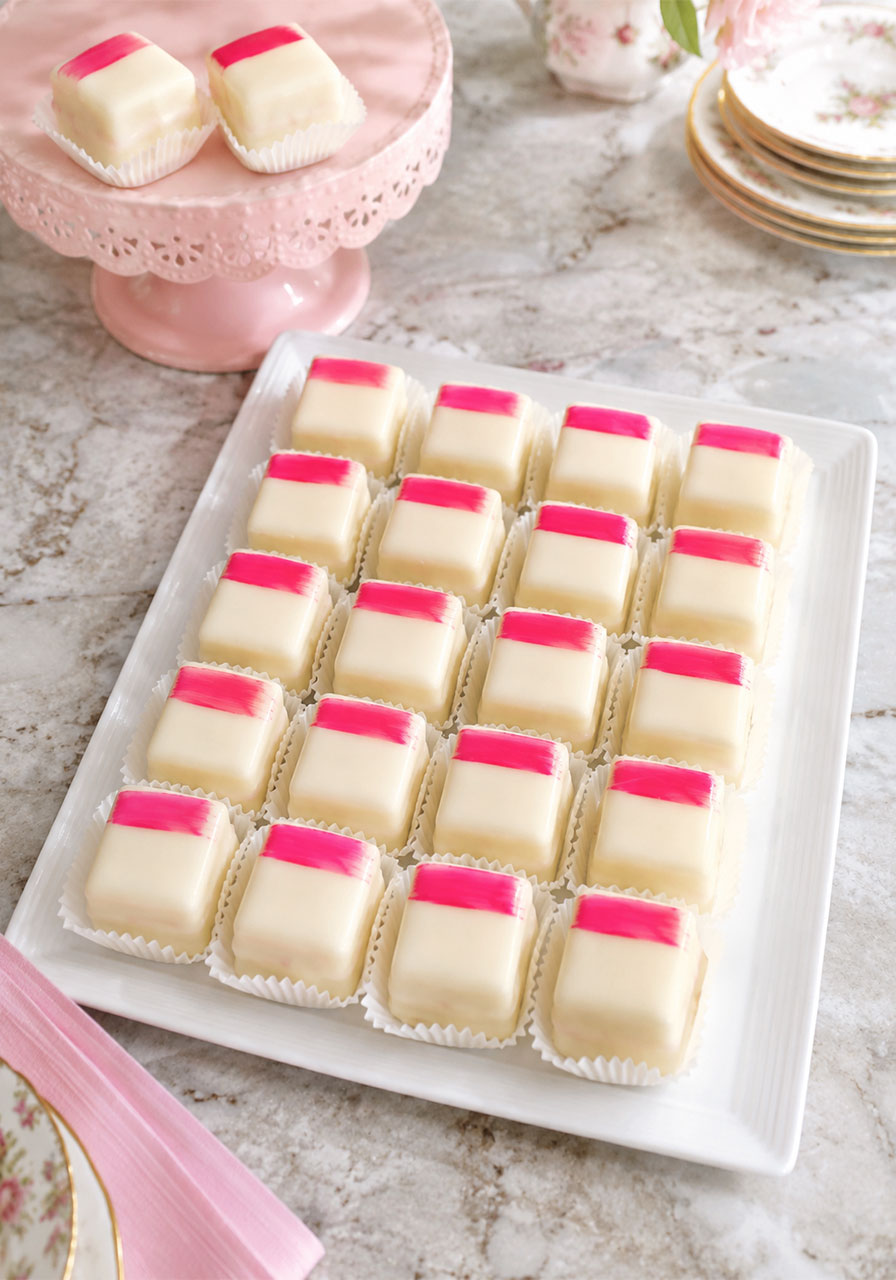
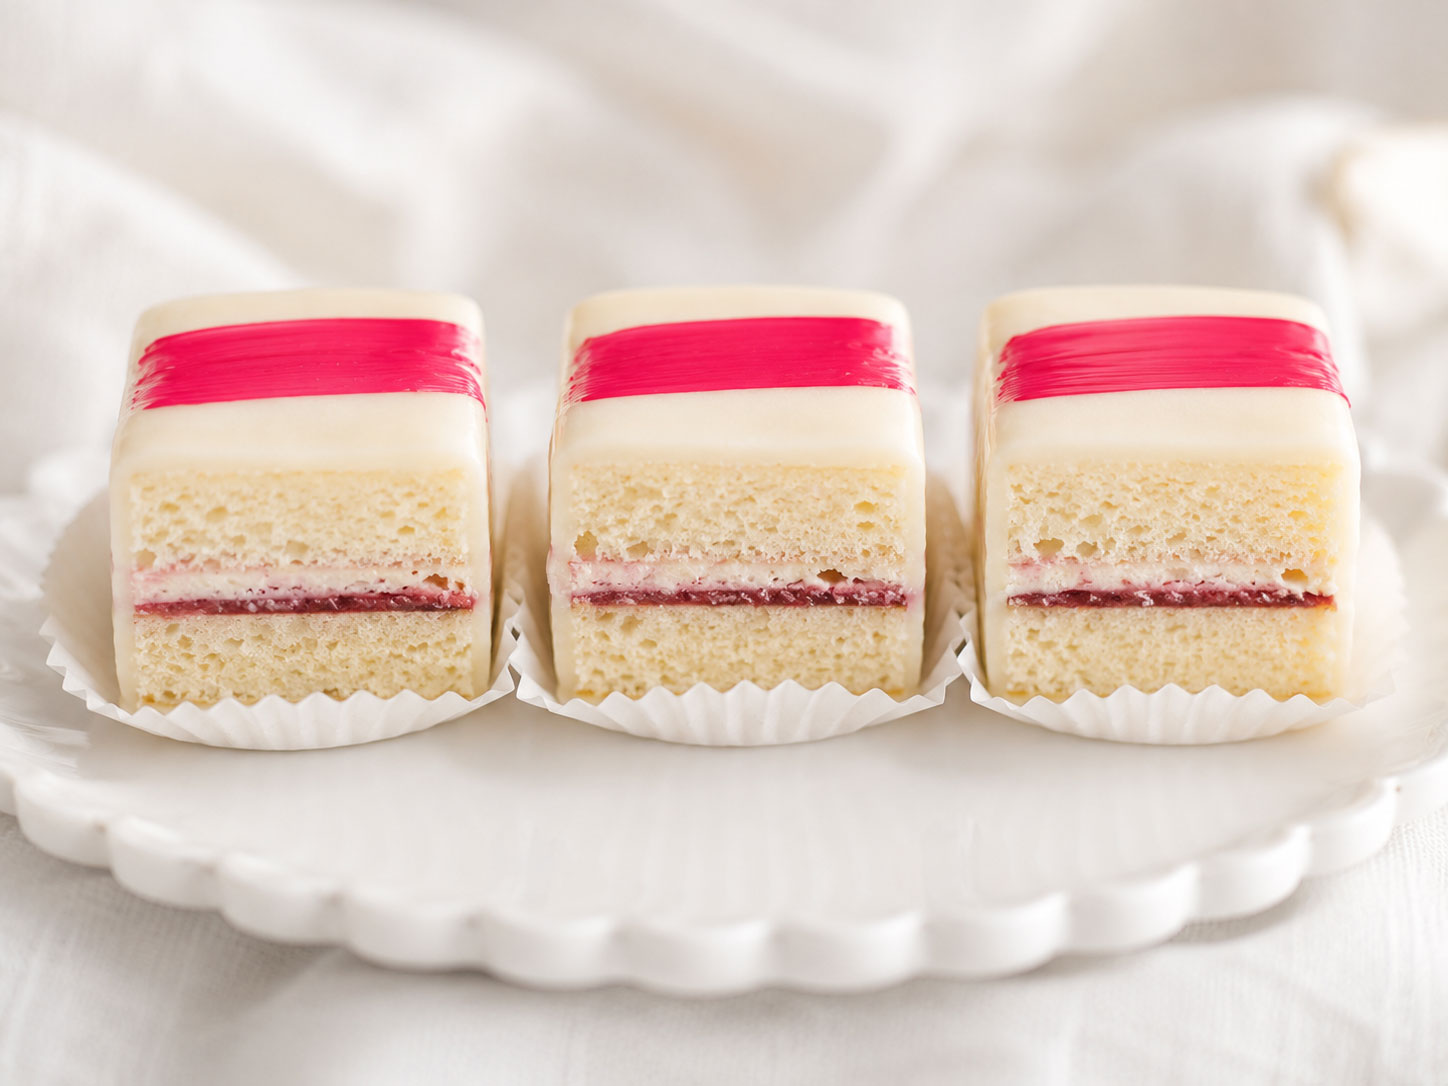
These petit fours are everything a party dessert should be. Buttery vanilla cake, tart raspberry filling, silky cream cheese frosting, and a dreamy almond-kissed white chocolate glaze. Every single bite is like a tiny, elegant party in your mouth.
Are they a little bit of work? Yes. Are they worth every single minute? One hundred percent yes. I’ve made these so many times that I can tell you with total confidence – once your guests try one, they won’t stop talking about them. One of my clients told me they were “the best cake she’d ever had in her life.” That’s the kind of party moment we’re here to create.
So let’s dive in! I’m going to walk you through every step, share all my hard-earned pro tips, and make sure your petit fours turn out absolutely gorgeous.
What Are Petit Fours, Exactly?
Great question! Petit fours are bite-sized cakes that originated in France. The name literally means “small oven” – French bakers used to bake these tiny pastries as their large bread ovens cooled down. How charming is that?
What we’re making today are technically petit fours glacé, which means they’re covered in a shiny poured glaze (rather than fondant or frosting). That gorgeous smooth coating is what gives them their signature elegant look.
They’re perfect for weddings, baby showers, bridal showers, birthday parties, holiday gatherings – basically any event where you want to wow your guests without pulling out a tiered cake.


Why You’re Going to Love This Recipe
This isn’t just any butter cake base – it’s a rich, dense, almost pound-cake-style vanilla cake that holds up perfectly when you cut it into tiny squares. The secret weapon? Evaporated milk and sour cream. Trust me, don’t swap those out. They make this cake unbelievably moist and flavorful.
Layer that with tangy raspberry filling and cream cheese frosting, then coat the whole thing in a silky almond white chocolate glaze, and you’ve got a dessert that genuinely tastes as incredible as it looks.
And here’s the thing – even if your petit fours don’t look perfectly identical, they’re still going to taste amazing. As one of my clients wisely said, “If they looked perfect, I wouldn’t believe they were homemade!” Embrace the handmade charm.
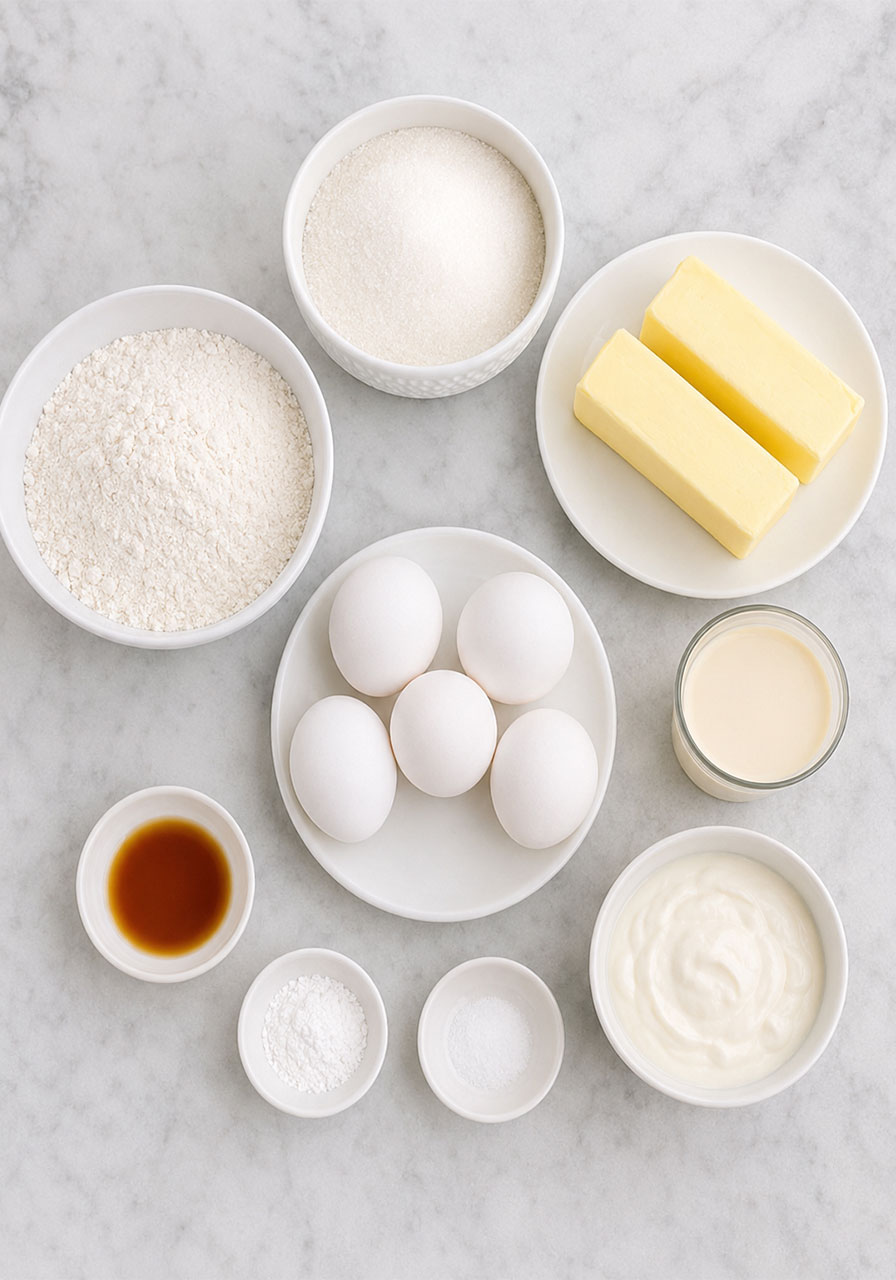
What You’ll Need: Petit Fours Ingredients
Here’s everything you’ll need to make the full recipe from scratch. Don’t be intimidated by the list – most of these are basic pantry staples!
For the Vanilla Butter Cake:
- 2¾ cups sugar
- ¾ cup salted butter, softened to room temperature
- ¾ cup shortening (Crisco is best here)
- 2 teaspoons vanilla extract
- 5 large eggs, at room temperature
- 3 cups all-purpose flour
- 1 teaspoon baking powder
- 1 teaspoon salt
- ¾ cup evaporated milk (do NOT substitute condensed milk!)
- ¼ cup full-fat sour cream
For the Cream Cheese Frosting:
- ½ cup salted butter (1 stick), room temperature
- ¼ cup Crisco shortening
- 4 oz cream cheese, room temperature
- 1.5 lbs powdered sugar
- ½ tablespoon vanilla extract
- 1–2 tablespoons milk (to adjust consistency)
For the Raspberry Filling:
- Homemade raspberry filling (highly recommended – make it 1–2 days ahead!)
- OR store-bought raspberry jam as a quick substitute
For the Petit Four Icing:
- 6 cups powdered sugar, sifted
- ½ cup water
- 2 tablespoons light corn syrup
- 1 teaspoon almond extract
- 1 teaspoon vanilla extract
- ¾ cup (6 oz) chopped white chocolate or almond bark
A Note on the Filling Options
The cake, frosting, and icing are all rich and sweet – so the filling is your chance to add a delicious contrast. I personally love something tart to balance all that sweetness.
Here are my favorite filling ideas:
- Raspberry Filling – My absolute top pick. The tartness pairs beautifully with the almond-white chocolate icing. Make it from scratch if you can!
- Lemon Curd – A close second. You can make it homemade, in the microwave, or grab a jar from the store.
- Fruit Jam – Any store-bought jam you love works perfectly in a pinch.
- Marzipan – A classic traditional filling. Great if you’re a fan of almond flavor!
- Caramel – I haven’t tried this yet, but I imagine it would be incredible. Swap the almond extract in the icing for vanilla if you go this route.
Equipment You’ll Need
Having the right tools makes this process so much smoother. Here’s what I recommend:
- 13×18-inch half sheet pan (with a lid if possible – great for freezing!)
- Parchment paper or silicone baking mats
- Hand mixer or stand mixer
- Mixing bowls
- Flexible cutting boards (a total game-changer for this recipe)
- Cake leveler or Agbay – or a long serrated knife in a pinch
- Ruler or straight edge (for cutting uniform squares)
- Wire cooling rack
- Skewers (optional – for the dipping method)
- A makeshift double boiler (large pot + glass bowl)
Don’t have an Agbay? No worries! I’ll share a workaround tip below that makes slicing the cake layers much easier.
How to Make Petit Fours: Step-by-Step
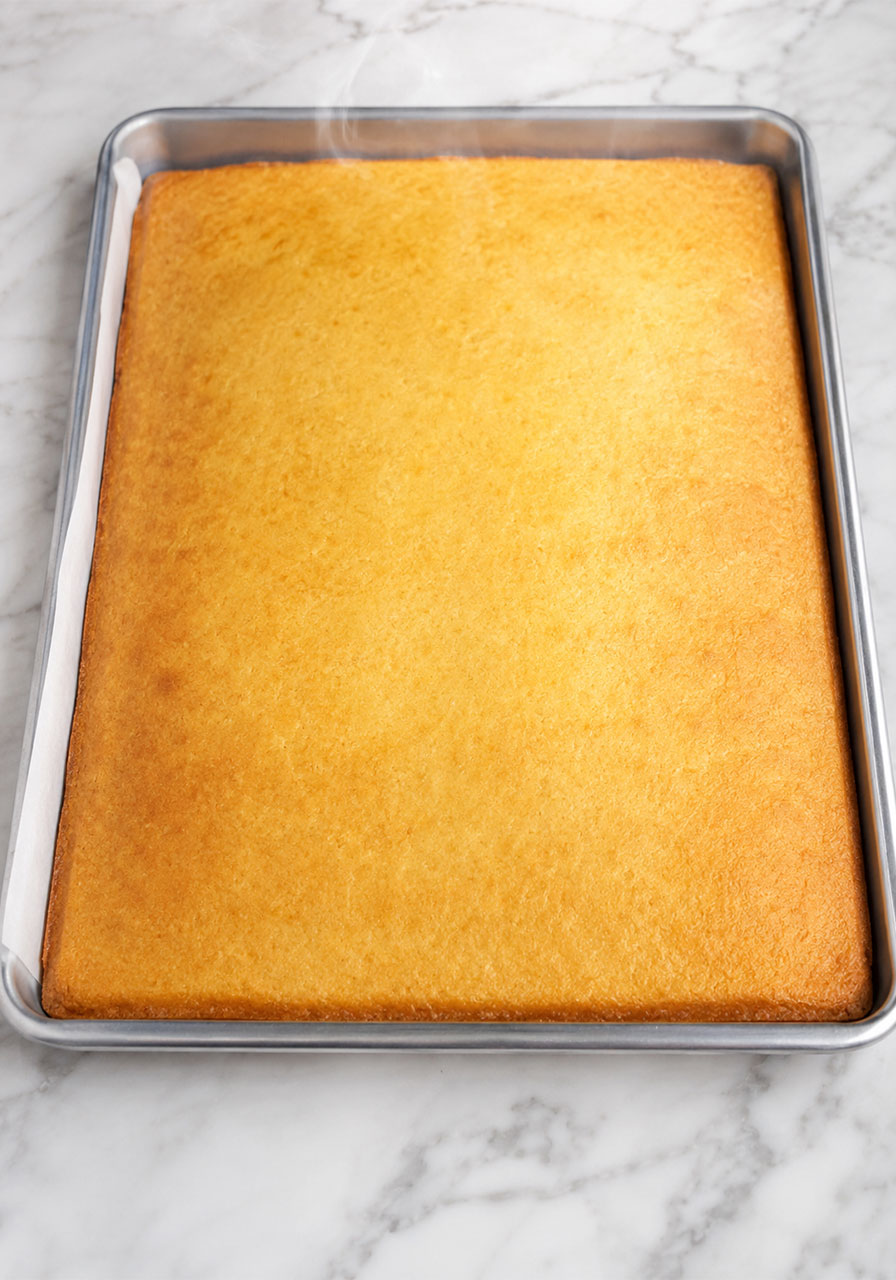
Step 1: Bake the Vanilla Butter Cake
Preheat your oven to 325°F.
Line your 13×18-inch half sheet pan with parchment paper, then spray the edges with non-stick baking spray.
In a large bowl, cream together the sugar, butter, and shortening until smooth. Beat in the vanilla extract. Add the eggs one at a time, beating until fluffy after each addition.
In a separate bowl, sift (or whisk) together the flour, baking powder, and salt.
Alternately add the flour mixture and the evaporated milk to the butter mixture, starting and ending with the flour. Beat for 2 minutes on medium speed. Then gently fold in the sour cream – don’t overmix here.
Pour the batter onto your prepared sheet pan and spread it out evenly to the edges.
Bake for 25–35 minutes, or until a toothpick inserted in the center comes out clean. Check it at 25 minutes – you don’t want to overbake this beauty!
Let the cake cool completely before moving to the next step. This is important – a warm cake will fall apart on you.
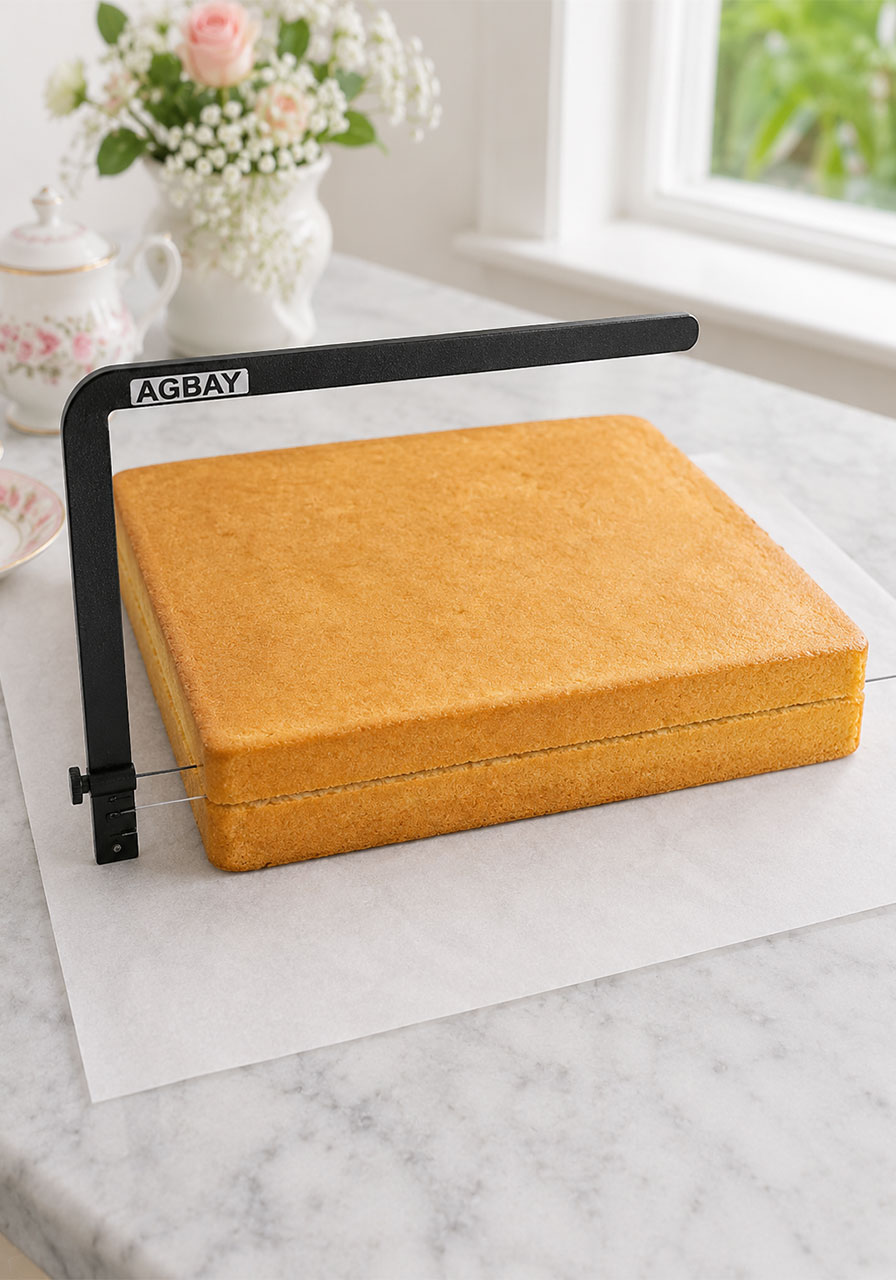
Step 2: Flip and Torte the Cake
Once the cake is fully cooled, flip it out onto a clean work surface lined with a fresh sheet of parchment paper. Gently peel away the baked-on parchment.
Now it’s time to torte – a fancy word for splitting the cake horizontally into two thin layers. This is what allows you to add that gorgeous filling inside.
The easiest way to do this is with an Agbay or a cake leveler. If you don’t have one, here’s my favorite workaround: cut the cake into four sections first, then use a long serrated knife to split each smaller piece horizontally. Much more manageable!
Once sliced, slide a flexible cutting board under the top layer and carefully lift it onto a separate sheet of parchment. Set it aside – you’ll need it in a moment.
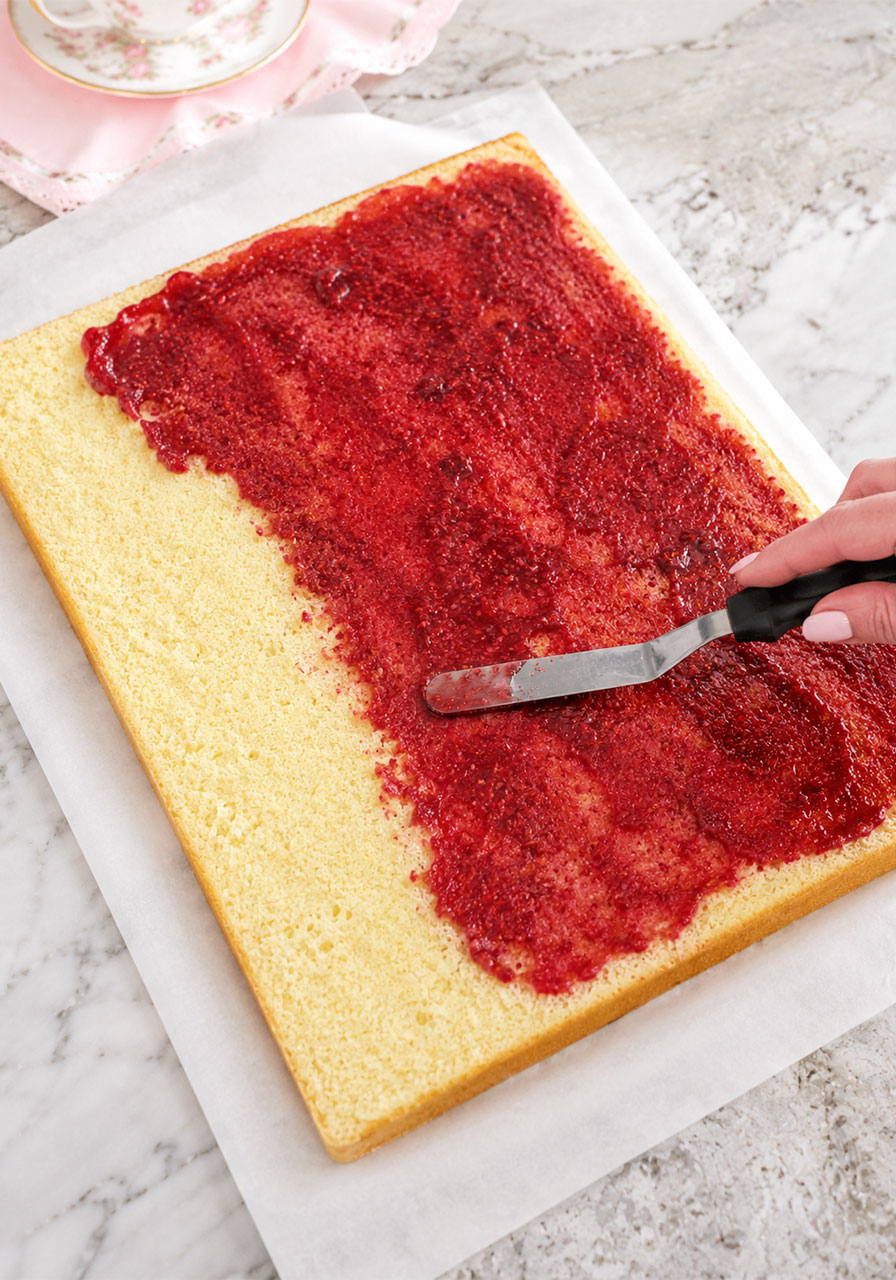
Step 3: Add the Filling and Frosting
With the bottom layer cut-side up, spread a thin, even layer of raspberry filling across the entire surface. Key word: thin! If it’s too thick, the layers will slide around when you try to stack them.
Next, spread a thin layer of cream cheese frosting right on top of the filling. This adds even more flavor AND helps the layers stay put.
Use your flexible cutting board to carefully place the top cake layer back on, cut-side down, lining up the edges as neatly as you can.
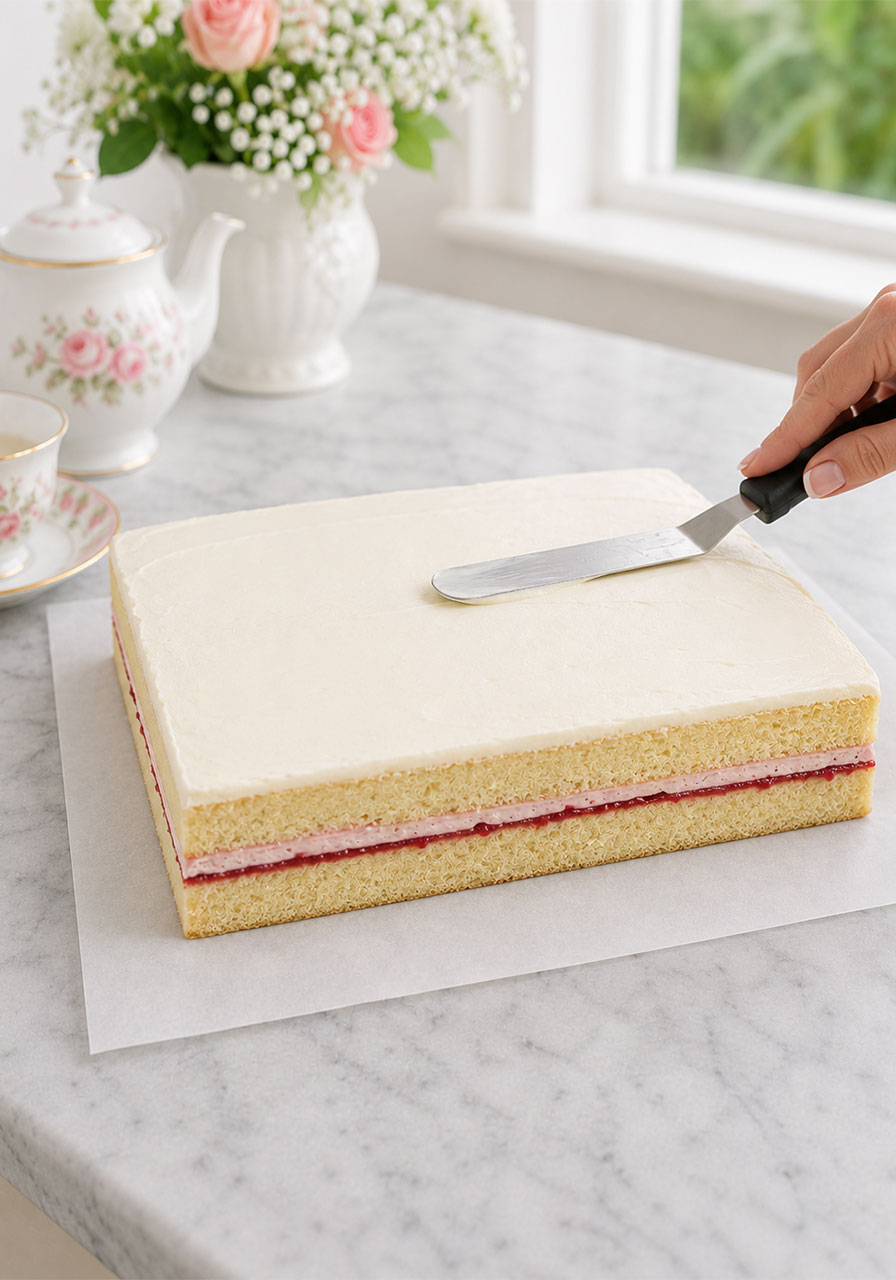
Step 4: Frost the Top and Trim the Edges
Now spread a smooth, even layer of cream cheese frosting over the entire top of the cake. This is your foundation for the poured icing – the smoother you get it, the smoother your finished petit fours will look.
Take your time here. Fill in any low spots, and use an offset spatula to create a really flat, level surface.
Once the top is smooth, use a sharp knife to trim all four edges of the cake. This gives you clean, straight cuts when you go to slice the petit fours later – and you get to snack on the trimmings, which are absolutely delicious.
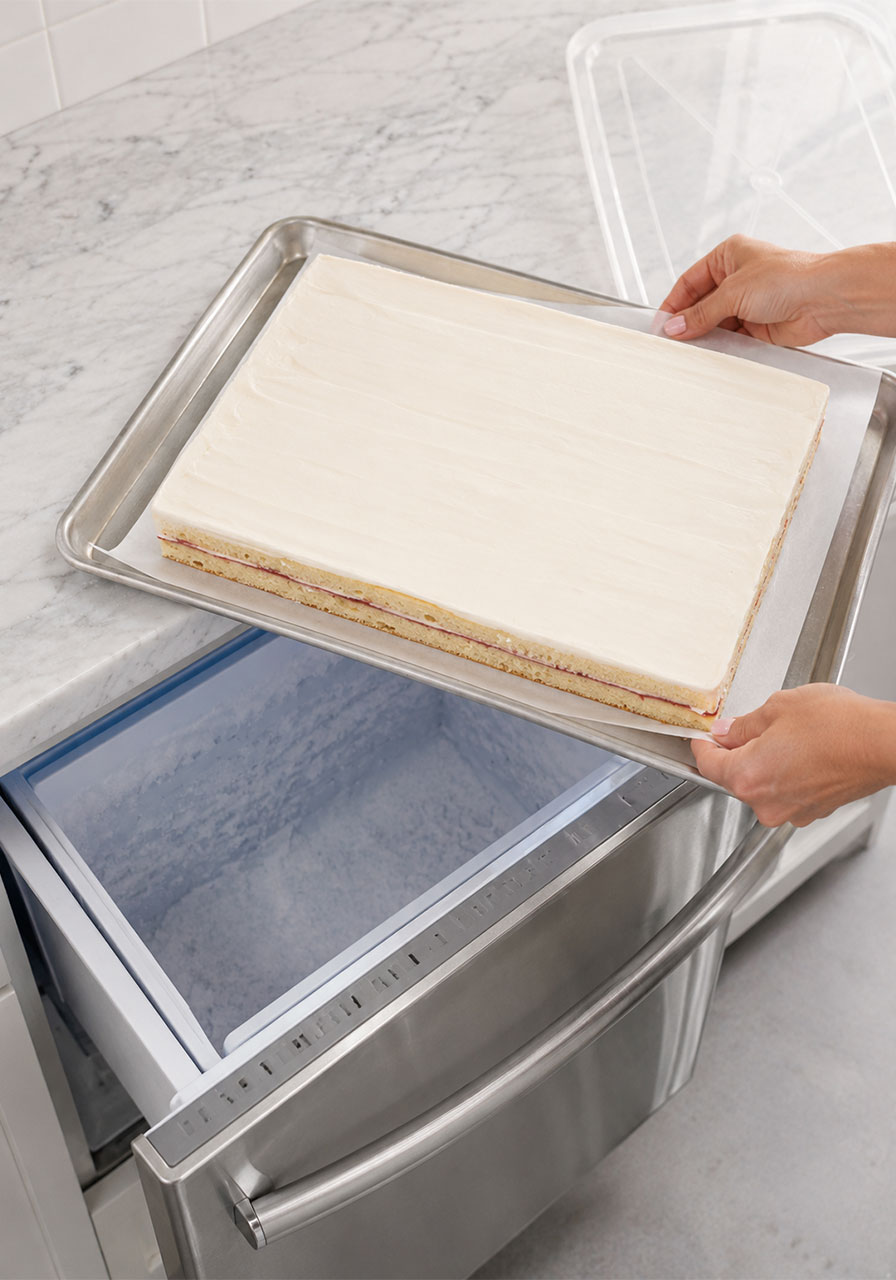
Step 5: Freeze the Cake
This step is non-negotiable! Slide the parchment and cake back onto your sheet pan, cover it with a lid (or wrap it well), and freeze for 30 minutes to 1 hour.
Why? Because frozen cake is infinitely easier to cut into clean, uniform squares AND to dip into the icing without it crumbling or falling apart. Don’t skip this!
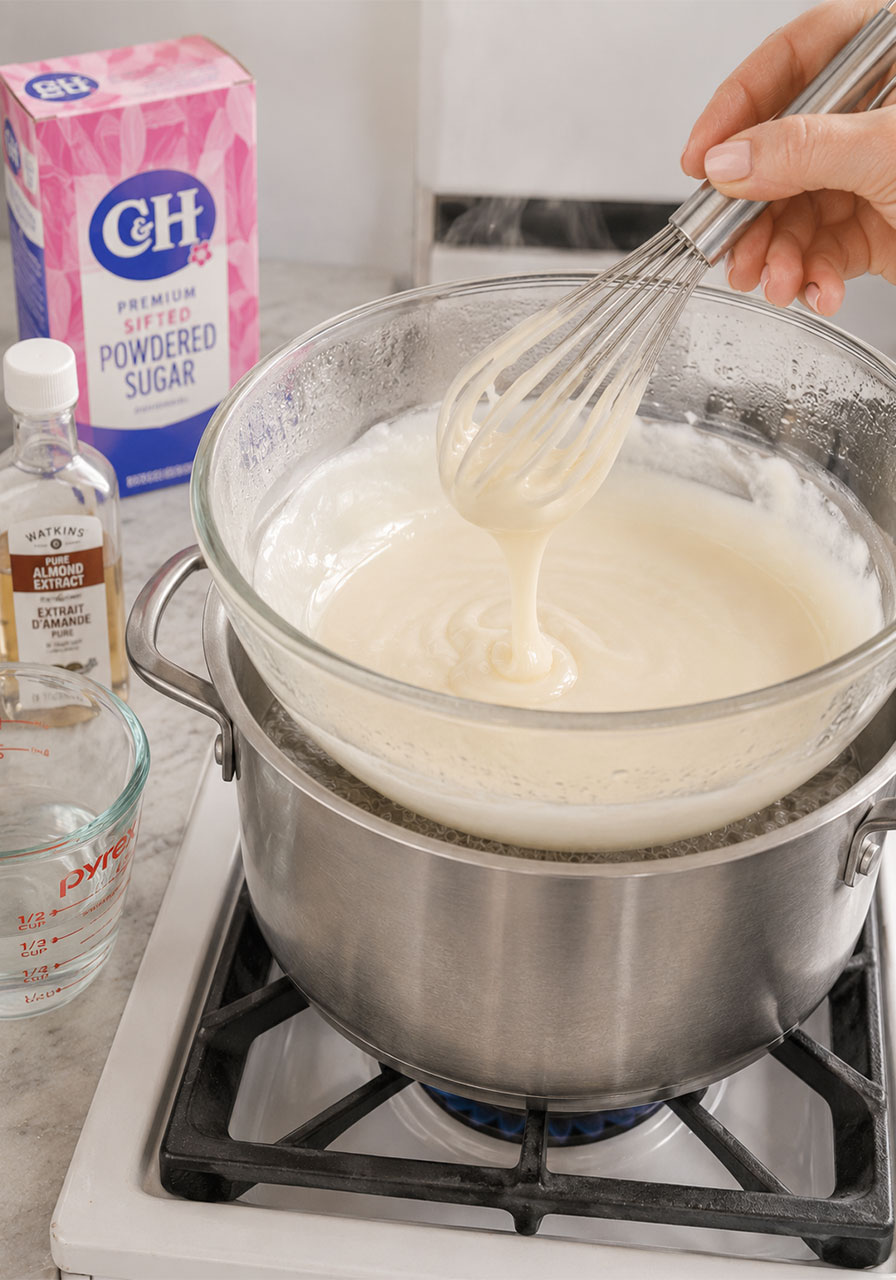
Step 6: Make the Petit Four Icing
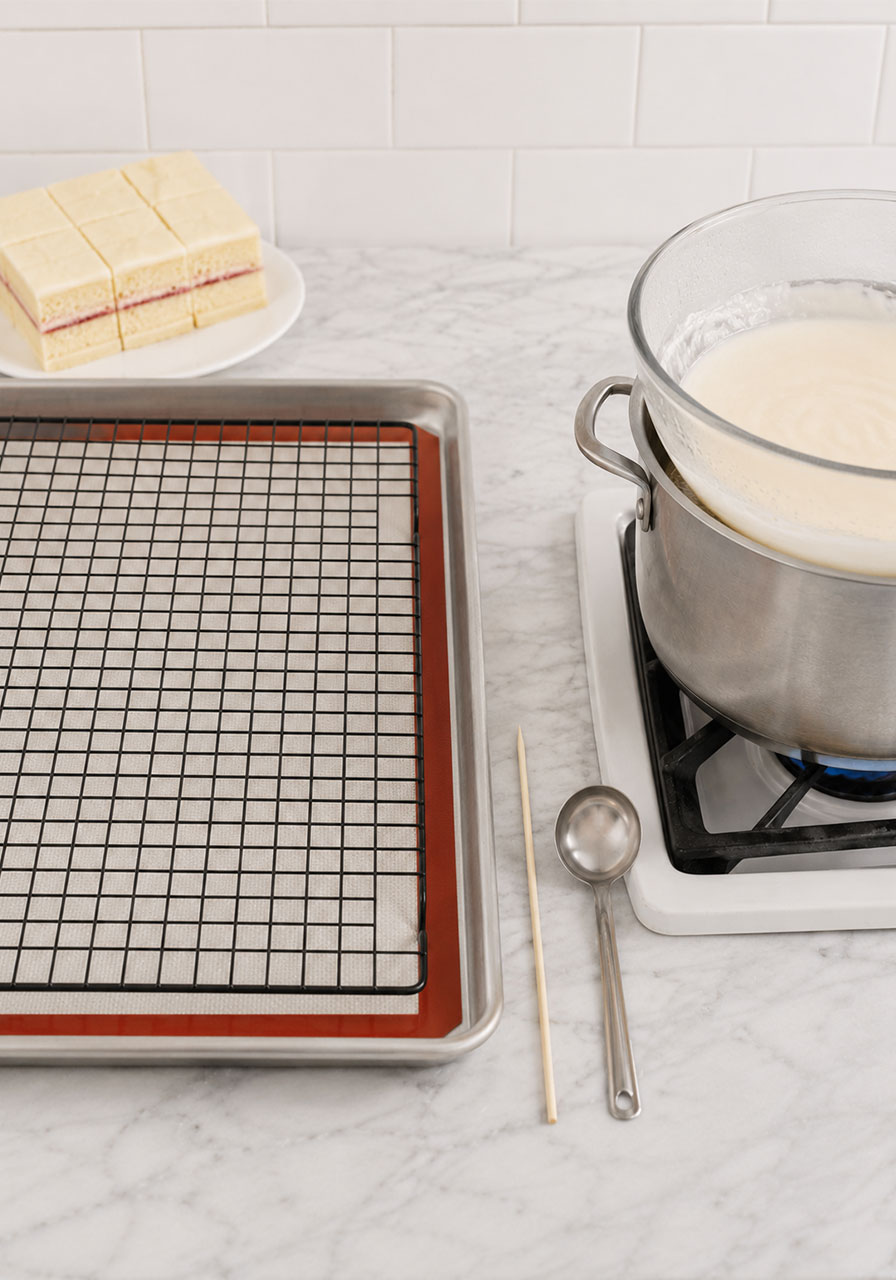
While the cake freezes, set up your makeshift double boiler: bring a pot of water to a gentle boil, then place a large glass or metal bowl on top. All your icing work happens in that bowl!
Whisk together the powdered sugar, water, corn syrup, almond extract, and vanilla extract. Keep stirring until the mixture is smooth, consistent, and thin enough to drizzle off a spoon – but not so thin that it just runs right off the cake.
A good temp check: when the icing reaches 92°F, it’s ready.
Add the chopped white chocolate or almond bark (do NOT use white chocolate chips – they don’t melt smoothly!) and stir until fully melted and incorporated.
Keep the icing warm over the low heat of your double boiler as you work. It sets up fast as it cools!
Step 7: Set Up Your Icing Station
Line a baking sheet with parchment paper, wax paper, or a silicone mat.
Place a wire cooling rack on top – ideally one that’s larger than the sheet, so there’s plenty of space for the icing to drip down freely. Any excess icing that pools on the paper below can be re-melted and reused!
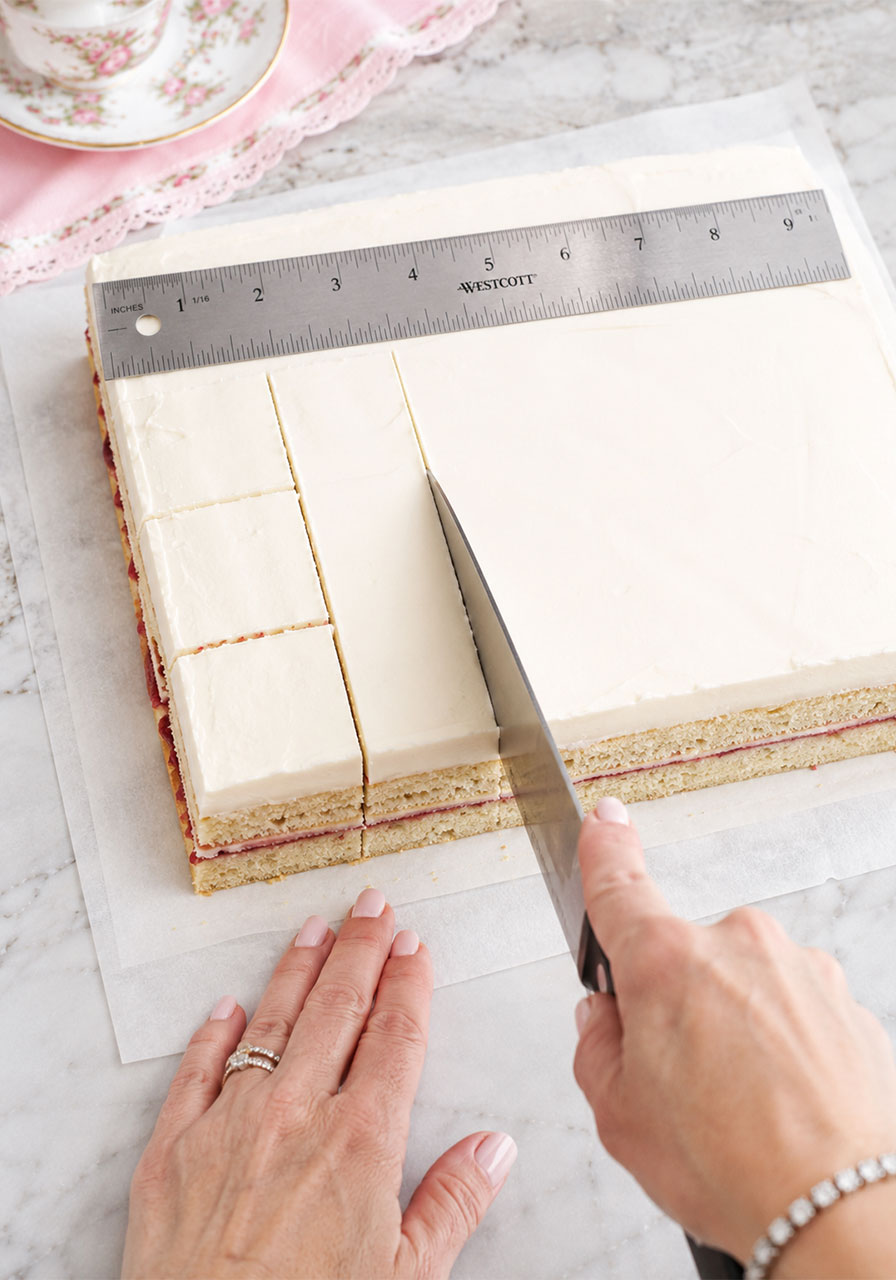
Step 8: Cut the Cake into Squares
Take the frozen cake out of the freezer. Using a sharp knife (and a ruler or straight edge if you want them extra precise), cut the cake into 1 to 1.25-inch squares.
A small biscuit cutter works wonderfully here if you want perfectly uniform shapes! Eyeballing is totally fine too – I do it all the time.
Pro tip: Work in small batches of 10–12 pieces at a time. Keep the rest of the cake in the freezer while you work. Cold cake = cleaner, prettier results.
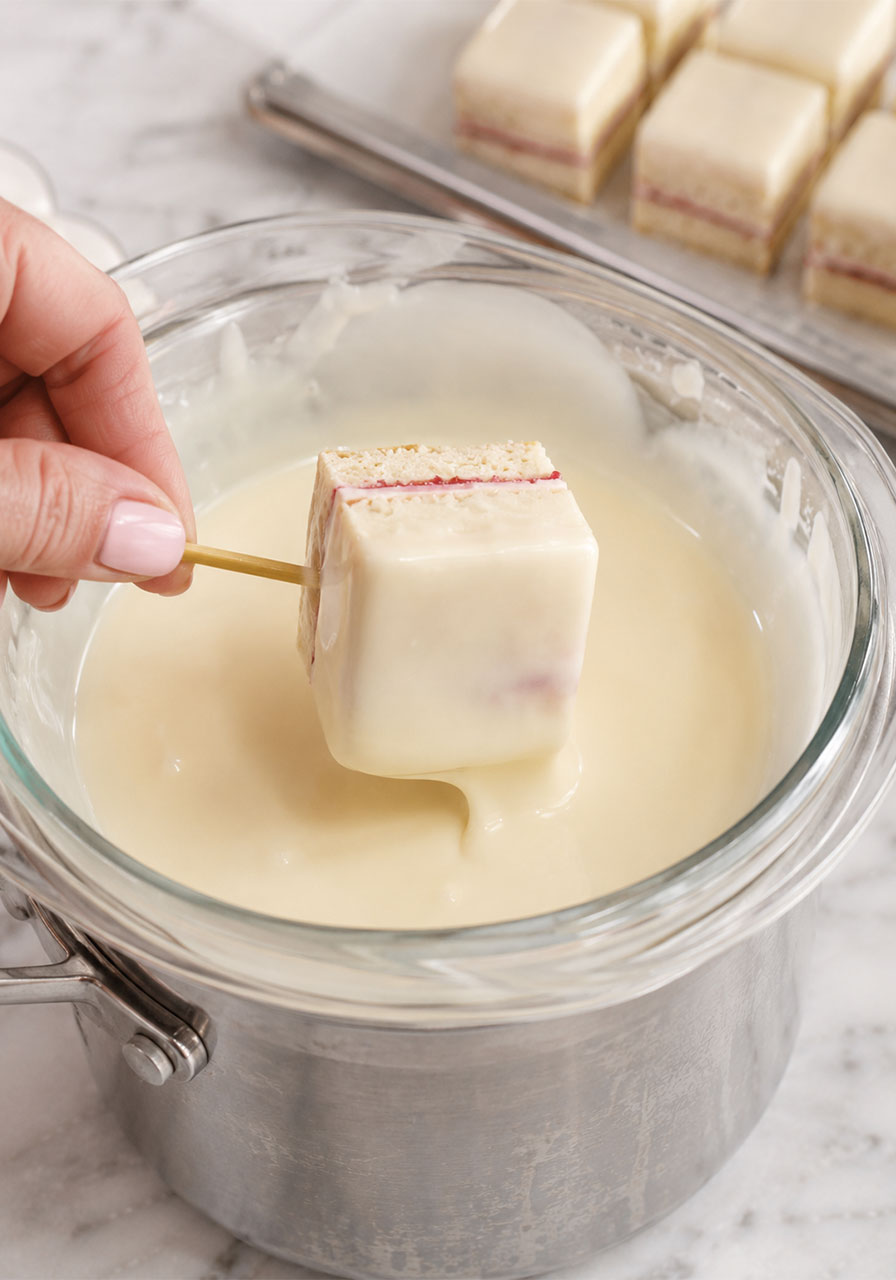
Step 9: Ice the Petit Fours
You’ve got two options here – both work beautifully:
Method 1 – Skewer Dipping: Insert a skewer into the side of each frozen square. Dip the whole thing into the warm icing, then place it on your prepared cooling rack. Twist the skewer gently as you pull it out to minimize any hole marks. Quick, efficient, and so satisfying!
Method 2 – Ladle Pouring: Place the frozen squares on your cooling rack and ladle the warm icing over the top of each one, working your way around the sides first, then over the middle. Work quickly – the icing sets fast on the cold cake.
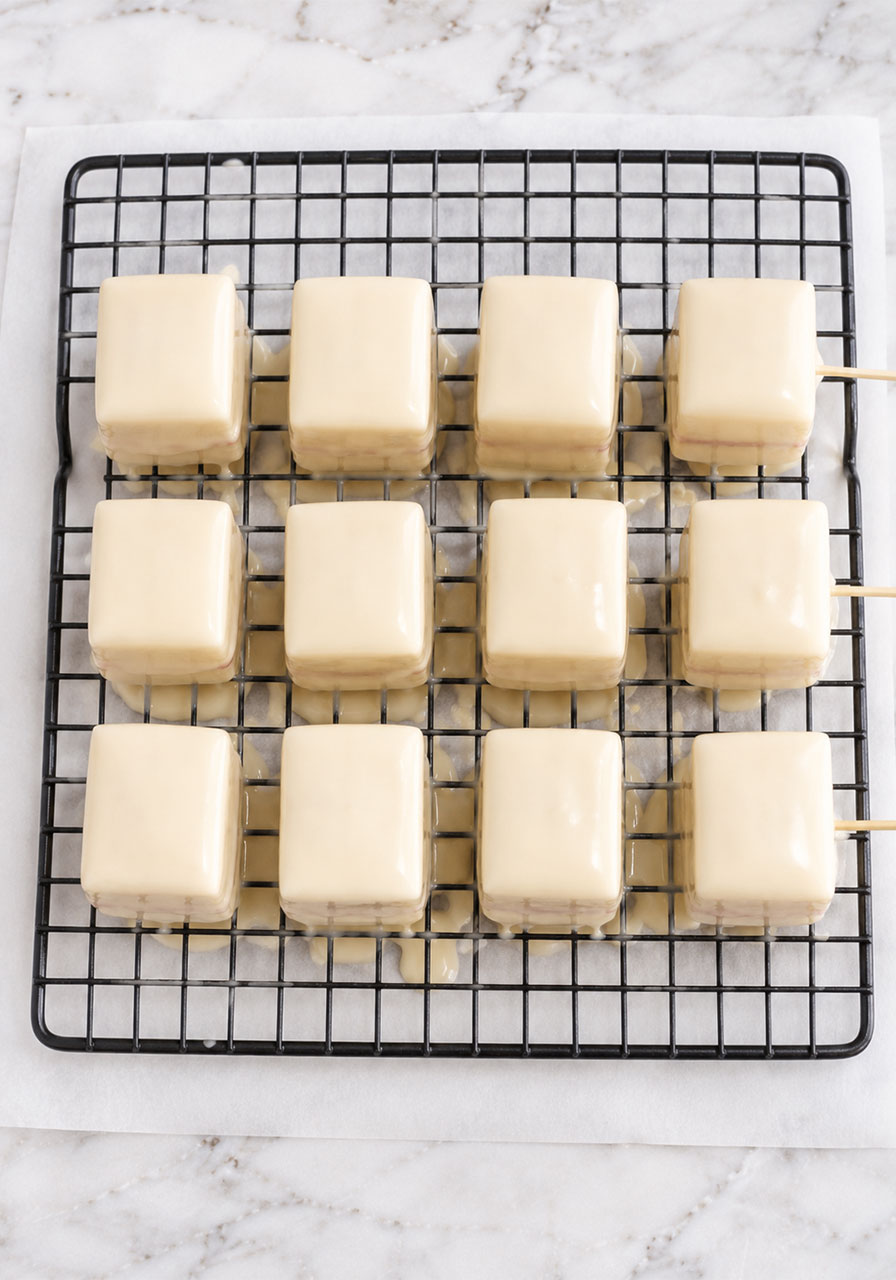
Either way, the excess icing drips down onto your parchment below and can be collected, re-melted, and used again. Zero waste, I love it!
If you’re adding sprinkles or other decorations that need to stick, do it NOW before the icing sets. And because the cake is cold, the icing sets up very quickly – usually just a few minutes.
Pro Tips for Perfect Petit Fours
I’ve made these more times than I can count, and these tips have saved me so many times:
Room temperature ingredients matter. Make sure your butter, eggs, cream cheese, and sour cream are all at room temperature before you start the cake batter. It makes a huge difference in texture.
Don’t rush the freezer step. Seriously – frozen cake is the secret to clean edges and easy dipping. Give it the full 30–60 minutes.
Keep your icing warm. Turn the heat down under your double boiler, but keep it simmering. The icing sets up fast when it cools, and you want it fluid and pourable the whole time.
Spread the filling thin. A thick layer of fruit filling makes the cake layers slide around and is harder to handle. A thin, even spread is all you need.
Use almond bark or white chocolate bars – not white chocolate chips – for the icing. Chips don’t melt smoothly and will make your icing lumpy.
No Agbay? No problem. Divide the cake into four smaller sections before you torte it. Splitting a smaller piece with a serrated knife is so much easier than trying to split a full sheet cake.
Making just a partial batch? Use part of the sheet, then wrap and freeze the remaining cake. It keeps for up to 3–4 weeks in the freezer!
How to Decorate Your Petit Fours
This is where you get to make them truly yours! Here are some gorgeous decoration ideas:
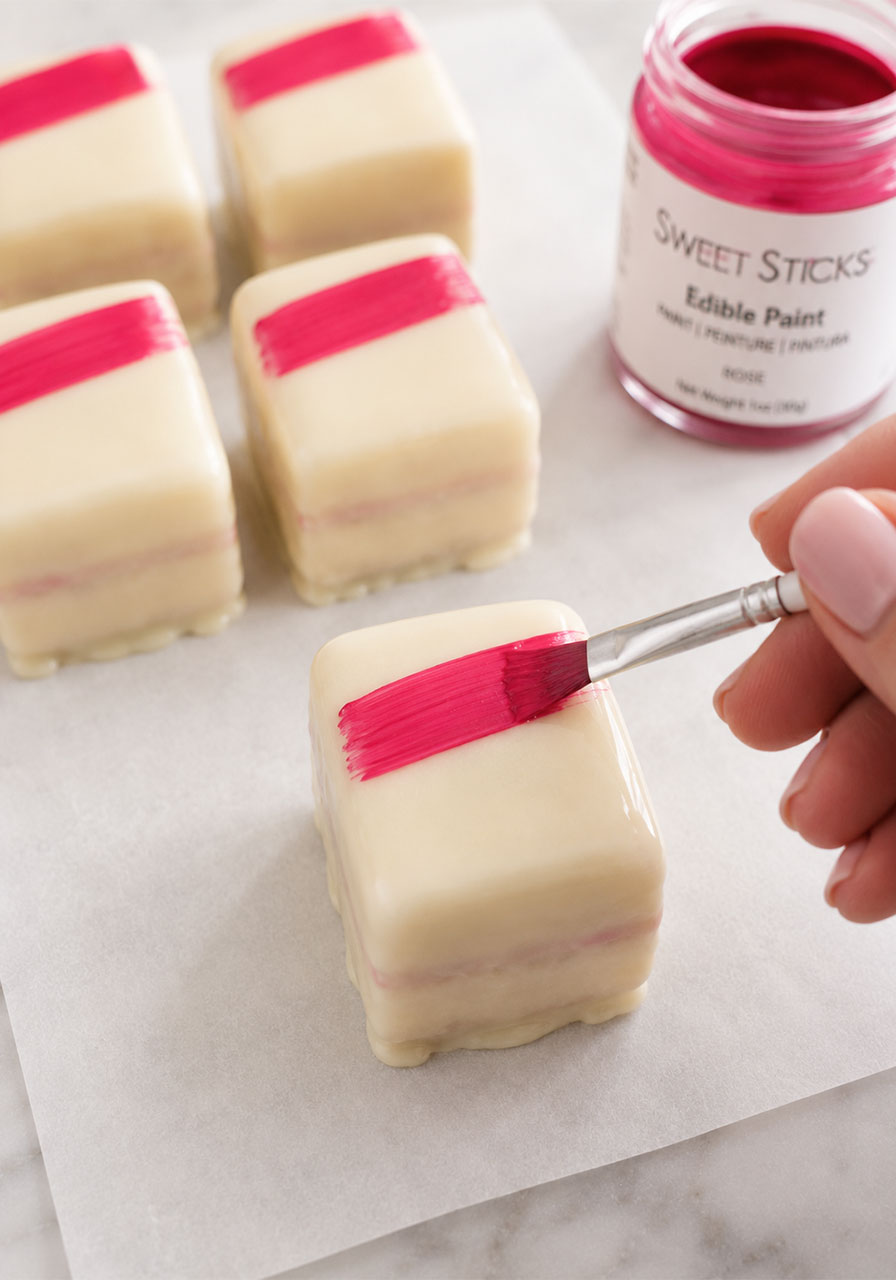
Brush stroke of color – My personal favorite! Use edible paint (like Sweet Sticks Edible Paints) to swipe a streak of gold, pink, or any color across one side. It looks incredibly elegant and takes just seconds to do.
Fondant decorations – Small fondant bows, flowers, or leaves pressed gently onto the iced top look stunning at weddings and formal events.
Buttercream or royal icing flowers – Pipe tiny flowers on top for a garden-party vibe. So pretty!
Monograms or initials – Custom chocolate or fondant letters make petit fours feel incredibly personalized for showers and weddings.
Drizzle of colored icing – Tint a little extra icing with gel food coloring and drizzle it over the top for a simple, modern touch.
Sprinkles – Add these right after dipping, before the icing sets. Festive, fun, and effortless!
Wafer paper accents – Wafer paper butterflies, flowers, or cut shapes placed on top look absolutely dreamy.
How Many Petit Fours Does This Recipe Make?
One batch baked in a 13×18-inch sheet pan yields approximately 84 petit fours at 1.25-inch squares.
Cut them slightly larger? You’ll get around 60–70. Cut them at 1-inch squares and trim minimally? You could get up to 130 from a single batch.
That means this recipe is perfect for large events – and if you’re feeding a smaller crowd, you can freeze the extra uncut cake for up to 3–4 weeks.
Serving Tips
Petit fours are best served at room temperature. If they’ve been in the fridge, pull them out at least 30 minutes before serving. If they were frozen, thaw them in the fridge overnight, then let them sit at room temperature for about an hour before the party.
For presentation, I love placing each petit four in its own small candy cup. It makes them look like they came from a fancy bakery – and they will absolutely impress every single guest who picks one up.
Arrange them on a tiered stand, a rectangular platter, or scattered across a dessert bar. They photograph beautifully too, so set up that dessert table shot!
How to Store Petit Fours
At room temperature: Fine for a few hours during a party, but not ideal for overnight storage.
In the refrigerator: Store in an airtight container for up to one week. Bring to room temperature before serving.
In the freezer: Fully decorated petit fours freeze beautifully for up to 2 months in a freezer-safe container. Thaw overnight in the fridge, then bring to room temperature before serving.
Make-Ahead Tips
One of the best things about this recipe is how make-ahead friendly it is. Here are two great approaches:
Option 1: Bake, fill, and frost the whole sheet cake. Wrap it tightly and freeze for up to 2 months. When you’re ready, thaw overnight in the fridge, then cut, dip, and decorate.
Option 2: Cut and ice all the petit fours, then freeze them (without delicate decorations). Thaw before the party and add your final decorations fresh.
I always recommend making the raspberry filling 1–2 days ahead of time if you’re going the homemade route. It takes the pressure off the day you’re baking!
Christmas Petit Fours – A Bonus Idea!
Want to make these extra festive for the holidays? Here’s what I do: bake two sheet cakes – one with red batter and one with green batter. Then mix and match the layers so each petit four has one red layer and one green layer inside. Finish them with a brush stroke of gold edible paint on the outside.
They’re absolutely stunning on a Christmas dessert table and have become one of my top-selling holiday treats. Your guests won’t be able to resist picking them up just to see the colorful surprise inside!
Frequently Asked Questions
Can petit fours be made ahead of time?
Yes! You can make them days in advance and refrigerate, or weeks in advance and freeze. They hold up incredibly well.
Can you freeze petit fours?
Absolutely. Finished petit fours freeze for up to 2 months in a freezer-safe container. You can also freeze the assembled (but uncut) cake for up to 2 months.
Can I use a box cake mix instead of scratch?
Technically you could, but I’d really encourage you to try this scratch recipe. The dense, buttery texture is what makes these petit fours so special – a box mix will give you a softer cake that doesn’t hold its shape as well when cut and dipped.
Why is my icing setting too fast?
Your cake squares are too cold, or your icing cooled down. Keep your remaining cake squares in the freezer (not the fridge), and keep your icing over a low heat to stay fluid.
Can I use different flavors?
Of course! Lemon curd is a fantastic filling alternative. For the icing, swapping the almond extract for more vanilla gives a more neutral flavor that pairs with almost anything.
Perfect Petit Fours
Ingredients
For the cake:
- 2¾ cups sugar
- ¾ cup salted butter, softened
- ¾ cup shortening (Crisco)
- 2 teaspoons vanilla extract
- 5 large eggs, room temperature
- 3 cups all-purpose flour
- 1 teaspoon baking powder
- 1 teaspoon salt
- ¾ cup evaporated milk
- ¼ cup full-fat sour cream
For the cream cheese frosting:
- ½ cup salted butter (1 stick), room temperature
- ¼ cup Crisco shortening
- 4 oz cream cheese, room temperature
- 1.5 lbs powdered sugar
- ½ tablespoon vanilla extract
- 1–2 tablespoons milk
For the filling:
- Homemade raspberry filling, or store-bought raspberry jam
For the petit four icing:
- 6 cups powdered sugar, sifted
- ½ cup water
- 2 tablespoons light corn syrup
- 1 teaspoon almond extract
- 1 teaspoon vanilla extract
- ¾ cup (6 oz) chopped white chocolate or almond bark
Instructions
Make the cake:
- Preheat oven to 325°F. Line a 13×18-inch half sheet pan with parchment paper and spray the edges with non-stick baking spray.
- In a large bowl, cream together the sugar, butter, and shortening until smooth. Beat in the vanilla. Add eggs one at a time, beating until fluffy.
- In a separate bowl, sift or whisk together the flour, baking powder, and salt.
- Alternately add the flour mixture and evaporated milk to the butter mixture. Beat on medium speed for 2 minutes. Fold in the sour cream.
- Pour batter onto the prepared pan, spreading evenly. Bake 25–35 minutes, until a toothpick comes out clean. Check at 25 minutes. Cool completely.
Make the cream cheese frosting:
- Cream the butter and Crisco together on low speed until smooth and creamy.
- Add vanilla and cream cheese; mix until very smooth.
- Gradually add powdered sugar until combined. Add milk 1 tablespoon at a time until you reach a spreadable consistency.
Assemble the cake:
- Flip the cooled cake onto parchment paper. Peel off the baked-on parchment.
- Torte (split horizontally) the cake into two thin layers using a cake leveler or long serrated knife. Slide a flexible cutting board under the top layer and lift it off onto a separate sheet of parchment.
- Spread a thin layer of raspberry filling on the cut side of the bottom layer. Spread a thin layer of cream cheese frosting on top of the filling.
- Place the top cake layer back on, cut-side down, aligning the edges.
- Spread a smooth, even layer of cream cheese frosting over the entire top of the assembled cake. Level it carefully – the smoother the top, the smoother the final icing.
- Trim all four edges of the cake with a sharp knife.
- Freeze the cake for 30–60 minutes.
Make the petit four icing:
- Set up a double boiler: bring a pot of water to a gentle boil, then set a large glass bowl on top.
- In the glass bowl, whisk together the powdered sugar, water, corn syrup, almond extract, and vanilla extract until smooth. The icing should be thin enough to drizzle but not so thin it runs off completely. It's ready at approximately 92°F.
- Add the chopped white chocolate or almond bark and stir until fully melted and smooth. Keep warm over low heat.
Ice the petit fours:
- Line a baking sheet with parchment or a silicone mat. Place a wire cooling rack on top.
- Remove the frozen cake from the freezer. Use a sharp knife to cut into 1 to 1.25-inch squares.
- Work in small batches of 10–12 squares at a time, keeping the rest in the freezer.
- Ice each square using the skewer dipping method (insert a skewer into the side, dip in icing, place on rack, twist skewer out) or the ladling method (place squares on rack and ladle icing over the top and sides).
- Add any sprinkles or decorations before the icing sets. Decorations that don't need to stick (painted accents, fondant pieces) can be added after the icing is firm.
- Let the icing set fully (just a few minutes, since the cake is cold), then transfer to candy cups or a serving platter.
Notes
- Do NOT skip the freezing step – frozen cake cuts cleanly and dips perfectly.
- Use almond bark or white chocolate bars, not white chocolate chips, for the icing.
- Spread the raspberry filling in a thin, even layer – a thick layer makes the cake slide.
- Make homemade raspberry filling 1–2 days ahead to save time on baking day.
- No Agbay? Cut the cake into four sections before torting for easier handling.
- The iced petit fours can be refrigerated for up to 1 week or frozen for up to 2 months.