If you’ve ever tried to flip an omelet at a campsite while half-asleep and still in your pajamas… you already know the struggle is real.
Cracked eggs rolling off a tilted pan. Filling landing in the fire. The whole group standing around watching you fumble while their coffee gets cold.
Yeah. We’ve been there.
That’s exactly why this Omelet in a Bag recipe is about to become your new best camping companion. It’s the breakfast hack you didn’t know you needed – and once you try it, you’ll honestly wonder how you ever survived camp mornings without it.
The best part? Every single person gets to build their own personalized omelet, all cooked at the same time, with zero fuss and zero mess. Yes, really.
Let’s get into it!
Why You’re Going to Absolutely Love This Recipe
This isn’t just a cute little cooking trick. It’s a genuine game-changer for anyone who has to feed a group of hungry campers in the morning.
Here’s why this method is so brilliant:
Everyone customizes their own bag. Picky eaters? No problem. Your friend who hates mushrooms and your husband who wants everything in there? Both handled.
You cook all the omelets at the same time. No standing over a hot stove for 45 minutes making one omelet at a time while everyone else eats.
Cleanup is practically nothing. You’re cooking in a bag. The bag goes in the trash. Done.
It works at home too! Busy weekends, big family brunches, slumber party mornings – this method is a lifesaver anywhere you need to feed a crowd fast.
Convinced yet? Good. Let’s talk about what you’ll need.


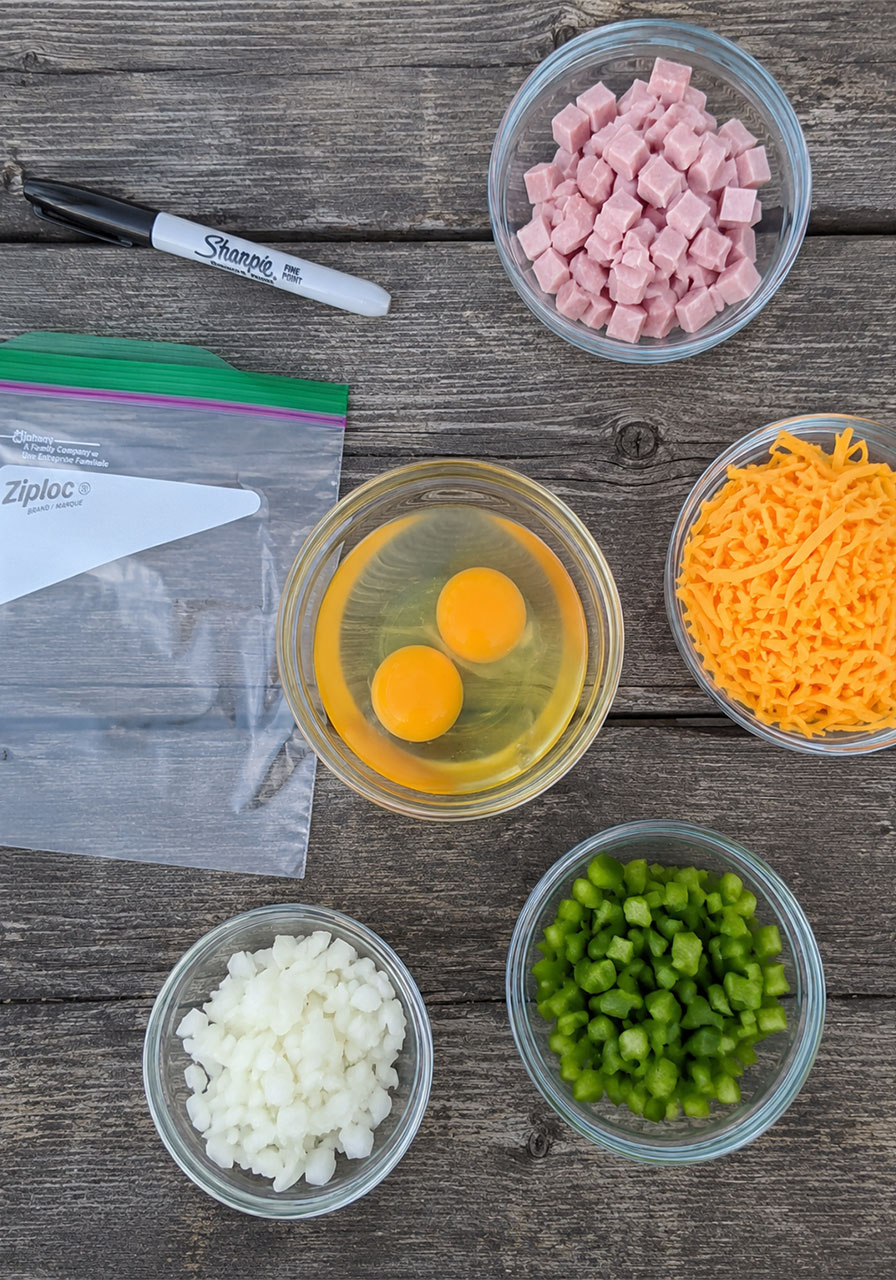
What You’ll Need
The beauty of this recipe is in its simplicity. Here’s the basic shopping list:
- Zip-top sandwich bags (one per person) – use a BPA-free brand like Ziploc
- 2 large eggs per omelet
- Your choice of mix-ins (more on this below!)
- Optional toppings for serving
- A large pot and enough water to submerge the bags
- A heat source – campfire, camp stove, or your kitchen stove all work great
That’s it. No special equipment, no fancy tools. Just a pot and a bag.
The Best Mix-In Ideas for Your Omelet Bag
This is where the fun really starts. Think of the bag as a blank canvas and let everyone go wild with their fillings.
Quick note before you load up those bags: Make sure all meats are pre-cooked before they go in. You can also pre-cook harder veggies like onions and peppers if you prefer a softer texture in the finished omelet.
Need some inspiration? Here are some crowd-favorite combinations to try:
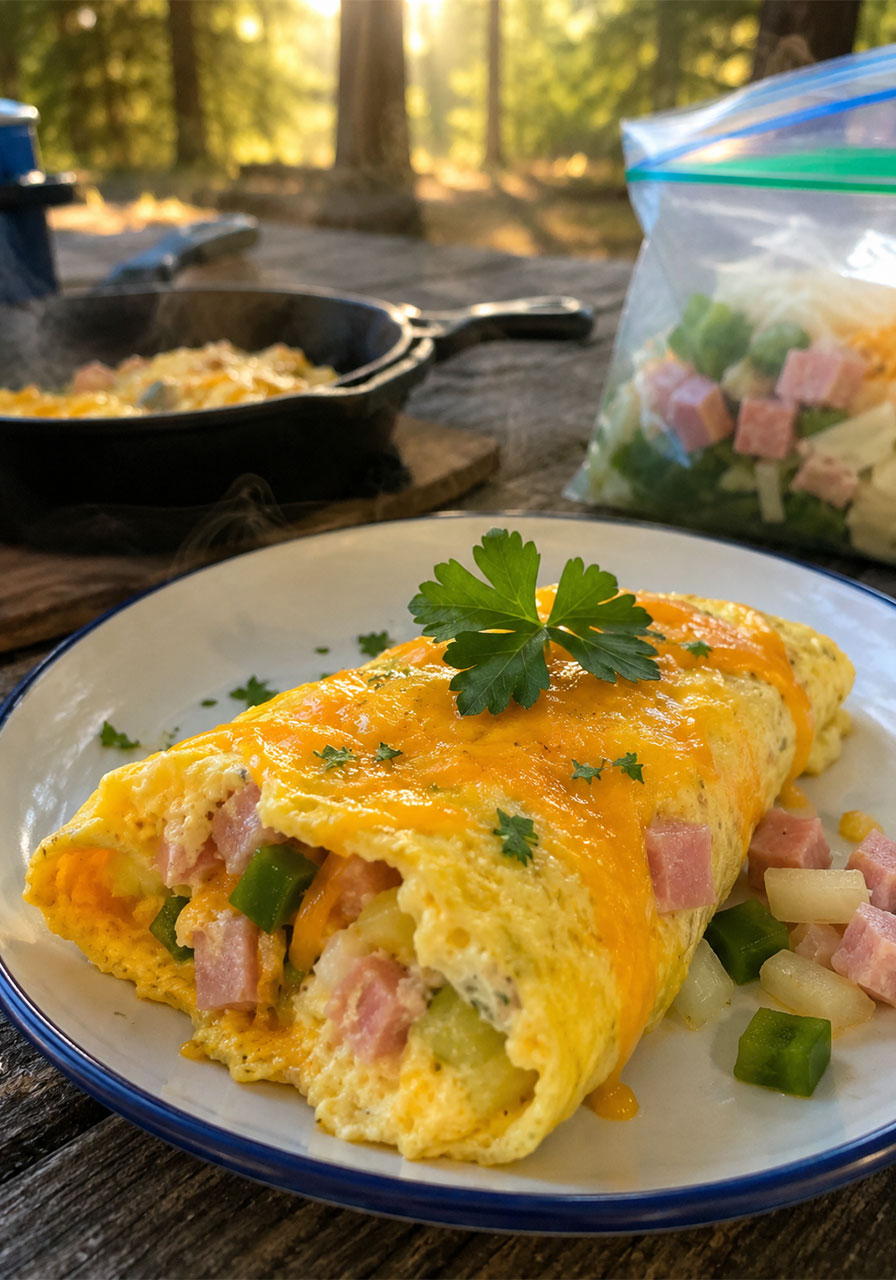
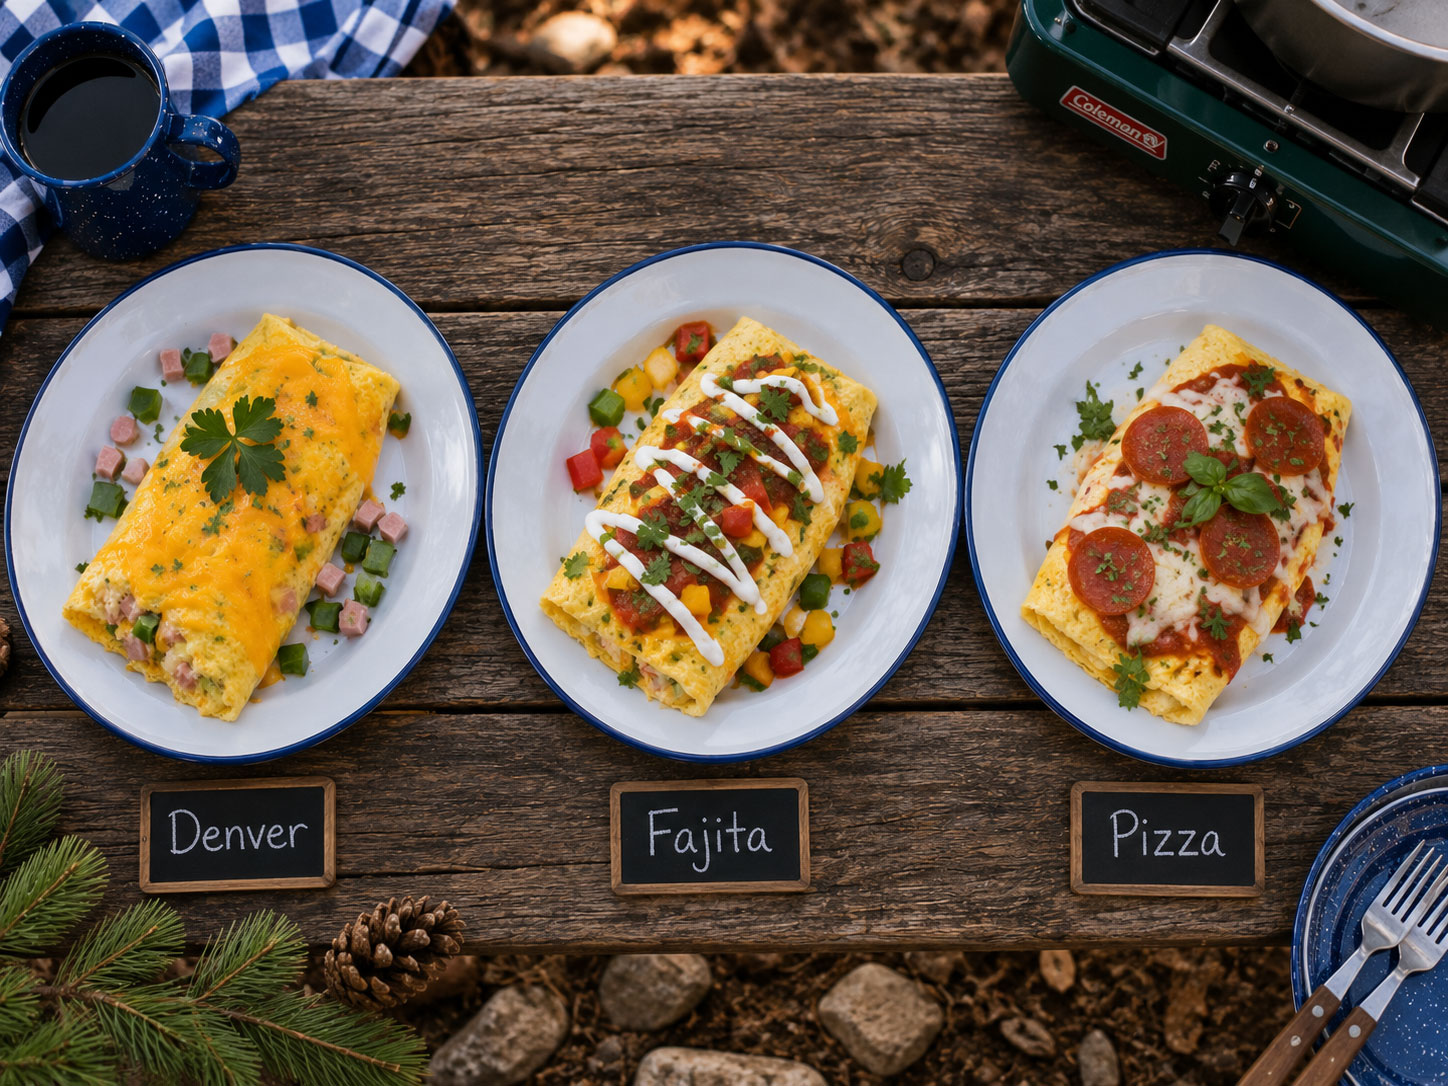
Denver Omelet
Ham, onion, green pepper, cheddar cheese. The classic. Never fails. Always disappears first.
Farmer’s Omelet
Bacon, ham, mushrooms, green pepper, onion, cheese. This one is for the person at camp who woke up starving and means business.
Chicken Fajita Omelet
Chopped pre-cooked chicken, salsa, onion, green pepper, cheese. Top with more salsa and sour cream when serving. Seriously, try this one – it’s so good.
Garden Omelet
Green pepper, onion, mushrooms, tomatoes, cheese. Light, fresh, and perfect if you’re trying to balance out those s’mores from last night.
Meat Lover’s Omelet
Bacon, pork sausage, ham, green pepper, onion, cheese. Basically a full breakfast inside one egg. No further explanation needed.
Philly Cheesesteak Omelet
Thinly sliced beef, onion, green pepper, cheese whiz, provolone. This one always gets the “wait… in an omelet?!” reaction and then everyone wants a bite.
Mushroom and Sausage Omelet
Pork sausage, mushrooms, cheese. Simple, savory, satisfying. A solid go-to for the no-fuss camper.
Pizza Omelet
Italian sausage, pepperoni, pizza sauce, mozzarella cheese. Yes, this is as fun as it sounds. Kids will lose their minds over it.
Alfredo Omelet
Spinach, tomatoes, Alfredo sauce, parmesan. Surprisingly elegant for something cooked in a bag at a campsite!
Simple Spinach and Tomato
Just spinach and tomato. Sometimes the lightest option is the most refreshing one after a big hike the day before.
Of course, these are just starting points. If your family has a combination that works for them, go ahead and throw it in the bag. That’s the whole point – it’s completely yours to customize.
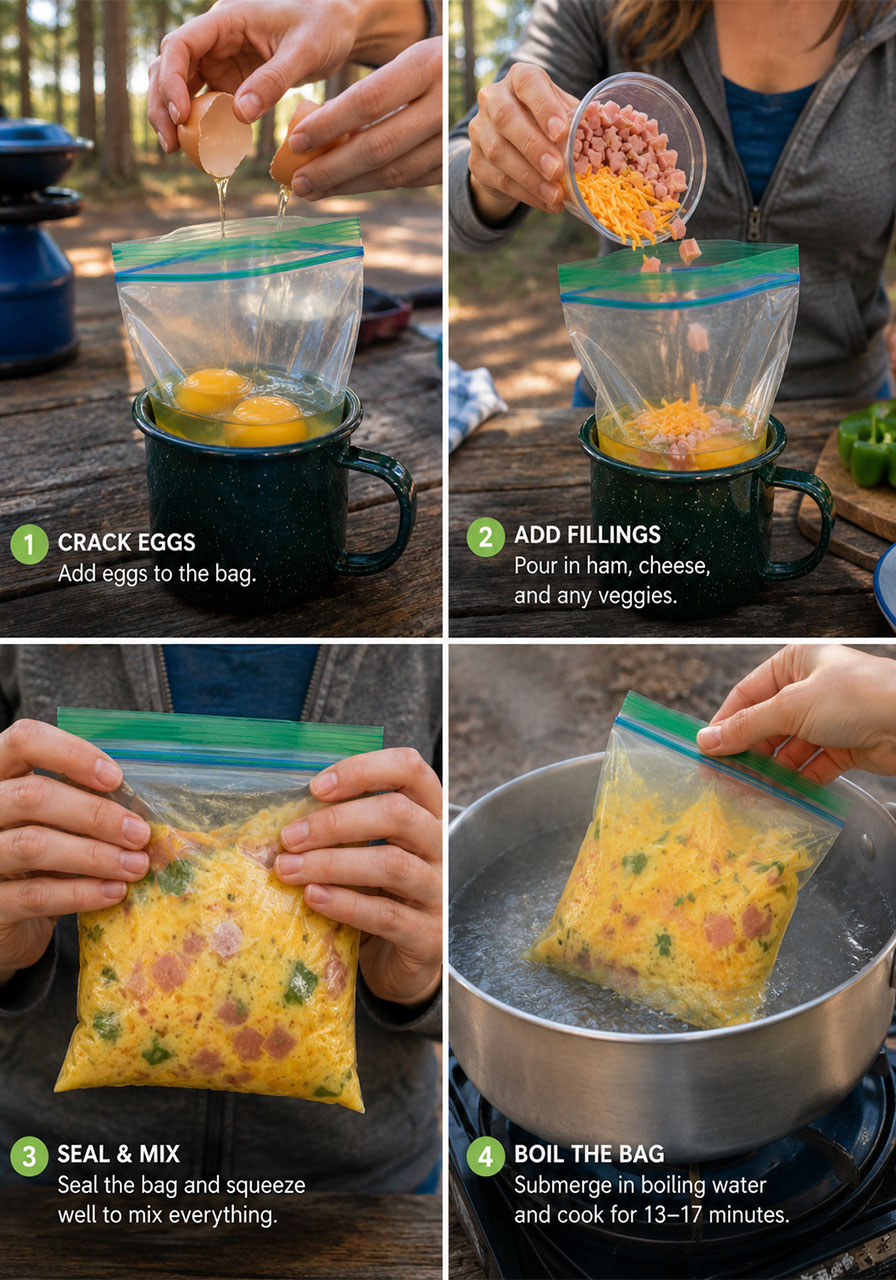
How to Make an Omelet in a Bag (Step-by-Step)
Alright, here’s where the magic happens. Follow these steps and you’ll have perfectly cooked, personalized omelets ready in about 13 minutes.
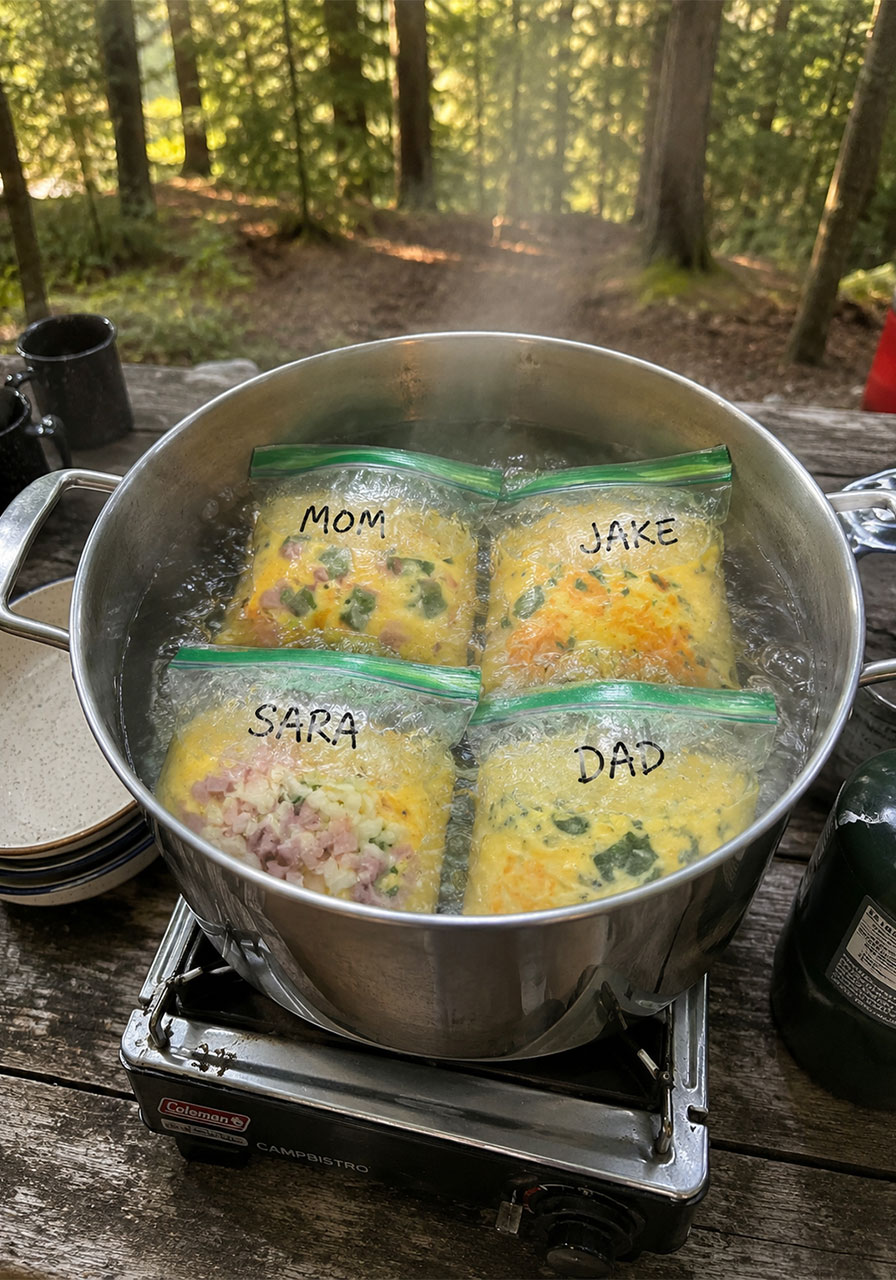
1. Bring a large pot of water to a boil. You’ll want enough water so the bags can be fully submerged. Set it on your camp stove or over the campfire and let it get to a rolling boil.
2. Write names on the bags. Especially important when you’re feeding a group! Use a marker to label each bag so everyone gets their own creation.
3. Crack 2 eggs into each bag. Then add each person’s chosen mix-ins directly into the bag.
4. Seal the bag and mix everything together. Zip the top almost all the way, then use your hands to squish and squeeze the bag until the eggs and fillings are fully combined. Then press out as much air as possible, seal completely, and push the mixture down toward the bottom of the bag.
5. Place the sealed bags in the boiling water for exactly 13 minutes. You can cook multiple bags at once – just make sure they’re all fully submerged. This is the part where you get to sit down and enjoy your coffee!
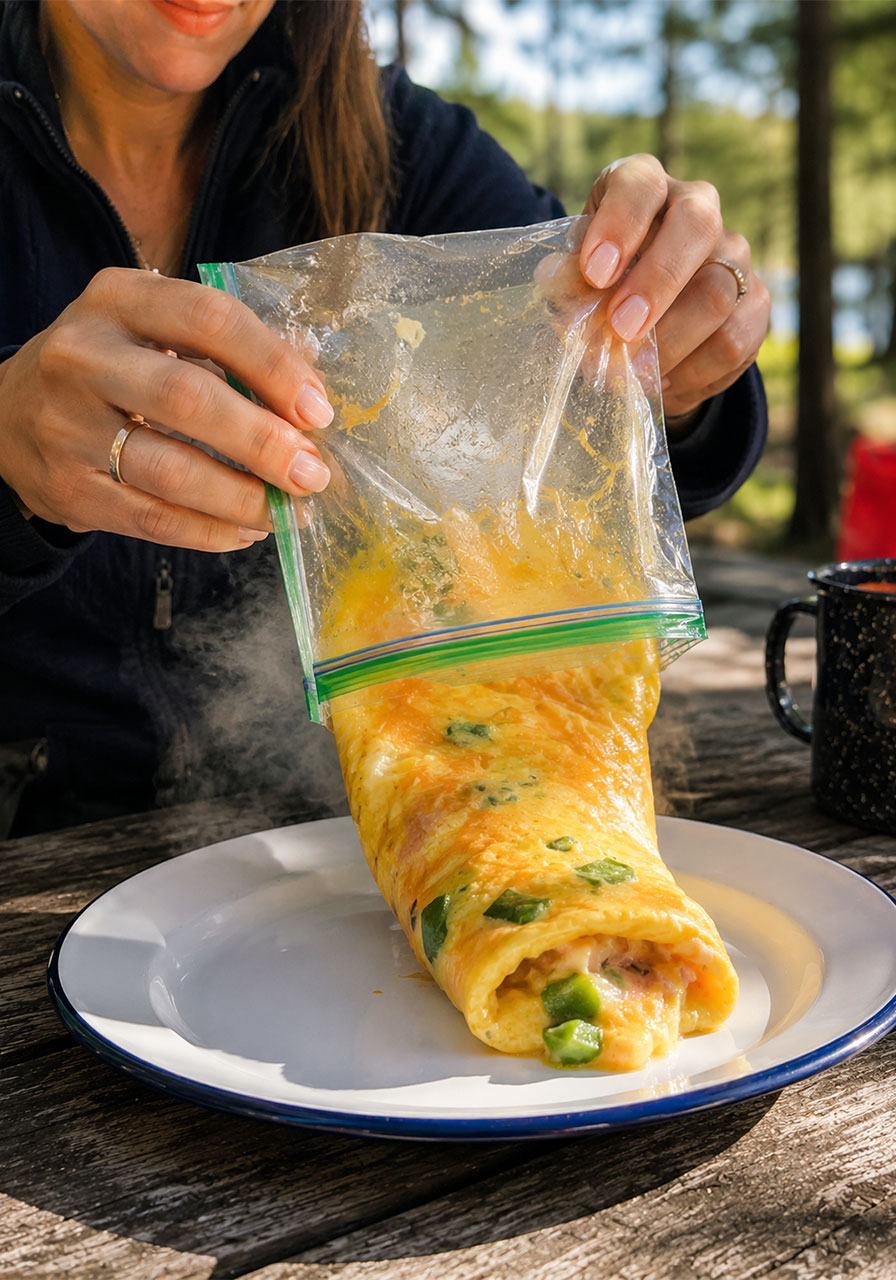
6. Carefully remove the bags from the water. Use tongs – they will be hot! Open the top of the bag, and jiggle the omelet onto a plate. It’ll slide right out like a little egg roll of joy.
7. Add your toppings and dig in! Sour cream, salsa, hot sauce, extra cheese – go for it. You earned it.
Frequently Asked Questions
What if my omelet comes out runny?
Just pop the bag back in the boiling water for a few extra minutes. The 13-minute mark works perfectly for most omelets, but if you packed your bag extra full, it might need a little longer.
What if the omelet sticks to the bag?
Same fix – give it another minute or two in the boiling water. The omelet firms up as it finishes cooking, which makes it slide out much more easily.
Is it safe to boil a plastic zip-top bag?
Yes – as long as you use a BPA-free brand like Ziploc. This is not the place to reach for the generic dollar store bags. Stick with a trusted BPA-free brand and you’re completely good to go.
Can I make these at home?
Absolutely! This method is just as amazing in your kitchen as it is at camp. It’s especially handy when you’re hosting a big brunch and need to feed a crowd all at once. No more standing over the stove – just drop the bags in and mingle with your guests!
Can kids make their own bags?
Yes! This is one of those recipes kids genuinely love to be involved in. Let them choose their fillings and seal up their own bag. It makes them way more excited to eat breakfast, too.
Can I prep the bags ahead of time?
You can prep everything except the eggs the night before. Chop your veggies, cook your meats, and have everything ready to go in individual containers. In the morning, just crack the eggs in, add the fillings, seal, and boil. Breakfast in 15 minutes flat.
Tips to Make Your Omelet in a Bag Even Better
A few little tricks that make a big difference:
Don’t overfill the bags. Stick to 2 eggs and a reasonable amount of mix-ins. Overstuffed bags can take longer to cook and get a bit messy.
Get all the air out. The more air you remove before sealing, the better the omelet will cook. Squish that bag!
Pre-cook your meats. Raw meat won’t cook through properly in 13 minutes. Always use pre-cooked bacon, ham, sausage, and chicken.
Have toppings ready to go. The omelets come out fast, so have your sour cream, salsa, and hot sauce lined up and ready. Makes serving a crowd so much smoother.
Label every single bag. Sounds obvious until you’re holding four identical bags over a boiling pot. Trust the label system!
How to Serve Omelet in a Bag at Your Camping Party
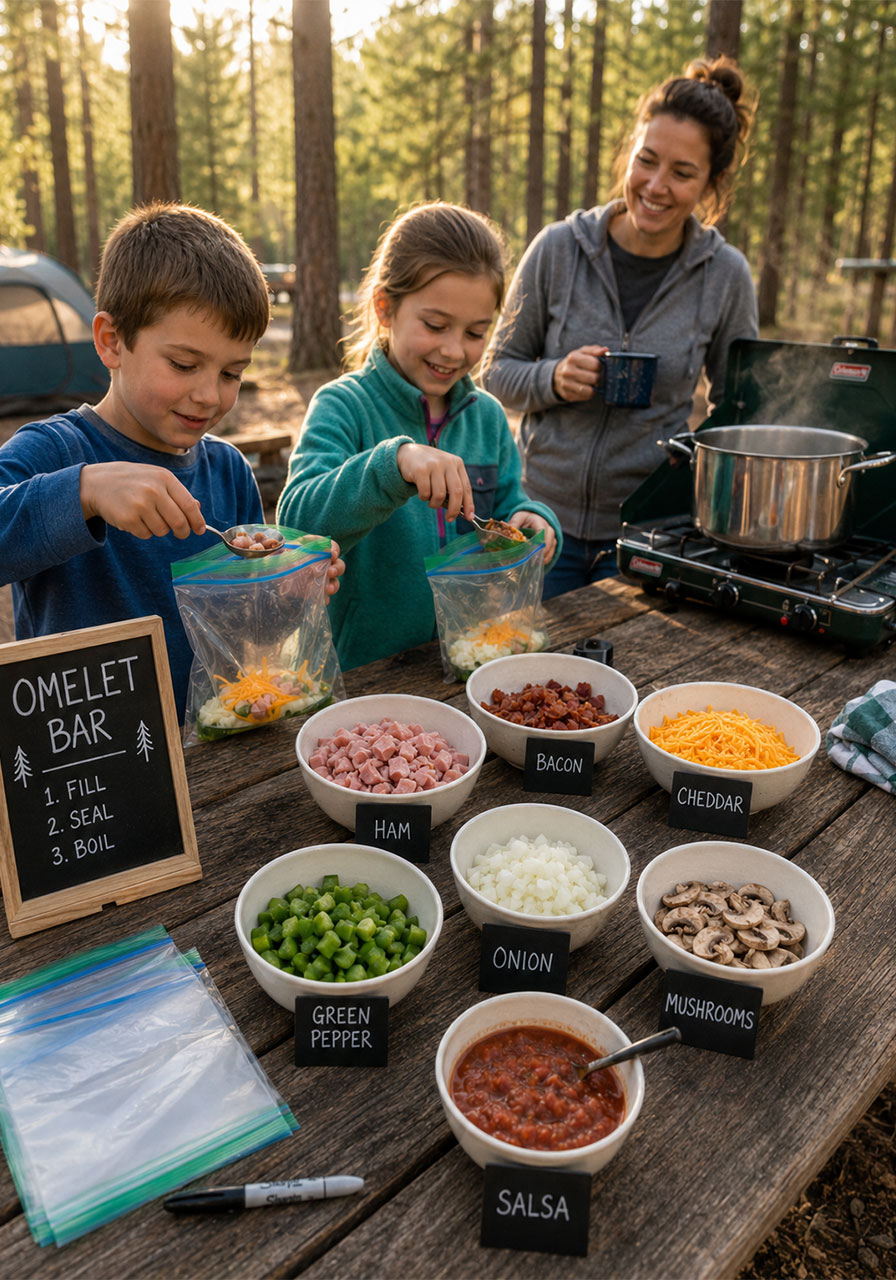
One of the best things about this recipe is how naturally it turns breakfast into a fun, interactive experience for everyone at camp.
Set up a little “omelet bar” with all the filling options laid out in small bowls or containers. Let everyone build and seal their own bag before the water boils. Then when the timer goes off, it’s an exciting little moment – everyone unwrapping their custom creation!
Pair these omelets with some campfire hash browns, a big fruit salad, and some strong coffee and you have a full breakfast spread that feels so much more special than it was to pull together. That’s the magic of a recipe this easy – it gives you back time to actually enjoy your camping trip.
Great Occasions to Make Omelet in a Bag
Yes, this recipe was born for camping – but don’t sleep on it for other situations too:
Camping trips – obviously the MVP here
Weekend cabin getaways with a big group of friends
Slumber parties – let the kids make their own breakfast in the morning
Family brunch at home when you need to feed a crowd without losing your mind
Holiday mornings when everyone’s running around and you need breakfast to just… handle itself
Cooking with kids – it’s hands-on, fun, and practically foolproof
Wherever you’re headed, this recipe is coming with you.
Final Thoughts
Look, not every camping breakfast needs to be complicated to be memorable. In fact, the best ones usually aren’t.
This Omelet in a Bag recipe is the kind of thing that becomes a tradition. The kind of breakfast people actually look forward to on camping mornings. The kind of thing you’ll make once, and then immediately text your best friend about.
It’s fast, it’s flexible, it’s practically mess-free – and it makes you look like the most organized, thoughtful host at the campsite. We’re here for it. You’re going to love it.
Happy camping, happy eating, and happy hosting!
Omelet in a Bag
Equipment
- 1 zip-top sandwich bag per person (BPA-free brand like Ziploc recommended)
- Large pot
- Tongs
- Marker for labeling bags
Ingredients
- 2 large eggs
- Desired mix-ins (see suggestions below)
- Optional toppings for serving
Mix-In Suggestions
- Denver: Ham, onion, green pepper, cheddar cheese
- Farmer: Bacon, ham, mushrooms, green pepper, onion, cheese
- Chicken Fajita: Chopped cooked chicken, salsa, onion, green pepper, cheese. Top with salsa and sour cream.
- Garden: Green pepper, onion, mushrooms, tomatoes, cheese
- Meat Lover's: Bacon, pork sausage, ham, green pepper, onion, cheese
- Philly Cheesesteak: Thinly sliced beef, onion, green pepper, cheese whiz, provolone
- Mushroom and Sausage: Pork sausage, mushrooms, cheese
- Pizza: Italian sausage, pepperoni, pizza sauce, cheese
- Alfredo: Spinach, tomatoes, Alfredo sauce, cheese
- Simple: Spinach and tomato
Instructions
- Bring a large pot of water to a rolling boil.
- While the water heats, write each person's name on their bag using a marker.
- Crack 2 eggs into each labeled bag. Add desired mix-ins.
- Seal the bag most of the way, then use your hands to squish and mix everything together thoroughly. Press out as much air as possible, seal completely, and push the mixture to the bottom of the bag.
- Once the water is boiling, place the sealed bags in the water. Make sure they are fully submerged. Cook for exactly 13 minutes.
- Using tongs, carefully remove the bags from the hot water. Open the top of the bag and jiggle the omelet out onto a serving plate – it will slide right out.
- Add any desired toppings and serve immediately.
Notes
- If the omelet comes out runny, return the sealed bag to boiling water for a few extra minutes.
- If the omelet sticks to the bag, boil it a little longer – it will release more easily as it firms up.
- Always use a trusted BPA-free bag brand. Do not use generic bags for boiling.
- You can cook multiple bags simultaneously in the same pot – great for large groups!
- Pre-chop and pre-cook all fillings the night before to make morning prep even faster.