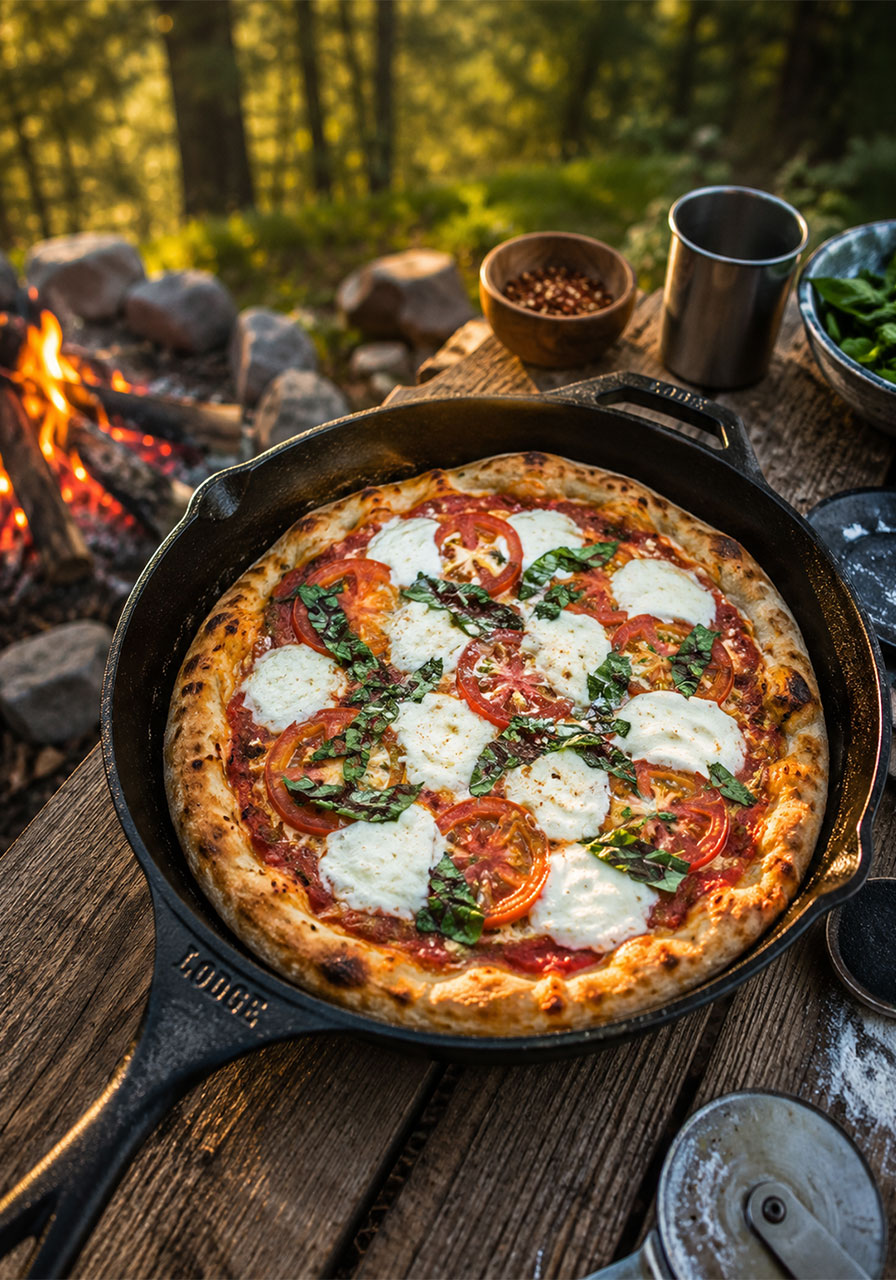
Hot, crispy, cheesy pizza – made from scratch – right at your campsite. Yes, we’re serious. And yes, it tastes just as incredible as it sounds.
If you’ve ever sat by a campfire and thought “I wish I could have pizza right now,” this post is basically written for you. Because not only is campfire pizza 100% doable, it’s actually one of the most fun, impressive, crowd-pleasing things you can serve at a camping trip, backyard gathering, or outdoor party.
Whether you’re planning a camping birthday party, a girls’ weekend in the woods, or just a cozy Friday night bonfire with your crew – this campfire pizza recipe is about to become your new go-to. Let’s get into it!
Why Campfire Pizza Is the Ultimate Outdoor Party Food
Let’s be honest: most camping food is either a hot dog or some version of a hot dog. And while we love a good s’more moment, when you’re feeding a group of people who actually want a real meal, you need something better.
Campfire pizza checks every single box. It’s filling, it’s customizable, and it makes you look like an absolute culinary genius in front of your friends – even though it’s genuinely easy to pull off.
The secret? A trusty cast iron skillet. That’s it. No pizza oven, no outdoor grill with a lid, no fancy equipment. Just a good skillet, a campfire (or a camp stove), and a little bit of confidence.
We’ve made this recipe more times than we can count, and every single time, the reaction is the same: “Wait… you made that here? From scratch?!”
Yes. Yes we did. And so can you.


What You’ll Need to Make Campfire Pizza
Before we get to the fun part, let’s talk supplies. The good news: you probably already have most of this at home, and everything packs easily into a cooler or camp bag.
For the Dough:
- 2 ½ cups all-purpose flour
- 1 packet rapid rise yeast
- 2 teaspoons salt
- 1 cup warm water
- 5 tablespoons olive oil (divided: 2 tbsp for the dough + 3 tbsp for the skillet)
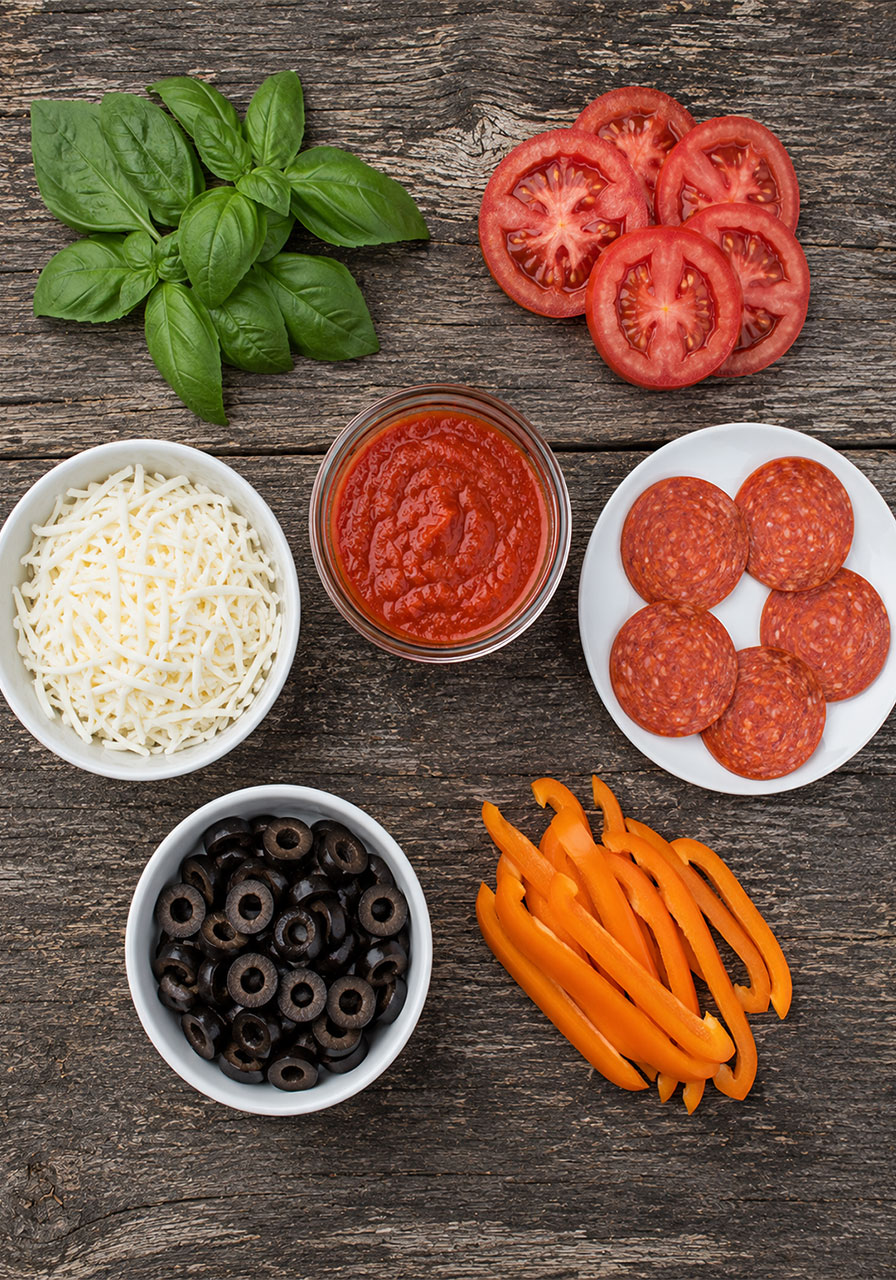
For the Toppings (your call!):
- Pizza sauce or marinara (a small jar works great)
- Shredded mozzarella or fresh mozzarella slices
- Fresh tomatoes, sliced
- Fresh basil
- Any other toppings you love – pepperoni, olives, bell peppers, mushrooms, you name it!
Equipment:
- 10″ or 12″ cast iron skillet (this is non-negotiable – it’s the magic tool that makes this whole thing work)
- Mixing bowl or camp pot
- Fork
- Tongs
- Cast iron lid or aluminum foil
- Cutting board
- Chef’s knife
- Heat-safe gloves or oven mitts
Pro Tip: Pack your dry ingredients (flour, yeast, salt) together in a zip-lock bag before you leave home. It saves space and means less to measure at the campsite!
Don’t Be Scared of the Yeast
We’re going to say this upfront because we know a lot of people read the word “yeast” and immediately close the tab. Please don’t close the tab.
Rapid rise yeast is genuinely foolproof. You don’t need to “proof” it or check the water temperature with a thermometer. You just mix it in with the dry ingredients, add warm (not boiling, just warm) water, stir it together, knead it a few times, and let it sit for 20 minutes.
That’s literally it. There’s no complicated fermentation process happening here. No timing disaster waiting to unfold. Just flour, water, yeast, and 20 minutes of doing absolutely nothing while it rises.
We promise – if you’ve ever made pancakes from scratch, you can make this dough.
Step-by-Step: How to Make Campfire Pizza
Step 1: Make the Dough
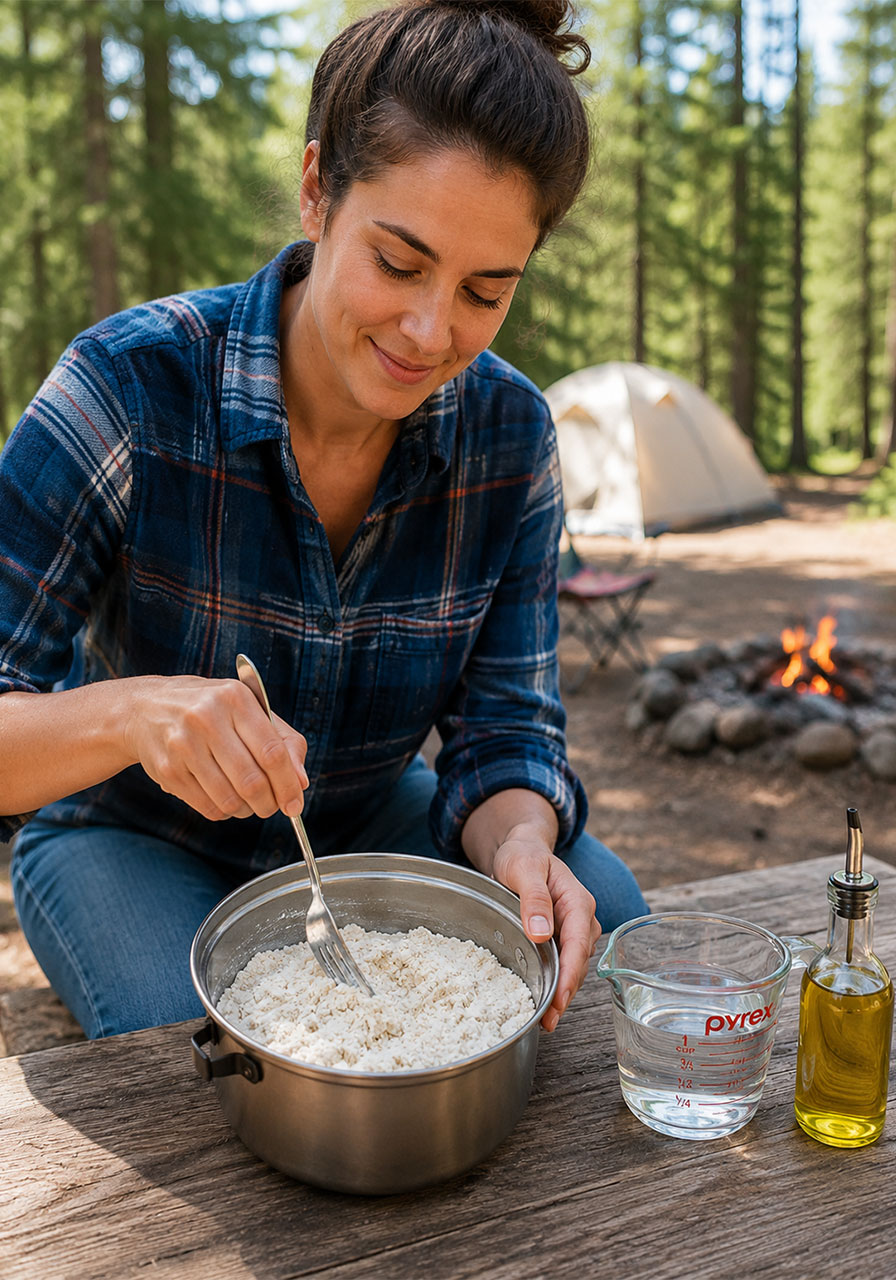
In your mixing bowl or camp pot, combine the flour, rapid rise yeast, and salt. Give it a quick stir with a fork to distribute everything evenly.
Add 1 cup of warm water and 2 tablespoons of olive oil to the dry ingredients. Mix with your fork until it starts coming together into a shaggy dough – it’ll look rough and messy at first, and that’s totally fine.
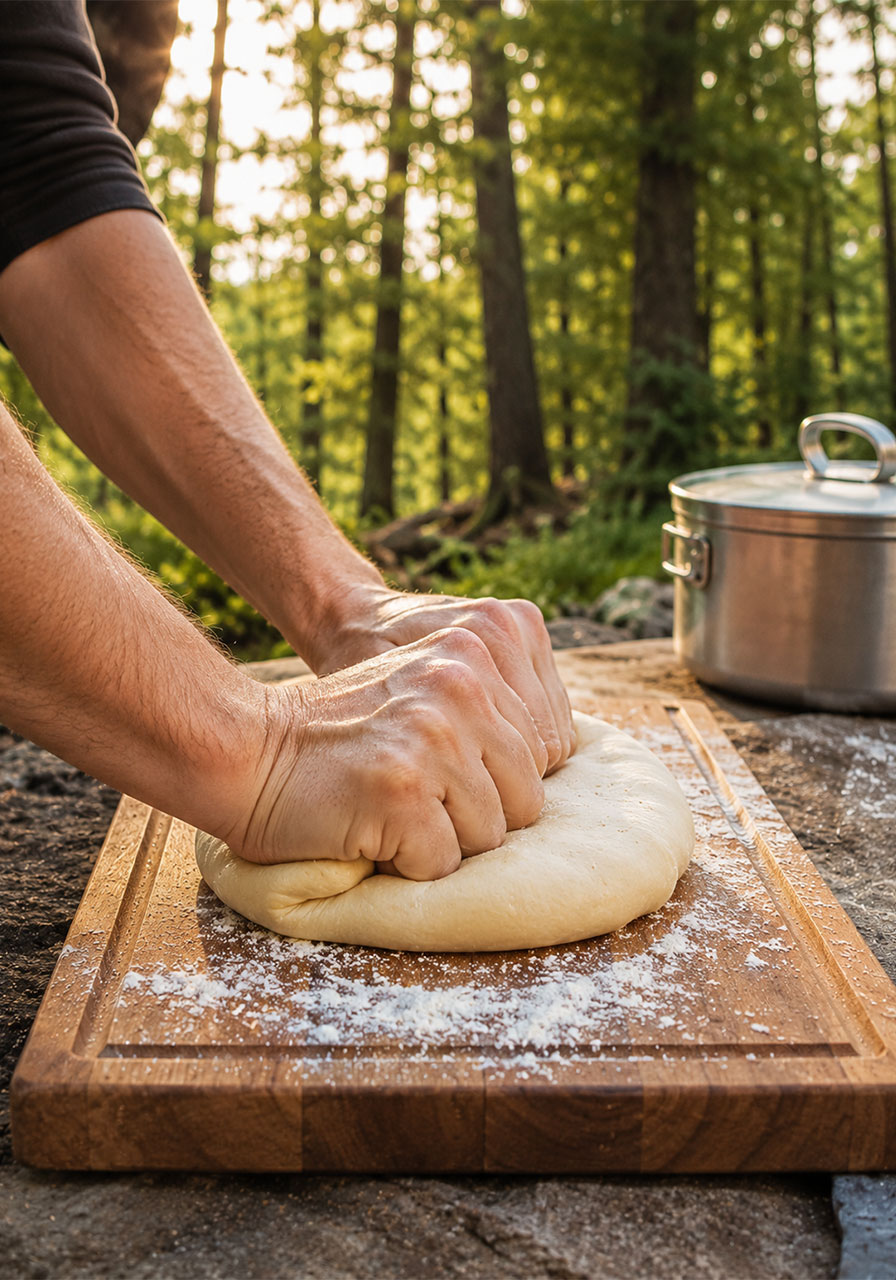
Once it starts clumping together, turn it out onto a lightly floured cutting board and knead it a few times with your hands until it forms a smooth ball. You don’t need to go crazy here – just a few folds and pushes until everything is incorporated.
Cover the dough loosely (a plate or plastic bag works great) and let it rest for 20 minutes. This is prime time to prep your toppings, pour yourself a drink, and enjoy the campfire vibes.
Step 2: Divide and Shape the Dough
After 20 minutes, uncover your dough – it should have puffed up slightly. Turn it onto your cutting board and divide it into two equal pieces. Each piece will become one pizza.
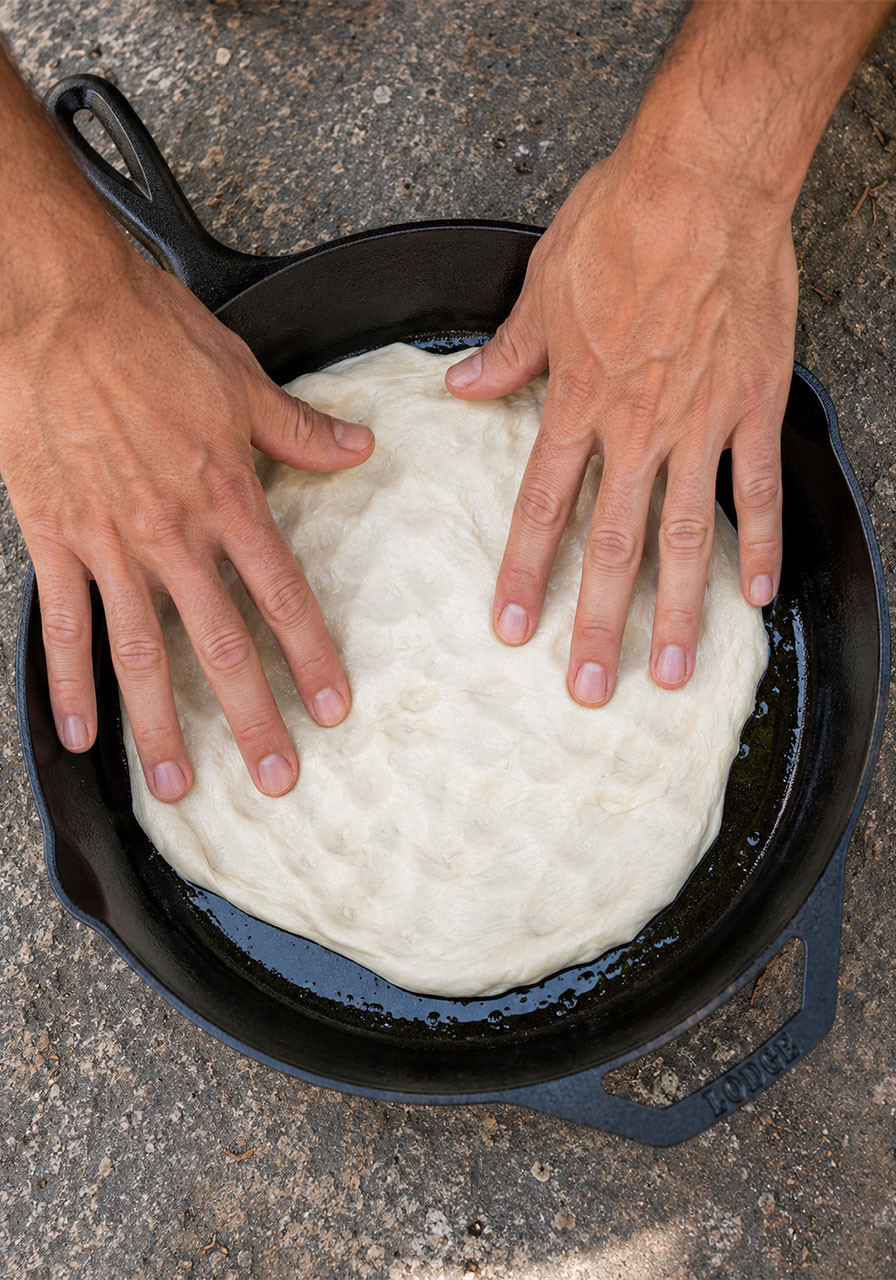
Drizzle about 1 tablespoon of olive oil into your cast iron skillet and swirl it around to coat the entire surface. Place one dough ball into the skillet and, using your fingertips, press and push the dough outward toward the edges until it roughly fills the pan.
Don’t stress about it looking perfect. Rustic, slightly uneven edges are 100% the campfire aesthetic.
Drizzle an extra ½ tablespoon of olive oil along the edge of the dough – this helps the crust get beautifully golden and crispy.
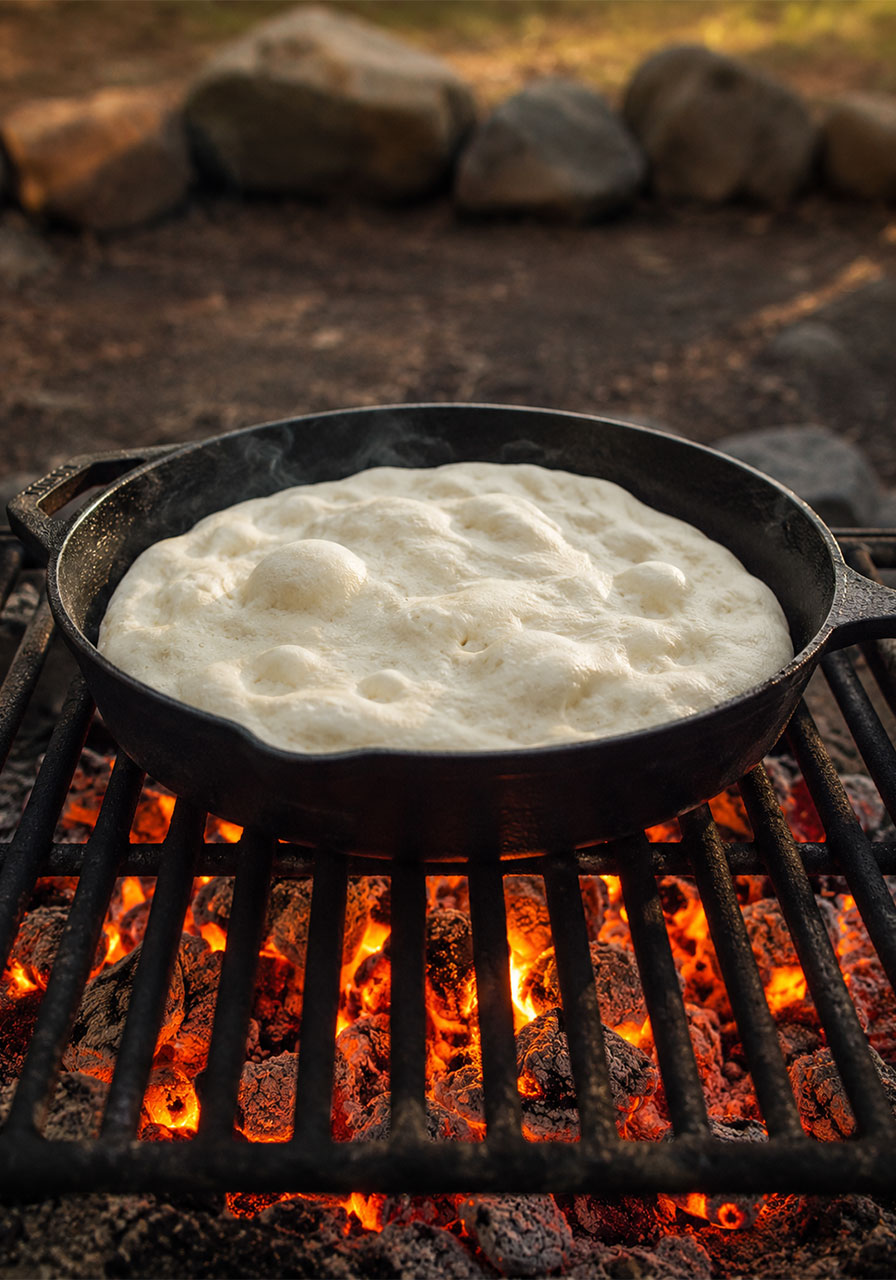
Step 3: Cook the First Side
Place your cast iron skillet on the grate over your campfire, or onto your camp stove at fairly high heat.
Cook for 3–5 minutes. What you’re looking for is the bottom of the crust to firm up and turn golden brown. At the 3-minute mark, use your tongs to gently lift one edge and take a peek underneath. You’re looking for a nice golden color – not pale, not burned.
If you’re using a camp stove: Cast iron doesn’t heat perfectly evenly over a single burner, so rotate the pan every minute or so to make sure all sides of the crust get equal heat.
If you’re cooking over a campfire: The broad, even heat of the flames does the work for you – just keep an eye on it.
Step 4: The Flip (This Is the Fun Part)
Once the bottom is golden, pull the entire skillet off the heat and set it on a heat-safe surface. The skillet will be extremely hot, so use your gloves and take your time here.
Using your tongs, grab the edge of the crust and flip it over so the toasted side is now facing up and the uncooked side is facing down into the skillet.
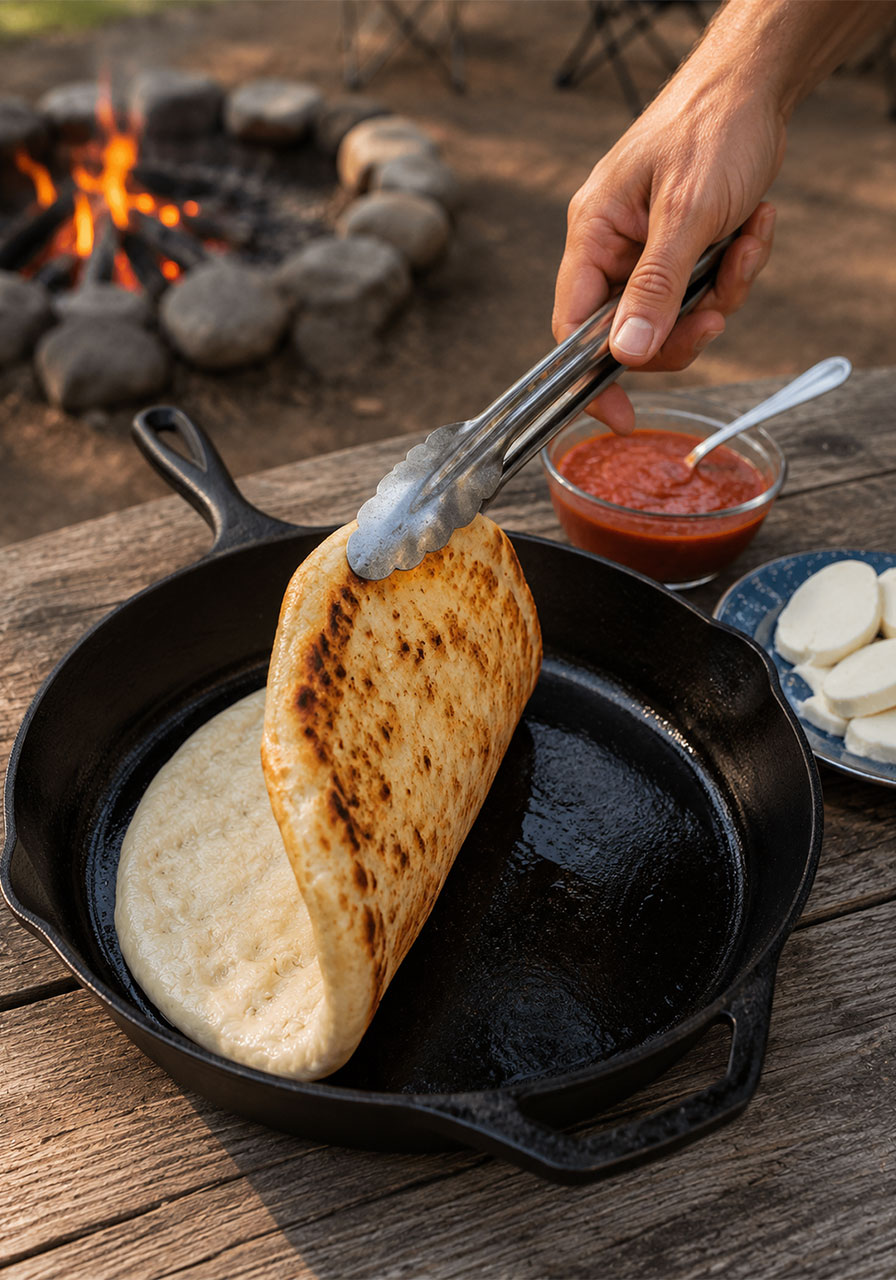
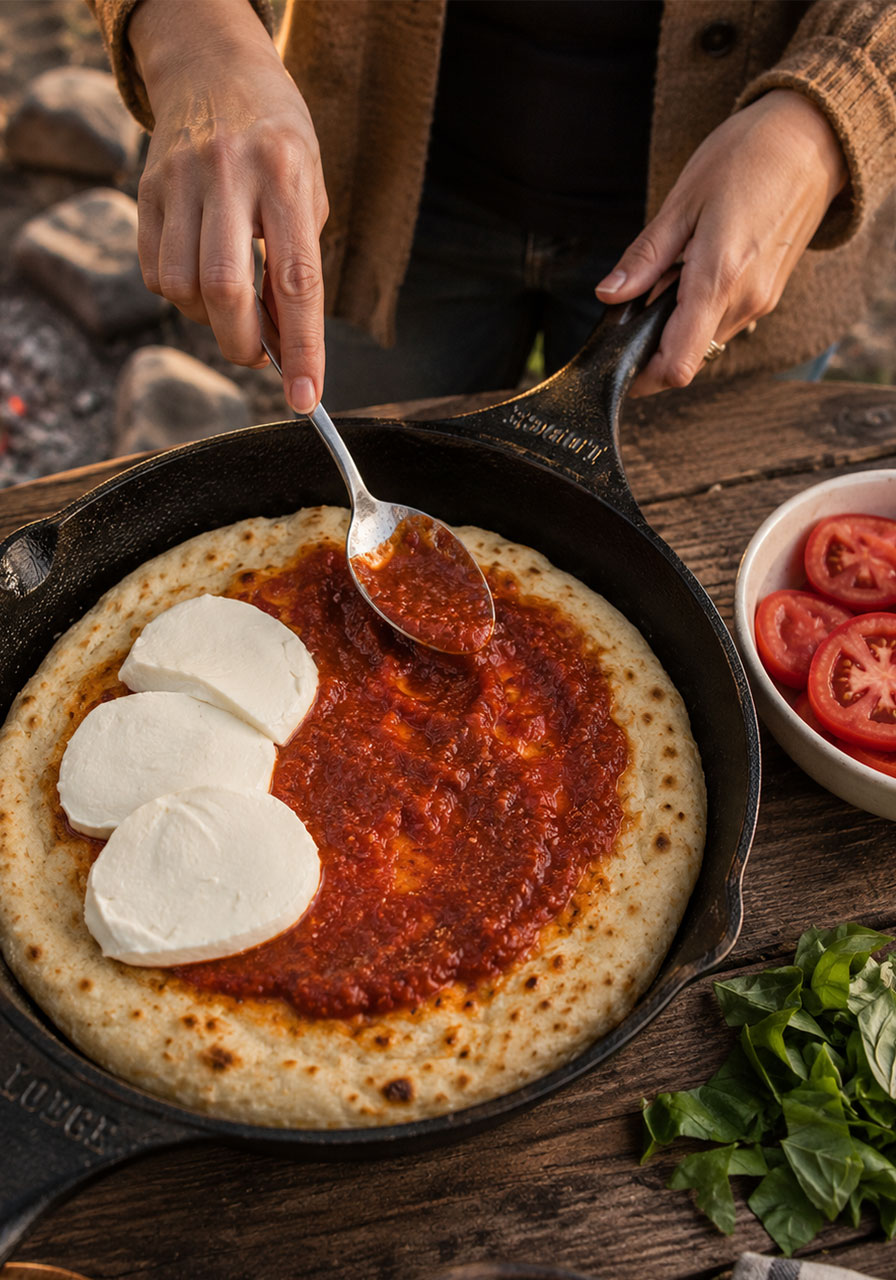
Now work quickly: add your pizza sauce, cheese, and toppings to the toasted side. Don’t overthink it – a simple layer of sauce, a generous handful of cheese, and your favorite toppings is all you need.
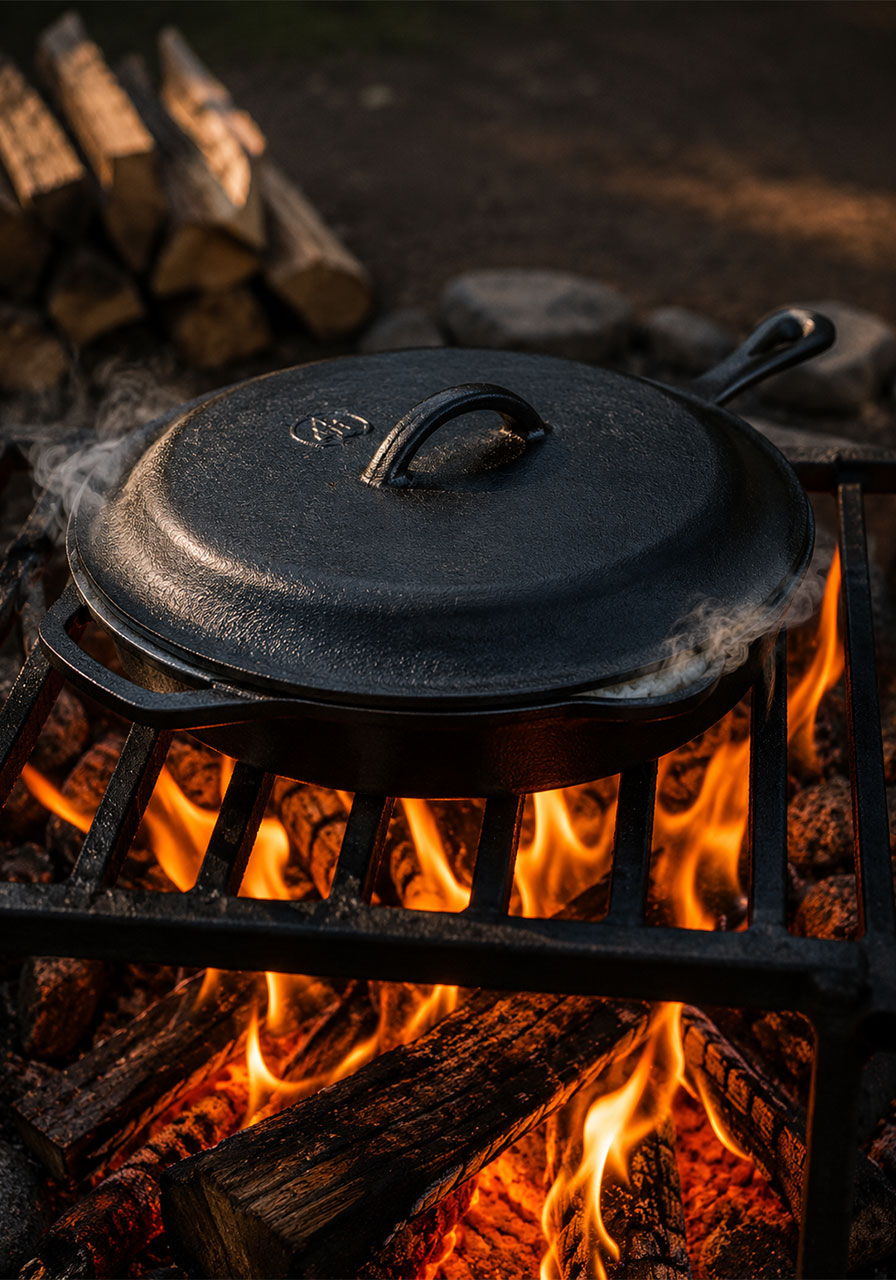
Step 5: Melt, Cover, and Finish
Once your toppings are on, return the skillet to the heat. Cover it with a cast iron lid or a sheet of aluminum foil. This traps the heat and melts the cheese beautifully.
Cook for another 3–5 minutes. After a few minutes, once the cheese looks melted, remove the cover so any steam can escape. This prevents the pizza from getting soggy, especially if you’re using moisture-heavy toppings like fresh mozzarella or tomatoes.
Cook uncovered for the remaining time until the bottom crust is golden and crispy to your liking.
Step 6: Slide It Out and Eat It Immediately
Remove the skillet from heat. Carefully transfer the pizza to a plate using your tongs. Slice it up, hand it around, and get ready for everyone to lose their minds a little bit.
While your crew is eating the first pizza, get your second dough ball going in the skillet and start the whole process again. Repeat until everyone is fed and happy.
Tips for the Best Campfire Pizza Every Time
We’ve made enough campfire pizzas to know what works and what doesn’t. Here’s everything we’ve learned so you can nail it on your first try.
Use a 12″ Skillet for a Thinner Crust
The 10″ skillet gives you a thicker, more focaccia-like crust (totally delicious). The 12″ spreads the dough out more for a thinner, crispier result. Both are amazing – it really comes down to personal preference and what size skillet you have.
Pre-Heat Your Cast Iron Lid
One of the best tricks we’ve picked up: place your cast iron lid directly on the fire grate for a minute or two before using it to cover the pizza. A warm lid melts the cheese so much faster. Game changer.
Don’t Pile on Too Many Toppings
We know, we know – more toppings sounds better. But on a cast iron campfire pizza, less is genuinely more. A thick layer of toppings adds moisture and weight that the crust can’t always support without an actual oven. Keep it simple: sauce, cheese, and 2–3 toppings max. Trust us on this one.
Go Easy on Wet Toppings
Fresh mozzarella, heirloom tomatoes, spinach – these are all delicious but they release a lot of steam when they cook. If you’re using any of them, make sure to remove the cover halfway through so that steam can escape. Otherwise you’ll end up with a soggy bottom, and nobody wants that.
Shape the Second Dough Ball in a Cold Pan
After you transfer your first pizza, the skillet is going to be very hot. If you try to press the second dough ball directly in immediately, you risk burning your fingers – and the dough. Let the pan cool for a minute or two, or even better, shape the second ball in a separate cold pan or on your cutting board first, then transfer it in.
Watch the Heat
Campfire heat is less predictable than a kitchen oven. If you notice the bottom browning too fast before the top is done, pull the skillet slightly off-center from the flame to lower the intensity. The cast iron retains heat well enough to keep cooking even with less direct flame.
Our Favorite Topping Combos
Can’t decide what to put on your campfire pizza? Here are some combos that are absolutely dreamy – and easy to pack for a camping trip.
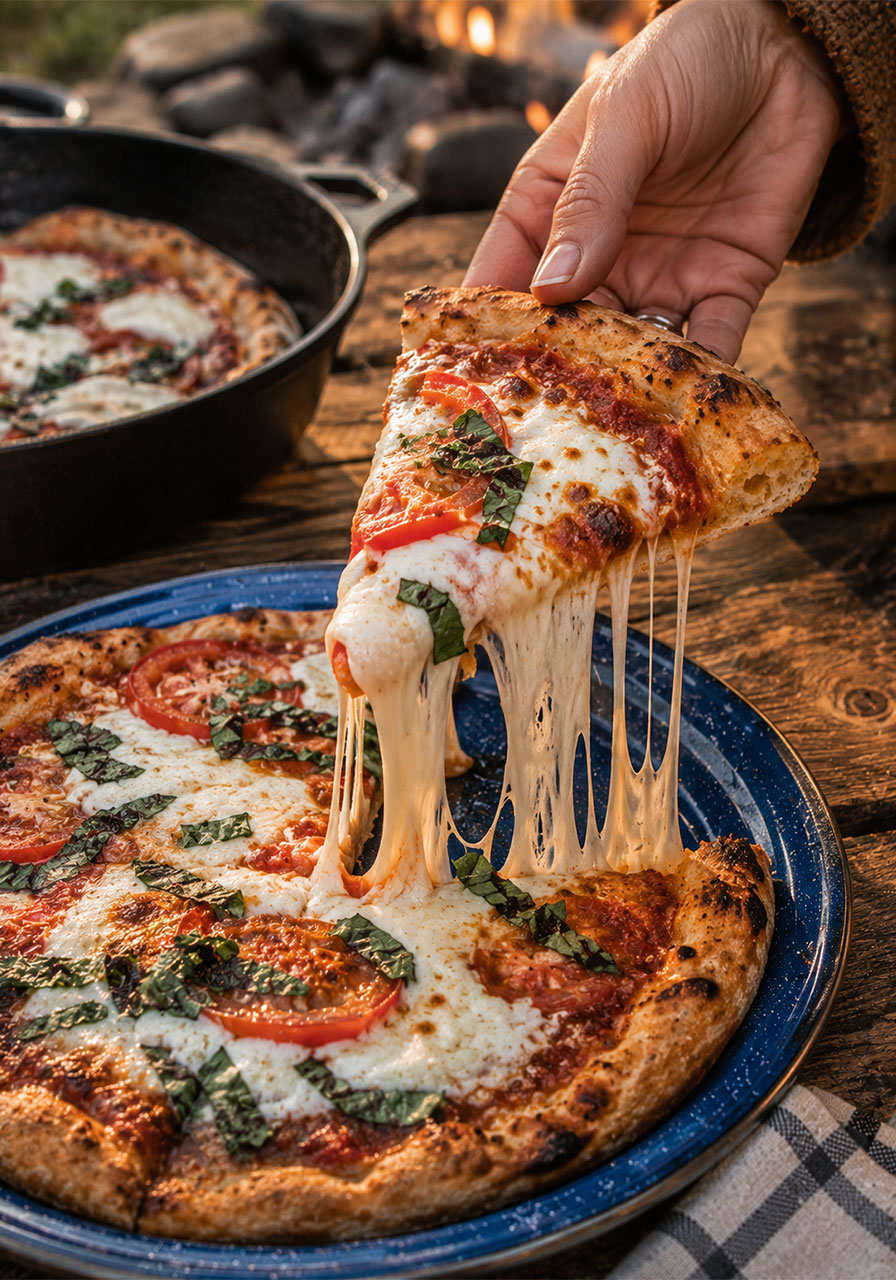
Classic Margherita
Pizza sauce + fresh mozzarella slices + sliced tomatoes + fresh basil. Simple, elegant, and insanely delicious when the crust is perfectly golden. This is our personal favorite and honestly the one that gets the most “oh WOW” reactions.
Pepperoni Lover
Pizza sauce + shredded mozzarella + pepperoni slices. You literally cannot go wrong here. Pack the pepperoni in a zip-lock and it travels perfectly.
BBQ Chicken
BBQ sauce instead of pizza sauce + shredded chicken (great use for rotisserie chicken!) + red onion + mozzarella. Rich, smoky, and so satisfying after a day of hiking.
Garlic White Pizza
Olive oil + minced garlic + mozzarella + fresh spinach + a sprinkle of parmesan. No tomato sauce needed – this one is light and amazing.
Veggie Garden
Pizza sauce + mozzarella + sliced bell peppers + mushrooms + black olives. Colorful, fresh, and great for a mixed group with different dietary preferences.
How to Pack for Campfire Pizza Night
Campfire pizza is a party food, which means you’re probably making it for more than just yourself. Here’s how to set yourself up for a smooth, stress-free pizza night at the campsite.
Prep at home: Pre-measure your dry ingredients (flour, yeast, salt) into a zip-lock bag. Label it. Done. This shaves serious time off the cooking process and means less measuring at the campsite.
Pack olive oil in a small squeeze bottle: Way easier to control than a big bottle, and it takes up less space.
Bring a small jar of sauce: Store-bought marinara or pizza sauce works perfectly. One small jar is usually enough for two pizzas.
Pre-shred your cheese: Shredded mozzarella from a bag is the easiest option. If you want to go fancy, fresh mozzarella packs well in a zip-lock and keeps in a cooler just fine for a couple of days.
Set up a topping station: Lay all your topping options out on a cutting board so everyone can customize their slice. This is especially fun for groups – let your guests be their own pizza chefs!
Can You Make This Without a Campfire?
Absolutely yes! A camp stove works just as well as a campfire for this recipe – just make sure to rotate the skillet over the burner so the heat distributes evenly.
And honestly? This recipe works on your regular stovetop at home too. If you want to practice before your camping trip, or if you’re just craving skillet pizza for a fun weeknight dinner, fire up your stove and go for it. Same technique, same delicious result.
Some people even do a hybrid: cook the dough on the stovetop, then finish the topped pizza under the broiler for a minute to melt the cheese. All valid. All delicious.
Why This Is the Perfect Party Food
Pizza is universally loved. Pizza made by hand, around a campfire, with your friends gathered and drinks in hand? That’s not just a meal – that’s a memory.
There’s something magical about the process of making pizza together outdoors. Everyone gets involved. Someone’s stretching the dough, someone’s managing the toppings station, someone’s tending the fire. It’s interactive, it’s fun, and it turns an ordinary evening into something you’ll still be talking about on the drive home.
If you’re planning a camping bachelorette party, a girlfriend getaway weekend, a family camping birthday, or even just a spontaneous backyard bonfire – add campfire pizza to the menu. We can almost guarantee it’ll be the highlight of the whole trip.
Because the best parties are always the ones where everyone leaves full, happy, and a little bit amazed.
Frequently Asked Questions
Can I use store-bought pizza dough instead of making my own?
Yes! Pre-made dough from the refrigerated section of the grocery store works great. Just let it come to room temperature before pressing it into the skillet. The cooking time will be roughly the same.
What if my campsite doesn’t have a fire grate?
No problem – use your camp stove! Set the heat to medium-high and rotate the skillet every minute or so to ensure even heating. It works beautifully.
Can I make the dough ahead of time?
Yes! Make the dough at home the night before, let it do its rise, then punch it down, wrap it tightly in plastic wrap, and store it in the fridge. Bring it to room temperature at the campsite before using. It’ll actually taste even better with a longer, slow rise.
How do I know when the bottom crust is done?
Use your tongs to gently lift one edge of the crust and peek underneath. You’re looking for a deep golden-brown color – similar to the bottom of a good grilled cheese. If it’s pale, give it more time. If it’s darkening too fast, lower your heat.
My cheese isn’t melting – what do I do?
Cover the pizza! The lid (or foil) traps steam and heat, which is what melts the cheese. For extra-fast melting, pre-heat your cast iron lid directly on the fire grate before placing it over the pizza.
Can I double the recipe for a larger group?
Easily! The base recipe makes 2 pizzas. Double it for 4, triple for 6, and so on. Just know that you’ll be cooking them one at a time in the skillet, so plan the timing accordingly. A good trick: get the second pizza cooking while everyone is eating the first – you’ll keep the momentum going and no one has to wait too long.
With this campfire pizza recipe in your back pocket, you’re officially ready to host an outdoor pizza party that your friends will be begging you to re-create all summer long. Grab your cast iron, load up your cooler, and get ready to become the most legendary camp cook in your friend group.
Because life’s too short for boring camping food.
Campfire Pizza from Scratch
Equipment
- Mixing bowl or camp pot
- Fork
- 10" or 12" cast iron skillet
- Tongs
- Cast iron lid or aluminum foil
- Cutting board
- Chef's knife
- Heat-safe gloves or oven mitts
Ingredients
For the Dough:
- 2 ½ cups all-purpose flour
- 1 packet rapid rise yeast
- 2 teaspoons salt
- 1 cup warm water
- 5 tablespoons olive oil, divided (2 tbsp for dough + 3 tbsp for skillet, split between 2 pizzas)
Toppings (your choice):
- Pizza sauce or marinara
- Mozzarella cheese (shredded or fresh)
- Any toppings you love
Instructions
- In a mixing bowl or pot, combine the flour, rapid rise yeast, and salt. Stir briefly with a fork to distribute.
- Add the warm water and 2 tablespoons of olive oil to the dry ingredients. Mix with a fork until a rough dough forms.
- Knead the dough a few times in the bowl or on a lightly floured surface until it comes together into a smooth ball.
- Cover the dough and let it rise for 20 minutes.
- After rising, turn the dough out onto a cutting board and divide it into two equal pieces.
- Add 1 tablespoon of olive oil to a preheated 10" or 12" cast iron skillet and swirl to coat. Place one dough half in the skillet and press it outward toward the edges with your fingertips. Drizzle ½ tablespoon of olive oil along the edge of the dough.
- Place the skillet on a grate over the campfire or on a camp stove over fairly high heat. Cook for 3–5 minutes, until the bottom is firm and golden brown. Lift the edge with tongs around the 3-minute mark to check the color.
- Remove the skillet from the heat and set it on a heat-safe surface. The skillet will be very hot – use caution for the next steps.
- Using tongs, flip the crust so the toasted side faces up and the uncooked side faces down. Add your pizza sauce, cheese, and toppings to the toasted side. Cover the skillet with a cast iron lid or aluminum foil and return it to the heat.
- Cook for another 3–5 minutes until the bottom is golden brown. Once the cheese is melted, remove the lid or foil to let steam escape and prevent sogginess. Continue cooking uncovered for the remaining time.
- Remove the skillet from heat. Transfer the pizza to a plate using tongs. Repeat with the second dough half.
Notes
- Use a 10″ skillet for a thicker crust, 12″ for a thinner, crispier result.
- If using a camp stove, rotate the skillet over the burner every minute to ensure even heat distribution.
- Pre-heat your cast iron lid on the fire grate before using it to cover the pizza – it melts the cheese much faster.
- For wet toppings (fresh mozzarella, tomatoes, spinach), remove the lid halfway through to let steam escape and keep the crust crispy.
- To make ahead: prepare dough at home, allow it to rise, then punch down, wrap tightly, and refrigerate overnight. Bring to room temperature before using.