
Raise your hand if you’ve ever needed a science project that actually holds a classroom’s attention for more than five minutes. This is that project.
The Gelatin Bioplastic experiment turns three pantry staples into hard, glossy, colorful plastic shapes that kids can hold, admire, and take home. No fancy lab equipment. No toxic chemicals. Just gelatin, water, and a little patience.
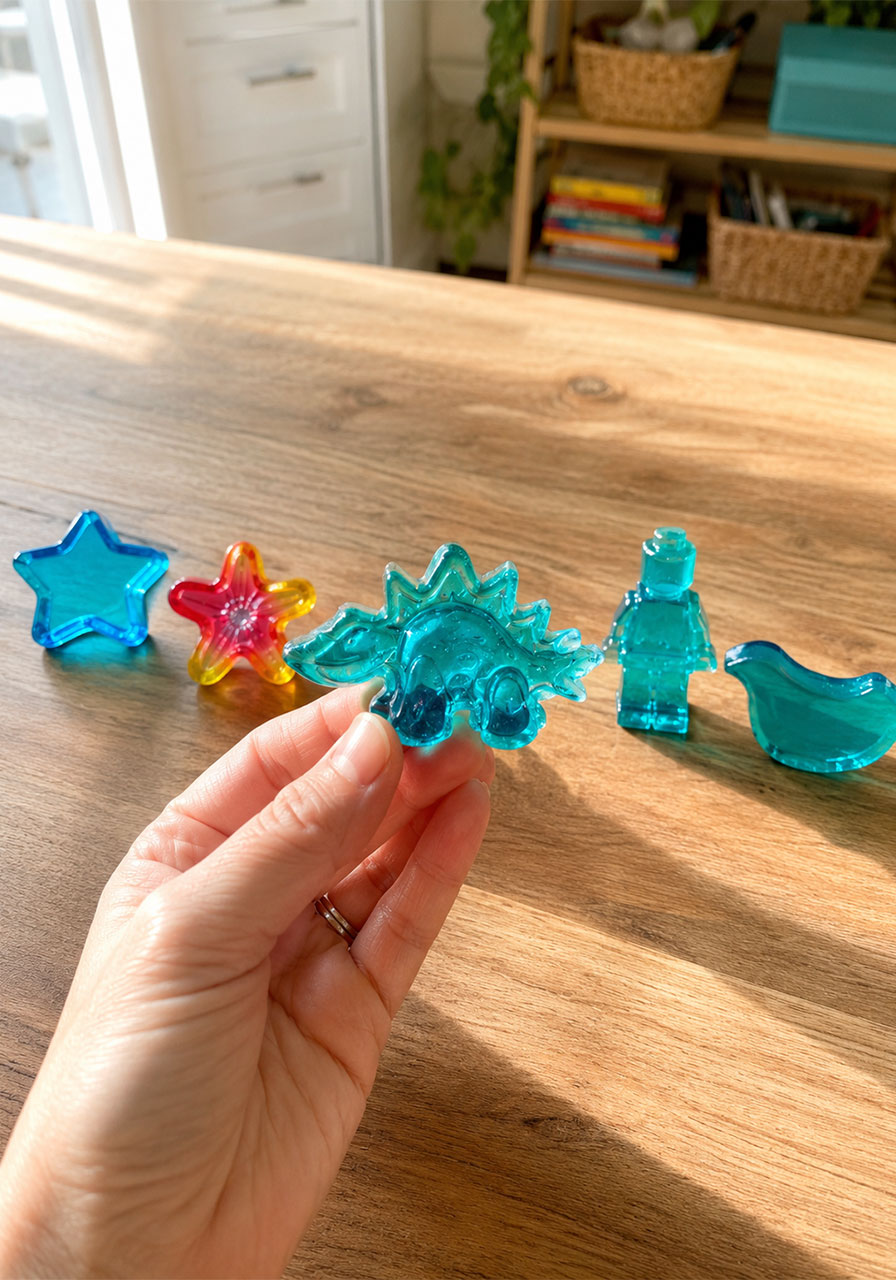
If you’ve made milk plastic before, get ready for a twist. This version comes out clear and shiny, almost like stained glass or candy. It’s the kind of “wow” moment that makes kids actually care about polymers, hydrogen bonds, and biomass.
Best for: Classrooms, homeschool pods, STEM clubs, rainy-day family science, science fair projects.
Time to Play: 15 minutes of hands-on prep, plus 2-5 days of curing (yes, really – and it’s worth it).
Group Size: Works for one curious kid or a full classroom of 30.
Why This Project Is a Must-Try
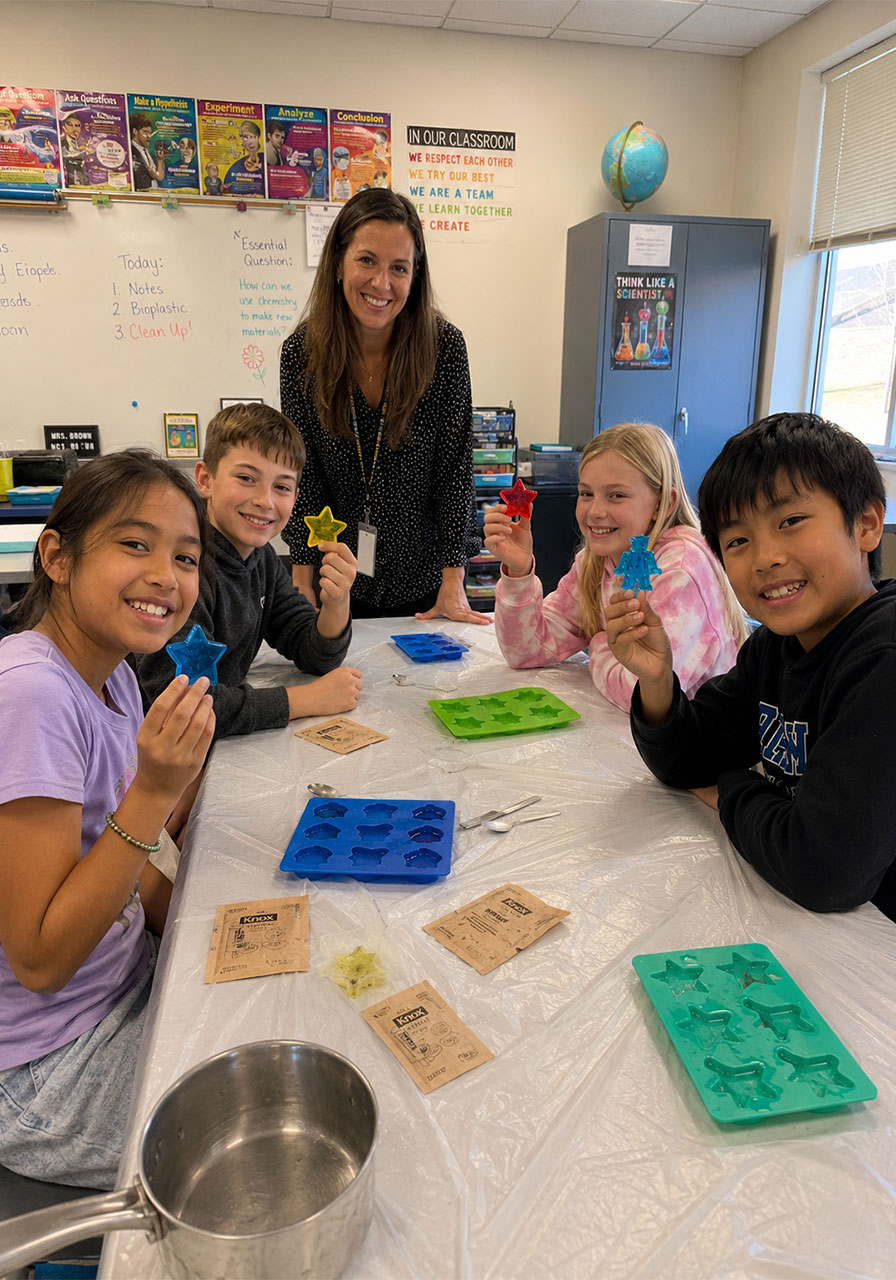
Plastic pollution is a topic every kid has heard about, but few understand. This experiment makes it click. Instead of lecturing about “bioplastics,” you let them build one with their own hands.
It also sneaks in real chemistry. Collagen, amino acid chains, hydrogen bonding – all of it becomes tangible instead of abstract. Kids remember what they touch far longer than what they hear.
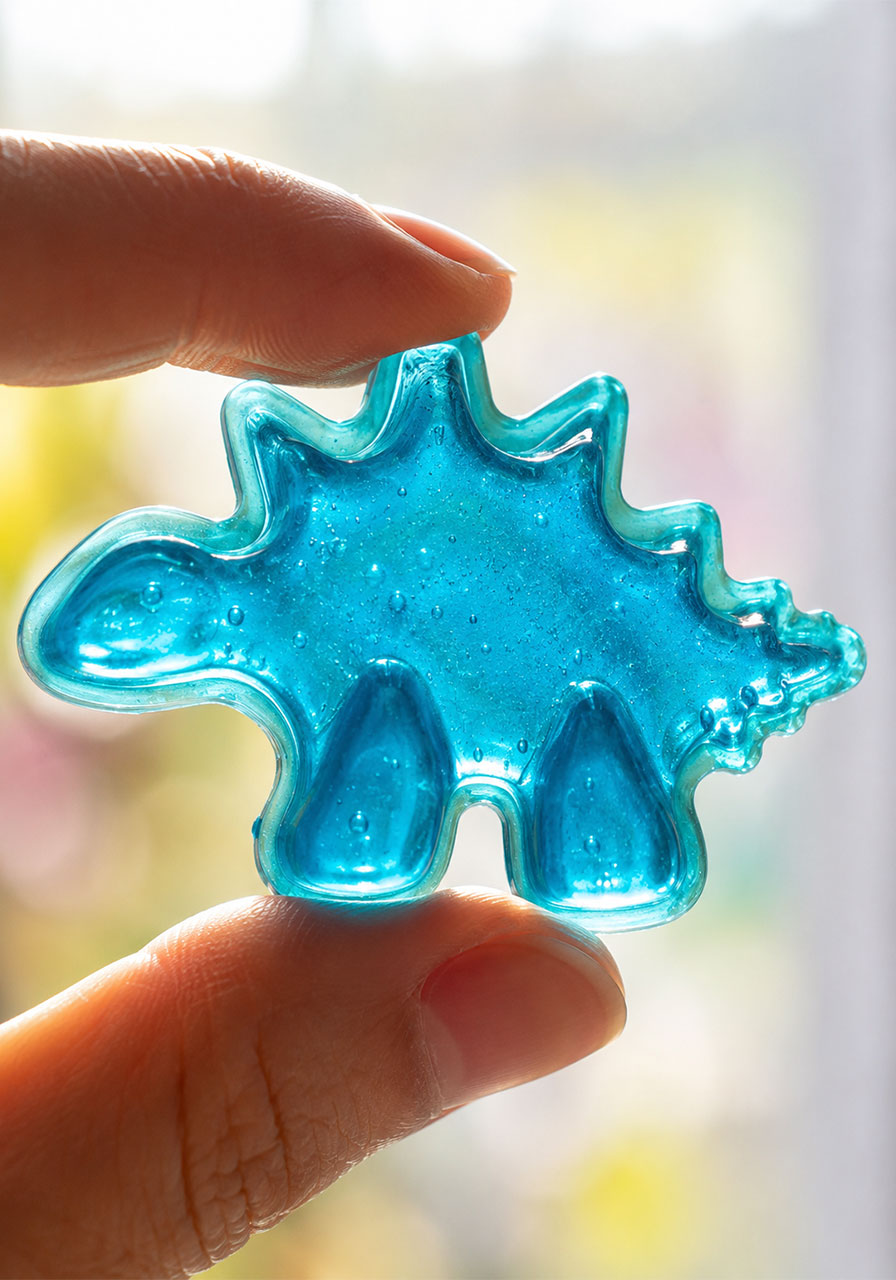
And honestly? Watching a gummy-textured blob slowly harden into a rigid, glassy dinosaur over a few days feels a little bit like magic, even for the adults running the activity.

What You’ll Need
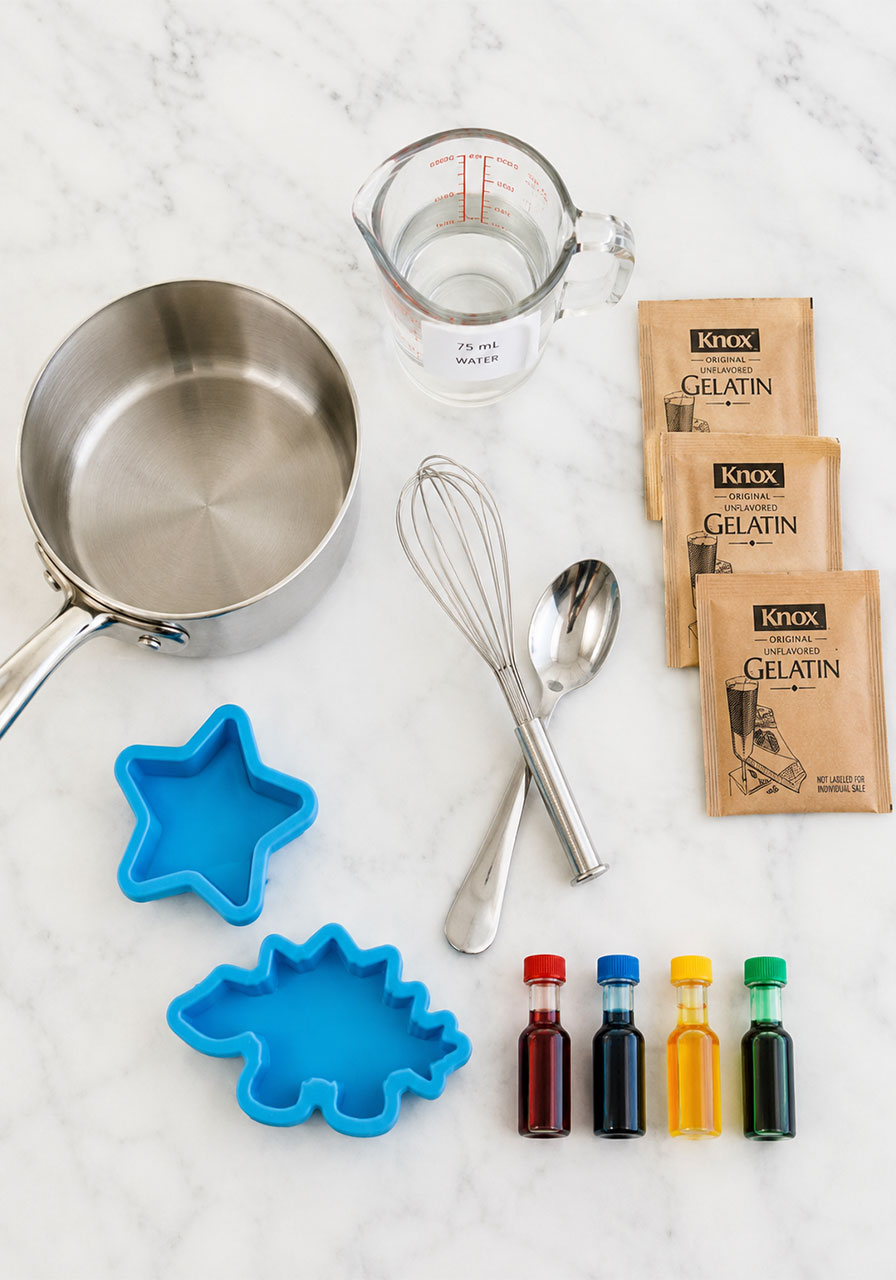
A stove
A small pot
A spoon
A whisk
3 packets of unflavored gelatin
75 mL of water
Food coloring (optional, but highly recommended)
Silicone molds (optional – cookie cutters or a plain lid work too)
Pro Tip: Silicone candy molds or ice cube trays with fun shapes (dinosaurs, stars, gems) make the final product look extra impressive. Dollar stores are a goldmine for these.
How to Make Plastic From Gelatin: Step-by-Step
Follow these steps in order. This is one of those experiments where skipping a step now means troubleshooting a mess later, so read through once before you start.
Step 1: Mix and Heat
Add 75 mL of water and 3 gelatin packets to your pot.
If you want colored plastic, add 2-3 drops of food coloring now.
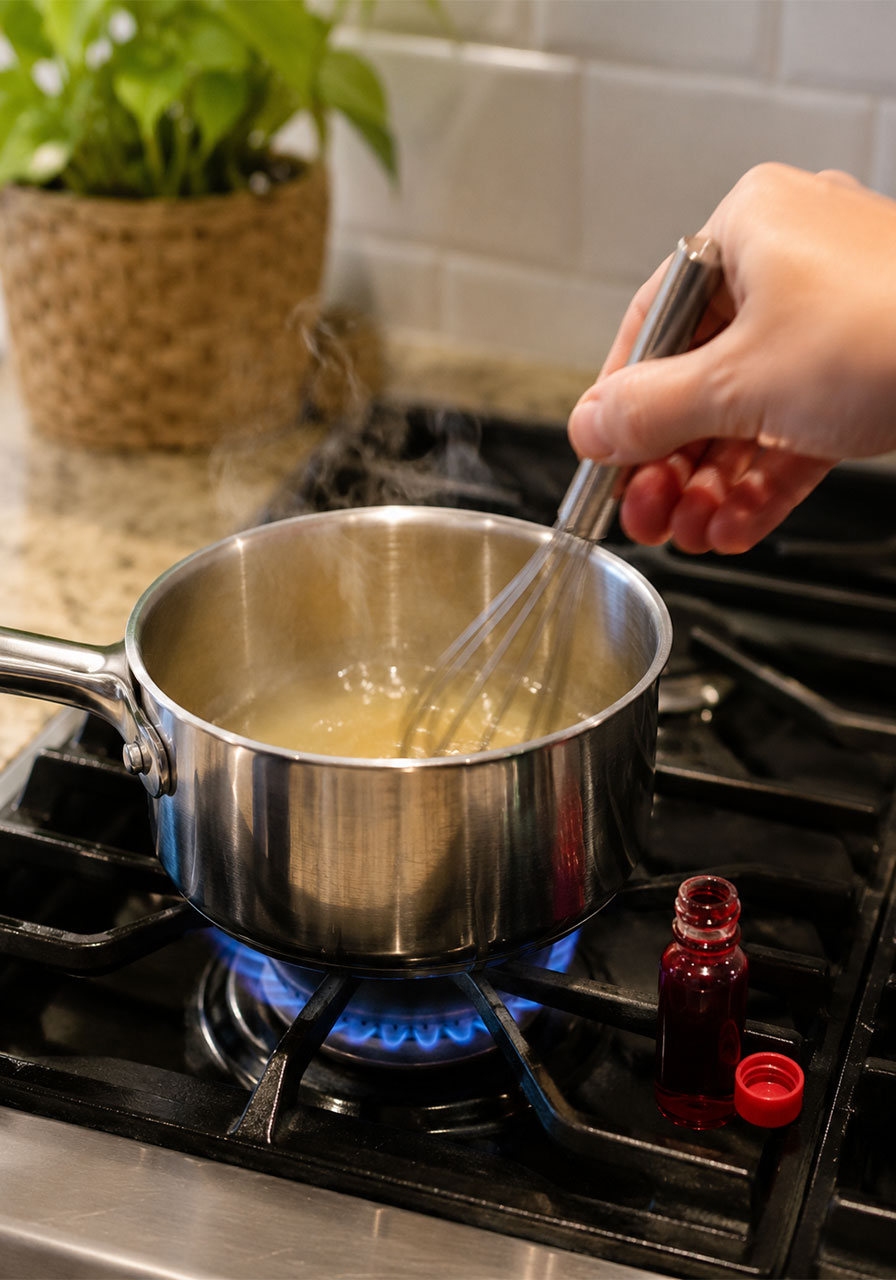
Whisk continuously over medium-low heat until the mixture is completely combined and smooth.
Step 2: Watch for the Steam
Keep whisking until the mixture starts to steam and thicken slightly.
As soon as you notice that thickening, remove the pot from the heat immediately. Overheating won’t ruin it, but this is the sweet spot for the clearest results.
Step 3: Skim the Foam
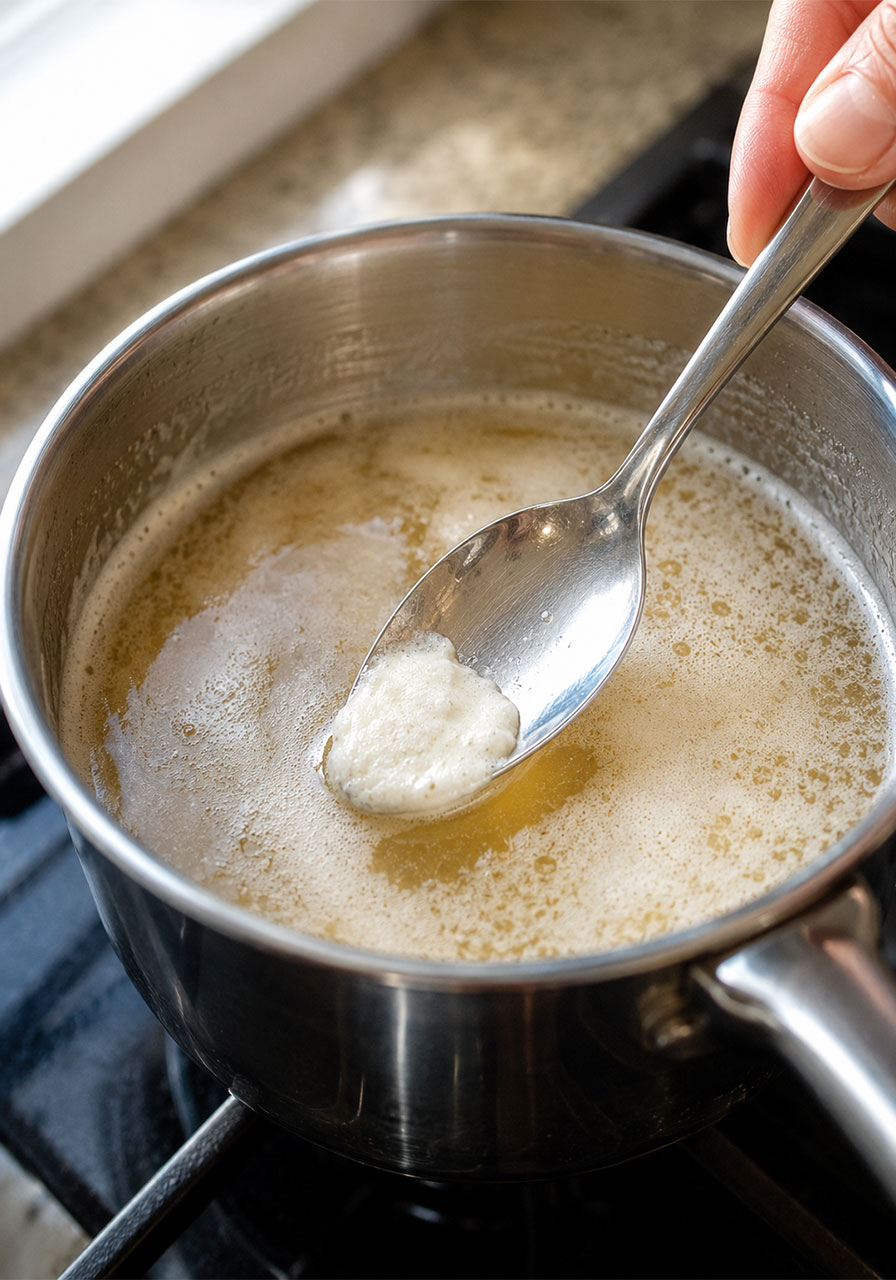
A foamy layer will form on top of your mixture. Gently scrape it off with your spoon and discard it.
This step controls how clear your final plastic will be. The more foam you remove, the more glass-like your finished piece looks.
Don’t stress if you miss some. A little cloudiness still looks great, and it won’t affect how the plastic cures.
Step 4: Choose Your Shaping Method
You have two options here, and we recommend trying both if you have enough gelatin on hand.
Option A – The Lid Method:
Pour the solution onto a flat container lid and let it sit undisturbed for about 45 minutes. It will firm up into a rubbery material you can cut with cookie cutters, scissors, or a butter knife, or shape entirely by hand. As it continues curing over the next two days, it naturally twists and curls into unexpected, organic shapes. This method is genuinely fun to watch, and it’s a great one to set aside just to observe.
Option B – The Silicone Mold Method:
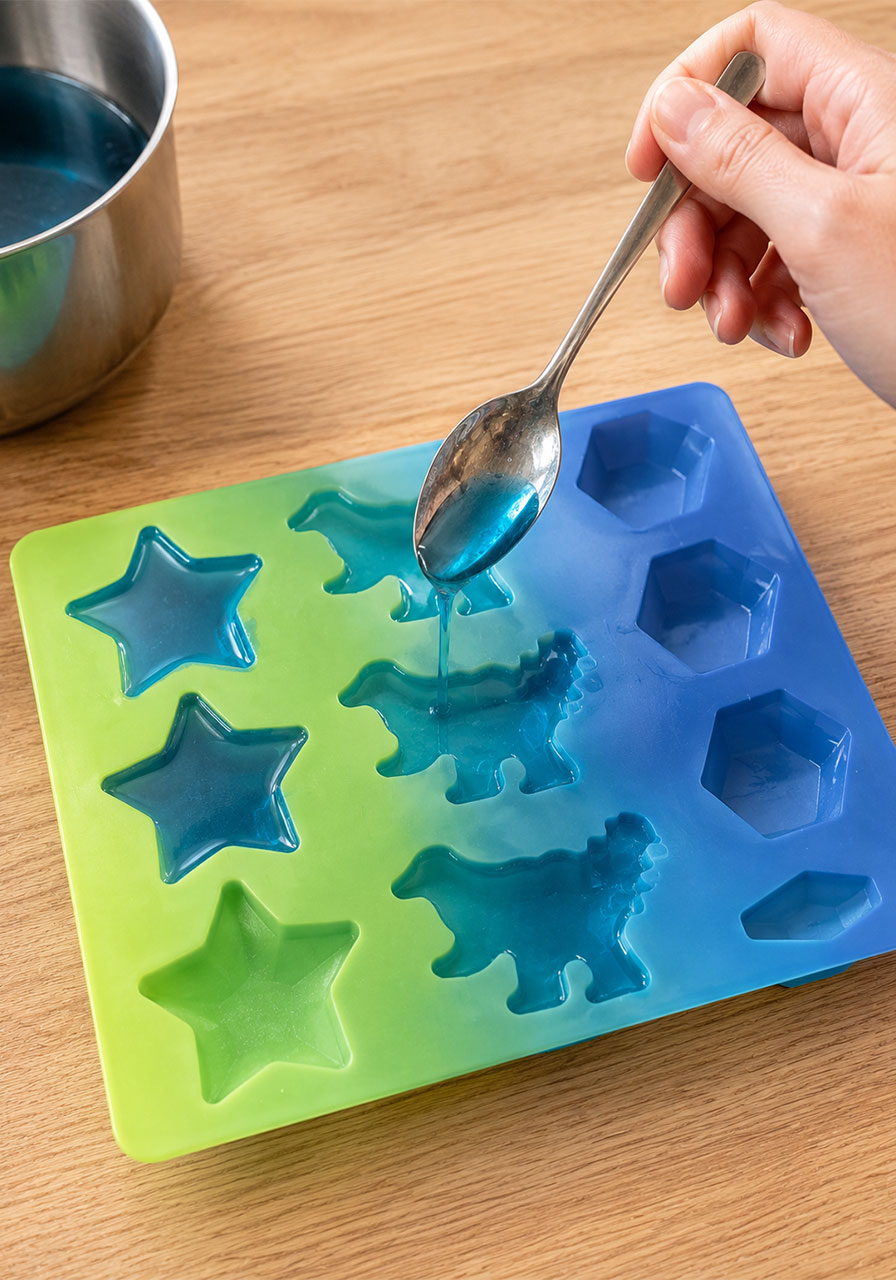
Carefully spoon the liquid into silicone molds. Fill them generously and thickly. Thin layers tend to twist and warp as they set, while thicker pours hold their shape and detail much better.
Heads up: thicker pieces take longer. Expect 4-5 days in the mold, followed by another 1-2 days of open-air hardening before the plastic is fully cured and safe to handle roughly.
Step 5 (Optional): Create a Two-Color Design
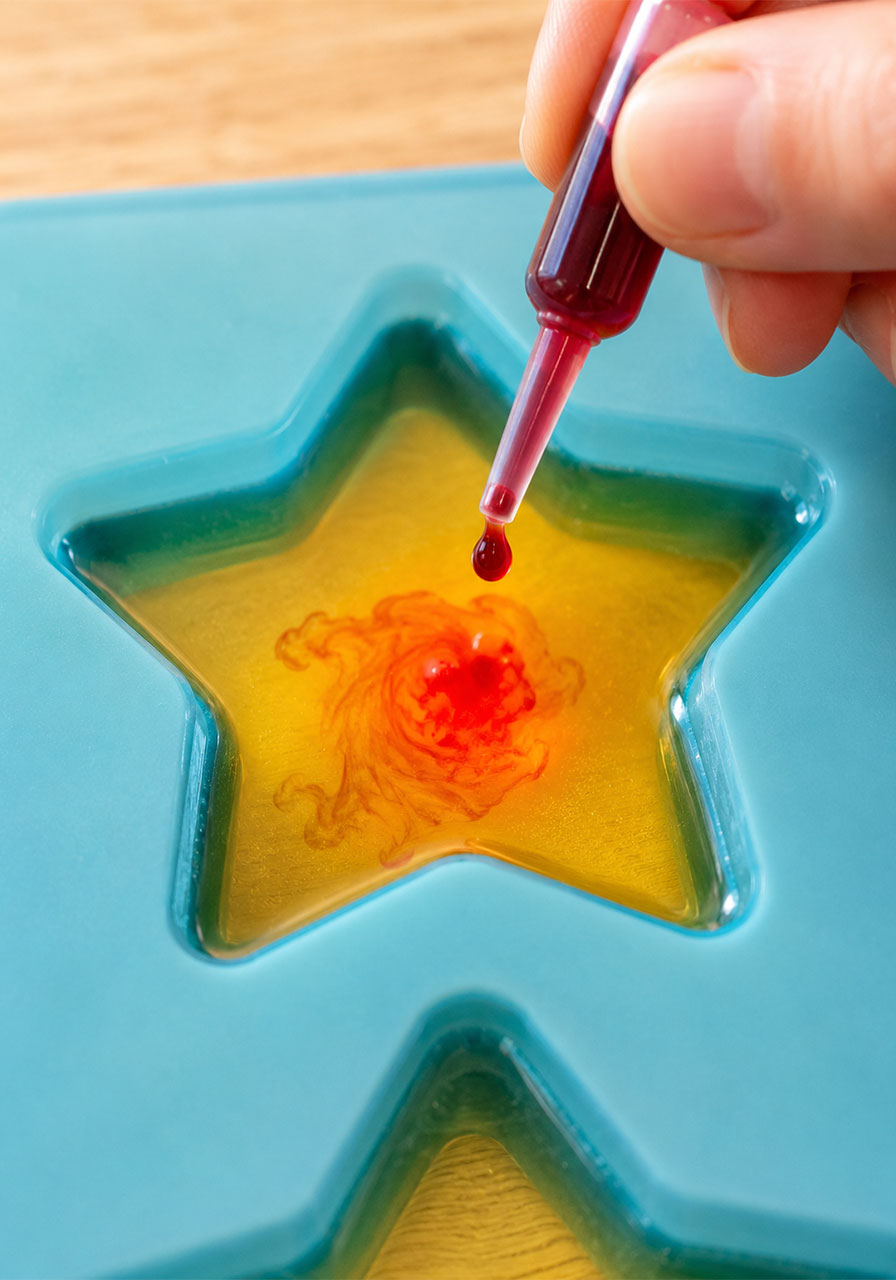
Want to level this up visually? Pour your gelatin solution into the mold, let it sit for about 5 minutes, then add a single drop of a second color.
If the solution is still hot and liquid, the colors will swirl and blend together beautifully. If it has cooled down, the second color stays more separate, creating a marbled effect instead.
Either way, this small extra step turns a simple shape into something that looks intentionally designed.
Pro Tip: Try this with holiday shapes – red and green for Christmas, orange and black for Halloween, or pastel swirls for a spring classroom theme.
Troubleshooting: What to Do If Something Goes Wrong
Every science teacher knows the real learning happens when something doesn’t go as planned. Here’s how to handle the most common issues.
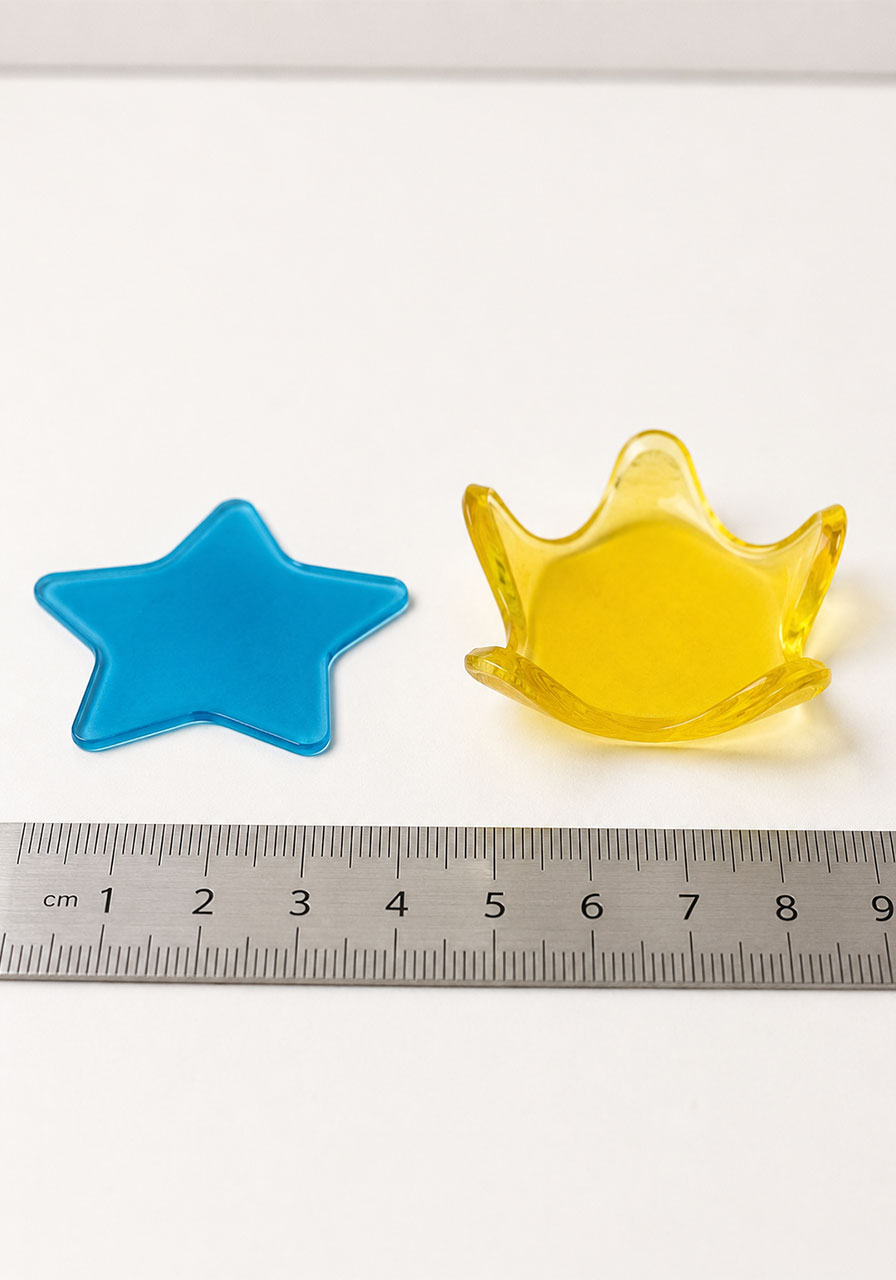
My plastic is curling up.
This is completely normal, especially with thinner pieces. Thicker pours curl less. You can also place a flat, heavy book on top of the pieces while they cure to keep them flatter, though this will flatten the shape slightly.
My plastic looks cloudy instead of clear.
This usually means some foam was left behind during Step 3. Next batch, skim more thoroughly and whisk a little less aggressively to reduce bubbles.
My plastic isn’t hardening.
Patience is the fix here. This is not a same-day experiment. Give it the full 2-5 days depending on thickness. In testing, every single piece eventually cured hard, it just takes time.
The Science Behind It (Explained the Fun Way)
This project is a hands-on introduction to something called bioplastics, plastics made from biomass or organic material instead of fossil fuels. That’s a genuinely useful real-world concept for kids to understand right now.
Gelatin comes from collagen, a protein found in animals that holds cells together. Collagen is built from long chains of amino acids twisted into a triple helix, kind of like a tiny rope made of rope.
At room temperature, those chains sit still and solid. Heat loosens the bonds between them, letting the chains slide apart and stretch. That’s the “melting” you see happening in the pot.
Gelatin also loves water. As the mixture cools, hydrogen atoms on the chains link up with water molecules in a process called hydrogen bonding.
Because this recipe uses a lot of gelatin and relatively little water, nearly all the water gets locked into that 3D structure as it cures. Less water plus more structure equals hard plastic instead of jiggly gelatin dessert.
If this recipe used more water, you’d end up with something closer to a gummy candy or a bowl of jello. It’s the ratio that makes all the difference, which is a great discussion point for older students.
Turn Cleanup Into a Second Experiment
Don’t just toss the finished pieces when the unit is over. Turn breakdown testing into a follow-up lesson on biodegradability.
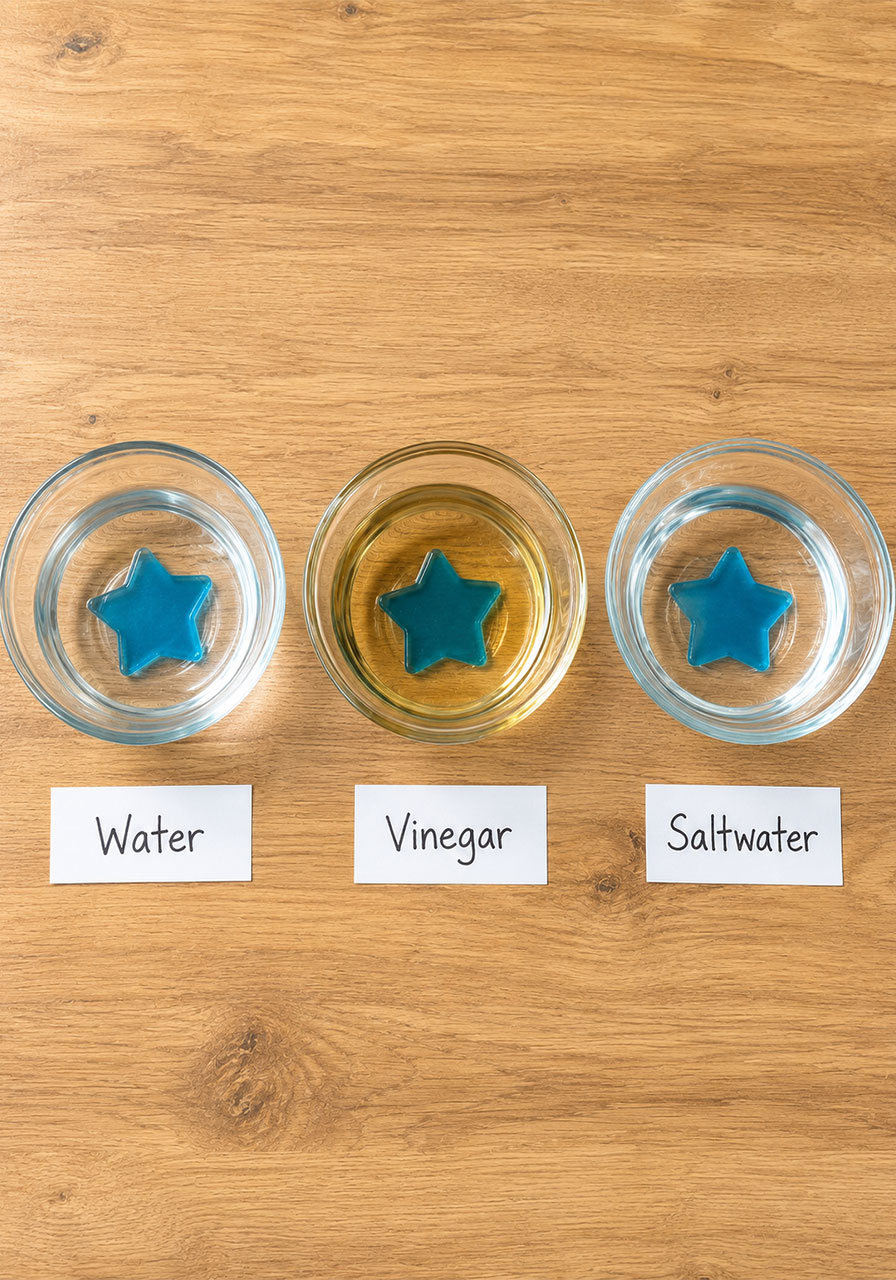
Set out three small bowls: plain water, vinegar, and saltwater. Drop a piece of bioplastic into each one and observe over several days.
Students can track and compare which liquid breaks the plastic down fastest, then discuss why. It’s a simple way to extend one activity into an entire week of observation and data logging.
Good to know: these gelatin bioplastic pieces will also fully break down in a standard home compost system within about 30 days.
Safety Notes for Teachers and Parents
This is a low-risk kitchen science project, but a few reminders go a long way.
Stovetop heating should always be adult-supervised or adult-only, depending on the age group.
These pieces are not food, even though they’re made from gelatin. Keep them away from younger siblings or students who might be tempted to taste-test.
Label finished pieces clearly if they’re being displayed or sent home, so no one mistakes them for candy.
Frequently Asked Questions
How long does gelatin bioplastic actually take to fully cure?
Thin pieces on a lid firm up in about 45 minutes but take roughly 2 days to fully harden. Thicker mold-based pieces take 4-5 days curing plus another 1-2 days hardening.
Can I reuse silicone molds for food afterward?
Yes, once thoroughly washed. The gelatin plastic process itself is non-toxic, though the finished pieces should not be eaten.
Is this project safe for a classroom of young kids?
Yes, especially if the adult handles the stovetop portion and students take over at the pouring, coloring, and shaping stages.
What’s the difference between this and milk plastic?
Milk plastic (casein plastic) tends to come out more opaque and matte. This gelatin version is the one to reach for when you want that clear, glossy, “actual plastic” look.
Final Thoughts
Great STEM activities do two things at once: they hold a kid’s attention and they teach something that sticks. This one checks both boxes without requiring a single specialty ingredient.
Whether you’re filling a classroom science block, planning a homeschool unit on materials and chemistry, or just looking for a rainy Saturday project, this is one you’ll likely come back to again and again.
Because the best STEM lessons are the ones kids ask to do a second time.
