
Forget boring worksheets. This is the STEM activity that turns your classroom or backyard into an art studio and a science lab at the same time.
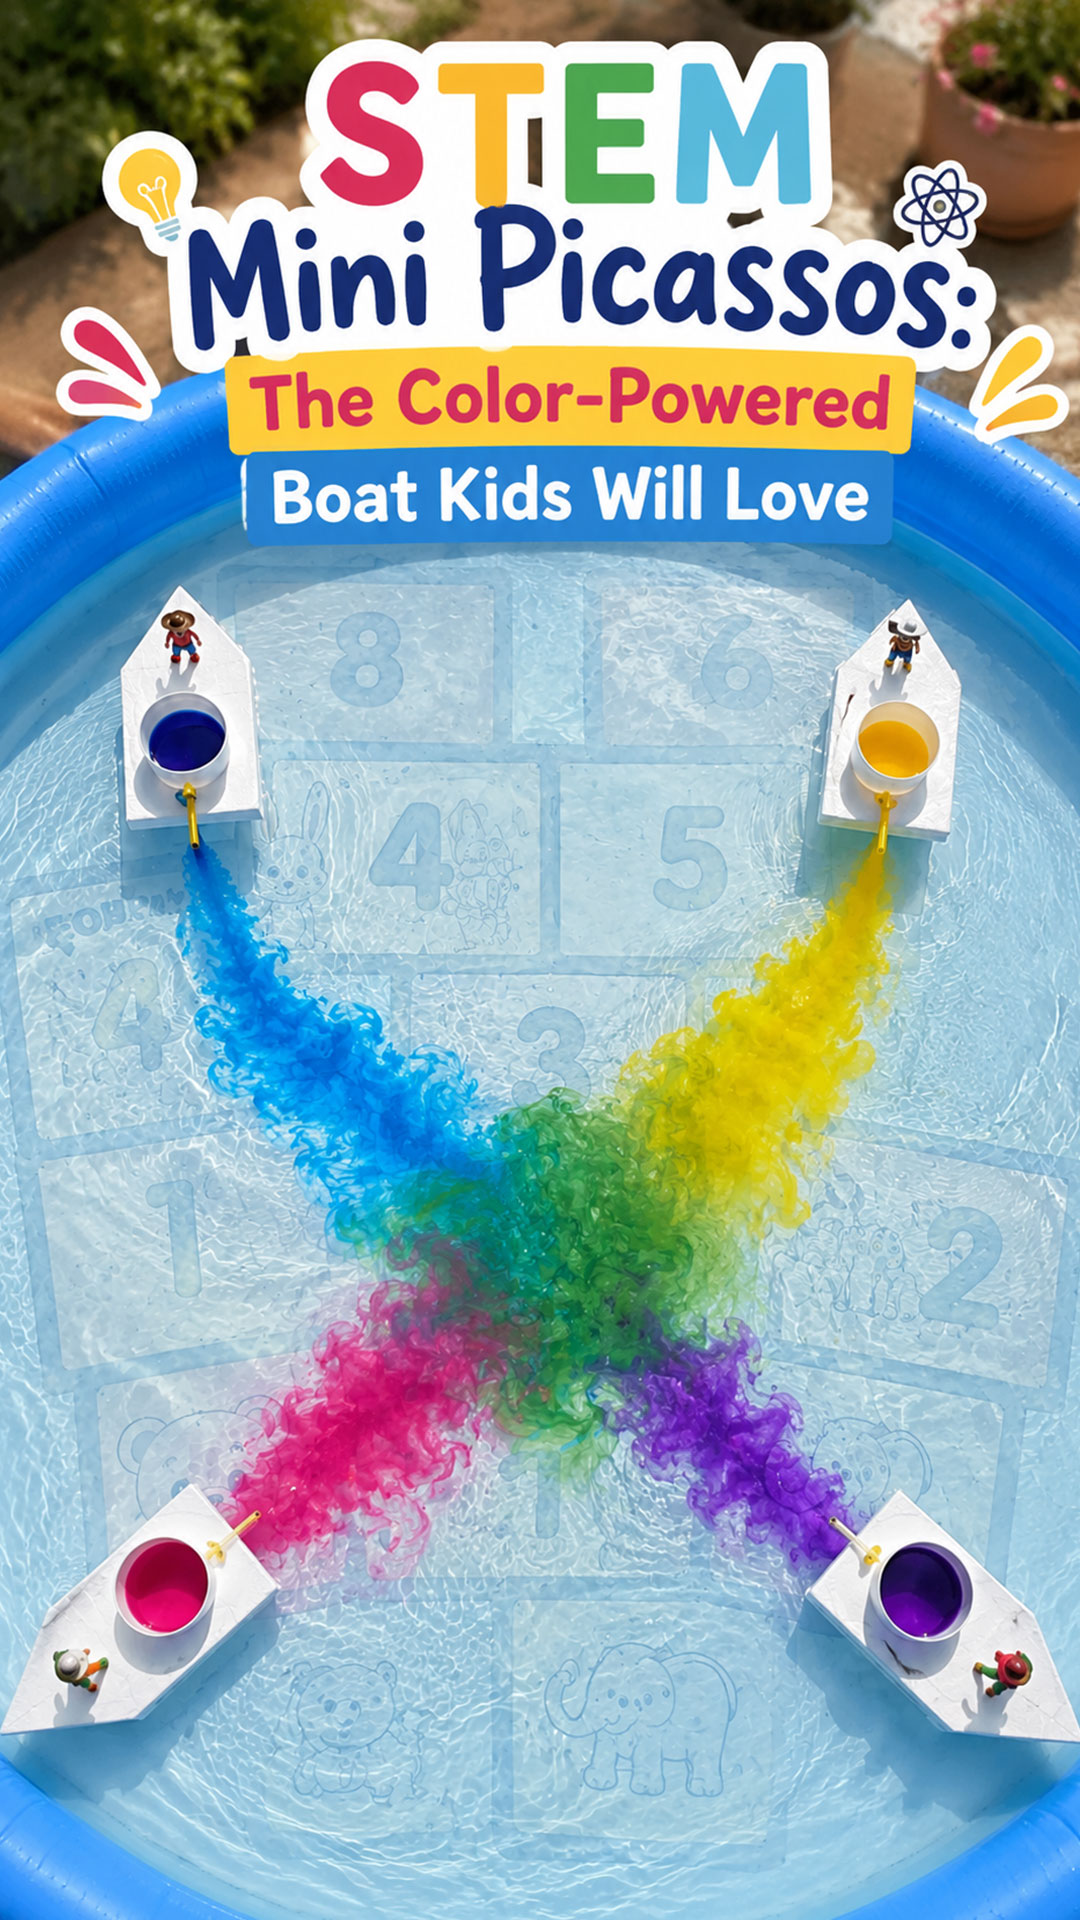
We call it the Mini Picasso Boat, and it’s one of the most satisfying “wow” moments you can hand your kids. You build a tiny foam boat, add a splash of color, set it on the water, and watch it glide across the surface while it paints a swirling, ribbon-like trail behind it.
It looks like magic. It’s actually surface tension, and your kids are about to become experts in it.
Whether you’re a teacher planning a hands-on science unit, or a parent looking for a screen-free afternoon that actually holds a kid’s attention, this project checks every box: cheap materials, real science, and a finished product gorgeous enough to photograph.
Best For
Best for: Kids ages 5 and up, classrooms, STEM clubs, birthday parties, and rainy-day boredom busters.
Time to Build: About 15-20 minutes.
Time to Play: 10-15 minutes per boat, though most kids will want to refill and relaunch it again and again.
Group Size: Works for one curious kid or a whole classroom building their own fleet.

What You’ll Need
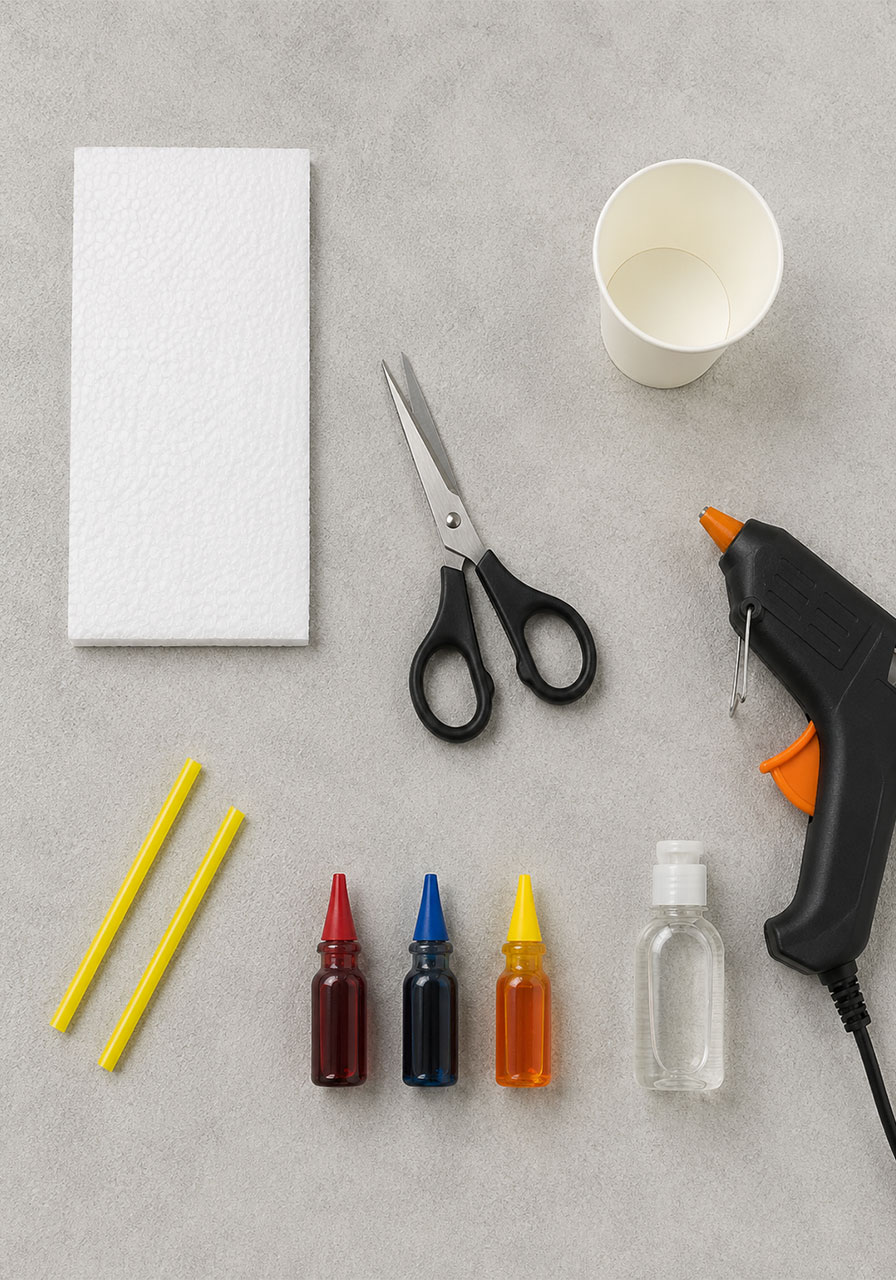
A sheet of craft foam or styrofoam board
Scissors
A pencil, for tracing your boat shape
A flexible plastic straw or thin tubing
A small paper cup
Hot glue gun (adult use recommended)
Food coloring, in as many colors as you want to test
A small squirt of dish soap
A shallow pool, tub, tray, or basin of water
Optional: a tiny sticker or figurine, to give your boat a captain
That’s it. Every piece of this build is something you probably already have in a kitchen drawer or a craft bin.
How to Build Your Mini Picasso Boat
Building this boat is genuinely foolproof, even if you’ve never built anything with foam before. Here’s exactly how to do it.
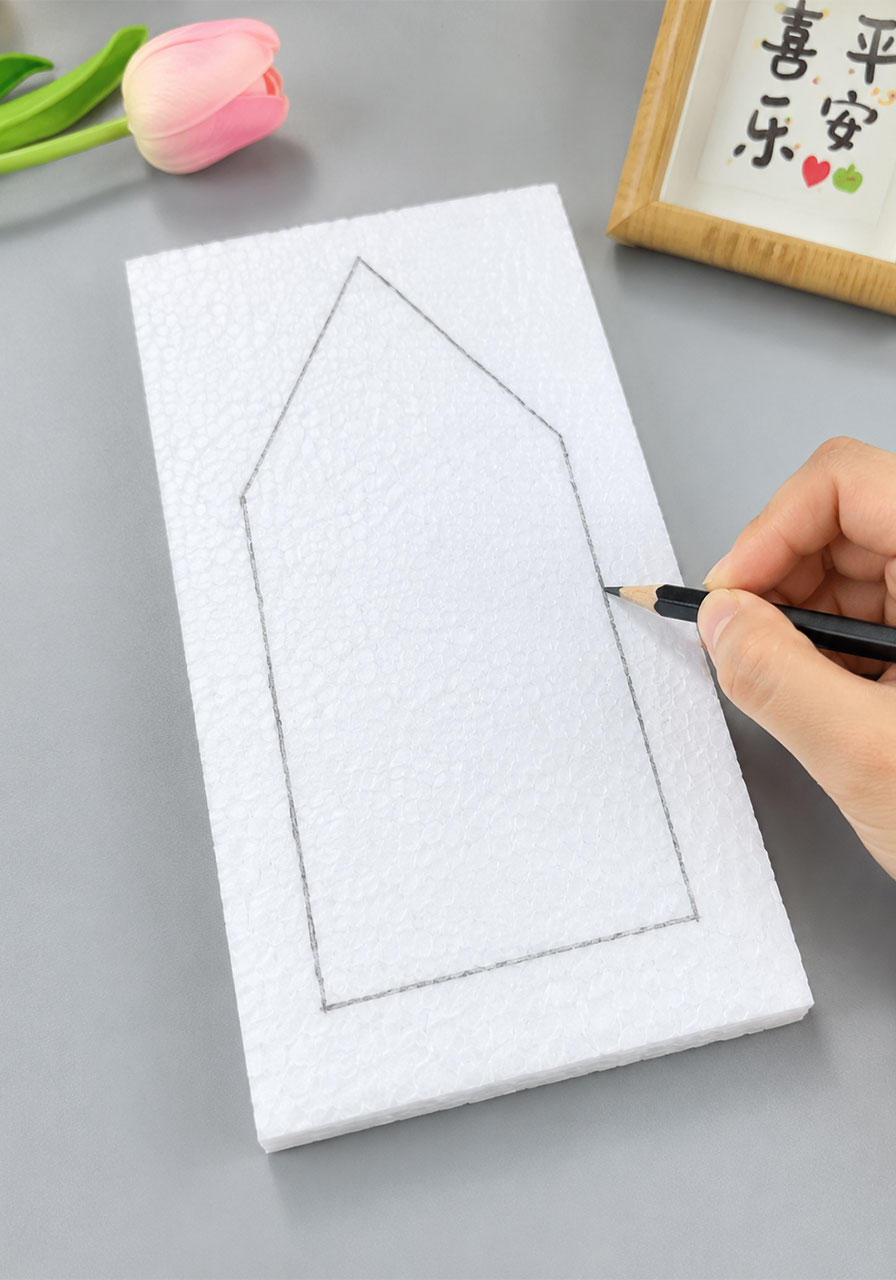
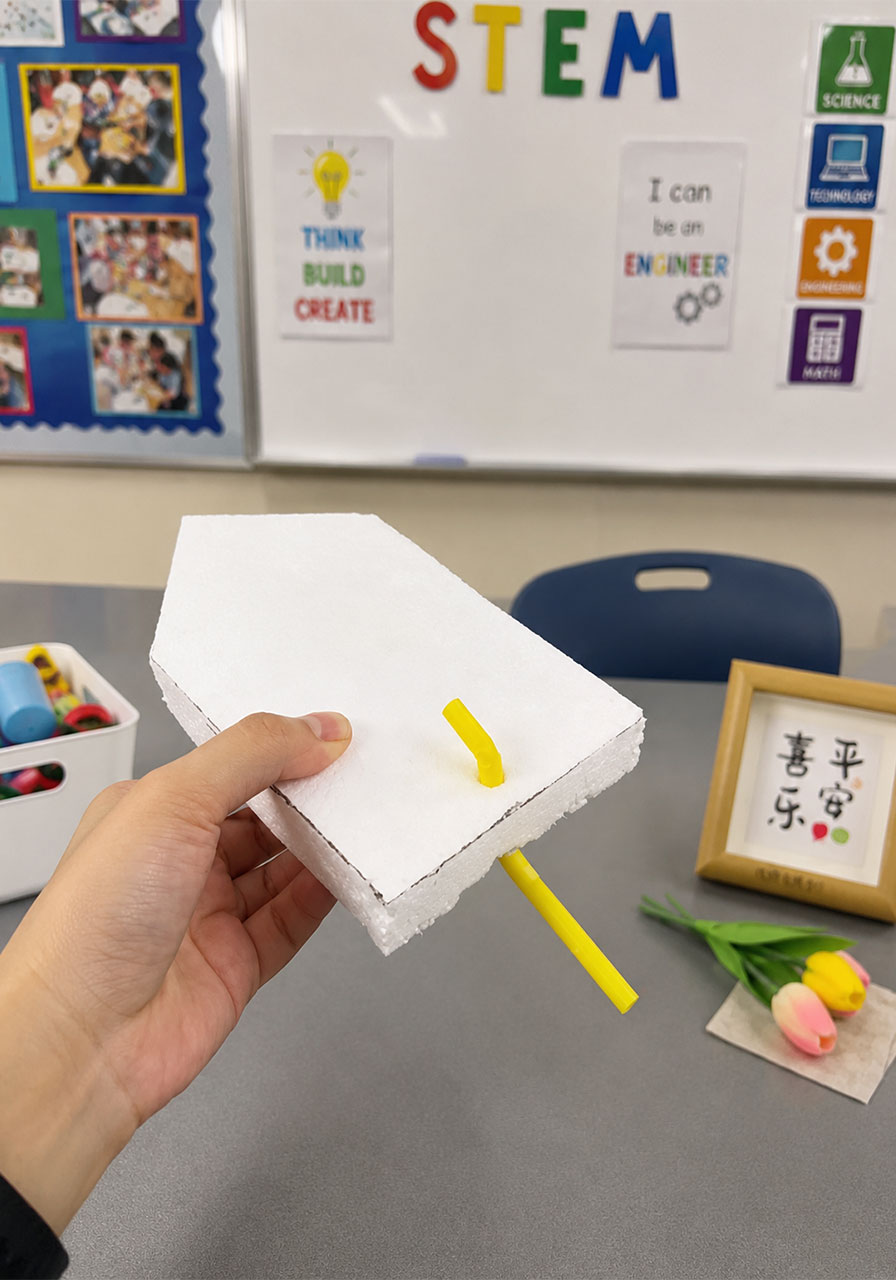
1. Draw a simple house shape on your foam board: a pointed roof on top, a rectangular body below. This shape becomes the hull of your boat.
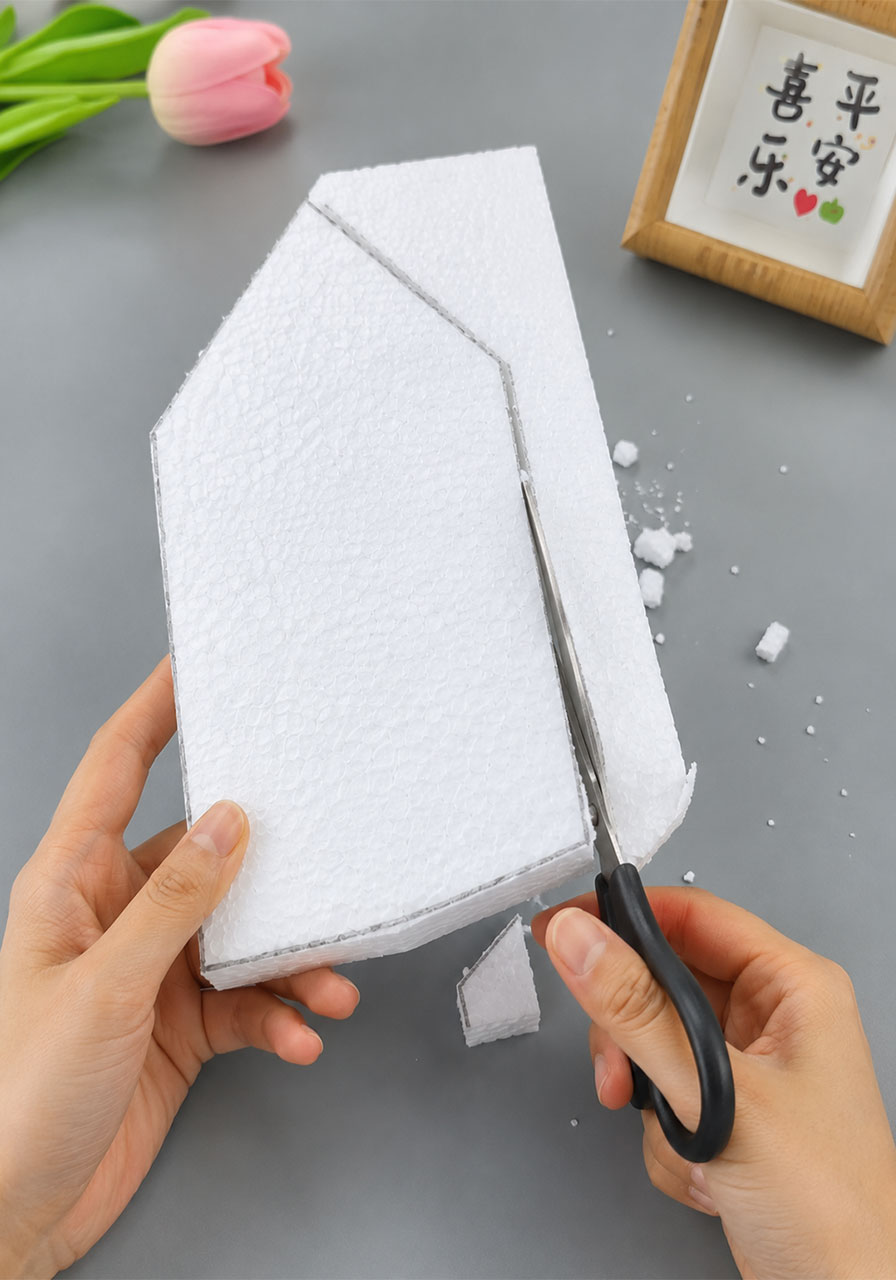
2. Cut the shape out carefully with scissors. This is your boat’s body.
3. Cut your straw into two pieces: one longer piece and one short piece, about an inch long.
4. Poke the short straw piece partway into the flat side of the boat, near the bottom edge, so it sits like a small handle sticking out.
5. Push the long straw piece through the pointed back tip of the boat, so one end pokes out the back and will later dip down into the water.
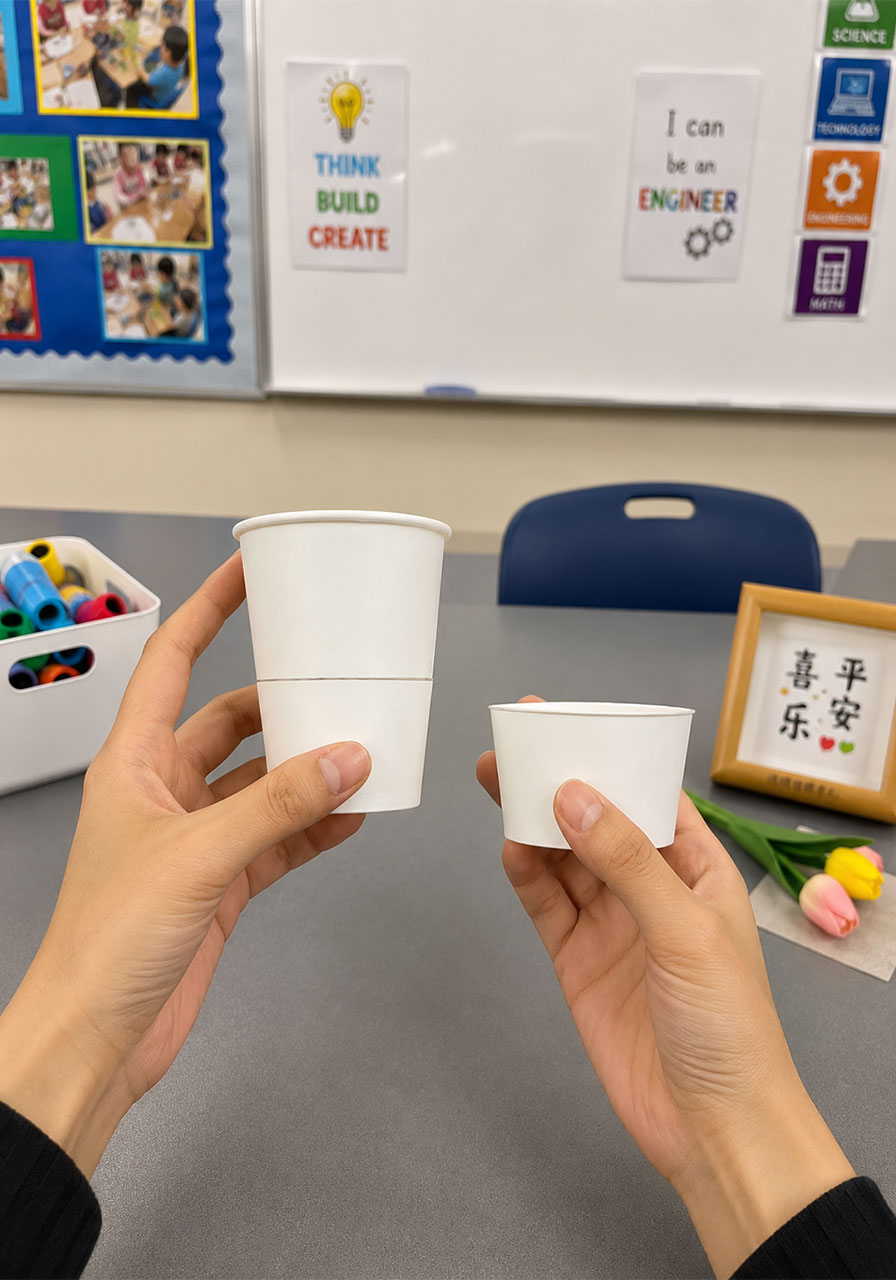
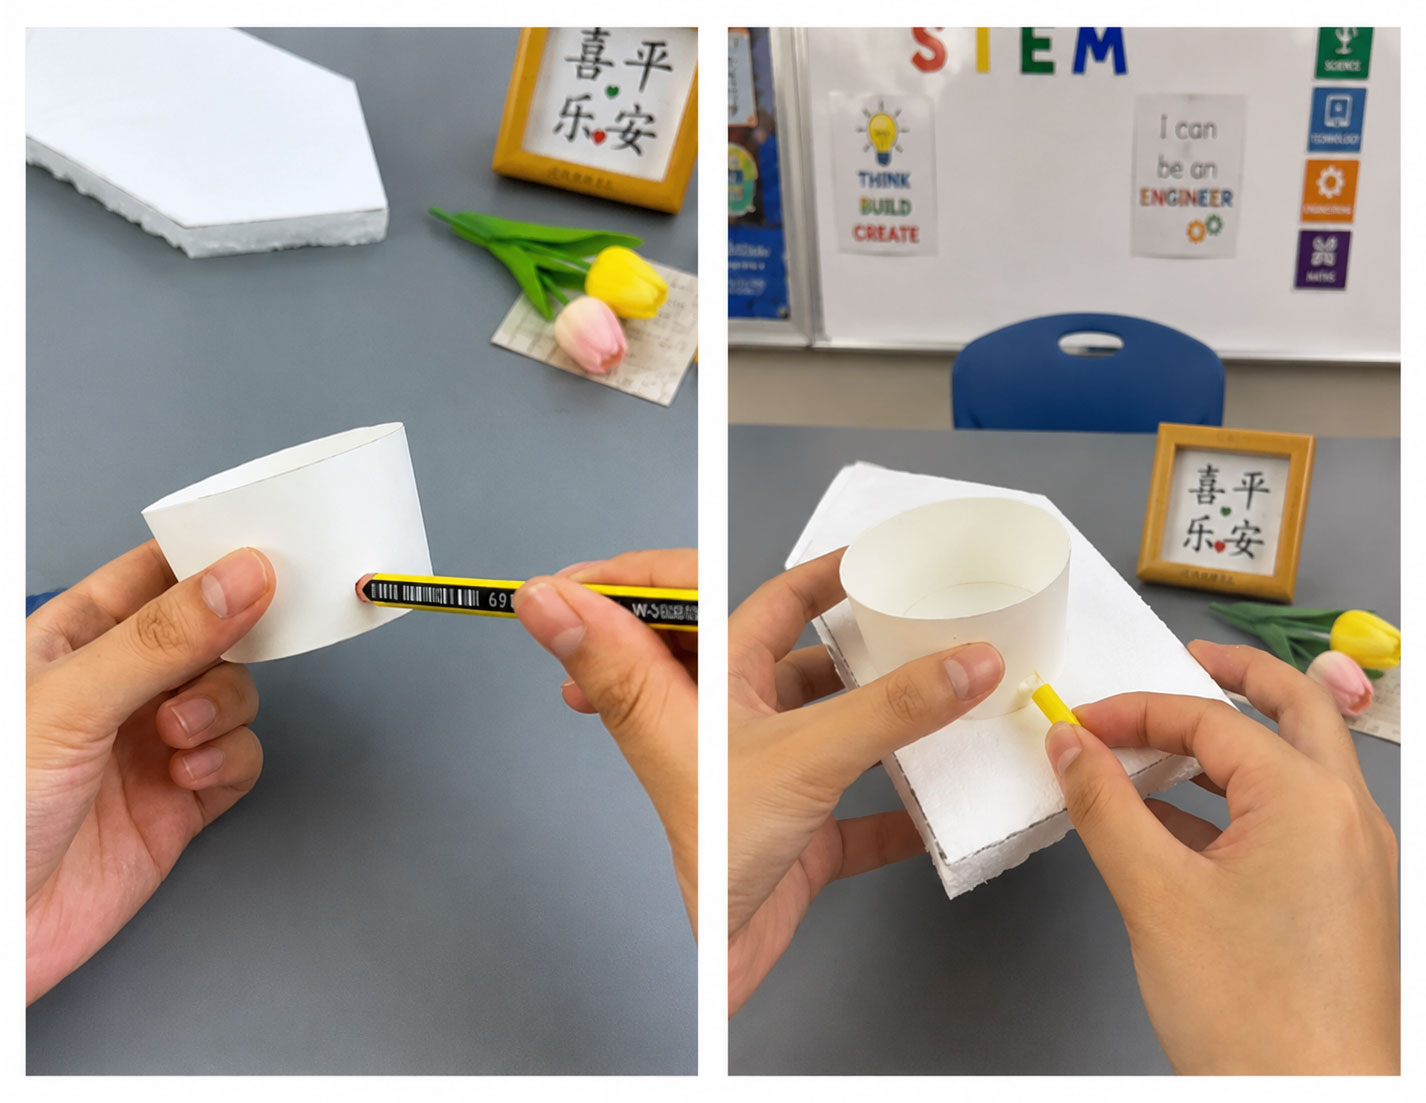
6. Take your paper cup and trim it down to about half its original height, so you’re left with a short, shallow cup.
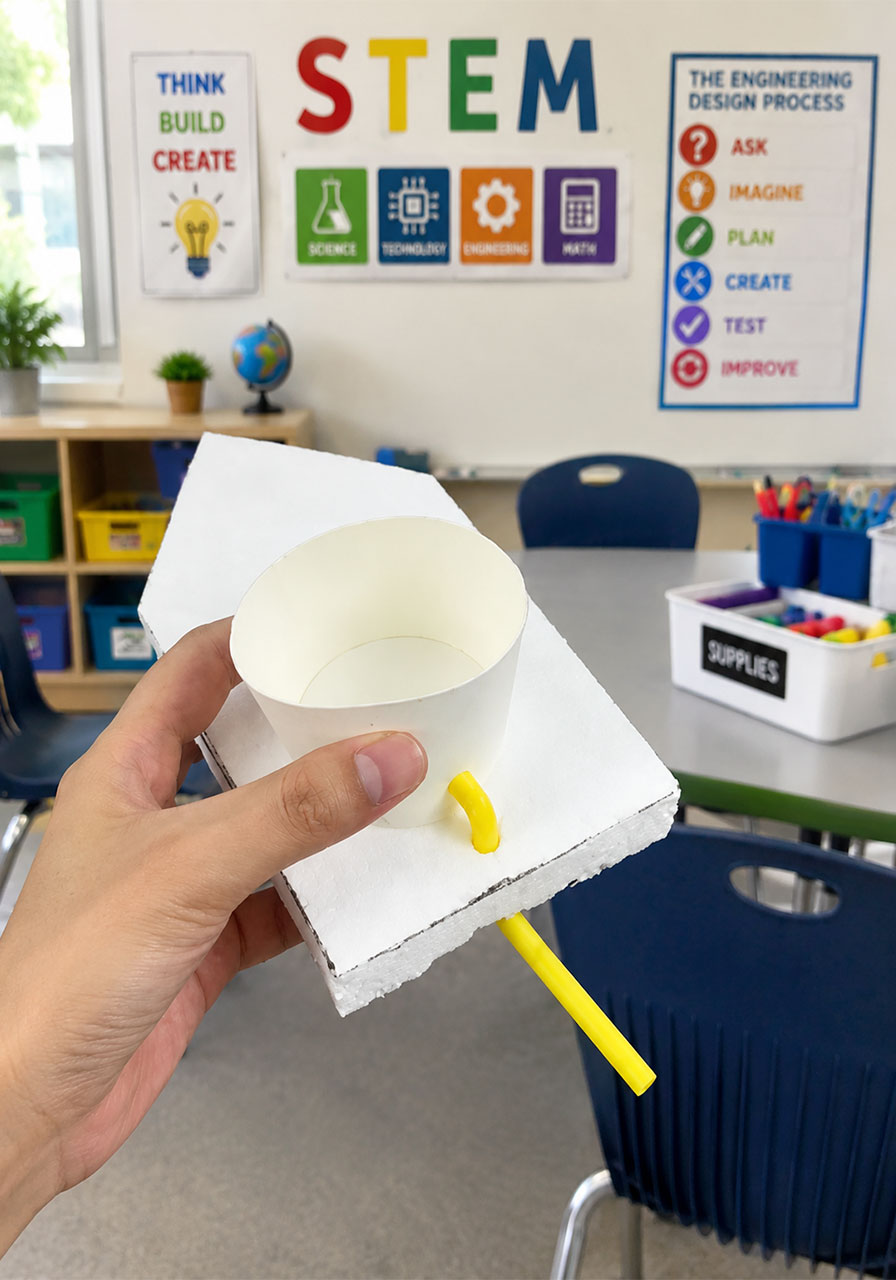
7. Glue the trimmed cup onto the top of the boat, right where the short straw piece is sticking out, so the cup is anchored in place.
8. Let the glue set fully, then add your sticker or tiny figurine on top for a little personality. This part is optional, but it turns your science project into a character your kids will actually cheer for.
Once it’s dry, flip it over and check that the long straw is angled down toward where the water line will hit. That little tube is what makes the whole experiment work.
How to Launch Your Color-Powered Boat
Now comes the fun part: bringing this thing to life.
1. Fill a shallow pool, tub, or tray with clean water and set your boat on top so it floats level.
2. Mix a few drops of food coloring with a small amount of water and a tiny drop of dish soap in a separate cup.
3. Slowly pour your colored mixture into the cup on top of the boat.
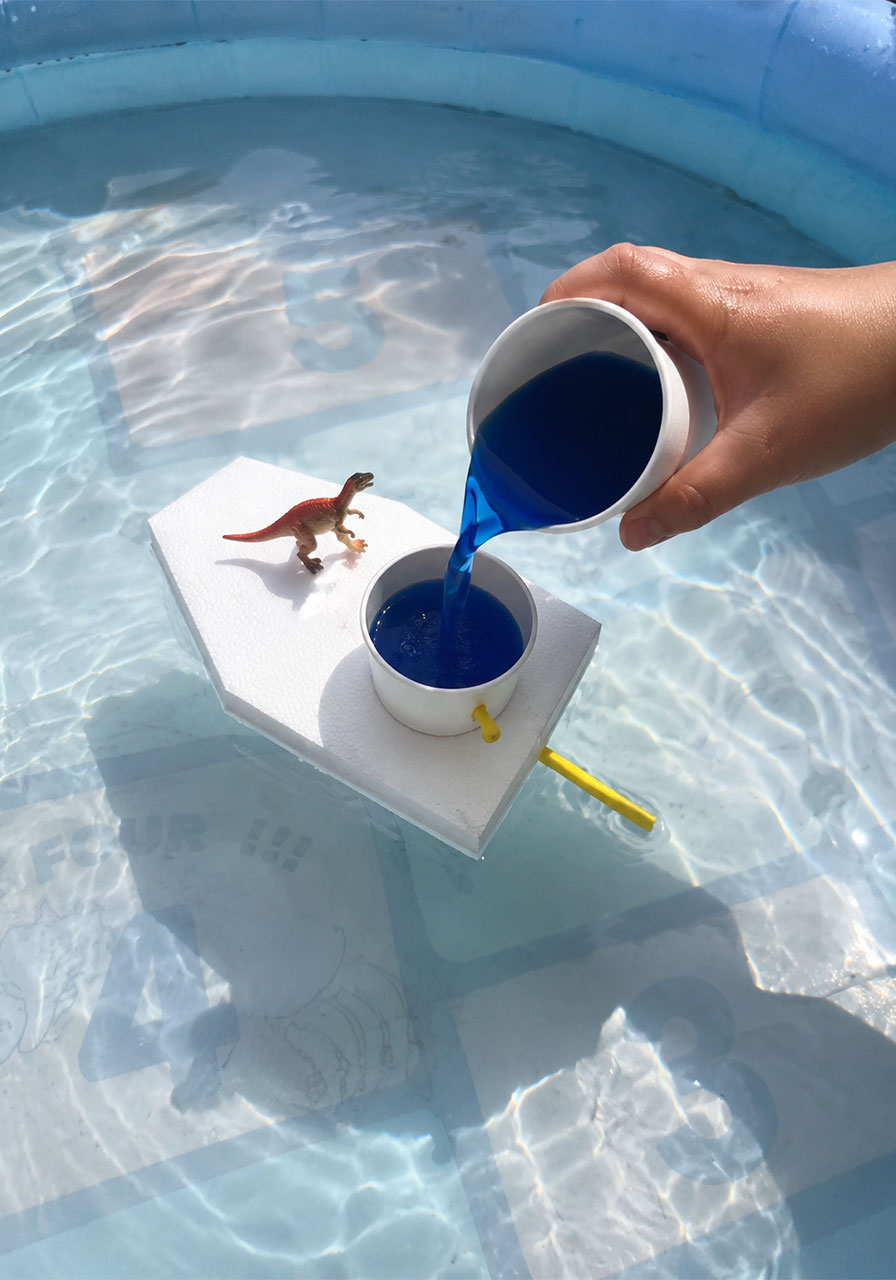
4. Watch closely: the liquid will drain down through the tube and release behind the boat, right at the waterline.
5. As the color hits the water, you’ll see the boat glide forward while a swirling ribbon of color streams out behind it, like a paintbrush trailing across a canvas.
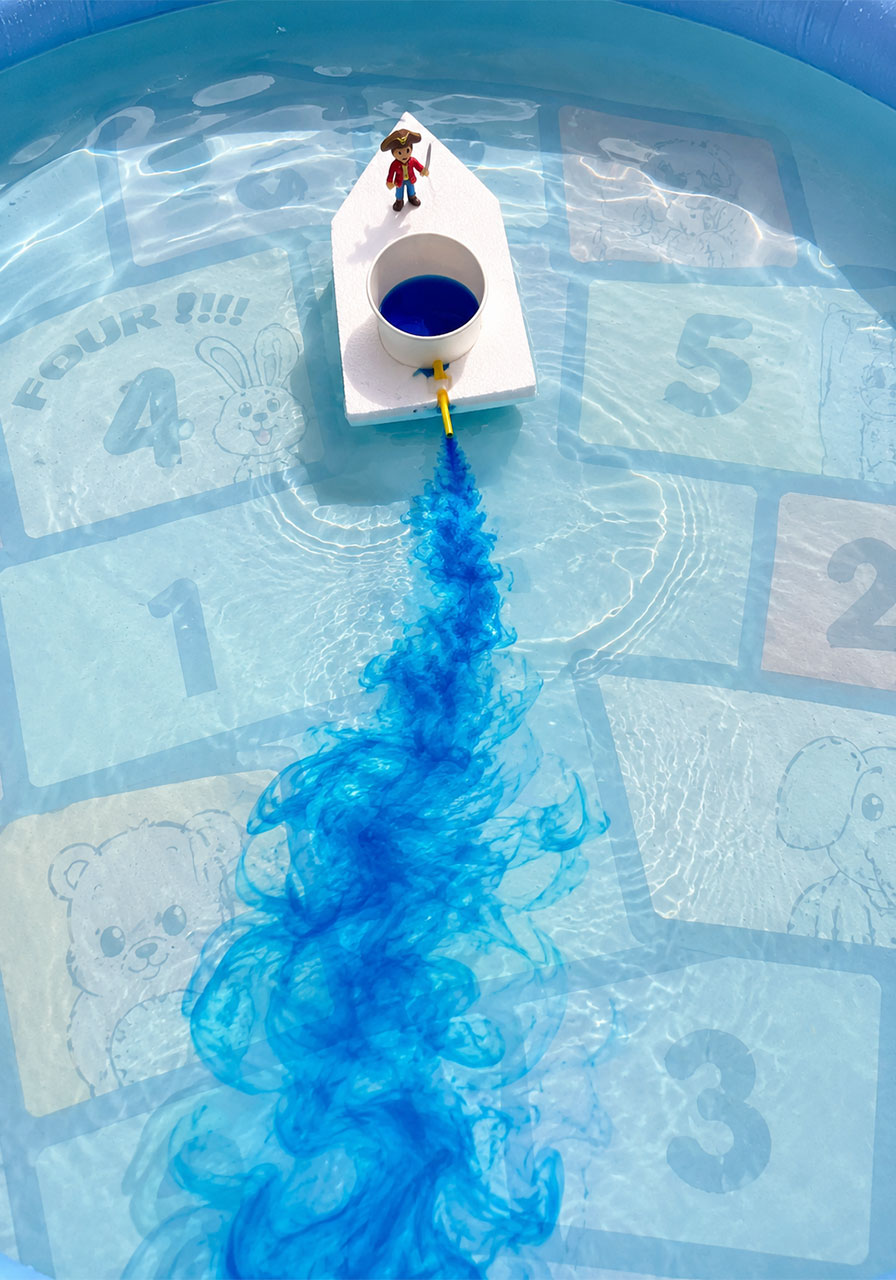
6. Repeat with a new color for a completely different “painting,” or let siblings race their boats side by side.
The first time your kids see that boat take off on its own, they will absolutely ask “how did it do that?” That question is exactly the point.
The Science Behind the Magic
Here’s the fun part you get to explain, and trust us, this is the kind of science fact that makes you look like the smartest person in the room.
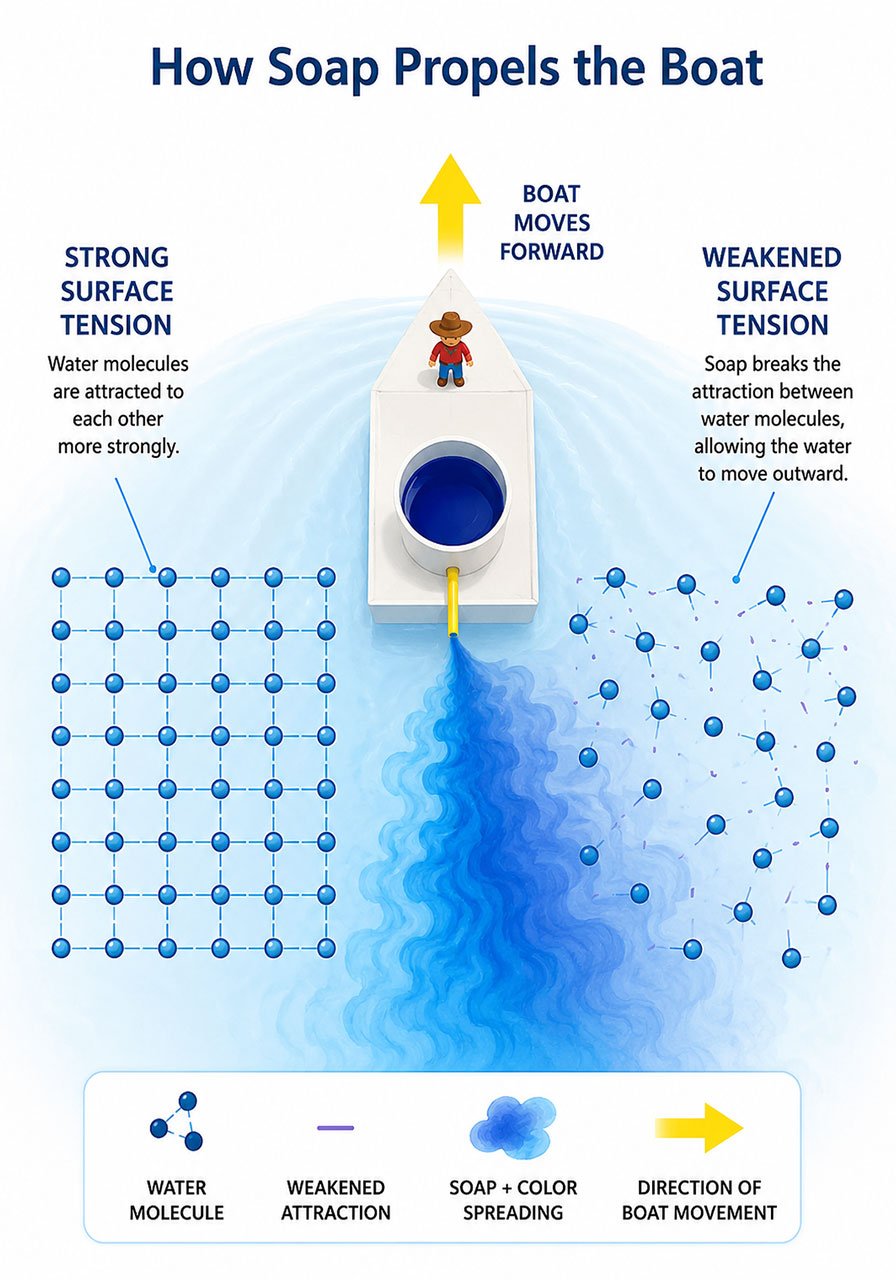
Water molecules cling tightly together at the surface, creating something called surface tension. Think of it like an invisible, stretchy skin sitting on top of the water.
When your colored, soapy mixture hits the water behind the boat, the soap breaks that surface tension right where it lands. The water in front of the boat still has full surface tension, so it’s essentially “stronger” than the water behind it.
That imbalance pulls the boat forward, away from the weakened water, in a real physics phenomenon called the Marangoni effect. The food coloring just makes the whole process visible, so kids can actually see the invisible force of surface tension at work.
In other words: your kids aren’t just making pretty swirls. They’re watching a genuine scientific principle play out in real time, and they built the tool that proved it.
Pro Tip
Use a clear plastic tub or a light-colored pool bottom so the color trail really pops. A dark surface will swallow up all that beautiful swirling color, and that’s the whole show.
Also, go easy on the dish soap. A single small drop per mixture is plenty. Too much soap and the boat will zoom off before anyone gets a good look at the color trail.
Fun Variations
Once your kids master the basic build, try these twists to stretch the learning even further.
Color Mixing Lab: Load two boats with primary colors, like blue and yellow, and let their trails cross in the water. Ask your kids to predict what new color will form where the trails meet.
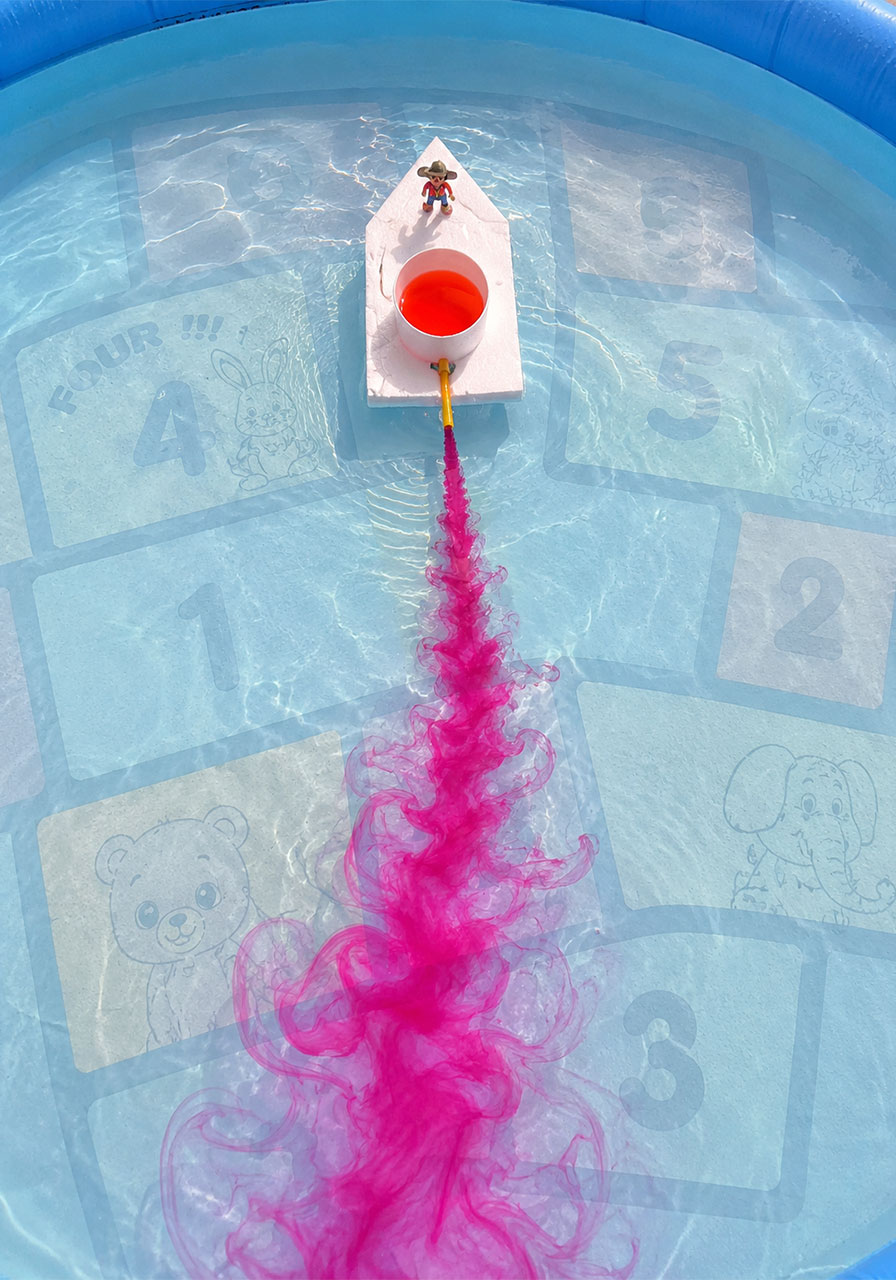
Boat Races: Build a small fleet and let every kid decorate and launch their own. Time how far each boat travels before it stops.
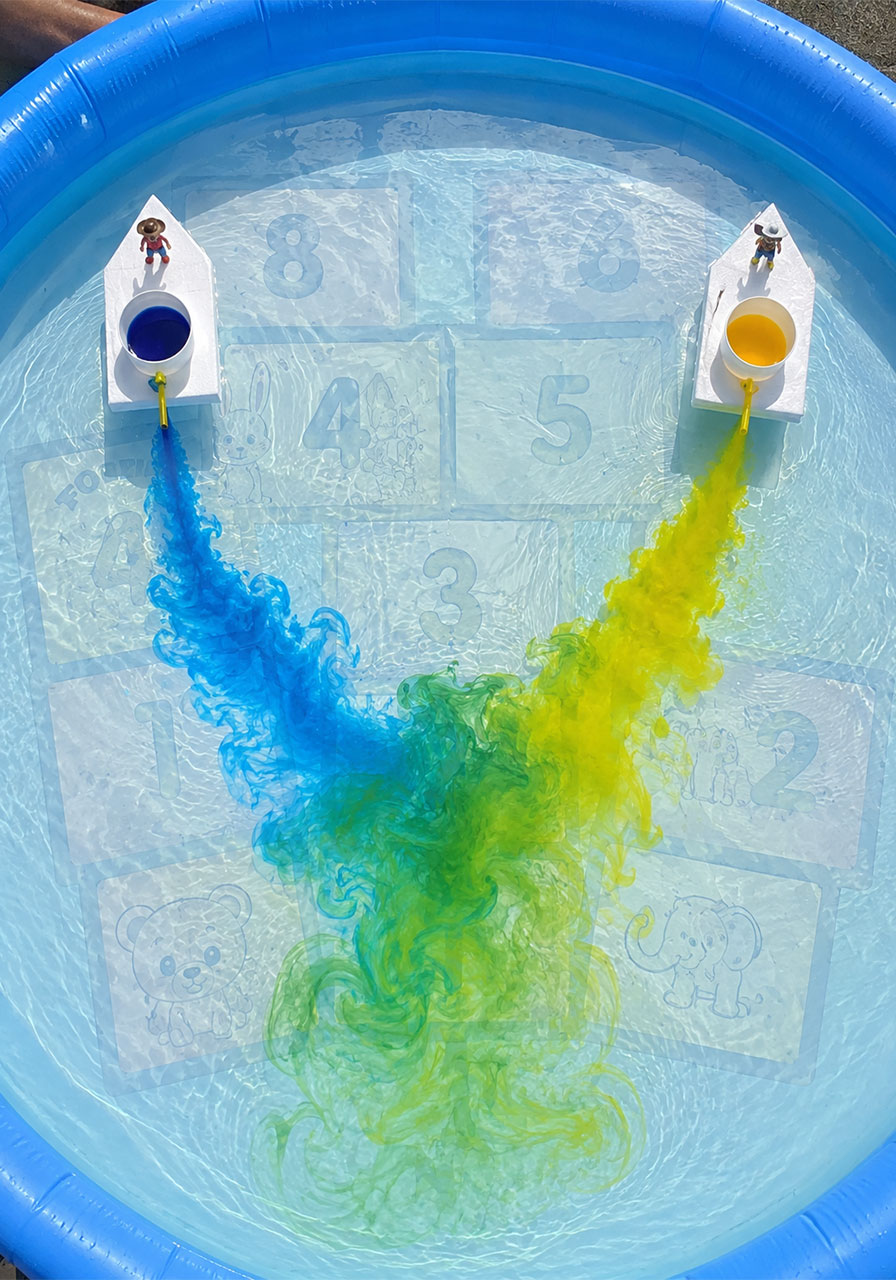
Soap Ratio Experiment: Make a few color mixtures with different amounts of dish soap and have kids guess which one will make the boat travel fastest. This turns a fun activity into a real experiment with a hypothesis and a result.
Classroom Gallery: Photograph the swirling color trails from above right after each launch. Kids can print their favorite “painting” and compare how each one turned out differently, just like real abstract art.
Why This Project Belongs on Your STEM Shelf
This is exactly the kind of activity we love here at Play Party Games: something that feels like pure fun on the surface, but is secretly packed with real learning underneath.
It’s kid-friendly, classroom-ready, and works just as well as a solo rainy-day project as it does for a full birthday party or STEM night at school. Best of all, it costs almost nothing to build, and the payoff is a genuinely beautiful, ever-changing piece of art that your kids made with their own hands.
Because the best learning moments are the ones that don’t feel like learning at all, they feel like play.
Build one boat, or build ten. Either way, get ready for a lot of “can we do it again?”
