
Boo-tiful doesn’t even begin to cover it. These glittery, glowing resin ghosts are hands-down one of the easiest ways to turn any Halloween gathering into something guests will be talking about long after the candy’s gone.
Here’s the fun part: no two ghosts ever turn out exactly alike. Every single one you pour is a little surprise, which makes this project feel more like a magic trick than a craft.
Whether you’ve never touched resin before or you’re already a glue-gun-and-glitter veteran, this is one of those planning-ahead projects that pays off big. You mix it up days before the party, let it work its magic, and by the time your guests arrive, you’ve got a table full of spooky-cute décor that looks like it came from a boutique store.
Ready to dive in? Let’s get your ghosts glowing.
Why You’ll Love This Project
This one checks every box for a party host on a timeline. It’s low-mess, budget-friendly, and requires zero special skills to pull off.
Best of all, it’s a make-ahead project. You’re not scrambling the morning of the party trying to throw together decorations. Mix your resin a few days early, let it cure, and you’ve got a whole squad of spooky little ghosts ready to set the mood.
Plus, once you pop a flameless tea light underneath, these things practically glow like they’ve got their own tiny spirit trapped inside. Dramatic? Yes. Worth it? Absolutely.
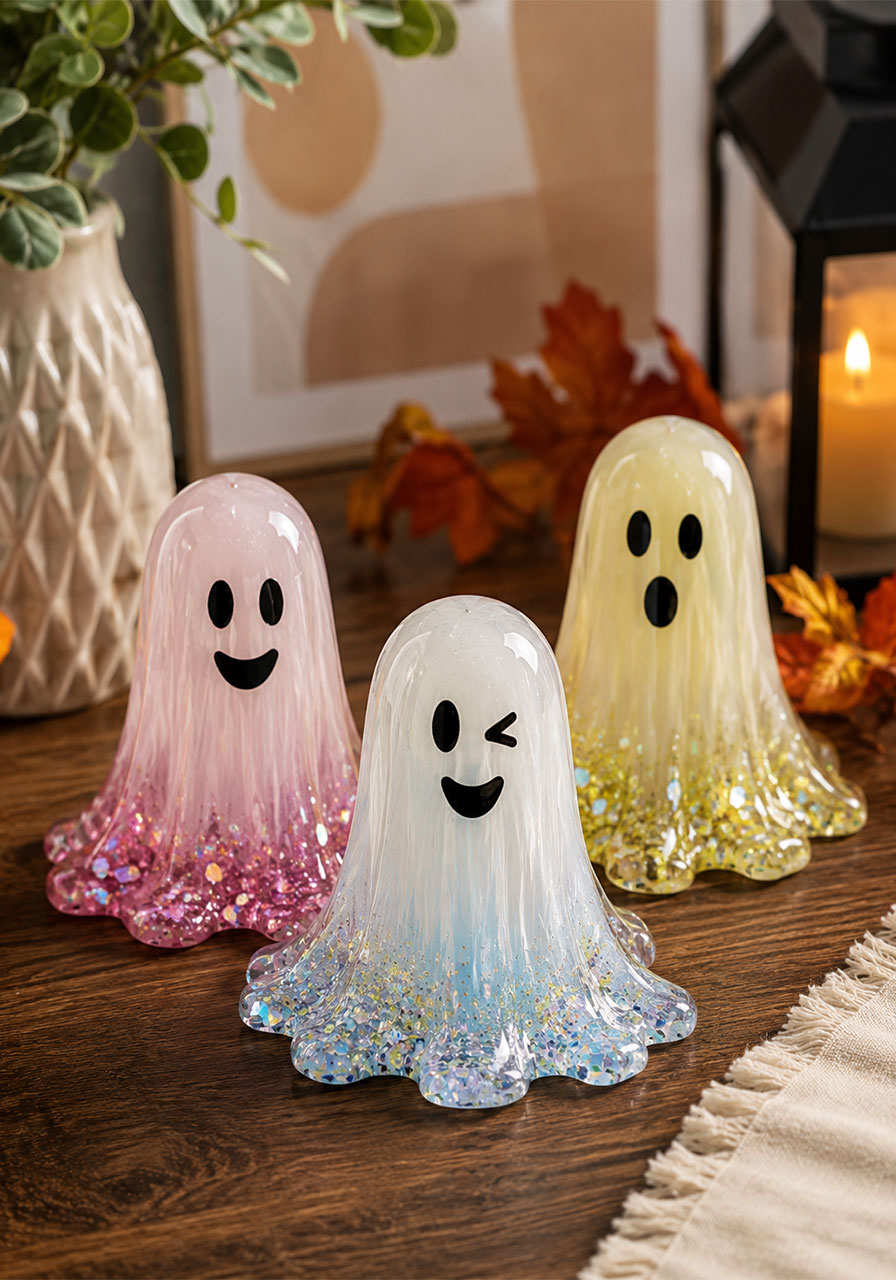

Resin Ghost Party Décor
Best for: Halloween parties, fall gatherings, spooky-season table centerpieces
Time to Make: About 20-30 minutes of hands-on work, plus 3-4 hours of curing time and an overnight set
Makes: 1 ghost per batch (double or triple the recipe for a whole ghostly gang)
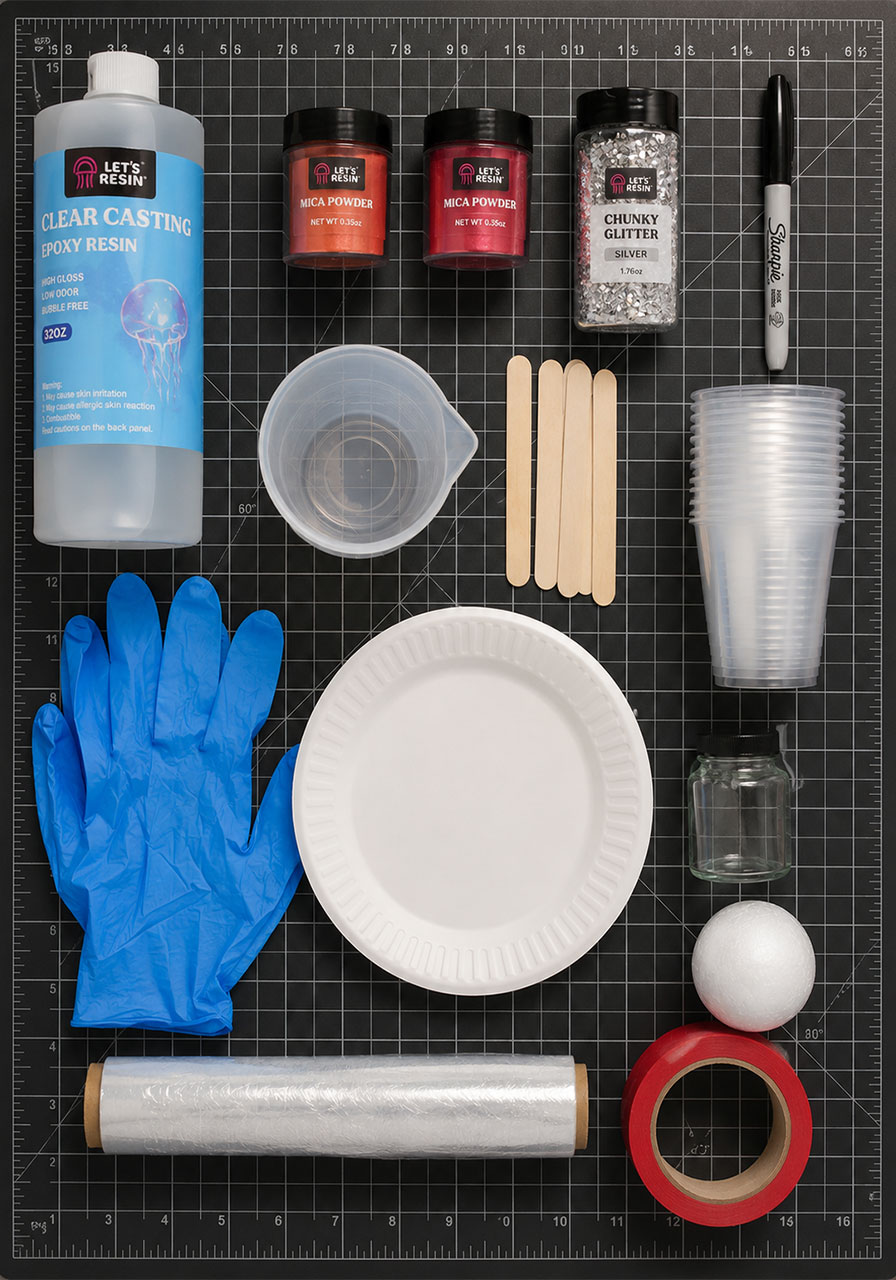
What You’ll Need
Casting resin (epoxy, not UV resin – more on why below)
Mica powder in 2 shades of the same color
Chunky silver glitter
A black Sharpie marker
Silicone mat (to protect your table)
Nitrile gloves
Silicone measuring cup
Popsicle sticks or a resin stir stick
A few disposable plastic cups
One 12-inch paper plate
Plastic food wrap
A small glass jar
A Styrofoam ball
Painter’s tape
A quick safety note before you start: Resin crafting is easy, but it does need a little respect. Always work in a well-ventilated room, wear your gloves and eye protection, and check your resin’s label to see if it calls for a respirator. Protect your table with a drop cloth or silicone mat too, since resin isn’t exactly forgiving on furniture.
How to Make Your Resin Ghost
Step 1: Mix your resin.
Pour equal parts Resin (Part A) and Hardener (Part B) into your silicone measuring cup. We used 75ml of each for 150ml total, but check your specific brand’s ratio since they can vary. Stir slowly with your popsicle stick for a full 3-5 minutes, scraping the sides and bottom as you go, until the mixture turns clear.
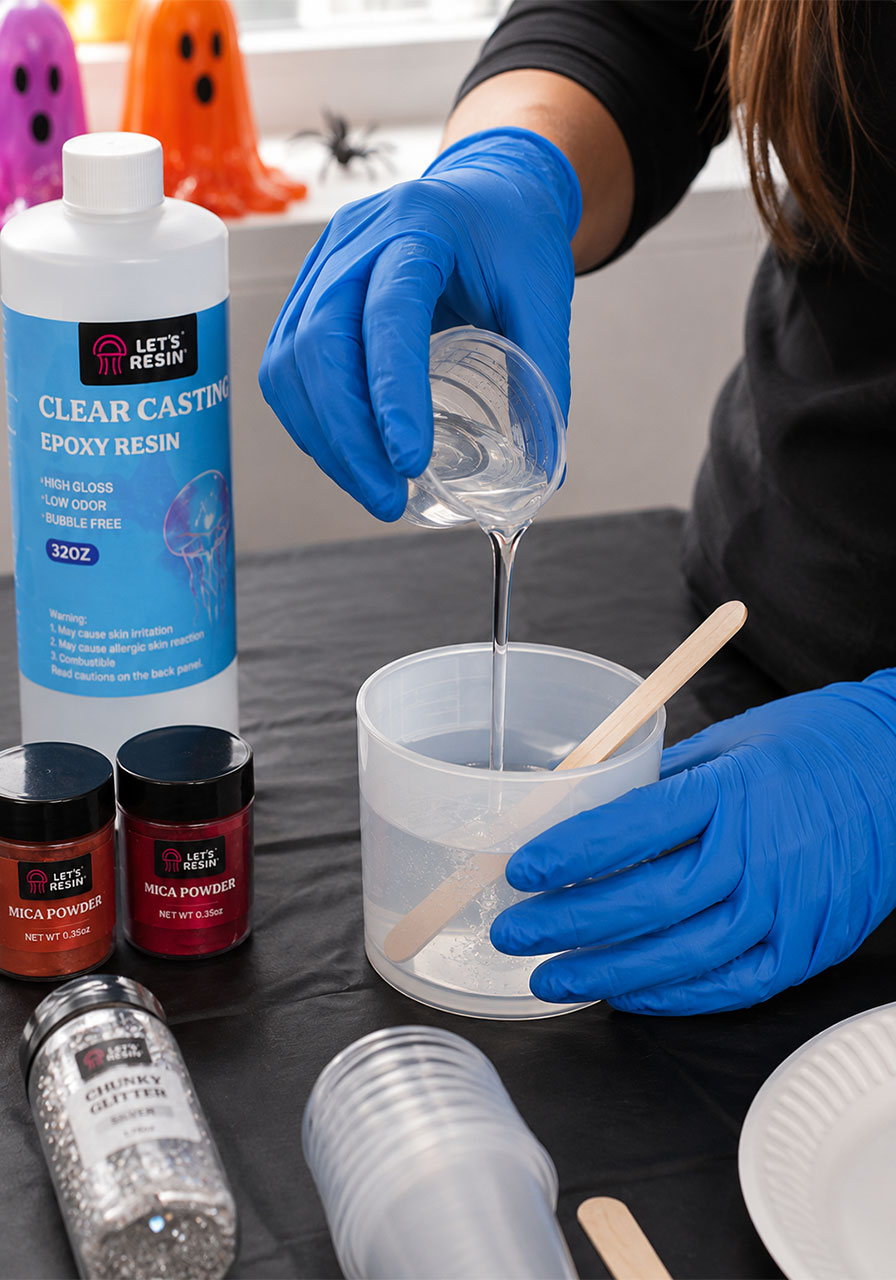
Step 2: Split and color it.
Pour your mixed resin into two separate cups, giving one cup slightly more than the other. Add your lighter mica powder shade to the bigger cup and your darker shade to the smaller one. Stir each until the color is fully blended in.
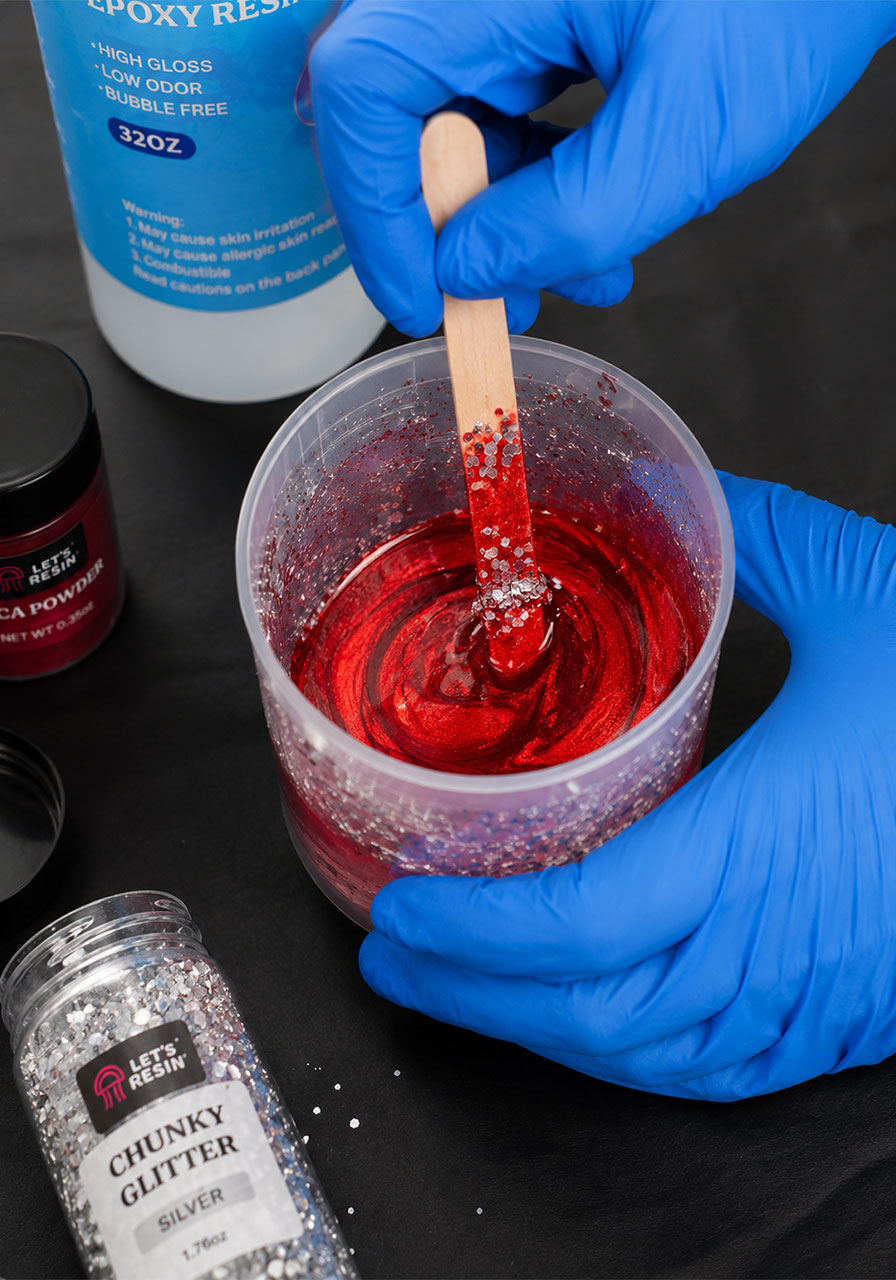
Step 3: Build your color plate.
Line a paper plate with plastic wrap. Pour your lighter resin into the center, covering about two-thirds of the plate. Then pour a ring of the darker resin around the outside edge, letting the two colors touch. Leave about an inch of bare space around the rim.
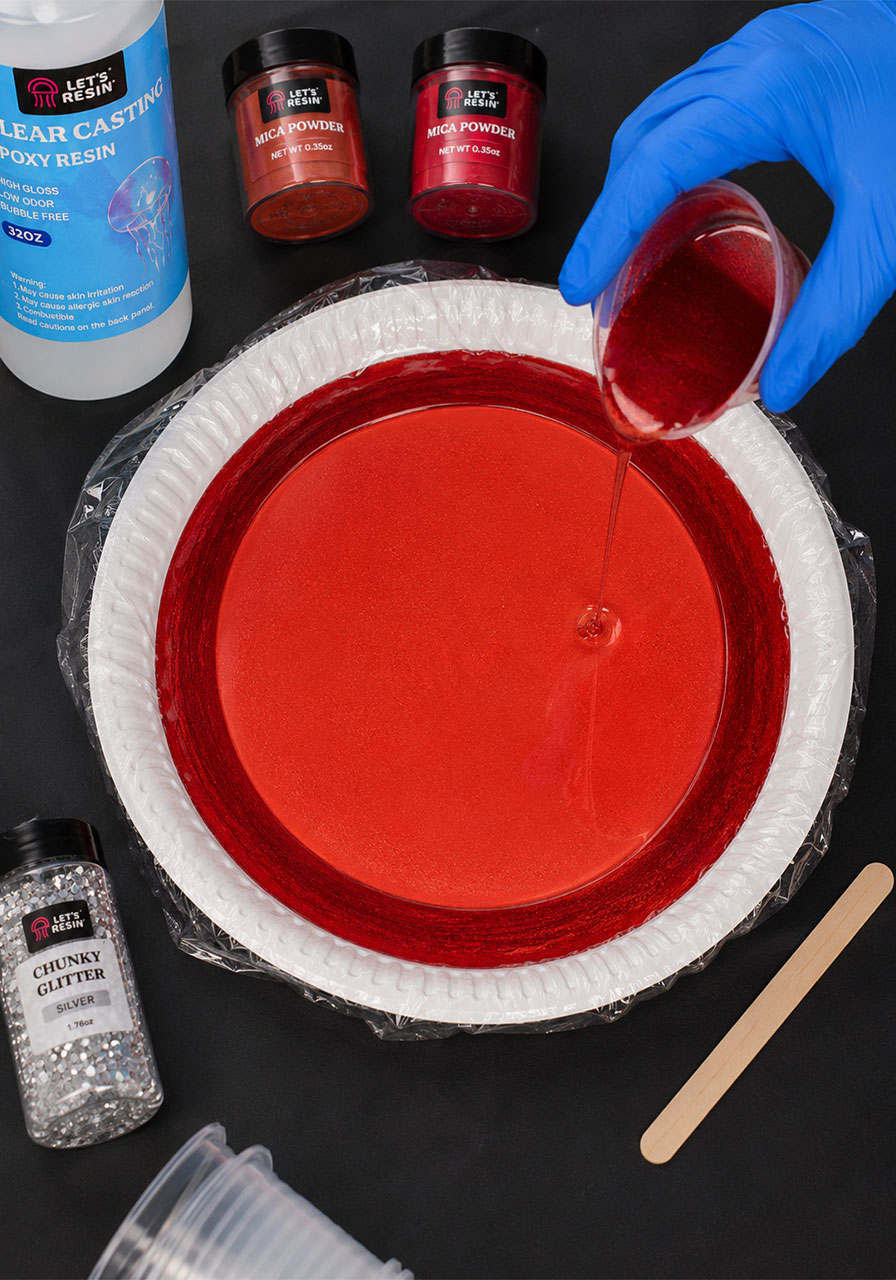
Step 4: Add the sparkle.
Stir chunky silver glitter into your darker resin cup, then pour it in a ring on top of the darker color you already added. Finish by pouring the rest of your lighter resin into the center, so the light shade becomes the star of the show.
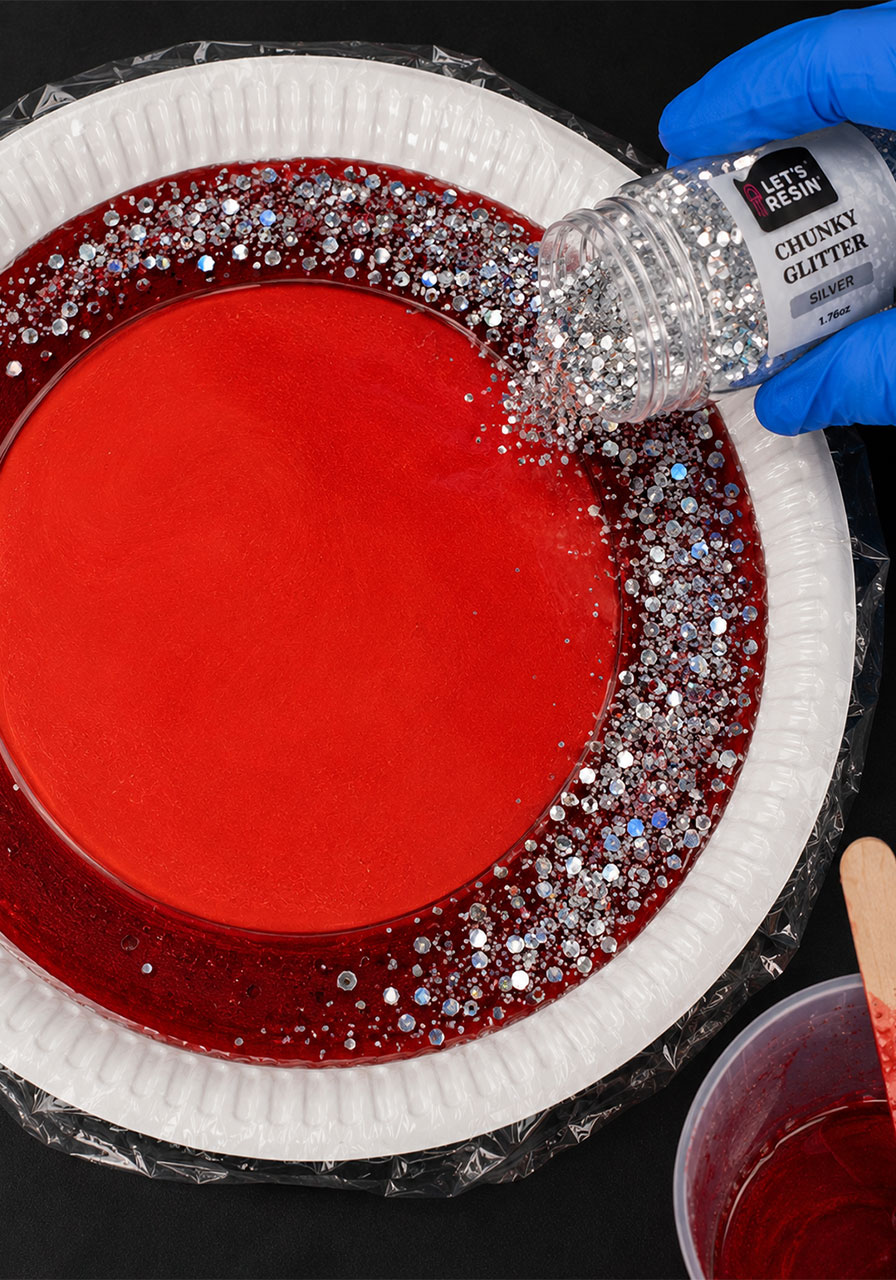
Step 5: Let it rest.
This is the part that takes patience. Let the resin cure until it’s no longer liquid, but still soft enough to shape – tacky to the touch without sticking to your gloves. This usually takes 3-4 hours, but it really depends on your room’s temperature and humidity. Set a timer for 2.5 hours, then check every 20 minutes after that.
Step 6: Build your ghost mold.
While you wait, tape a Styrofoam ball to the top of a small glass jar using painter’s tape. This becomes your ghost-shaping form – the ball is the head, the jar is the body.
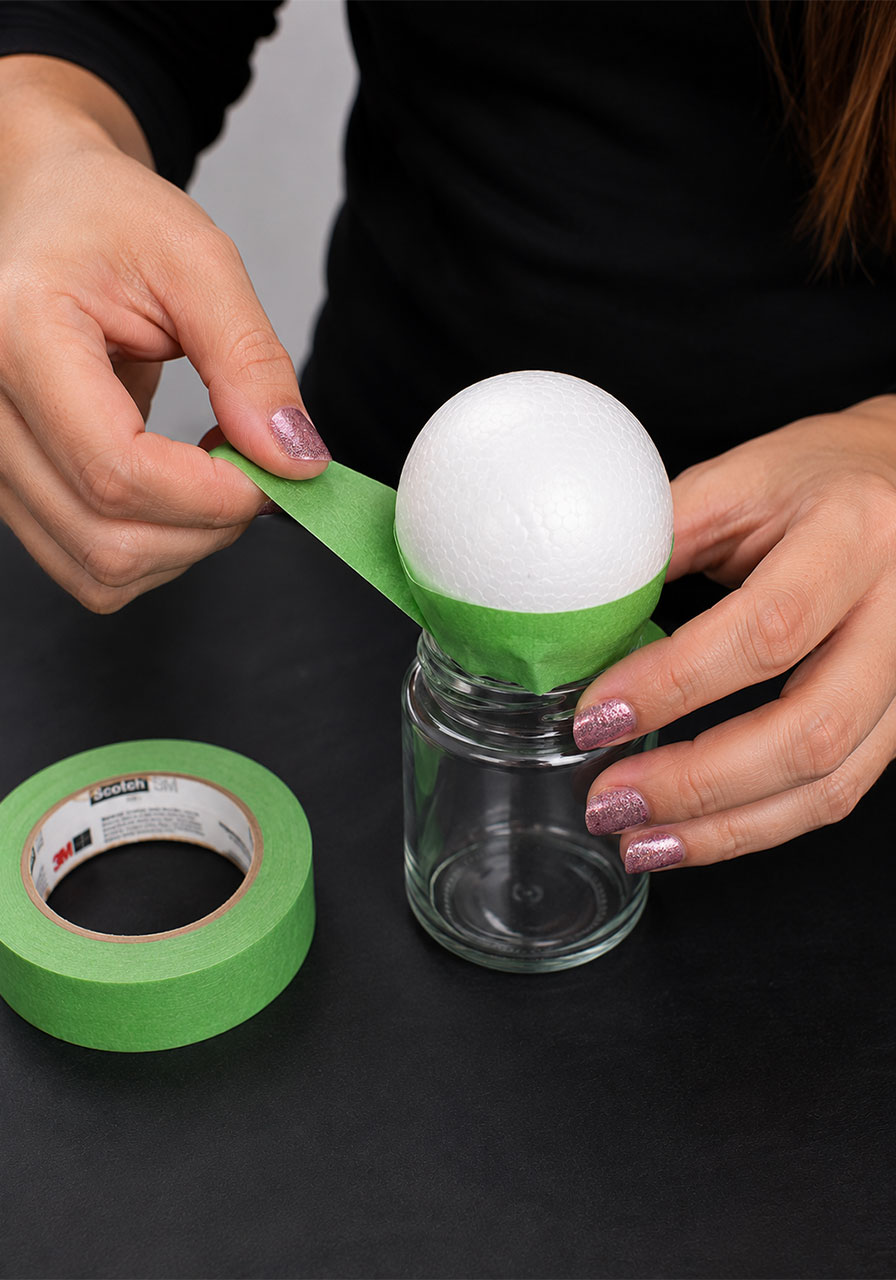
Step 7: Shape your ghost.
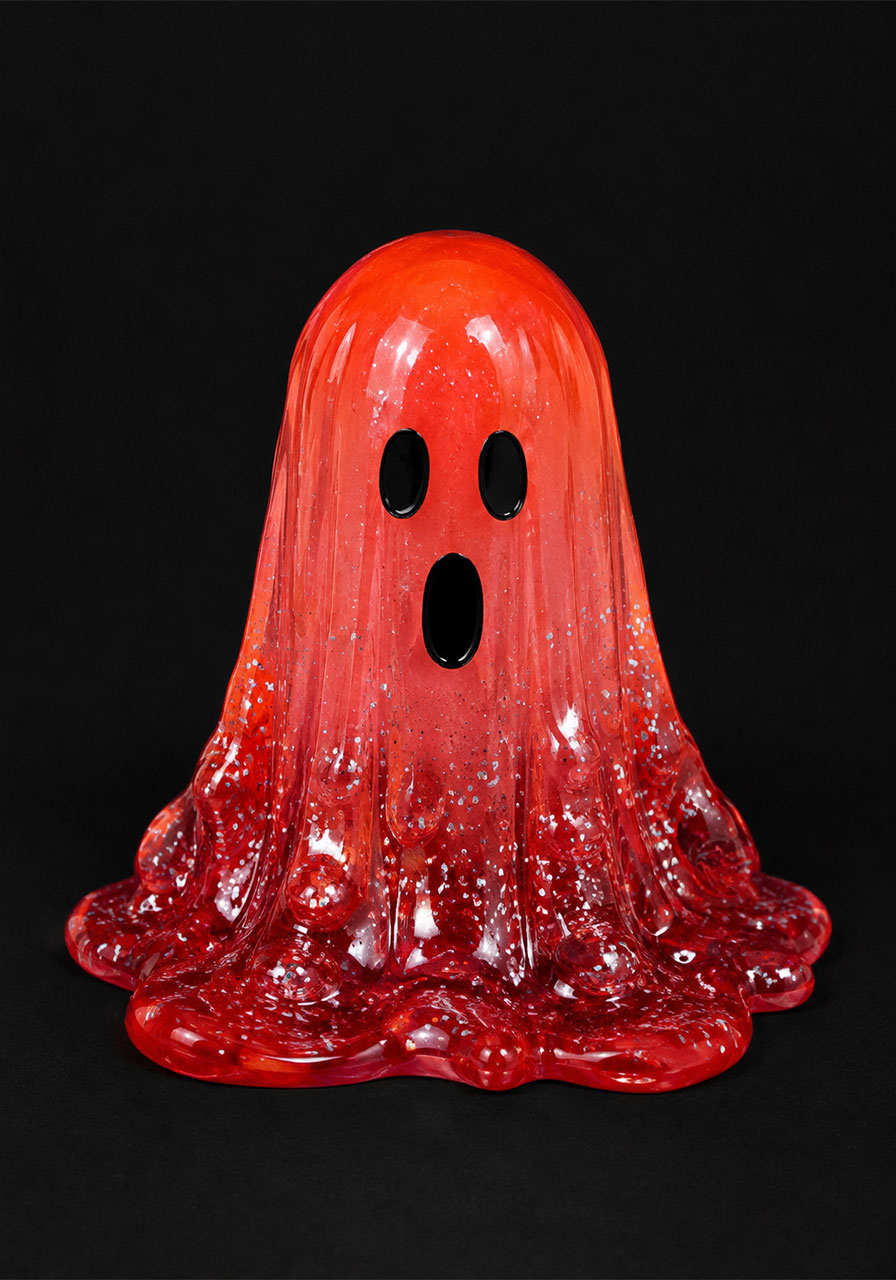
Once your resin has reached that soft, tacky stage, lift the plastic wrap off the plate and drape it over your mold, centering the middle of the resin over the ghost’s head. Let gravity do most of the work here – the resin will naturally droop and drip down into a ghostly shape. Gently adjust the plastic wrap to fine-tune the form.
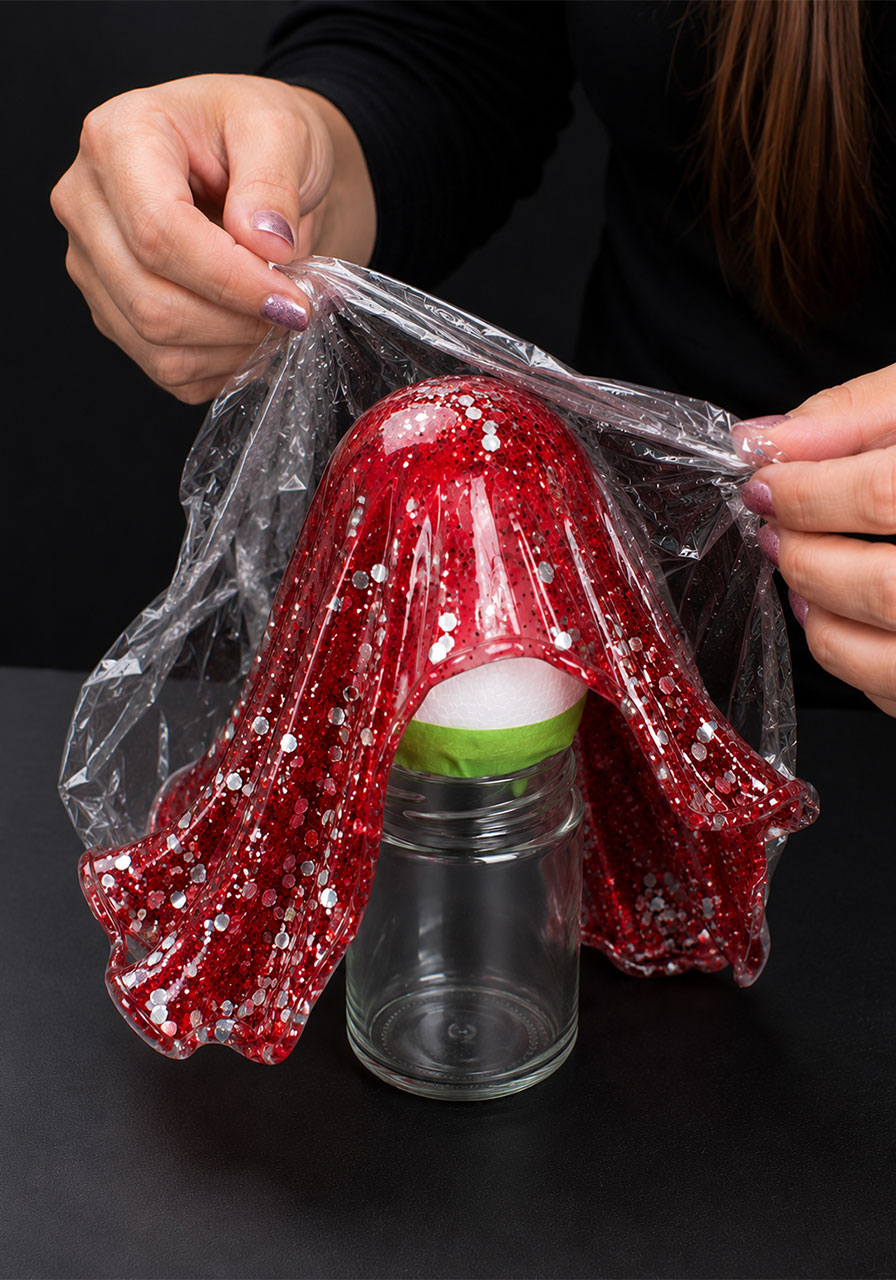
Step 8: Let it set overnight.
Leave your ghost to harden fully, following your resin’s recommended cure time.
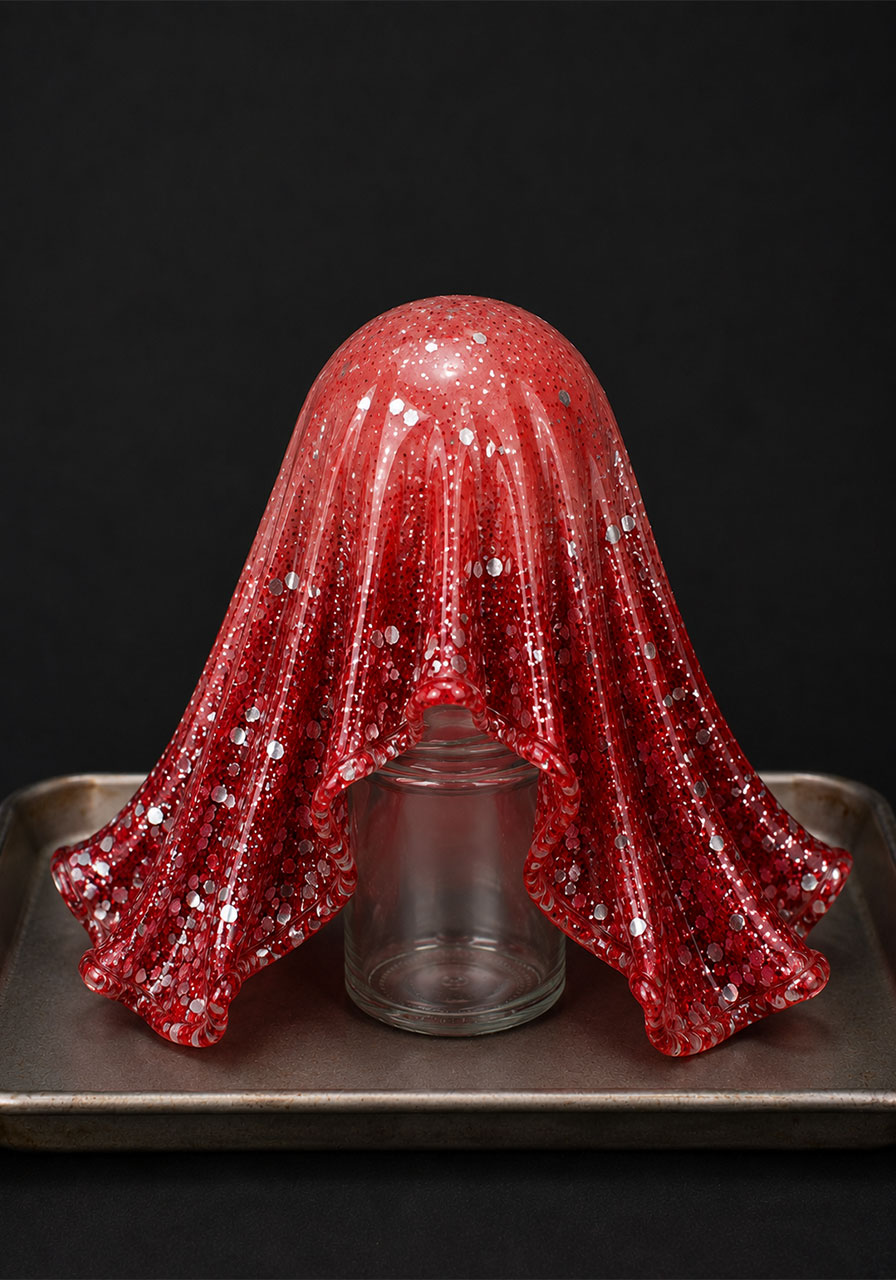
Step 9: Unveil your ghost.
The next day, carefully remove your ghost from the jar mold. Peel away as much plastic wrap as you can, using tweezers for any stubborn bits that stuck to the surface. Don’t stress if a little wrap stays behind – it happens, and it’s totally fine.
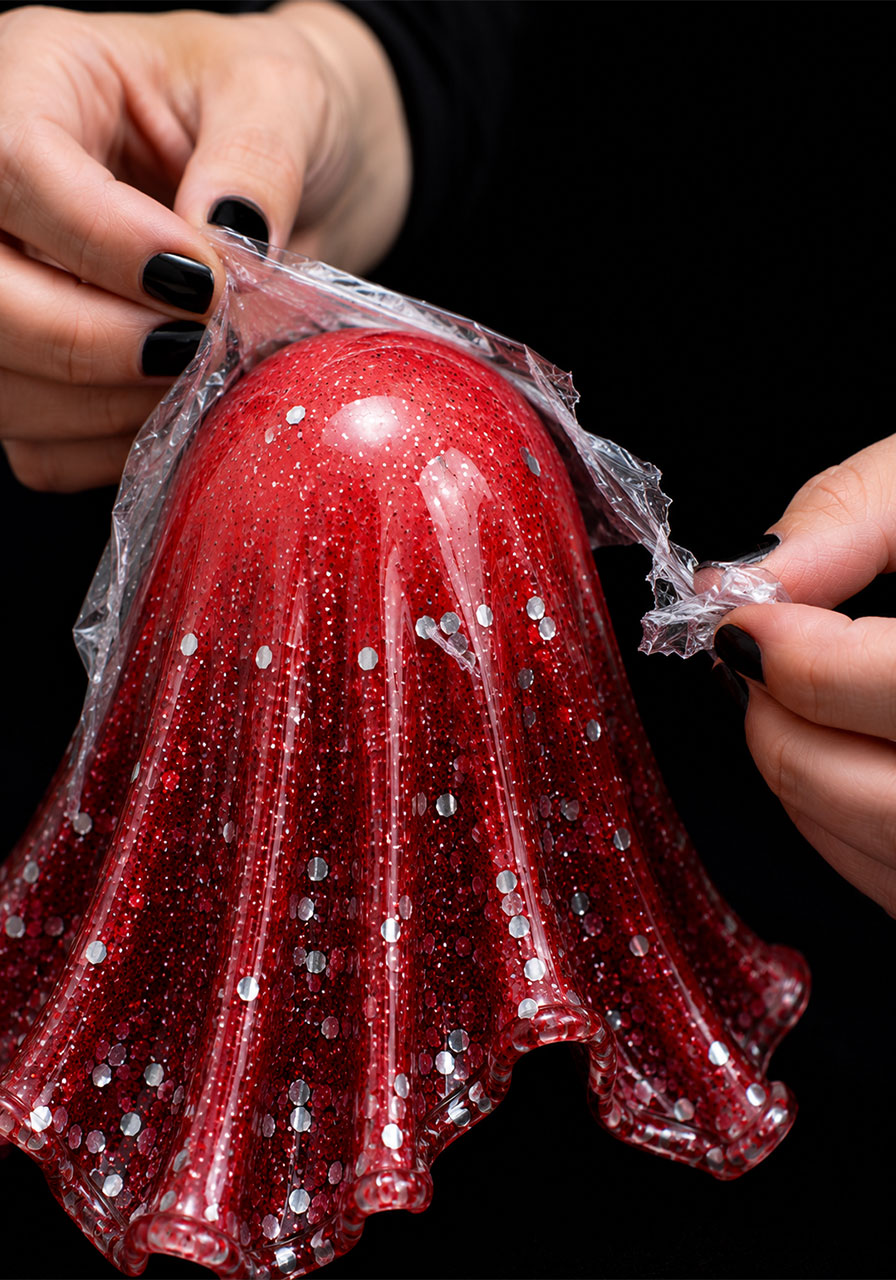
Step 10: Give it a face.
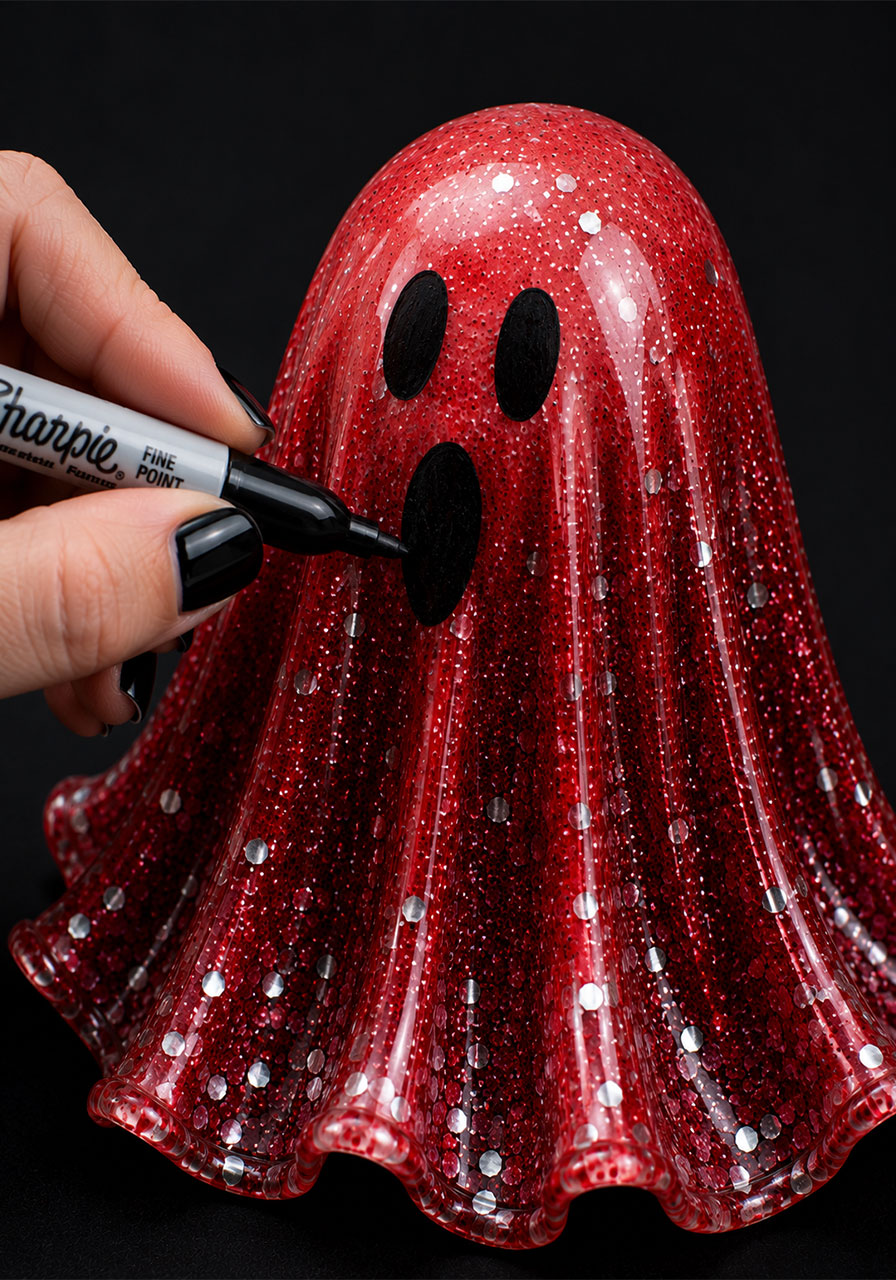
Pick whichever side of your ghost looks best and draw on a classic spooky face using a black Sharpie or paint pen. Two dots for eyes, one oval for that iconic “boo” mouth, and you’re done!
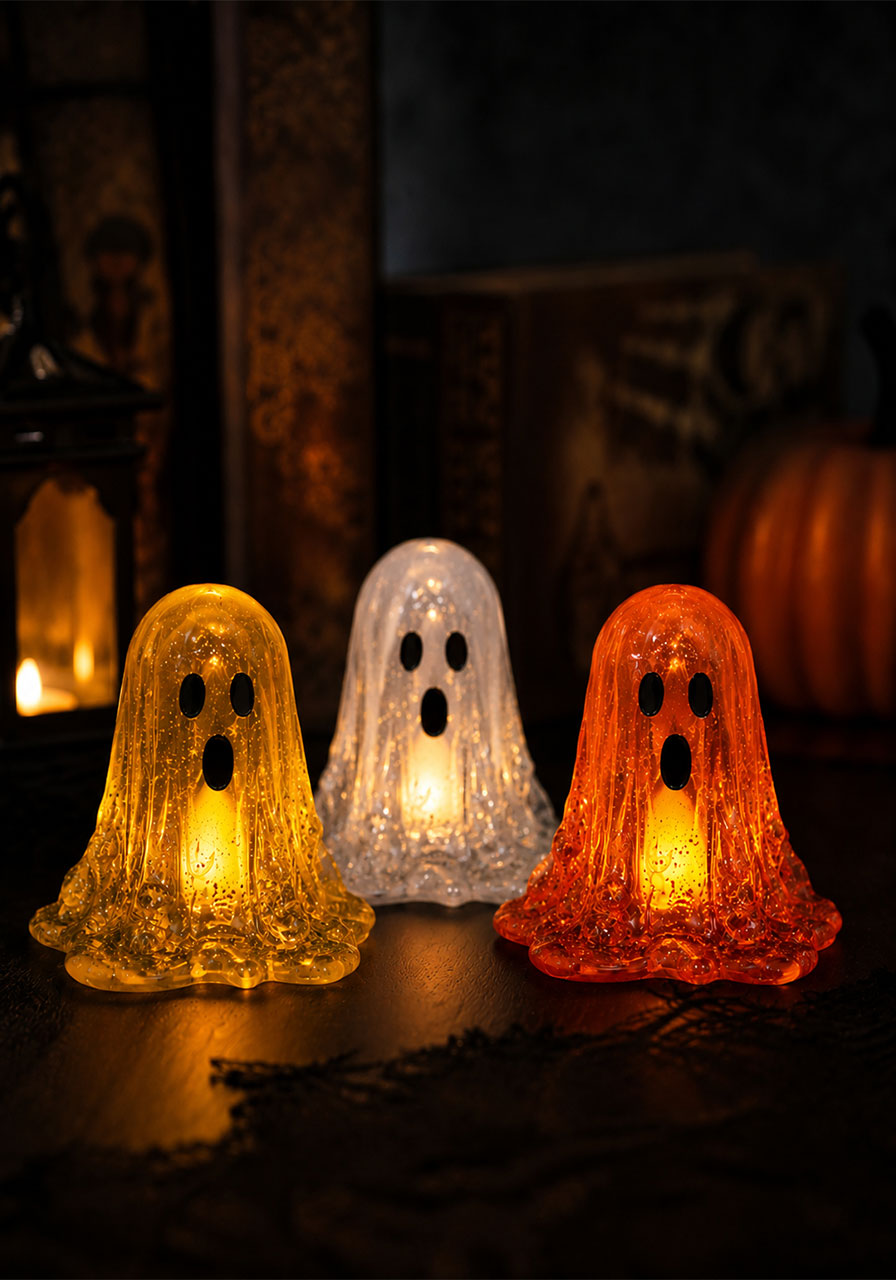
Pro Tip: Once your ghost has fully cured, set it over a flameless tea light and dim the lights. The glow shining through the translucent resin gives it that “real floating spirit” effect that makes people stop mid-conversation to ask where you got it.
Common Questions Before You Get Started
How do I know when my resin is ready to shape?
You’re looking for that in-between stage – not liquid, not fully hard. The resin should feel tacky when you touch it but shouldn’t come off on your glove or dent when pressed lightly.
Start checking around the 2.5-hour mark, then test every 15-20 minutes after that. Every room and every resin brand behaves a little differently, so don’t panic if yours takes longer than ours did.
If it’s still runny when you try to move it, give it more time. If it’s already gotten a bit too firm, don’t worry – your ghost just won’t have quite as dramatic a “melted” drape, but you’ll still get a great shape.
What kind of resin should I use?
Stick with epoxy resin for this project, not UV resin. Epoxy cures slowly enough that you actually get a window of time to shape it properly. UV resin sets far too fast and won’t give you the working time you need to drape your ghost.
Look for a clear-casting epoxy that’s made specifically for art and craft projects. These tend to produce fewer bubbles and give you that glassy, glossy finish that makes the whole ghost look almost alive.
Can I display my resin ghosts outside?
These ghosts are best kept indoors. Direct sunlight can cause resin to yellow over time, and outdoor temperature swings or moisture can make it brittle and more likely to crack.
If you want to bring your ghosts out for the big night – say, lined up on a covered porch for trick-or-treaters – that’s totally fine for a few hours. Just bring them back inside afterward so they stay looking their spooky best for years to come.
What other ways can I color my resin ghost?
Mica powder and glitter are the classic combo we used, and they’re popular for a reason – easy to work with and always give a beautiful shimmer. But you’ve got plenty of other options too.
Alcohol inks give you vibrant, see-through color, while acrylic paint creates a more solid, opaque look. If you really want to lean into the spooky factor, glow-in-the-dark pigment is a fantastic choice. You can even layer methods together, like glitter mixed with glow powder, for a richer, more magical effect.
Make It a Whole Ghostly Gang
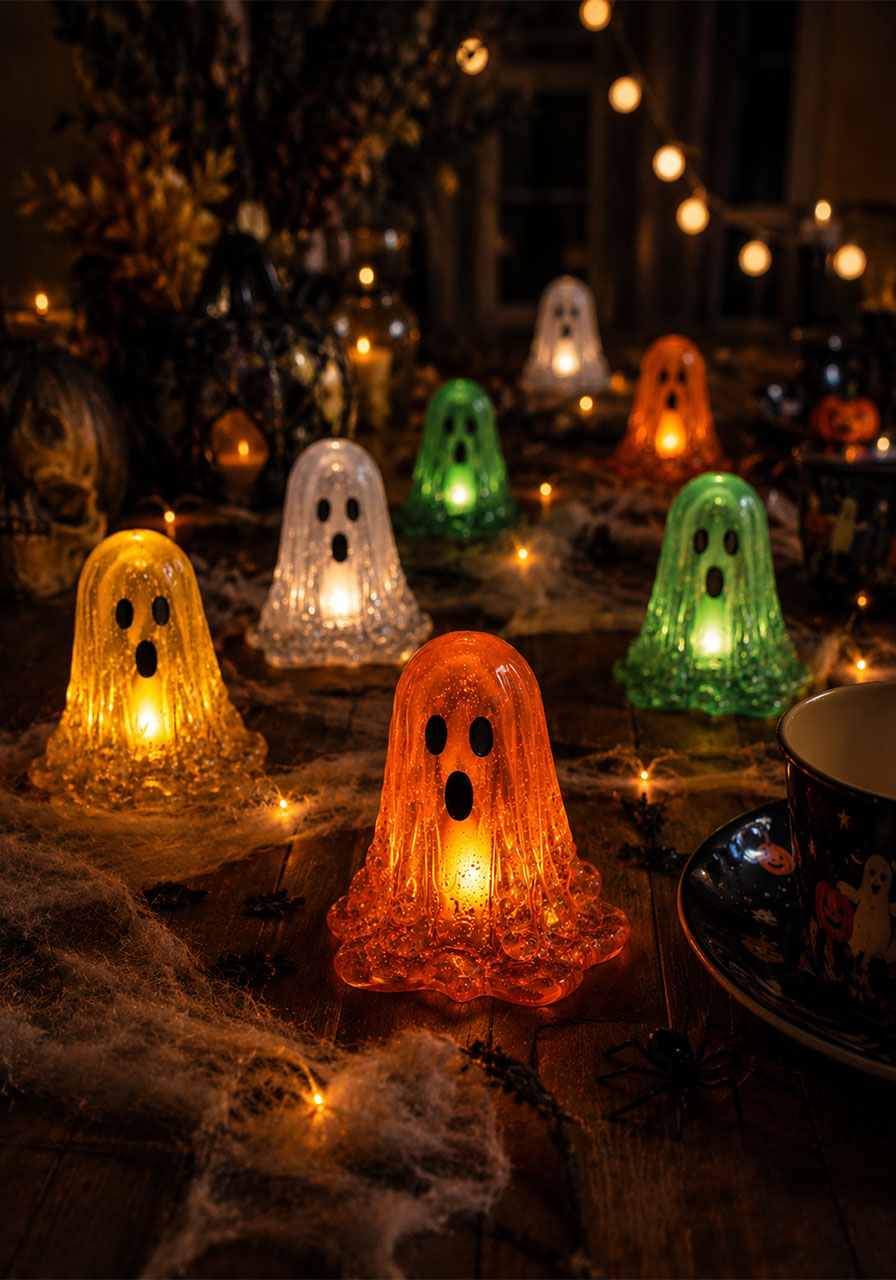
Once you’ve made one resin ghost, you’ll want a whole haunted village of them. Try mixing different mica powder colors for each batch – purple, green, orange, and blue all look stunning grouped together on a mantel or table.
Since these are a make-ahead project, they’re perfect for hosts who like to plan things out in advance. Whip up a batch or two every weekend leading up to Halloween, and by the time your party rolls around, you’ll have a whole collection ready to set the scene.
Group a few different colors together with some mini pumpkins and fake spiderwebs for an easy, no-stress centerpiece. Or scatter individual ghosts around the room on shelves, windowsills, and side tables for décor that shows up everywhere your guests look.
With a table full of these glowing, glittery little ghouls, you’ve basically guaranteed your Halloween gathering gets remembered as “the one with those amazing ghosts.” And really, isn’t that the whole point of hosting?
