Planning a kids’ birthday party and dreading the inevitable “I’m bored!” chorus? We’ve got you covered. These hands-on craft activities will keep little hands busy, imaginations running wild, and parents asking, “Where did you get these ideas?”. The best part? Most of these require minimal prep and supplies you probably already have lying around.
Let’s dive into craft activities that transform your party from chaotic to creative – because the best parties are the ones where kids actually make something they’re proud to take home.

Setting Up for Craft Party Success
Before we jump into the fun stuff, let’s talk strategy. A little prep goes a long way in keeping your craft party running smoothly (and your sanity intact).
Pick Your Theme
Choose a theme that excites the birthday kid and makes your craft selection easier. Superheroes, unicorns, dinosaurs, outer space – whatever gets them pumped! A cohesive theme ties everything together and makes the party feel extra special.
Stock Up Smart
Gather all your supplies at least a week before the party. Nothing kills the creative vibe faster than realizing mid-craft that you’re out of glue sticks. Pro tip: always buy 25% more supplies than you think you’ll need – kids are wonderfully unpredictable.
Match the Activity to the Age Group
Younger kids (ages 3-6) need simpler projects with fewer steps, while older children (ages 7-12) can tackle more complex creations. When in doubt, have a backup activity ready that’s slightly easier – you can always level up if the kids breeze through it.


1. Rock Painting Masterpieces
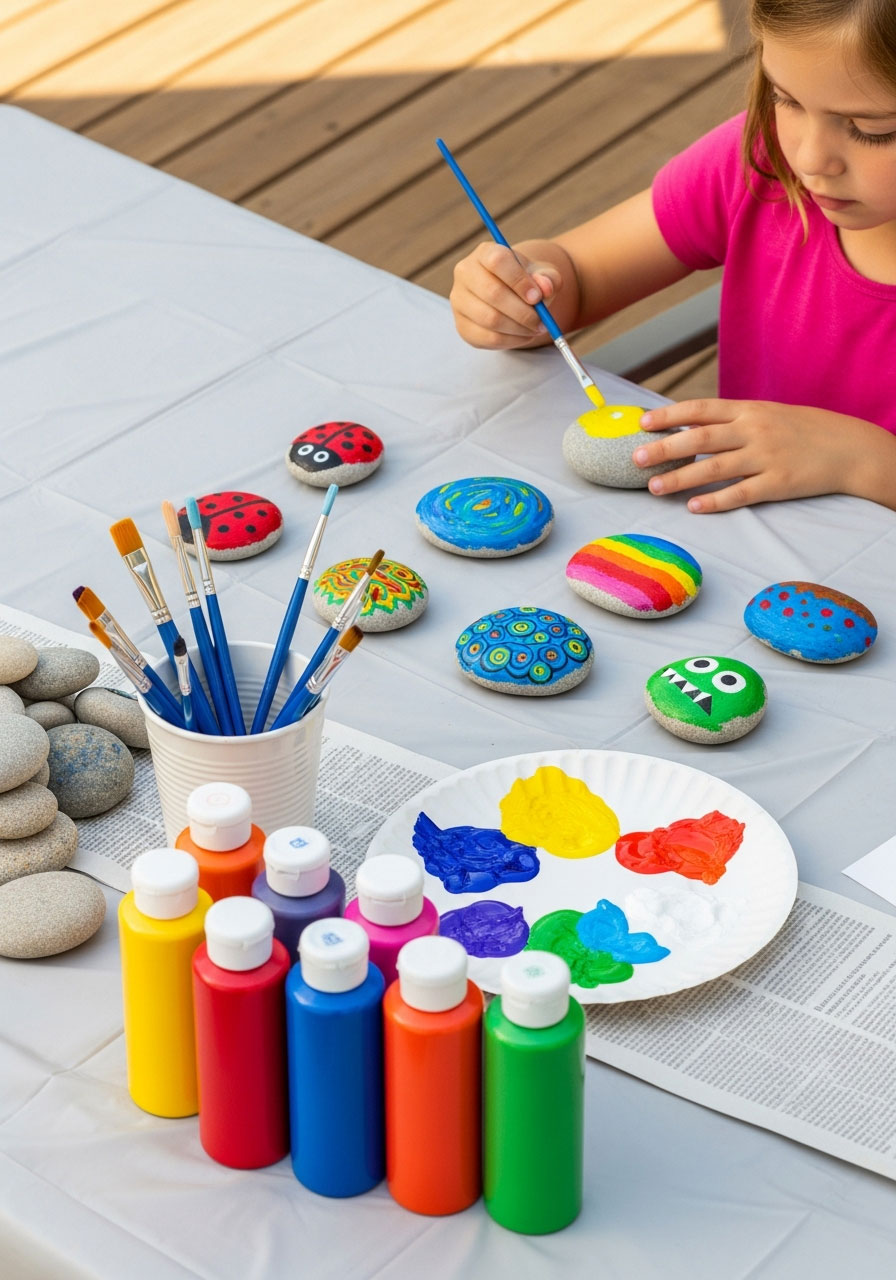
Turn ordinary rocks into extraordinary keepsakes! This activity is perfect because it’s mess-friendly and works for literally any age group.
Best for: All ages, outdoor or indoor parties
Time to Complete: 20-30 minutes
What You’ll Need:
Smooth, clean rocks (collect them beforehand or buy them at a craft store)
Washable acrylic paint (trust us on the “washable” part)
Paintbrushes in various sizes
Paper plates for palettes
Newspaper or plastic tablecloths to protect surfaces
How to Set It Up:
1. Cover your craft table with newspaper or a plastic tablecloth – paint happens.
2. Set up painting stations with rocks, paints, and brushes for each child.
3. Let the kids paint whatever they want: monsters, ladybugs, inspirational words, or abstract designs.
4. Set aside a drying area where finished rocks can rest undisturbed.
5. Once dry, kids can take their rocks home as party favors.
Pro Tip: Use a hairdryer on the cool setting to speed up drying time if you’re short on space. For extra durability, seal the finished rocks with a clear acrylic spray (parents only!).
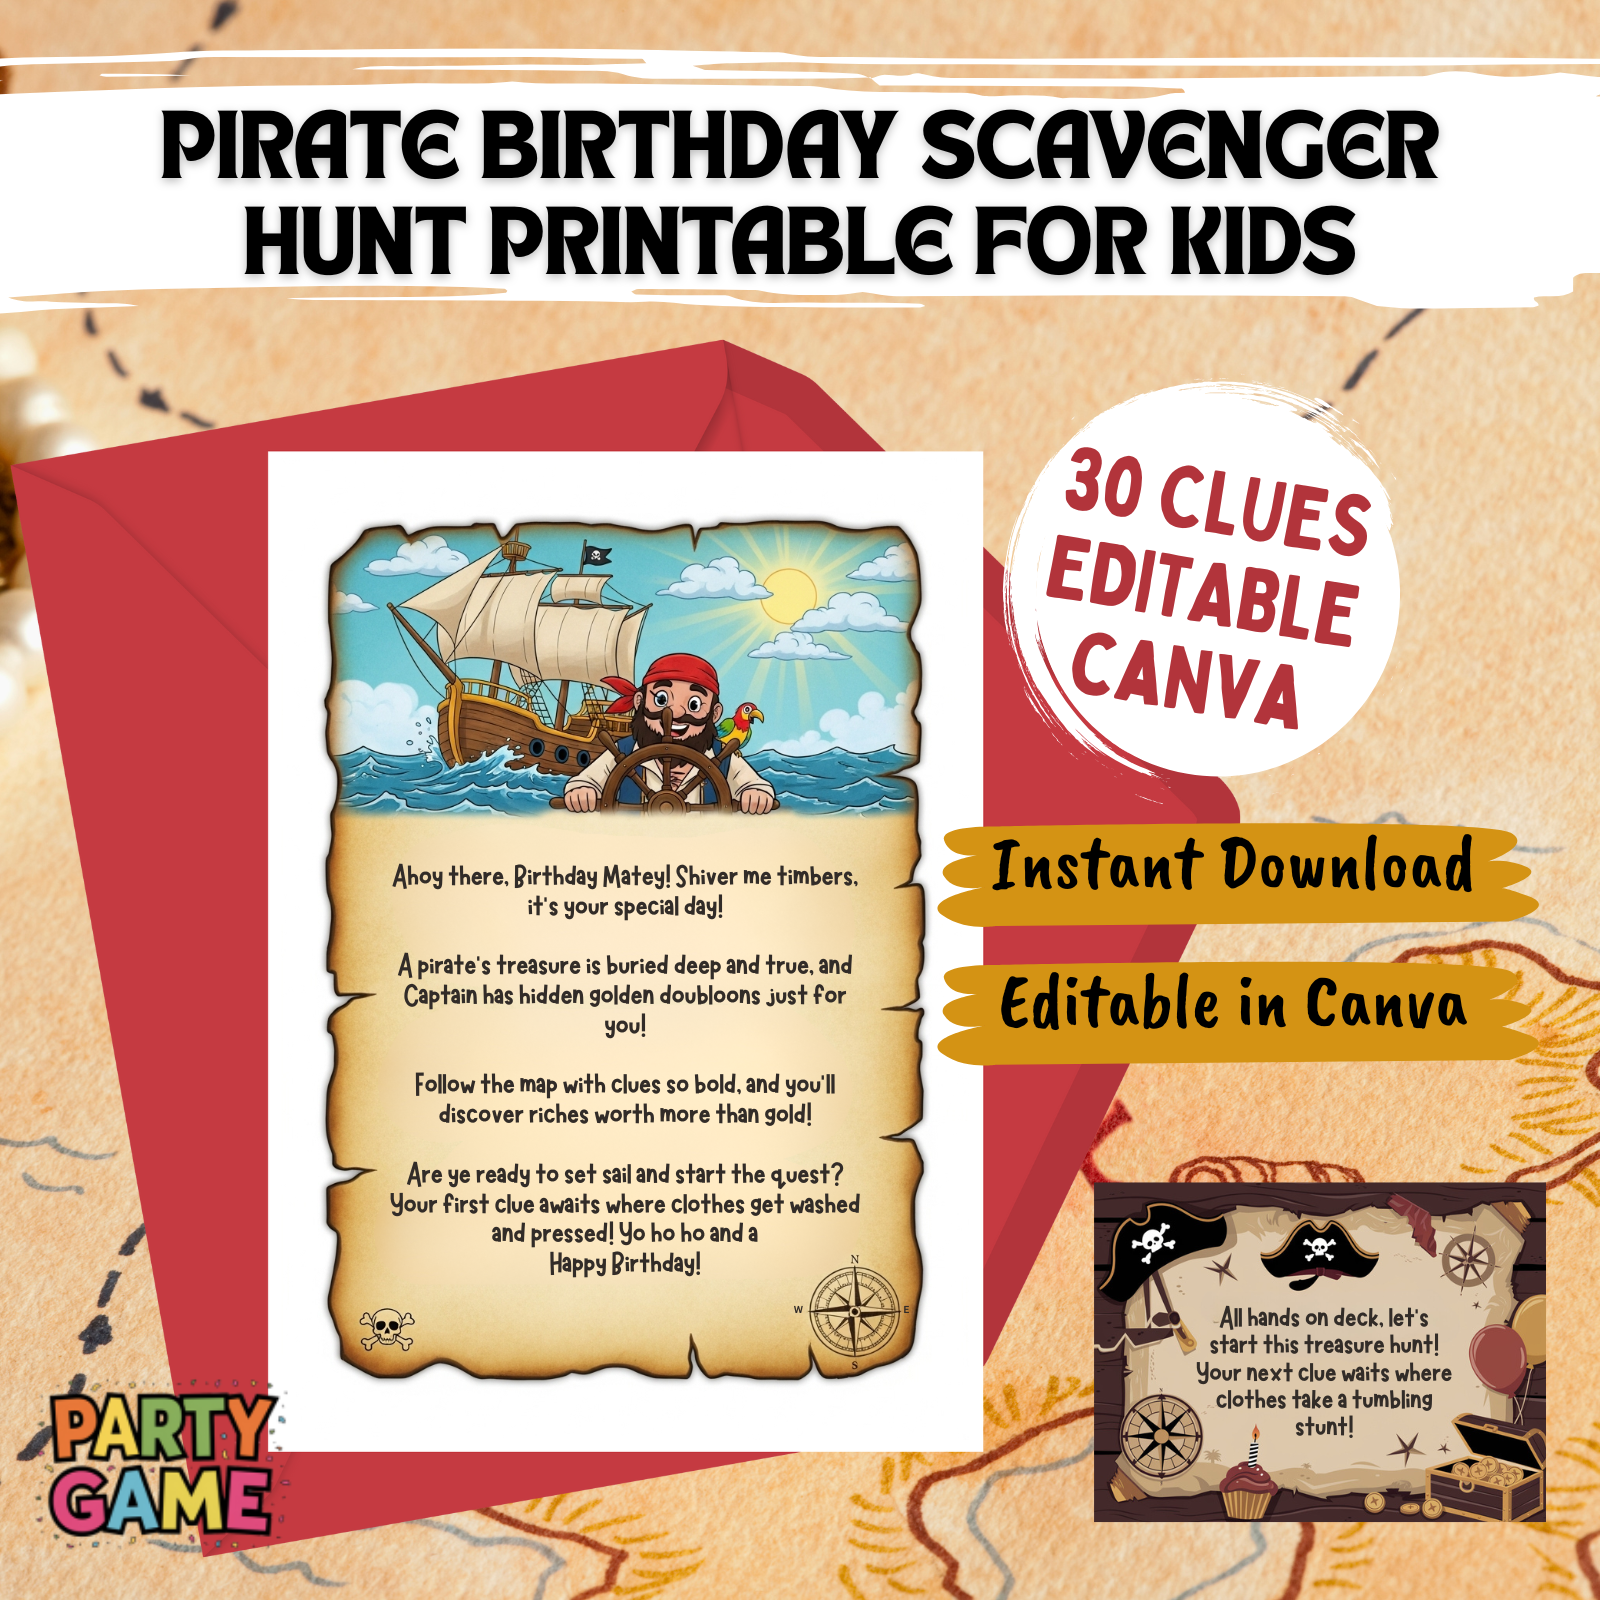
Pirate Birthday Scavenger Hunt for Kids Printable
Instant Pirate Adventure: Download, print, and play in 15 minutes! No stress – just instant, unforgettable fun for kids ages 4-12
Indoor Party Lifesaver: Perfect for apartments & houses. Keep 1-10 kids wildly entertained for 45 minutes with clever rhyming clues
A Treasured Memory: Watch your birthday child become the hero of an epic story. Includes a thrilling intro and congratulatory treasure letter
Fun That Secretly Teaches: Kids race to solve riddles while building reading, problem-solving, and teamwork skills. Fun with a hidden purpose!

Indoor Birthday Scavenger Hunt Printable for Kids – 12 challenges
Your 15-Minute Party Hero: Instantly download, print, and hide. Get 1-2 hours of immersive, screen-free fun with 12 unique puzzles. Stress-free entertainment, guaranteed
More Than a Hunt – It’s a “”Cake Bandit”” Adventure! Kids don’t just find clues; they solve the mystery of the stolen cake! This engaging storyline creates a memorable birthday mission
Ultimate Indoor Party Lifesaver: Perfect for bad weather or small spaces. Keeps kids ages 4-10+ happily challenged with picture matching, mazes, and secret codes
Fun That Secretly Builds Genius: Laughter meets learning! These 12 clever challenges boost problem-solving, teamwork, and critical thinking skills without the kids even noticing

Difficult Birthday Scavenger Hunt Printable for Adults – The Oracle’s Birthday Prophecy
Forget Boring Parties. Unleash the Oracle: Transform a birthday into an epic mystery with 30 brain-teasing riddles, ciphers, and challenges. Customize the perfect adventure for your guests
Be the Host of the Most Memorable Party: Provide the clever, shared activity that gets everyone laughing and collaborating. It’s the highlight that guests will talk about for years
Sophisticated Fun, Zero Effort: Just download, pick your 10 favorite clues from 30 options, and hide them. Get a complete, themed adventure without the stress of planning from scratch
Challenge Adult Minds with “The Prophecy”: Move beyond simple games. This hunt features logic puzzles, cryptic ciphers, and hilarious dares designed specifically to engage and thrill adults

Happy Birthday Decorations
Everything in one box = party stress solved – Banner, honeycomb balls, swirls, and garland all coordinated. No last-minute runs to three different stores at 9 PM the night before.
Photo-ready in 15 minutes – Easy assembly means you spend less time wrestling with decorations and more time enjoying the birthday person’s reaction. Looks expensive, sets up fast.
Reusable = smart money – Quality materials hold up through the party AND pack away for next year. Stop buying flimsy decorations that rip before cake time.
Saves you $50+ vs. party store prices – Get the complete coordinated look without the markup. Guests think you hired a decorator; you paid a fraction of the cost.
2. Tie-Dye T-Shirt Station
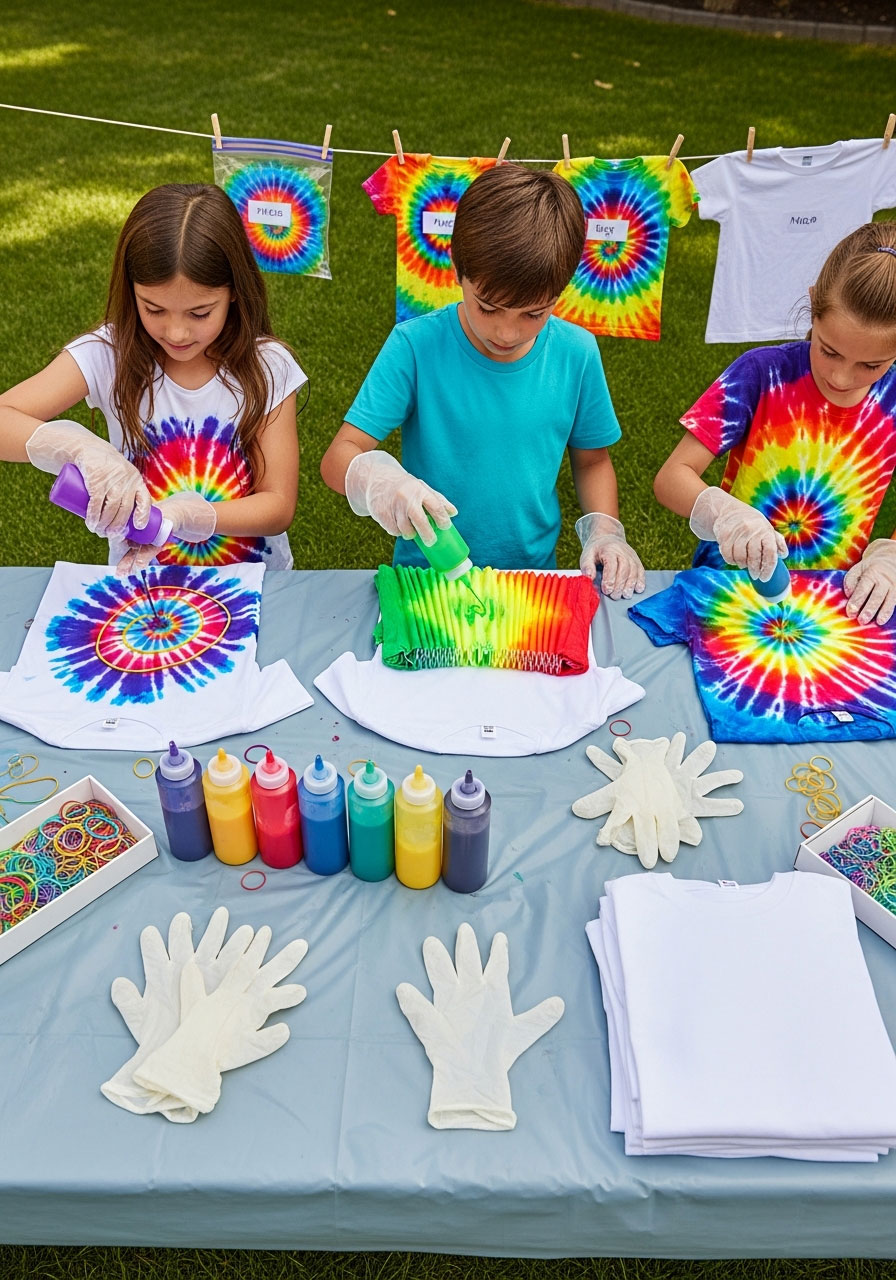
Get ready for some serious color explosions! Kids will love creating wearable art they can show off long after the party ends.
Best for: Ages 6+, outdoor parties work best
Time to Complete: 30-40 minutes (plus drying time)
What You’ll Need:
Plain white cotton T-shirts (pre-washed, in various sizes)
Tie-dye kit with multiple colors
Rubber bands
Plastic gloves for each child
Plastic tablecloths and garbage bags
Ziplock bags for kids to take home their creations
How to Set It Up:
1. Have each child put on plastic gloves – this activity gets messy in the best way possible.
2. Show them how to twist, scrunch, or fold their shirts and secure with rubber bands.
3. Let kids apply dye colors to different sections of their bundled shirts.
4. Place each finished shirt in a labeled ziplock bag to continue processing at home.
5. Send instructions home with parents: rinse in cold water after 6-8 hours, then wash separately.
Pro Tip: Set up your tie-dye station outside if possible. If you’re indoors, cover EVERYTHING with plastic, and have a bucket of soapy water nearby for quick hand cleanups.
3. Paper Plate Masks
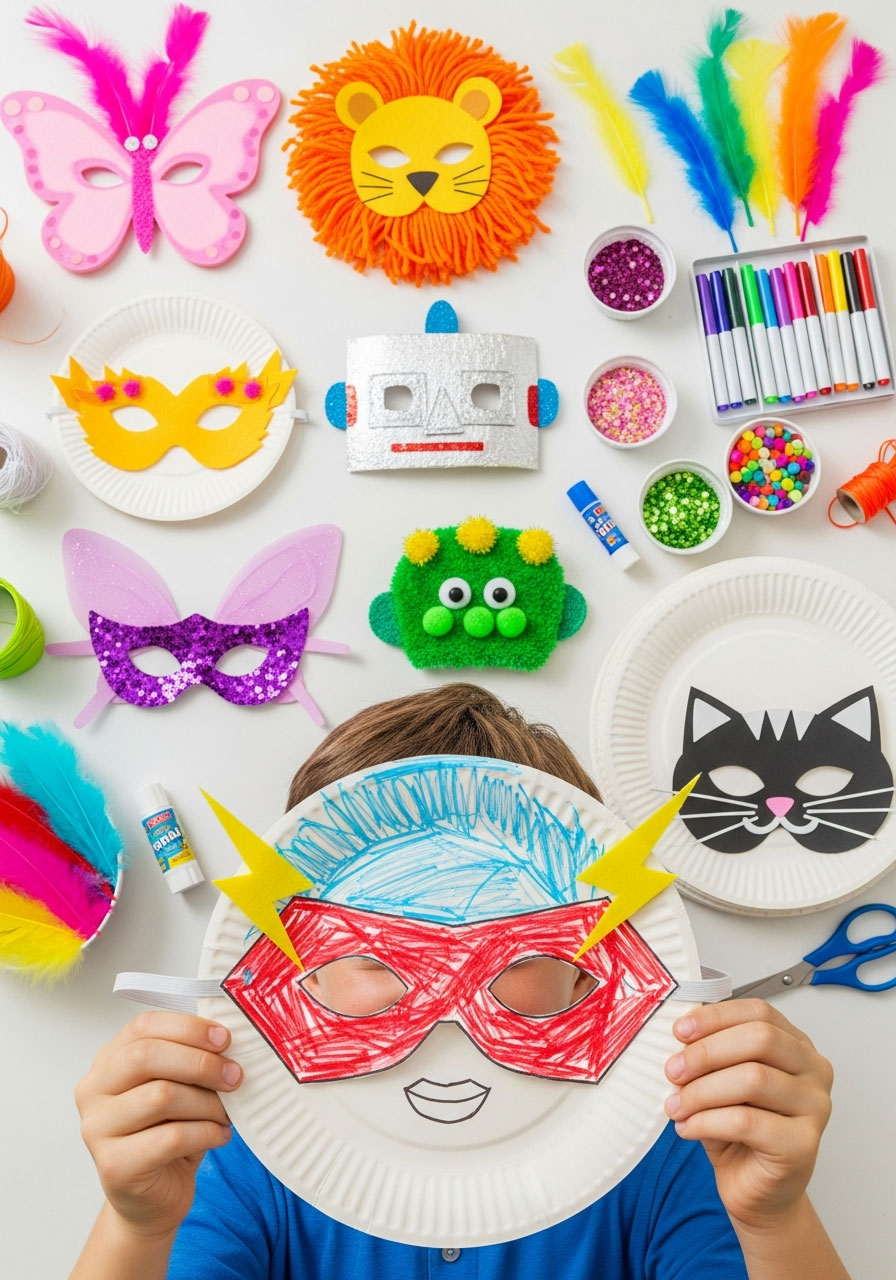
Unleash superhero identities, animal personas, or fantasy characters with this budget-friendly activity that sparks serious imagination.
Best for: Ages 4-10, perfect for themed parties
Time to Complete: 20-25 minutes
What You’ll Need:
Sturdy paper plates (one per child)
Markers, crayons, and colored pencils
Feathers, sequins, and pom-poms
Glue sticks and craft glue
Elastic cord or craft sticks (for wearing or holding)
Scissors (for adult use)
How to Set It Up:
1. Pre-cut eye holes in each paper plate before the party starts.
2. Set out all decorating supplies in the center of the table.
3. Let each child choose their mask style: superhero, animal, monster, or fairy.
4. Kids decorate using markers, then add 3D elements with glue.
5. Attach elastic cord so kids can wear their masks, or glue on a craft stick to create a handheld mask.
Fun Variation: Turn this into a mini fashion show where each child shows off their mask creation and strikes a pose!
4. Beaded Jewelry Making Bar

Transform your party space into a boutique jewelry studio where kids become jewelry designers for the day.
Best for: Ages 5+, especially popular for girls’ parties
Time to Complete: 25-35 minutes
What You’ll Need:
Assorted beads in different colors, shapes, and sizes
Elastic cord or jewelry wire
Lobster clasps and jump rings (for older kids)
Small bowls or muffin tins to organize beads
Scissors
Trays or placemats for each child’s workspace
How to Set It Up:
1. Sort beads by color or type into small bowls for easy selection.
2. Pre-cut elastic cord into 10-inch lengths (one per child, plus extras).
3. Show kids how to tie a secure knot, or use clasps for older children.
4. Let them design their own patterns – symmetrical, rainbow, or totally random.
5. Help them secure the ends when they’re done creating.
Pro Tip: Choose beads with larger holes for younger kids – threading can be frustrating with tiny openings. Also, set up a “design station” with sample patterns for inspiration.
5. Cupcake Decorating Competition

Every kid is a pastry chef at heart! This edible craft doubles as dessert and entertainment.
Best for: All ages (with varying levels of supervision)
Time to Complete: 15-20 minutes
What You’ll Need:
Unfrosted cupcakes (one per child, plus extras)
Multiple colors of frosting in piping bags
Sprinkles, edible glitter, and candy toppings
Chocolate chips, gummy candies, and mini marshmallows
Edible markers
Individual plates or cupcake stands
Wet wipes for sticky fingers
How to Set It Up:
1. Set up each child’s station with a plain cupcake and a plate.
2. Create a “toppings bar” with all the decorating supplies in the center.
3. Give each child a piping bag with their frosting color choice.
4. Let them create their masterpiece – no design is too wild!
5. Take photos of each creation before the inevitable eating begins.
Fun Variation: Make it a friendly competition with categories like “Most Colorful”, “Most Creative”, or “Tallest Tower”. Everyone gets a prize!
6. DIY Treasure Hunt Crafting

Before the hunt begins, kids create their own treasure maps and decorate their treasure collection bags!
Best for: Ages 6-12, outdoor parties
Time to Complete: 20 minutes (crafting) + 20-30 minutes (hunt)
What You’ll Need:
Brown paper bags or small canvas bags (one per child)
Markers, stamps, and stickers
Tea-stained paper or aged-looking craft paper
Crayons or colored pencils
Hidden treasures (small toys, candy, stickers)
Pre-written clues
How to Set It Up:
1. First, have kids decorate their treasure collection bags with their names and designs.
2. Give each child a “treasure map” to color or embellish with landmarks.
3. Hide treasures around the party area while kids finish decorating.
4. Hand out the first clue and let the adventure begin!
5. Kids collect found treasures in their personalized bags.
Pro Tip: Tailor the difficulty of clues to your age group. Younger kids need visual clues or pictures, while older kids can handle riddles and multi-step directions.
7. Sock Puppet Theater
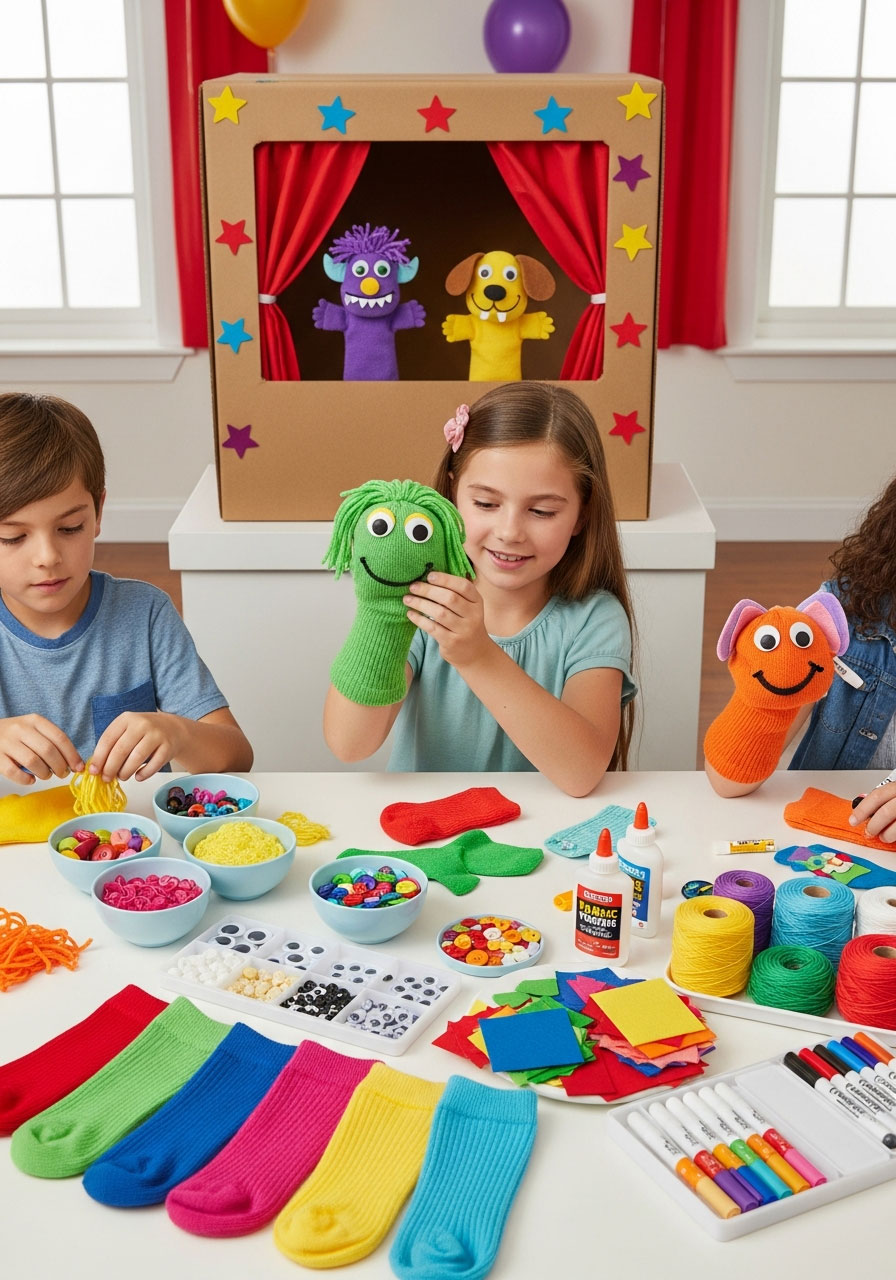
Old socks transform into hilarious puppet characters, and the impromptu puppet shows that follow are pure comedy gold.
Best for: Ages 5-10
Time to Complete: 25-30 minutes
What You’ll Need:
Clean crew socks (one per child – buy colorful ones!)
Googly eyes in various sizes
Buttons for noses or decorations
Felt pieces in assorted colors
Yarn for hair
Fabric glue or hot glue gun (adult supervised)
Markers
How to Set It Up:
1. Give each child a sock as their puppet base.
2. Set out all materials so kids can grab what they need.
3. Show them how to position the sock on their hand to figure out where features should go.
4. Let them glue on eyes, yarn hair, felt tongues, and button details.
5. Once dry, set up a “puppet theater” (a decorated cardboard box works great) for performances.
Fun Variation: Have kids pair up and create a quick puppet show together. You’ll be amazed at the creativity!
8. Origami Creation Station

Introduce kids to the ancient art of paper folding – it’s like magic when that flat paper becomes a 3D animal!
Best for: Ages 7+ (or 5+ with very simple designs)
Time to Complete: 20-30 minutes
What You’ll Need:
Origami paper in various colors and patterns
Simple origami instruction books or printed guides
Regular printer paper as backup
Markers for adding faces or details
How to Set It Up:
1. Choose 2-3 simple designs appropriate for your age group (paper airplanes, boats, fortune tellers, jumping frogs).
2. Create one sample of each design beforehand so kids know what they’re making.
3. Have instruction sheets at each station with step-by-step photos.
4. Walk through the first fold or two as a group, then let kids work at their own pace.
5. Have extra paper available – origami often requires a few attempts!
Pro Tip: Start with a collaborative warm-up fold like a paper airplane or fortune teller that everyone does together. It builds confidence before tackling harder designs.
9. Recycled Robot Factory
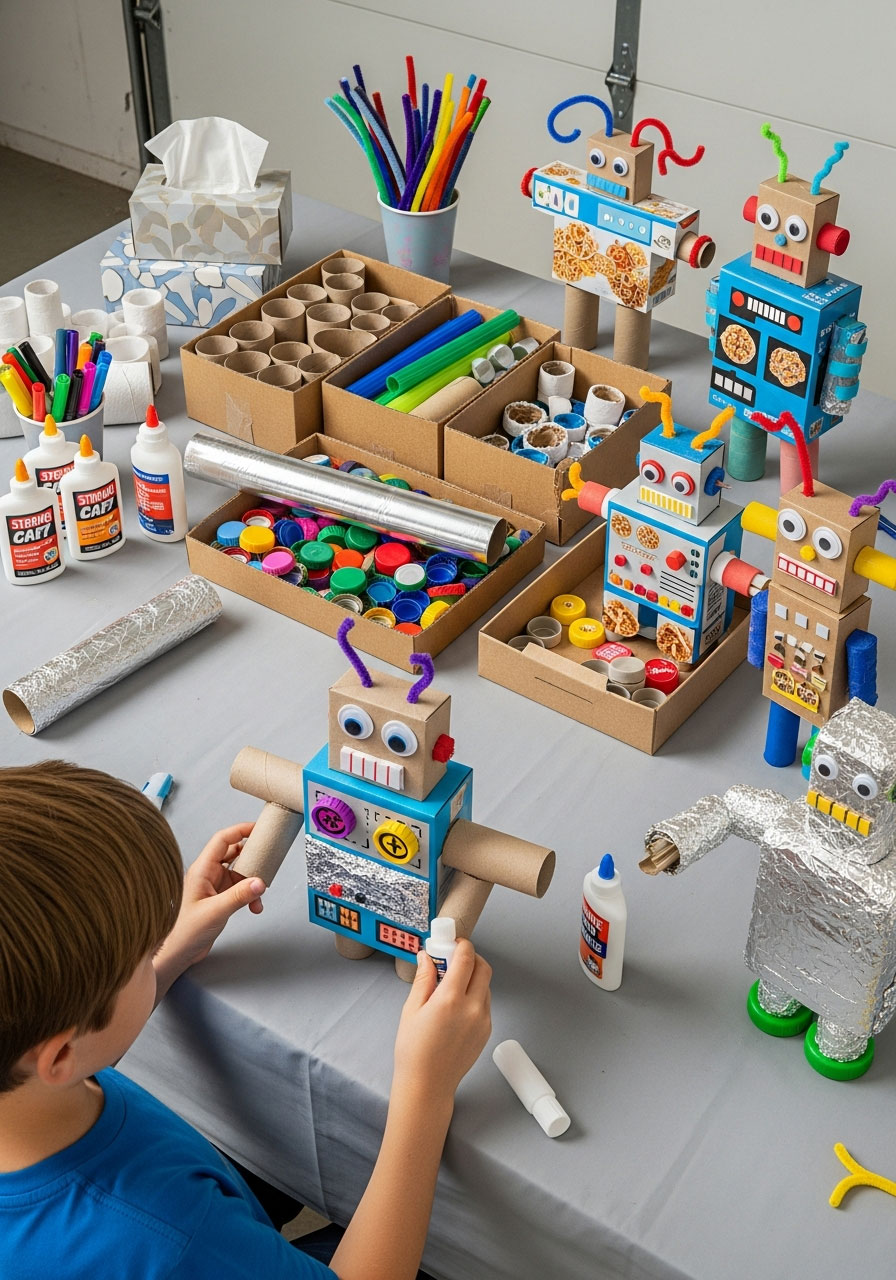
Give cardboard boxes and recyclables a second life as imaginative robots. This eco-friendly activity teaches creativity and sustainability!
Best for: Ages 5-11
Time to Complete: 30-40 minutes
What You’ll Need:
Assorted cardboard boxes (cereal boxes, tissue boxes, small shipping boxes)
Toilet paper rolls and paper towel tubes
Bottle caps, lids, and buttons
Aluminum foil for details
Pipe cleaners
Markers and paint
Strong craft glue or hot glue gun (adult supervised)
Googly eyes
How to Set It Up:
1. Set up a “parts station” with all the recyclable materials organized by type.
2. Let each child choose their robot’s body (the main box).
3. Kids add arms, legs, and antennas using tubes and pipe cleaners.
4. Glue on bottle caps for control panels, eyes, or buttons.
5. Decorate with markers or paint to bring their robot to life.
Pro Tip: Send out a request to parents a week before asking them to save recyclables. You’ll have more variety and save money!
10. Slime Making Lab
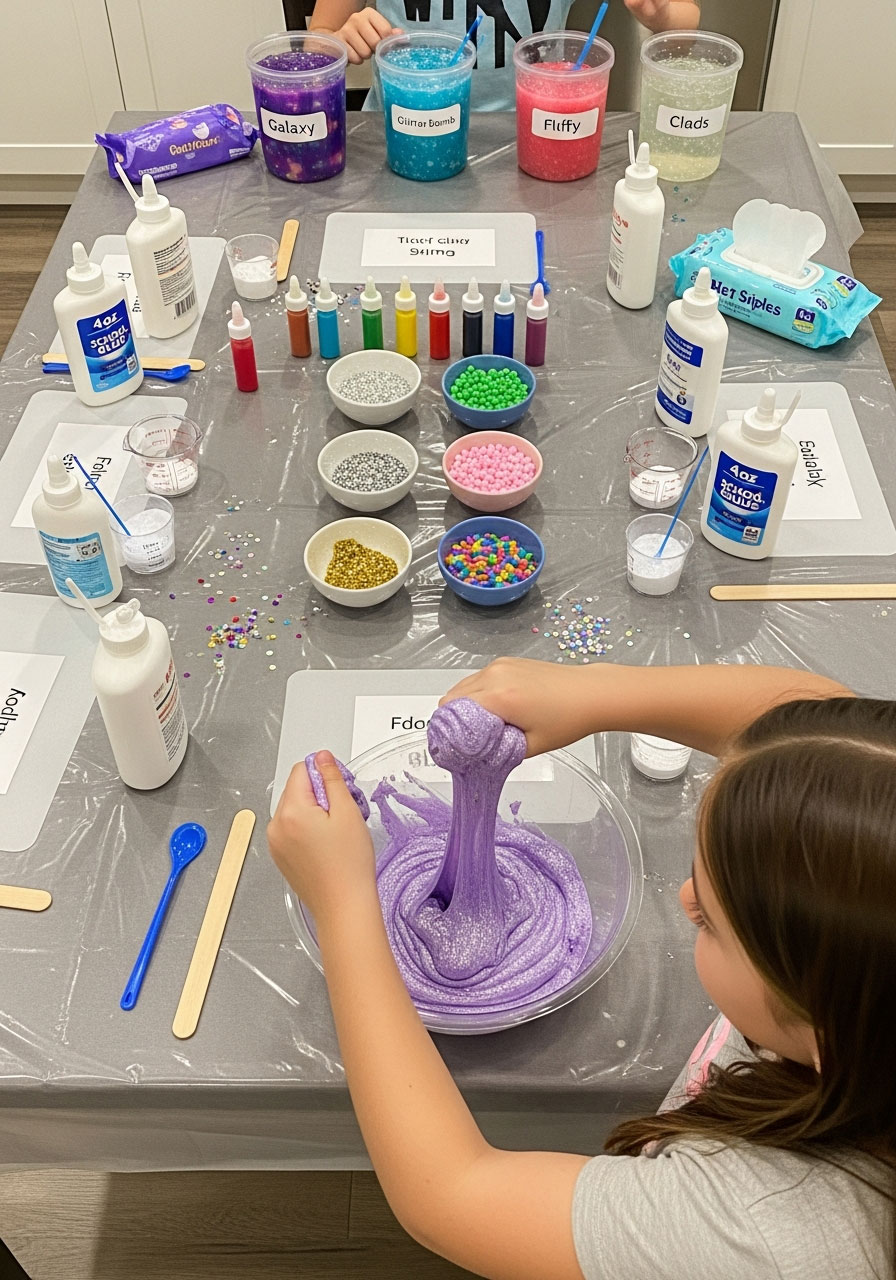
Kids go absolutely wild for slime! Set up a science-meets-art station where they create their own gooey masterpiece.
Best for: Ages 6+
Time to Complete: 20-25 minutes
What You’ll Need:
White school glue (4-6 oz bottles work best)
Liquid starch or contact lens solution with baking soda
Food coloring or liquid watercolors
Glitter, foam beads, or confetti
Mixing bowls (one per child)
Craft sticks or spoons for stirring
Small containers with lids for take-home slime
How to Set It Up:
1. Pour glue into each child’s bowl (about 4 oz).
2. Let them add food coloring drops and glitter – this is where personality shines!
3. Add liquid starch slowly while they stir until the mixture pulls away from the bowl.
4. Let kids knead their slime until it reaches the perfect stretchy consistency.
5. Store in containers for kids to take home (label with names immediately!).
Pro Tip: Cover your table with a plastic tablecloth and have wet wipes within arm’s reach. Also, warn parents about the slime going home – not everyone appreciates the surprise!
11. Nature Collage Art Walk
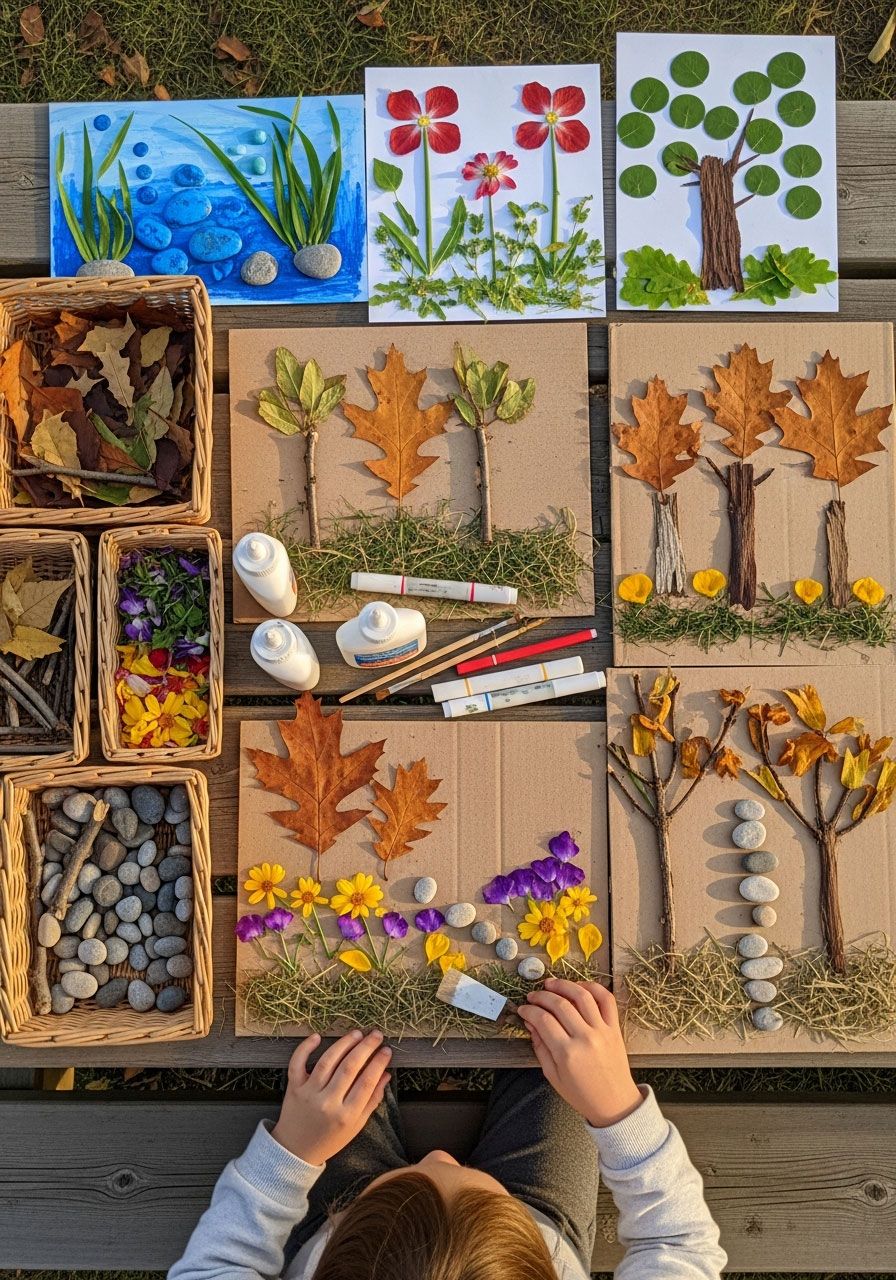
Take the party outside! Kids collect natural treasures, then turn them into beautiful nature-inspired artwork.
Best for: Ages 4-10, outdoor venue required
Time to Complete: 15 minutes (collecting) + 20 minutes (creating)
What You’ll Need:
Small bags or baskets for collecting
Sturdy cardboard or poster board as collage base
White glue or mod podge
Paintbrushes for spreading glue
Markers or crayons for added details
Access to a yard, park, or nature area
How to Set It Up:
1. Give each child a collection bag and take a 15-minute nature walk.
2. Kids gather leaves, flower petals, small twigs, grass, and interesting stones.
3. Back at the craft table, give each child their cardboard base.
4. They arrange their natural findings into a picture or pattern.
5. Once they’re happy with the design, help them glue everything down.
Fun Variation: Create a nature “scene” – like a forest, underwater world, or garden – using only found materials. The creativity is incredible!
12. Friendship Bracelet Workshop
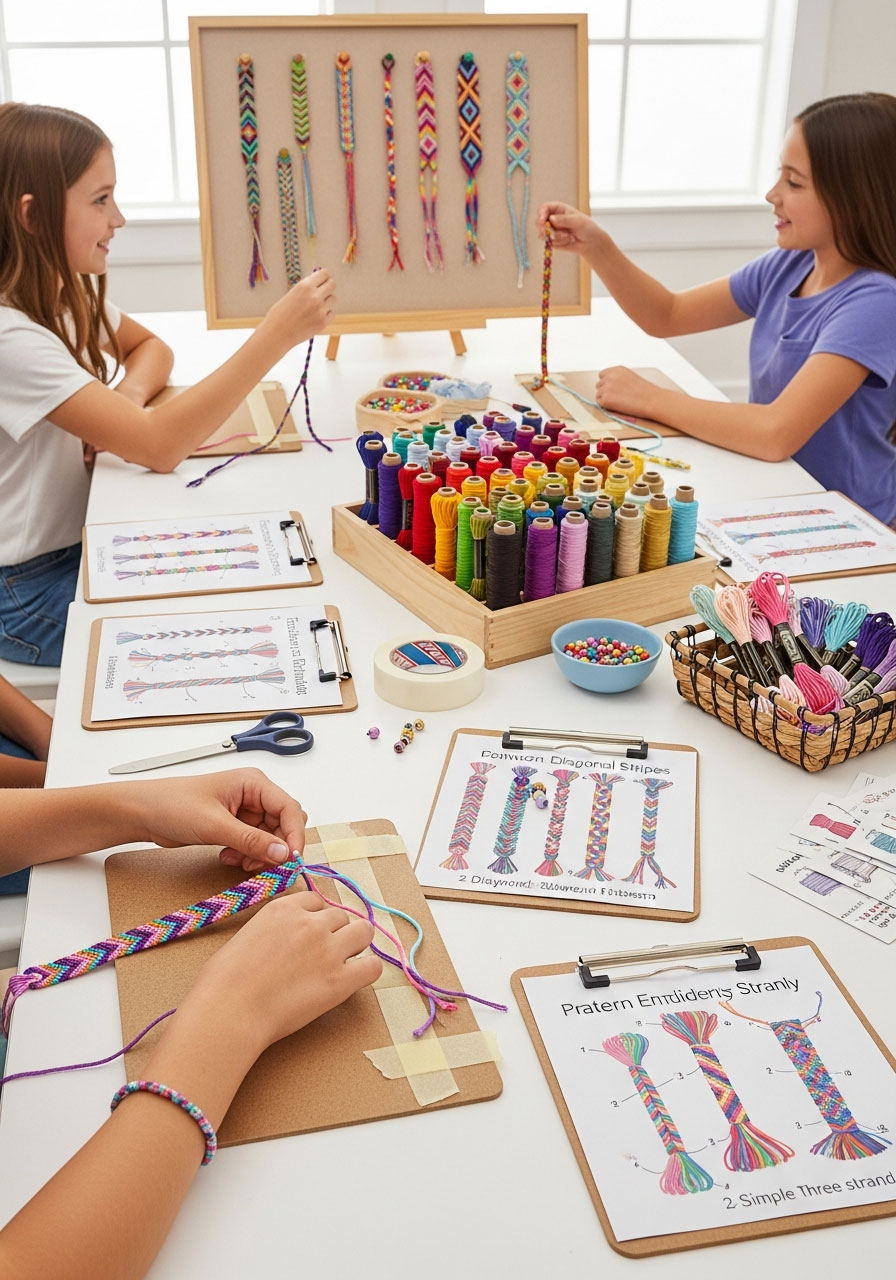
Teach kids this classic craft that’s been bringing friends together for generations. Plus, they’ll have a party favor that actually means something!
Best for: Ages 7-12
Time to Complete: 30-45 minutes
What You’ll Need:
Embroidery floss in rainbow colors
Scissors
Tape or clipboards to secure bracelets while knotting
Beads with holes large enough for floss (optional)
Simple pattern printouts for reference
Clasps or ties
How to Set It Up:
1. Pre-cut embroidery floss into 24-inch strands (3-4 strands per bracelet).
2. Show kids the basic braiding or simple knotting technique.
3. Tape the starting end to the table or clipboard so it doesn’t slip.
4. Let kids work at their own pace – some will master it quickly, others need more time.
5. Help tie off finished bracelets so they can wear them immediately.
Pro Tip: Pair up kids so they can help each other and exchange bracelets when finished. The “friendship” part is just as important as the bracelet!
13. Button Art Creations

Buttons aren’t just for clothes! Kids use colorful buttons to “paint” pictures or fill in designs with texture and dimension.
Best for: Ages 5-9
Time to Complete: 25-30 minutes
What You’ll Need:
Assorted buttons (various sizes, colors, and shapes)
Sturdy cardstock or canvas panels
Pencils for sketching designs
White craft glue
Small bowls to organize buttons by color
Optional: pre-drawn outline templates
How to Set It Up:
1. Organize buttons by color in small bowls or muffin tins.
2. Give each child a cardstock base and have them sketch a simple design (heart, rainbow, animal, their initial).
3. Kids select buttons and arrange them to fill their design before gluing.
4. Once satisfied with placement, they glue buttons down one by one.
5. Let dry completely before handling.
Pro Tip: For younger kids, provide templates they can fill in. Older kids love the challenge of creating their own designs from scratch.
14. Pasta Art Masterpieces
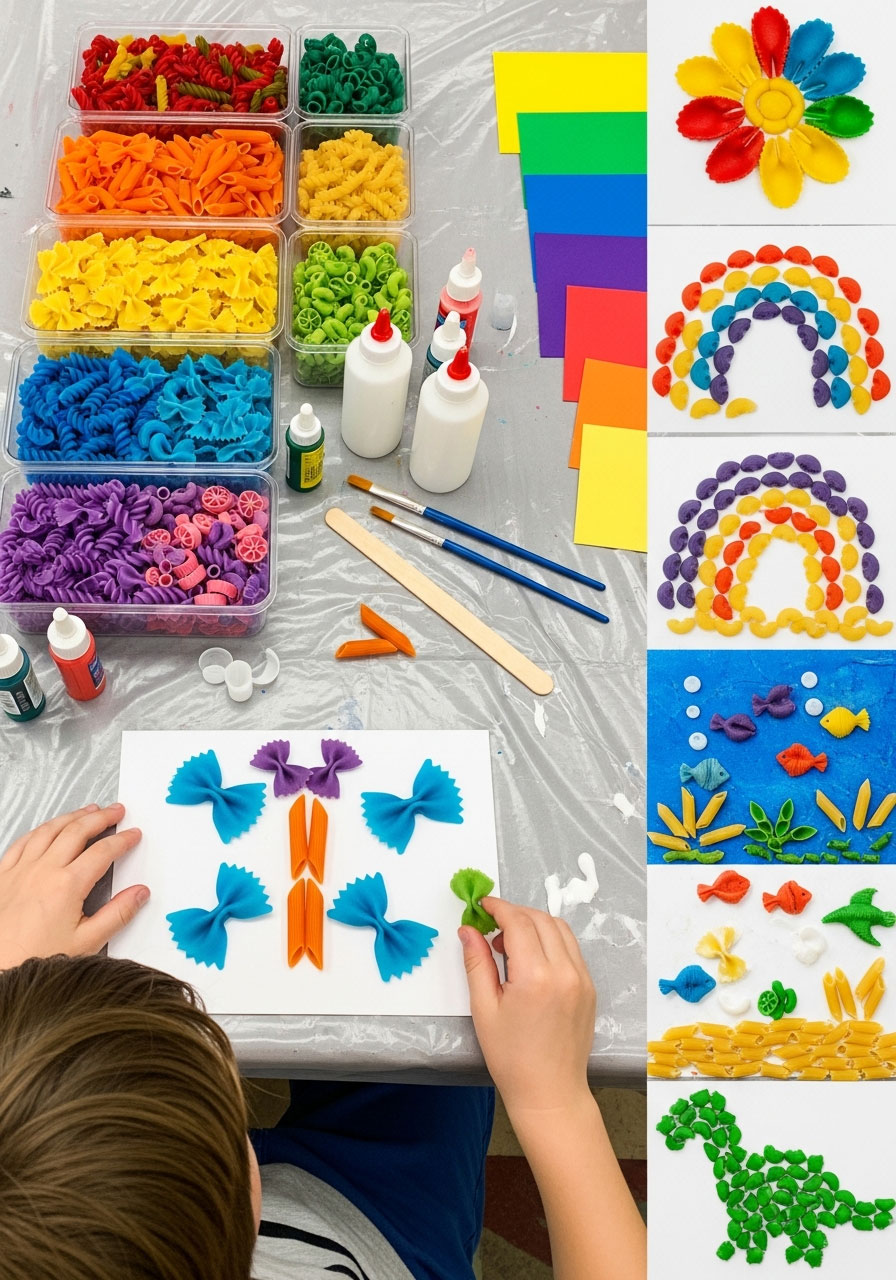
Who knew your pantry could be an art supply? Dyed pasta creates stunning, textured art that’s totally unique.
Best for: Ages 4-8
Time to Complete: 20-25 minutes (if pasta is pre-dyed)
What You’ll Need:
Various pasta shapes (penne, bow ties, shells, macaroni)
Food coloring and rubbing alcohol (for dyeing pasta beforehand)
Sturdy paper or cardboard
White glue
Bowls to organize dyed pasta by color
Optional: paint or markers for background
How to Set It Up:
1. Pre-party prep: Dye pasta by shaking it in ziplock bags with food coloring and a splash of rubbing alcohol, then dry overnight on baking sheets.
2. Organize dried pasta by color and shape.
3. Give each child their paper base and let them sketch or plan their design.
4. Kids glue pasta pieces to create pictures – flowers, rainbows, animals, abstract art!
5. Let dry flat for 30 minutes before moving.
Fun Variation: Create pasta mosaics where kids fill in a picture outline entirely with pasta, like a colorful puzzle!
15. Sock Monkey Stuffies
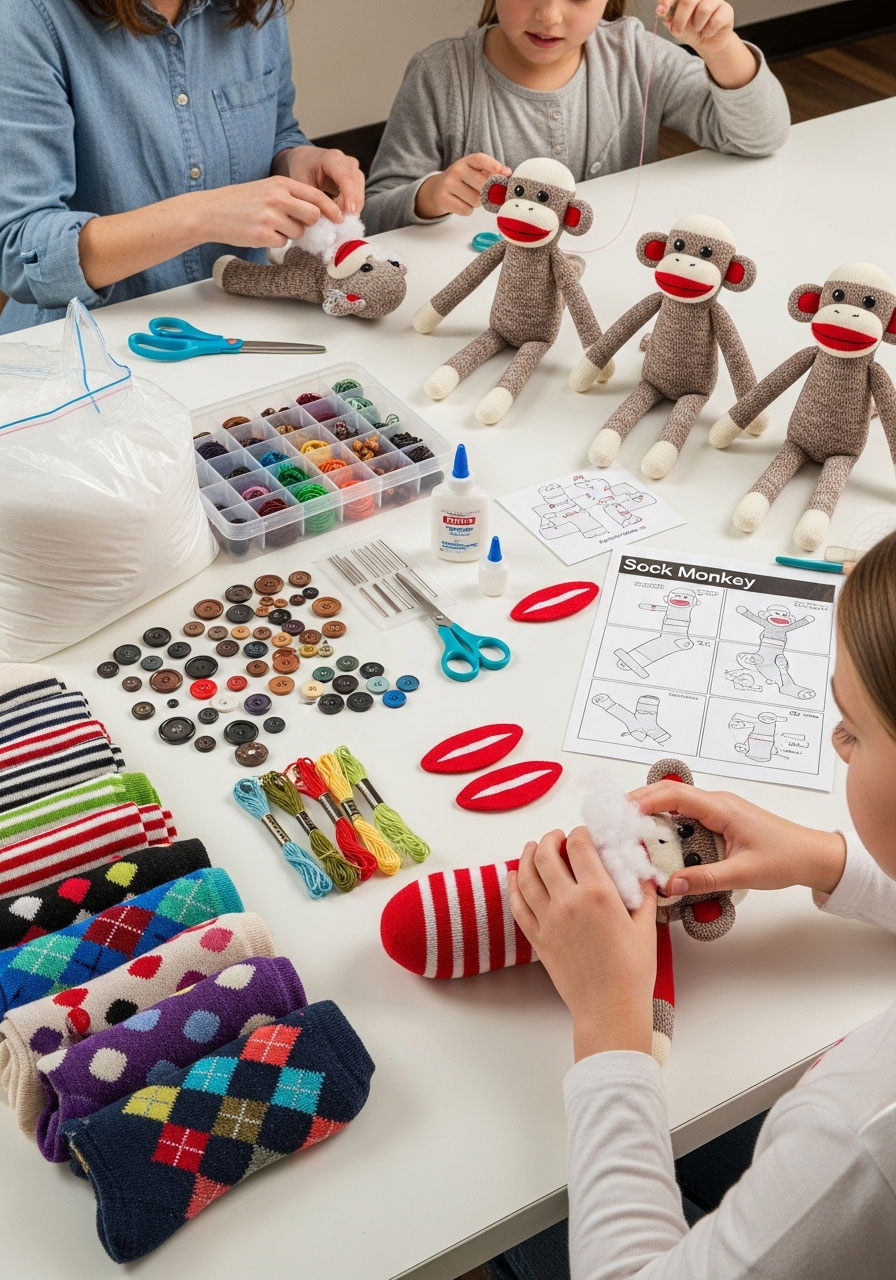
These adorable stuffed friends are surprisingly easy to make and become instant beloved toys!
Best for: Ages 8-12 (younger kids need more assistance)
Time to Complete: 40-50 minutes
What You’ll Need:
Colorful crew socks (two per child – buy fun striped or patterned ones)
Polyester stuffing
Buttons or safety eyes
Embroidery floss or yarn
Needles (large, dull tapestry needles for kids)
Fabric glue as an alternative to sewing
Scissors
Pre-cut felt pieces for mouths
How to Set It Up:
1. Demonstrate how one sock becomes the body/head and the second becomes arms, legs, and tail.
2. Help kids stuff the main sock for the body, then tie off or help them make simple stitches.
3. Cut and stuff the second sock’s pieces (have these pre-cut for younger kids).
4. Kids glue or sew on arms, legs, and tail pieces.
5. Add button eyes and felt mouths for personality.
Pro Tip: For party time constraints, use fabric glue instead of sewing – it’s faster and less frustrating for kids new to needlework.
16. Painted Birdhouse Village
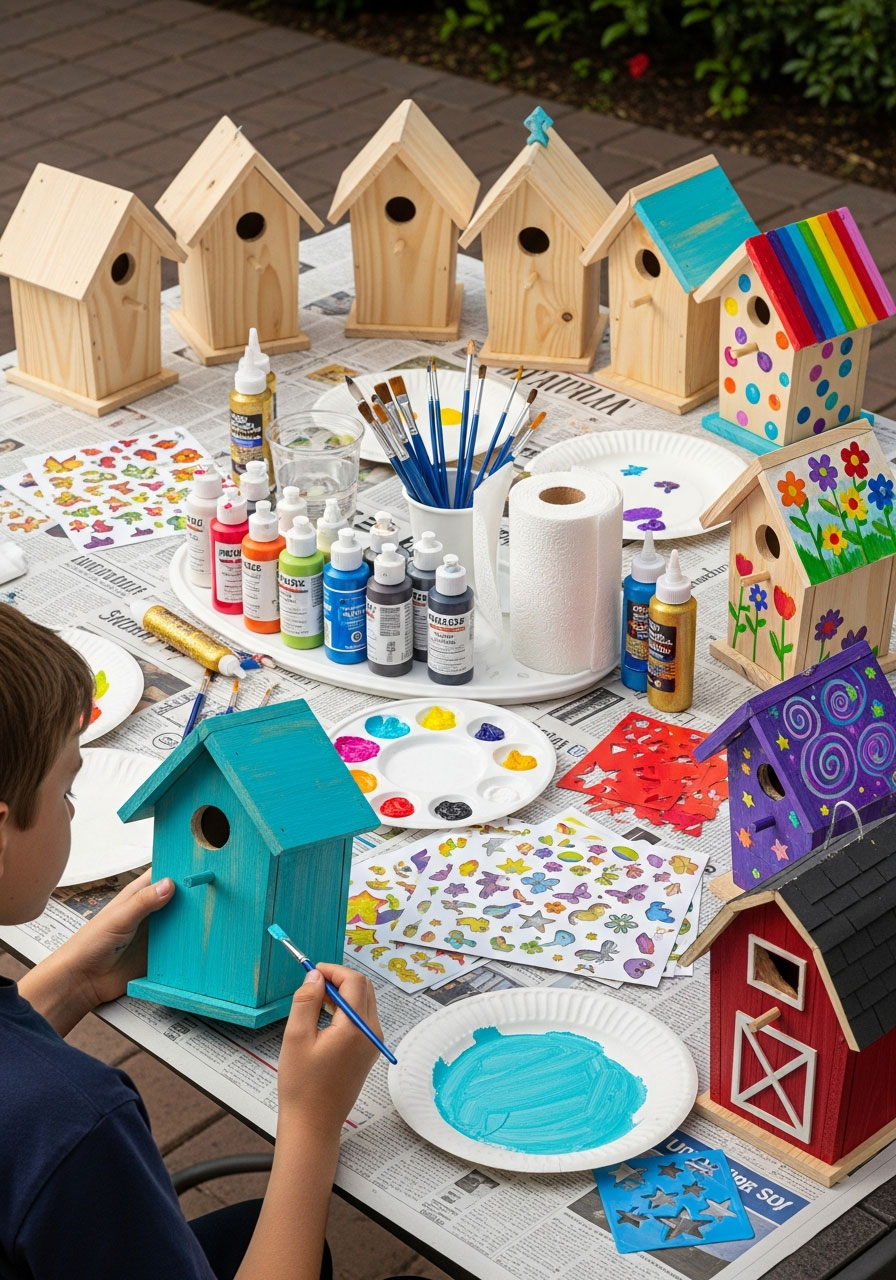
Kids paint miniature houses that birds will actually use! It’s art that serves a purpose – how cool is that?
Best for: Ages 6-12
Time to Complete: 30-35 minutes
What You’ll Need:
Unfinished wooden birdhouses (one per child)
Acrylic paints in bright colors
Various paintbrush sizes
Paint palettes or paper plates
Stickers, stencils, or stamps for decoration
Glitter glue for sparkle
Newspaper to protect surfaces
Optional: sealer spray for outdoor durability
How to Set It Up:
1. Cover tables with newspaper and set up painting stations.
2. Let each child choose their birdhouse and base paint color.
3. While the base coat dries, kids can plan their design.
4. Add details, patterns, or scenes using contrasting colors.
5. Finish with glitter glue, stickers, or stenciled designs.
Pro Tip: Set up a drying station away from the action. Alternatively, use a hairdryer to speed up paint drying between coats!
17. Balloon Animal Twisting
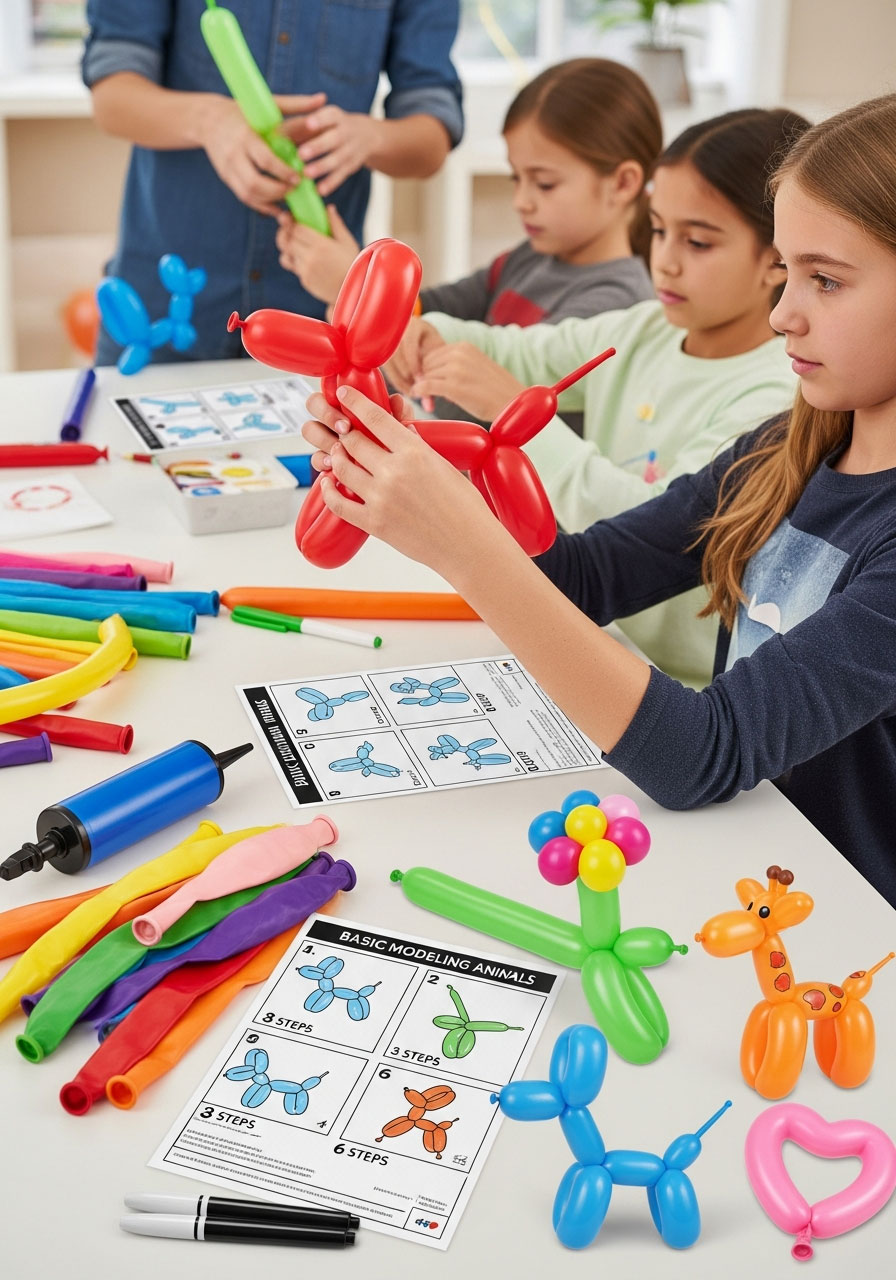
Turn the party into a circus as kids learn to create their own balloon animals. Prepare for lots of popping sounds and laughter!
Best for: Ages 7+ (requires hand strength)
Time to Complete: 20-30 minutes
What You’ll Need:
Modeling balloons (buy more than you think you need – they pop!)
Balloon pump (crucial – don’t attempt to blow these up manually)
Simple instruction sheets with pictures
Permanent markers for adding faces
Adult helpers for tying knots
How to Set It Up:
1. Start with a demonstration of the most basic design (usually a dog).
2. Give each child 3-4 balloons to work with.
3. Help them pump up balloons, leaving a few inches uninflated at the end.
4. Walk through the basic twists together: bubble twist, lock twist, fold twist.
5. Let kids attempt their own after seeing the demo.
Pro Tip: Balloons will pop – it’s part of the fun! Have ear-sensitive kids sit a bit further from the action, and keep the extras flowing.
18. Felt Finger Puppets
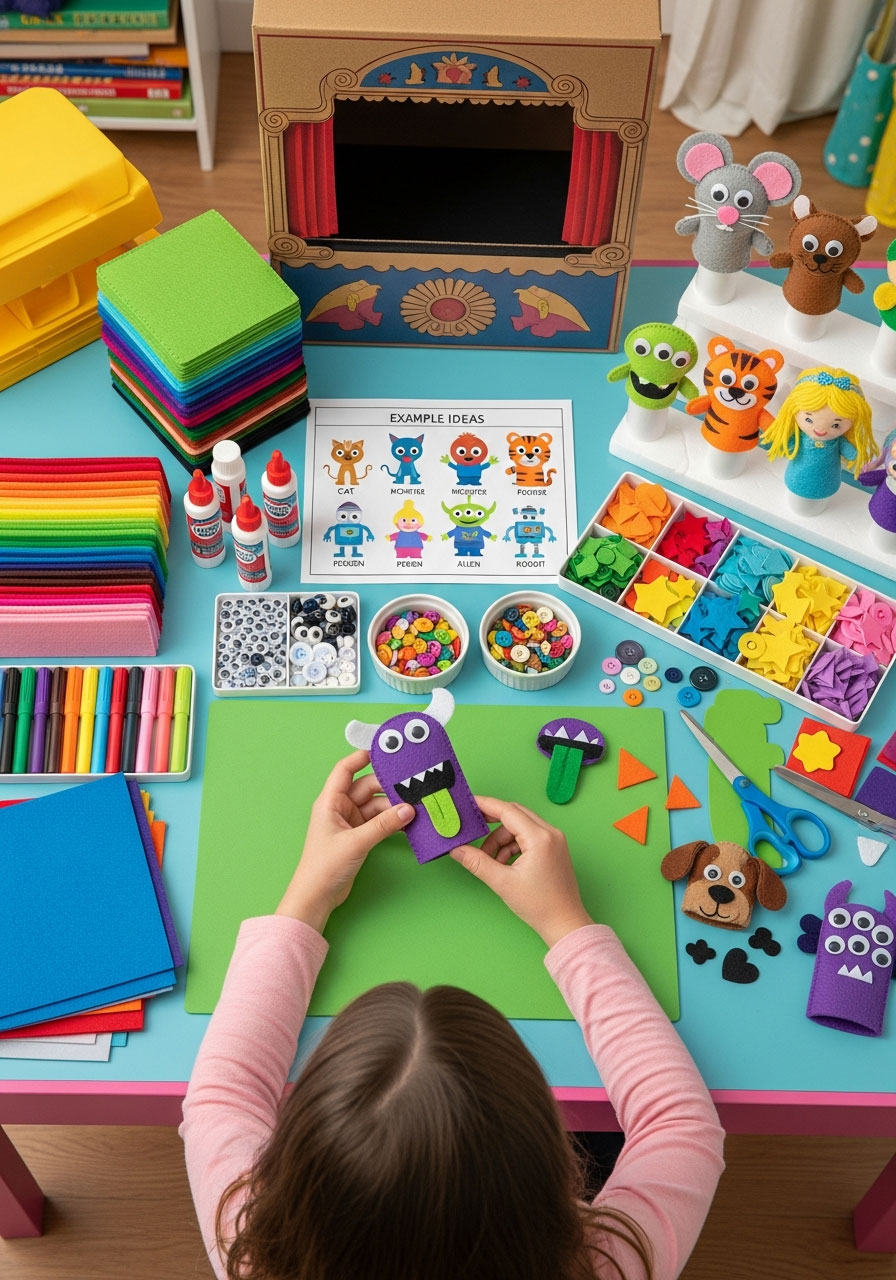
These tiny puppets pack maximum personality! Kids create entire casts of characters from simple felt shapes.
Best for: Ages 6-10
Time to Complete: 25-30 minutes
What You’ll Need:
Pre-cut felt sheets in assorted colors
Pre-cut finger puppet bases (rectangles sized to wrap around fingers)
Googly eyes
Buttons, sequins, and small felt scraps
Fabric glue
Fabric markers
Scissors (for detail work)
How to Set It Up:
1. Pre-cut felt rectangles (2 inches by 3 inches) and glue or stitch them into tubes that fit over fingers.
2. Set out felt scraps, embellishments, and glue.
3. Kids choose their character: animals, monsters, people, or fantasy creatures.
4. They glue on features – ears, eyes, mouths, hair, clothes.
5. Use fabric markers to add final details.
Fun Variation: Once everyone has 2-3 puppets, have an impromptu puppet show with a cardboard box theater!
19. Color-In Pillowcase Party
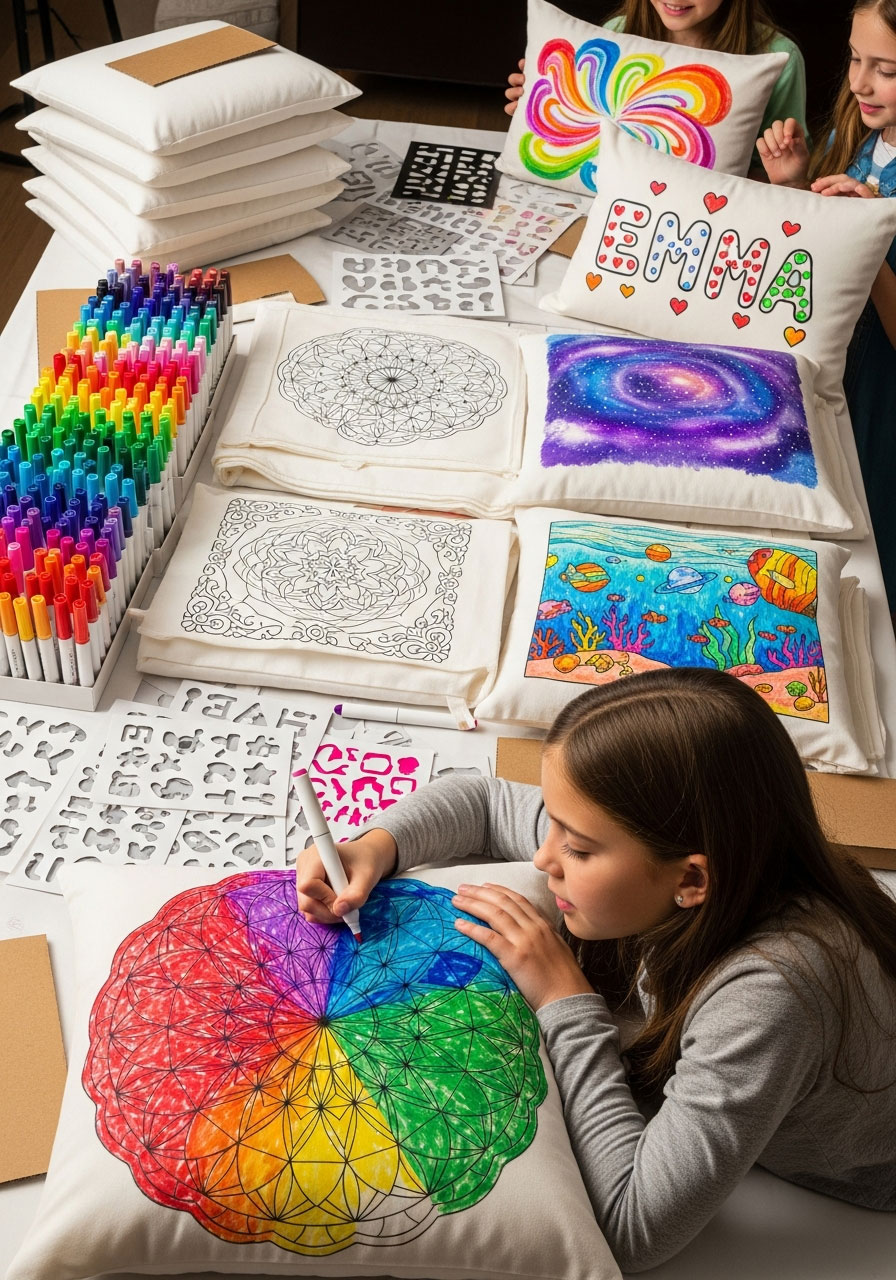
Perfect for sleepover parties! Kids color custom pillowcases they’ll actually use every night.
Best for: Ages 5-11, ideal for slumber parties
Time to Complete: 30-40 minutes
What You’ll Need:
Plain white cotton pillowcases (pre-washed, one per child)
Fabric markers in various colors
Cardboard inserts (to prevent bleed-through)
Stencils for kids who want guidance
Iron (for heat-setting later – parent task)
How to Set It Up:
1. Slide cardboard inside each pillowcase to create a firm drawing surface and prevent marker bleed-through.
2. Let kids choose between blank canvas creativity or using stencils for designs.
3. They color and doodle their masterpieces – names, favorite characters, patterns, or scenes.
4. Once complete, remove cardboard.
5. Parents heat-set designs at home by ironing (follow fabric marker instructions).
Pro Tip: Send instructions home with parents about heat-setting. Alternatively, buy pre-designed “color-in” pillowcases with outlined designs ready to fill in!
20. Mason Jar Lantern Lights
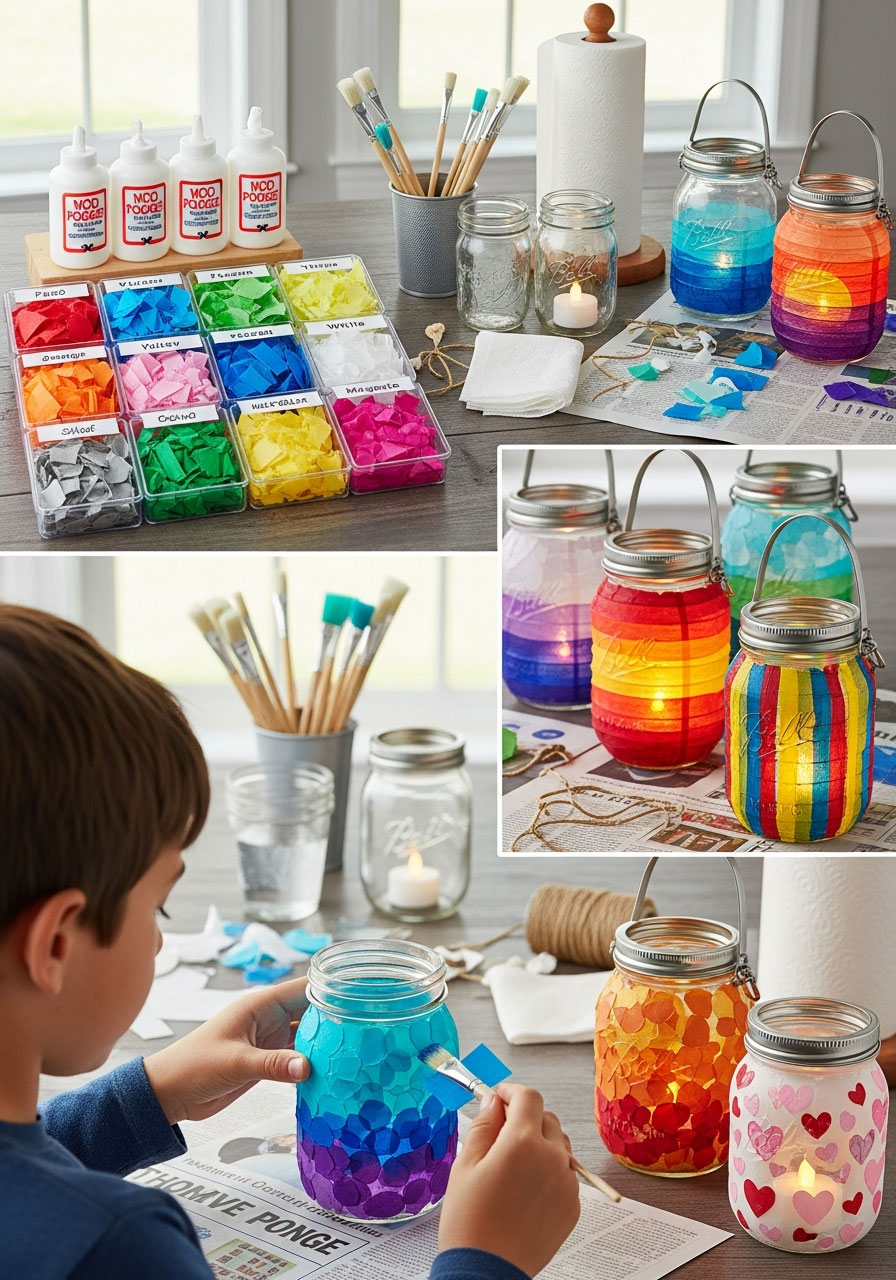
Kids create magical glowing lanterns perfect for their bedrooms. This craft combines art and function beautifully!
Best for: Ages 6-12
Time to Complete: 25-30 minutes (plus drying time)
What You’ll Need:
Clean mason jars (one per child)
Tissue paper in various colors (torn into pieces)
Mod Podge or diluted white glue
Paintbrushes for applying glue
Battery-operated tea lights or fairy lights
Ribbons or twine for decoration
Newspaper to protect surfaces
How to Set It Up:
1. Give each child a clean, dry mason jar.
2. Show them how to brush glue onto a section of the jar, then press on tissue paper pieces.
3. Kids layer overlapping tissue pieces in their chosen colors or patterns.
4. Brush another coat of glue over the tissue to seal.
5. Let dry completely (30-60 minutes), then add a tea light inside.
Pro Tip: Create these early in the party so they have time to dry before kids leave. The glowing reveal at the end makes a magical finale!
21. Crown or Tiara Decorating
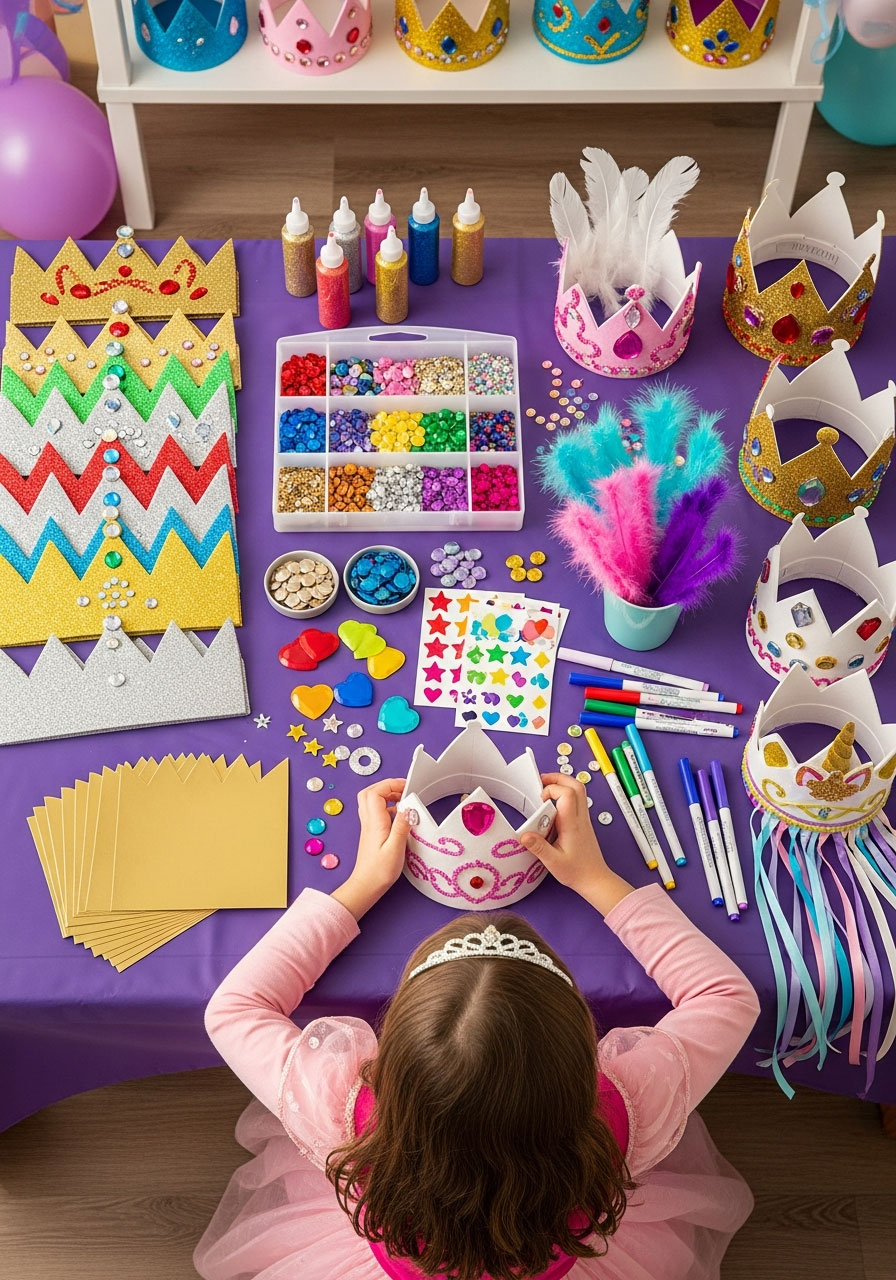
Every kid is royalty at this party! They design and decorate their own wearable crowns.
Best for: Ages 4-10, perfect for princess or royalty-themed parties
Time to Complete: 20-25 minutes
What You’ll Need:
Pre-cut crown templates from cardstock or foam
Glitter glue in multiple colors
Stick-on gems and jewels
Sequins and stickers
Feathers and ribbons
Markers and crayons
Stapler or tape to size crowns to heads
How to Set It Up:
1. Pre-cut crown shapes from sturdy cardstock (or buy foam crown kits).
2. Set out all decorating supplies in the center of the table.
3. Kids design their crowns with gems, glitter, and embellishments.
4. While crafts dry, kids can do another quick activity.
5. Size each crown to the child’s head and staple or tape the ends together.
Fun Variation: Host a royal coronation ceremony where each child presents their crown and receives a special title like “Duke of Dancing” or “Princess of Pizza”!
22. DIY Photo Frame Keepsakes
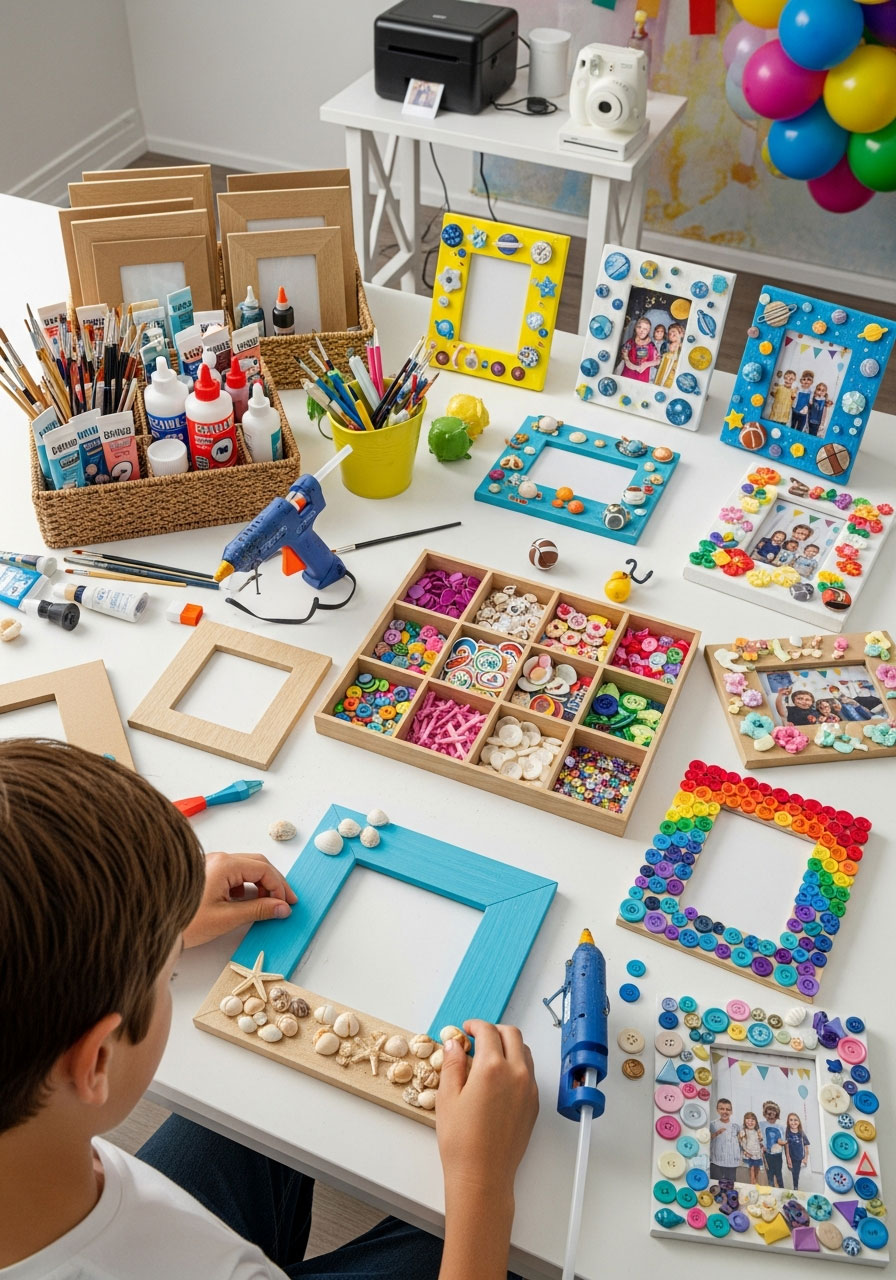
Kids create custom frames, then take a party photo to put inside – instant party favor with a memory built right in!
Best for: Ages 6-12
Time to Complete: 25-30 minutes
What You’ll Need:
Plain wooden or cardboard frames (one per child)
Acrylic paint and paintbrushes
Decorative items: buttons, shells, small toys, foam stickers
Glitter, sequins, and ribbon
Strong craft glue or hot glue gun (adult supervised)
Instant camera or printer to provide photos
How to Set It Up:
1. Give each child a plain frame to decorate.
2. Kids paint their frame base first and let it dry (or use pre-painted frames).
3. While paint dries, set up a photo backdrop for party pictures.
4. Kids glue decorations onto their frames – the more personality, the better!
5. Take group or individual photos and print them to insert into the finished frames.
Pro Tip: Take photos toward the beginning of the party while kids are still clean-ish! By frame-decorating time, the photos will be ready to insert.
Making Your Craft Party Run Smoothly
Here’s the secret sauce to a successful craft party: preparation and flexibility. Set up stations ahead of time, have more supplies than you need, and don’t stress if things get messy – that’s proof the fun is happening!
Consider assigning adult helpers to different stations, especially for activities requiring glue guns or intricate steps. And remember, the goal isn’t perfection – it’s creativity, confidence, and memories.
With these 22 craft activities in your party-planning toolkit, you’re ready to host a bash that keeps kids engaged, excited, and creating something they’re genuinely proud of. The best part? No screens required – just imagination, materials, and a whole lot of fun!
More Birthday Party Ideas to Keep the Fun Rolling:
40+ Magical Harry Potter Birthday Games That’ll Cast a Spell on Your Party
36 Dinosaur Birthday Party Ideas (Roaring Fun & Easy!)
The Birthday Fishbowl Game (+ Free Word List)
20 Fun Spa Birthday Party Ideas for Kids That’ll Have Them Saying “Best Day Ever!”
22 Best DIY Birthday Backyard Games & Lawn Activity Ideas
40 Brilliant Ideas to Throw the Ultimate LEGO Birthday Party
15 Epic Birthday Party Games for Tweens That Actually Work
22 Fun Girl Birthday Party Ideas at Home
22 Surprisingly Fun Birthday Balloon Games For Kids
18 Epic Outdoor Birthday Party Ideas for Kids That’ll Make You the Hero Parent
95 Epic Indoor Birthday Party Games for Kids of All Ages That’ll Make You the Hero Host
30+ Sparkling Fun Unicorn Birthday Party Ideas That’ll Make Your Party Absolutely Magical
As an Amazon Associate, we may earn a commission from qualifying purchases at no additional cost to you.