Perfect for: Kids ages 4–12 | Time to Make: 20–30 minutes | Difficulty: Super easy
Looking for a quick, creative activity that’ll keep your kids busy – and actually get them outside? This DIY paper spinner is exactly that. Kids color it themselves, help build it, and then get to run around playing with something they made with their own hands. That’s a pretty epic combo.
The best part? When you spin this thing, it hums. Yes, it actually makes a satisfying whirring sound. Kids go absolutely wild for it.
Most of the supplies are probably already sitting in your craft drawer. And the whole project takes under 30 minutes – start to spin.
Why Kids (and Parents!) Love This Craft
This isn’t just a one-and-done craft that ends up forgotten under the couch. Once kids figure out how to get the spinner going, they’re out the door challenging everyone to races and showing off their designs.
The coloring step is secretly a fantastic art activity on its own. Spirals, stars, rainbow dots – whatever pattern your child chooses will look totally mesmerizing once the disc gets spinning. It’s a wonderful little science-meets-art moment.
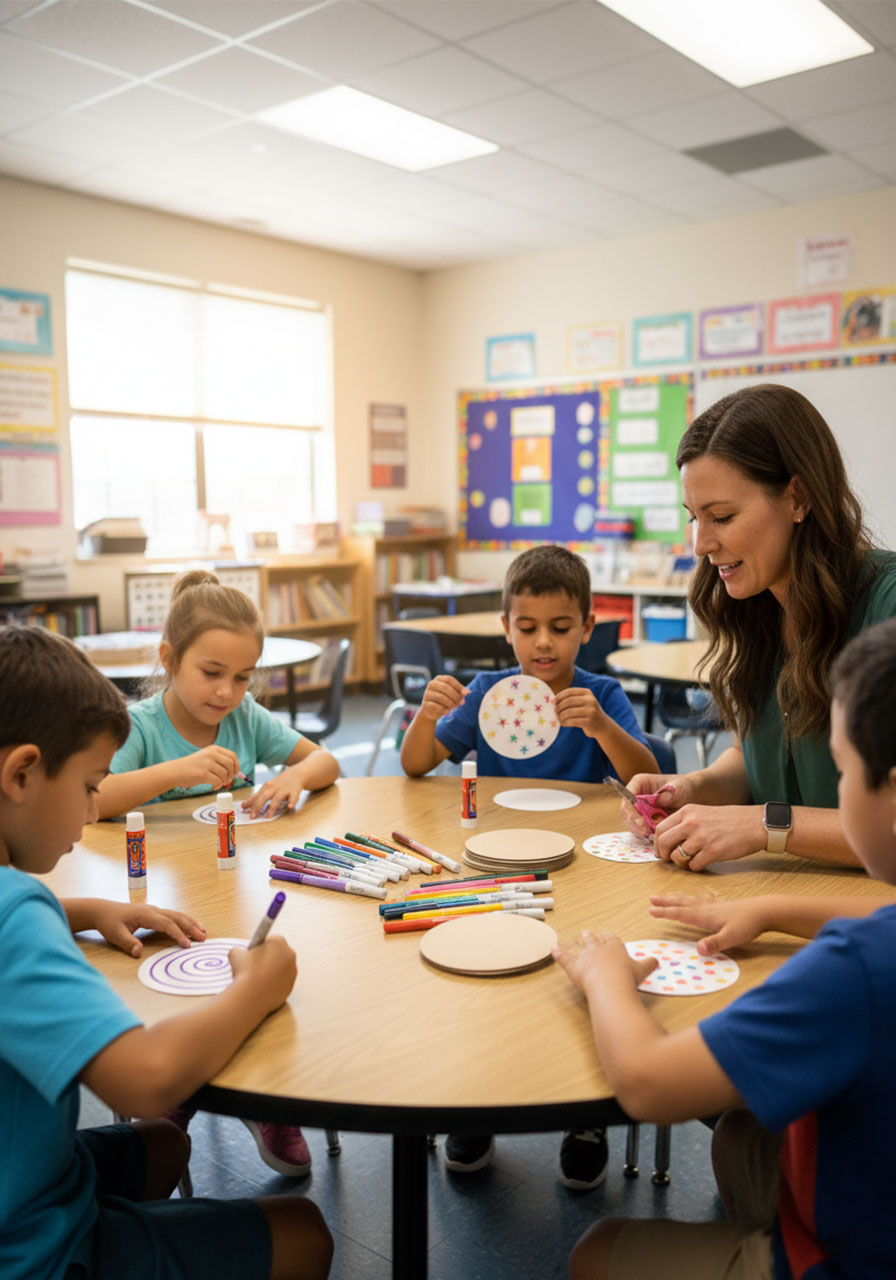
And for teachers: this is an absolutely stellar classroom craft. Set up a “design station,” have kids color their spinners, then head outside for a group play session. Zero mess, maximum fun.


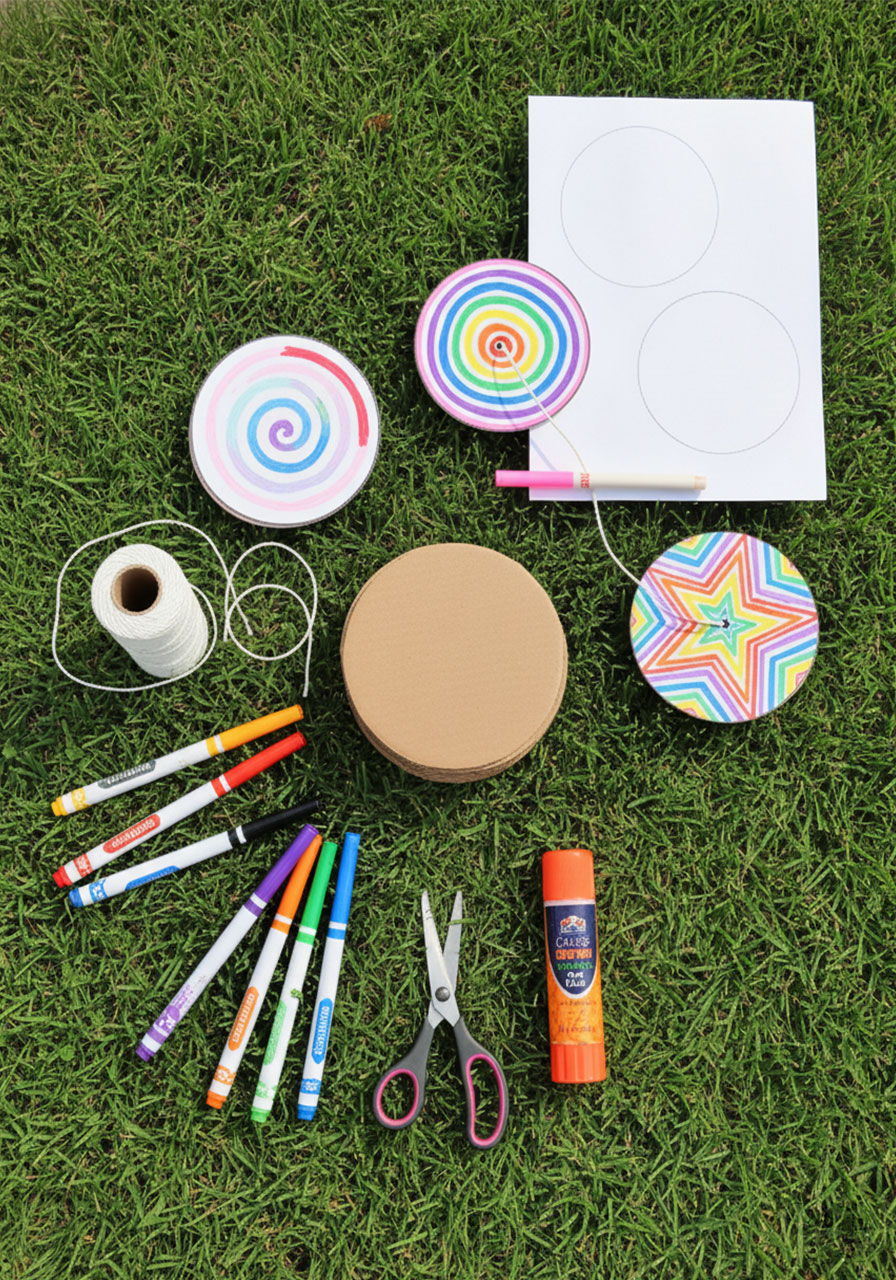
Supplies You’ll Need
Printer paper (or the free circle template – more on that below)
Cardboard (from any cereal box, shipping box – whatever you have)
Colorful markers (the more colors, the better!)
Scissors
A glue stick
Twine or sturdy string – about 28 inches per spinner
A pencil or sharp skewer (for poking holes)
That’s it! No fancy supplies, no craft store run required.
💡 Pro Tip: Gather these supplies ahead of time and set up a little “spinner station” for your kids or students. Lay out all the markers in rainbow order – it’s a small touch that makes the whole activity feel extra special.
Step-by-Step Instructions
Step 1: Print or Draw Your Circle Template
First things first – you need two paper circles to decorate. You can download and print a free circle template (just right-click and save), or grab a large round lid or bowl and trace two circles onto printer paper yourself.
Two circles per spinner means you get to decorate both sides – and both sides will be visible when the spinner is in action, so make them both count!
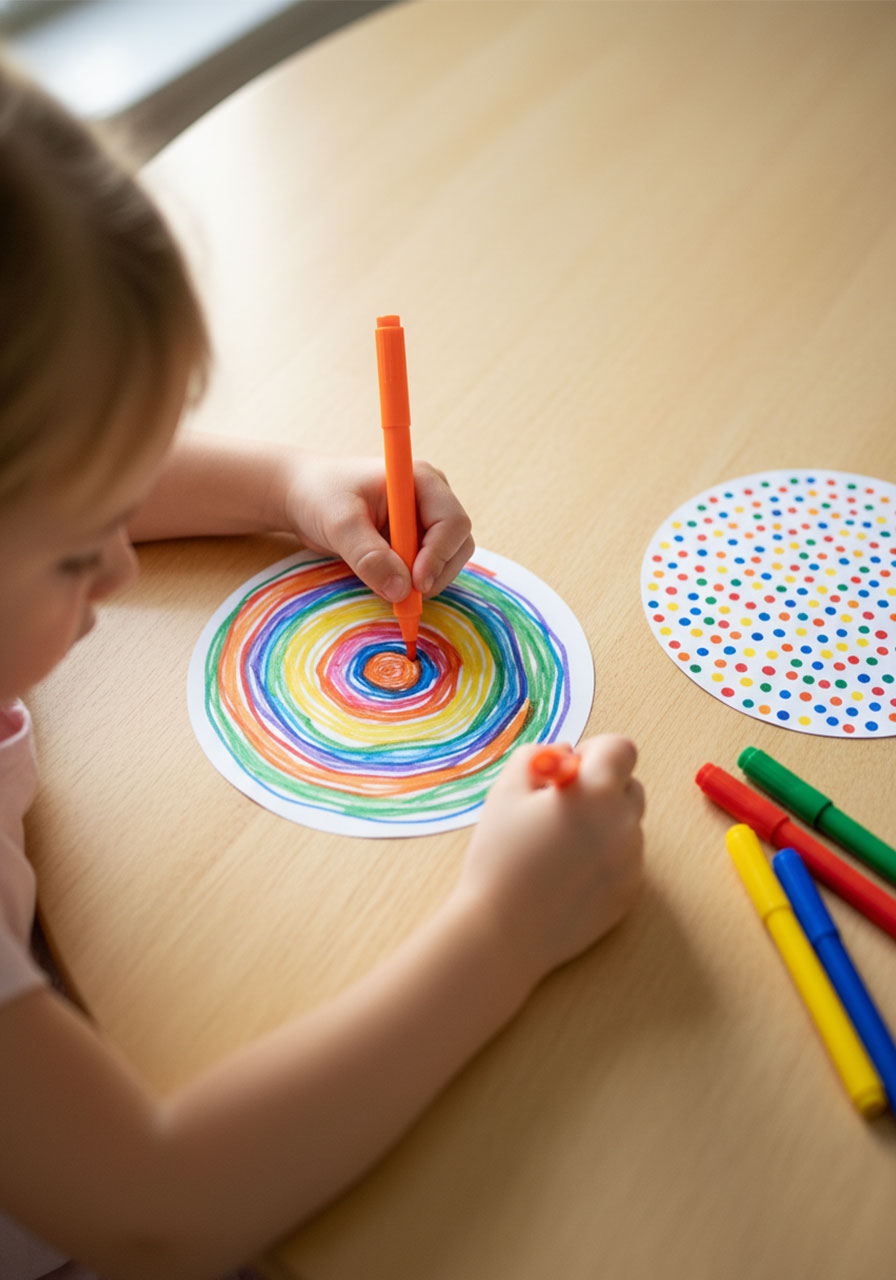
Step 2: Color Your Circles
This is the most exciting step – and the most important one for how cool the final spinner looks. The more colorful and bold the design, the more visually stunning the spin effect will be.
Some tried-and-true designs that look absolutely amazing in motion:
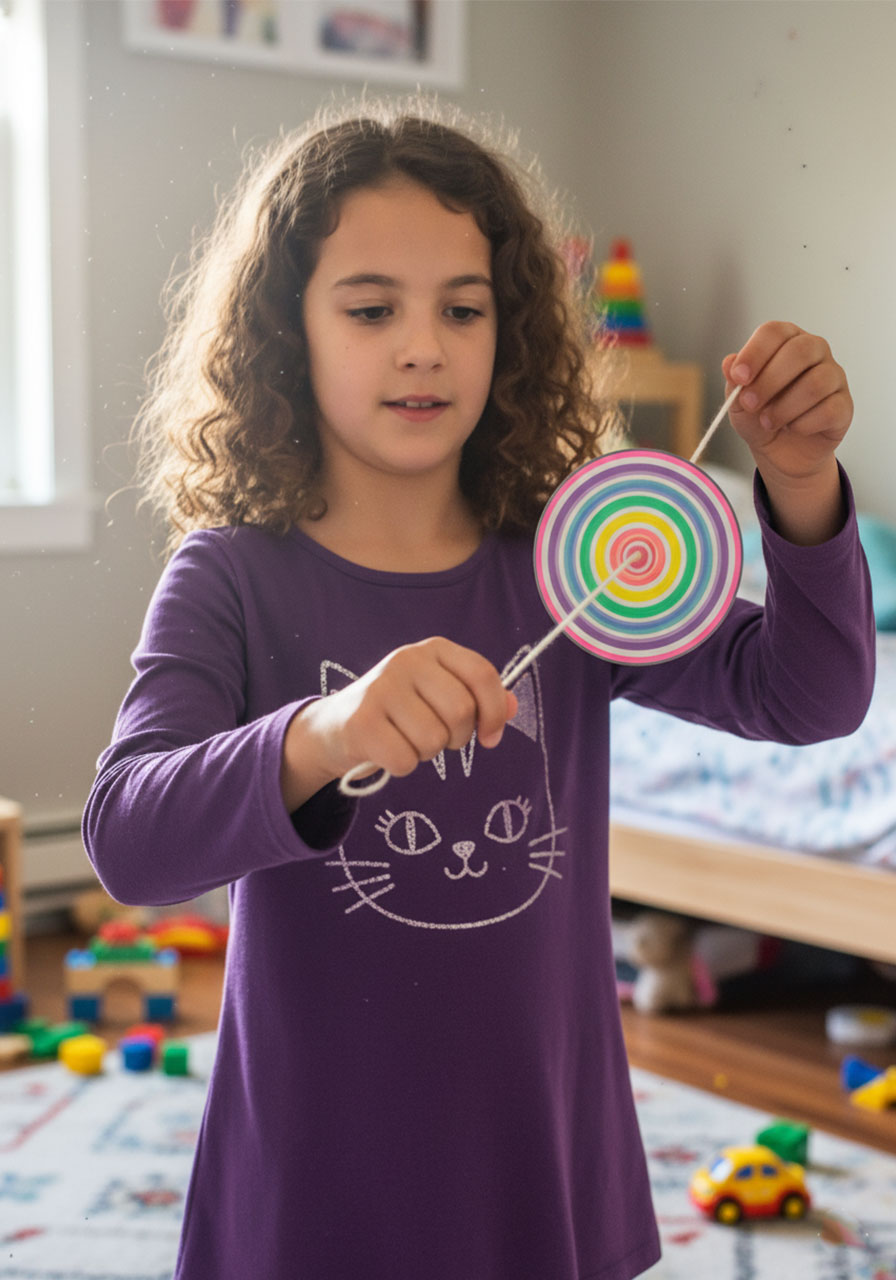
Rainbow spiral – Start at the center and swirl outward in concentric arcs of different colors
Bullseye rings – Alternating colored rings from center to edge
Rainbow star – Draw a star in the center and fill it with bold, bright lines radiating outward
Rainbow dots – Fill the whole circle with colorful dots of different sizes – this one looks like a galaxy when it spins!
Encourage kids to go bold. Bright colors = a more impressive spin show.
Step 3: Cut Out Your Paper Circles
Once the coloring is done and the markers are dry, carefully cut out both paper circles along the outline. Younger kids may need a hand here – just trace the cut line for them and let them give it a go with safety scissors.
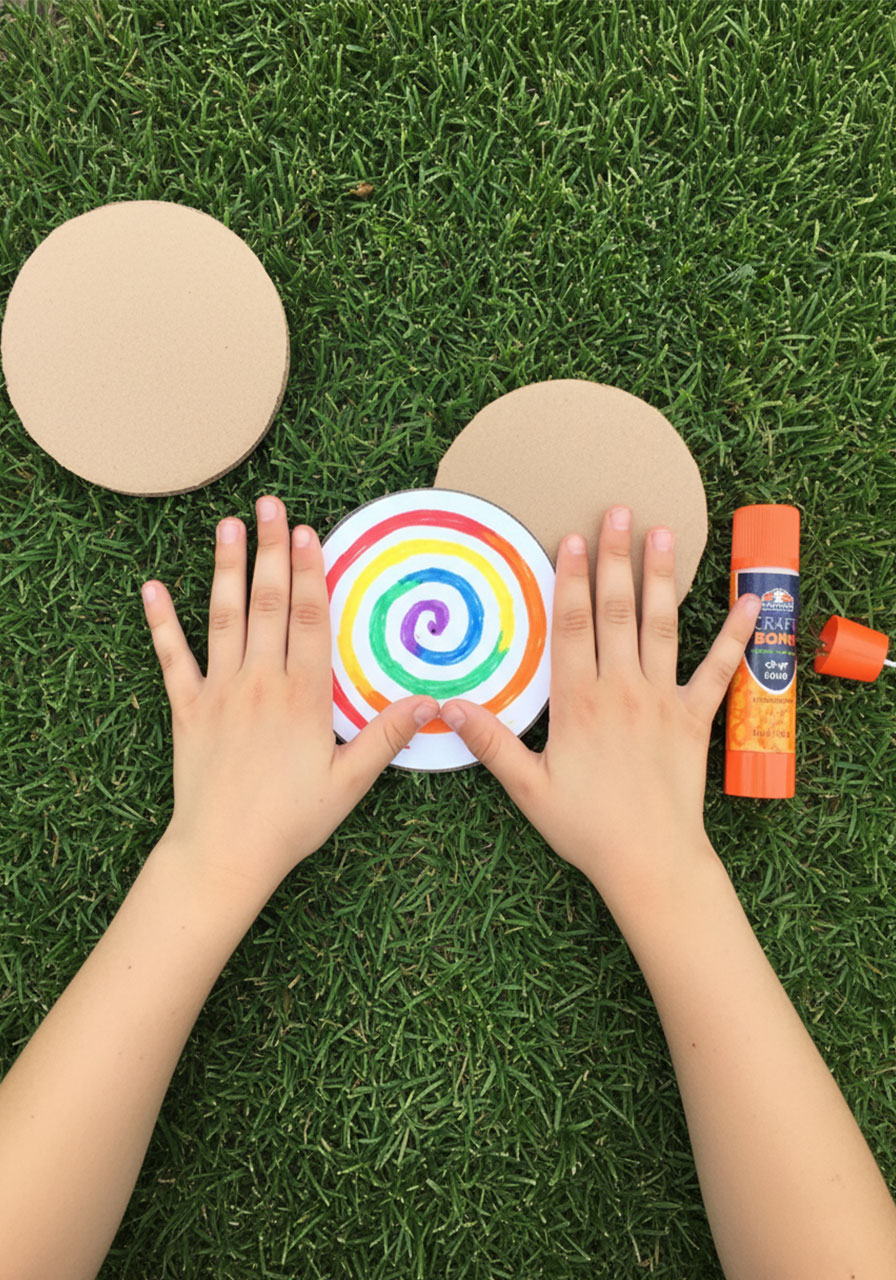
Step 4: Make the Cardboard Base
Place one of your paper circles on a piece of cardboard and trace around it. Cut out one cardboard circle – this is the sturdy “backbone” of your spinner. It gives the whole thing the weight it needs to spin properly.
💡 Pro Tip: If you want an extra-sturdy spinner (great for active kids who play hard!), glue two layers of cardboard together before adding the paper. It makes the disc heavier and the humming spin even more satisfying.
Step 5: Glue the Paper Circles to the Cardboard
Take your glue stick and apply a thin, even layer to one side of the cardboard disc. Press one decorated paper circle firmly onto it. Smooth out any bubbles. Flip it over and repeat on the other side with your second paper circle.
You now have a beautiful, double-sided decorated disc. Let it dry for a couple of minutes before the next step.
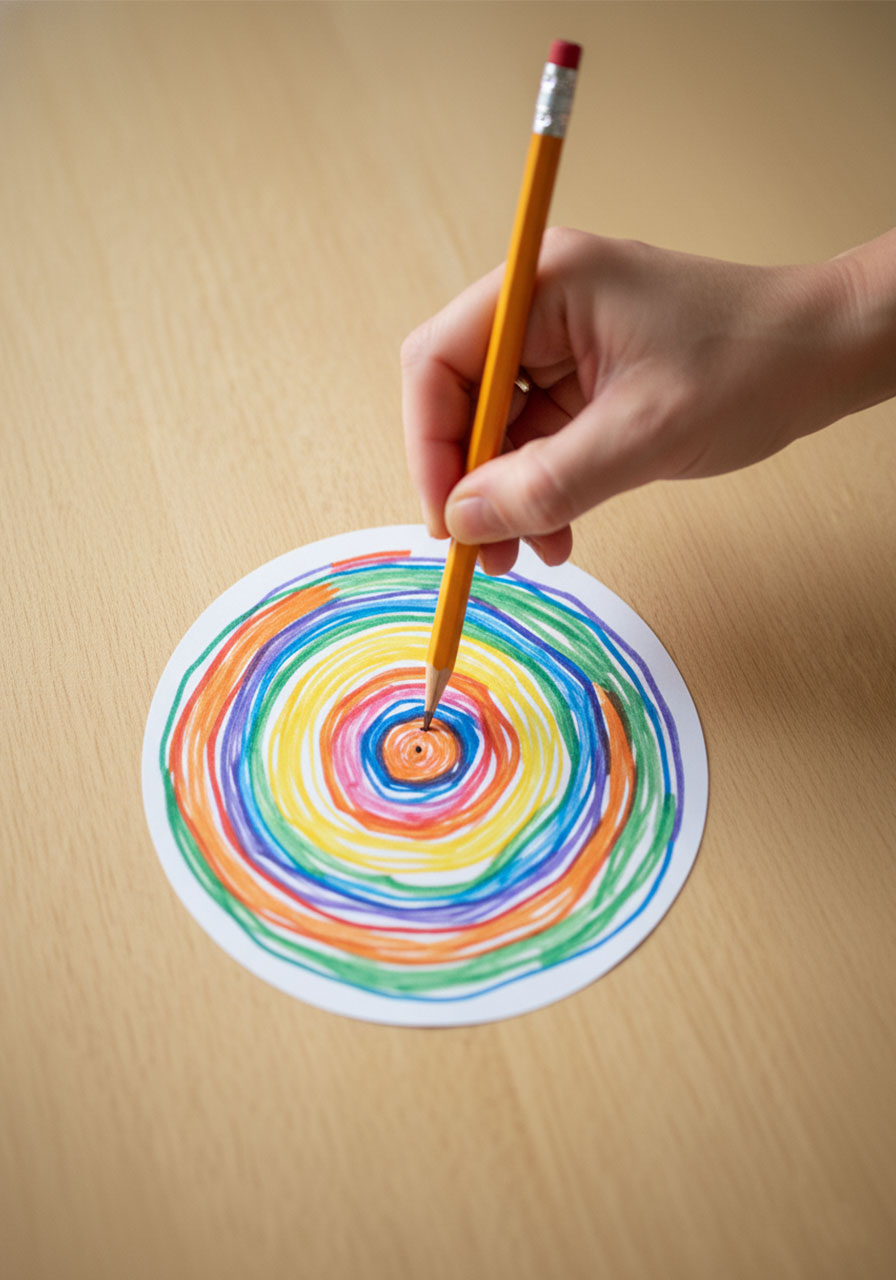
Step 6: Poke Two Holes in the Center
This is the step that transforms your disc into a spinner. Using a sharp pencil, skewer, or pen, poke two holes near the very center of the cardboard disc, about half an inch apart from each other.
Getting these holes close to the true center is key – if they’re off to one side, the spinner will wobble instead of spin smoothly. Take a moment to eyeball the middle before you poke!
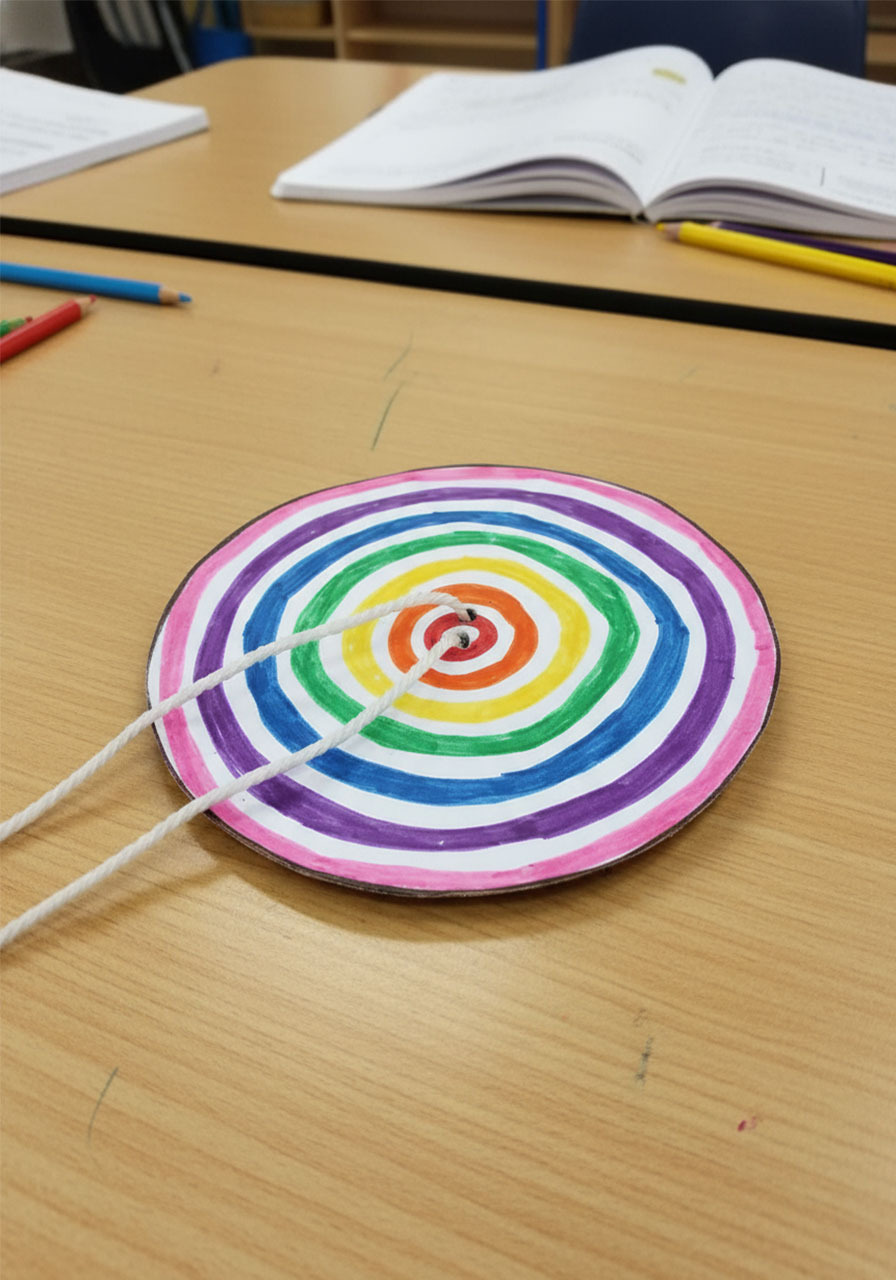
Step 7: Thread the Twine
Cut a piece of twine or sturdy string about 28 inches long. Thread it through one hole from front to back, then back through the second hole from back to front – so the disc is sitting in the middle of a loop of string with two long tails coming out of the front.
Tie the two ends of the string together with a secure knot. Now you have a loop of string running through the center of your spinner disc.
💡 Pro Tip: If your string keeps fraying and unraveling at the ends, quickly run a lighter or match flame near the tip to melt and seal it. Adults only for this step! A quick dab of clear nail polish works great too and is safer around kids.
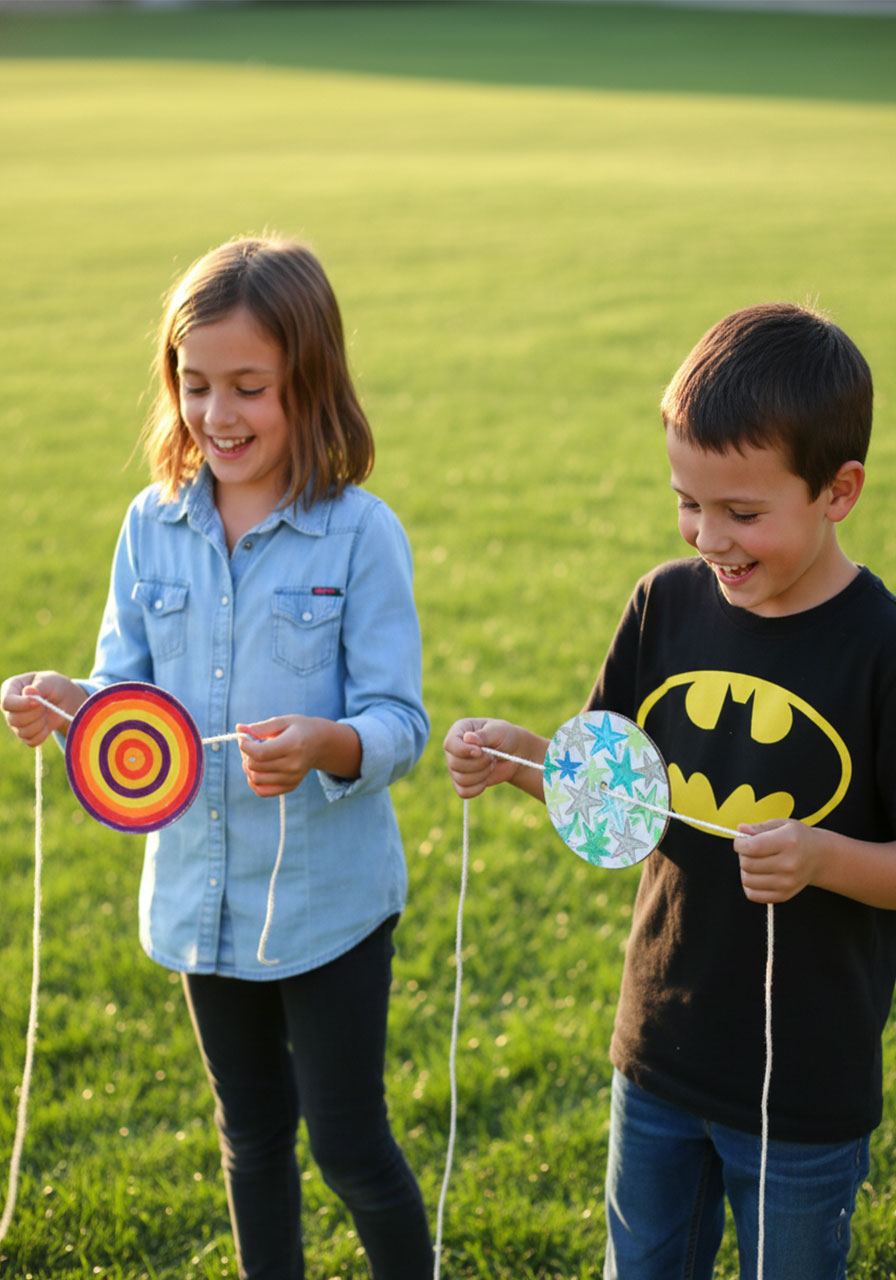
How to Play With Your DIY Spinner
Here comes the fun part – and there’s a tiny trick to getting this right on the first try.
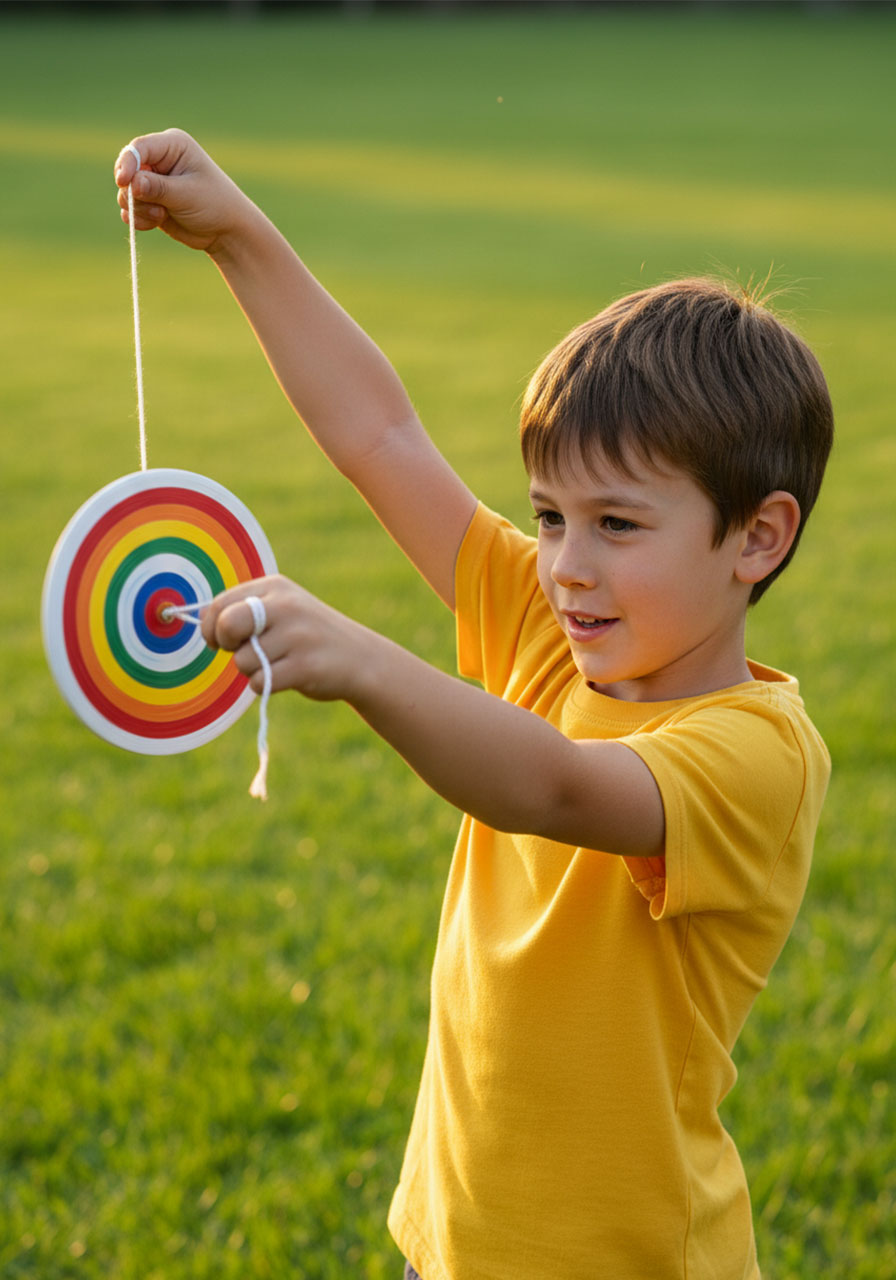
1. Hold the loop of string with one finger (or thumb) on each end, with the disc hanging in the middle.
2. Swing the disc in a circular motion – like you’re twirling a lasso – to wind up the string. Do this for about 10 full rotations until the string is tightly twisted on both sides of the disc.
3. Now gently pull your hands apart. The twisted string will unwind, spinning the disc – and the disc will re-twist the string in the other direction.
4. Keep gently pulling out and relaxing the tension in a smooth rhythm. The spinner will keep going, picking up speed, and start to hum!
It takes about 30 seconds to get the hang of the pull-and-relax rhythm, but once kids figure it out, they will not want to stop. Fair warning: you might need to make one for yourself too.
🌟 Fun Variation: Once everyone has their spinners, turn it into a contest! Who can keep their spinner going the longest without stopping? Or host a “design competition” – vote on whose spinner looks the coolest while it’s spinning. Spoiler: they all look amazing.
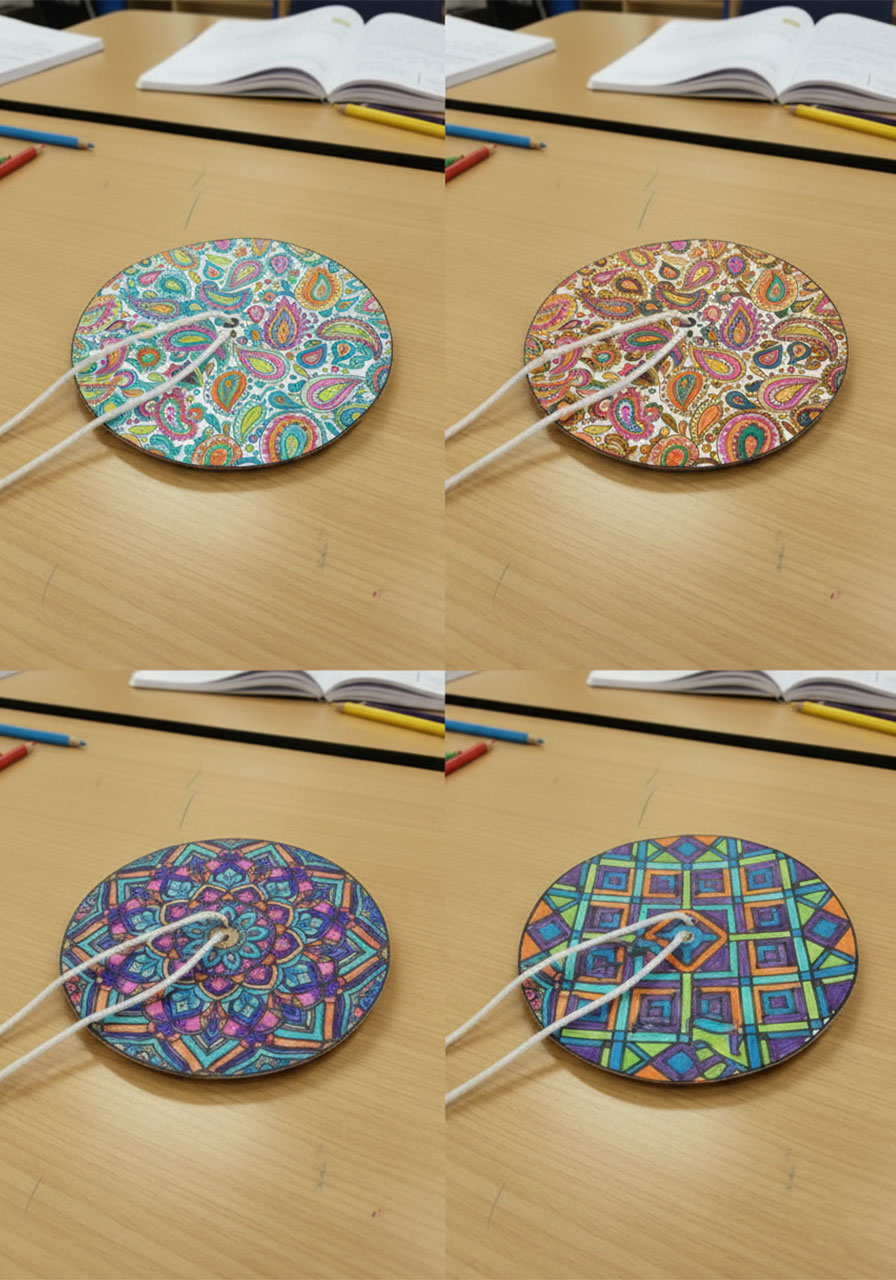
Design Ideas to Get Your Creative Juices Flowing
Not sure what to draw? Here are a few more ideas that look absolutely jaw-dropping in motion:
Yin and yang – Simple and stunning when spinning
Color wheel sections – Draw pie-slice wedges in rainbow order; they’ll blur together into new colors as the disc spins (hello, science lesson!)
Checkerboard pattern – Black and white squares create a hypnotic optical illusion
Letter or number – Write a big bold initial in the center and watch it disappear into a blur
Flower or mandala – Petal shapes radiating from the center look gorgeous
There’s genuinely no wrong answer here. Half the fun is the “reveal” moment when you first get the spinner humming and see your design come to life.
Tips for Teachers: Use This as a Classroom Activity
This craft is absolutely built for the classroom. It hits creative arts, fine motor skills, and – if you lean into it – basic physics concepts like centripetal force and color mixing.
A few ways to level it up in a school setting:
Science tie-in: Challenge students to predict what colors will appear when their spinner is in motion. This is a fantastic visual demonstration of color mixing and optical illusions.
Art challenge: Give everyone the same template but different color palettes and see how differently they turn out.
Math connection: Talk about symmetry, radius, and center points while making the disc. It sneaks learning into a craft activity!
Take-home project: Send the supplies home in a little baggie and let families make one together. It’s an instant family activity night.
💡 Pro Tip for Large Groups: Pre-cut the cardboard circles the night before. It saves a ton of time and keeps the activity moving smoothly when you’re managing a whole classroom of excited kids.
Troubleshooting: If Your Spinner Isn’t Spinning Right
Sometimes the first attempt doesn’t go perfectly – and that’s totally fine. Here’s a quick cheat sheet for the most common issues:
Spinner wobbles instead of spinning smoothly: Your holes are probably slightly off-center. Repoke them a little closer to the middle.
String keeps breaking: Use a thicker twine or double up the string. Avoid thin sewing thread – it snaps too easily.
Disc bends while spinning: Add another layer of cardboard for more stiffness. Double-thickness cardboard makes a huge difference.
Can’t get it to spin at all: Make sure you’re winding it up enough first – 10+ full rotations of the disc before you start pulling. Then keep the pull-relax rhythm steady and smooth, not jerky.
Make a Batch for a Party or Playdate!
Here’s a little secret: DIY paper spinners make the most ridiculously fun party activity. Set up a coloring station, have kids decorate their own disc, then watch the backyard explode with spinning, humming, laughing chaos. It’s the kind of thing kids talk about for weeks.
For a birthday party, cut out enough cardboard circles ahead of time and lay out a rainbow of markers. It doubles as a craft activity and a take-home party favor – two birds, one very colorful stone.
With these spinners in your back pocket, you’re armed with one of those rare kids’ crafts that’s just as fun to make as it is to play with. Now go grab some cardboard, uncap those markers, and let the spinning begin!
More Summer Craft & Activity Ideas to Keep the Fun Rolling:
Beaded Pipe Cleaner Butterflies (Easy Step-by-Step Craft for Kids!)
How to Make Moon Sand With Only 2 Ingredients (Kids Go Absolutely Wild for This!)
Easy Jellyfish Suncatcher Craft for Kids (That Looks Stunning in a Window!)
Paper Loop Pufferfish Craft: The Cutest 3D Summer Activity for Kids
Egg Carton Ladybug Craft Ideas Kids (and Teachers!) Will Absolutely Love