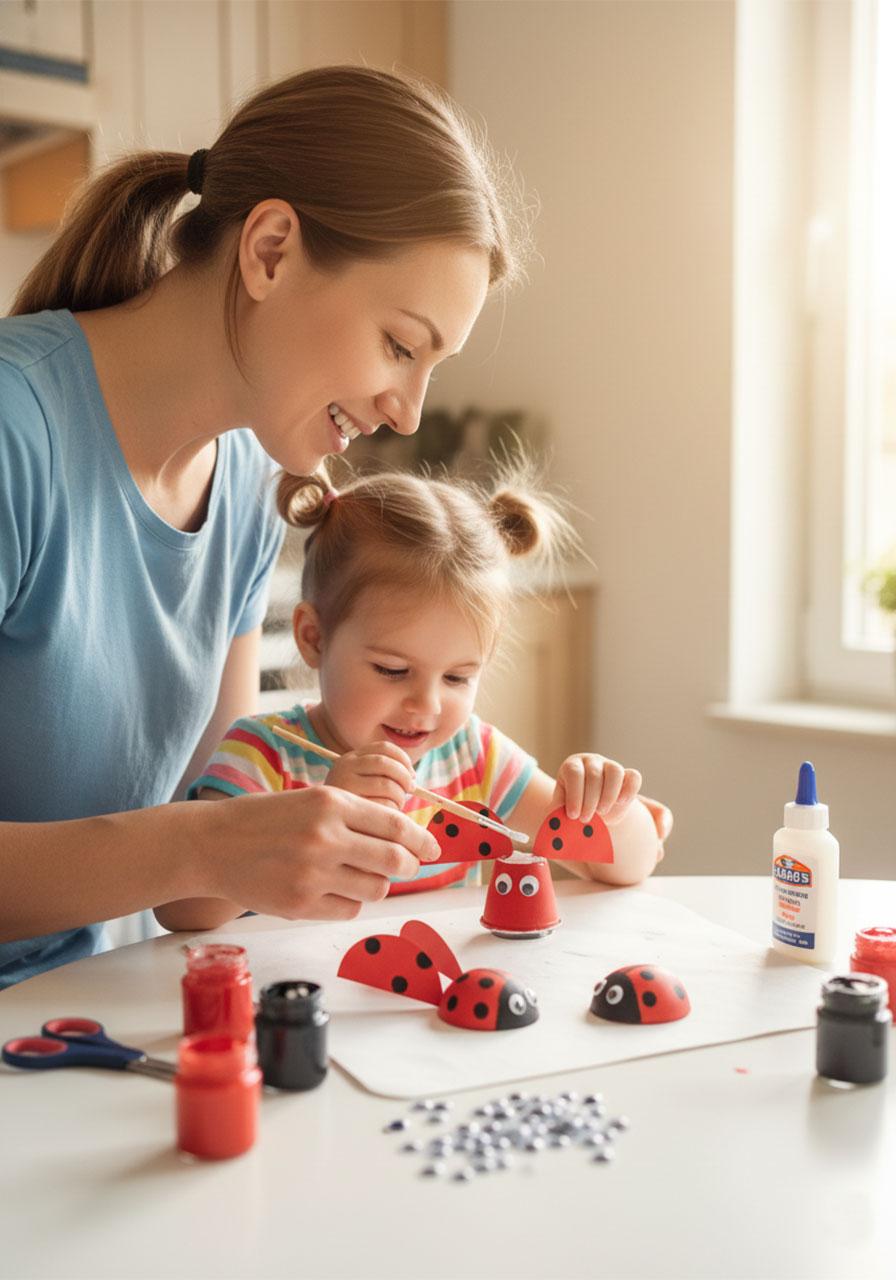
Spring is right around the corner, and you know what that means – it’s time to bust out the egg cartons and get crafty! This egg carton ladybug craft is one of those rare projects that checks every box: it’s simple, adorable, uses supplies you probably already have at home, and keeps kids genuinely engaged from start to finish.
Whether you’re a parent looking for a fun weekend activity or a teacher planning a spring unit, this one is an absolute keeper.
I’ve made these with kids as young as three, and I’ll tell you – watching their faces light up when they stick on those googly eyes? Priceless every single time.
Why Kids (and Adults!) Love This Craft
There’s something magical about turning something as ordinary as an egg carton into a cheerful little ladybug. Kids get a kick out of it, and honestly? So do grown-ups.
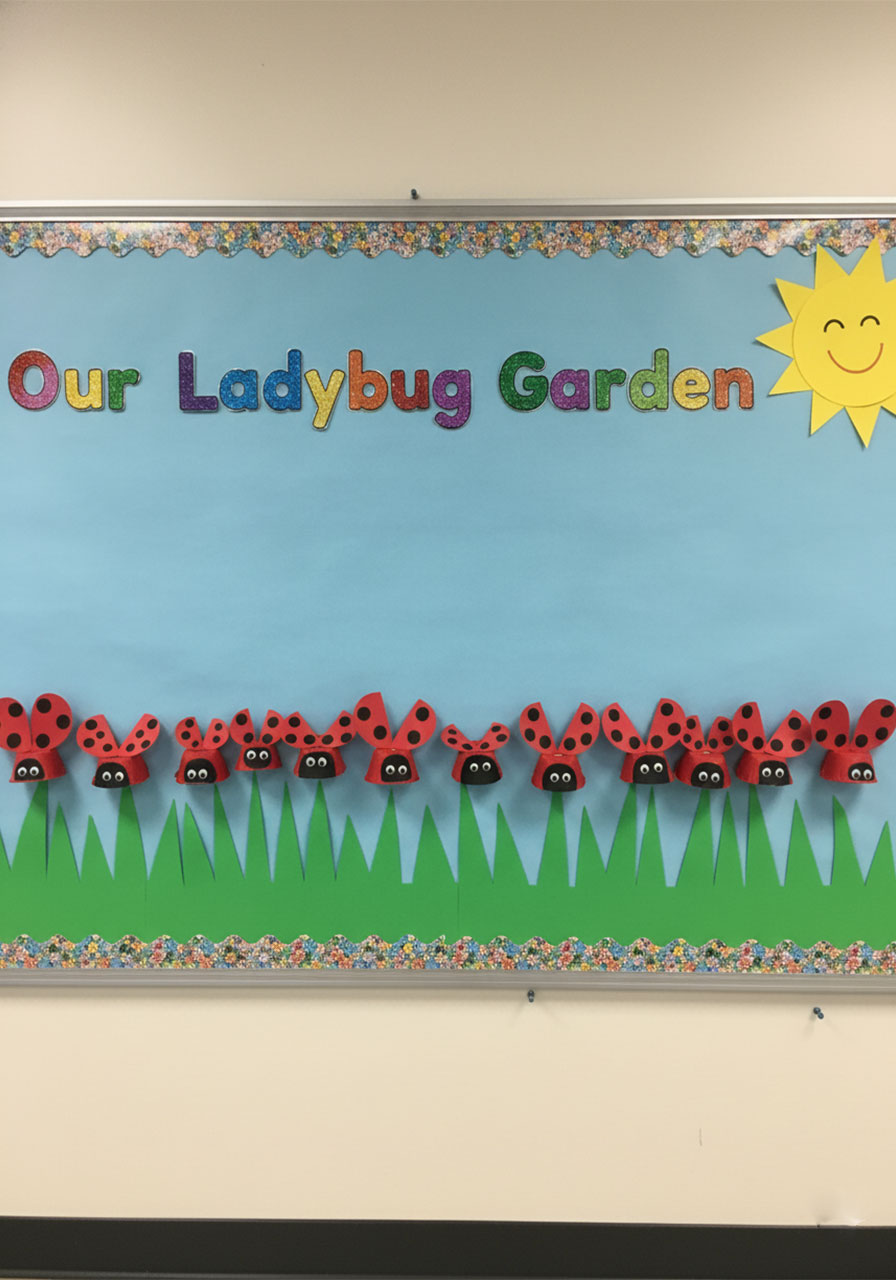
These little bugs are perfect for spring and summer classroom décor. Line them up on a windowsill or bulletin board and your room instantly feels festive.
They also double as a hands-on learning tool. Use them for counting activities, sorting by number of spots, or pair them with a beloved picture book like The Grouchy Ladybug by Eric Carle or Ten Little Ladybugs for a reading-and-craft combo your kids will talk about for weeks.
And once craft time is over? Kids love using them for imaginative play. A cluster of handmade ladybugs can spark a whole afternoon of creative storytelling.


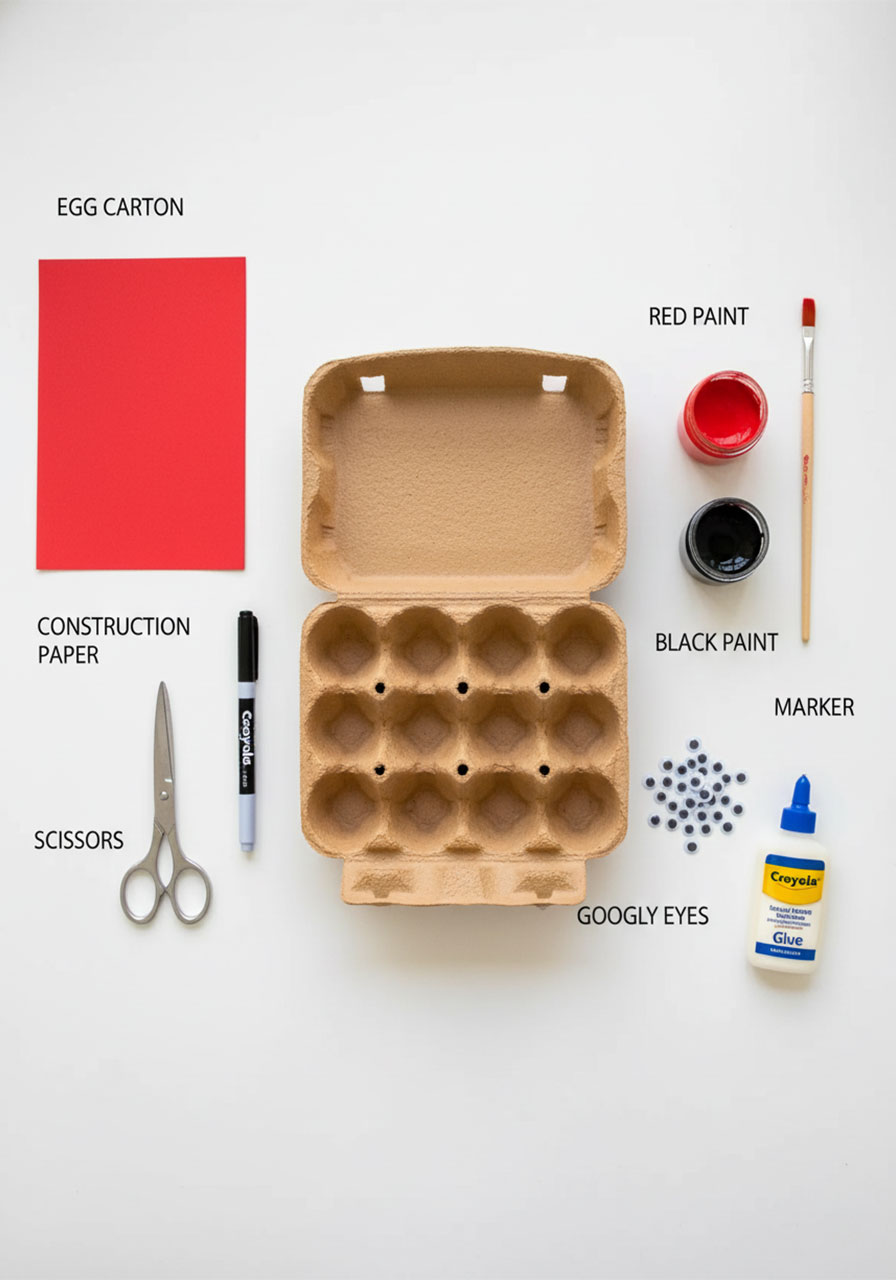
What You’ll Need
The best part about this project is that most of these supplies are probably already in your home or classroom. Here’s your quick shopping list:
Empty egg carton (cardboard, not foam)
Red tempera paint or acrylic paint
Black tempera paint or acrylic paint
Red construction paper
Scissors (adult scissors work best for cutting the egg carton)
Black marker or crayon
Googly eyes
Craft glue or a glue stick
Pro Tip: Tempera paint is great for younger kids because it cleans up easily with water. If you want a slightly more vibrant, durable finish, go with acrylic paint instead – just cover that table first!
How to Make an Egg Carton Ladybug
This craft has just a few simple steps. You can prep some parts in advance (like cutting the egg carton and construction paper circles) to make it even smoother with a group of kids.
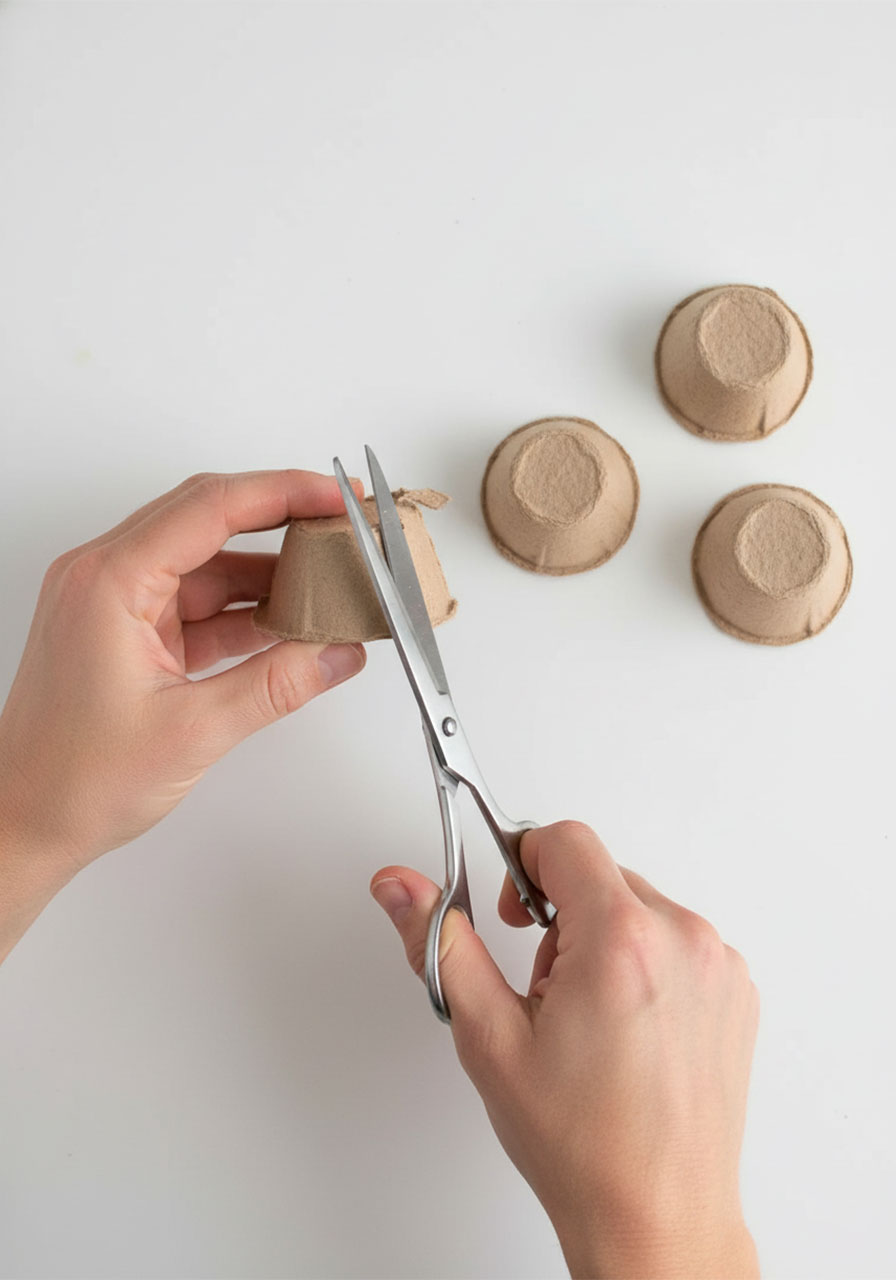
Step 1: Cut the Egg Carton
Cut apart your empty egg carton so you have individual cup sections – one cup per ladybug. Flip each cup upside down so the rounded side faces up. That rounded bump is going to be your ladybug’s body!
Heads up: Egg cartons can be surprisingly tough to cut cleanly. A sharp pair of adult scissors makes this step much easier. This part is best handled by a grown-up before the kids sit down to paint.
Step 2: Paint the Body
This is the fun part – and yes, it will get a little messy (in the best possible way).
Paint the top and sides of the egg carton cup red. This is the ladybug’s shell.
Then, paint the front section black – this will become the ladybug’s head and face area.
Set the painted cups aside and let them dry completely before moving on. If you’re working with a group, this is a great time to get started on the wings while the bodies dry!

Step 3: Make the Wings
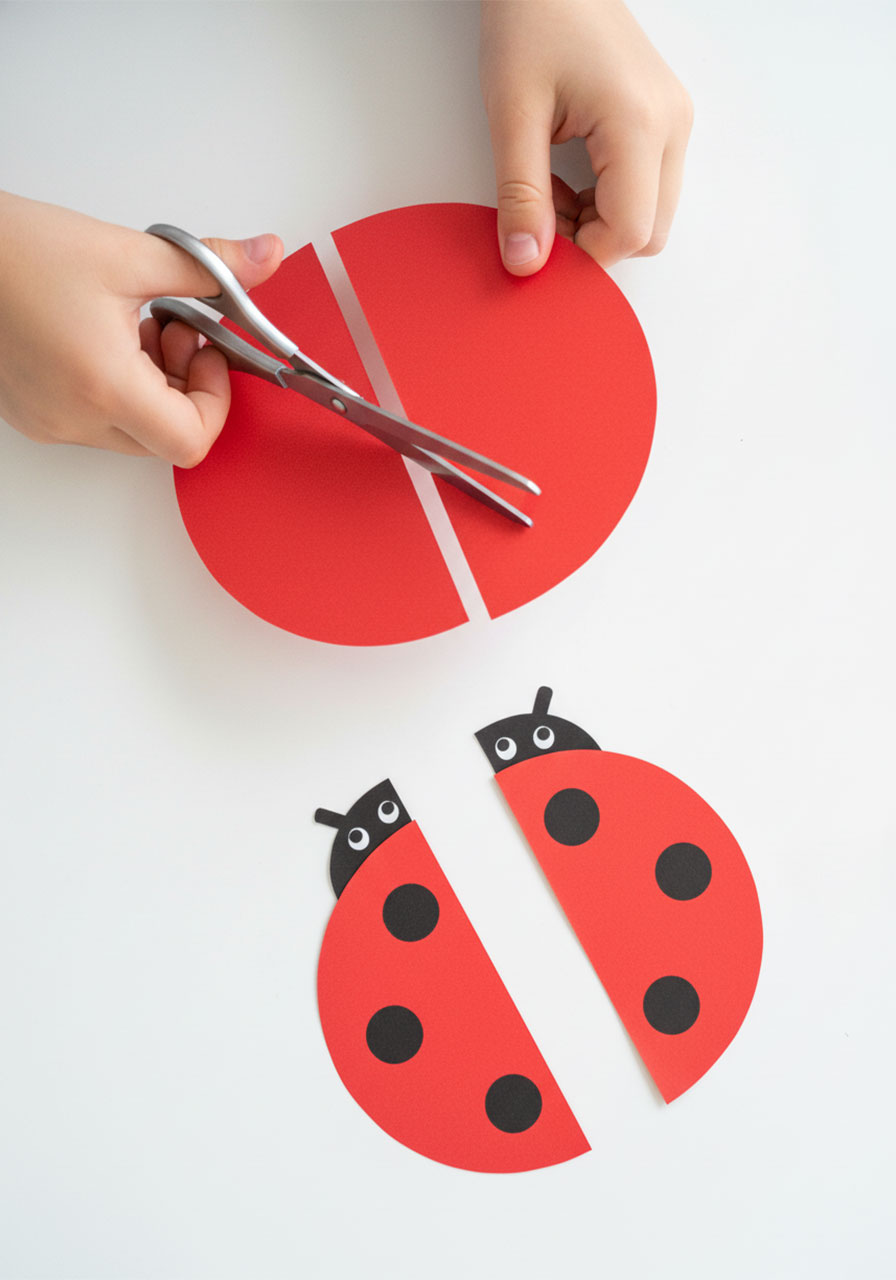
Grab your red construction paper. Cut out a circle – roughly the size of a drink coaster works well, but you can size it up or down depending on your egg carton cups.
Then, cut the circle in half. Those two halves are your ladybug’s wings!
Using a black marker or crayon, draw dots on each wing. You can go classic with two or three dots per wing, or let your kids go wild and add as many spots as they want. No two ladybugs have to look the same!
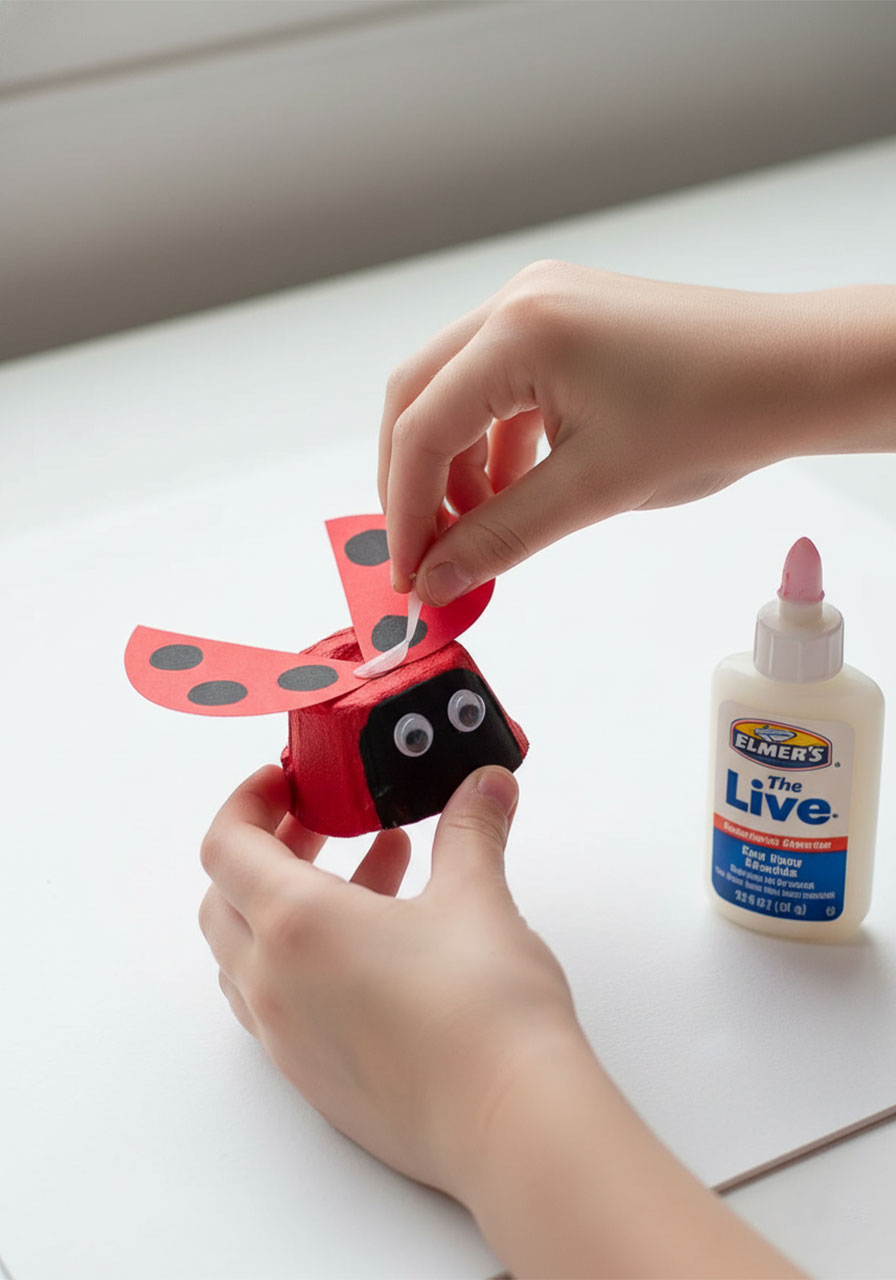
Step 4: Attach the Wings
Once the painted body is fully dry, it’s time to bring this ladybug to life.
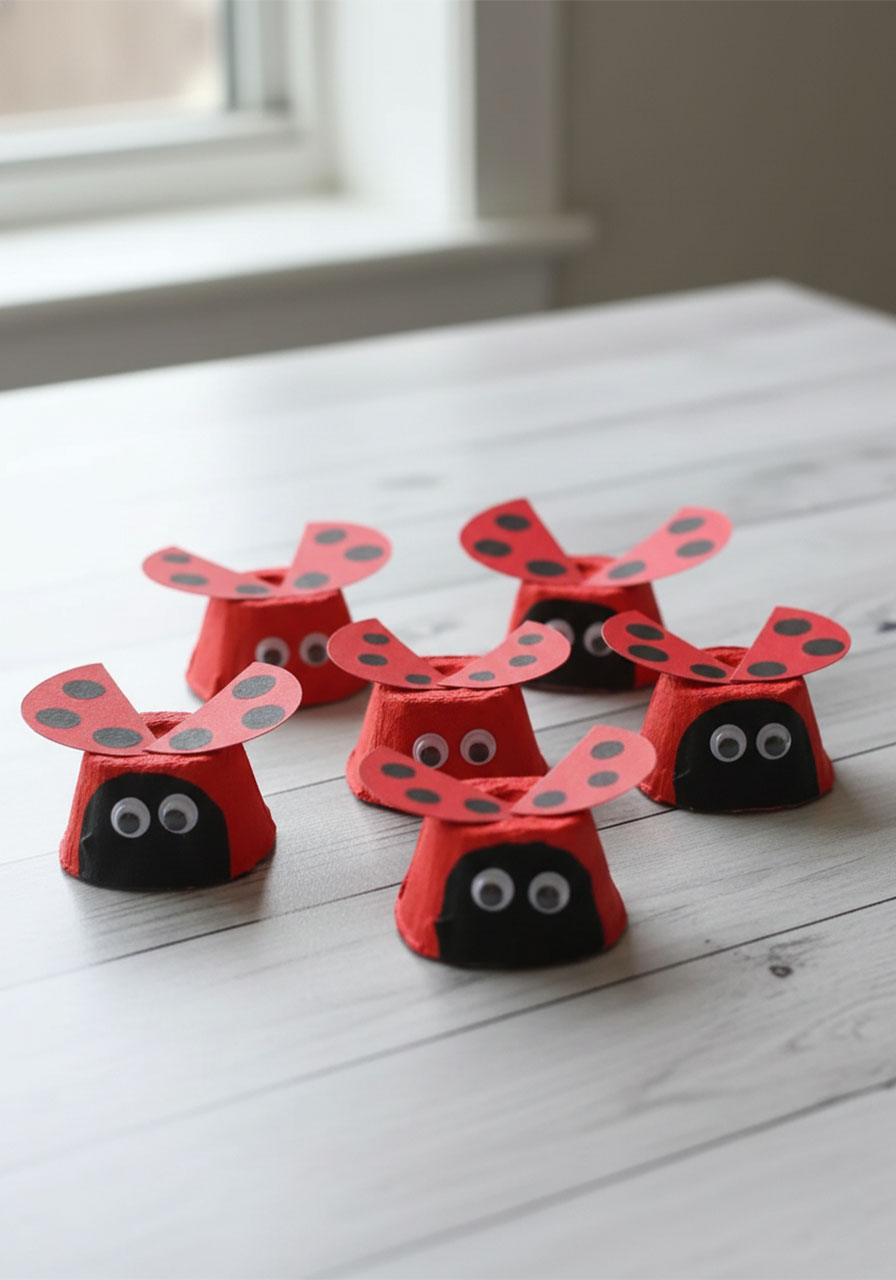
Apply glue to the flat (bottom) edge of each wing and press the wings onto the top of the egg carton body. Position them so they fan outward, like the ladybug is mid-flight. That open-wing look is what makes these little guys look so lively!
Let the wings set for a minute before moving on so they stay in place.
Step 5: Add the Googly Eyes
Last step – and arguably the most satisfying one.
Dab a little glue onto the back of two googly eyes and press them onto the black front section of the ladybug’s body. Place them side by side so they’re looking straight ahead.
Let everything dry completely, and your ladybug is officially ready for the world!
Tips for Doing This Craft with a Group
If you’re running this as a classroom activity or a party craft station, a little prep goes a long way.
Cut all the egg carton cups in advance so kids can jump straight to the painting. Pre-cut the construction paper circles too – you can even pre-cut them into halves to save time with younger children.
Set up a drying station (a sheet of newspaper or a paper plate for each child works great) so the bodies can dry while kids work on decorating their wings. This keeps everyone busy and minimizes the dreaded “I’m done, now what?” moment.
For very young kids, a glue stick is easier to handle than liquid craft glue. For older kids or smaller groups, a low-temp hot glue gun (adult-supervised!) gives a much sturdier hold on the wings.
Fun Ways to Use Your Finished Ladybugs
Once your ladybugs are dry and ready, the fun doesn’t have to stop at the craft table. Here are a few ideas to extend the activity:
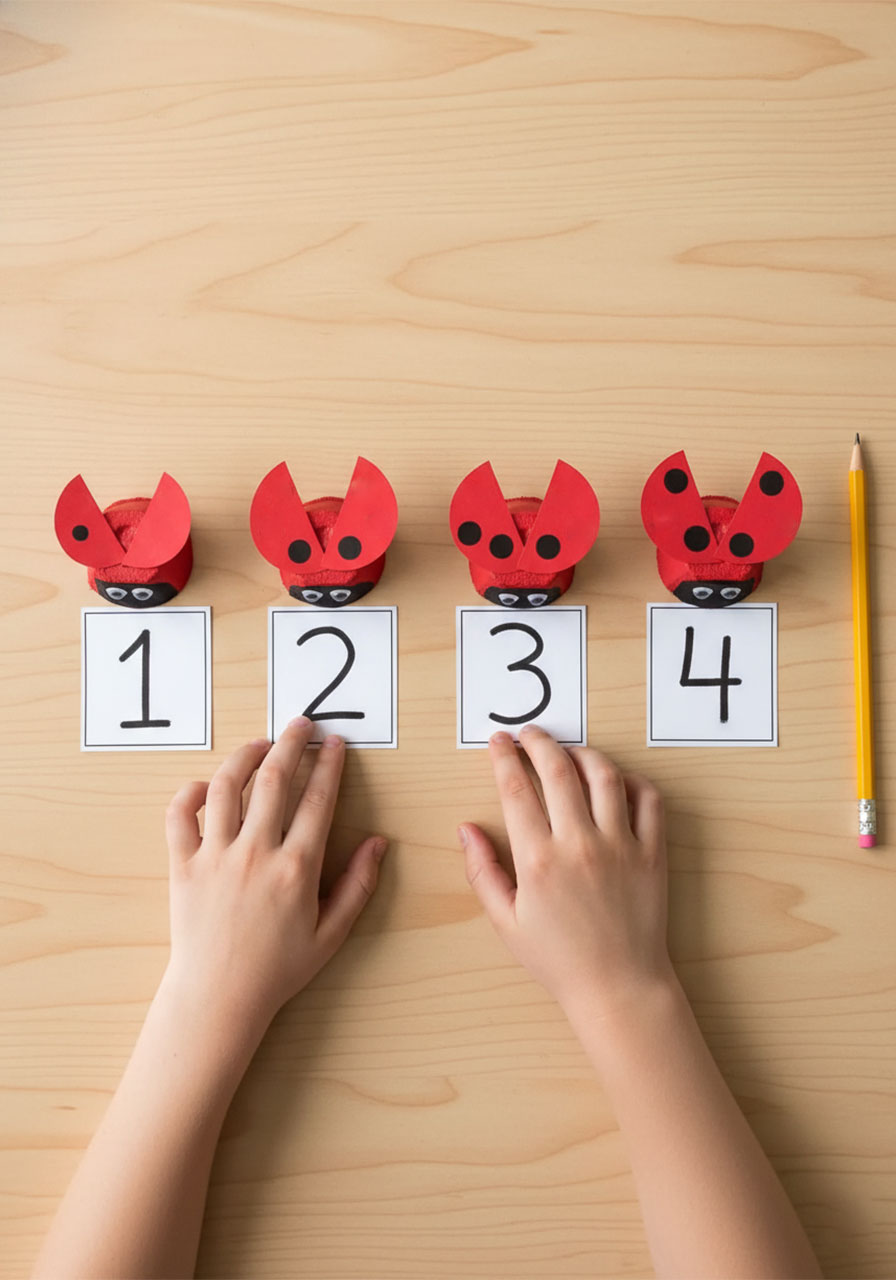
Math Centers: Use the ladybugs as hands-on manipulatives. Ask kids to count the spots on each wing, add them together, or sort bugs from fewest to most spots. It turns a craft into a full learning moment.
Story Time Companion: Read The Grouchy Ladybug or Ten Little Ladybugs and let kids hold their handmade bugs while you read. It makes storytime feel interactive and special.
Classroom Décor: Line them up on a shelf, group them on a bulletin board, or hang them from the ceiling with string for a whimsical spring display.
Imaginative Play: Kids naturally start making up stories for their ladybugs. Give them names, build little homes out of paper – let their imagination run the show.
Make It Your Own: Fun Variations to Try
Once you’ve nailed the classic version, don’t be afraid to mix things up!
Colorful Bugs: Who says ladybugs have to be red? Try orange, yellow, or even purple – same steps, totally different vibe. Kids love having the freedom to choose their own colors.
Number Ladybugs: Write a number on each ladybug’s back and have kids draw the matching number of spots on the wings. A perfect craft-meets-math activity for kindergarteners.
Letter Bugs: Same idea, but with letters! Great for preschoolers working on alphabet recognition.
Mini Magnets: Glue a small strip of magnetic tape to the bottom and stick your ladybug on the fridge. Adorable and functional.
Ready to Make Your Own Egg Carton Ladybugs?
This craft is proof that the best kids’ activities don’t have to be complicated or expensive. A recycled egg carton, some paint, and a little creativity are all you need to make something genuinely adorable.
Whether you’re making one at home with your little one or setting up a whole craft station for a classroom full of kids, this project is guaranteed to bring big smiles.
Now grab that egg carton from the recycling bin – it’s time to make some bugs! 🐞
More Summer Craft & Activity Ideas to Keep the Fun Rolling:
How to Make Moon Sand With Only 2 Ingredients (Kids Go Absolutely Wild for This!)
Easy Jellyfish Suncatcher Craft for Kids (That Looks Stunning in a Window!)
Paper Loop Pufferfish Craft: The Cutest 3D Summer Activity for Kids
Pool Noodle Boats: The Easiest DIY Water Toy Kids Will Absolutely Love
Paper Plate Ice Cream Cone Craft: The Cutest Summer Activity for Kids
How to Make Beaded Pipe Cleaner Flowers (A Fun Kids Craft That Takes Under 10 Minutes!)