
You know that moment when you’re craving something saucy, sticky, and deeply satisfying – but you also promised yourself you’d eat better this week?
Yeah. We’ve all been there.
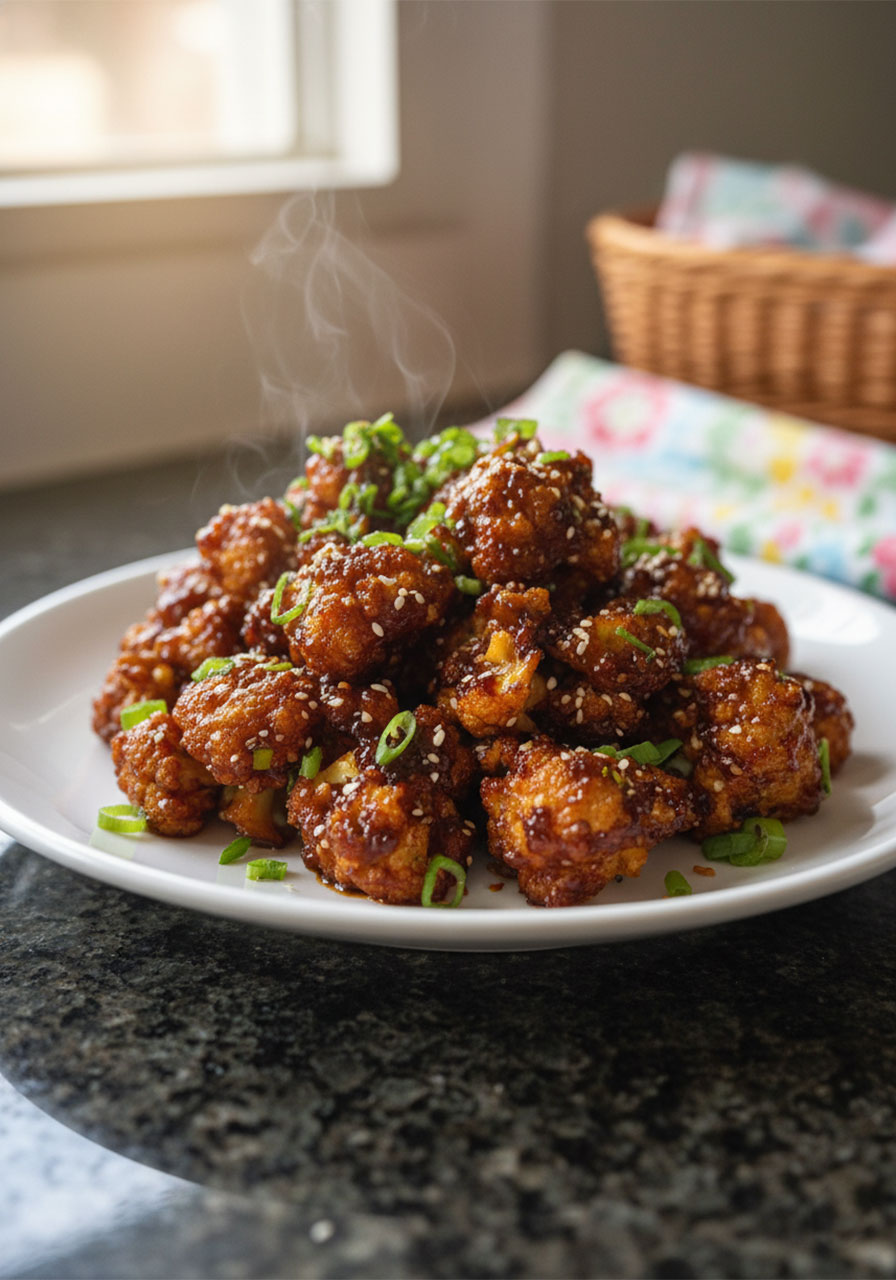
This Sticky Honey Garlic Cauliflower is your answer. It’s the dish that feels like a cheat meal but is actually something you can feel genuinely good about.
Sweet. Savory. A little garlicky. A little caramelized at the edges. And coated in a glossy, finger-licking glaze that makes it almost impossible to stop eating.
The first time I made this, my family thought I had ordered from our favorite Asian takeout spot. I didn’t correct them until they’d already had seconds.
Whether you’re serving this as a side dish, a light vegetarian main, or a gorgeous addition to your weeknight dinner rotation – this recipe is about to become one of your most-requested dishes.
Let’s get into it.
Why You’ll Love This Recipe
This isn’t just another roasted veggie recipe. This one has a little magic to it.
The cauliflower goes into the oven plain and comes out golden, slightly crispy, and tender inside. Then it gets tossed in a warm honey garlic sauce that clings to every single floret.
The result? Pure, unapologetic deliciousness – with a fraction of the calories and none of the guilt of actual takeout.
Here’s why this recipe works so well for women who are focused on nourishing their bodies without sacrificing flavor:
Cauliflower is a powerhouse. It’s low in calories, high in fiber, and packed with vitamins C and K. It supports digestion, reduces bloating, and keeps you feeling full.
The sauce is made from real, whole ingredients. Honey, garlic, ginger, sesame – no mystery additives, no preservatives.
It’s naturally vegetarian and easily made gluten-free. One simple swap (tamari instead of soy sauce) and everyone at the table is covered.
It’s ready in about 40 minutes. No complicated techniques. No special equipment. Just a baking sheet and one small saucepan.
Your body deserves food that energizes you. And your taste buds deserve food that makes you happy. This recipe does both.

What You’ll Need
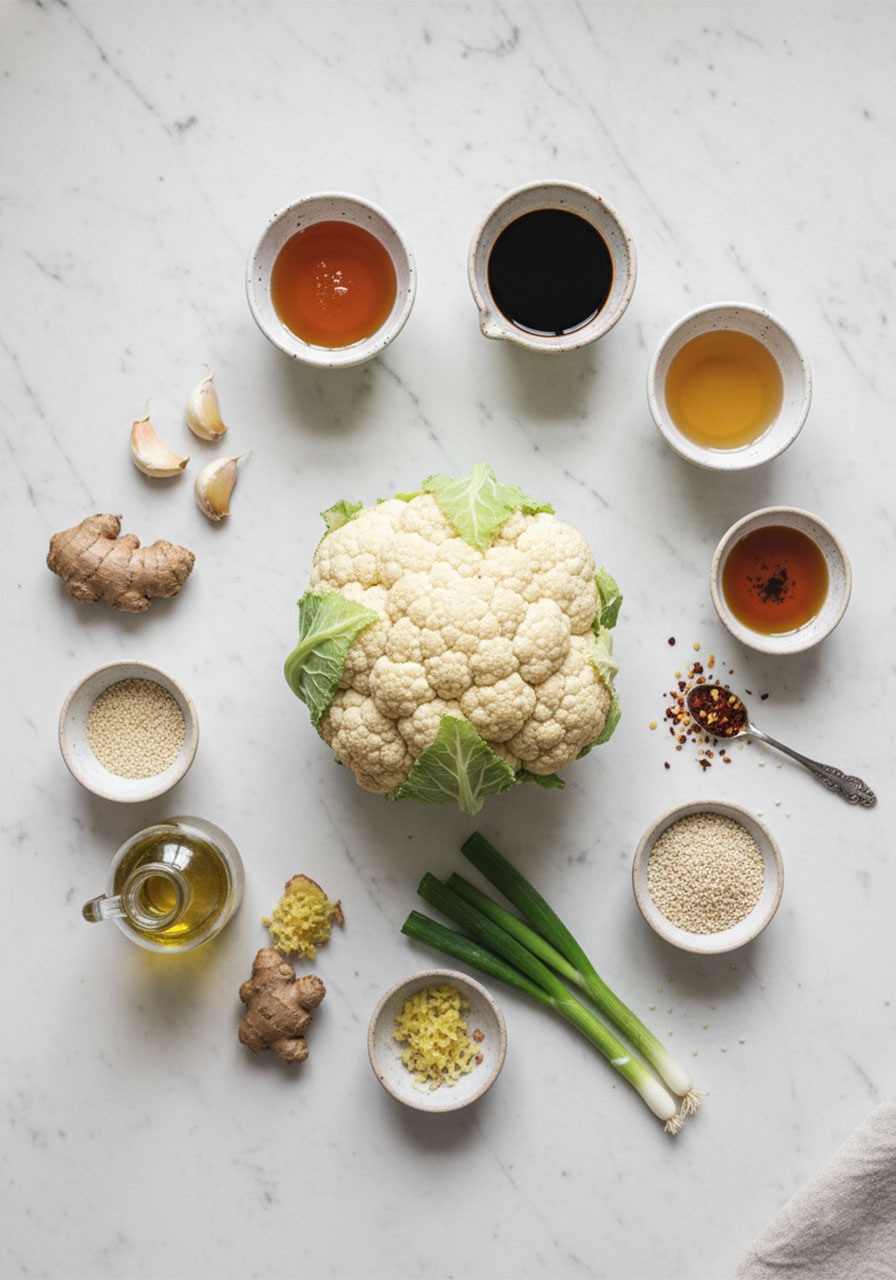
Good news: you probably already have most of this in your kitchen right now.
For the Cauliflower:
1 large head of cauliflower, cut into bite-sized florets
2 tablespoons olive oil
Salt and pepper to taste
For the Sticky Honey Garlic Sauce:
1/4 cup honey
1/4 cup soy sauce (or tamari for a gluten-free version)
2 tablespoons rice vinegar
1 tablespoon sesame oil
3 cloves garlic, minced
1 teaspoon fresh ginger, grated
Pinch of red pepper flakes (optional – add it if you like a little heat!)
For Garnish:
Sesame seeds
Chopped green onions
That’s it! Simple, clean ingredients that come together into something genuinely extraordinary.
Equipment You’ll Need
Nothing fancy required here. You’ll need:
A large baking sheet
Parchment paper (for easy cleanup – trust me on this one)
A small saucepan
A large mixing bowl
A sharp knife for cutting your florets
That’s your whole setup. Easy.
How to Make Sticky Honey Garlic Cauliflower
Here’s where the magic happens. Follow these steps and you’ll have a show-stopping dish on your table in under an hour.
Step 1: Preheat Your Oven
Set your oven to 400°F (200°C) and line your baking sheet with parchment paper.
This temperature is key. Hot enough to get that beautiful golden color, but not so hot that the florets burn before they cook through.
Step 2: Roast the Cauliflower
Toss your cauliflower florets with the olive oil, a pinch of salt, and a little black pepper.
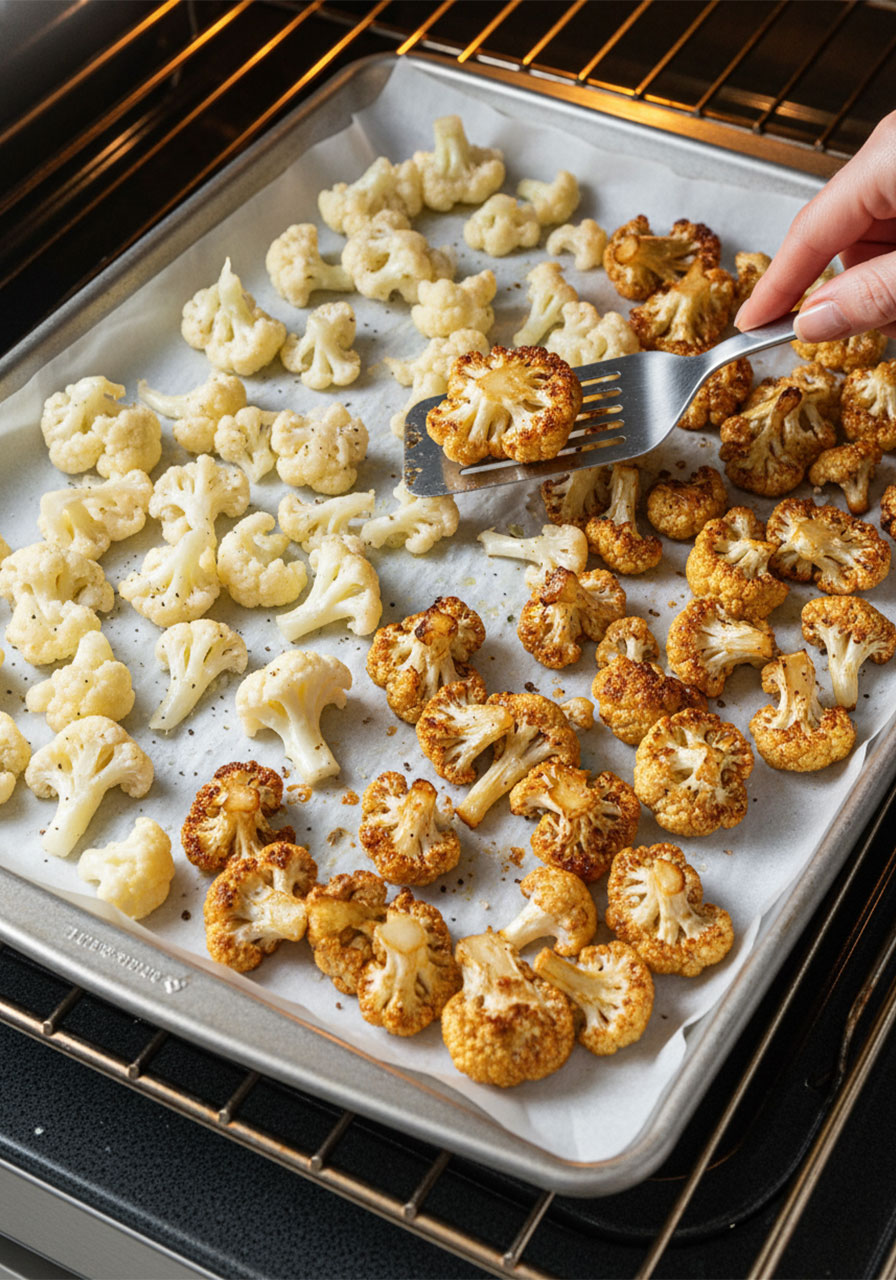
Spread them out on your prepared baking sheet in a single layer. This step is so important – if you pile them up, they’ll steam instead of roast, and you’ll miss out on those gorgeous caramelized edges.
Roast for 20 to 25 minutes, flipping halfway through. You’re looking for florets that are tender inside and slightly golden-brown on the outside.
The first time I made this, I was nervous the cauliflower looked “too dark.” Don’t be. That color means flavor. Let it happen.
Step 3: Make the Sticky Honey Garlic Sauce
While the cauliflower is doing its thing in the oven, make the sauce. This comes together in about 5 minutes.
In a small saucepan over medium heat, combine:
- Honey
- Soy sauce (or tamari)
- Rice vinegar
- Sesame oil
- Minced garlic
- Grated ginger
- Red pepper flakes (if using)
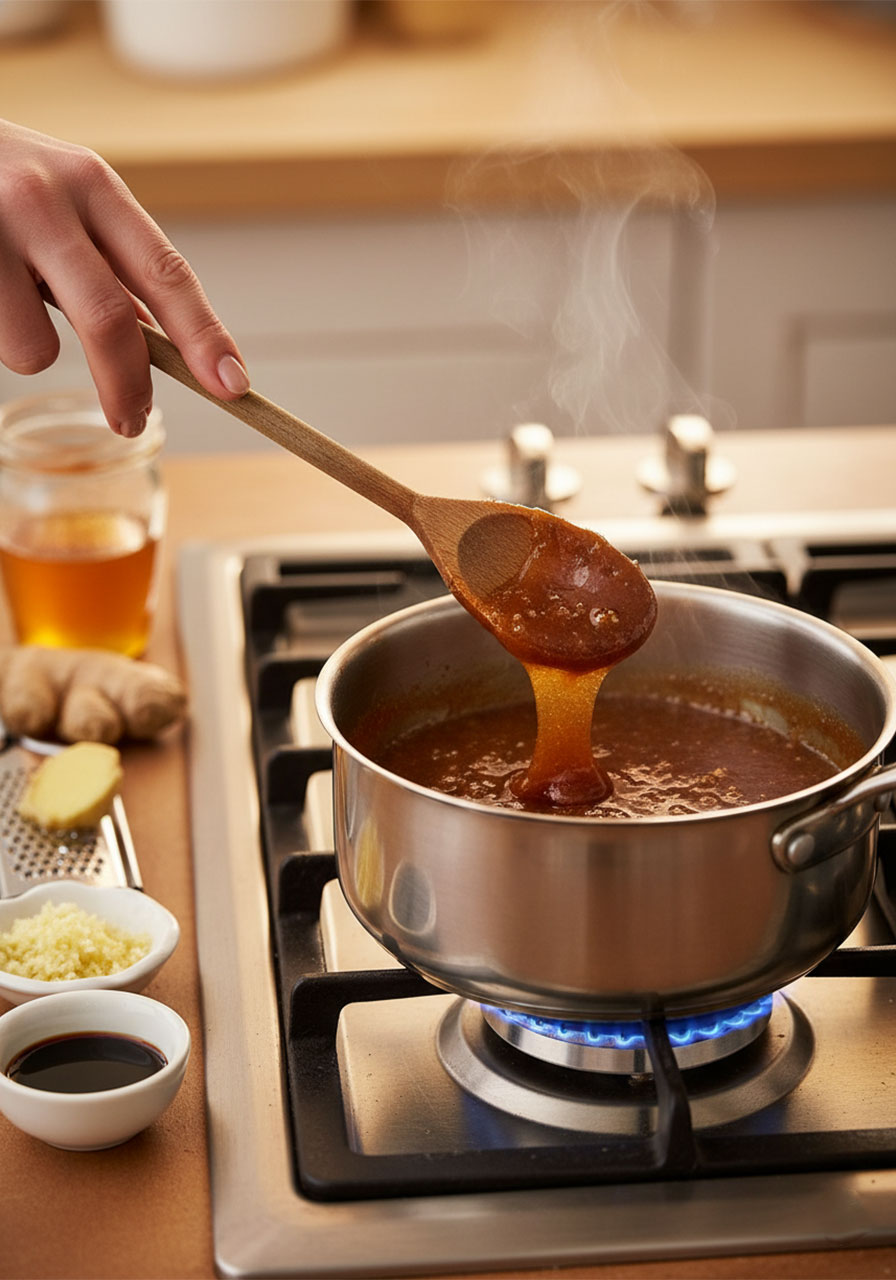
Stir constantly as it heats up. Let it come to a gentle simmer and cook for 3 to 5 minutes, stirring often, until it thickens slightly and coats the back of a spoon.
Remove it from the heat as soon as it reaches that consistency. It will continue to thicken slightly as it cools.
Your kitchen is going to smell incredible at this point. Just a heads up.
Step 4: Toss Everything Together
The moment you’ve been waiting for!
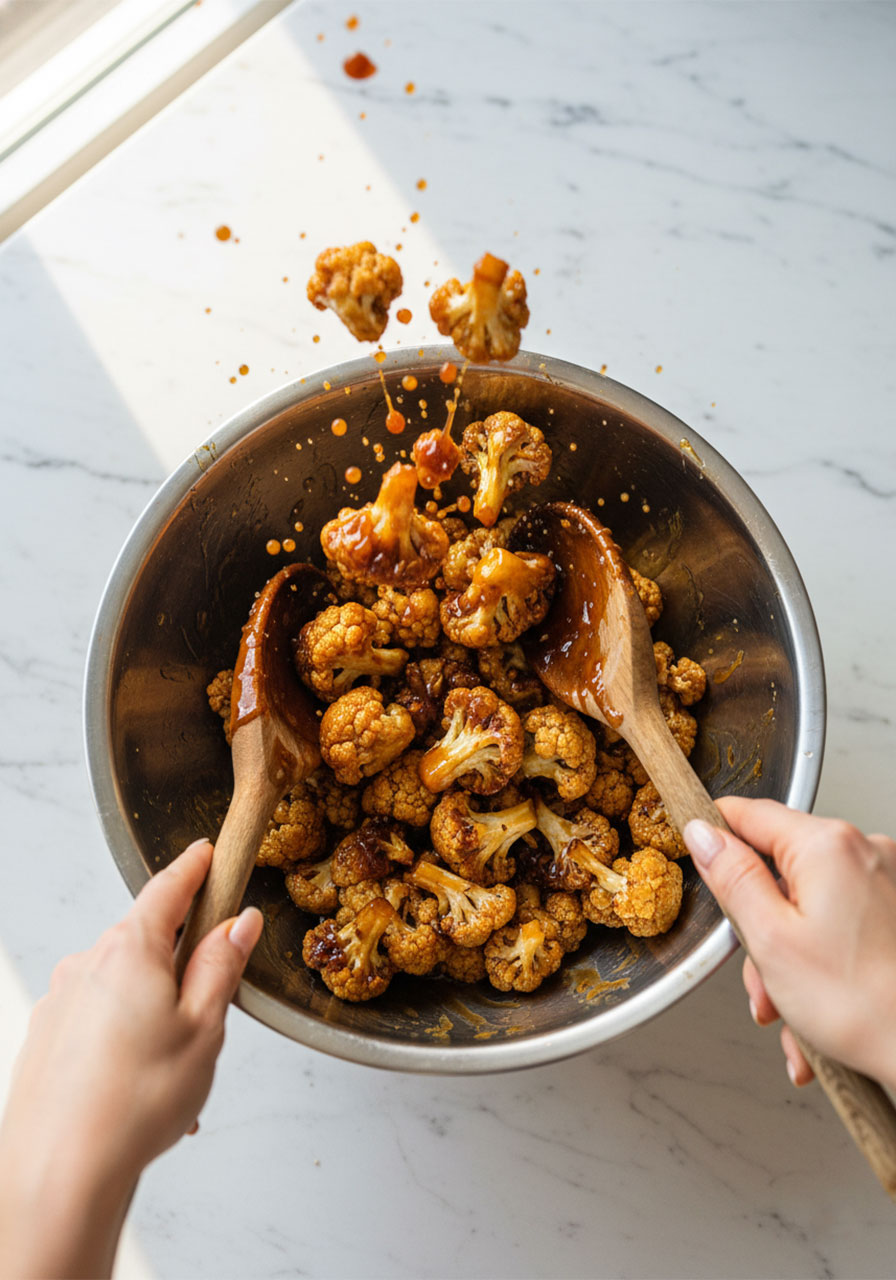
When your cauliflower comes out of the oven, immediately transfer it to a large bowl. Pour the warm sauce over the top and toss gently but thoroughly until every single floret is coated in that gorgeous, sticky glaze.
Work quickly here – the sauce clings best when both the cauliflower and sauce are still warm.
Step 5: Garnish and Serve
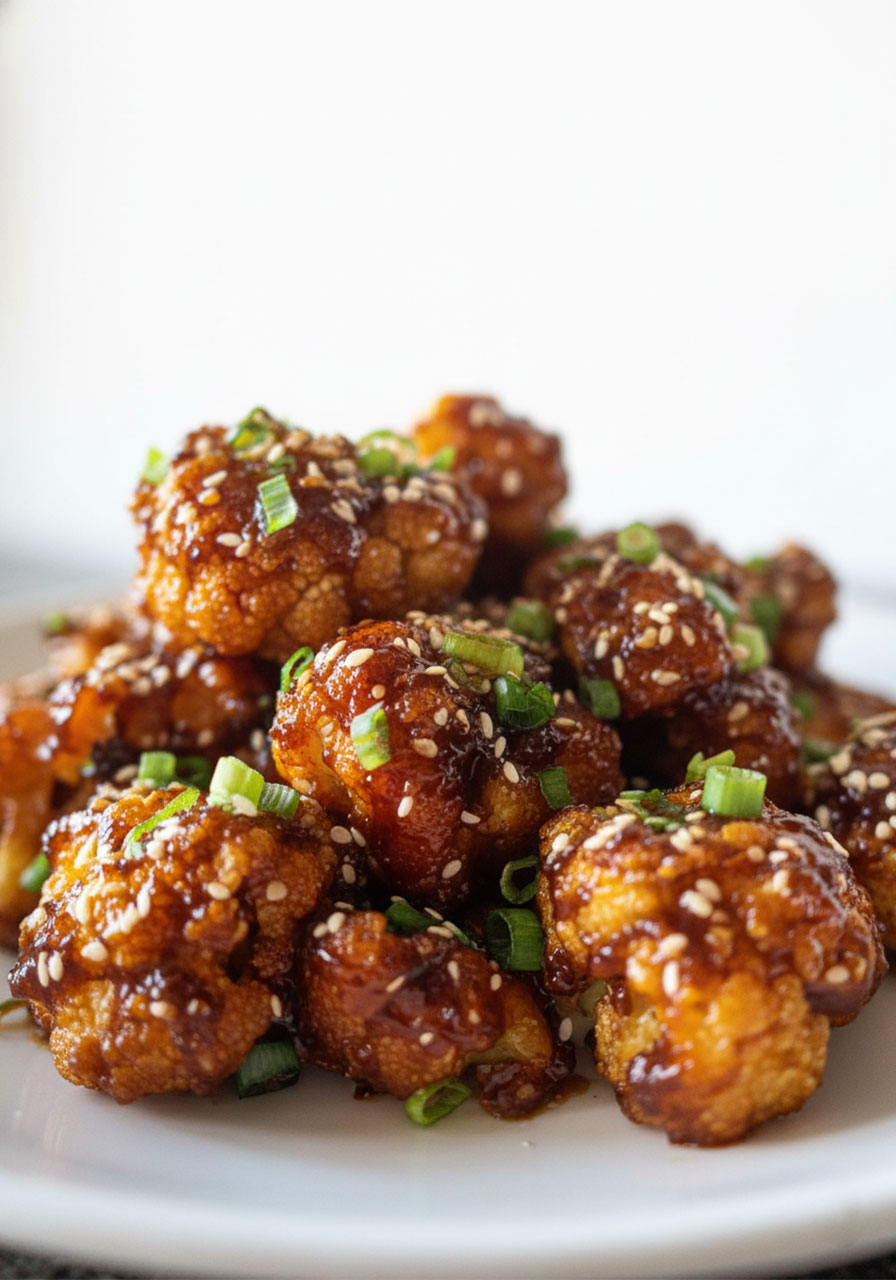
Transfer to your serving dish and shower it with sesame seeds and chopped green onions.
Serve immediately. This dish is at its absolute best fresh out of the bowl, while the glaze is still warm and glossy.
Prepare for compliments.
Pro Tips for the Best Results
I’ve made this recipe more times than I can count, and here’s what I’ve learned along the way.
Want Extra Crispy Cauliflower?
Before tossing your florets with olive oil, toss them with 1 tablespoon of cornstarch first. This creates a light coating that gets beautifully crispy in the oven.
It’s a game-changer. Truly.
Taste the Sauce Before You Pour
Every brand of soy sauce and honey is a little different. Before you pour the sauce over your cauliflower, give it a quick taste.
Want it sweeter? Add a little more honey. Too salty? A tiny extra splash of rice vinegar will balance it right out.
Want an Even Thicker Glaze?
Whisk together 1 teaspoon of cornstarch with 1 tablespoon of cold water and stir it into the simmering sauce. Within a minute or two, you’ll have a thick, luscious glaze that clings to every floret like a dream.
Don’t Skip the Flip
Flipping your cauliflower halfway through roasting means all sides get exposure to the heat. More surface area browned = more flavor. It’s 30 seconds of effort that makes a real difference.
Freshly Minced Garlic Makes a Difference
I know jarred minced garlic is convenient. But for this sauce, fresh garlic really does take it to another level. The flavor is brighter, bolder, and more aromatic. If you can, use fresh.
How to Serve It
This dish is incredibly versatile. Here are some of our favorite ways to enjoy it:
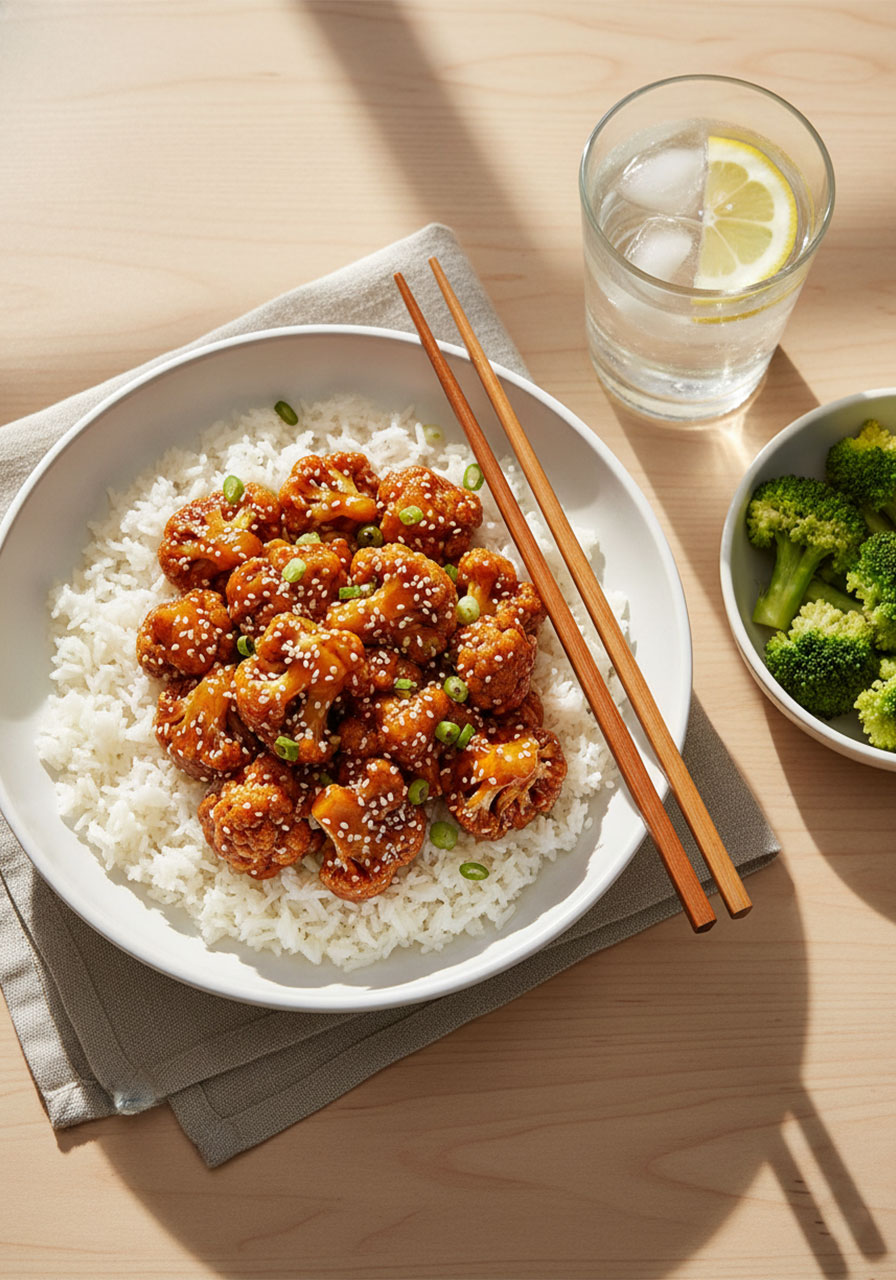
Over fluffy white or brown rice. The sauce pools into the rice and it is everything. This is the most classic pairing, and for good reason.
Alongside stir-fried noodles. Chewy noodles + sticky cauliflower = a dinner that feels like a treat but is totally wholesome.
With steamed broccoli or bok choy. If you want to build a full plant-based bowl, add some simple steamed greens on the side. The colors alone will make your plate look stunning.
As a party appetizer. Serve it in a large bowl with toothpicks and watch it disappear in minutes. It’s always the first thing gone at every gathering I’ve brought it to.
Tucked into lettuce wraps. For a lighter, low-carb option, spoon some into butter lettuce leaves and top with extra green onions. Crunchy, fresh, and so satisfying.
Can I Air Fry This Instead of Baking?
Absolutely – and honestly, the air fryer version is incredible.
Set your air fryer to 380°F and cook the florets for 12 to 15 minutes, shaking the basket halfway through. You’ll get even crispier edges and a slightly faster cook time.
The rest of the recipe – sauce, toss, garnish – stays exactly the same.
If you have an air fryer and you love crispy textures, this might actually become your preferred method.
How to Make It Gluten-Free
One swap is all it takes: replace the soy sauce with tamari.
Tamari is naturally gluten-free and has a slightly deeper, richer flavor than regular soy sauce. Everything else in the recipe is already gluten-free, so you’re good to go.
I always keep a bottle of tamari in my pantry for exactly this reason. It works beautifully here and in so many other recipes.
Storing and Reheating Leftovers
Fair warning: there are rarely leftovers. But if you do have some, here’s how to handle them.
Storage: Let the cauliflower cool completely, then store it in an airtight container in the refrigerator for up to 3 days.
Reheating: For the best texture, skip the microwave. Reheat in a skillet over medium heat for a few minutes, adding a tiny splash of water if needed to loosen the glaze. This brings back some of that original roasted texture and keeps the edges from getting too soft.
The microwave works in a pinch, but the stovetop method is worth the extra two minutes.
Why This Dish Is More Than Just a Recipe
Here’s something I think about a lot: the way we feed ourselves matters.
Not just nutritionally – but emotionally. When you make something with real ingredients, from scratch, with your own hands, something shifts. You feel capable. You feel nourished. You feel good about what you’re putting into your body.
This Sticky Honey Garlic Cauliflower is one of those dishes that bridges the gap between “healthy eating” and “food I actually want to eat.” It proves that you don’t have to choose between pleasure and wellness.
You can have both. You deserve both.
So the next time that takeout craving hits – and it will hit – come back to this recipe. Make something beautiful in your own kitchen. Sit down and actually enjoy it.
Your body, your mind, and your spirit will thank you.

Frequently Asked Questions
Can I make the sauce ahead of time?
Yes! The honey garlic sauce can be made up to 3 days in advance and stored in an airtight jar in the refrigerator. When you’re ready to use it, warm it gently in a small saucepan over low heat before tossing with your freshly roasted cauliflower.
Can I use frozen cauliflower?
Fresh cauliflower is strongly recommended for this recipe. Frozen cauliflower holds a lot of moisture, which makes it harder to get that beautiful caramelized exterior. If fresh isn’t available, thaw the frozen florets completely and pat them very dry with paper towels before roasting.
Is this recipe vegan?
It depends on the honey. Traditional honey is not considered vegan by strict standards. If you’re cooking for a vegan, substitute the honey with maple syrup or agave nectar in a 1:1 ratio. The flavor will be slightly different but still absolutely delicious.
Can I double the recipe?
Definitely! Just make sure you use two separate baking sheets and don’t crowd the florets. Overcrowding is the enemy of crispy cauliflower – those florets need space to breathe and roast properly.
What other vegetables work with this sauce?
This sauce is incredibly versatile. Try it with broccoli, Brussels sprouts, green beans, or even tofu. The honey garlic glaze works beautifully on almost anything you roast.
Quick Recap: Why This Recipe is a Must-Try
Ready to make this tonight? Here’s the quick version of why this dish deserves a permanent spot in your rotation:
It satisfies that takeout craving without the guilt
It’s packed with nutrients that support your body from the inside out
It comes together in 40 minutes with simple pantry ingredients
It’s endlessly customizable – spicier, sweeter, crispier, it’s all up to you
It’s a guaranteed crowd-pleaser whether you’re cooking for yourself or feeding a table of friends
Once you make this, you’ll wonder how your weeknight dinner rotation ever existed without it.
Drop a comment below and let me know how yours turned out! Did you go full crispy with the cornstarch trick? Did you serve it over rice or noodles? I want to hear all about it. 🧡
Sticky Honey Garlic Cauliflower
Ingredients
For the Cauliflower:
- 1 large head cauliflower, cut into bite-sized florets
- 2 tablespoons olive oil
- Salt and pepper to taste
For the Honey Garlic Sauce:
- 1/4 cup honey (or maple syrup for vegan)
- 1/4 cup soy sauce (or tamari for gluten-free)
- 2 tablespoons rice vinegar
- 1 tablespoon sesame oil
- 3 cloves garlic, minced
- 1 teaspoon fresh ginger, grated
- Pinch of red pepper flakes (optional)
For Garnish:
- Sesame seeds
- Green onions, chopped
Instructions
- Preheat your oven to 400°F (200°C). Line a large baking sheet with parchment paper.
- Toss the cauliflower florets with olive oil, salt, and pepper. Spread them in a single layer on the prepared baking sheet – do not crowd them.
- Roast for 20 to 25 minutes, flipping halfway through, until the florets are tender inside and golden-brown on the edges.
- While the cauliflower roasts, make the sauce. Combine honey, soy sauce, rice vinegar, sesame oil, garlic, ginger, and red pepper flakes in a small saucepan.
- Heat over medium heat, stirring constantly, until the sauce simmers and thickens slightly – about 3 to 5 minutes. Remove from heat.
- Transfer the roasted cauliflower to a large bowl. Pour the warm sauce over the top and toss gently until every floret is fully coated.
- Serve immediately, garnished generously with sesame seeds and chopped green onions.
Notes
- For extra crispy cauliflower: Toss the florets with 1 tablespoon of cornstarch before adding the olive oil. This creates a light, crunchy coating that makes a noticeable difference.
- To thicken the glaze: Whisk 1 teaspoon of cornstarch with 1 tablespoon of cold water and stir it into the simmering sauce. Cook for 1 to 2 more minutes until thickened.
- To make it gluten-free: Use tamari instead of soy sauce.
- To make it vegan: Replace honey with maple syrup or agave nectar.
- Air fryer method: Cook at 380°F for 12 to 15 minutes, shaking halfway through. Then toss with sauce as directed.
- Storage: Store leftovers in an airtight container in the refrigerator for up to 3 days. Reheat in a skillet over medium heat for best texture.
- Taste and adjust: Before tossing with the cauliflower, taste your sauce. Add more honey for sweetness or more rice vinegar to balance the saltiness.
- Calories: ~250
- Carbohydrates: ~45g
- Protein: ~5g
- Fat: ~8g
- Fiber: ~7g
- Sugar: ~25g
- Sodium: ~600mg
- Cholesterol: 0mg
