
Some desserts are pretty. Some desserts are delicious. And then there’s this Gluten-Free Chocolate Mousse Cake – the one that’s both, every single time, without fail.
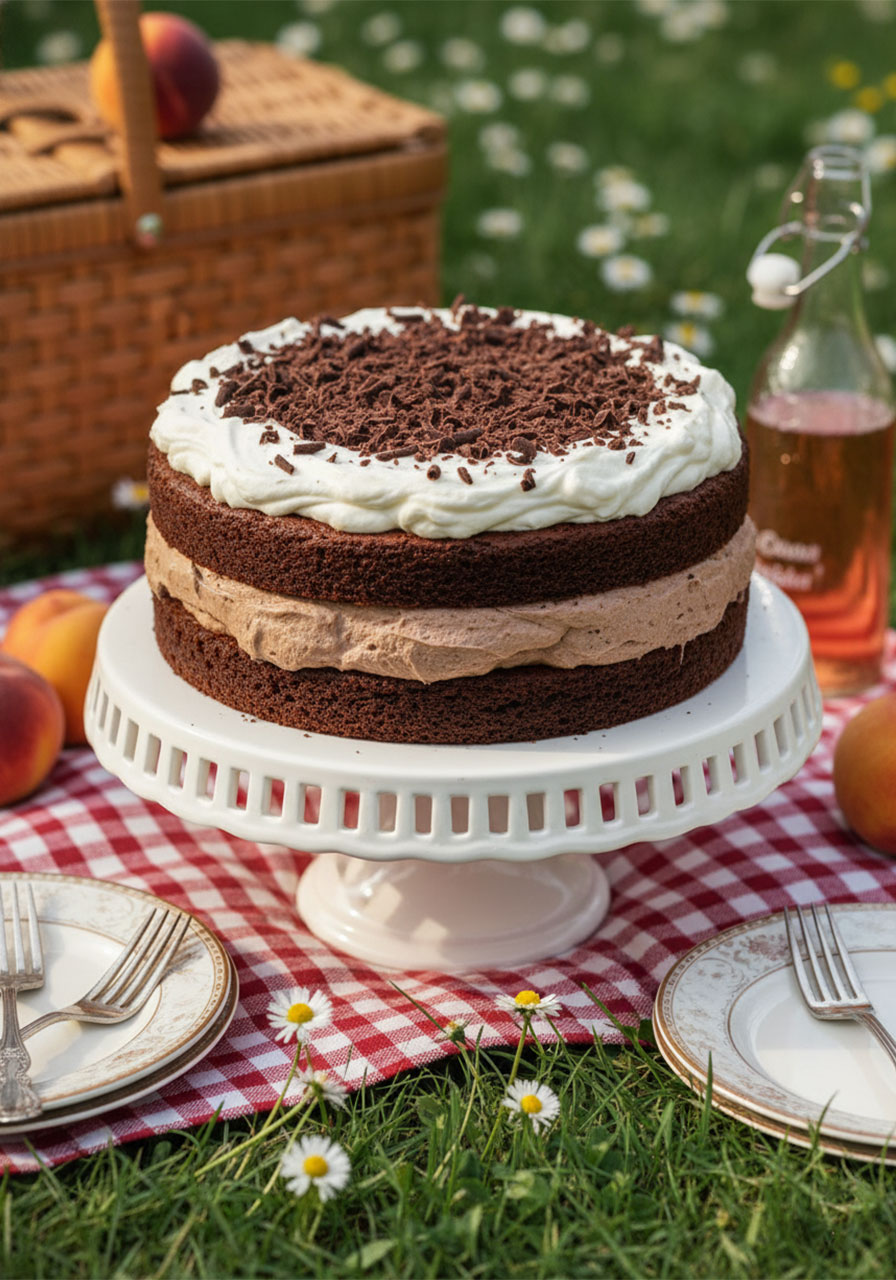
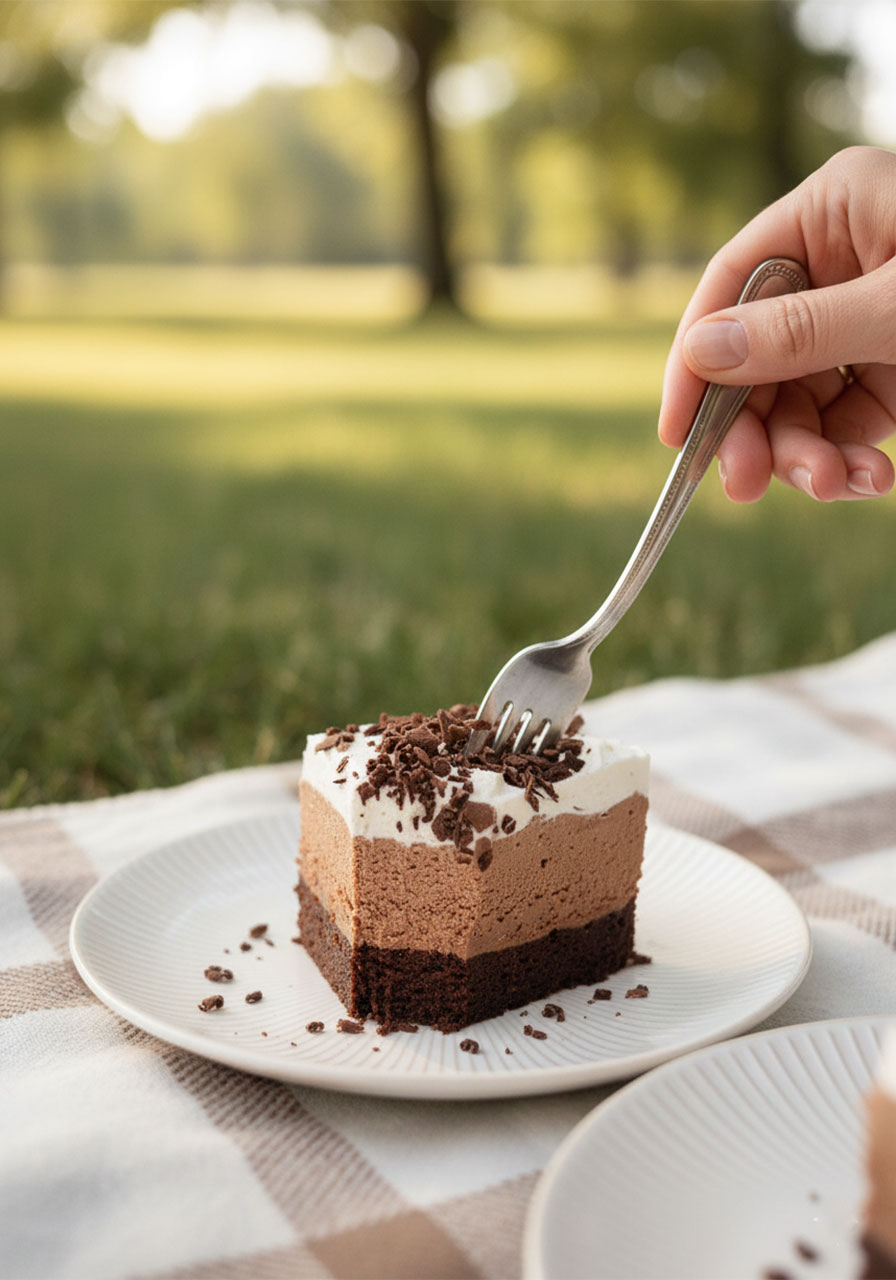
Three show-stopping layers. One dense, fudgy brownie-style base. A cloud of silky cream-cheese chocolate mousse in the middle. And a crown of fluffy whipped cream with gorgeous chocolate shavings on top.
It looks like it came from a bakery. It tastes like pure chocolate heaven. And nobody – not one person – will ever guess it’s gluten-free.
Whether you’re baking for a birthday, a holiday gathering, a girls’ night in, or just because you deserve something spectacular today – this cake is your answer.
Let’s make it together.
Why You’re Going to Absolutely Love This Cake
First, let’s talk about what makes this dessert genuinely special – because it’s more than just “a chocolate cake.”
The bottom layer bakes up like a cross between a fudgy brownie and a flourless chocolate cake. It’s dense, chewy, and deeply rich. Think: the best brownie you’ve ever had, but elevated.
The middle layer is the real magic. Instead of a traditional egg-based mousse (which can feel fussy and fragile), this mousse is built on cream cheese. That means it’s thick, stable, incredibly creamy, and holds its shape beautifully when you slice it.
The top layer is simple, classic whipped cream – light, airy, and the perfect contrast to all that rich chocolate beneath it.
Together? It’s the kind of dessert that gets very quiet at the table. The good kind of quiet – when everyone is too busy savoring every bite to say a word.


A Note Before You Start (This One Matters!)
This cake needs time to chill and set properly in the refrigerator – at least 6 hours, ideally overnight.
Don’t skip this step. The mousse needs that time to firm up into those gorgeous, clean layers you see in the photos.
The good news? It means you can make this a full day ahead, which makes it the ultimate stress-free party dessert. You do the work the night before, pop it in the fridge, and walk out with a showstopper the next day.
Plan ahead, and you’ll be amazed at how effortless this feels.
What You’ll Need
For the Brownie Cake Base:
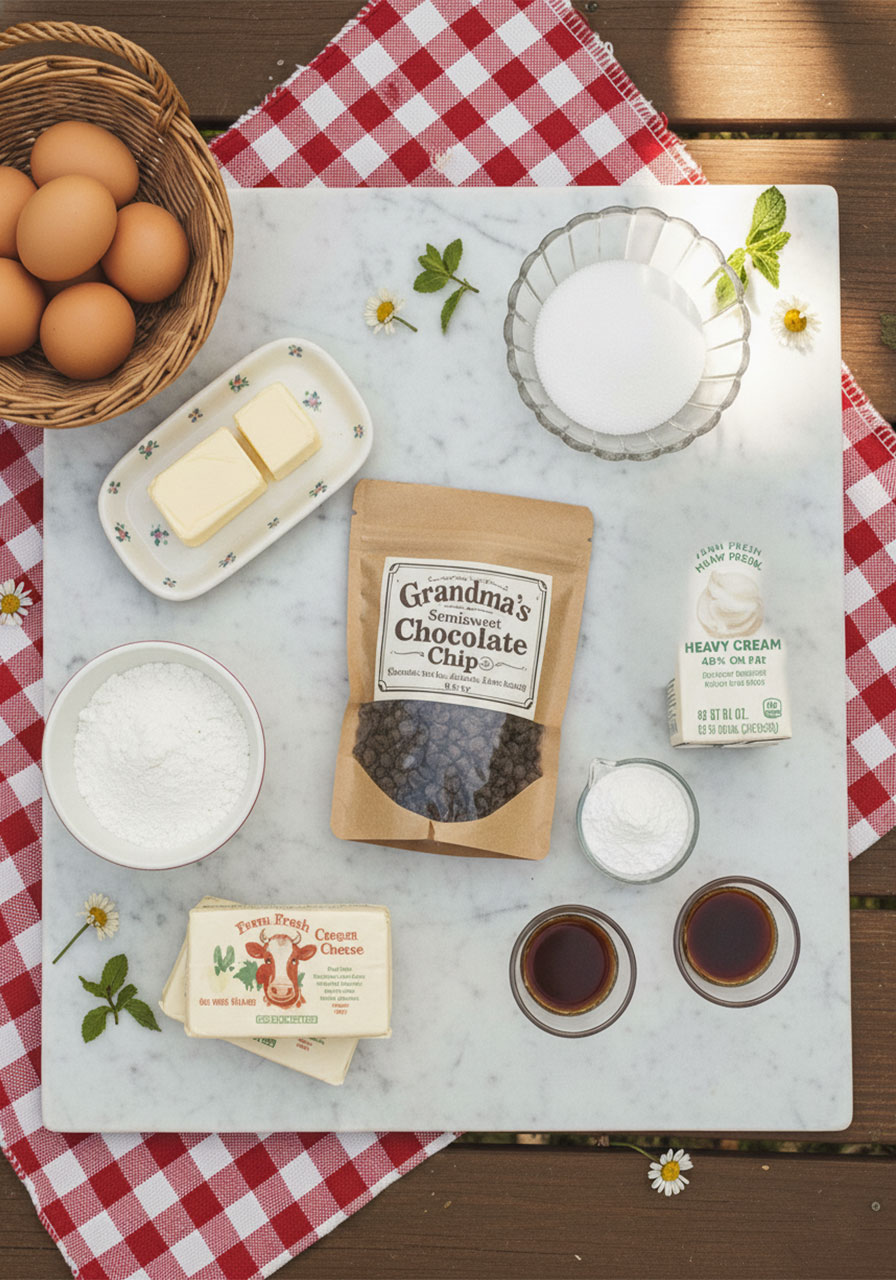
8 oz bittersweet or semisweet chocolate (chopped or chips)
1 cup butter (2 sticks)
1 cup sugar
5 eggs
1 tablespoon vanilla extract
1/4 teaspoon salt
1/4 cup gluten-free 1:1 baking flour
For the Chocolate Mousse Layer:
8 oz bittersweet or semisweet chocolate (chopped or chips)
1 1/3 cup powdered sugar
2 packages (8 oz each) cream cheese, softened
2 teaspoons vanilla extract
2 cups cold heavy cream (see note below – this matters!)
For the Whipped Cream Topping:
3/4 cup cold heavy cream
2 tablespoons powdered sugar
2 teaspoons vanilla extract
Grated or shaved chocolate, for garnish (optional but highly recommended)
Equipment:
10-inch springform pan
Stand mixer or hand mixer
Microwave-safe bowls
Wire cooling rack
The Heavy Cream Secret (Don’t Skip This!)
Here’s a pro tip that makes all the difference: not all heavy cream is created equal.
For the mousse to turn out thick, creamy, and perfectly set, you need heavy cream with a milk fat content of 35% or higher.
Many store brands labeled “heavy whipping cream” only contain 30–33% milk fat – which isn’t quite enough fat to give the mousse that luscious, cloud-like texture.
Look for a carton that clearly states 35% (or higher) milk fat on the label. Brands like Darigold (40% milk fat) are excellent if you can find them.
When in doubt, flip the carton over and check. That five-second step is the difference between a mousse that sets up beautifully and one that stays a little too soft.

How to Make the Brownie Cake Base
This bottom layer is the foundation of everything – and it bakes up fudgy, rich, and absolutely irresistible on its own.
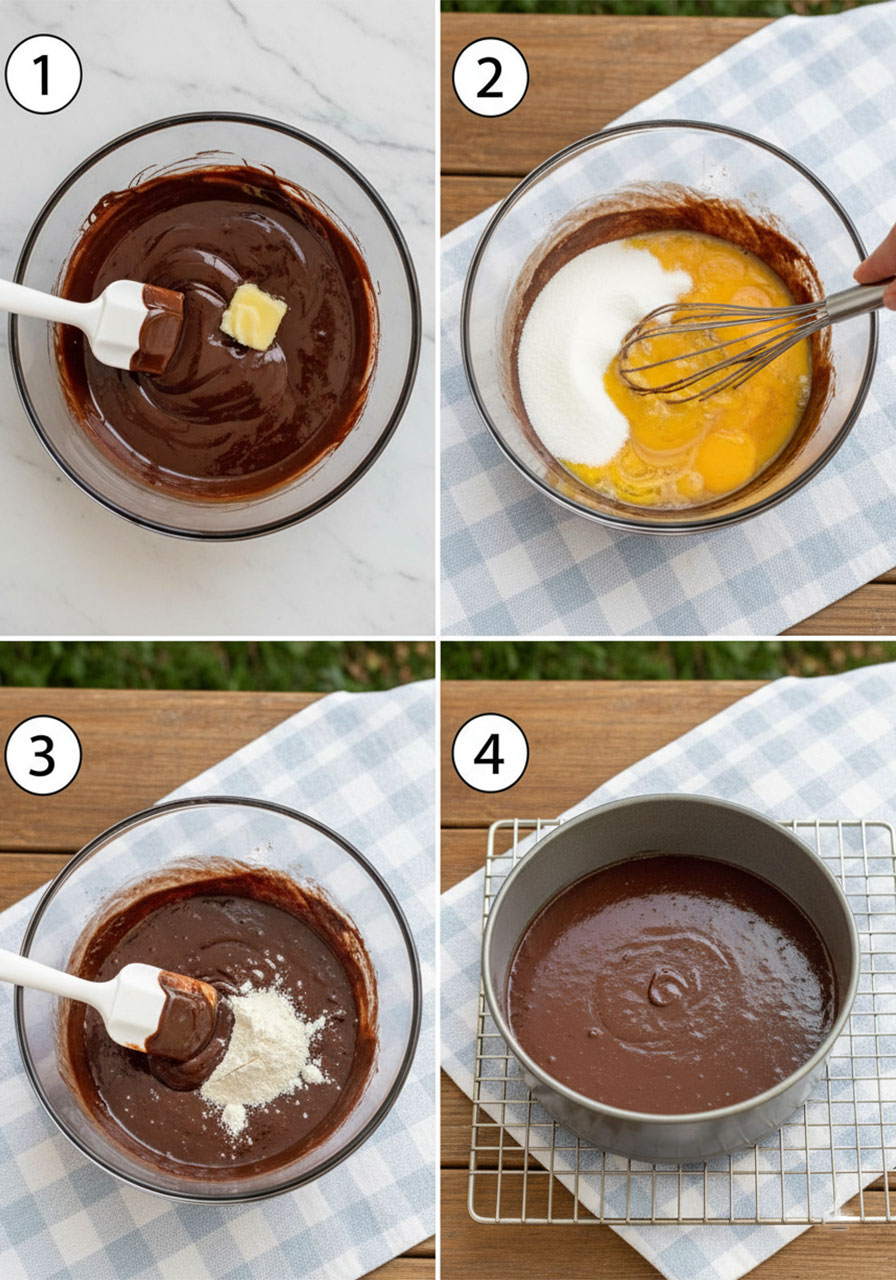
1. Preheat your oven to 325°F. Spray a 10-inch springform pan generously with cooking spray.
2. Melt the butter and chocolate together. Cut the butter into tablespoon-sized pieces, place in a microwave-safe bowl with the chopped chocolate. Microwave in 15-second intervals, stirring between each, until fully melted and smooth. Don’t rush this – low and slow prevents burning.
3. Add the sugar, vanilla, and salt. Whisk everything together until well combined.
4. Add the eggs one at a time. Whisk each egg in fully before adding the next. This keeps the batter smooth and gives the cake structure.
5. Fold in the gluten-free flour. Use a rubber spatula and mix just until combined – don’t overwork it.
6. Pour into your prepared pan. Smooth it into an even layer.
7. Bake for 30–35 minutes, until a toothpick inserted into the center comes out clean.
8. Cool completely on a wire rack. This is non-negotiable – if the cake is even slightly warm when you add the mousse, everything will slide and melt. Patience is your best baking tool here.
How to Make the Chocolate Mousse Layer
Once your cake base is completely cool, it’s time for the star of the show. This mousse comes together faster than you might expect – and the result is absolutely stunning.
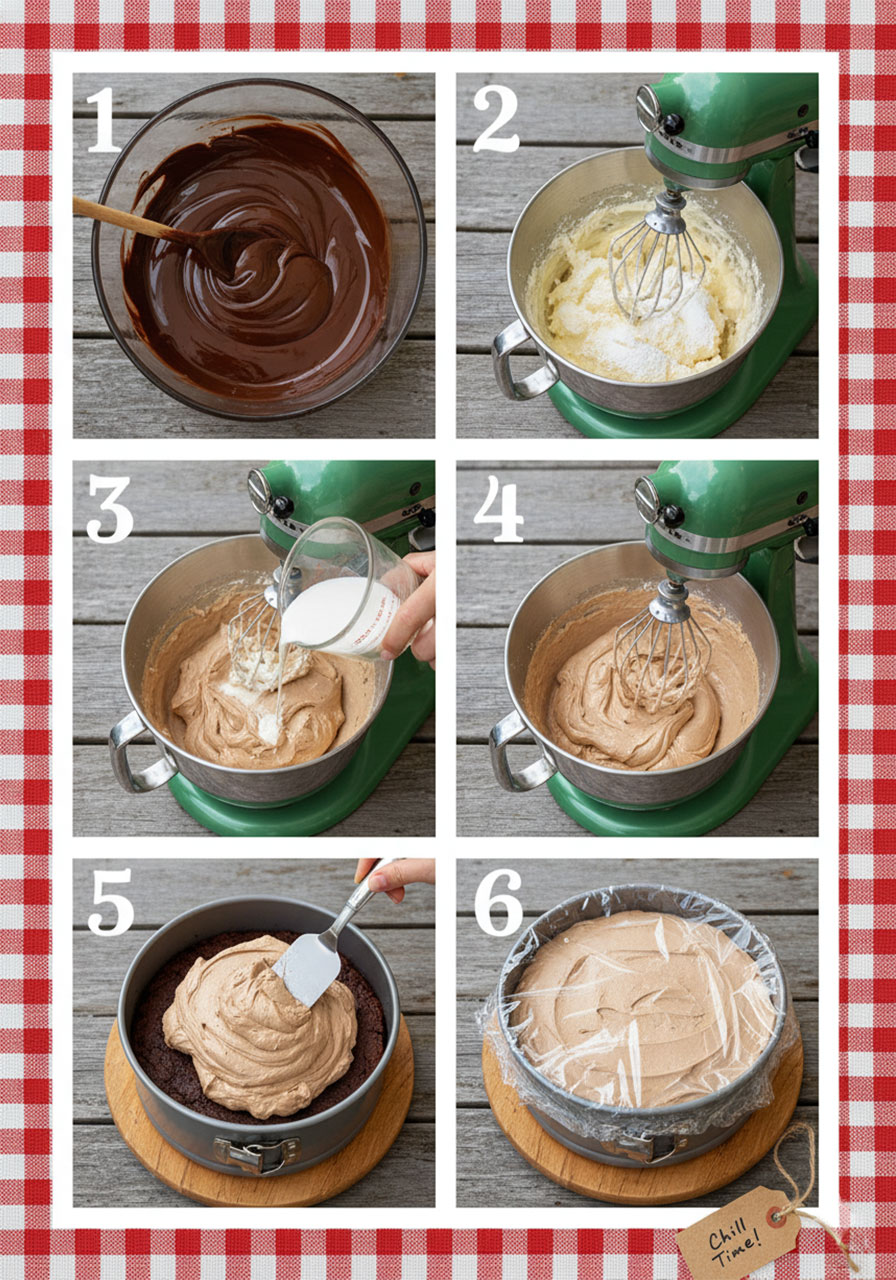
1. Melt the chocolate. Place the chopped chocolate in a microwave-safe bowl and microwave in 15-second intervals, stirring between each, until completely smooth. Let it cool slightly – you want it melted, not steaming hot.
2. Mix the base. In a stand mixer (or with a hand mixer), combine the melted chocolate, softened cream cheese, powdered sugar, and vanilla. Beat until completely smooth, scraping down the sides and bottom of the bowl once or twice.
3. Add the heavy cream slowly. With the mixer running on low speed, pour the cold heavy cream in a slow, steady stream. This is important – adding it too fast can keep the mousse from whipping up properly.
4. Scrape the bowl. Stop the mixer, scrape down the sides and bottom thoroughly, then increase the speed to medium-high.
5. Whip until light and fluffy – about 3 to 4 minutes. The mousse should look airy, hold its shape, and have noticeably increased in volume.
6. Spread over the cooled cake layer. Use a spatula to smooth it into an even, gorgeous layer all the way to the edges.
7. Cover and refrigerate for at least 6 hours, or up to 24 hours. The wait is worth it – trust the process.
How to Make the Whipped Cream Topping
This step comes right before serving – light, fluffy whipped cream is the perfect finishing crown for your masterpiece.
1. In the bowl of a stand mixer fitted with the whisk attachment (or using a hand mixer), combine the cold heavy cream, powdered sugar, and vanilla.
2. Whip on medium-high speed until stiff peaks form – about 4 to 5 minutes.
3. Spread the whipped cream in an even layer over the set mousse.
4. Top generously with chocolate shavings or grated chocolate. To make elegant shavings at home, simply run a vegetable peeler along the edge of a chocolate bar. It’s surprisingly easy and looks absolutely stunning.
How to Slice and Serve Like a Pro
Before you release the springform pan, run a thin knife around the entire inside edge of the pan. This loosens the cake cleanly so it releases without sticking.
Then carefully open the springform latch and lift the ring away. Marvel at your beautiful creation for a moment – you earned it.
For the cleanest slices, use a sharp knife and wipe it clean between cuts with a damp cloth.
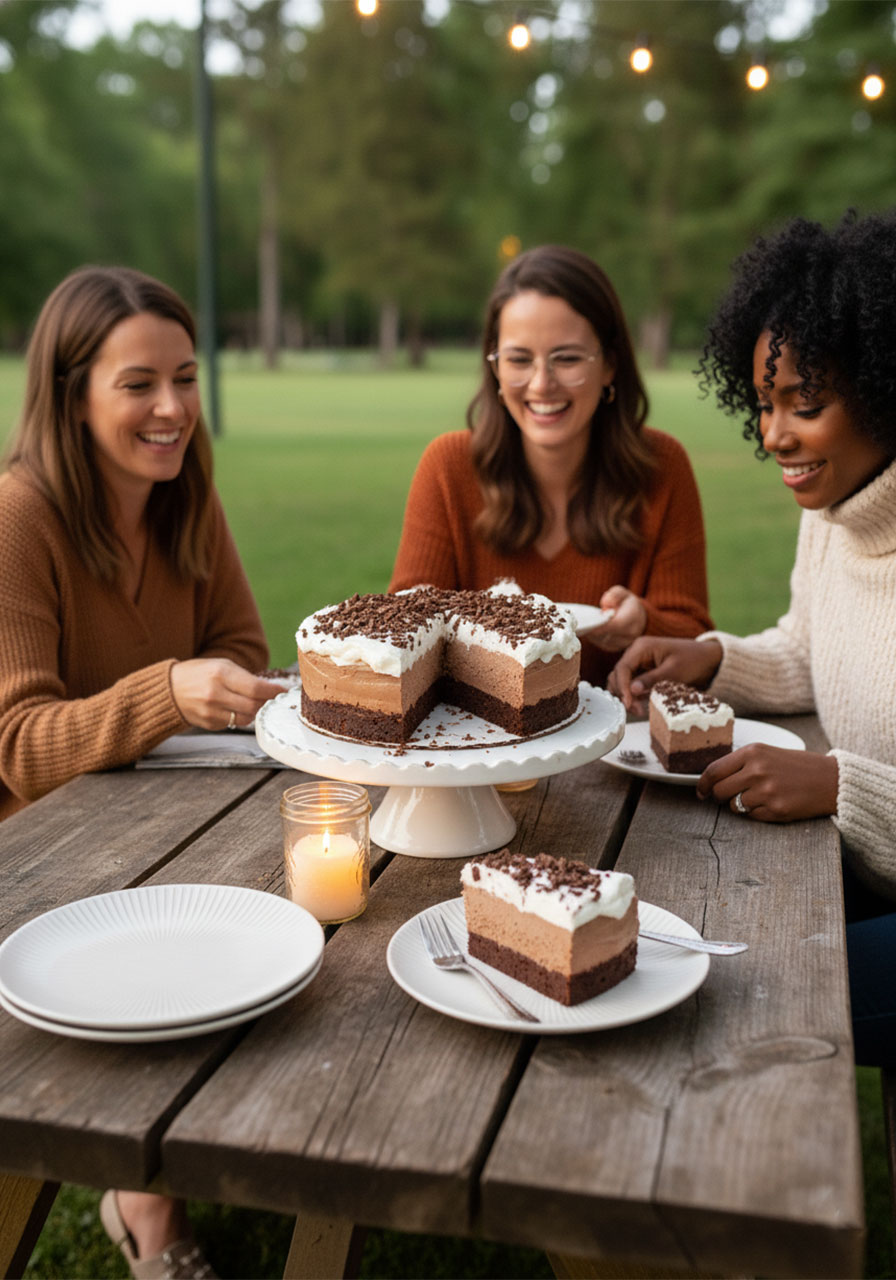
Serve immediately, or keep refrigerated until ready. This cake actually holds up beautifully for up to 3 days in the fridge – if it lasts that long.
Tips for Making This Cake Absolutely Perfect
Use high-quality chocolate. Since chocolate is the star ingredient here, quality really does matter. A good semisweet or bittersweet chip – like Guittard – will give you noticeably richer flavor. It’s worth the small splurge.
Make sure your cream cheese is fully softened. Cold cream cheese won’t blend smoothly and will leave lumps in your mousse. Take it out of the fridge at least an hour before you start.
Don’t rush the cooling step. Putting warm mousse on a warm cake is the most common mistake. Let the base cool fully – even pop it in the fridge for 20 minutes to speed things up if you’re impatient.
Add the cream slowly. Pouring it in too fast is the #1 reason mousse comes out too runny. A slow, steady stream gives the fats time to incorporate properly and whip up into that gorgeous, fluffy texture.
Make it the night before. Honestly, overnight chilling gives you the absolute best texture and makes party day completely stress-free. It’s a win-win.
Common Questions Answered
Can I make this dairy-free?
Yes! Readers have had great success making a dairy-free version using dairy-free cream cheese, vegan butter, and full-fat coconut cream in place of heavy cream. The texture may vary slightly, but the flavor is still incredible.
My mousse came out runny – what happened?
Two things usually cause a runny mousse: adding the heavy cream too fast, or using chocolate that was still too hot when you combined it with the cream cheese. The chocolate should be melted and smooth, but not steaming. Next time, let it cool for a few minutes before adding it to the mixer.
Can I use a regular cake pan instead of a springform?
A springform pan is really the best tool here – it lets you release the cake cleanly without disturbing those beautiful layers. If you don’t have one, this recipe is worth the investment of picking one up. They’re incredibly useful for cheesecakes and layered desserts too.
Can I make this into cupcakes?
It hasn’t been officially tested in cupcake form, but the concept would work in theory! The brownie base would need to be scaled down per cup, and the mousse would need to be piped on top. If you give it a try, we’d love to hear how it goes!
How long does this cake keep?
Stored covered in the refrigerator, this cake stays delicious for up to 3 days. Add the whipped cream topping the day you plan to serve it for the freshest presentation.
More Gluten-Free Desserts You’ll Love
If this cake has you in a gluten-free baking mood (and honestly, how could it not?), here are a few more recipes to explore:
Gluten-Free Cheesecake – a classic vanilla bean cheesecake with a walnut crust. Creamy, dreamy, and crowd-pleasing every time.
Gluten-Free Carrot Cake – moist, warmly spiced, and piled high with fluffy cream cheese frosting. It’s a showstopper.
Gluten-Free Chocolate Cake – a simple, fluffy sheet cake with a frosting that has a secret ingredient. (You’ll be surprised!)
Gluten-Free Peanut Butter Pie – same cream-cheese mousse technique, but peanut butter. If you loved this cake, you will adore that pie.
This Is the Cake That Starts a Tradition
Here’s the thing about this Gluten-Free Chocolate Mousse Cake – it tends to become the cake.
The one people request for their birthdays. The one you bring to a dinner party and never bring home again because the plate gets scraped clean. The one your friends text you about a week later asking for the recipe.
It’s that kind of dessert.
And the best part? You made it. Gluten-free, from scratch, absolutely gorgeous – and every single person at the table gets to enjoy it without compromise.
That’s the real magic of this cake. Not just how it tastes – but how it brings everyone together.
Now go make something delicious. You’ve got this. 🍫
Gluten-Free Chocolate Mousse Cake
Ingredients
For the Cake Layer:
- 8 oz bittersweet or semisweet chocolate, chopped (or use chips)
- 1 cup (2 sticks) butter
- 1 cup sugar
- 5 eggs
- 1 tablespoon vanilla extract
- 1/4 teaspoon salt
- 1/4 cup gluten-free 1:1 baking flour
For the Chocolate Mousse:
- 8 oz bittersweet or semisweet chocolate, chopped (or use chips)
- 1 1/3 cup powdered sugar
- 2 packages (8 oz each) cream cheese, softened
- 2 teaspoons vanilla extract
- 2 cups cold heavy cream (35% milk fat or higher)
For the Whipped Cream Topping:
- 3/4 cup cold heavy cream
- 2 tablespoons powdered sugar
- 2 teaspoons vanilla extract
- Grated or shaved chocolate, for garnish (optional)
Instructions
Make the Cake Layer:
- Preheat the oven to 325°F. Spray a 10-inch springform pan with cooking spray.
- Cut butter into tablespoon-sized pieces. Combine with chopped chocolate in a microwave-safe bowl. Microwave in 15-second intervals, stirring each time, until fully melted and smooth.
- Add sugar, vanilla, and salt to the chocolate mixture. Whisk to combine.
- Add eggs one at a time, whisking each until fully incorporated.
- Using a rubber spatula, fold in the gluten-free flour until just combined.
- Pour batter into the prepared pan and smooth into an even layer.
- Bake for 30–35 minutes, until set and a toothpick inserted in the center comes out clean.
- Remove from oven and cool completely on a wire rack before adding the mousse layer.
Make the Chocolate Mousse:
- Melt the chocolate in a microwave-safe bowl in 15-second intervals, stirring between each, until smooth. Let cool slightly.
- Add the melted chocolate, cream cheese, powdered sugar, and vanilla to a stand mixer bowl. Beat until completely smooth, scraping down the sides once or twice.
- With the mixer running on low speed, slowly pour in the cold heavy cream in a steady stream.
- Scrape down the bowl, then increase speed to medium-high and whip for 3–4 minutes until light and fluffy.
- Spread the mousse evenly over the cooled cake layer.
- Cover and refrigerate for at least 6 hours, or up to 24 hours.
Make the Whipped Cream Topping:
- In a stand mixer with the whisk attachment (or using a hand mixer), combine cold heavy cream, powdered sugar, and vanilla.
- Whip on medium-high speed until stiff peaks form, about 4–5 minutes.
- Spread over the chilled mousse layer. Garnish with chocolate shavings.
- Run a thin knife around the edge of the pan. Open the springform and remove the ring. Slice and serve.
