Father’s Day is coming up fast – and if you’re anything like me, you’ve been staring at that tiny pair of baby feet thinking, there has to be a way to make this moment last forever.
There is. And it’s easier than you think.
This “Heartbeat Footprint Art” is one of those gifts that stops a dad cold the moment he opens it. It’s personal. It’s beautiful. It looks like something you’d buy at a boutique gift shop – and it costs almost nothing to make.
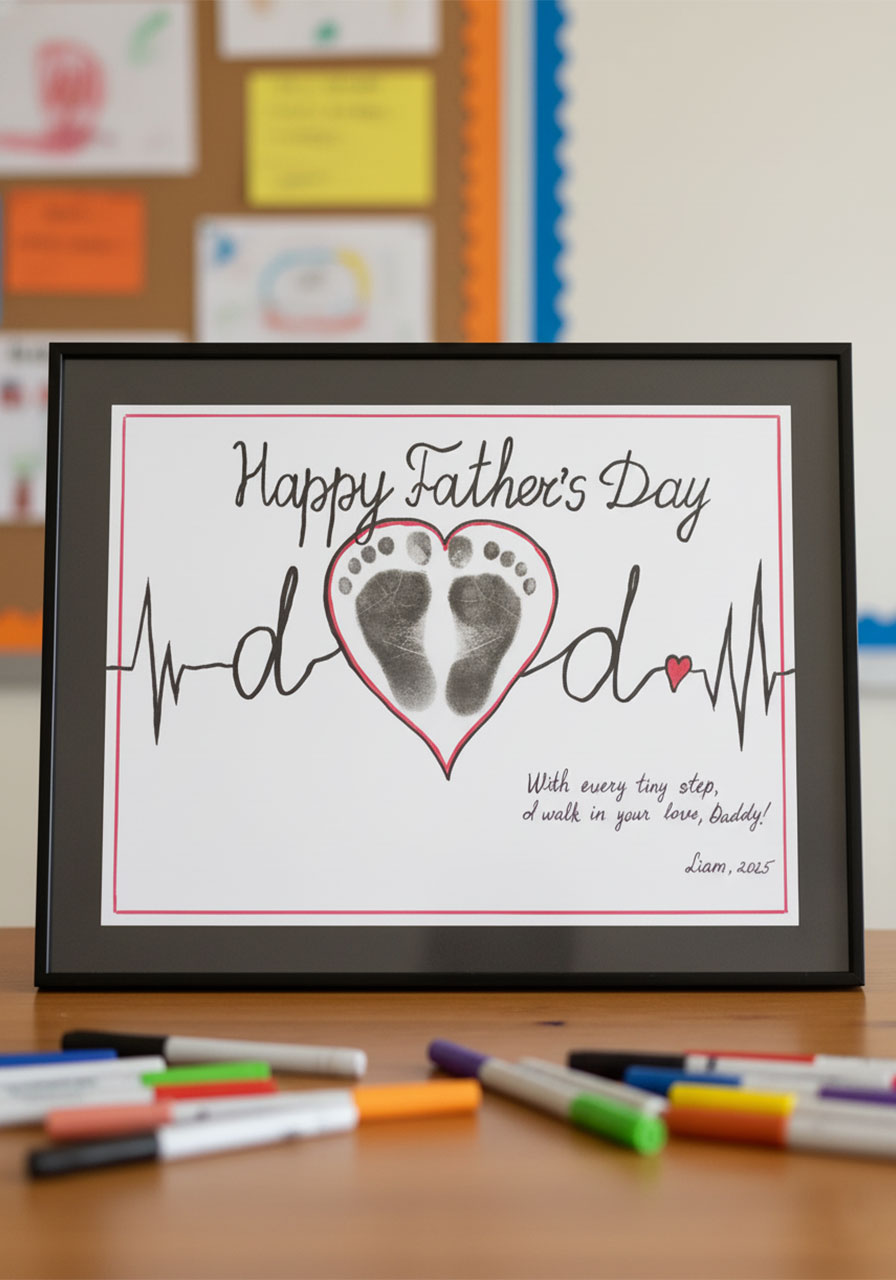
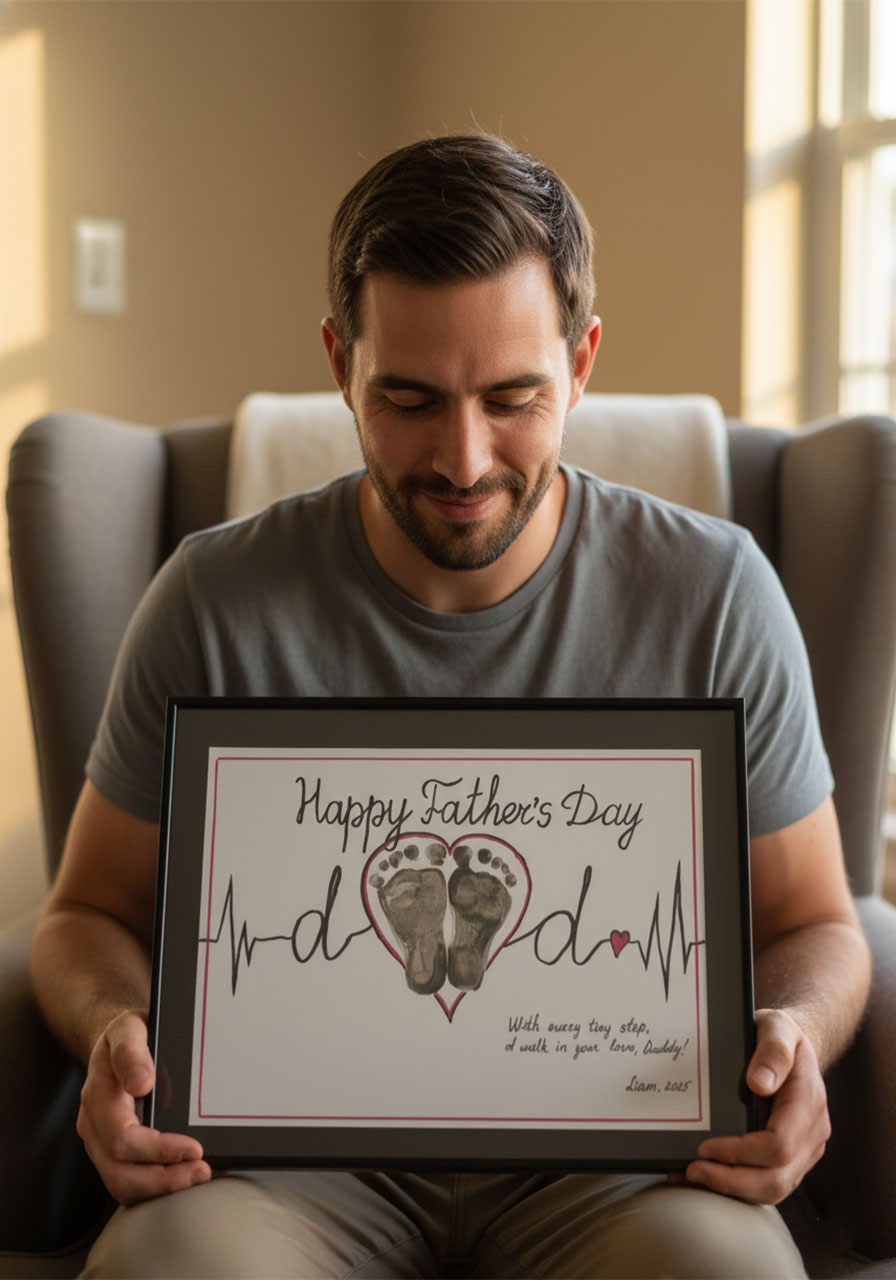
We’re talking about a framed art piece that turns your child’s actual footprints into the centerpiece of a heartbeat (EKG) design, with “Dad” written right in the middle. It’s a visual love letter that says: you are the heartbeat of this family.
First-time dad? This is the perfect first Father’s Day keepsake. Grandpa who has everything? He doesn’t have this. Trust me – this one ends up framed on a desk or hung on a wall, not tucked in a drawer.
Let’s make it.

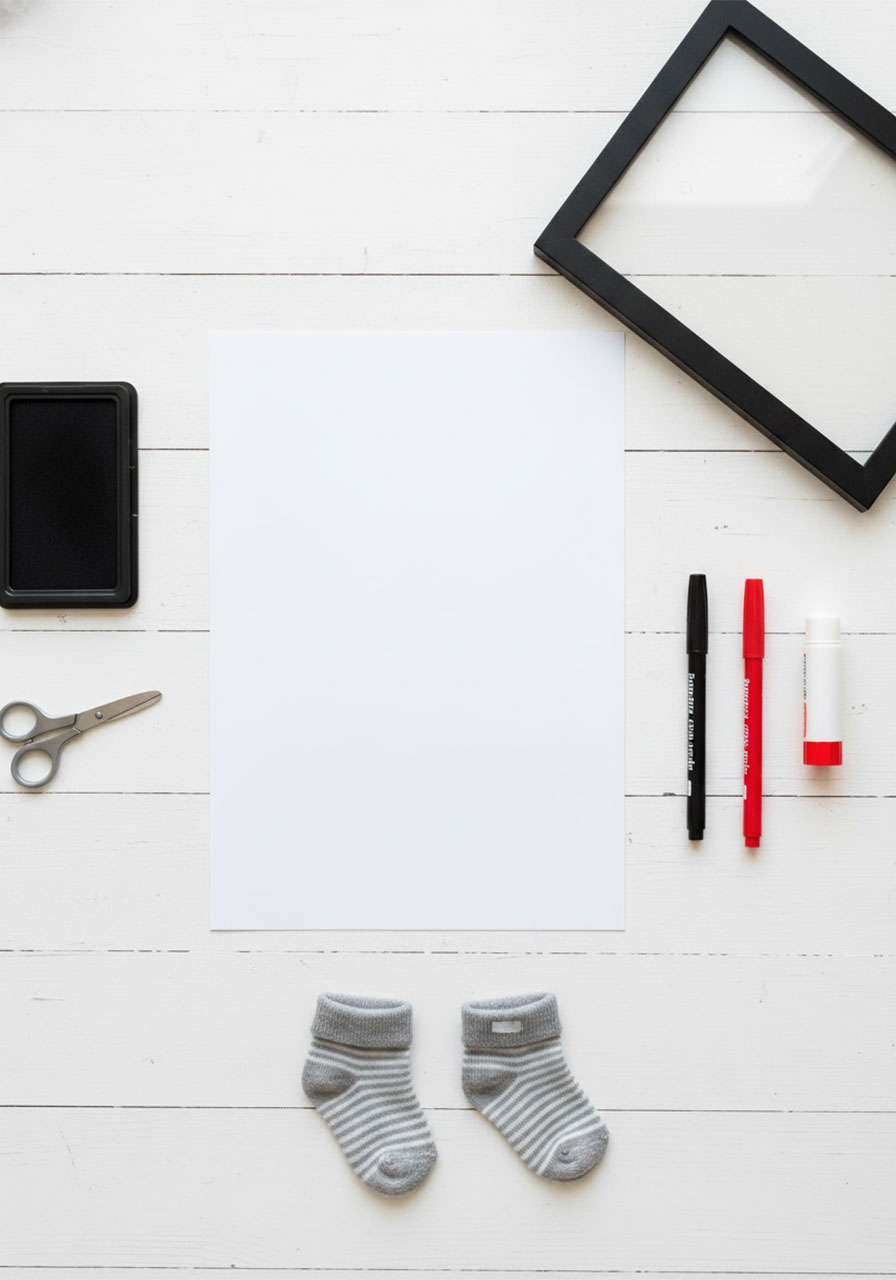
What You’ll Need
Everything on this list is easy to find at your local craft store or on Amazon. Most of it you may already have at home.
White cardstock (one sturdy sheet, at least 8.5 x 11 – cardstock holds up better than regular printer paper)
Black or grey ink pad (non-toxic, washable – essential for baby-safe footprints)
Black permanent marker (for drawing the heartbeat line and lettering)
Red or pink marker (for the heart outline and little accent details)
Scissors
Glue stick
A picture frame (standard 8×10 or 5×7 works great)
A helper – wrangling a wiggly baby’s foot is a two-person job!
Pro tip: Do the footprint step during naptime when they’re relaxed, not when they’re awake and kicking. You’ll thank yourself later.

How to Make It: Step-by-Step
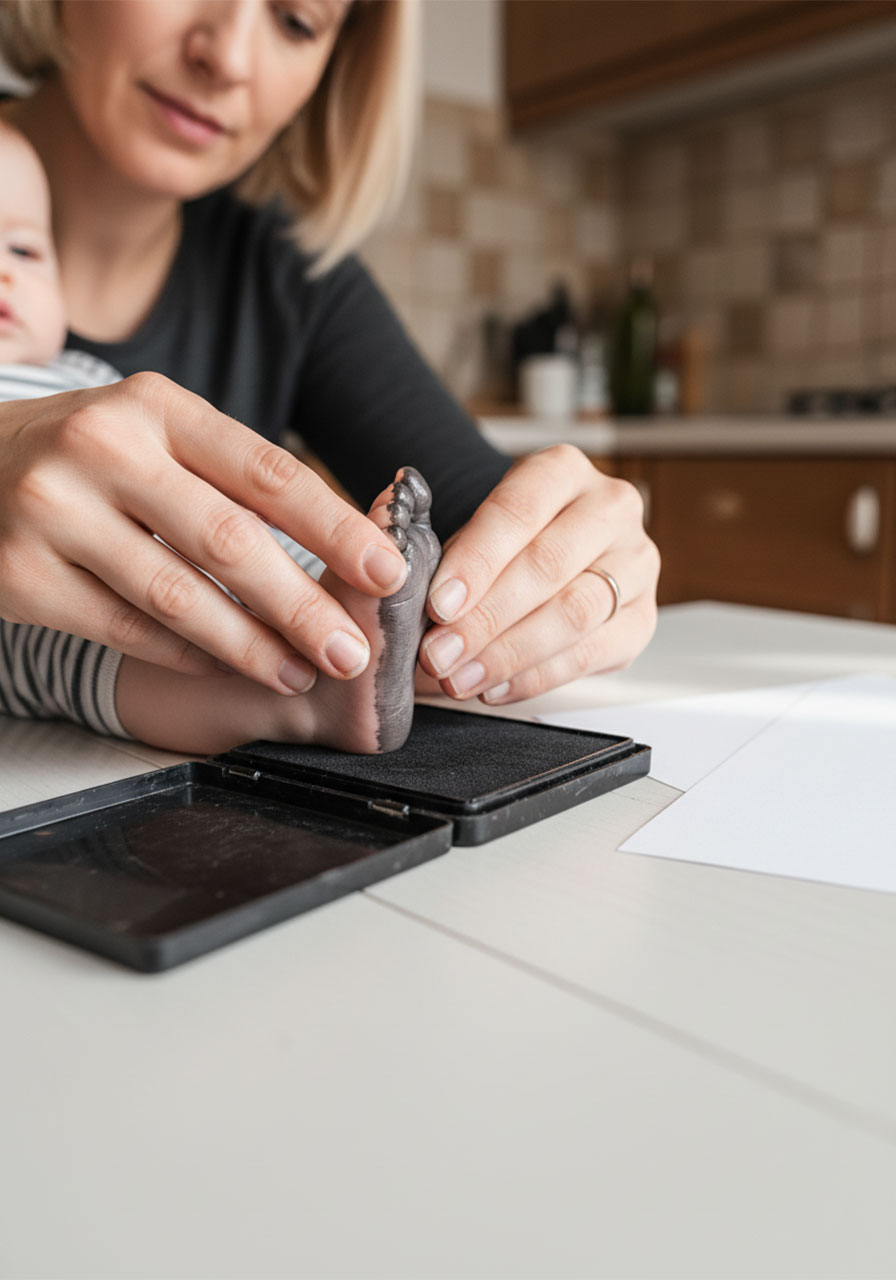
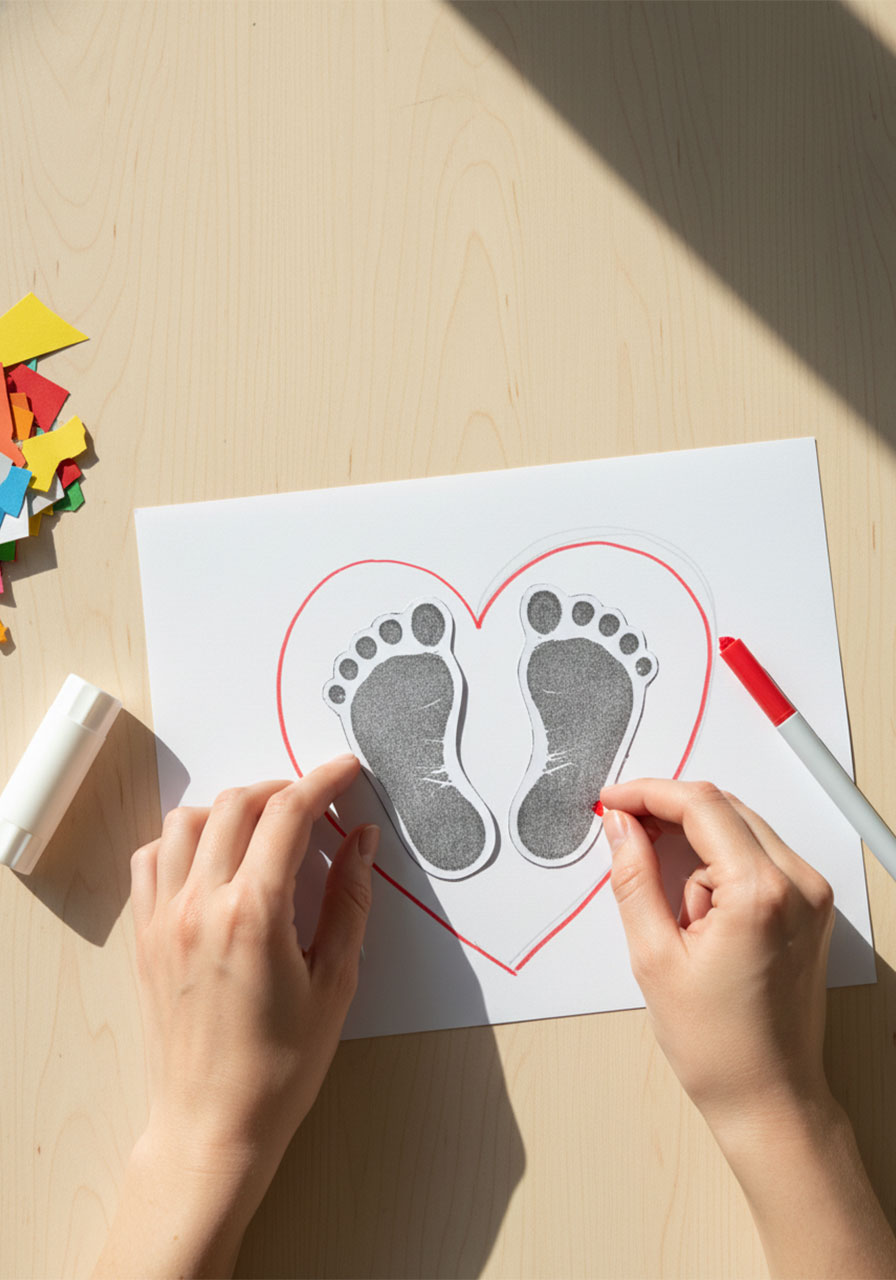
Step 1: Capture the Footprints
This is the most important step – and also the most fun (and slightly chaotic).
Press your child’s foot gently but firmly onto the ink pad, making sure to get even coverage across the whole foot, including the toes. Then press it down onto a separate scrap sheet of paper first to practice. Once you have a clean print you love, do it on a fresh piece of paper that you’ll cut from later.
You’ll want two footprints – one for each foot. Let them dry completely before moving on. This usually takes 5–10 minutes.
Don’t stress about perfection. A slightly smudged print has character. It’s real.
Step 2: Cut Out the Footprints
Once the prints are fully dry, use your scissors to carefully cut around each one. Leave a small white border around each footprint – about 1–2mm. This gives them a clean, polished look once they’re placed on the cardstock.
Set them aside for now.
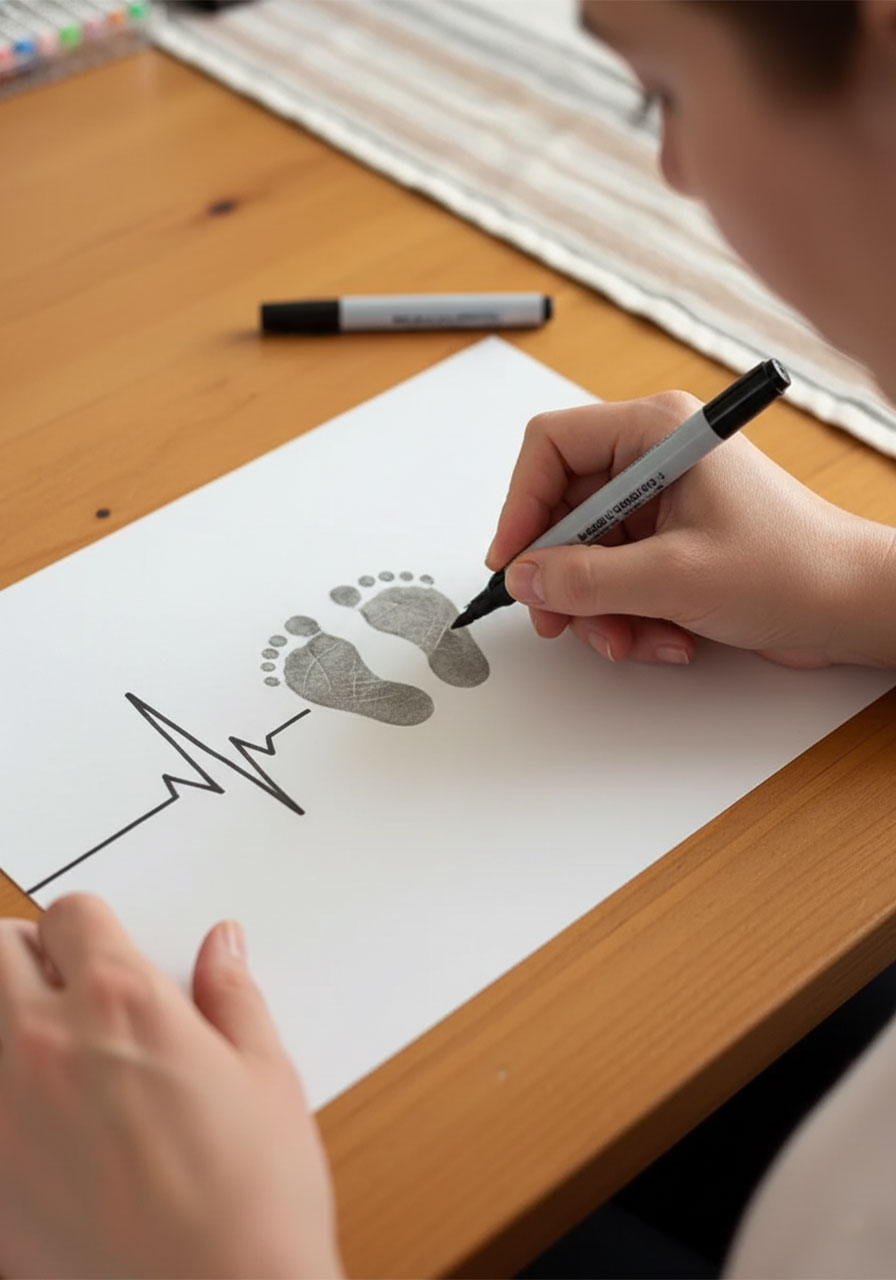
Step 3: Draw the Heartbeat (EKG) Line
Take your white cardstock and orient it horizontally (landscape).
With your black marker, draw a horizontal line across the middle of the paper from left to right. As you draw, add the classic EKG “heartbeat” spike pattern – a short flat line, then a sharp spike up and down, then flat again. Think of what a heart monitor looks like on a hospital screen.
Stop drawing in the center of the page. That’s where the footprints and heart will go.
After you place the footprints (next step), you’ll loop the line up into a heart shape around them, then continue the heartbeat line out the other side to the right edge of the paper.
Not confident drawing this freehand? Lightly sketch it in pencil first, then trace over it with marker. No one will know.
Step 4: Place the Footprints in a Heart Shape
Apply your glue stick to the back of each footprint cutout.
Place both footprints in the center of your cardstock, angling the heels toward each other so the feet naturally form the bottom curves of a heart. The toes should face slightly outward and upward – like two little feet standing together inside a heart.
Press them down firmly and let the glue set for a minute.
Now go back to your heartbeat line and draw the heart outline around the footprints, connecting the line into a heart shape that frames them. Use your red or pink marker to trace (or re-draw) the heart itself so it pops with color.
Step 5: Write “Dad” or “Daddy”
On the heartbeat line itself – to the left of the heart – write the letter “d” in a fun, looping style. On the right side of the heart, write another “d” so it reads: d ♥ d – or “Dad” with the heart as the “a.”
You can color in a tiny heart instead of the letter “a” using your red marker. It’s a small detail that makes the whole design feel intentional and polished.
Alternatively, write “DAD” or “DADDY” in block letters above or below the heart. Whatever feels right for your style.
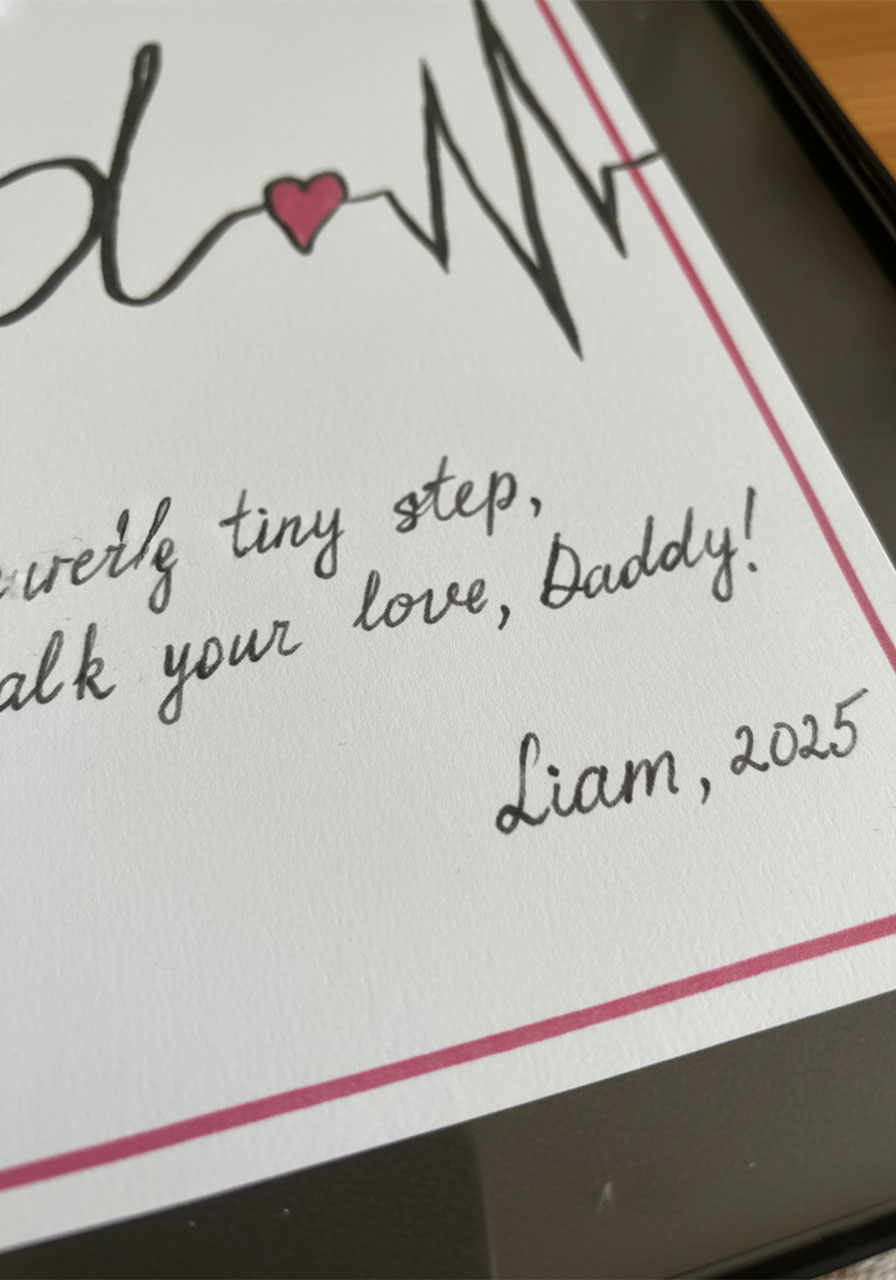
Step 6: Add the Sentimental Message
In the bottom right corner of the cardstock, write a short, heartfelt message. The one from the original video is absolutely beautiful:
“With every tiny step, I walk in your love, Daddy.”
Then add your child’s name and the year just below it. That tiny detail is what turns this from a cute craft into a time capsule.
Ten years from now, he’ll look at that date and feel everything.
Step 7: Add “Happy Father’s Day” at the Top
Use your black marker to write “Happy Father’s Day” in a curved or decorative style across the top of the paper. This is the finishing touch that makes it feel like a complete, intentional piece of art – not just a scrapbook page.
Take a step back and look at what you made. Pretty amazing, right?
Step 8: Frame It
Slip your finished piece into a simple frame. A black or white frame from the dollar store works perfectly – it doesn’t need to be fancy. The art does all the work.
The frame is what transforms this from “sweet DIY craft” to “gallery-worthy gift.” It tells Dad this is something worth keeping. Something worth displaying.
Because it is.
Tips to Make This Even Better
For newborns: Their feet are tiny and curling – press the entire foot flat and hold for a full 3 seconds before lifting. Move slowly and deliberately.
For toddlers: Distract them with a snack or a show before attempting the print. Speed is your friend here.
For older kids: Let them draw the heartbeat line themselves! Their wobbly hand-drawn line adds so much personality to the piece.
Multiple kids? Use both (or all!) footprints inside the heart. It becomes a whole family portrait.
Want it to last? Once it’s dry and complete, take it to a local print shop and have it scanned and printed on high-quality paper. Then frame the copy and store the original. Best of both worlds.
Why This Gift Hits Different
Dads are notoriously hard to shop for. They say they don’t need anything. They mean it.
But this? This isn’t something you can buy. It’s something only you can give. It has your child’s actual feet on it. It has a date. It has a name. It has love baked into every single step of making it.
And here’s the thing about sentimental gifts – they grow in value over time. The older your child gets, the more precious those tiny footprints become. The more he’ll reach for that frame on a hard day and feel steadied.
That’s the power of this craft. It’s not just art. It’s a reminder.
You are his heartbeat. And now he has something to hang on the wall that proves it.
Frequently Asked Questions
What if the footprint smudges?
It happens! Do a few test prints on scrap paper first to get the pressure right. If the final print has a small smudge, don’t panic – it still looks beautiful and handmade. That’s the whole point.
Can I use paint instead of an ink pad?
Absolutely. Non-toxic, washable acrylic paint in black or grey works just as well. Use a foam brush to apply a thin, even layer to the bottom of the foot. Press firmly and lift straight up without sliding.
What size frame should I use?
An 8×10 frame works for most standard cardstock. If you want more breathing room around the design, go up to an 11×14. Both look stunning.
Can I make this digitally?
Yes! Scan or photograph the footprints after they’re dry, then edit the design in Canva or Photoshop. You can add the heartbeat line, text, and heart digitally and print the final version on photo paper. This is great if you want to send copies to grandparents too.
How far in advance can I make this?
Make it up to a week ahead and store it flat in a folder or portfolio. The ink and marker hold up fine – just keep it away from moisture.
Happy crafting – and happy Father’s Day to all the incredible dads out there. 🖤
Did you make this? We’d love to see it! Tag us on Instagram so we can share your beautiful creation.
More Father’s Day Ideas to Keep the Fun Rolling:
Handprint “Mini-Me” Dad: The Cutest DIY Father’s Day Keepsake Your Kids Can Make
How to Make the Best Dad Ever 3D Pop-Up Father’s Day Card (Step-by-Step DIY)
Father’s Day Handy Dad Heart Card (The Cutest Craft for Your Handy Dad or Grandpa!)
Father’s Day Pop Up Card – I Whaley Love You Dad! (The Cutest Card He’ll Ever Get)
How to Make a Suit-and-Tie Father’s Day Card (He’ll Actually Want to Keep)
The Cutest Father’s Day Craft: Printable Toolbox Cards Kids Can Color & Gift