You want to give Dad something real this Father’s Day. Not another generic gift card. Not a mug with a pun on it. Something he’ll actually keep – and something that shows you put genuine love into every single detail.
This DIY Paper Rose Heart Bouquet is exactly that gift.
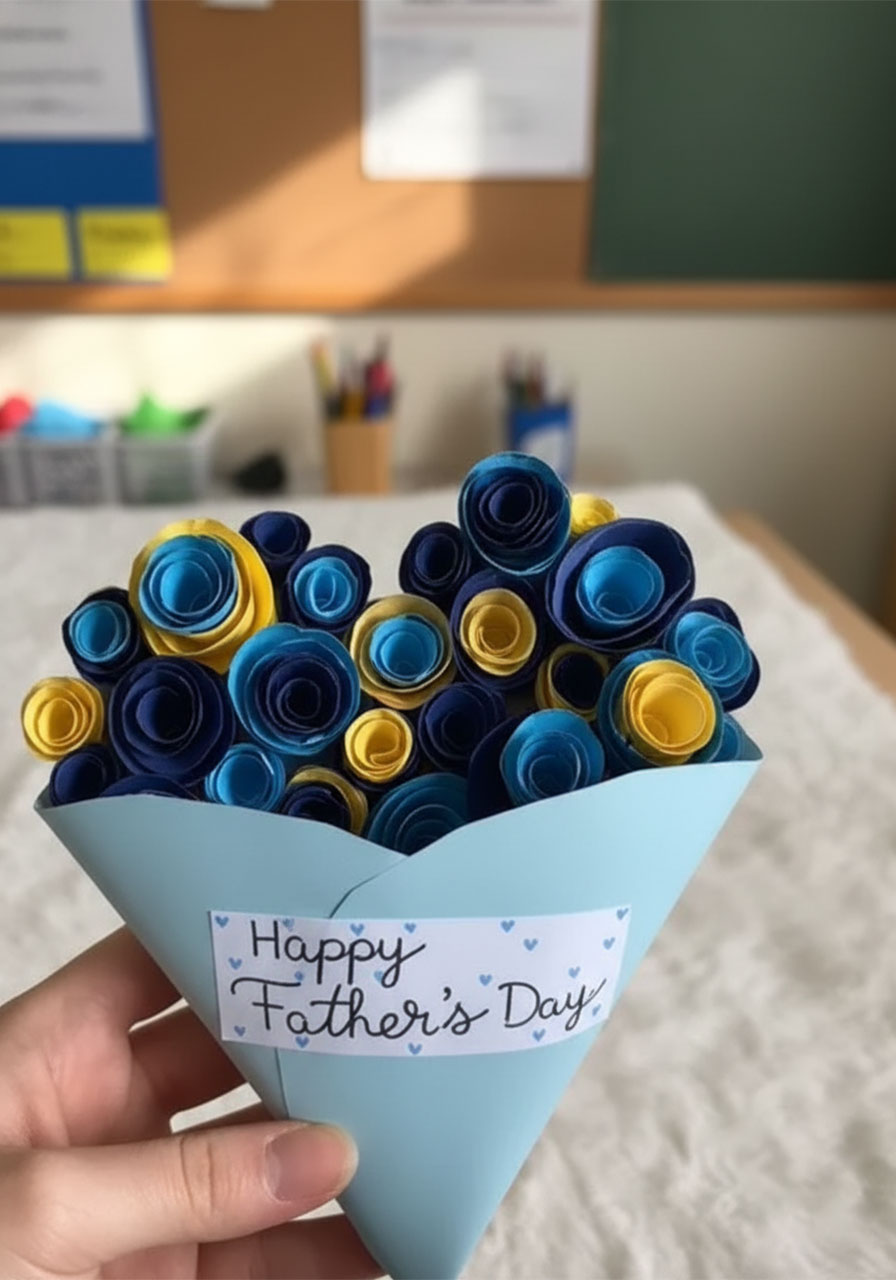
It’s a 3D paper flower display, a sentimental card, and a hidden message all rolled into one gorgeous keepsake. It looks like something you’d buy from a boutique gift shop. But here’s the secret: you made it yourself, with just a few sheets of paper and about an hour of your time.
And the best part? It folds open to reveal a personal message tucked inside – just for him.
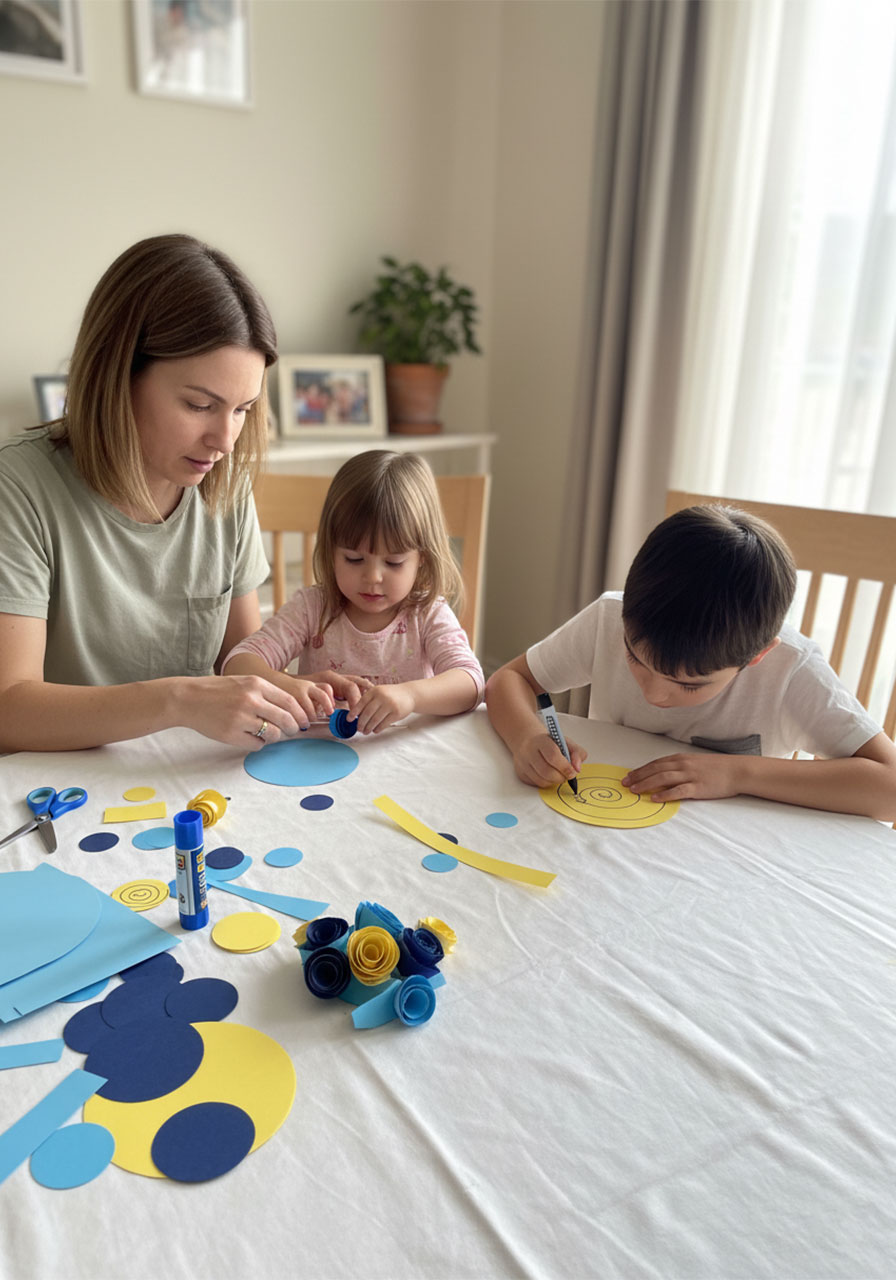
Whether you’re making this with your kids on a rainy Saturday afternoon or crafting it solo as a heartfelt gift from you alone, this project is beginner-friendly, endlessly customizable, and genuinely stunning. Let’s make something Dad will never throw away.

What Makes This Gift So Special
Most Father’s Day cards get read once and recycled. Most bouquets wilt by Thursday. This one does neither.
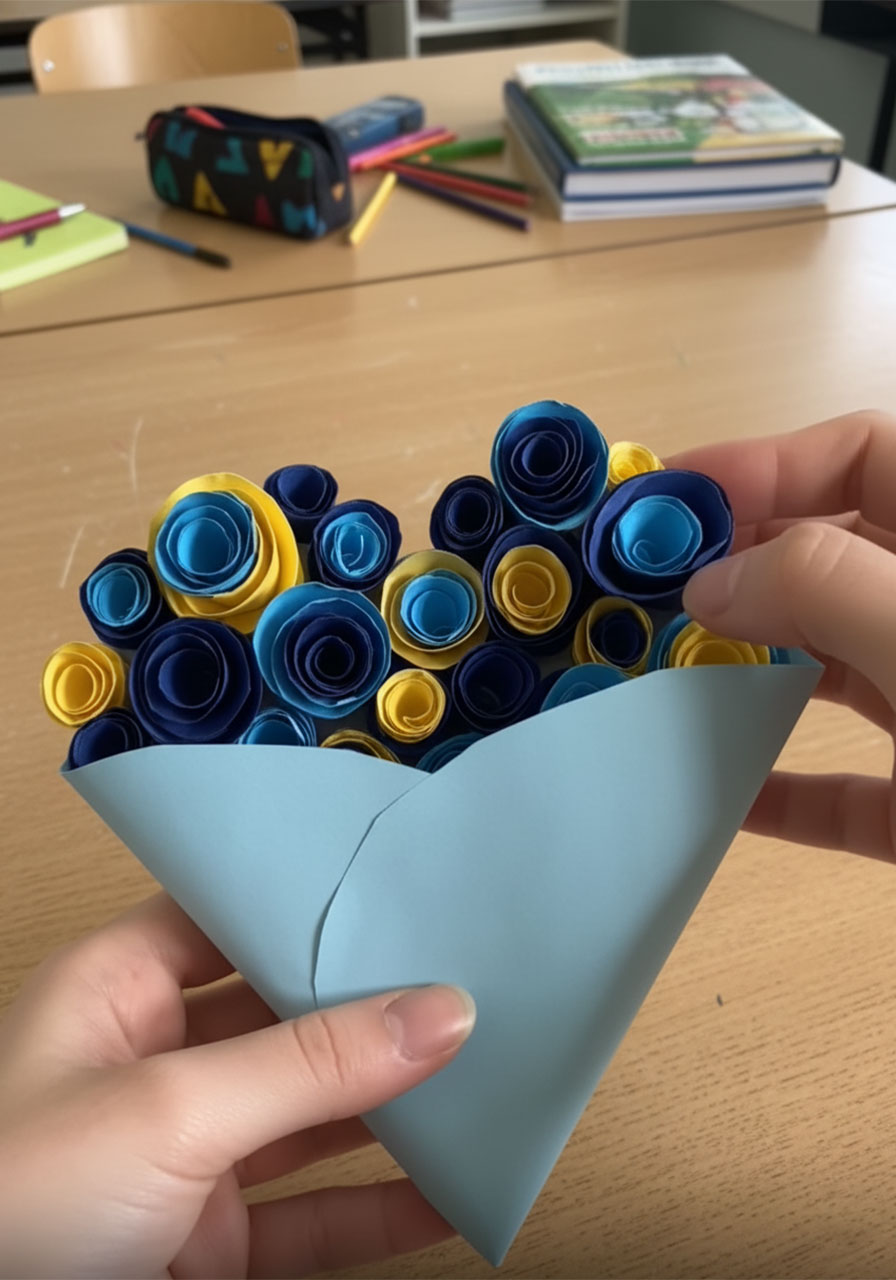
The Paper Rose Heart Bouquet uses a simple “spiral-roll” technique to create dozens of tiny 3D roses that cover a full heart-shaped base. That heart then slides into a paper cone wrapper – like a real flower bouquet – and the whole thing opens up to reveal a hidden message card inside.
It’s the kind of gift that sits on a desk for years. The kind Dad points to when someone asks what that beautiful thing is. And when he says “my daughter made that,” he’ll mean it with his whole chest.

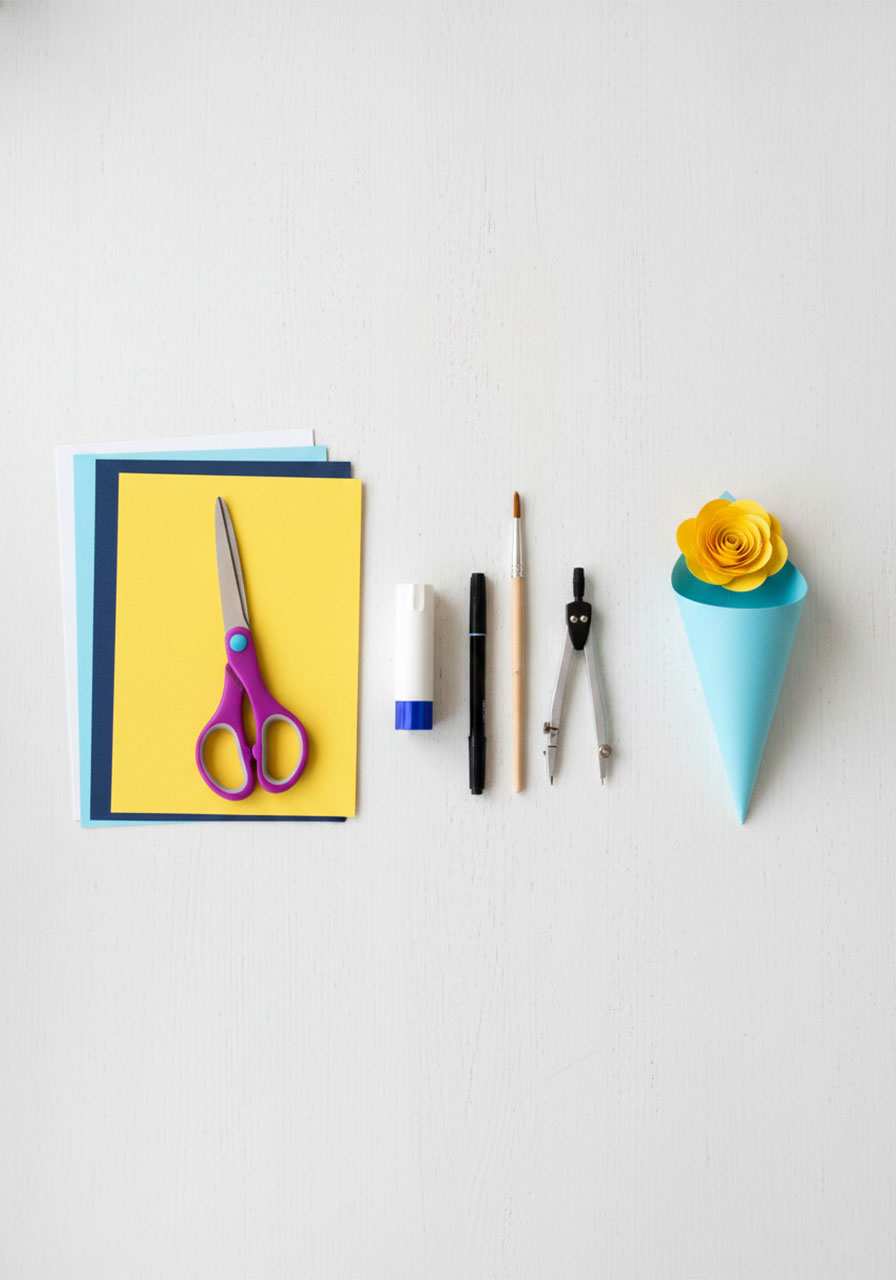
What You’ll Need
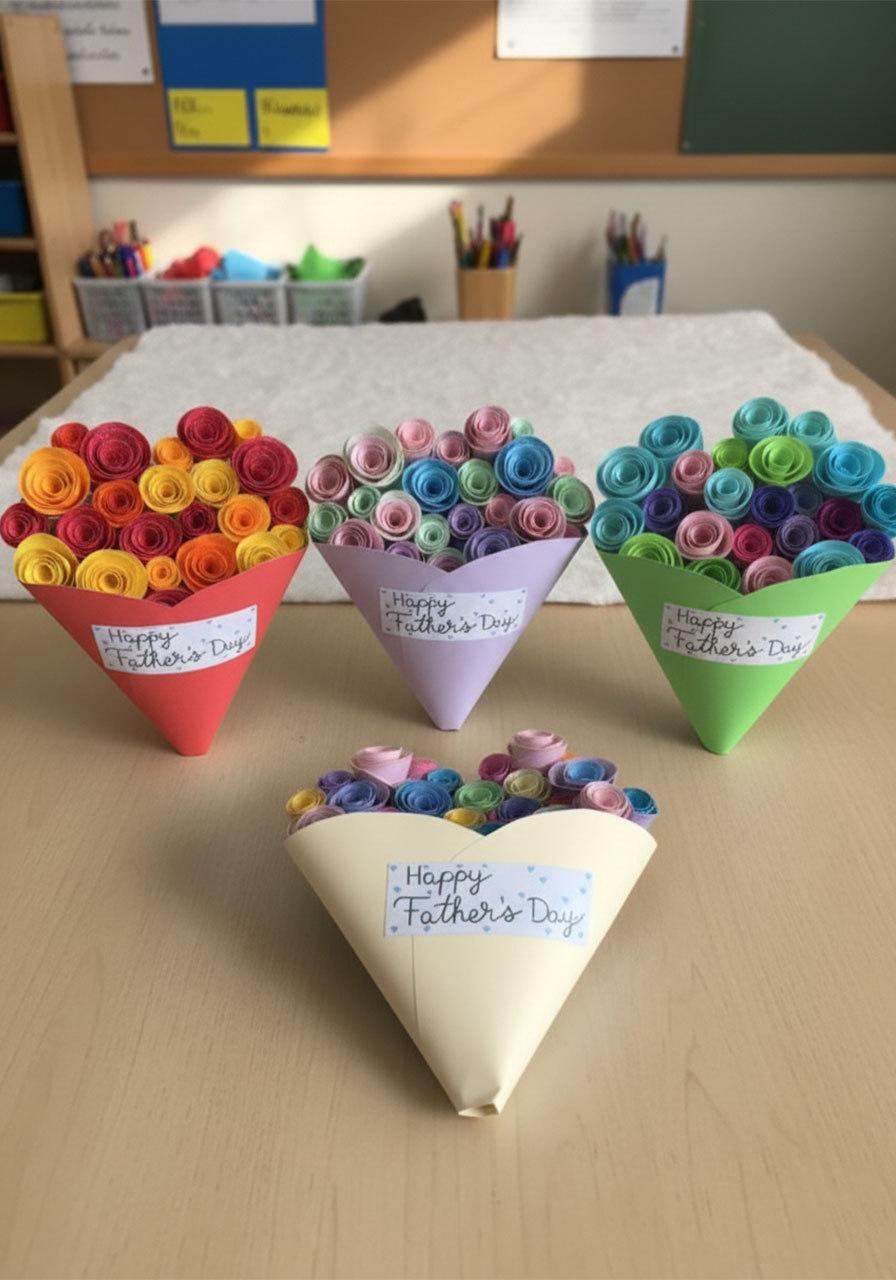
Construction paper or cardstock – light blue, dark navy blue, yellow, white, and one base color (pink, lavender, or light blue work great)
Scissors
Craft glue or a glue stick
A thin stick – a paintbrush handle, a wooden skewer, or a quilling tool all work perfectly
Markers or pens – for the hidden message and the gift tag
A compass (optional, but helpful for cutting nice even circles)
That’s it. No fancy equipment. No craft store haul required. If you’ve got paper and scissors at home, you’re already halfway there.
Step-by-Step Instructions
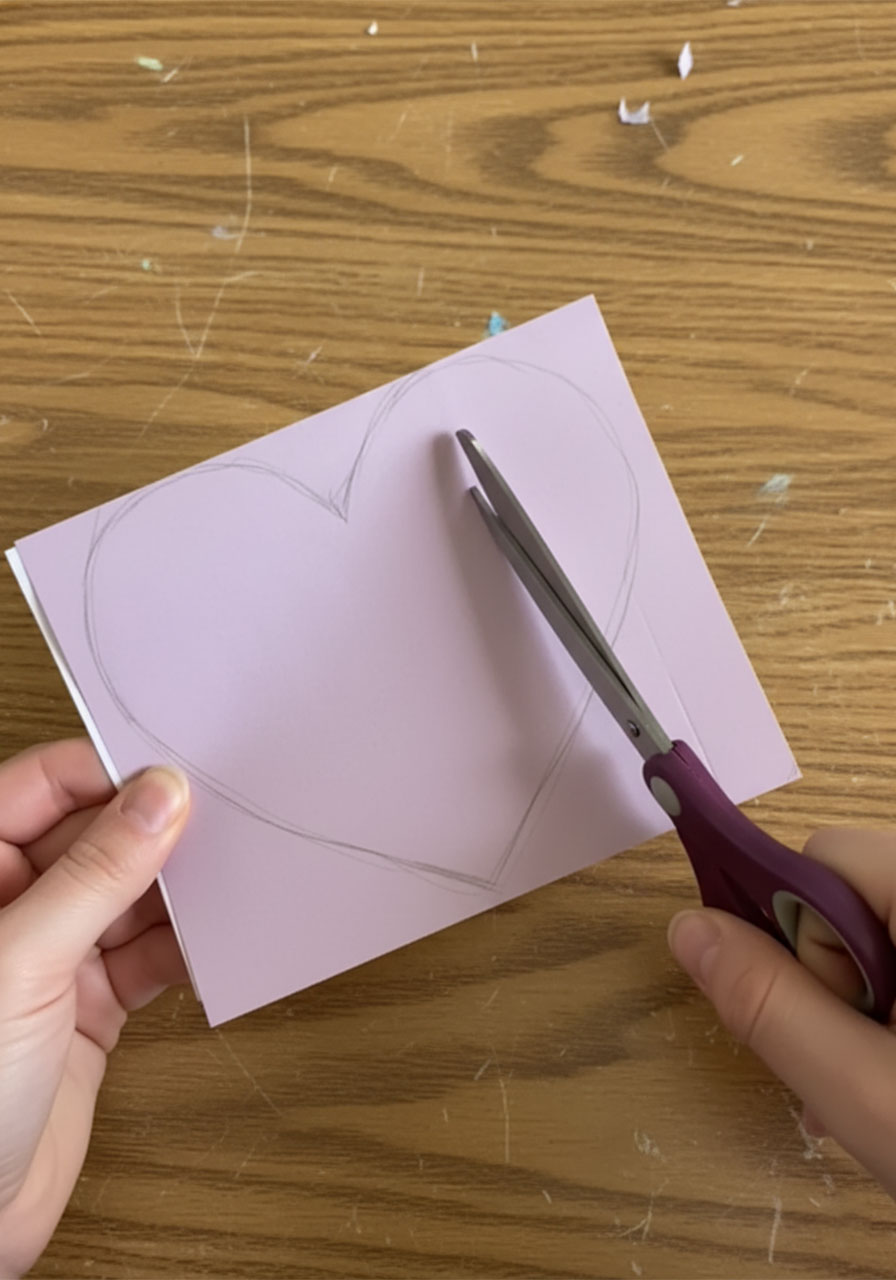
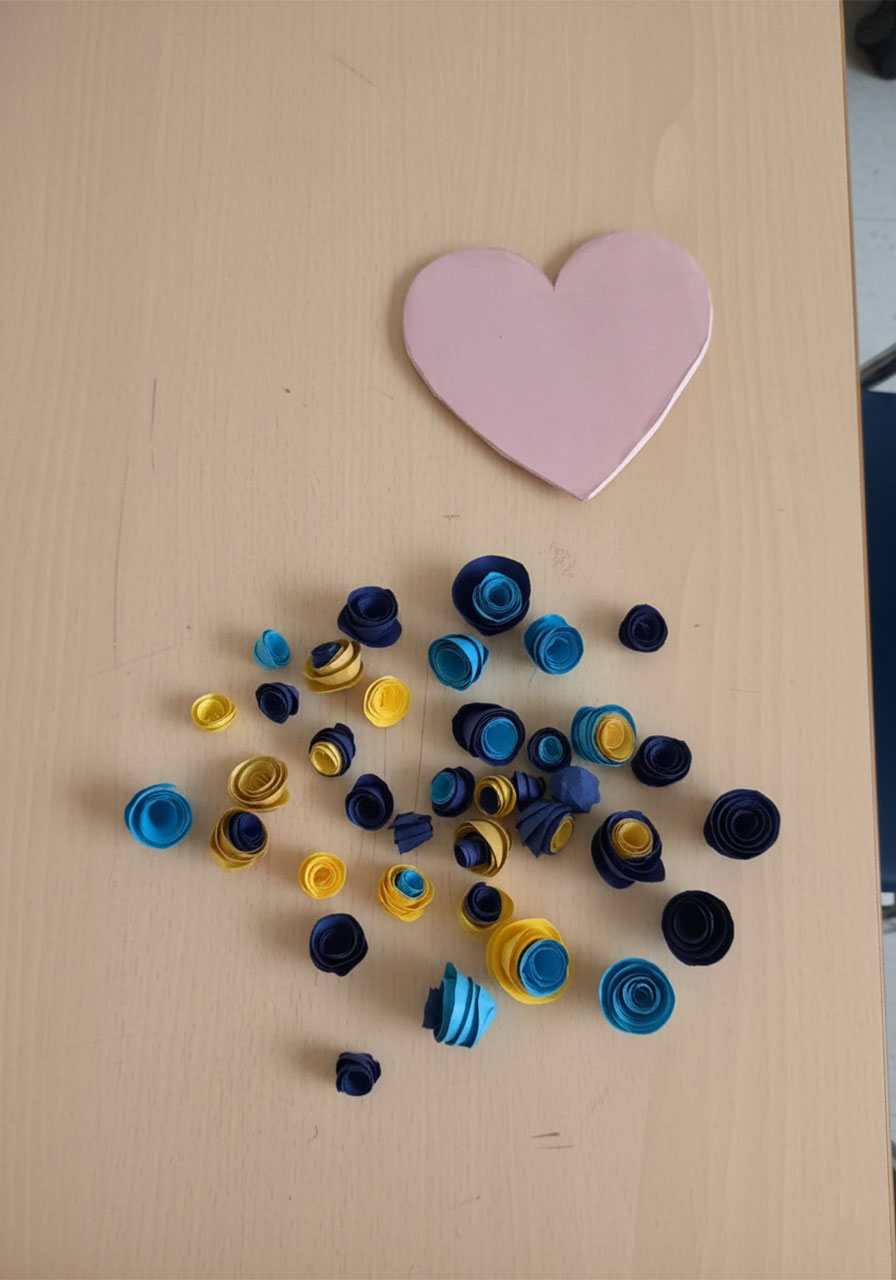
Step 1: Cut Your Heart Base
Start by cutting a large heart shape out of your base color paper – something like pink, lavender, or light blue works beautifully. This heart is the foundation everything else gets glued onto, so make it as big as you’d like the finished bouquet to be. A heart roughly the size of your palm is a great starting point.
Set it aside for now. Your canvas is ready.
Step 2: Make the Spiral Roses (This Is the Fun Part)
This is the technique that makes the whole project come alive. Once you make your first rose, you won’t be able to stop – fair warning.
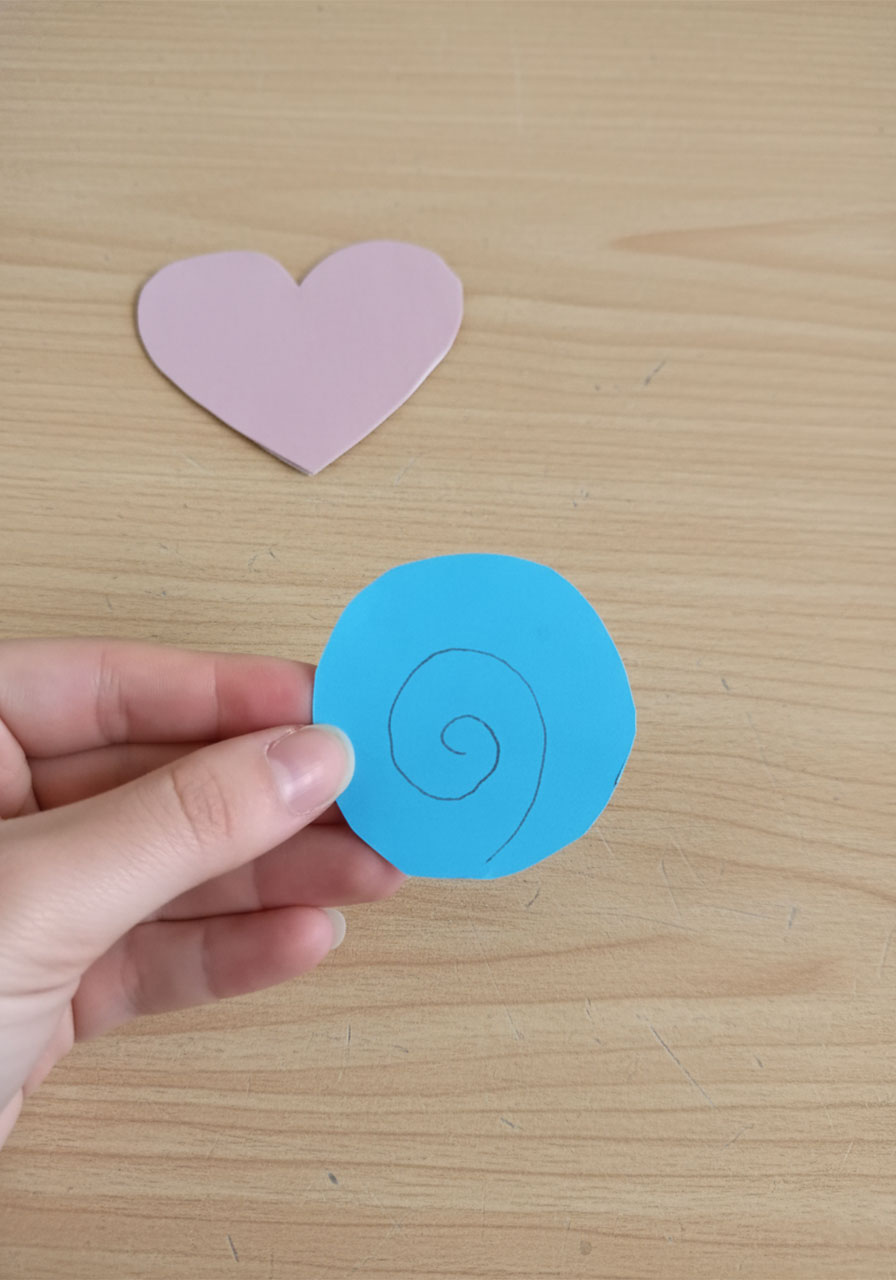
1. Cut out a small circle from your blue or yellow paper – about 2 to 3 inches wide. Don’t stress about perfect circles; organic shapes make the roses look more natural.
2. Using a pen or marker, draw a spiral inside the circle, starting at the outer edge and curling inward toward the center. Think of it like a snail shell.
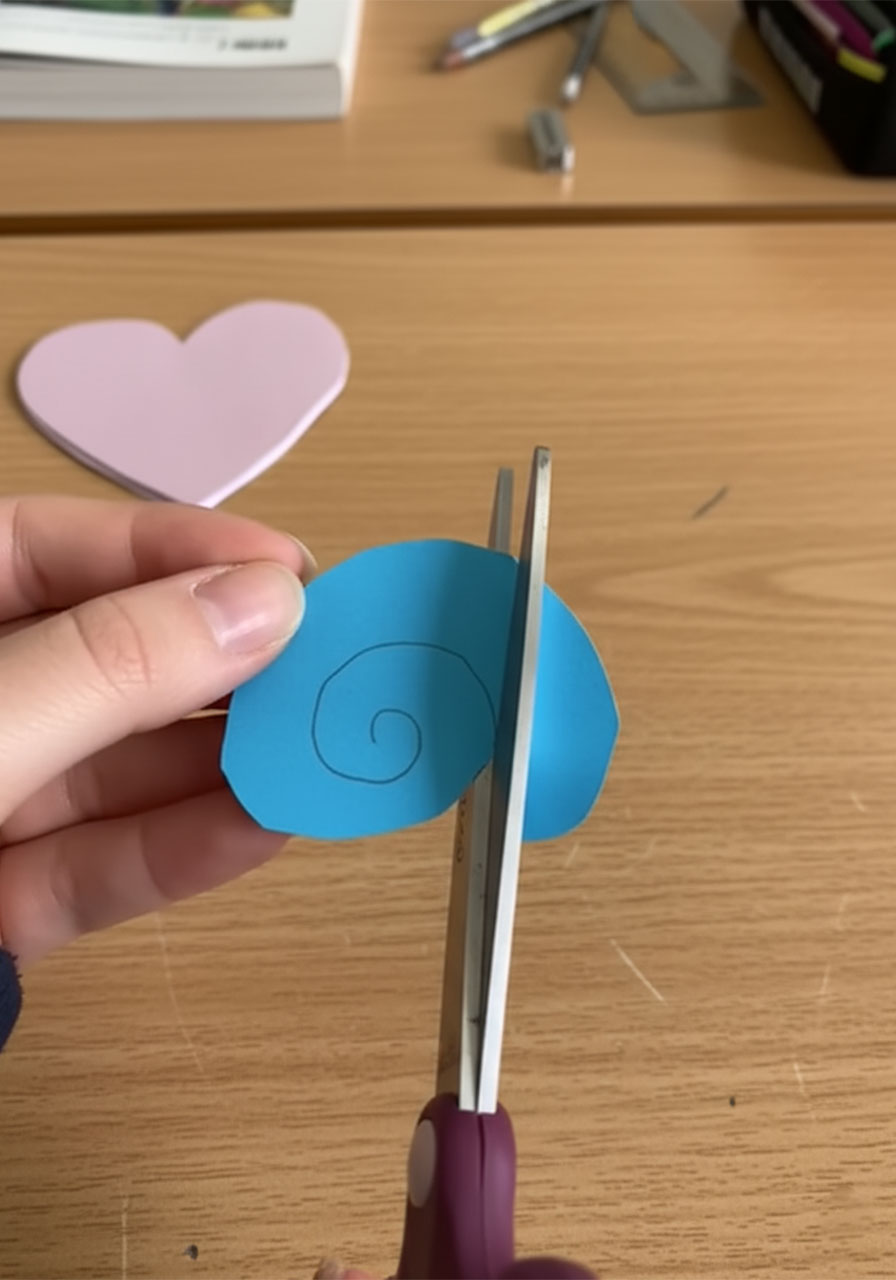
3. Cut along the spiral line. You’ll end up with one long, curling paper strip.
4. Take your thin stick and place the tip at the very outer end of the strip. Wrap the paper tightly around the stick, rolling from the outside in toward the center.
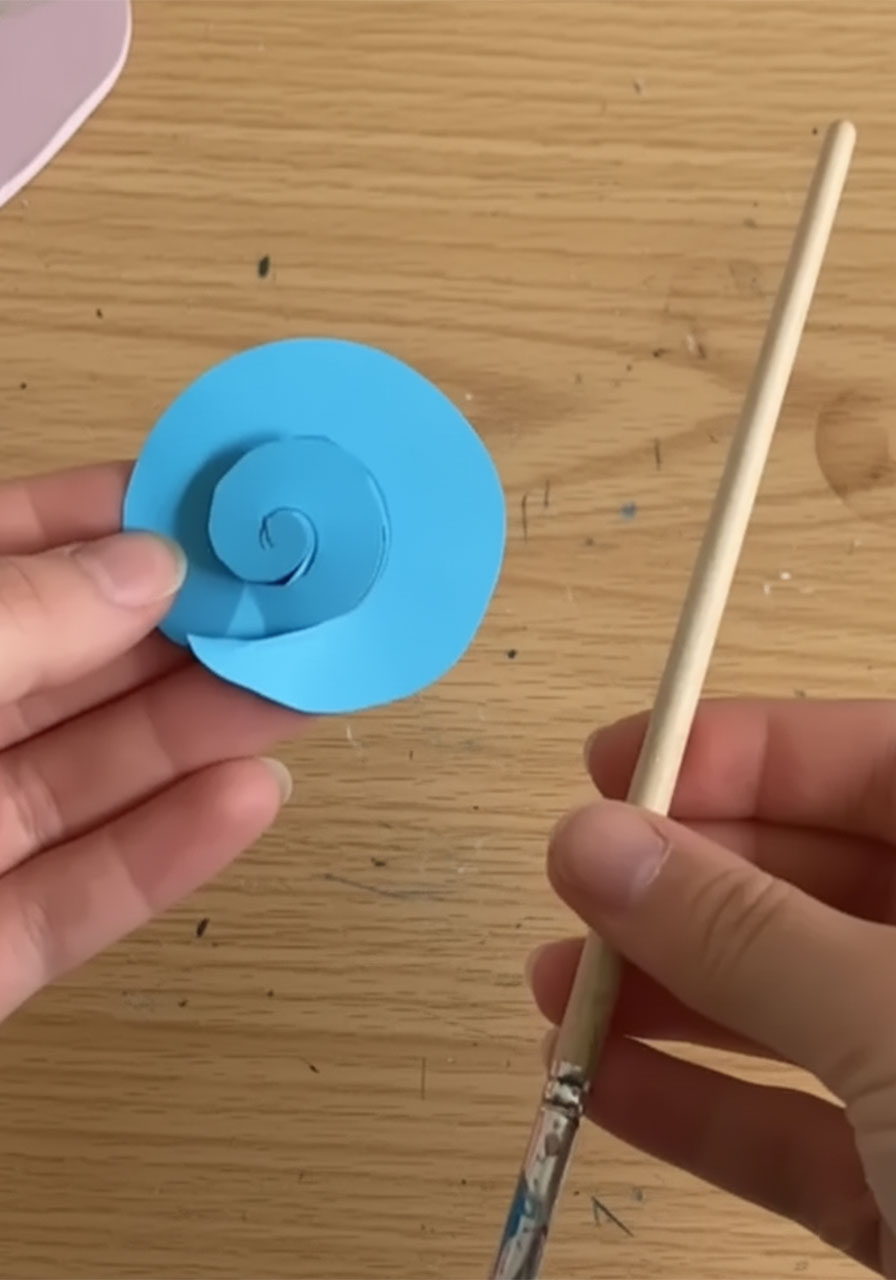
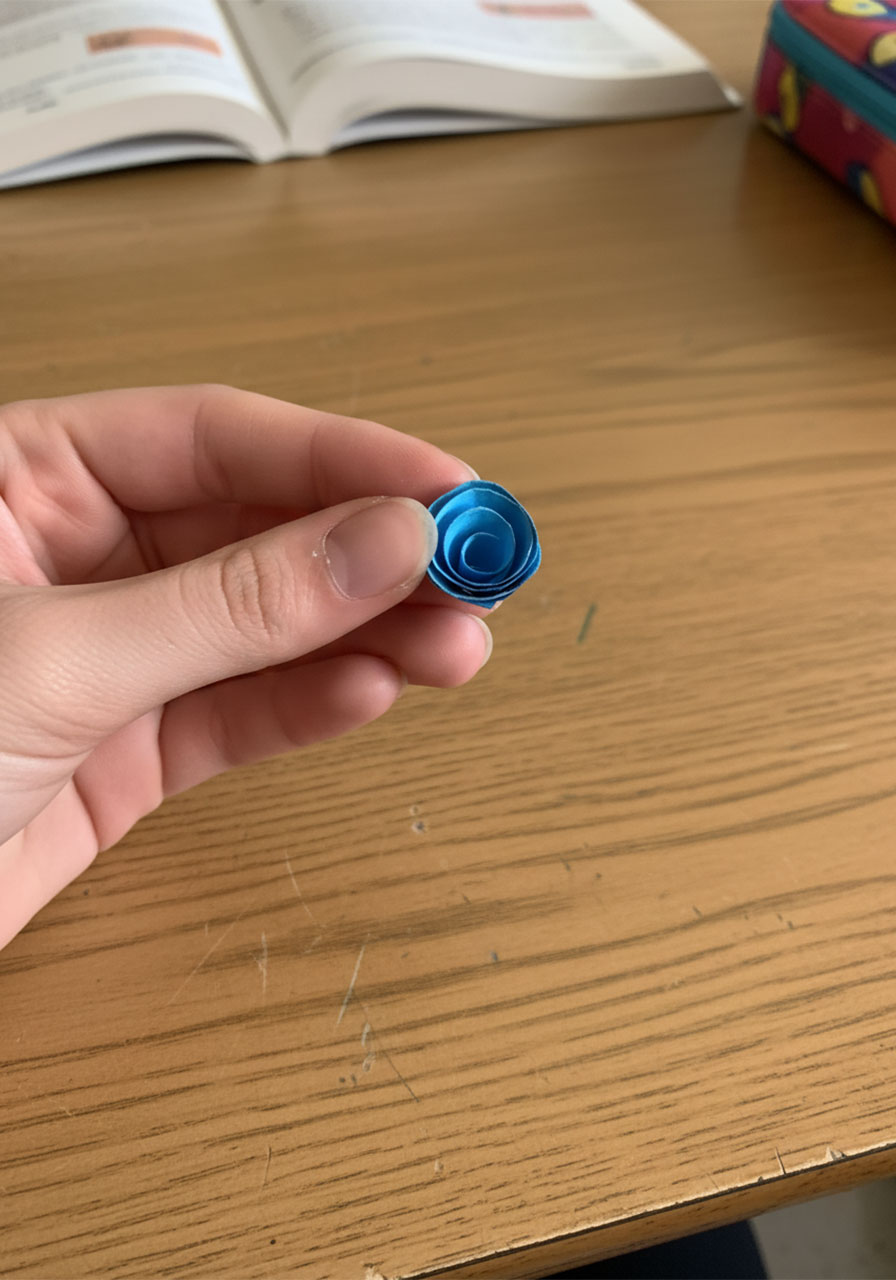
5. Slide the rolled paper off the stick gently and let it loosen just a little – it will naturally bloom open into a rose shape.
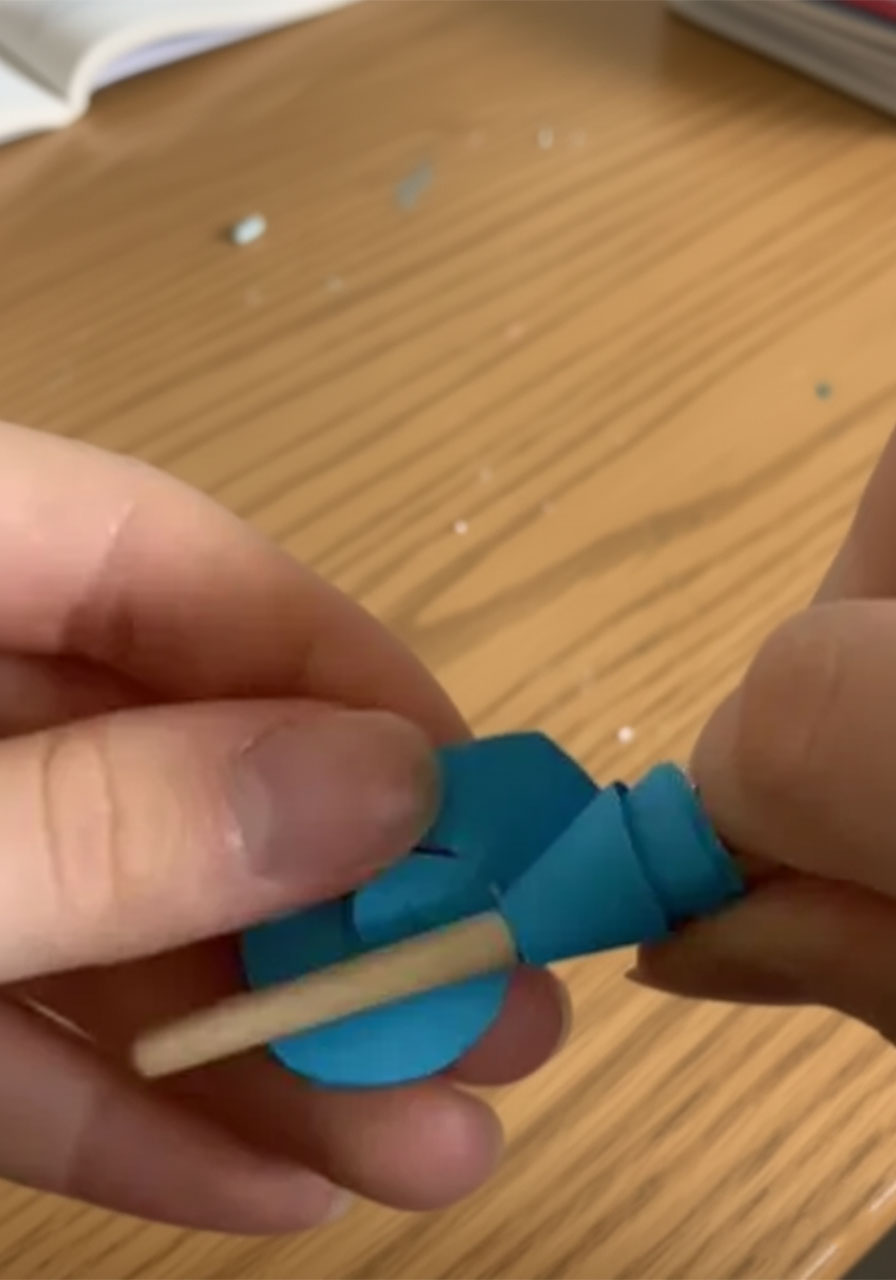
6. Put a small dot of glue on the very center bottom of the rose to hold the shape in place. Done! Your first paper rose is complete.
Make a lot of these – you’ll want enough to cover your entire heart base. Mixing dark navy, light blue, and yellow gives the bouquet that rich, layered look. Aim for at least 30 to 40 roses for a full, lush finish.
Pro Tip: Make roses in a variety of sizes – some tight and small, some looser and larger – for a more natural, textured bouquet look.
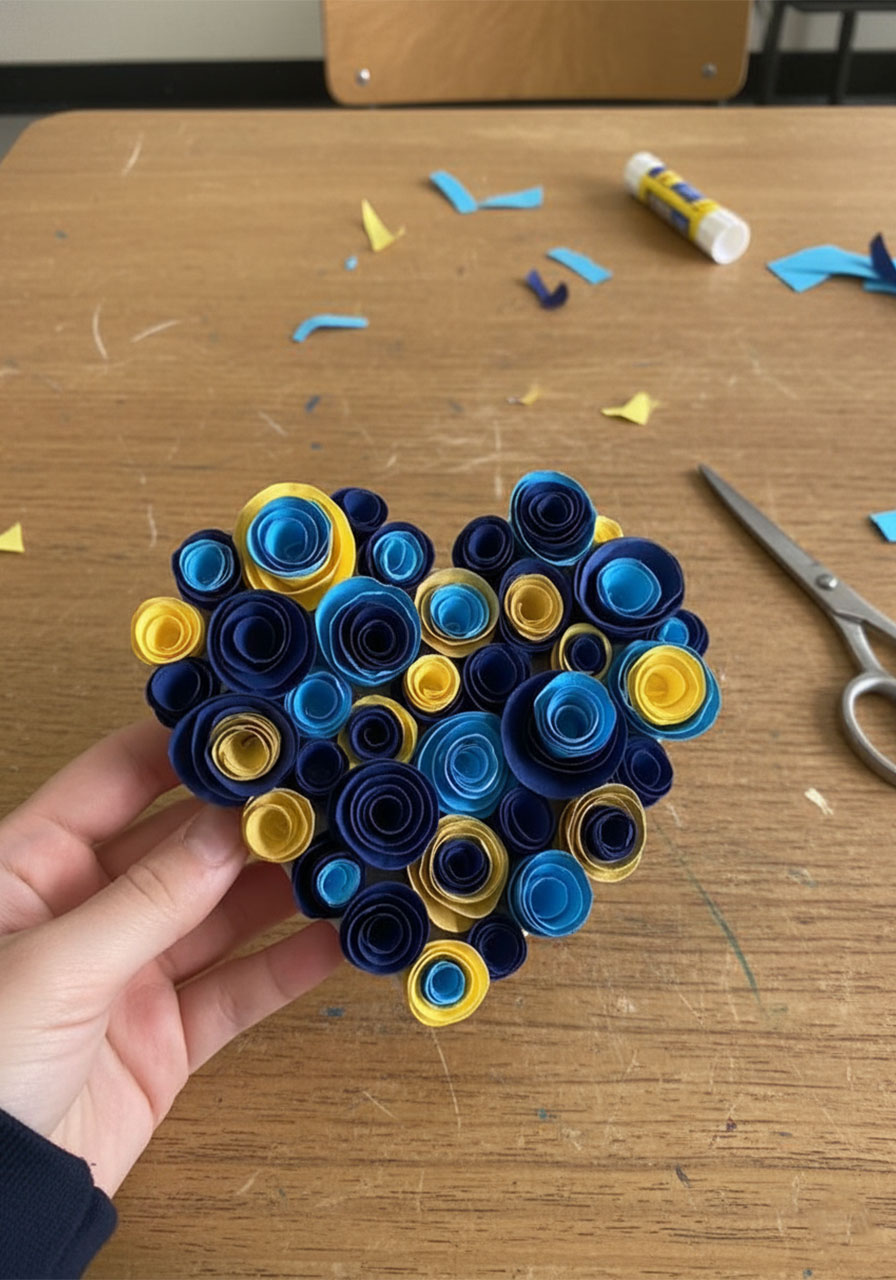
Step 3: Cover the Heart in Roses
Now comes the satisfying part. Apply a small dot of glue to the flat bottom of each paper rose and press it onto your heart base. Start from the edges and work inward, layering the roses close together so no base paper shows through.
Alternate your colors as you go – navy blue, light blue, yellow, repeat. Keep going until every inch of the heart is covered in a gorgeous 3D floral texture. When you hold it up, it should look like a miniature garden.
Step 4: Make the Bouquet Wrapper
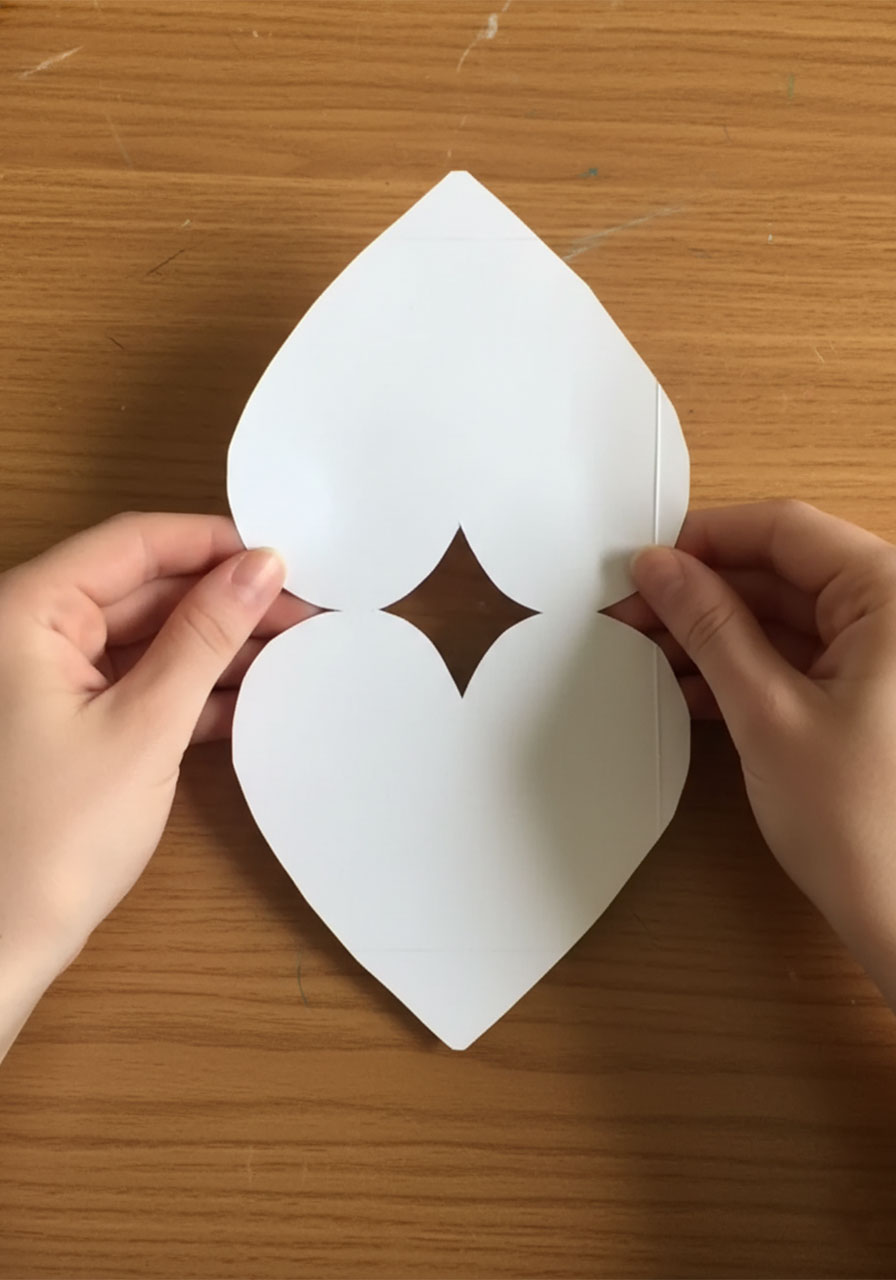
Take a sheet of light blue cardstock and cut it into a large heart shape – bigger than your flower heart. Then fold both sides of this heart inward so they meet in the middle, forming a cone or envelope shape. This is the “wrapper” that your bouquet will sit inside, just like a real flower bouquet from a shop.
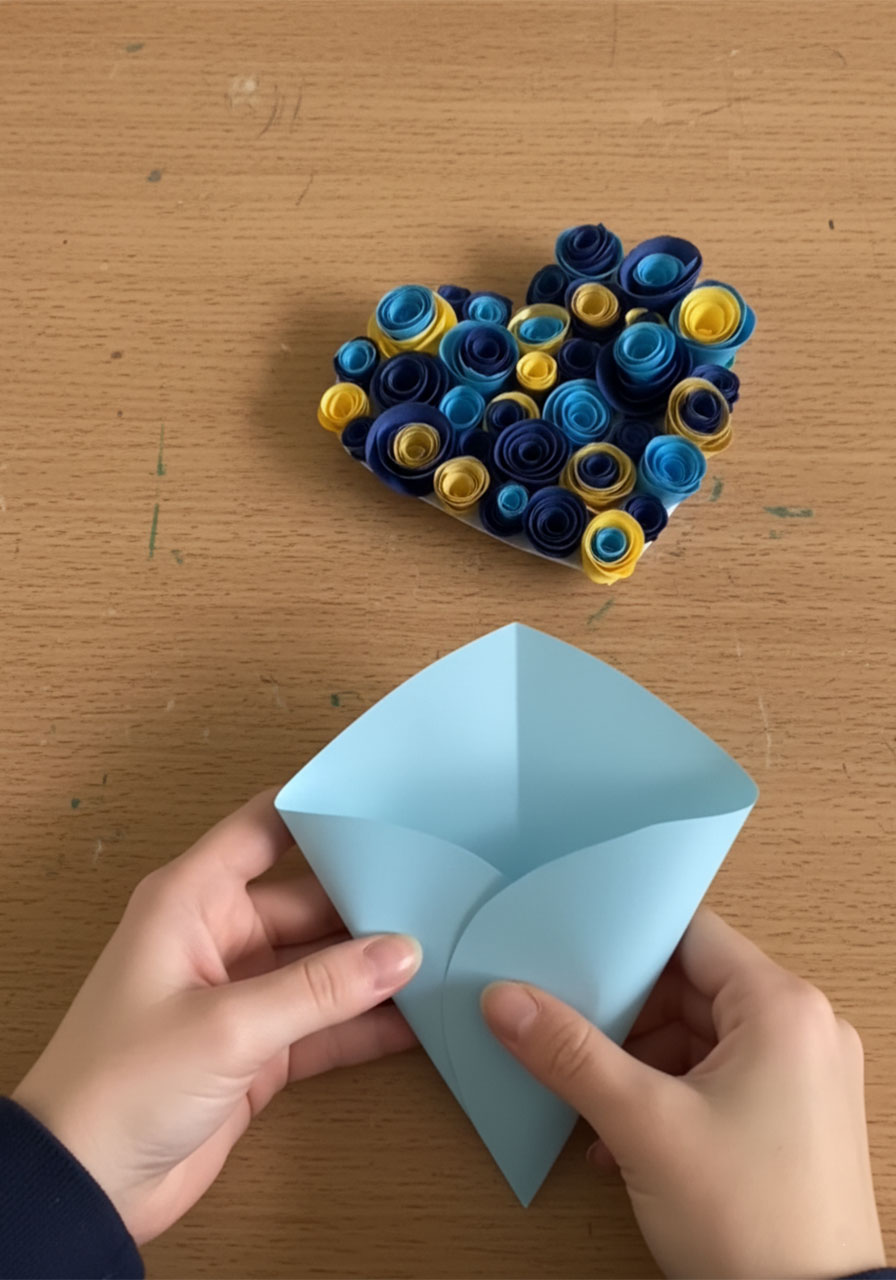
You can secure the cone shape with a small piece of tape or a dab of glue on the inside. Slide your flower heart into the top of the cone. It should nestle in beautifully, flowers facing up.
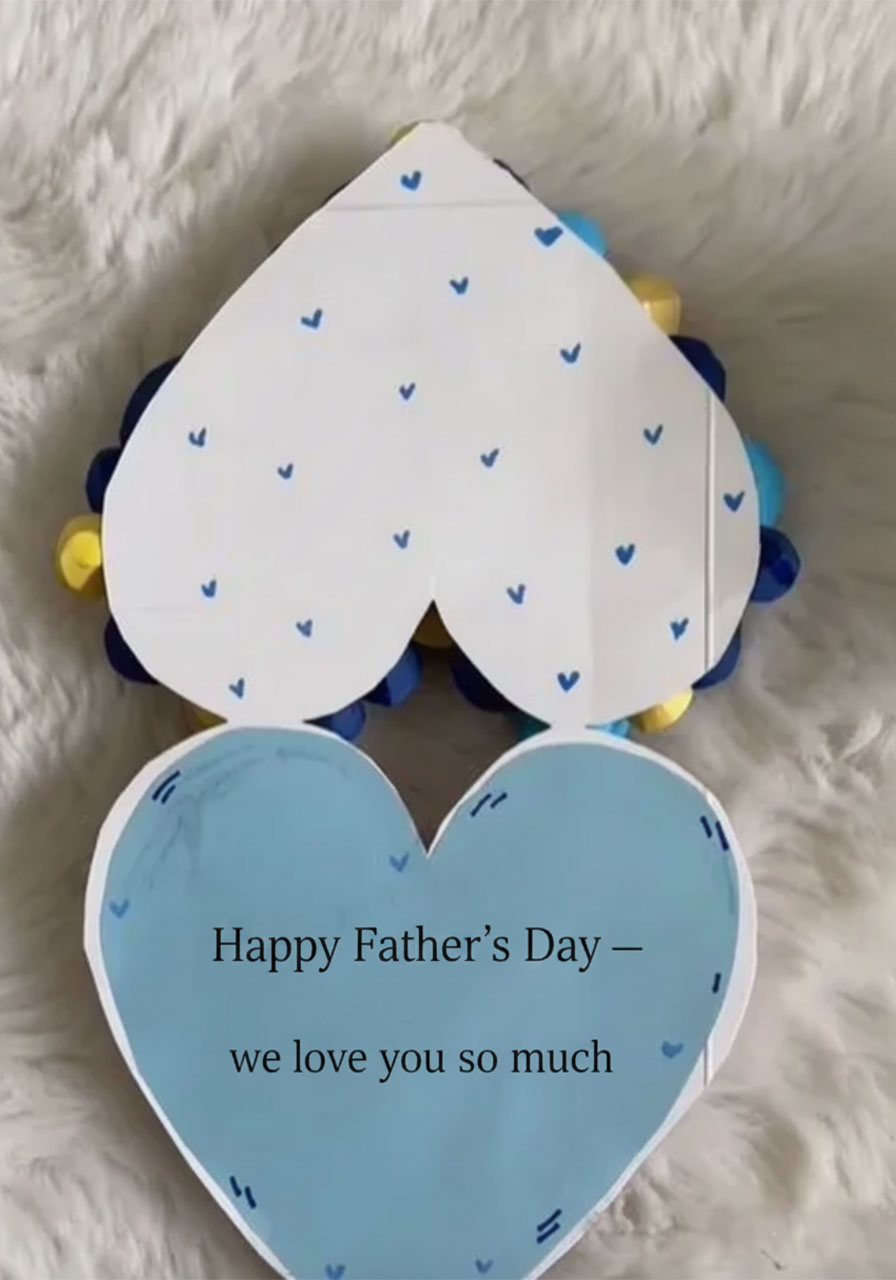
Step 5: Create the Hidden Message Card
Here’s where the real magic happens – the detail that makes this gift go from “beautiful” to unforgettable.
Cut two heart shapes out of white or light blue paper, the same size as each other. Connect them at the top edge (like a double heart that folds open) or keep them separate and glue one to the back of the flower heart so it can flip out.
On the inside of this double heart, write your message:
- “Happy Father’s Day – you’re our favorite person in the whole world.”
- “To the Dad who fixed everything, cheered the loudest, and loved the most.”
- A favorite memory, an inside joke, or even little notes from each kid.
You can also add tiny drawings, doodles of hearts, or little blue heart stamps with a marker. When Dad opens the bouquet wrapper, this message card is the secret waiting inside. Tuck it behind the flower heart or fold it neatly into the cone so he discovers it himself.
Step 6: Add the Gift Tag
Cut a small rectangular tag and write your message on the front – “To the Best Dad,” “Happy Father’s Day,” or anything that feels personal. Glue or tuck this tag onto the front of the blue cone wrapper, just like a real boutique bouquet would have.
And that’s it. You just made something extraordinary.
Ways to Make It Even More Personal
This gift is already incredible right out of the box – but if you want to take it up a notch, here are a few ideas that’ll really seal the deal.
Use his team’s colors. Swap out the blue and yellow for your dad’s favorite sports team colors. Instantly personal, instantly meaningful, zero extra effort.
Add a tiny photo. Leave one small open spot in the center of the rose heart and glue a tiny circular photo of the kids – or a family photo – right in the middle. He’ll stare at it every single day.
Spritz on a little scent. A tiny spray of his favorite cologne on the paper roses turns this into a full sensory experience. It sounds simple, but it makes the gift feel wildly thoughtful.
Let the kids sign it. If you’re making this with children, have each kid doodle their name, draw a little portrait of Dad, or stamp their handprint on the inside message card. Years from now, that’ll be the part he treasures most.
Go big. Make a larger version using a full sheet of cardstock for the heart base and bigger rose circles. A jumbo bouquet makes a stunning centerpiece and an even more impressive gift.
A Few Things That’ll Make Your Life Easier
Before you dive in, here are a few small tips that make a big difference in how smoothly everything goes.
Use cardstock instead of regular printer paper if you can – it holds the rose shape much better and gives the bouquet a sturdier, more polished look.
Don’t worry about making perfect spirals. Wobbly spirals make wonderfully organic roses. Imperfect is actually better here.
Keep your glue dots small. A tiny dab holds the rose just as well as a big squeeze, and it keeps things clean and neat.
Make more roses than you think you need. It’s so much easier to have extras than to stop mid-project to make more.
Assembly-line your roses. Cut all your circles first, draw all your spirals, cut them all, then roll them all at once. It goes much faster that way.
The Gift He’ll Keep Forever
Here’s the thing about Father’s Day gifts: the ones that land deepest are never the expensive ones. They’re the ones that prove someone slowed down, paid attention, and created something specifically for him.
This Paper Rose Heart Bouquet does all of that. It takes time – but not too much. It takes creativity – but not expertise. And it results in something that lives on a bookshelf, not in a drawer.
Make it with your kids. Make it solo. Make it for Dad, for Grandpa, for a father figure who deserves to feel seen this year.
Because the best gifts aren’t bought. They’re made – with paper, scissors, glue, and a whole lot of love.
More Father’s Day Ideas to Keep the Fun Rolling:
Handprint “Mini-Me” Dad: The Cutest DIY Father’s Day Keepsake Your Kids Can Make
How to Make the Best Dad Ever 3D Pop-Up Father’s Day Card (Step-by-Step DIY)
Father’s Day Handy Dad Heart Card (The Cutest Craft for Your Handy Dad or Grandpa!)
Father’s Day Pop Up Card – I Whaley Love You Dad! (The Cutest Card He’ll Ever Get)
How to Make a Suit-and-Tie Father’s Day Card (He’ll Actually Want to Keep)
The Cutest Father’s Day Craft: Printable Toolbox Cards Kids Can Color & Gift
Dad, You Rock! How to Make a Handprint Guitar Father’s Day Card (Printable Included)