
Raise your hand if you’ve ever tried to explain evaporation to a room full of seven-year-olds using only a whiteboard and a diagram. It’s rough out here.
The water cycle is one of those topics that sounds simple on paper. Evaporation, condensation, precipitation, collection. Four words, one arrow going in a circle. Easy, right?
Except kids don’t really “get” a cycle until they watch it happen with their own eyes. That’s the whole secret. You don’t need a fancier worksheet. You need a fogged-up bag, a cloud made of shaving cream, or a bowl on a sunny windowsill doing all the explaining for you.
Below are three teacher-tested, parent-approved water cycle experiments that turn an abstract science standard into something kids can actually watch, touch, and talk about. Each one uses supplies you probably already have at home or in your classroom closet. Each one comes with a built-in “aha” moment. And each one pairs perfectly with a simple recording sheet, so the science sticks.
Let’s get into it.
Experiment 1: The Sunny Bowl Water Cycle
This is the classic, and it earns that title. It’s the closest thing to watching a tiny weather system form right on your kitchen counter.
Best for: Kindergarten through 2nd grade, whole class or small group.
Time to Play: A few minutes of setup, then several hours of “wait and watch” (this is a great morning-to-afternoon experiment).
What You’ll Need:
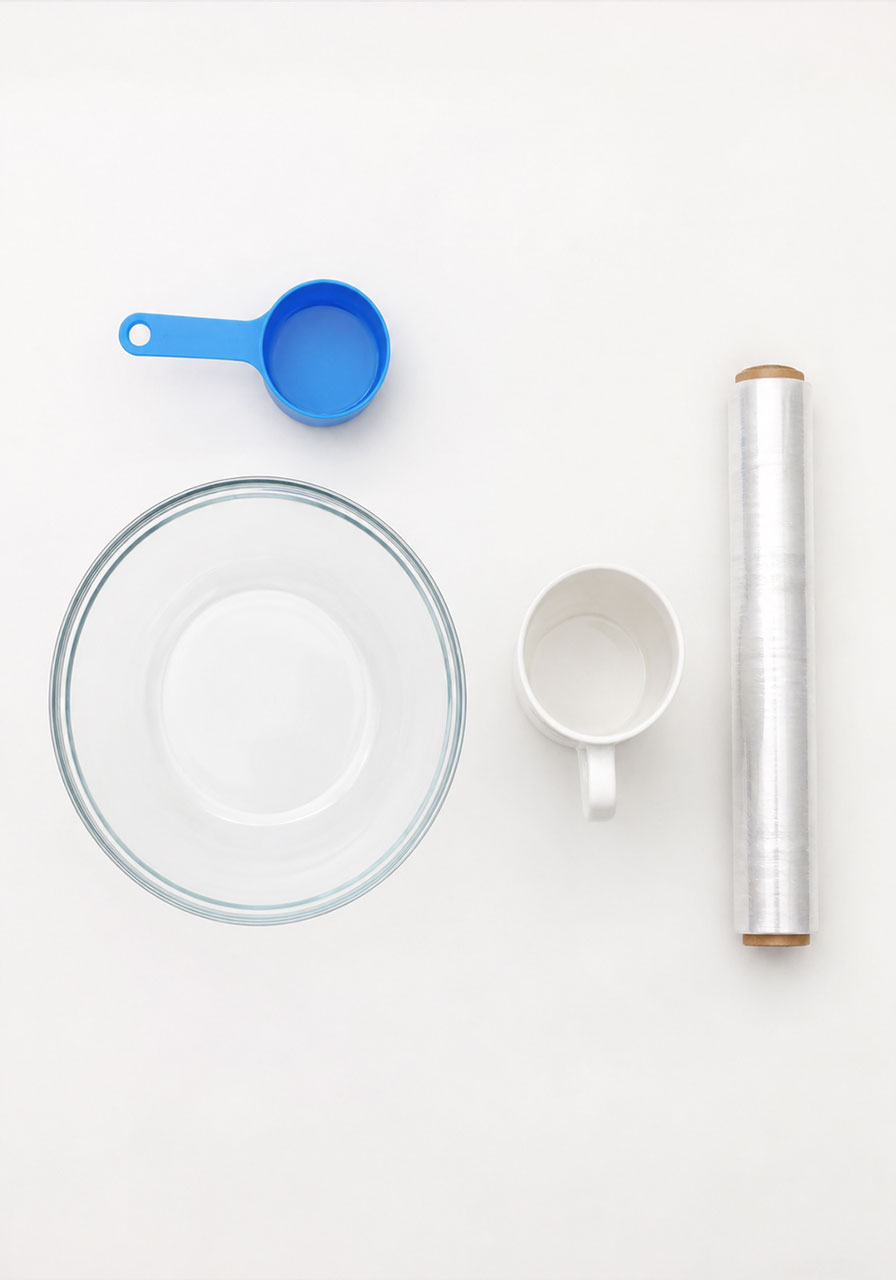
- A large clear bowl
- A small mug or cup
- Plastic wrap
- Water
- A sunny window or spot outside
How to Play:
1. Add a couple inches of water to the bottom of the large bowl.
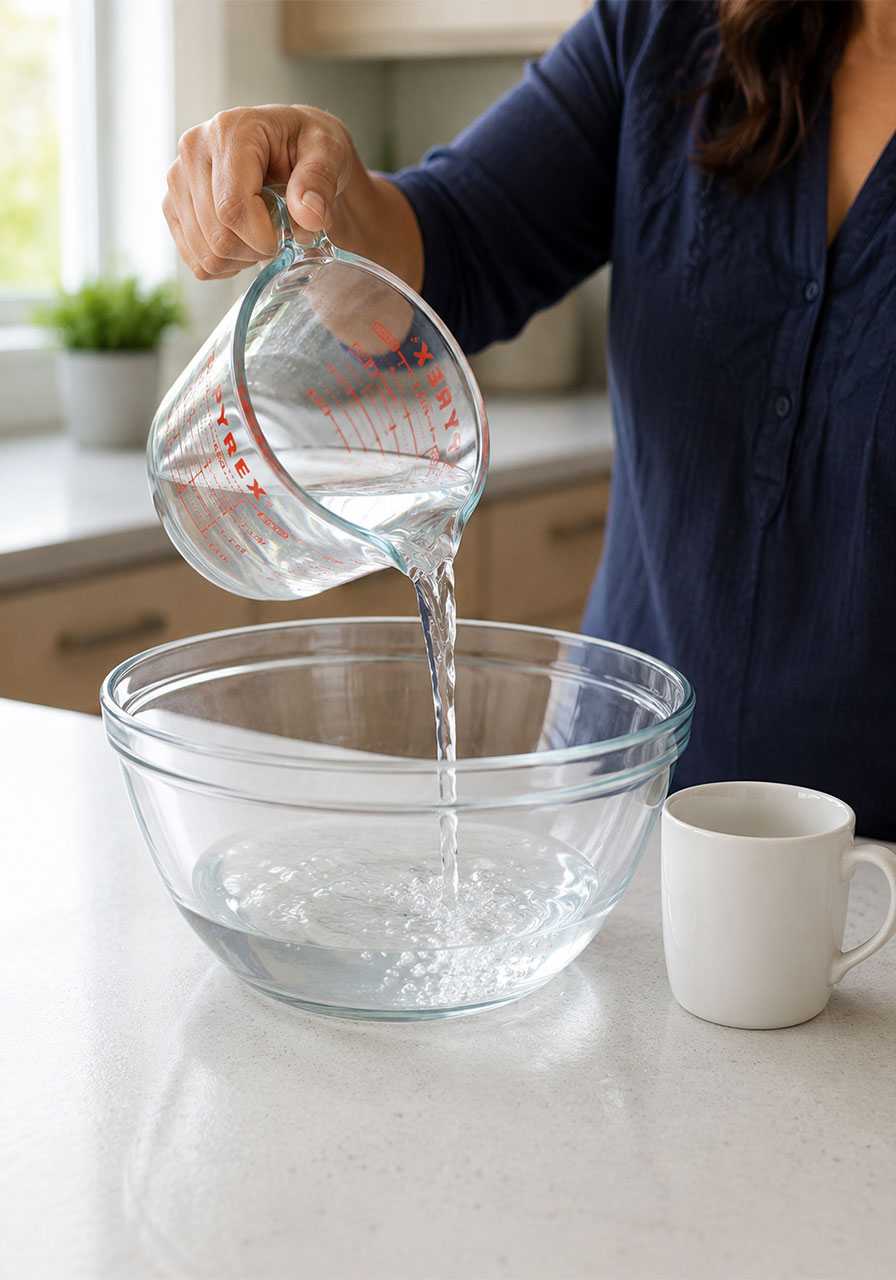
2. Place the small mug in the center of the bowl, standing upright, so it stays dry inside.
3. Stretch plastic wrap tightly over the top of the bowl to seal it.
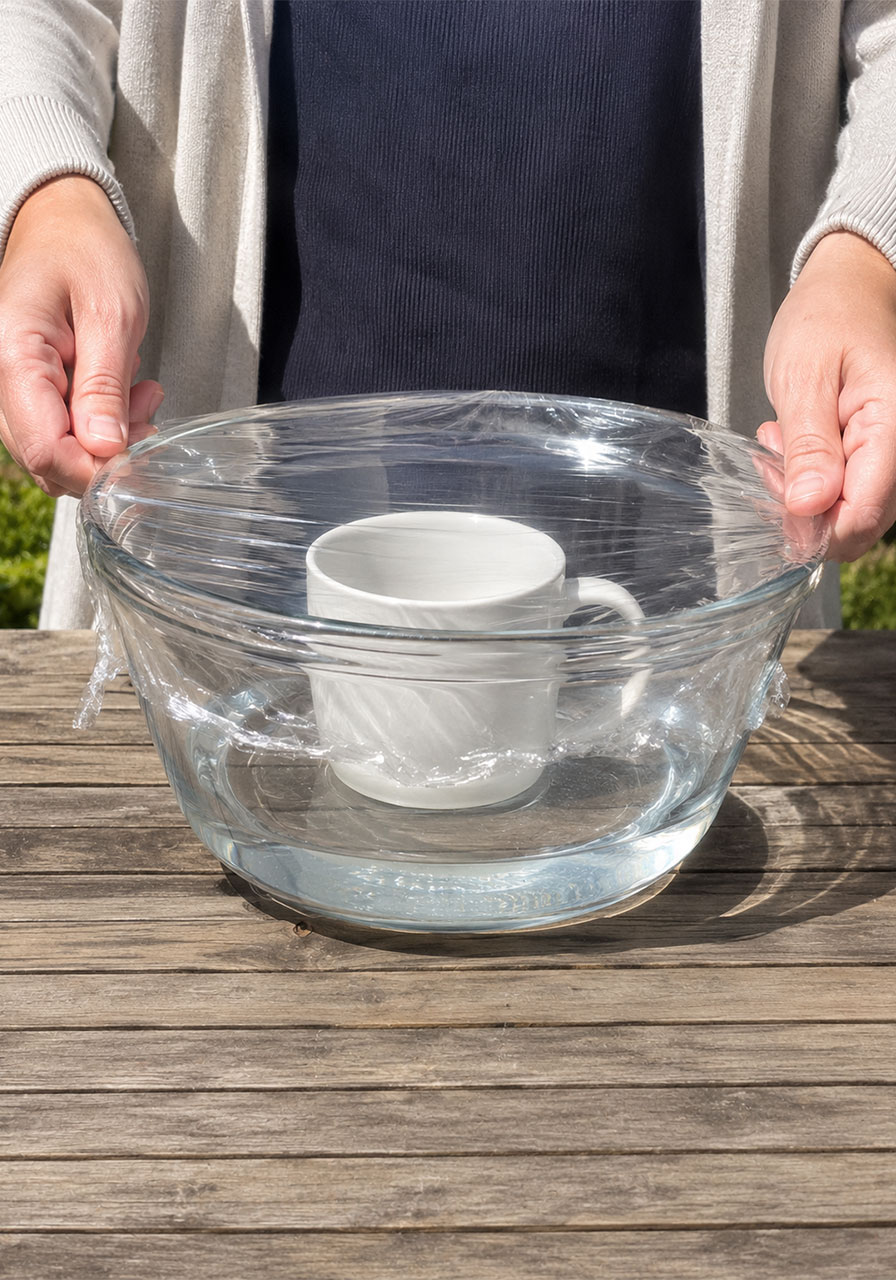
4. Set the whole thing in direct sunlight and leave it alone for several hours.
5. Come back and observe. You should see condensation clinging to the underside of the plastic wrap, with some droplets dripping down into the mug.
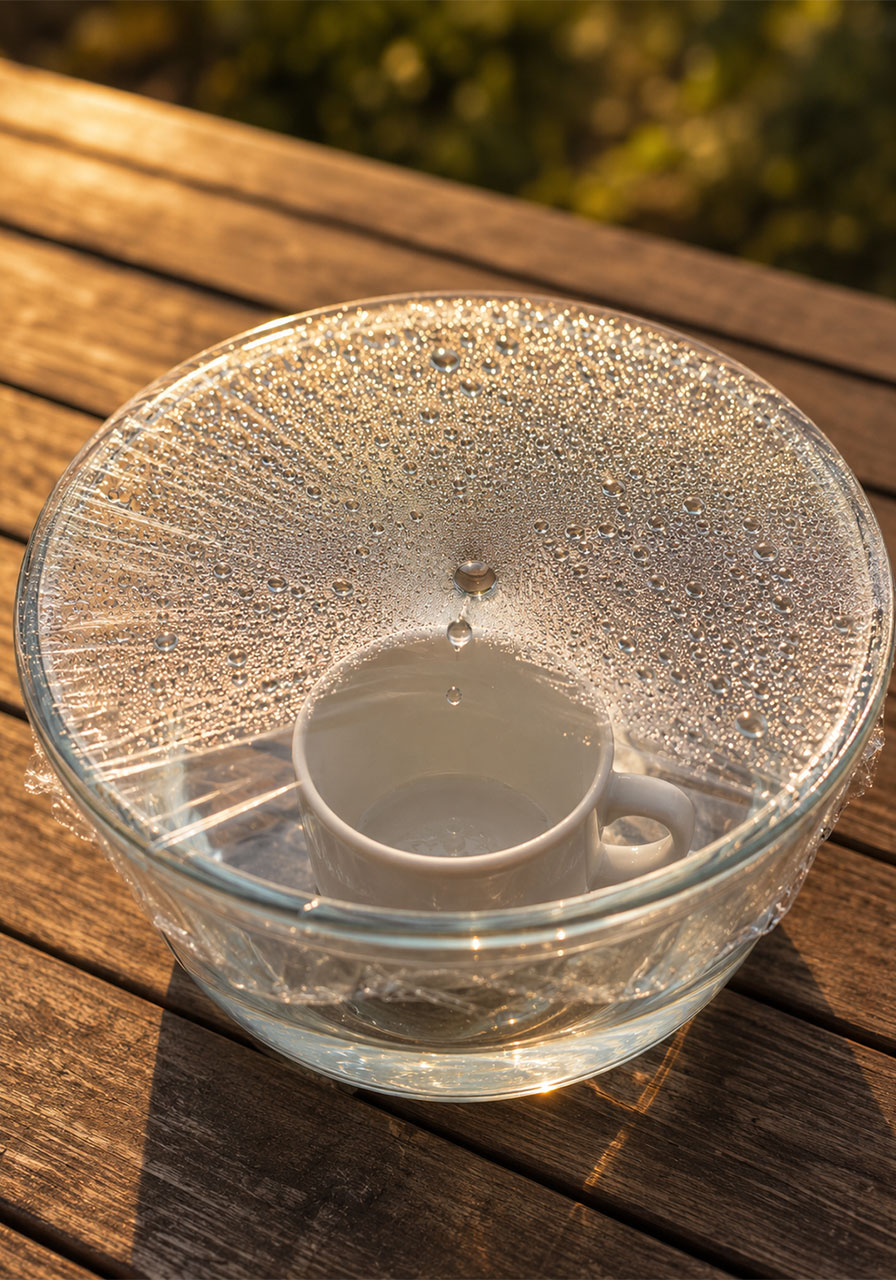
Here’s why this one works so well: kids can see all four stages of the water cycle happening in one container. The sun heats the water and turns it into vapor. That’s evaporation. The vapor hits the cooler plastic wrap and turns back into droplets. That’s condensation. The droplets get heavy and fall. That’s precipitation. And they land in the bowl or the mug, which represents a lake, ocean, or mountain collecting rainfall. That’s collection.
Once the experiment is done, have kids draw and label what they observed using the water cycle vocabulary words. You can also snap a photo of the actual bowl and have students insert it into a digital slide, Seesaw activity, or Pic Collage, then label each part directly on the photo. Seeing their own real experiment labeled with the vocabulary is a much stronger memory hook than seeing it on a printed diagram alone.
Pro Tip: Do this one first thing in the morning so there’s plenty of sunny hours for condensation to build up by afternoon. A cloudy day will slow things down, so save this experiment for forecasted sunshine.

Experiment 2: The Water Cycle in a Bag
If you love the bowl experiment but want something even more hands-on for each student to do individually, this is your answer. Every kid gets their own tiny water cycle, taped right to a window.
Best for: Individual student work, or a whole class set of window experiments lined up side by side.
Time to Play: A few minutes to set up, then a few hours on a sunny window.
What You’ll Need:
- A quart-size Ziploc baggie
- Tape
- Water
- Blue food coloring (optional)
- A permanent marker (optional)
How to Play:
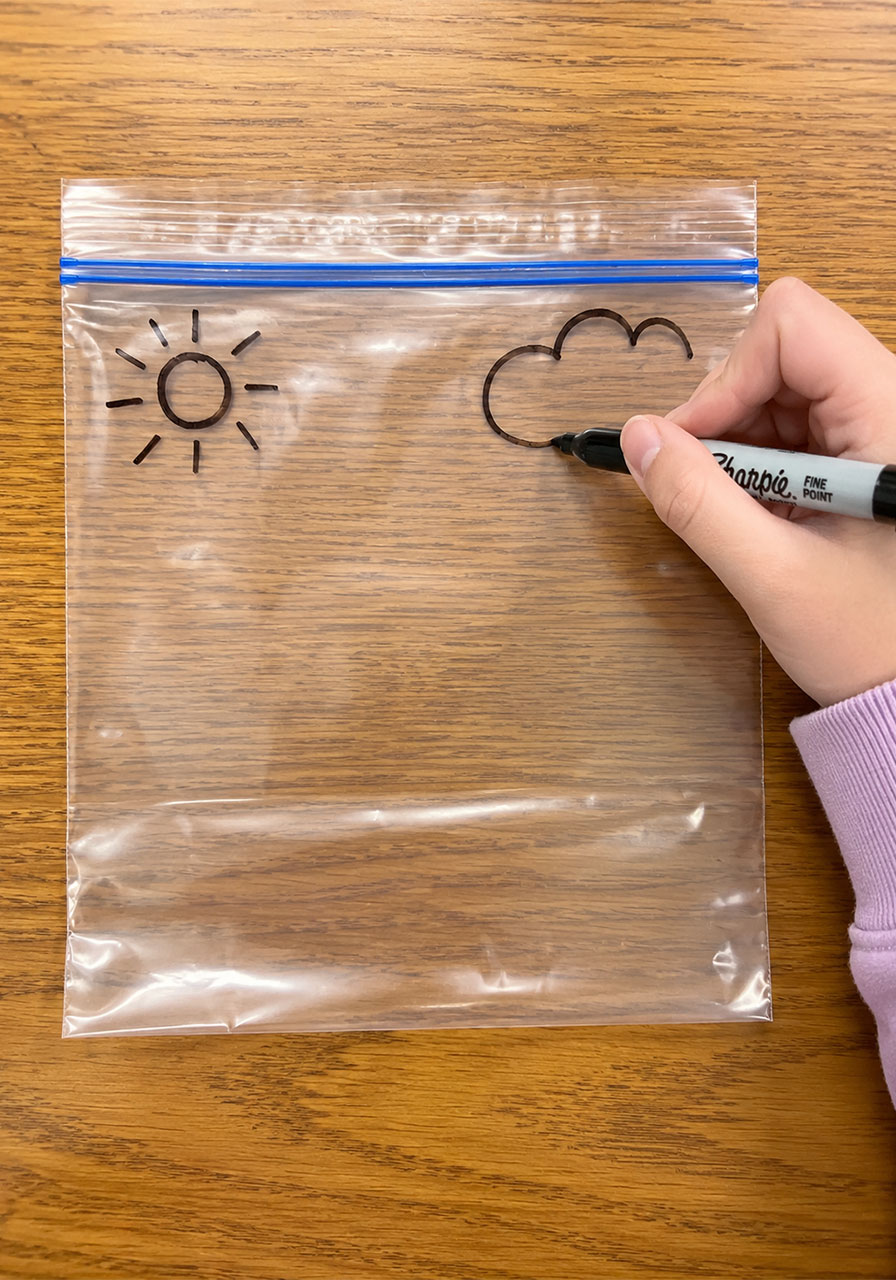
1. If you want to add a little extra clarity, draw a sun and a cloud near the top of the baggie with a marker, and a wavy line near the bottom to represent water.
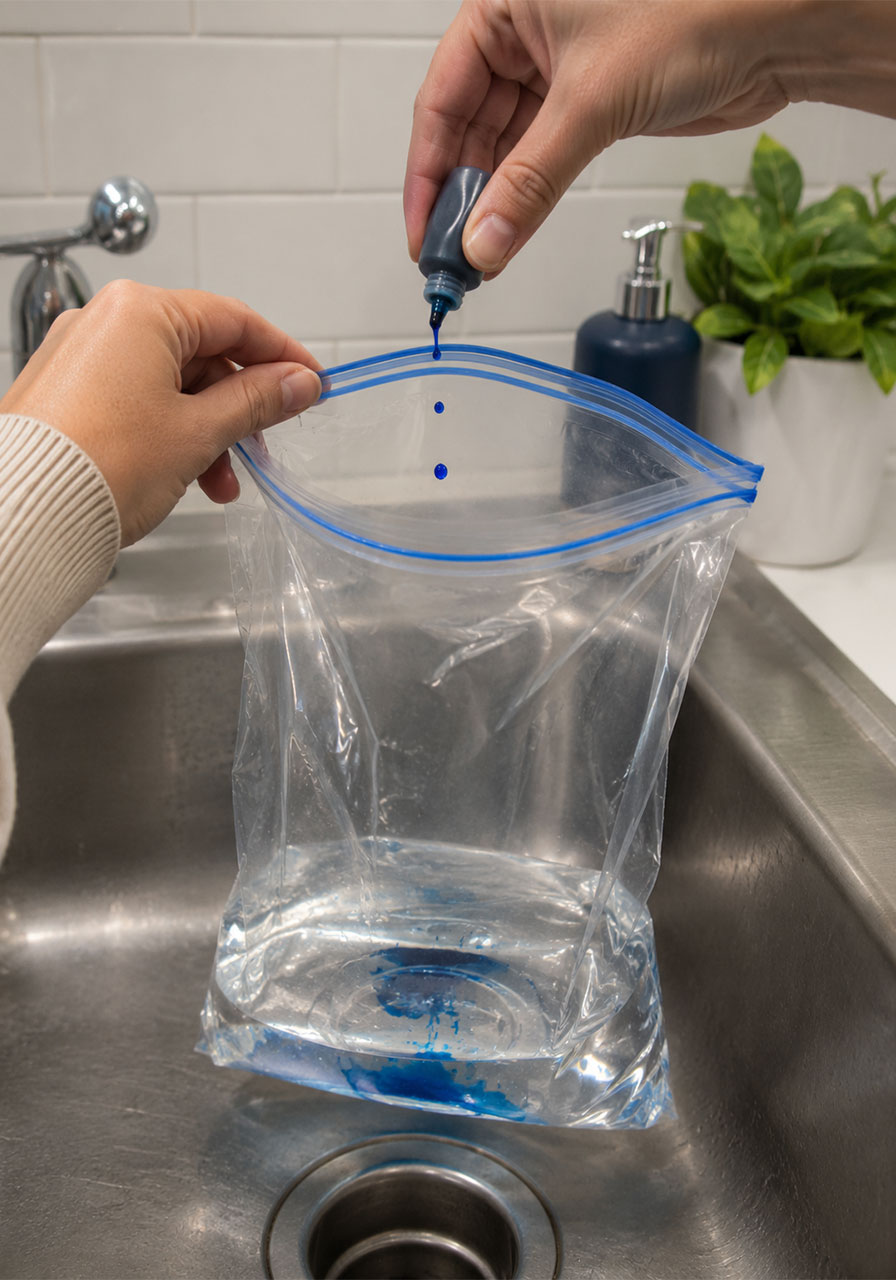
2. Add a small amount of water to the bottom of the bag, being careful not to splash the upper sides.
3. Add a few drops of blue food coloring to the water if you’d like a more visible effect.
4. Seal the bag and tape it securely to a sunny window.
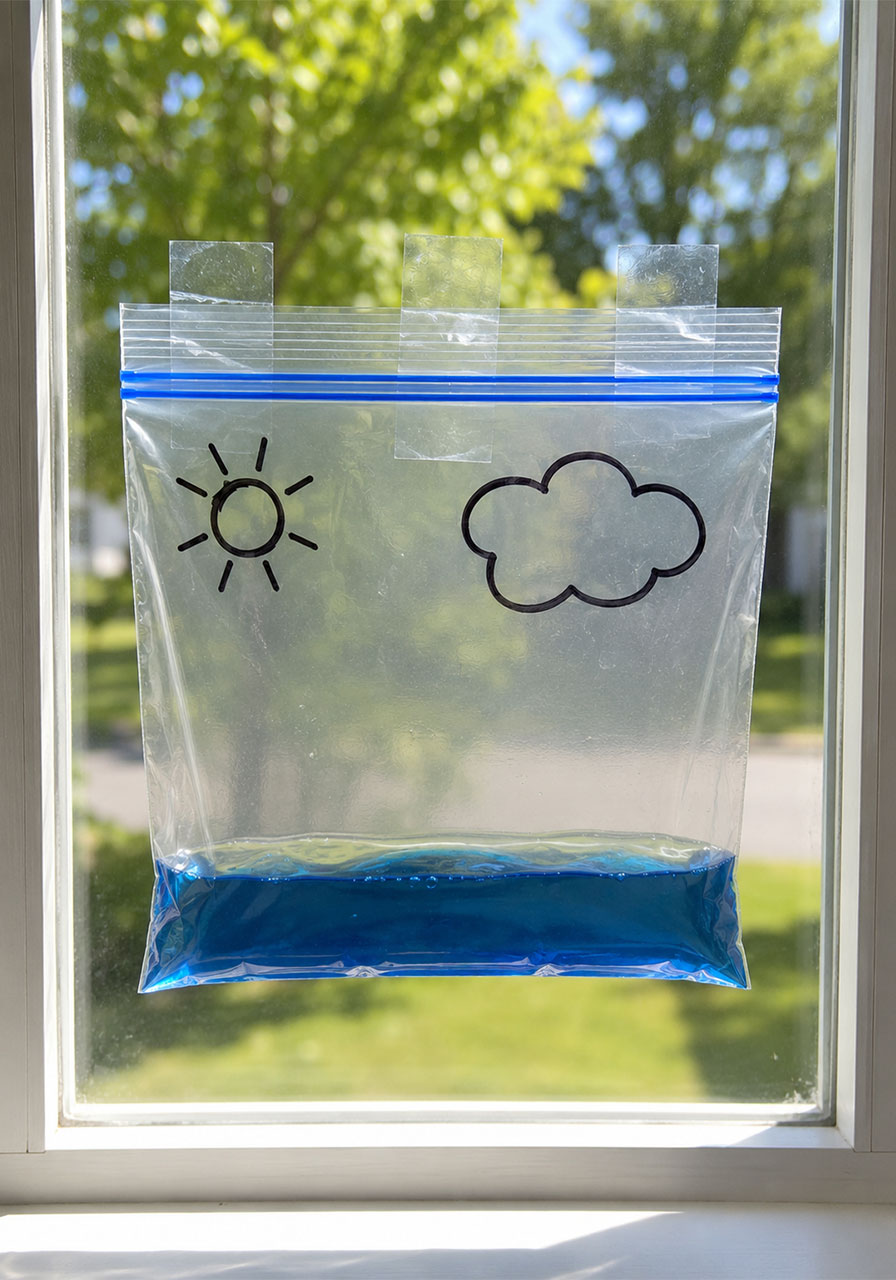
5. Leave it for several hours, or until you notice heavy condensation forming on the inside of the bag.
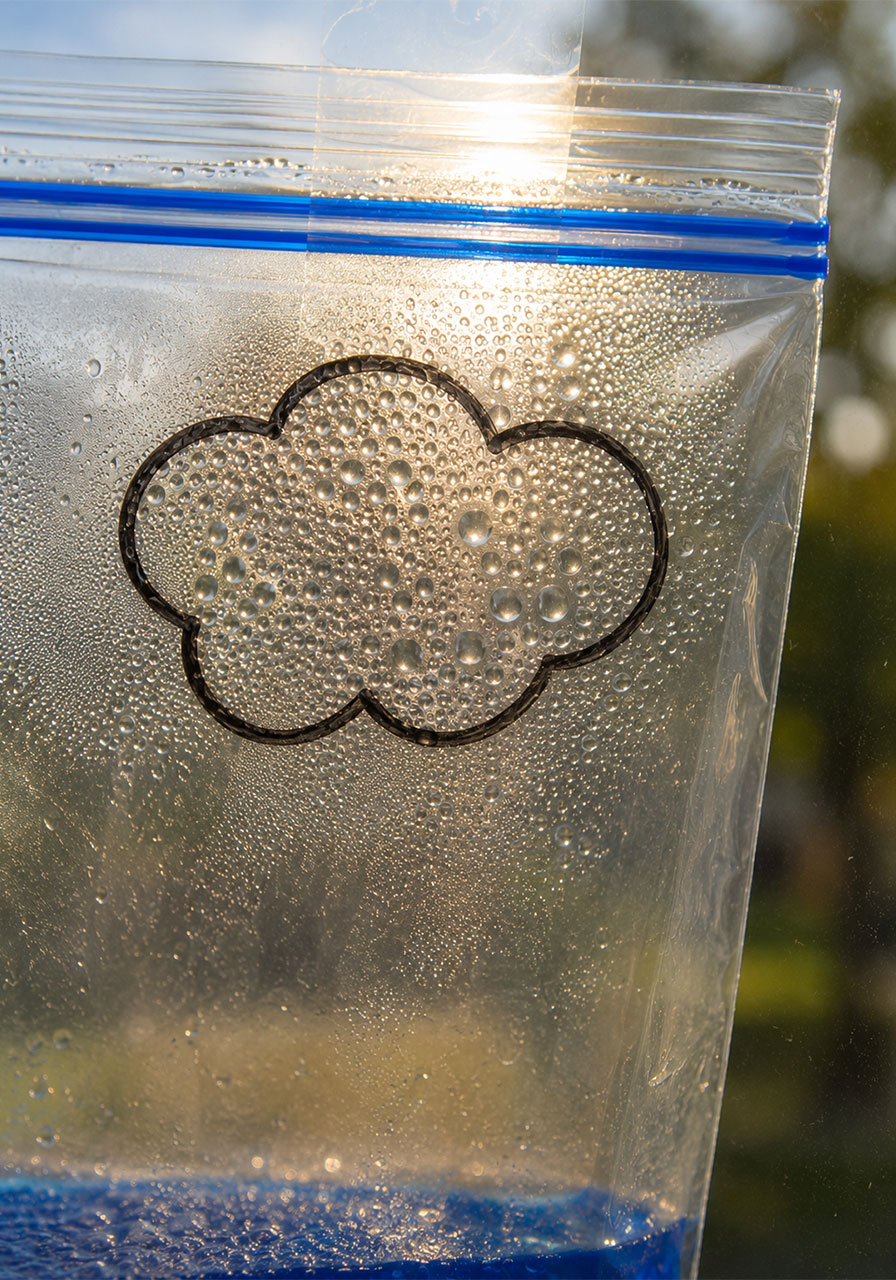
6. Remove the bag and let students observe. Give it a gentle tap if needed to help the water droplets fall.
This experiment shows the exact same four stages as the bowl version, but on a smaller, more personal scale. Kids can watch the colored water evaporate, rise, condense at the top of the bag, and eventually fall back down as tiny drops of “rain,” collecting again at the bottom.
Here’s a detail that always sparks a great classroom conversation: the water that condenses at the top of the bag comes back down clear, not blue. That’s because the food coloring is heavier than water vapor, so it stays behind while the water itself evaporates. It’s the exact same reason ocean water evaporates into fresh, salt-free rain, even though the ocean itself is salty. That one small observation does a lot of heavy lifting for understanding how evaporation actually works.
Once the bag experiment is finished, students can draw and label their own diagram using the water cycle vocabulary words, or take a quick photo and label it digitally using Seesaw, Pic Collage, or Google Slides.
Fun Variation: Line up everyone’s bags along the same window and let the class compare which ones show the most condensation. It’s a simple way to turn one experiment into a mini discussion about sunlight, temperature, and evaporation rates.
Experiment 3: The Shaving Cream Rain Cloud
This is the one that gets the loudest reaction. It’s part science experiment, part magic trick, and it’s the single best way to explain precipitation to a young learner.
Best for: Any age, especially great as a whole-class demo or a hands-on center activity.
Time to Play: 10 to 15 minutes, depending on how much shaving cream you use.
What You’ll Need:
- Shaving cream
- A small glass
- A medium or tall glass
- A straw or eye dropper
- Blue food coloring
- Water
How to Play:
1. In the small glass, mix about 3 tablespoons of water with roughly 10 drops of blue food coloring. This is your “rain” supply.
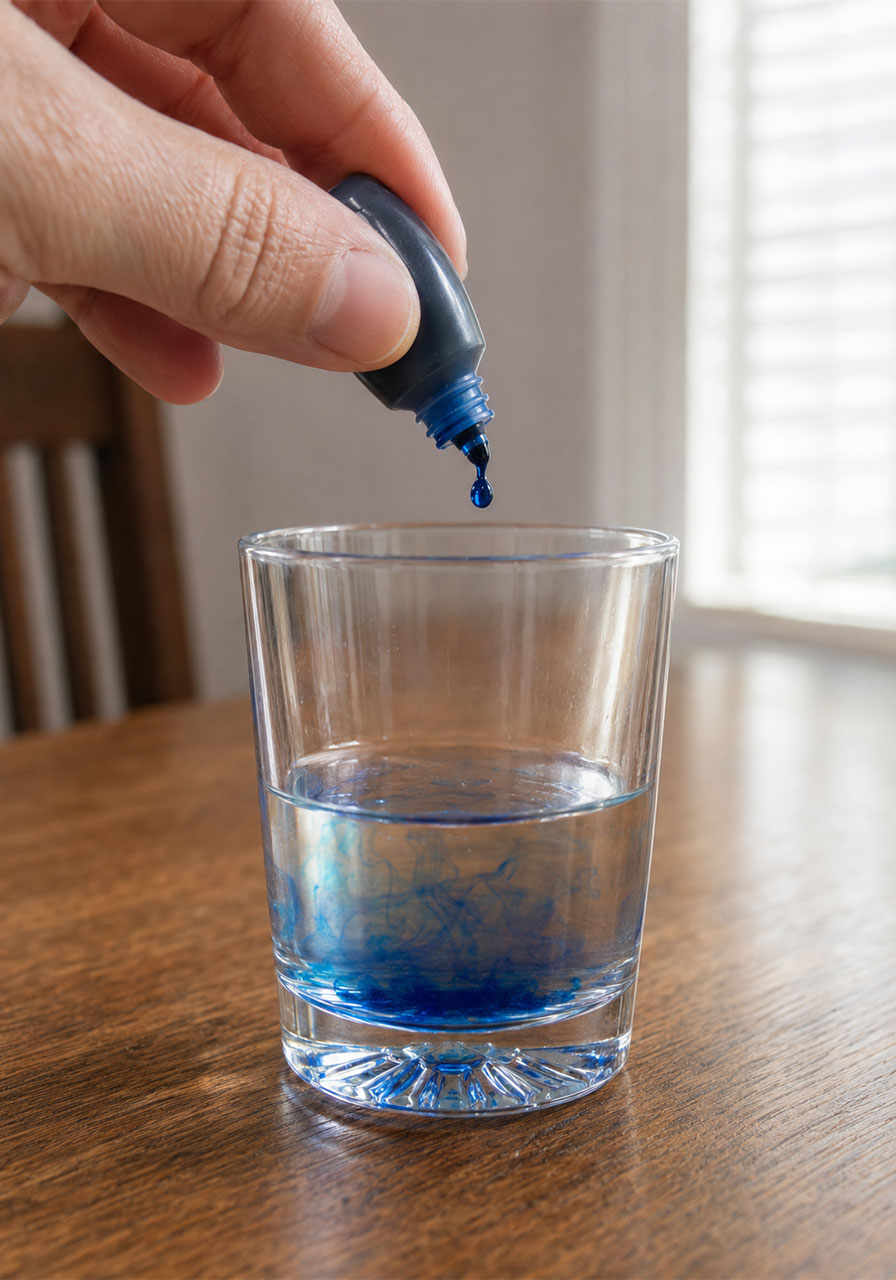
2. Fill the medium glass with water, then spray 1 to 3 inches of shaving cream on top. This shaving cream layer is your cloud. The thicker the layer, the longer the experiment will last.
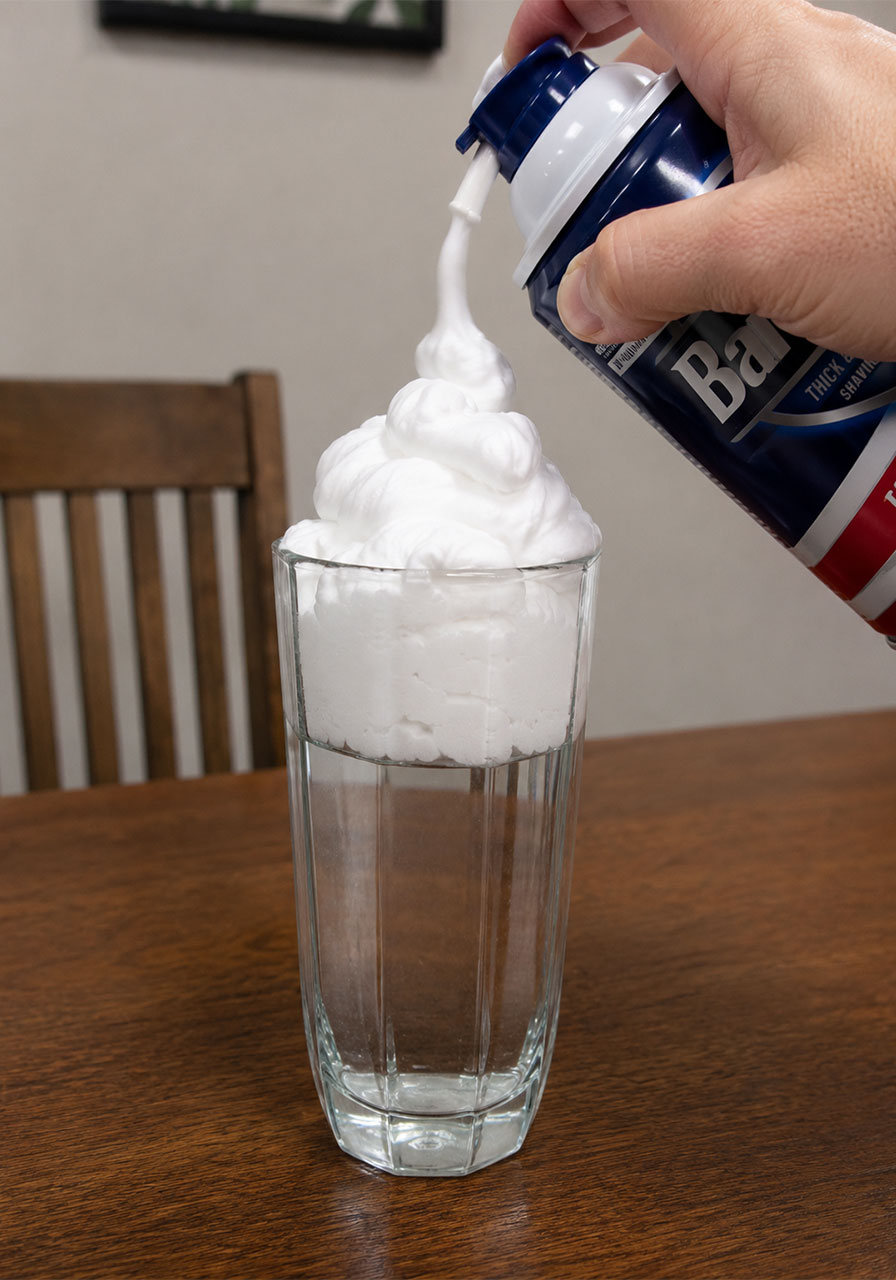
3. Using an eye dropper, or a straw with your finger over the top to control the drips, begin adding the colored water onto the shaving cream cloud, one drop at a time.
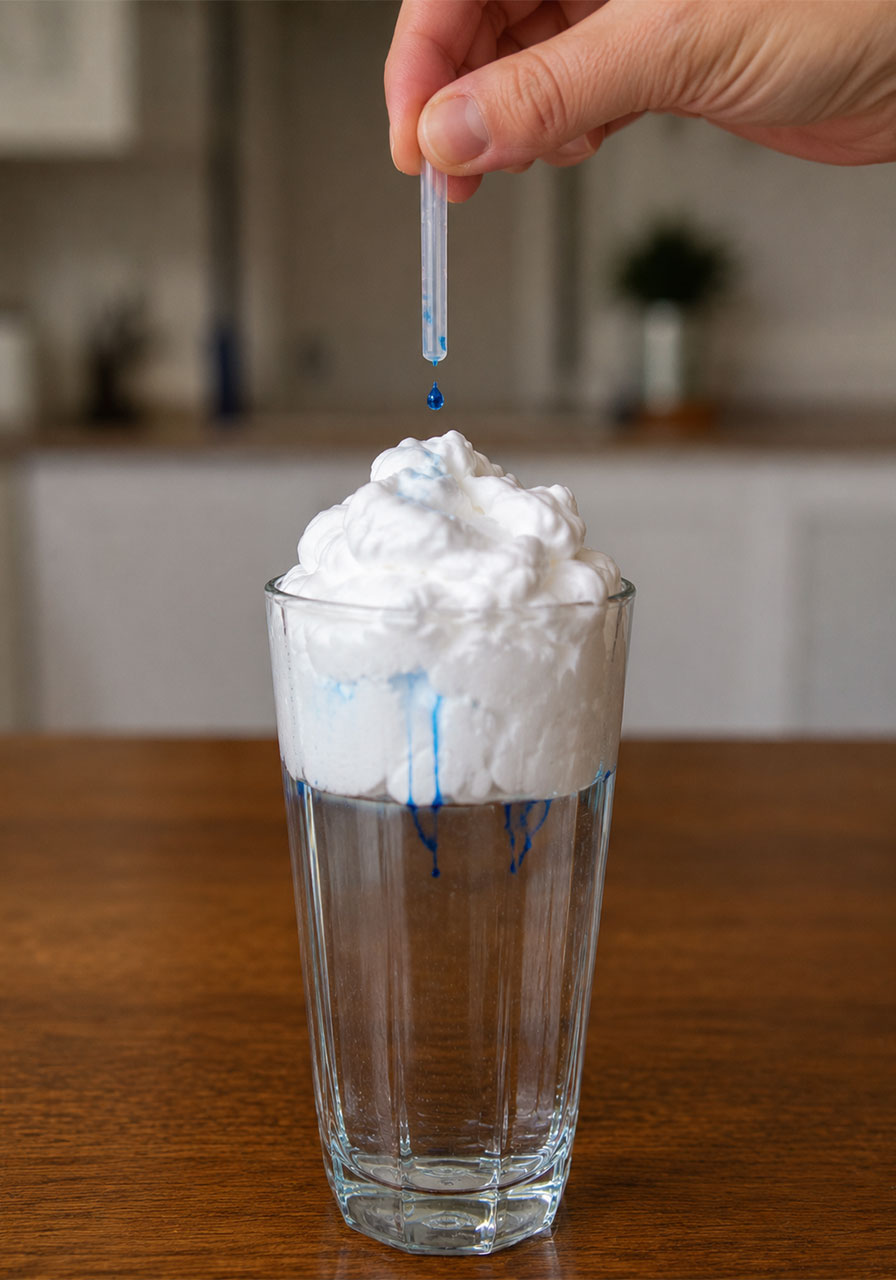
4. Keep adding drops and watch closely. Eventually the cloud will get too saturated to hold any more water.
5. Once the cloud reaches its limit, you’ll see colored “rain” start streaming down through the shaving cream and into the water below. Depending on how much shaving cream you used, this usually takes somewhere between 40 and 100 drops.
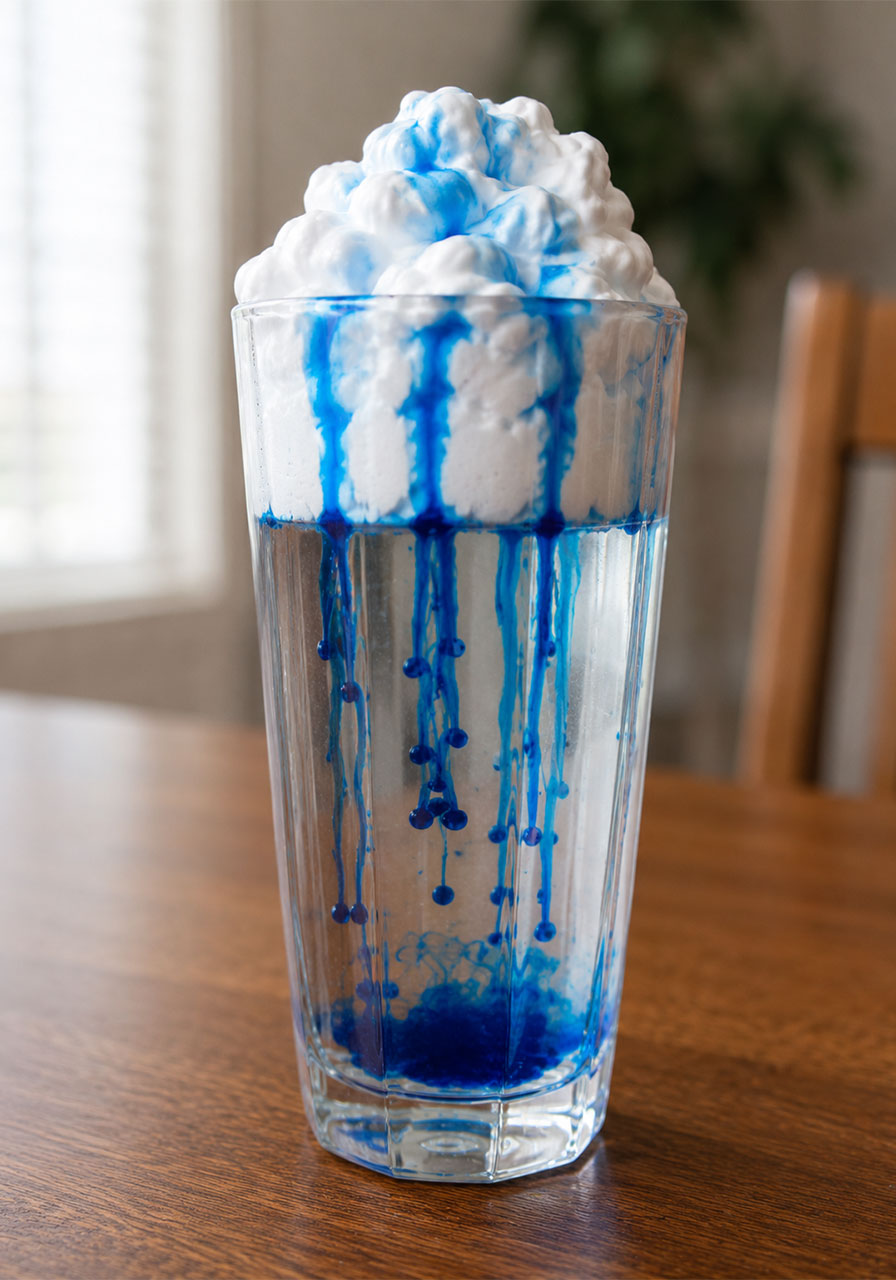
This experiment is a perfect stand-in for what actually happens inside a real rain cloud. Clouds hold water droplets until they get too heavy for the air to support them. Once that tipping point is reached, gravity takes over and the water falls as rain. Watching the “cloud” hold color after color of water, then suddenly release it all at once, makes that concept click in a way no textbook page can match.
Pro Tip: Before you start dropping water into the cloud, have students guess how many drops they think it will take before the rain starts, and write down their prediction. Count the actual number of drops as you go, then compare it to their guess at the end. It turns a simple demo into a real prediction-and-results science activity, and kids love finding out how close (or how far off) their guess was.
The Culminating Craft: A Water Cycle Wheel Students Can Spin
Once your class has run through one or all three experiments, it’s worth wrapping the unit up with a hands-on craft that ties everything together. A water cycle wheel is the perfect way to do it.
Best for: A culminating activity after any of the experiments above.
What You’ll Need:
- A paper plate
- A printable water cycle diagram (colored and labeled by students)
- Scissors and glue
- A brass fastener
- A simple raindrop cutout to act as the moving “arm”
How to Play:
1. Have students color a picture of the water cycle, making sure to include water, land, clouds, and sun.
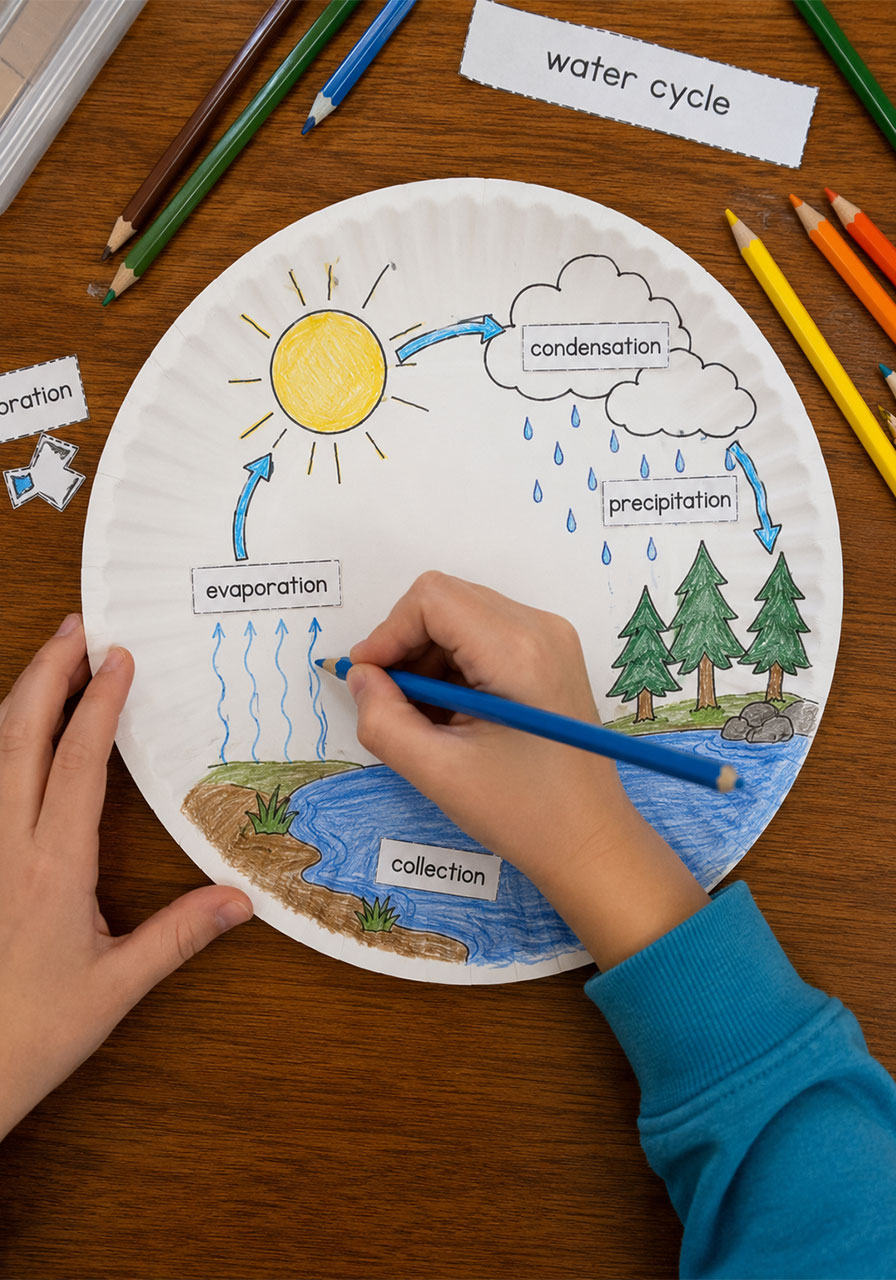
2. Label each stage using the vocabulary words: evaporation, condensation, precipitation, and collection.
3. Glue the finished diagram onto the paper plate.
4. Attach a raindrop-shaped arm to the center of the plate using a brass fastener, so it can spin freely.
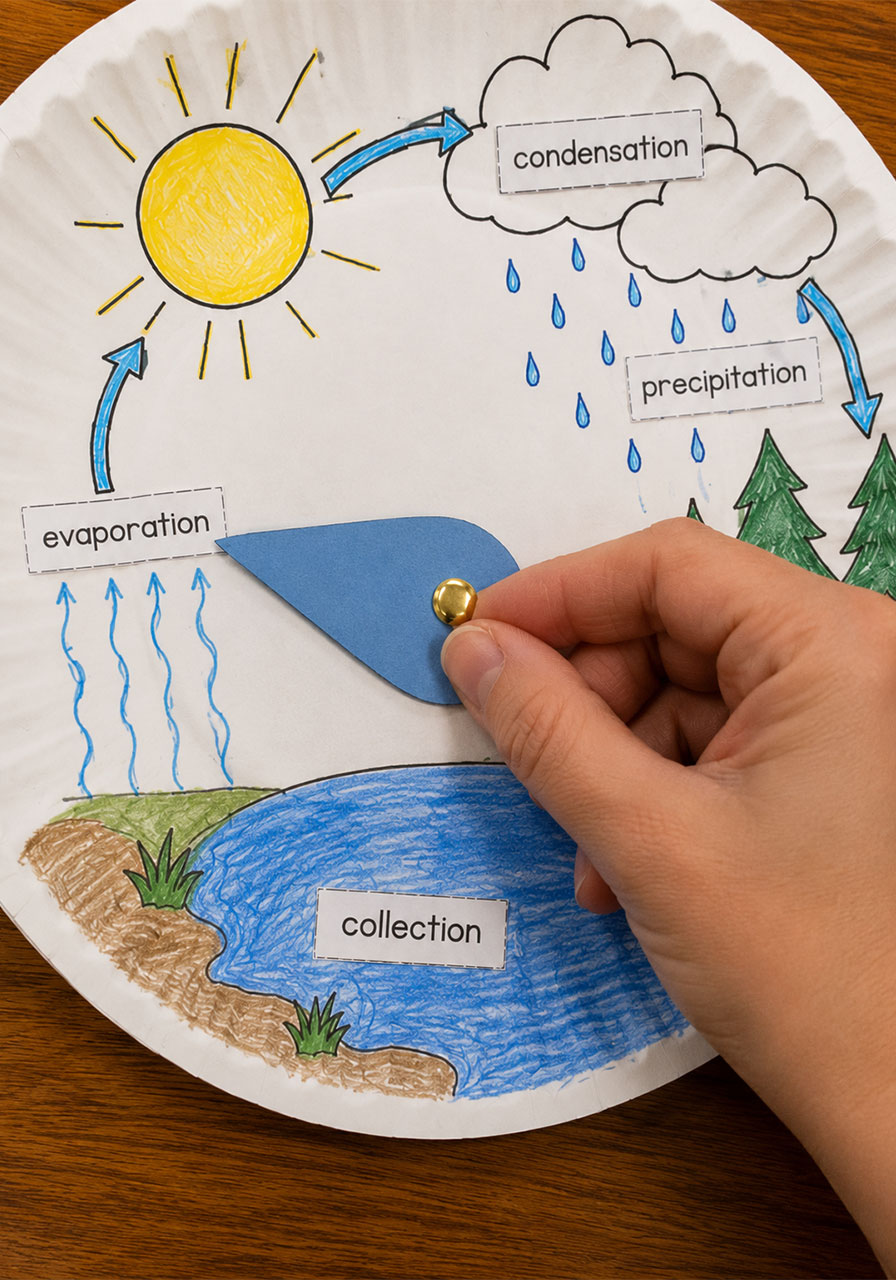
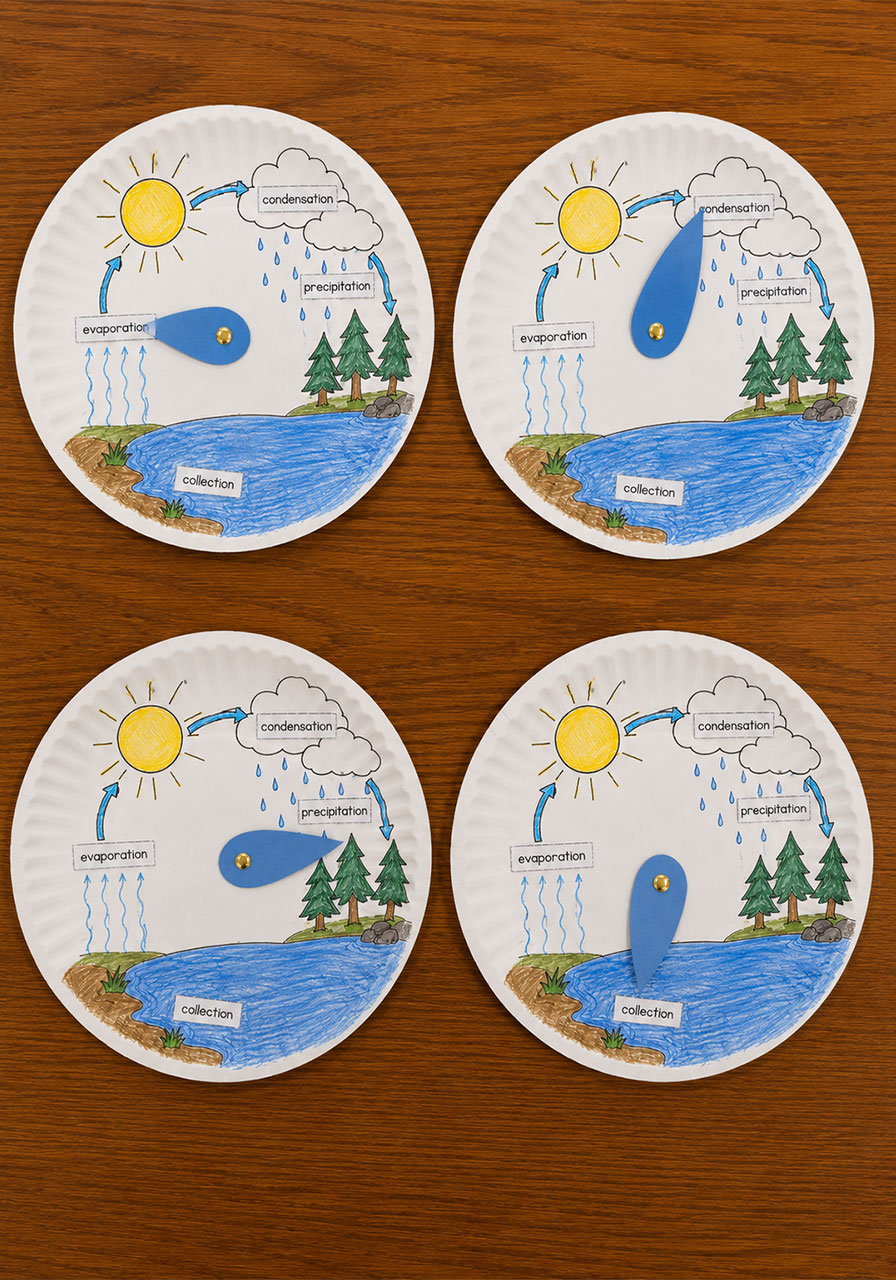
5. Let students move the raindrop arm through each stage of the cycle, narrating what’s happening as they go.
This craft gives kids something physical to hold onto, literally, as they explain the cycle in their own words. Watching that raindrop spin around and around drives home the most important idea of the whole unit: the water cycle never really stops. It just keeps going, stage after stage, over and over again.
Why These Experiments Work So Well for Home and Classroom Learning
Teachers and parents keep coming back to these same three experiments for a reason. They’re simple to set up, they use supplies most households and classrooms already have, and they turn a tricky vocabulary-heavy topic into something kids can watch unfold in real time.
They also travel well between settings. The bowl and bag experiments have both been used successfully in classrooms, at home for family science nights, and even for remote and hybrid learning, since they only need basic supplies and a sunny window.
Pair any of these experiments with a simple recording sheet, and you’ve got a complete lesson: hypothesis, observation, vocabulary, and reflection, all built around something students actually got to see and do themselves.
What Teachers Are Saying
These activities have become a go-to for elementary teachers looking for a hands-on way to teach the water cycle, and the feedback has been overwhelmingly positive.
One kindergarten teacher shared that the lineup “included so many fun activities to teach about the water cycle,” adding that students were “definitely engaged and begging for more.”
A second grade teacher said the resource “perfectly covers our 2nd grade standard,” while another educator noted that the water cycle is often a difficult concept for first graders, but that these experiments “made it much easier for them to understand.”
Several teachers also pointed out how well these activities worked for distance and hybrid learning, with one noting that families “appreciated the experiments because it made learning at home more engaging,” and another sharing that select pages were easily sent home so students could run their experiments independently.
Across the board, the common thread is simple: hands-on beats worksheets-only, every single time, when it comes to helping kids truly understand the water cycle.
Ready to Bring the Water Cycle to Life in Your Classroom?
Whether you’re planning a full science unit or just need one solid activity for a rainy afternoon (pun fully intended), these three experiments plus the water cycle wheel craft give you everything you need to make evaporation, condensation, precipitation, and collection feel real to your students.
Grab your supplies, pick a sunny day, and let your students watch science happen right in front of them.
Want the printable recording sheets, vocabulary cards, and water cycle wheel templates? Comment below and let us know, and we’ll get you the details on where to find the printables.
