
Ever had a classroom full of kids ask “can we do a science experiment today?” and you didn’t have anything ready? This craft is your answer.
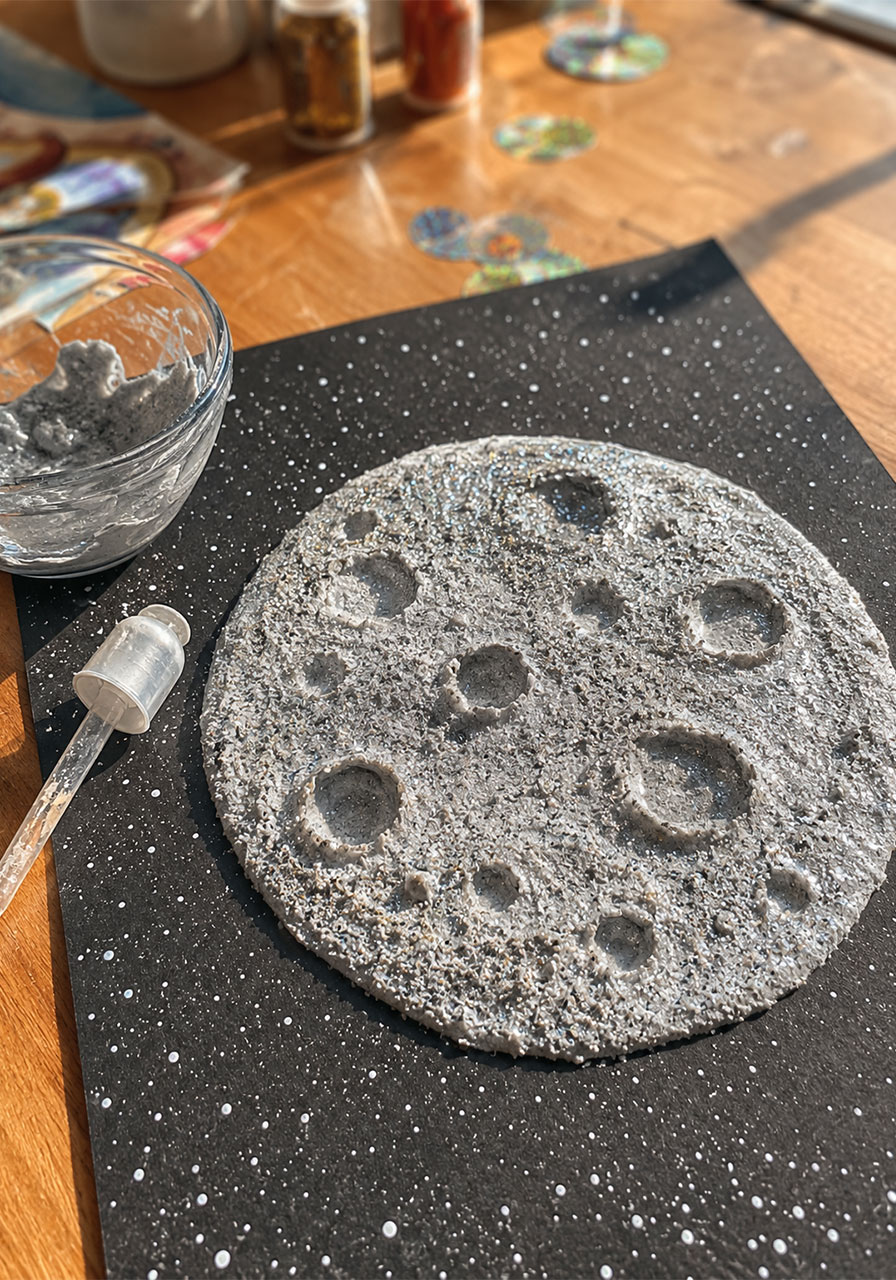
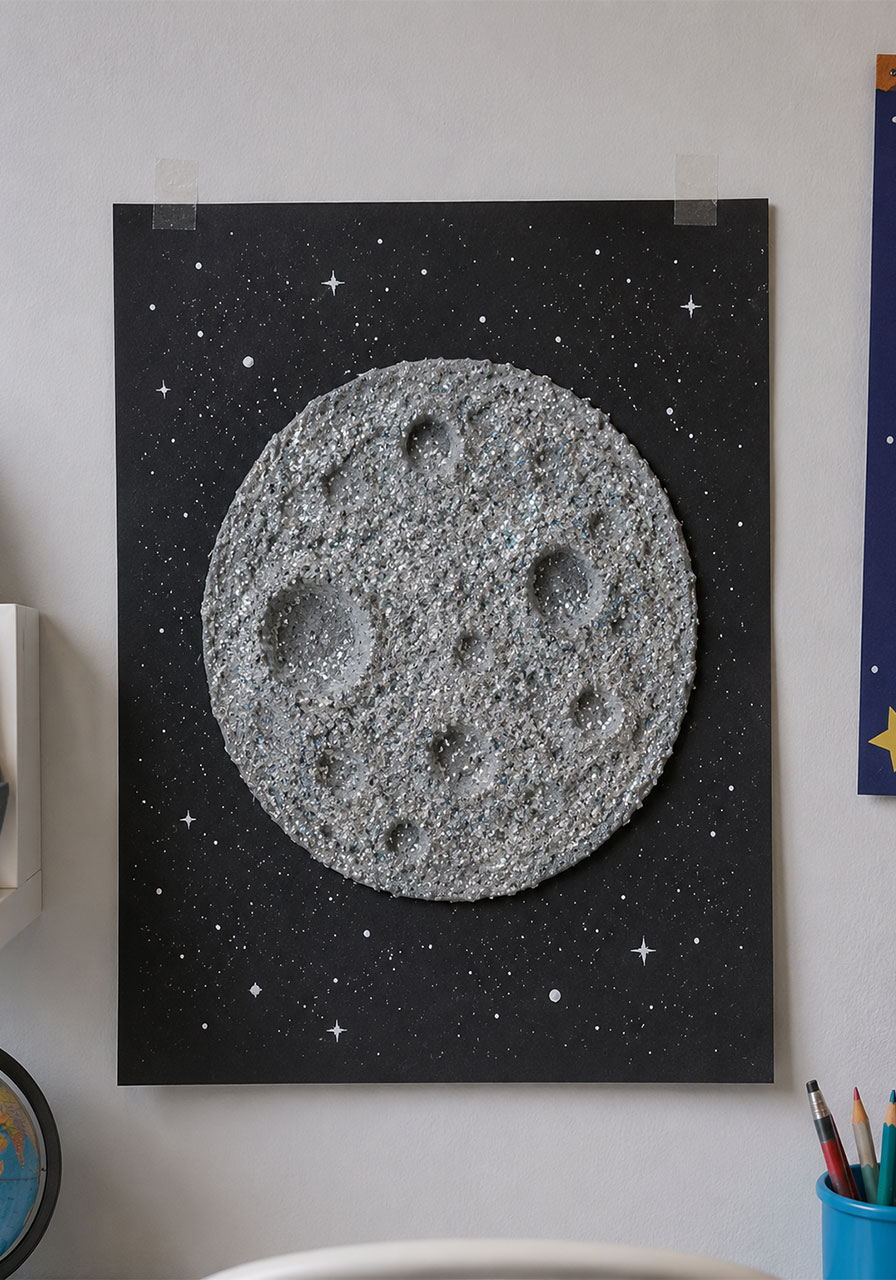
The Fizzing Moon Art Project turns a simple kitchen-cabinet reaction into a glittering, crater-covered moon your kids will be proud to hang on the wall.
It’s messy in the best way. It’s genuinely educational. And it takes just a few pantry staples to pull off.
Whether you’re a teacher planning a space unit, a parent looking for a rainy-day activity, or hosting a galaxy-themed birthday party, this one checks every box: hands-on learning, real “wow” factor, and a keepsake at the end.
Let’s walk through exactly how to make it, step by step, so it turns out perfectly the very first time.
Why This Craft Works So Well for Kids
Baking soda and vinegar have been a classroom staple for a reason: the reaction is instant, visible, and completely safe.
When vinegar hits a baking soda paste, it releases carbon dioxide gas. That’s what creates the fizzing, bubbling craters that make this project look like the real lunar surface.
Kids don’t just watch this happen. They control it. They decide where the vinegar goes, how much to add, and get to see cause and effect play out in real time on their own artwork.
That combination of art and chemistry is what makes this project stick in a kid’s memory long after the glitter gets vacuumed up.

Who This Craft Is Perfect For
Best for: Kids ages 4–12, classrooms, homeschool science units, space-themed birthday parties, and rainy-day activities.
Time to Make: 20 minutes of active crafting, plus 1–2 hours of drying time.
Group Size: Works for one child or a full classroom. Just scale up the materials.
Mess Level: Moderate. A tray or covered table keeps cleanup easy.
What You’ll Need
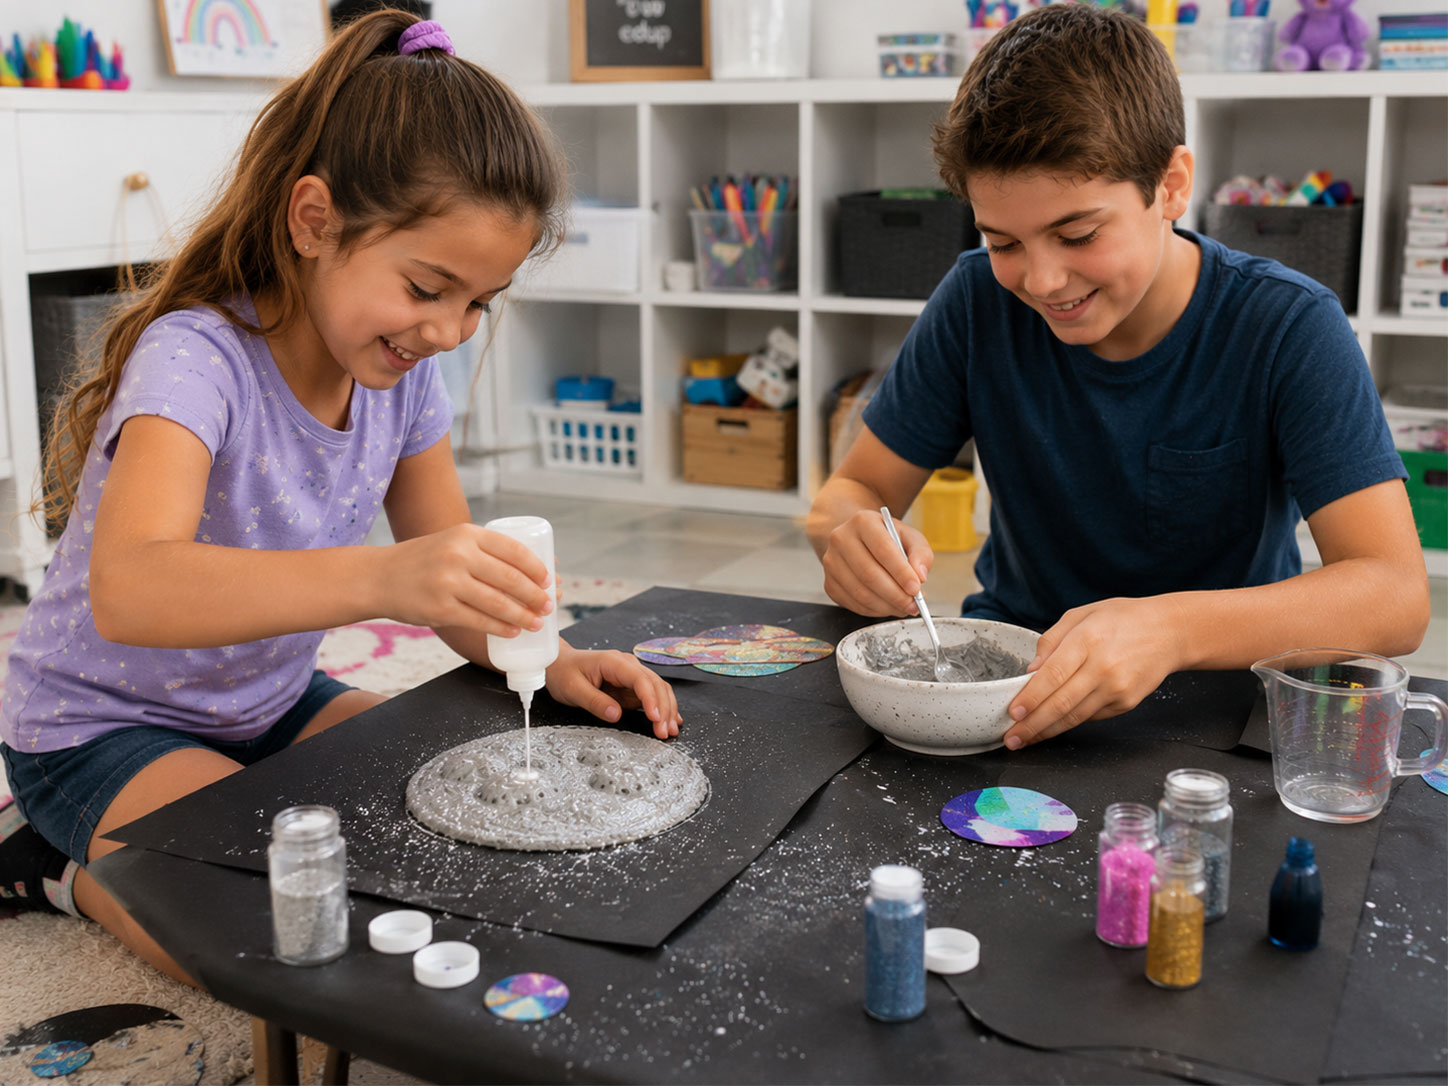
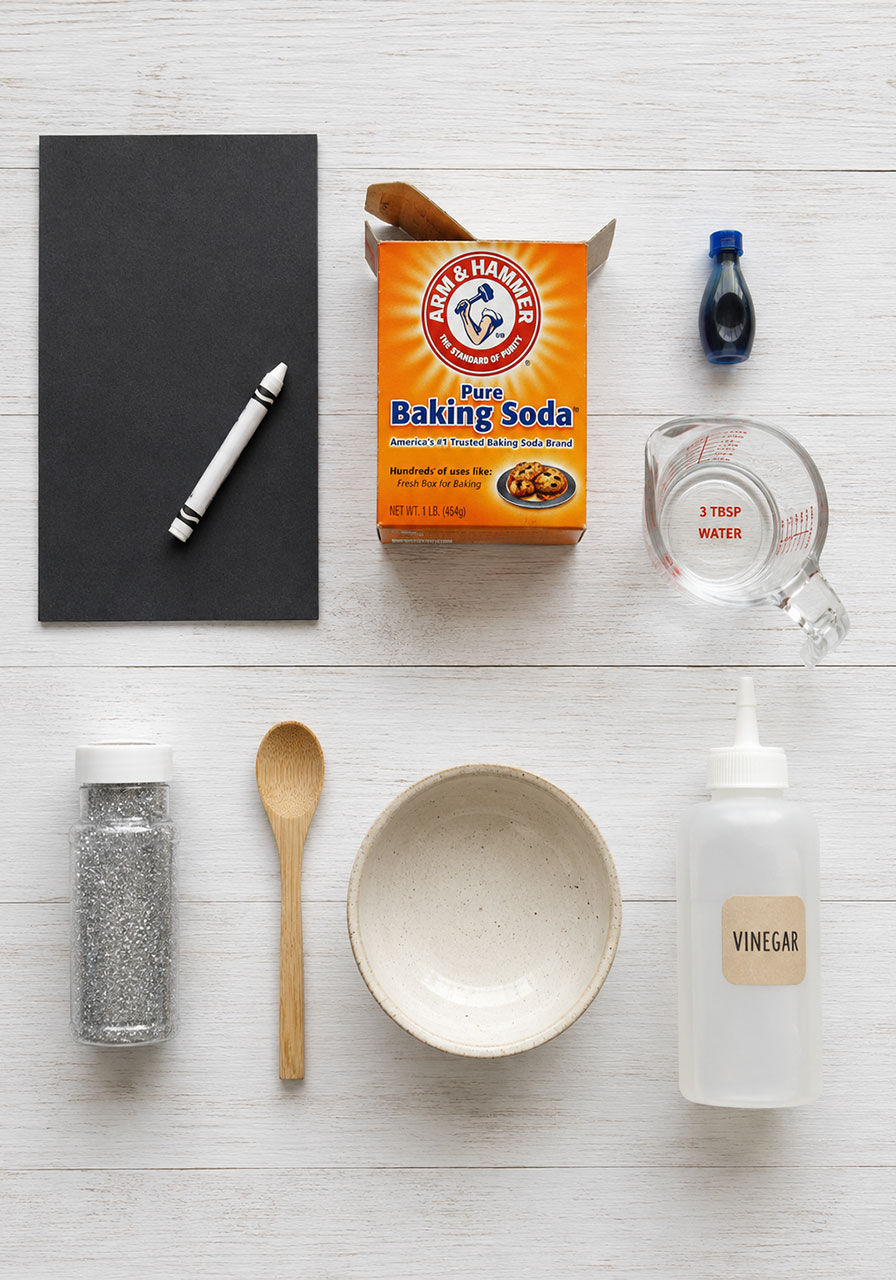
Here’s your shopping list for one moon (multiply for a group):
- ½ cup baking soda
- 2–3 tablespoons water
- Black or dark-colored construction paper
- White crayon or chalk (for sketching the moon outline)
- Small bowl and spoon for mixing
- Vinegar, poured into a squeeze bottle, pipette, or dropper
- Food coloring in gray, blue, or purple (optional, for a lunar tint)
- Silver or white glitter or mica powder (optional, for sparkle)
- Paintbrush or spoon for spreading the paste
- A tray or washable surface to contain the fizz
Everything here is inexpensive and easy to find. Most of it is probably already in your kitchen.
How to Make Fizzing Moon Art: Step by Step
Follow these steps in order and your moon will turn out picture-perfect.
Step 1: Set up your workspace.
Lay down a tray or cover your table before you start. This keeps the fizzing contained and cleanup fast.
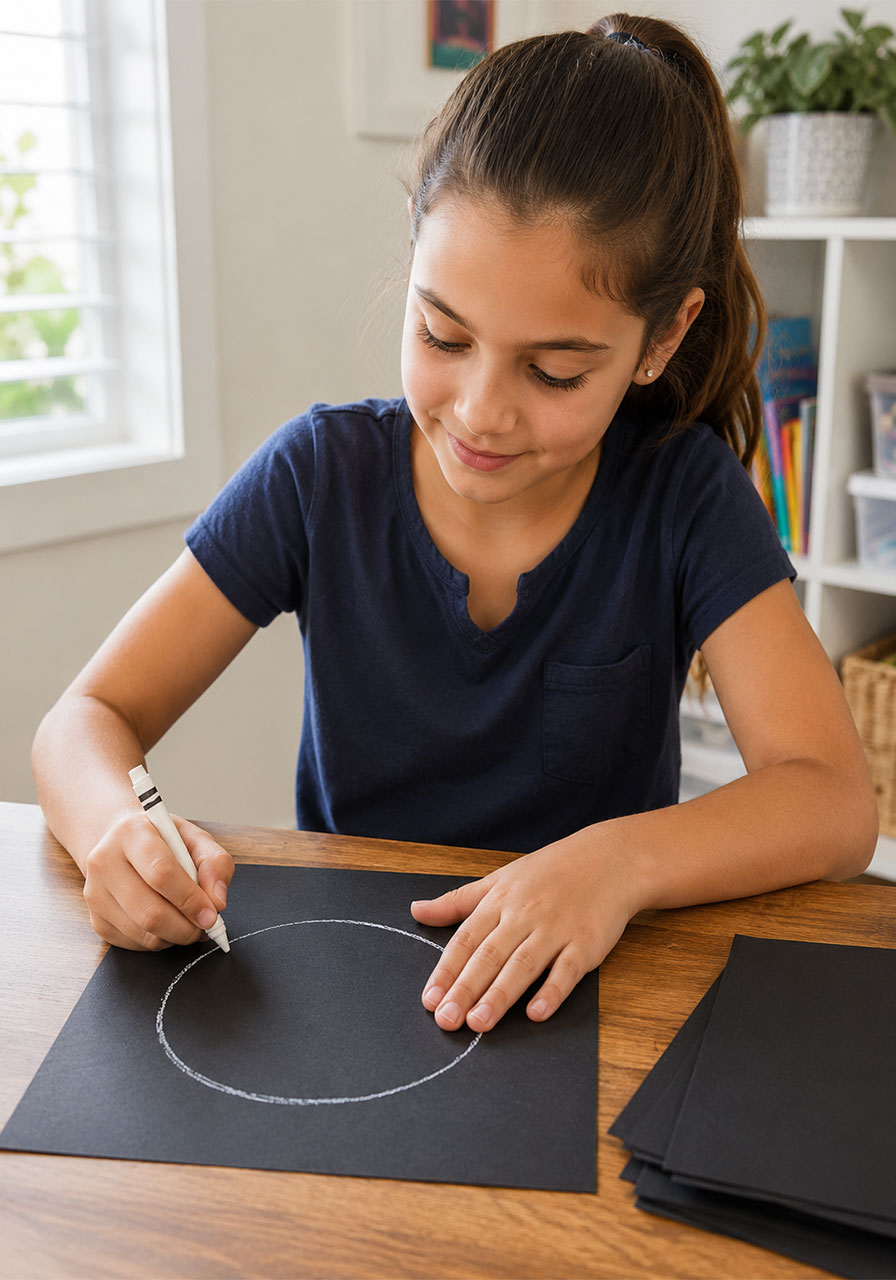
Step 2: Draw your moon outline.
Using a white crayon or chalk, sketch a circle or crescent shape on your dark construction paper. This outline is your guide for where the paste goes.
Step 3: Mix your baking soda paste.
In a small bowl, combine ½ cup baking soda with 2–3 tablespoons of water. Stir until it forms a thick, spreadable paste, similar to frosting.
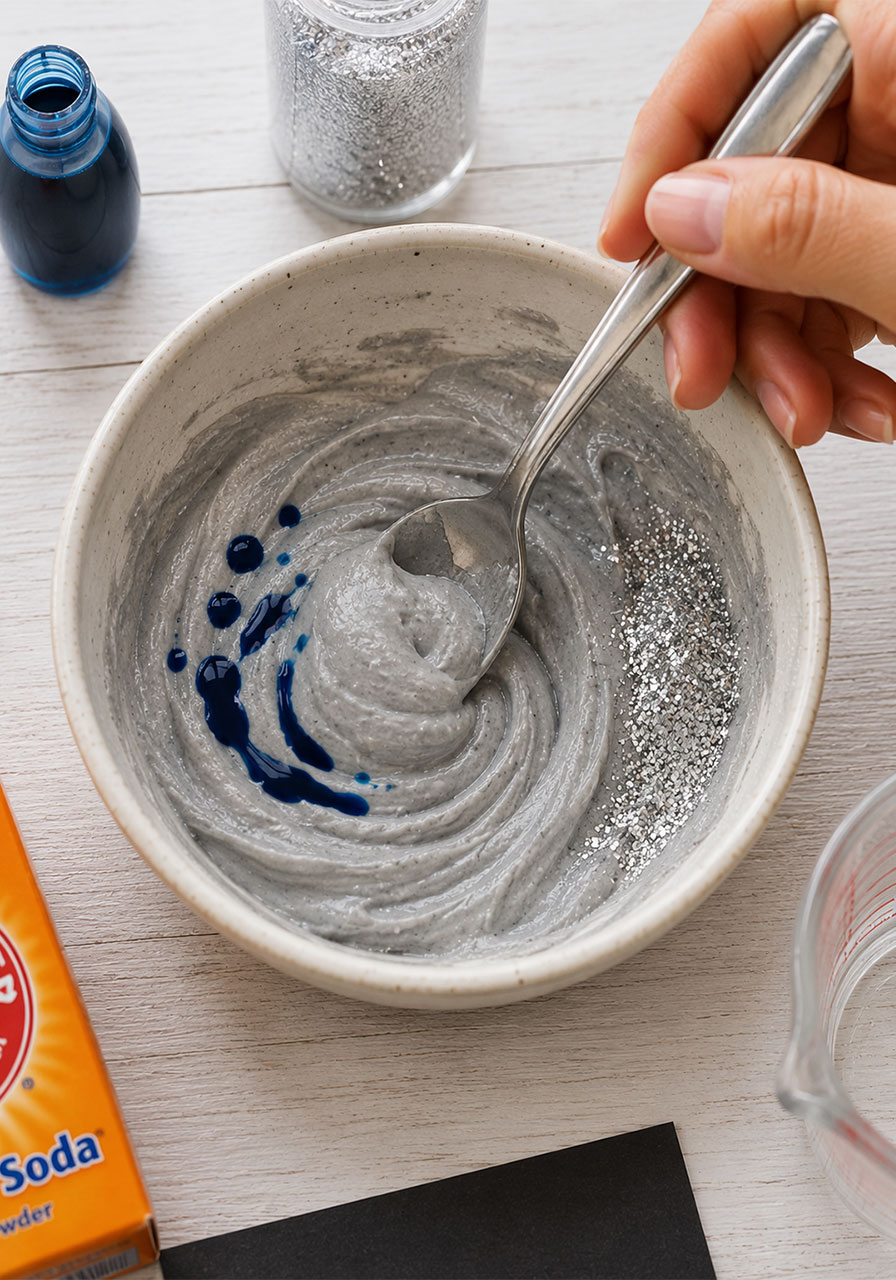
Step 4: Add color and sparkle.
Mix in a few drops of gray, blue, or purple food coloring for a moon-like tint. Stir in glitter or mica powder now if you want a shimmering finish.
Step 5: Spread the paste onto your outline.
Using a paintbrush or the back of a spoon, spread the paste inside your moon shape. Keep it thick enough to hold texture but thin enough for vinegar to soak through.
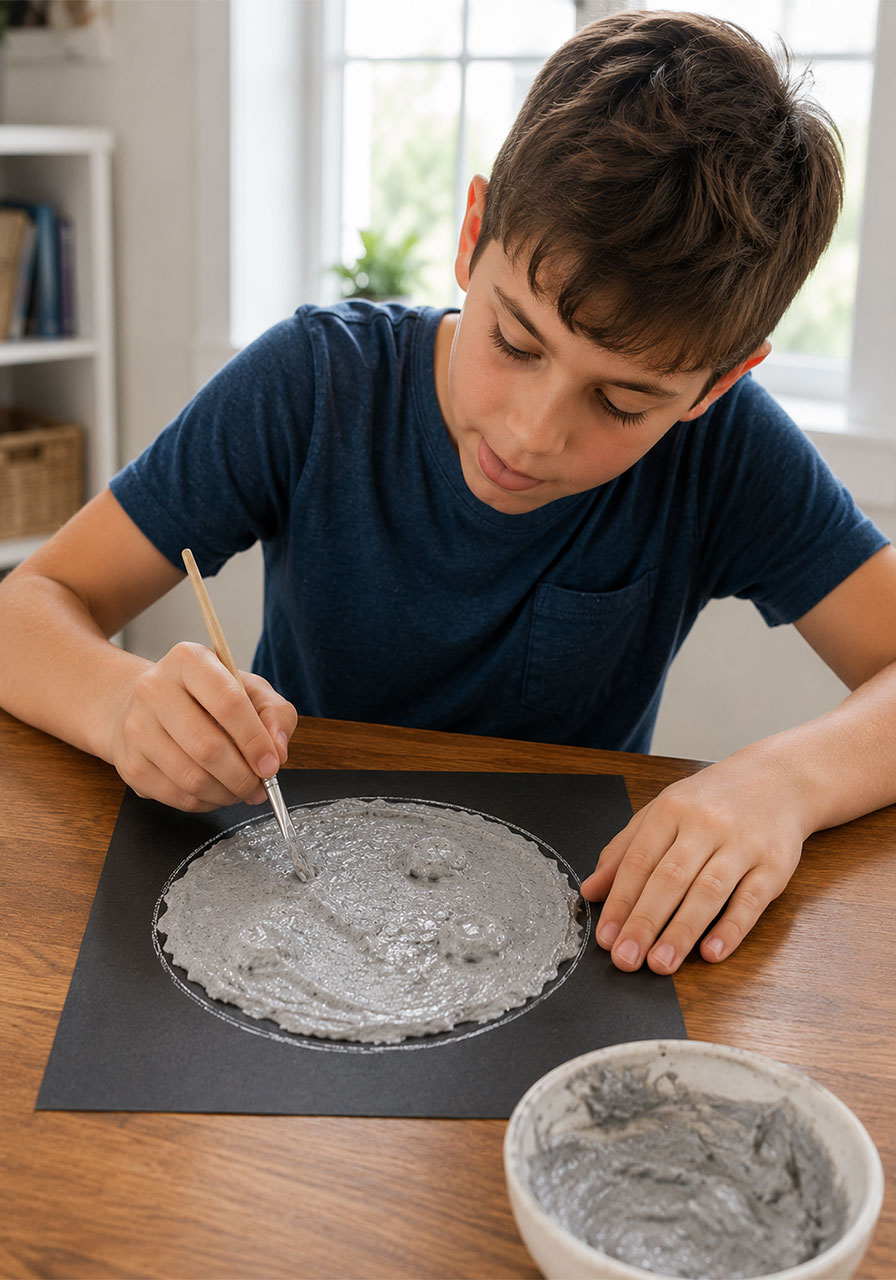
Step 6: Build up craters.
Add small extra mounds of paste in a few spots. These will become the fizzy craters once the vinegar hits them.
Step 7: Add the vinegar and watch it fizz.
Fill your squeeze bottle, pipette, or dropper with vinegar. Drizzle it slowly over the paste and watch the bubbles form instantly.
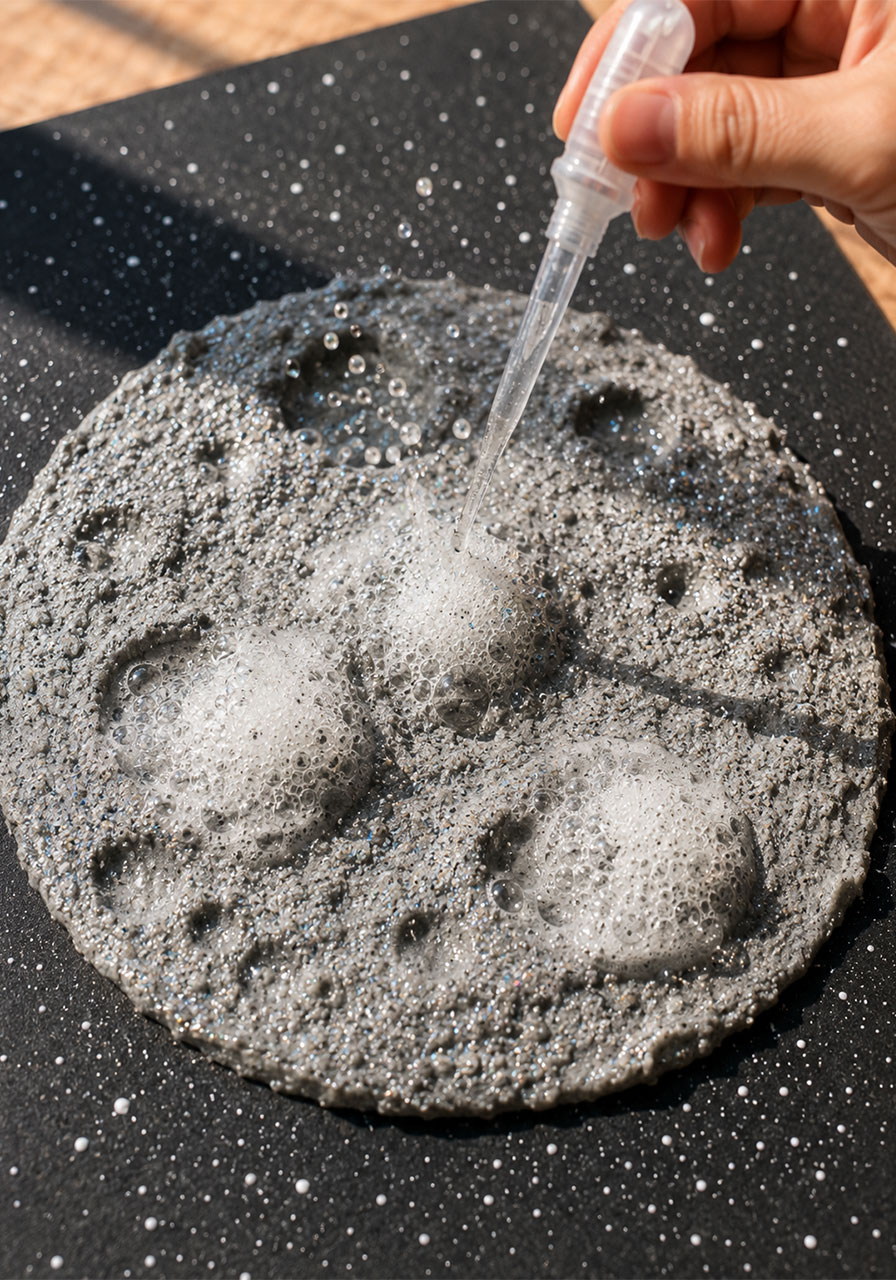
Step 8: Let it dry completely.
Set the artwork aside for 1–2 hours. Do not move it while it’s drying, or the texture can smear.
Once it’s dry, you’ve got a textured, sparkling moon that looks like it came straight out of a science museum gift shop.
Pro Tips for the Best Results
Use a thick paste, not a runny one. A paste that’s too watery will spread flat instead of holding those crater bumps.
Apply vinegar slowly. Kids tend to want to dump the whole bottle at once, but a slow drizzle creates more defined, crater-like bubbles.
Work in natural light or near a window if you can. The glitter and texture photograph beautifully with a little sunlight, which makes for a great classroom bulletin board or party favor to send home.
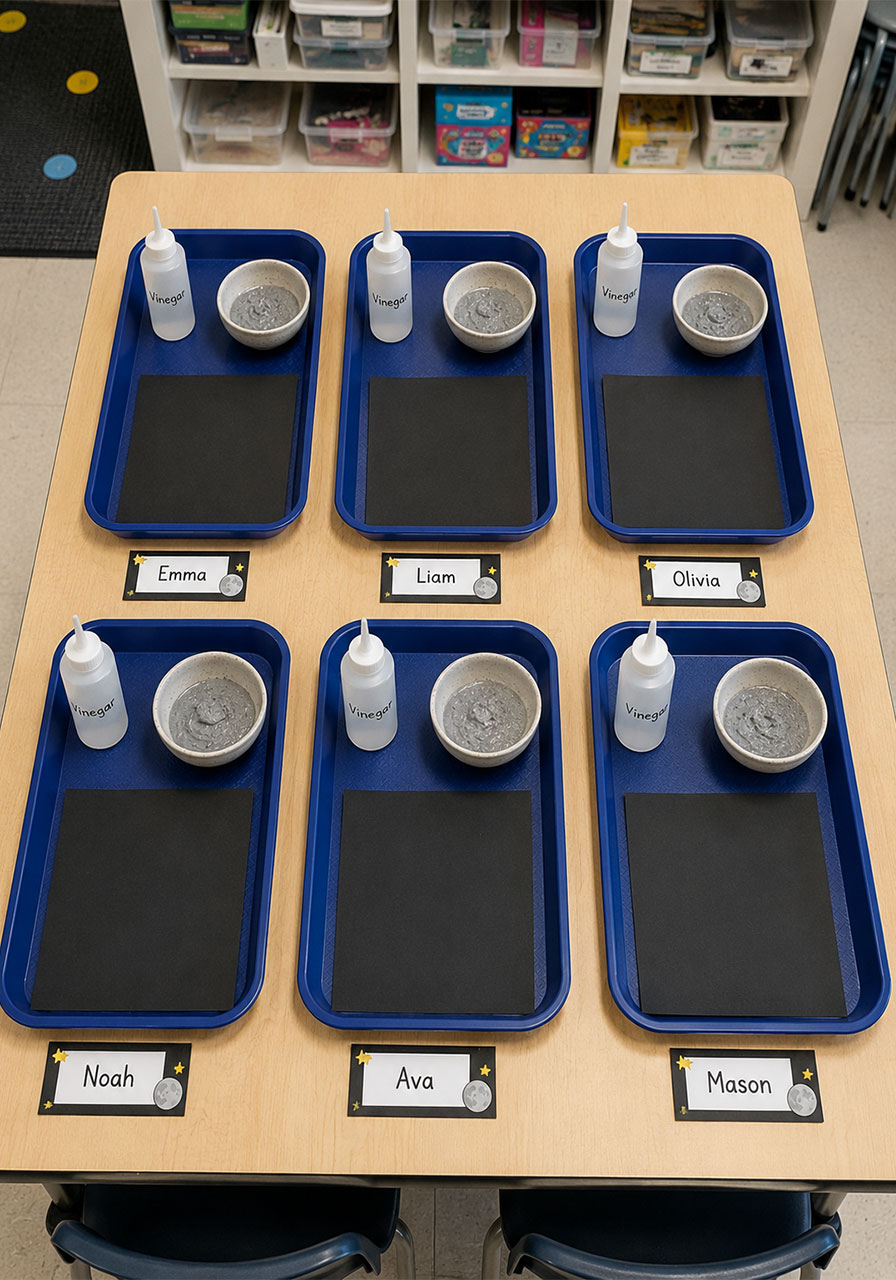
If you’re running this with a full classroom, pre-portion the baking soda into small cups ahead of time. It saves several minutes of chaos per table.
Fun Variations to Try
Turn this into a full solar system project by having each child make a different planet using different colors of paste and paper.
Hosting a space-themed birthday party? Set up a fizzing moon station as one of your party activities, and let each guest take their artwork home as a party favor.
For an extra science tie-in, ask kids to predict which spots will fizz the most before adding vinegar, then talk about why that happened afterward.
Want a nighttime sky version instead of a moon? Have kids paint stars and a moon shape, then use the fizzing technique only on the moon itself for contrast.
Troubleshooting Common Problems
Paste too runny or not fizzing?
Add a bit more baking soda to thicken it. If it still won’t fizz, check that your vinegar is fresh and being applied directly onto the paste, not just the paper.
Colors bleeding into each other?
Use less water in your paste mixture. A thicker paste holds color better and prevents muddy blending.
Artwork looks flat instead of textured?
Apply the paste in a slightly thicker layer and let it sit for a few minutes before adding vinegar. This gives it more structure to hold onto.
Safety Notes for Parents and Teachers
All materials here are non-toxic, but adult supervision is still a good idea, especially with the vinegar and food coloring.
Work on a tray or washable surface, since the fizzing reaction can splatter slightly.
If you’re using glitter or mica powder, do a quick check for any skin sensitivities in your group beforehand.
Keep small squeeze bottles and droppers away from children under 3, since they’re a choking hazard.
Frequently Asked Questions
Can I use lemon juice instead of vinegar?
Yes, but it produces a weaker fizz. Vinegar is still your best option for a strong, satisfying reaction.
How long does the finished artwork last?
Stored flat in a dry spot, it can last for several months. Humidity is its main enemy.
Is this safe for toddlers?
Yes, with direct adult supervision to prevent little ones from tasting the paste or vinegar.
Can I make the paste ahead of time?
It’s best made fresh right before use. It loses its texture and stops fizzing as well if it sits too long.
Why isn’t my moon fizzing anymore?
Your vinegar may be too diluted or your paste may have already reacted and dried out. Mix a fresh batch to fix it.
Wrap-Up: A Craft That Teaches While It Delights
The Fizzing Moon Art Project is proof that learning and fun aren’t opposites, they go hand in hand.
With a handful of kitchen staples and about 20 minutes, you’ll have kids engaged in real chemistry while creating something they’re genuinely excited to show off.
Add it to your go-to list of STEM activities, classroom projects, and party ideas. It’s the kind of craft that gets requested again and again.
Because whether it’s a classroom, a playdate, or a full-blown party, the best activities are the ones that leave kids covered in glitter and full of questions.
