
Raise your hand if you have ever watched a classroom go from “science is boring” to “can we do this again tomorrow” in under sixty seconds.
That is exactly what happens with this pollination STEM activity.
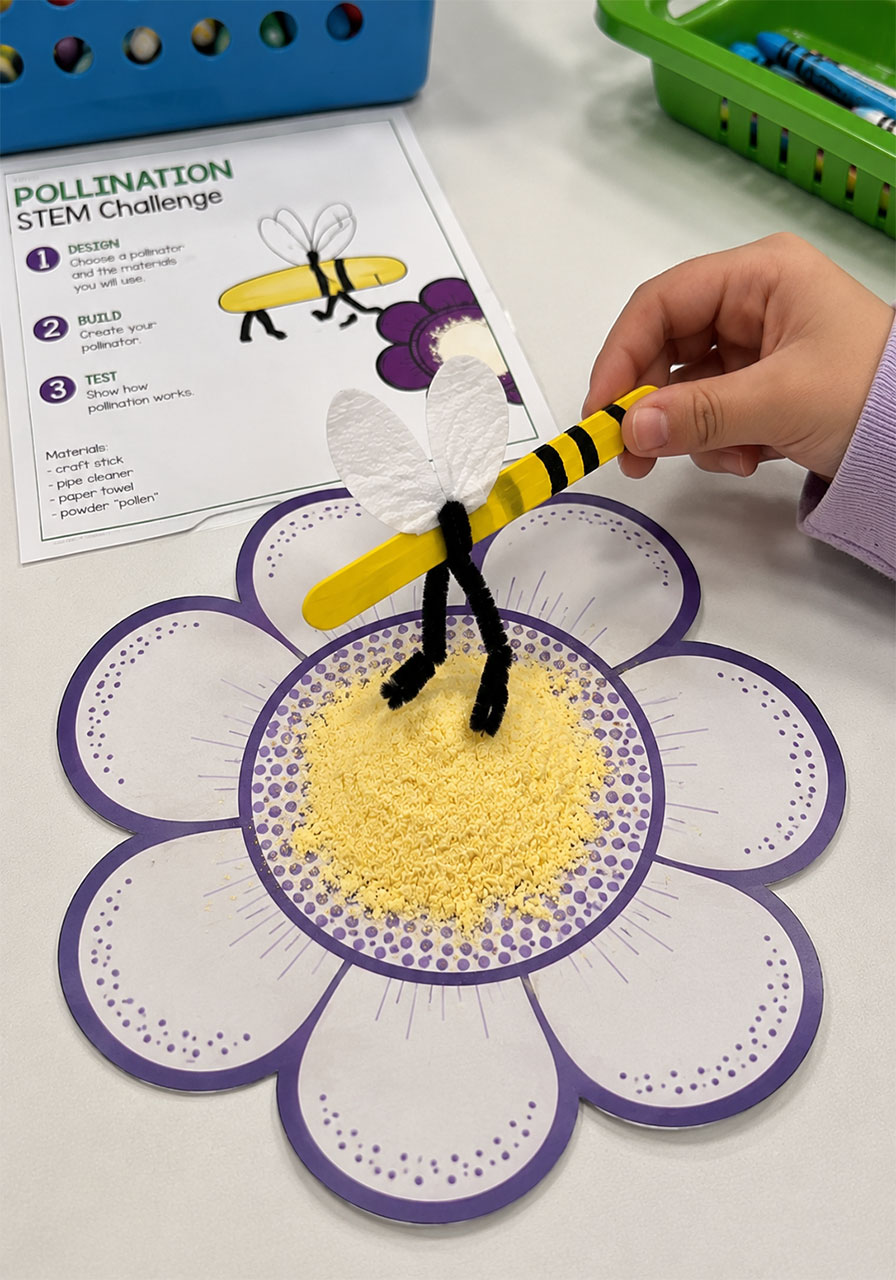
Kids build their own model bee out of craft sticks and pipe cleaners, then use mac and cheese powder to physically watch pollen move from flower to flower. It is hands-on, it is a little messy, and it makes an abstract science concept click instantly.
If you teach second grade or you are a parent looking for a solid STEM activity for home, this one belongs in your lesson plans. Below is exactly how to run it, step by step, plus a few tips we picked up from doing this one ourselves.
Why This Pollination STEM Activity Works So Well
Pollination is a core piece of most Plants, Animals, and Life Cycles units. Students need to understand that plants and animals depend on each other to survive.
That idea is easy to say out loud. It is much harder for a seven-year-old to actually picture.
This activity solves that problem by turning pollination into something kids can see and touch. When “cheese powder” sticks to a pipe cleaner leg and then transfers to a second flower, the concept of pollen transfer stops being a vocabulary word and becomes a memory.
That is the whole goal of a good STEM activity: turn the textbook definition into a hands-on experience students actually remember at test time.

What Is Pollination, Exactly?
Before you hand out materials, it helps to give students a simple, clear explanation they can hold onto.
Pollination is the transfer of pollen from one flower to another. Most plants need this pollen transfer in order to make seeds.
Pollen is a powdery substance found inside a flower. It is produced by a part of the flower called the stamen.
Some plants rely on animals to move that pollen for them. Bees, butterflies, hummingbirds, and bats are the most well known examples, and we call them pollinators.
Here is the part students love: pollinators are not trying to help the plant on purpose. They are just hungry.
Pollinators visit flowers to drink nectar, which is the sweet liquid flowers produce. While they are feeding, pollen sticks to their legs or body without them even noticing.
When that same pollinator flies to the next flower for more nectar, some of that pollen rubs off. The plant gets pollinated, and the animal gets a meal. Everybody wins.
That is the entire relationship you are about to recreate on a tabletop with craft sticks and cheese dust.
Materials You Will Need
Nothing on this list requires a special trip to the craft store. Most of it is probably already in your supply closet or kitchen.
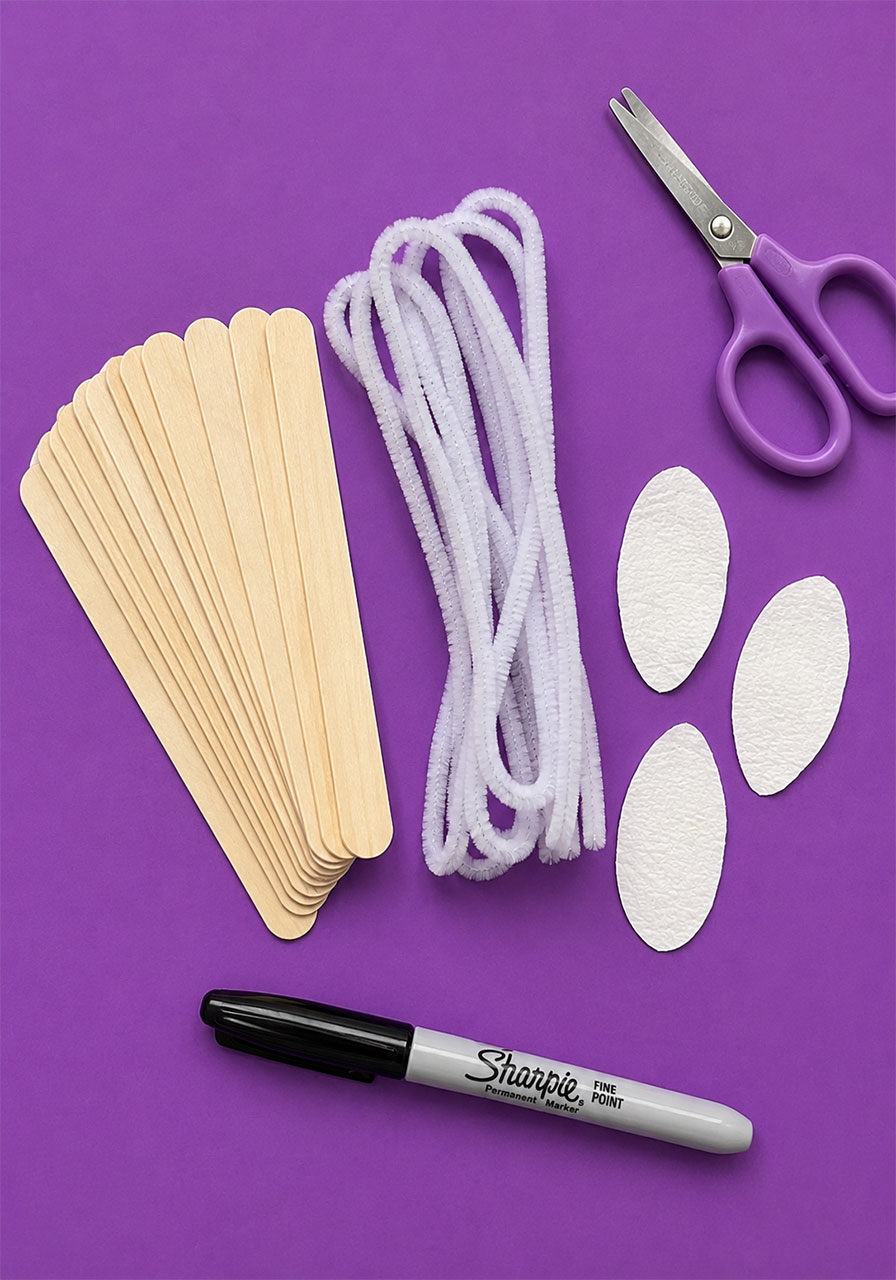
- Mac and cheese powder (about one third of a packet covers three to four students)
- Craft sticks
- Craft glue
- A hand lens or magnifying glass
- Markers or a black Sharpie
- Pipe cleaners
- Wiggly eyes (optional, but kids love them)
- Colored paper or coffee filters for wings, or paper towels if you want to match the original design
- Large and small flower templates, printed on cardstock if possible
- A lab sheet for each student
A quick tip on the mac and cheese powder: you do not need much per group. One packet easily covers an entire class if you divide it out ahead of time into small cups.
Step 1: Introduce the Question
Start the lesson by asking students one simple question: how do animals pollinate plants?
Do not answer it yet. Let them guess. This is the moment that builds curiosity and gets kids invested before they ever touch a material.
Write a few of their guesses on the board. You will come back to them at the end of the activity to see who was right.
Step 2: Design the Pollinator
Hand out the lab sheets and let students choose which pollinator they want to build. A bee is the easiest option for beginners, but butterflies and hummingbirds work too if you want to differentiate.
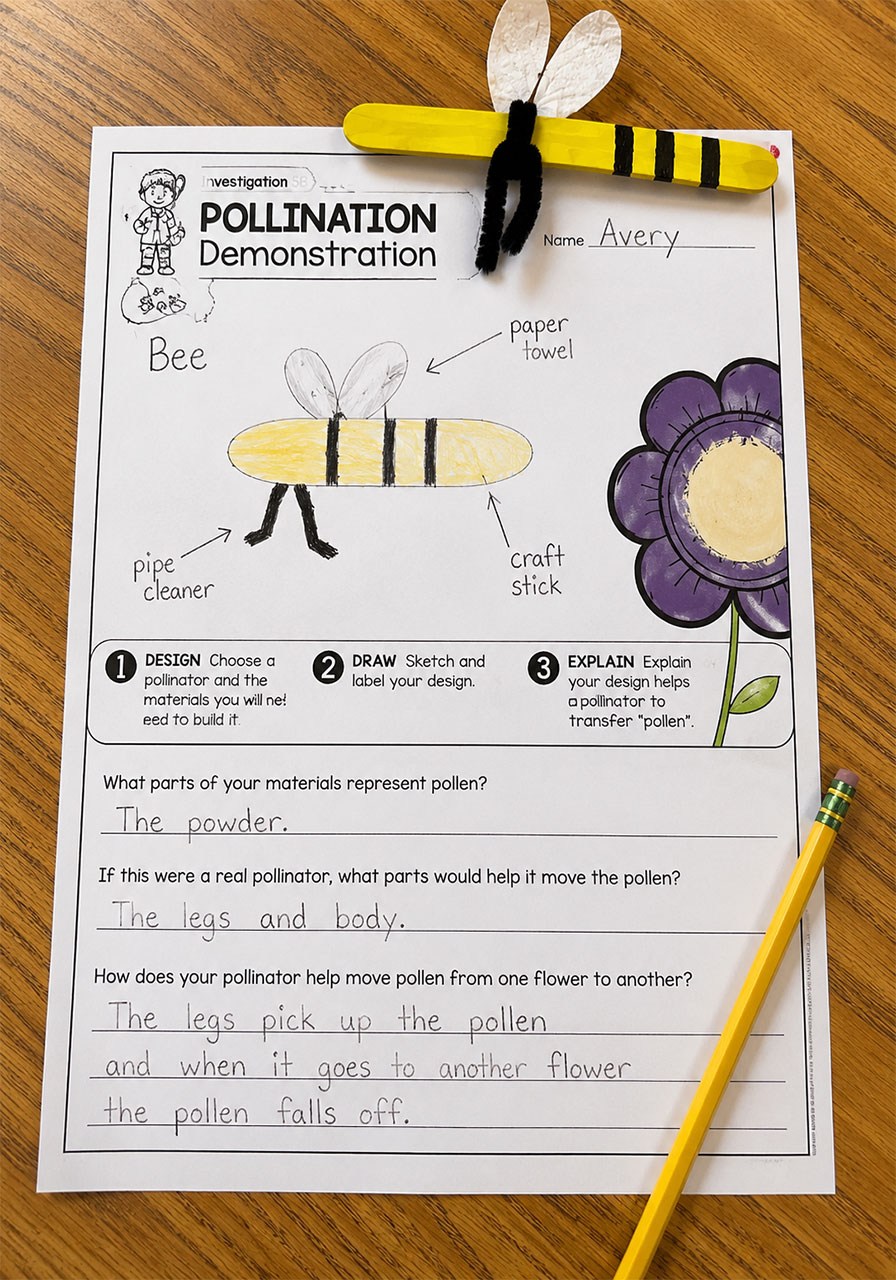
Before anyone picks up glue, have students sketch and label their design on the lab sheet.
This step matters more than it looks like on the surface. Asking students to explain what each material represents, and how it connects to the real animal, pushes them to think like an engineer instead of just following instructions.
A completed sketch might label the craft stick as the body, the paper towel pieces as wings, and the pipe cleaner as legs.
Step 3: Build the Model Pollinator
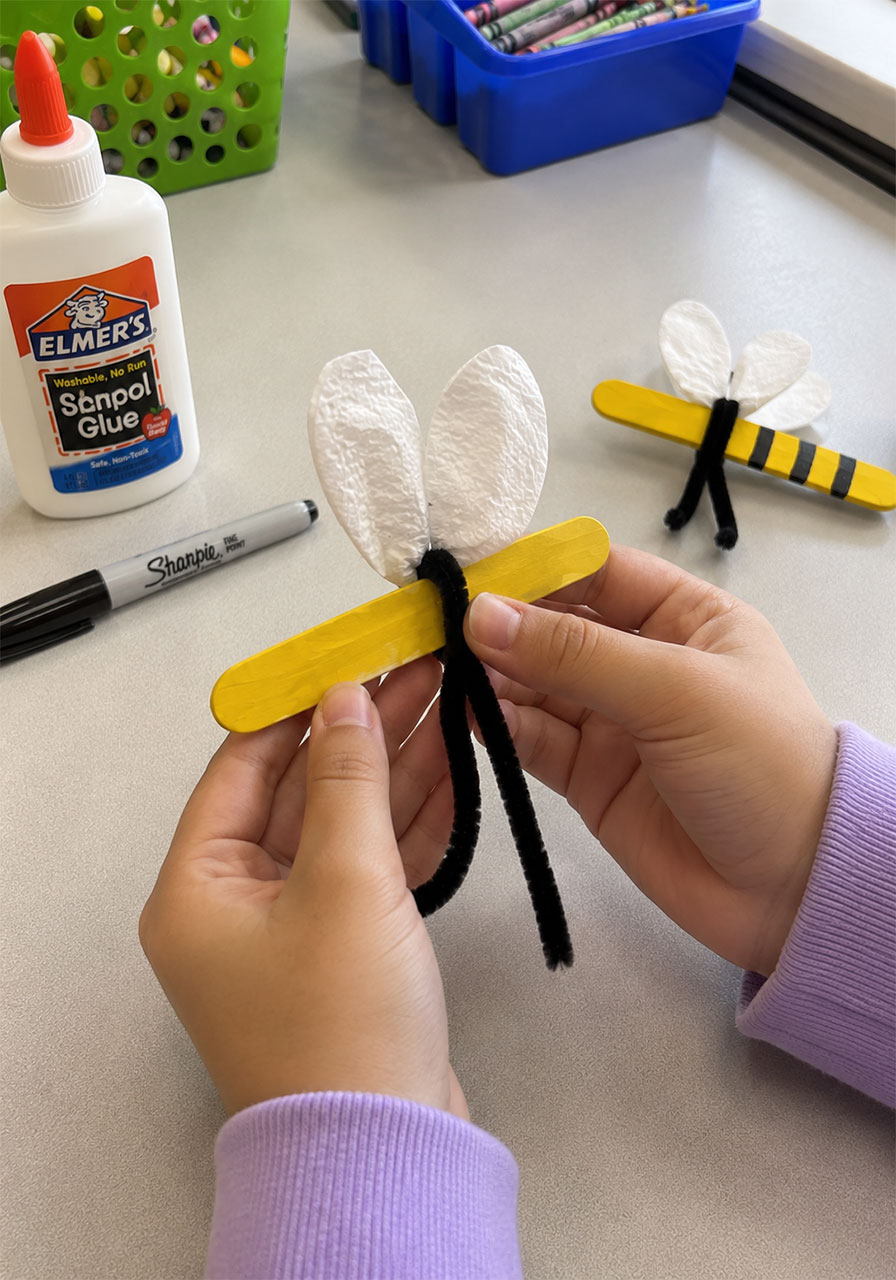
Now for the fun part. Here is exactly how to build the bee model shown in the photos above.
1. Cut a paper towel, colored paper, or coffee filter into small squares, roughly three inches wide.
2. Fold each square and cut it into a simple wing shape. You want two matching wings per student.
3. Cut a pipe cleaner in half. You will use it to attach the wings and form the legs.
4. Wrap the pipe cleaner around the center of the craft stick, sandwiching the two wings underneath so they hold in place.
5. Twist the pipe cleaner to secure it, then bend the two loose ends down to form legs.
6. Fold the very bottom of each pipe cleaner leg slightly to create tiny feet. This little detail matters, because those feet are what will pick up the “pollen” in the next step.
7. Use a marker or Sharpie to add stripes across the craft stick body, turning it into a bee. Wiggly eyes are optional but always a hit.
Give students plenty of time here. This is a craft project as much as it is a science lesson, and rushing it takes away from the engineering piece of the activity.
Step 4: Set Up the Flowers
Place a large flower template in front of each student or group. Pour a small mound of mac and cheese powder directly in the center of the flower.
This powder is standing in for pollen, and visually, it is a near perfect match.
Set the small flower template off to the side. Students will use it a few steps from now.
Step 5: Simulate the First Flower Visit
Have students hold their pollinator by the craft stick body and gently tap the feet into the pile of powder, just like a bee landing on a flower to feed.
Then hand out the hand lenses.
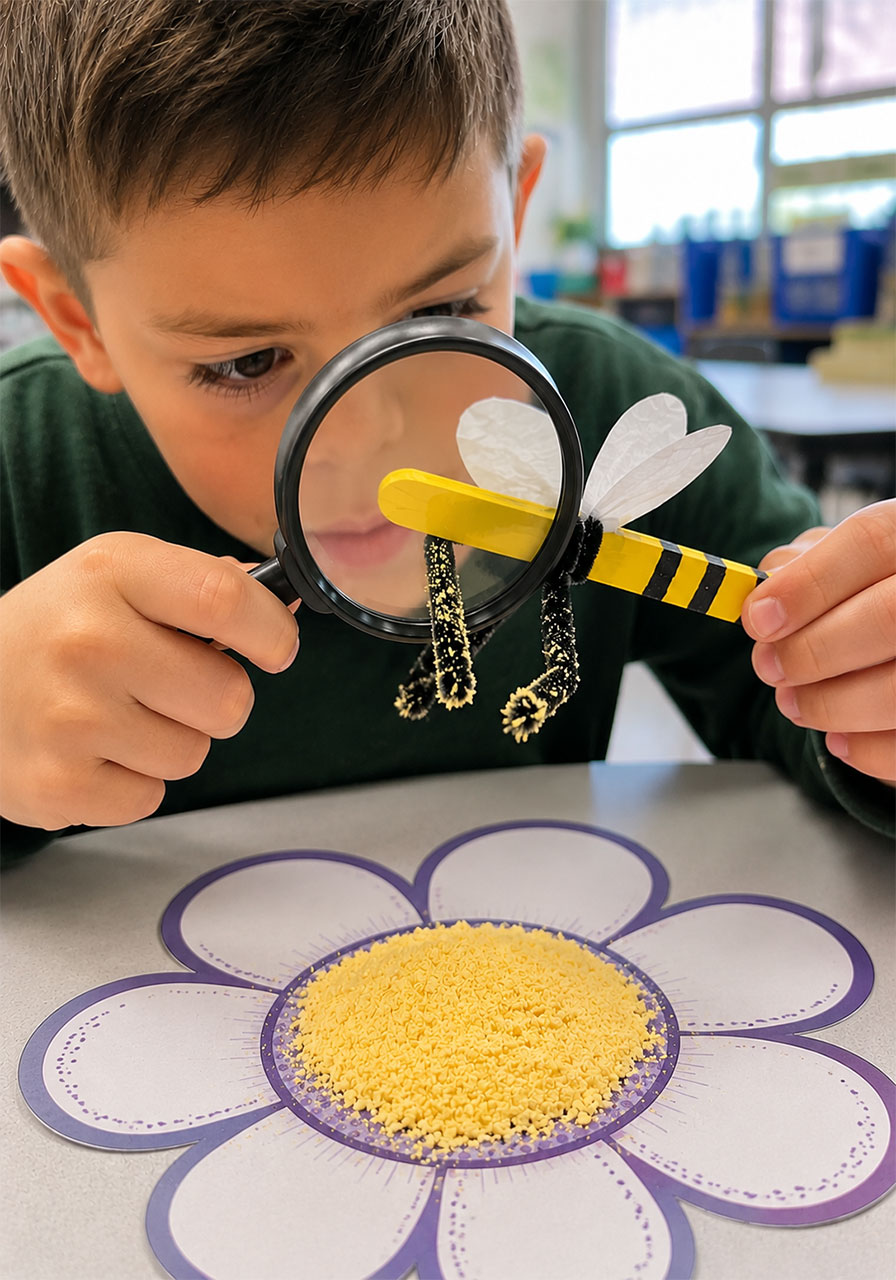
Have students examine the pipe cleaner feet up close. They should be able to clearly see the powder clinging to the fuzzy texture of the pipe cleaner, the exact same way real pollen clings to the tiny hairs on an insect’s legs.
Ask students to record what they observed on their lab sheet, either in words or with a quick sketch.
Step 6: Simulate the Pollen Transfer
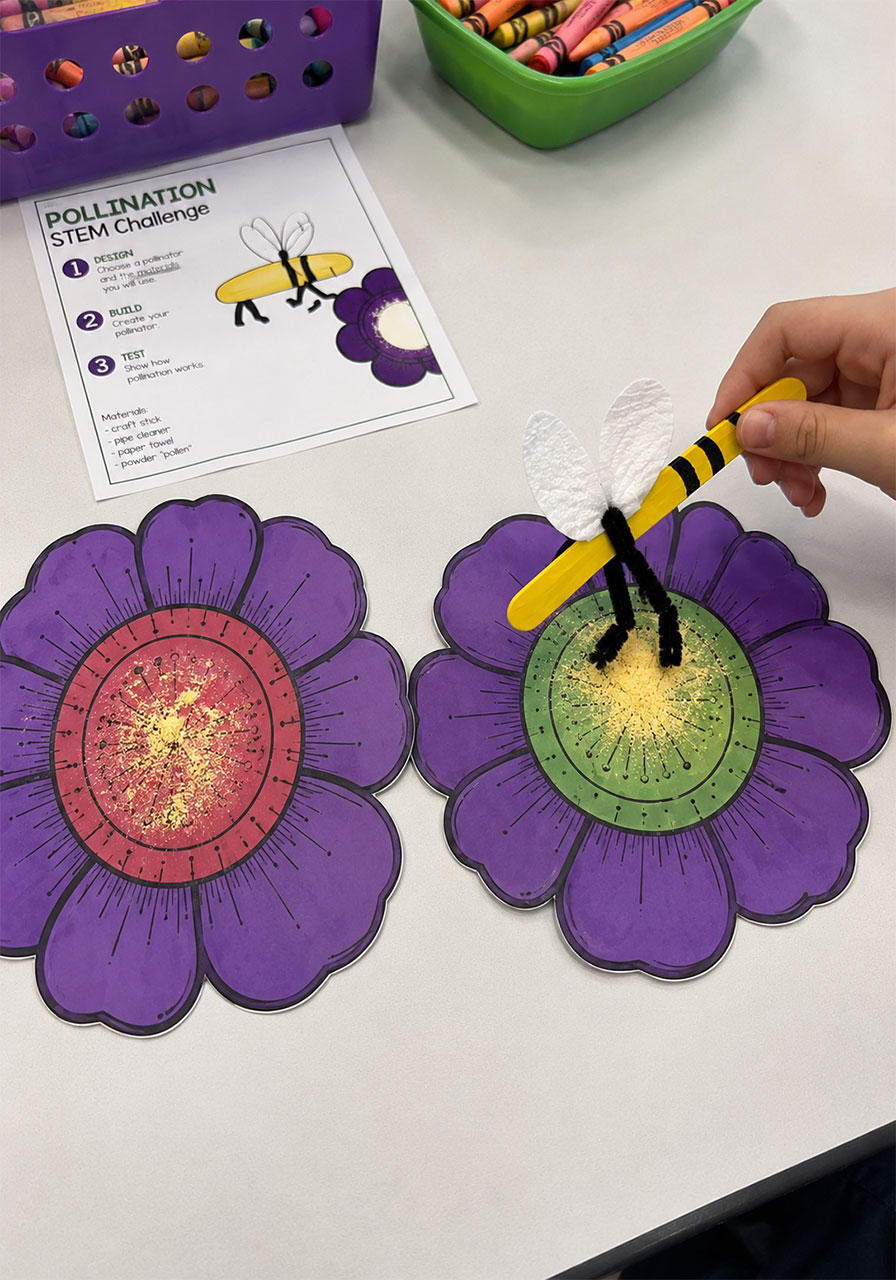
Now comes the payoff. Have students make their pollinator “fly” over to the small flower template.
Gently tap the powdered feet onto the center of the second flower.
Students should immediately see powder transfer from the pipe cleaner feet onto the new flower. That is pollination, happening right in front of them.
Have students record this second observation on their lab sheet as well. Comparing what happened at flower one versus flower two is where the real learning locks in.
Step 7: Connect It Back to Real Life
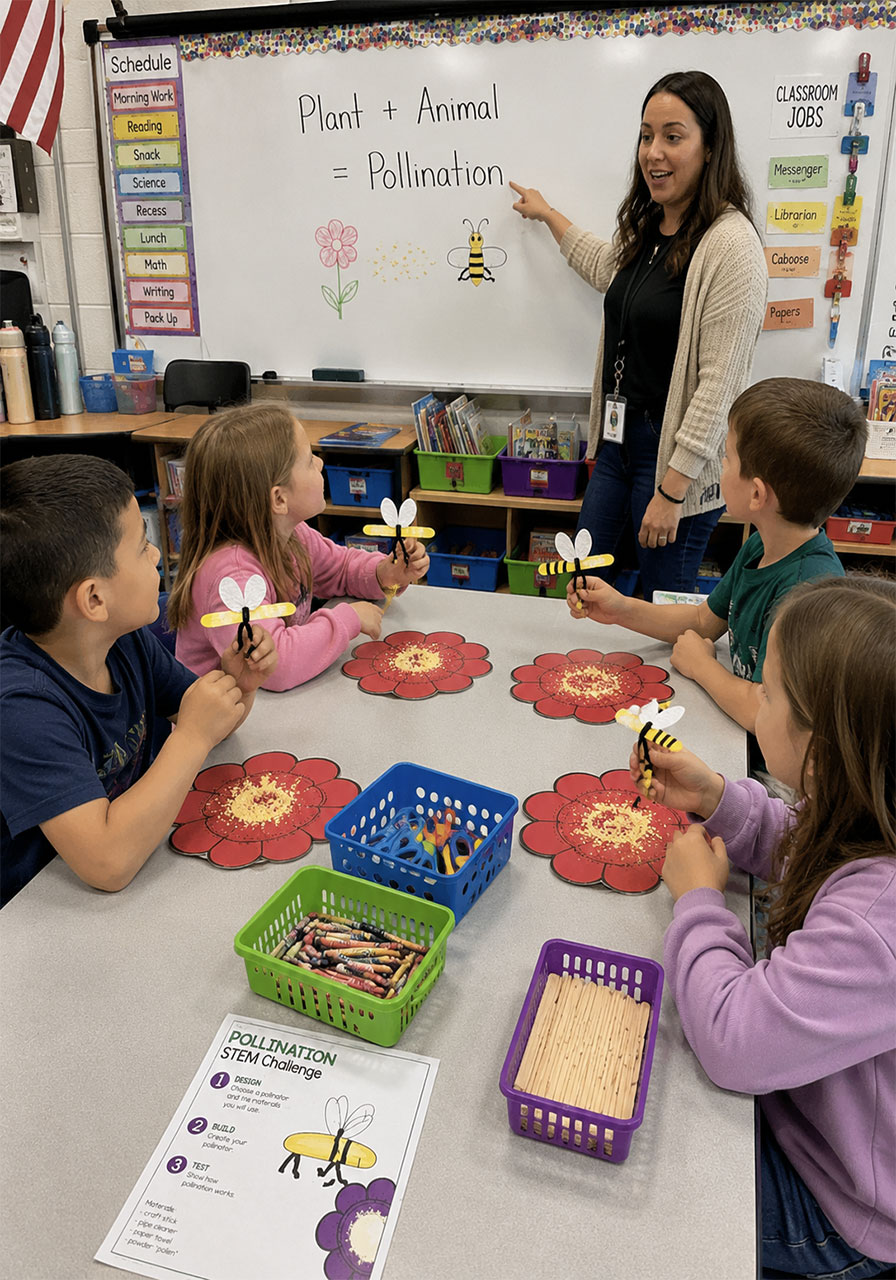
Close the activity with a class discussion. Ask students how their model pollinator compares to a real bee, butterfly, or hummingbird.
This is a great moment to circle back to the guesses they made at the very beginning of the lesson. Were they right about how animals pollinate plants?
Reinforce the big idea one more time: the plant gets pollinated, and the animal gets fed. Both sides benefit, which is exactly why we call it a relationship rather than an accident.
Pro Tips From the Classroom
A few small adjustments make this activity run even smoother.
Portion out the mac and cheese powder into small paper cups ahead of time. This keeps students from digging directly into a shared bag, which gets messy fast.
Print your flower templates on cardstock instead of regular paper. The powder brushes off easily afterward, so the flowers can be reused for multiple class periods.
If you have students who cannot have dairy or a food allergy concern, colored chalk dust or powdered tempera paint works as a substitute for the mac and cheese powder without changing the visual effect.
Keep a damp paper towel at each table. Little fingers get powdery fast, and this activity moves much faster when cleanup is built in rather than left for the end.
Fun Variations to Try
Once your students have mastered the bee model, this activity is easy to expand.
Let students design a butterfly using colored paper wings instead of paper towel wings, then compare how a butterfly’s proboscis differs from a bee’s legs when it comes to picking up pollen.
Try a hummingbird model using a longer craft stick and a small paper beak, since hummingbirds pick up pollen on their beaks and faces rather than their legs.
For older students, add a second color of powder to a third flower and have them track which pollinator visited which flower first, based on which color shows up where.
Build on the Lesson
This pollination STEM activity works even better when it is paired with a short reading passage on pollinators before you start building.
A quick nonfiction read about bees, butterflies, or hummingbirds gives students background knowledge to draw on when they are explaining their design, which makes the “explain your design” step of the lab sheet much stronger.
This activity also fits naturally into a broader life cycles or plant and animal needs unit, so consider building out a full week of lessons around it rather than treating it as a standalone day.
Why This One Is Worth Adding to Your Plans
Not every STEM activity earns a repeat request from students, but this one consistently does.
It is low prep, budget friendly, and gives every student a hands-on model they can point to and explain. Most importantly, it turns a concept that is often taught through pictures and paragraphs into something students physically watch happen.
Pin this one now, gather your craft sticks and pipe cleaners, and get ready for one of the more memorable science lessons of the year.
