
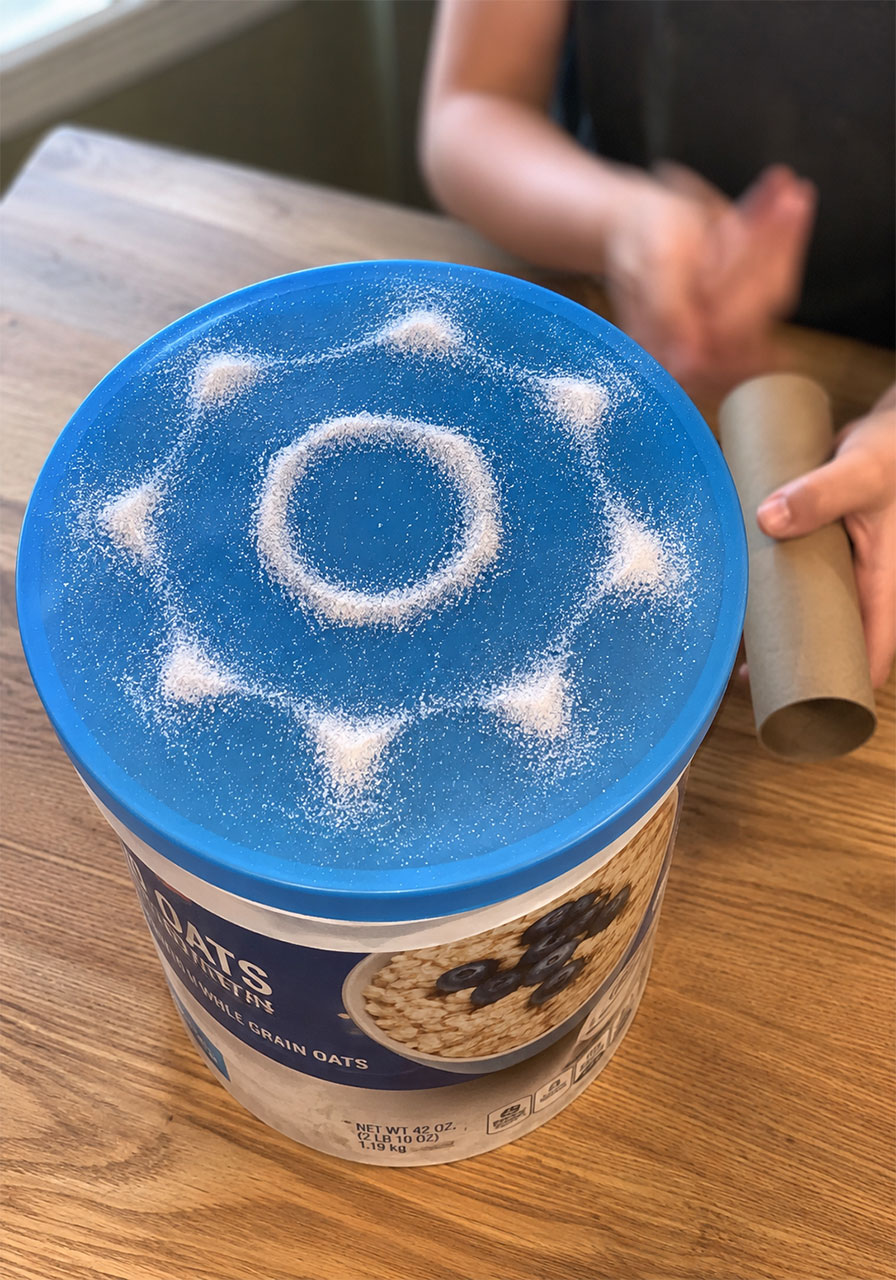
What if your students could see the sound coming out of their own mouths? Not a metaphor. Not a drawing. An actual pattern of salt, rearranging itself in real time because of a voice hitting a stretched balloon.
That’s exactly what happens with a Chladni plate (pronounced clad-nee), and it’s one of the most jaw-dropping “wait, THAT’S science?!” activities you can pull off with stuff sitting in your recycling bin.
This project turns invisible sound waves into rings, ripples, and blobby little patterns that shift every single time the pitch changes. Sing low, and you get one shape. Sing high and squeaky, and the whole pattern rearranges itself in front of everyone’s eyes.
It’s hands-on, it’s loud (in the best way), and it teaches real physics without a single worksheet. Here’s exactly how to build one, step by step, no guesswork required.
Why This Activity Is a Teacher and Parent Favorite
Good STEM activities do two things at once: they hook kids emotionally, and they teach something real. This one does both.
Emotionally, it’s instant gratification. There’s no waiting three days for a seed to sprout. You sing into a tube, and the pattern changes right there, live, in front of the whole group.
Scientifically, it’s a genuine introduction to sound waves, vibration, and resonance, the same core concepts kids will revisit in physics class years later. You’re not dumbing anything down here. You’re just making it visible.
It also works for a huge age range. A three-year-old will happily shriek into the tube and watch salt jump around. A ten-year-old can start asking why a low hum makes one shape and a high note makes another, and that question is where the real learning kicks in.
Ages: 3 and up, with an adult helping for the building part.

What You’ll Need
Nothing on this list requires a special trip. Most of it is already in your house or your recycling bin.
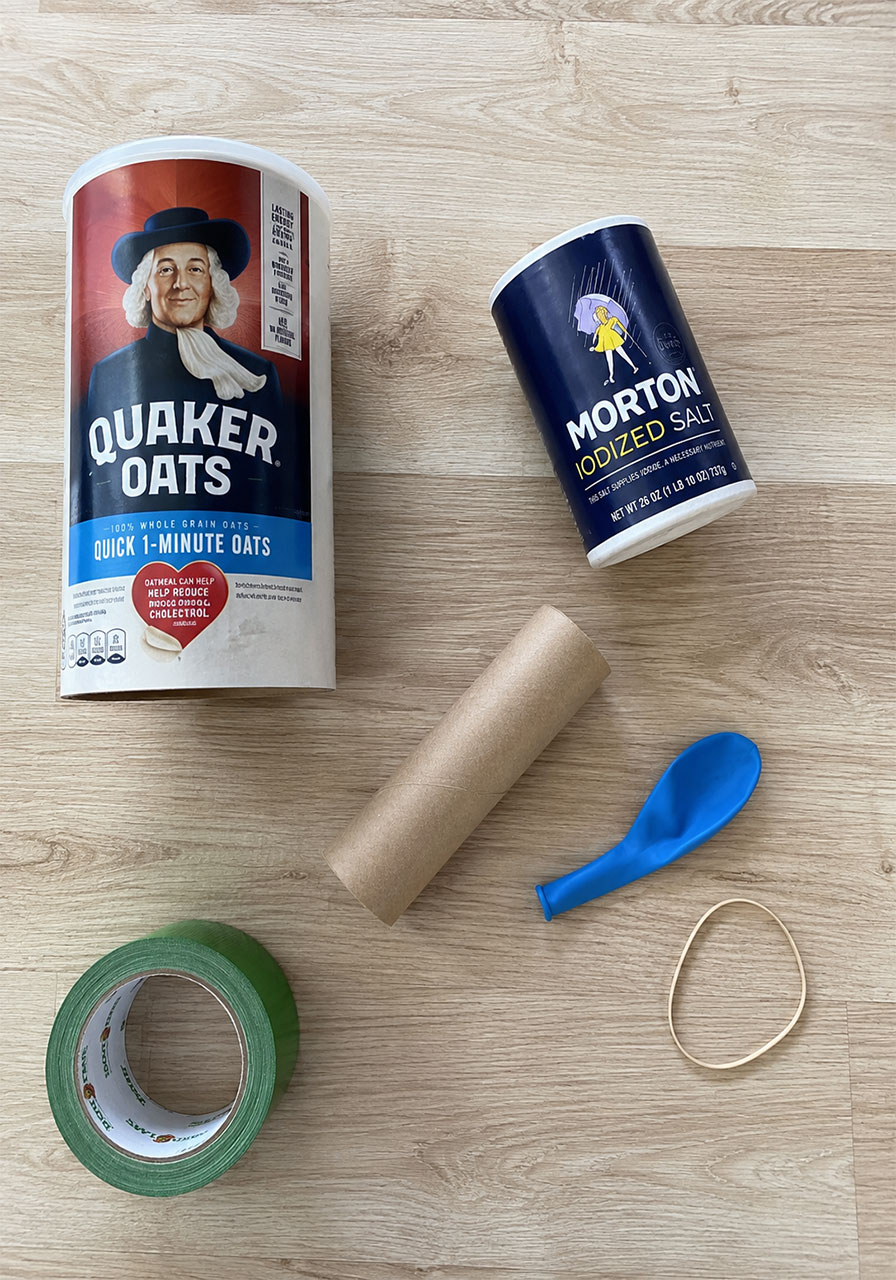
- A big cylindrical container, like an empty oatmeal canister
- A smaller cardboard tube, like an empty paper towel roll
- A balloon (large 18-inch balloons work best if you have them)
- A rubber band that stretches around the top of your large container
- Tape (duct tape holds up the best)
- A knife or scissors, adult-only for the cutting steps
- Table salt
A quick note on substitutions: if you don’t have an oatmeal canister, an empty milk carton with the top cut off works too, and it gives you a square plate instead of a round one. More on that later.
How to Build Your Chladni Plate
Give yourself about 15 minutes for setup. None of these steps are hard, but a few need an adult’s hands, especially the cutting.
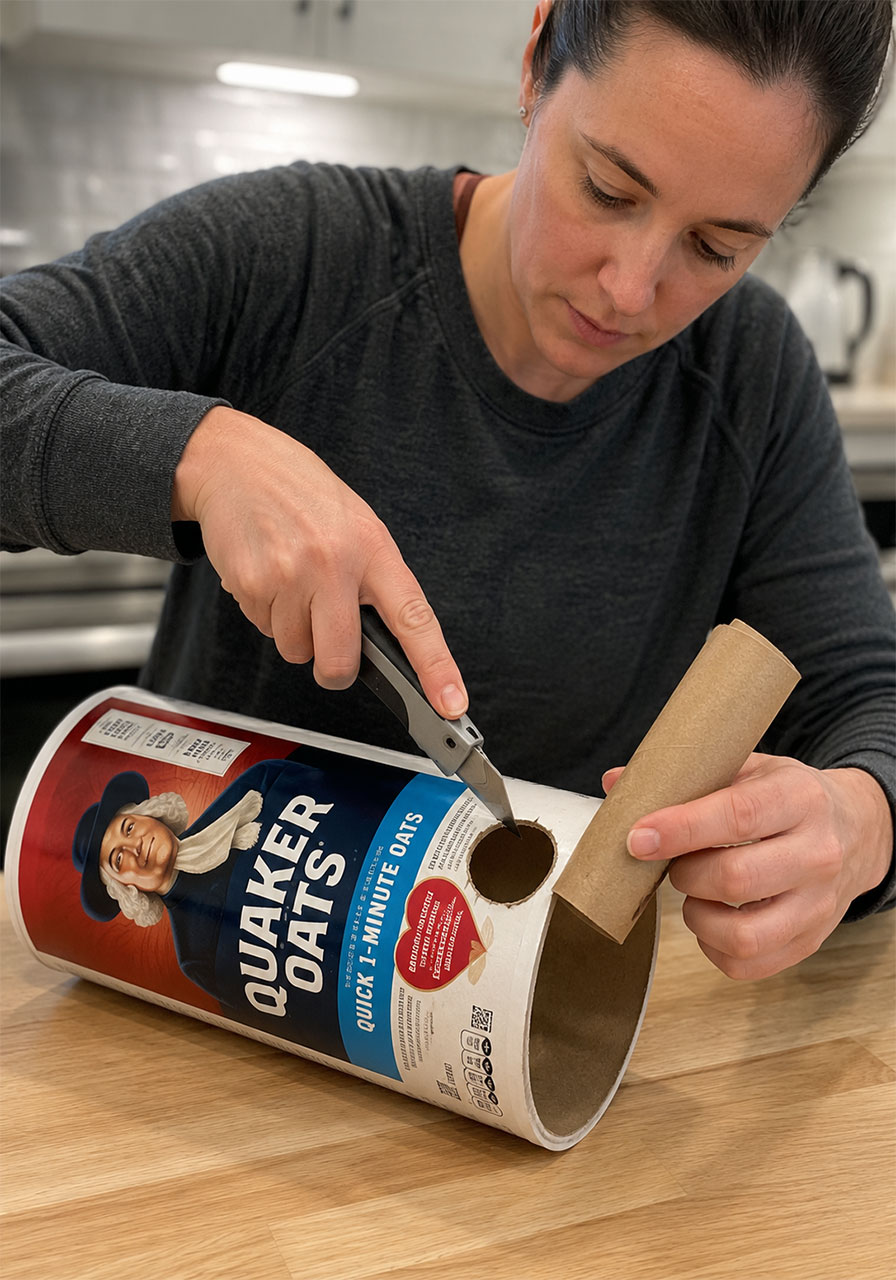
Step 1: Cut the hole.
Using your smaller cardboard tube as a guide, trace and cut a hole into the side of your large cylinder, near the bottom edge. It does not need to be perfect. A slightly rough circle works completely fine.
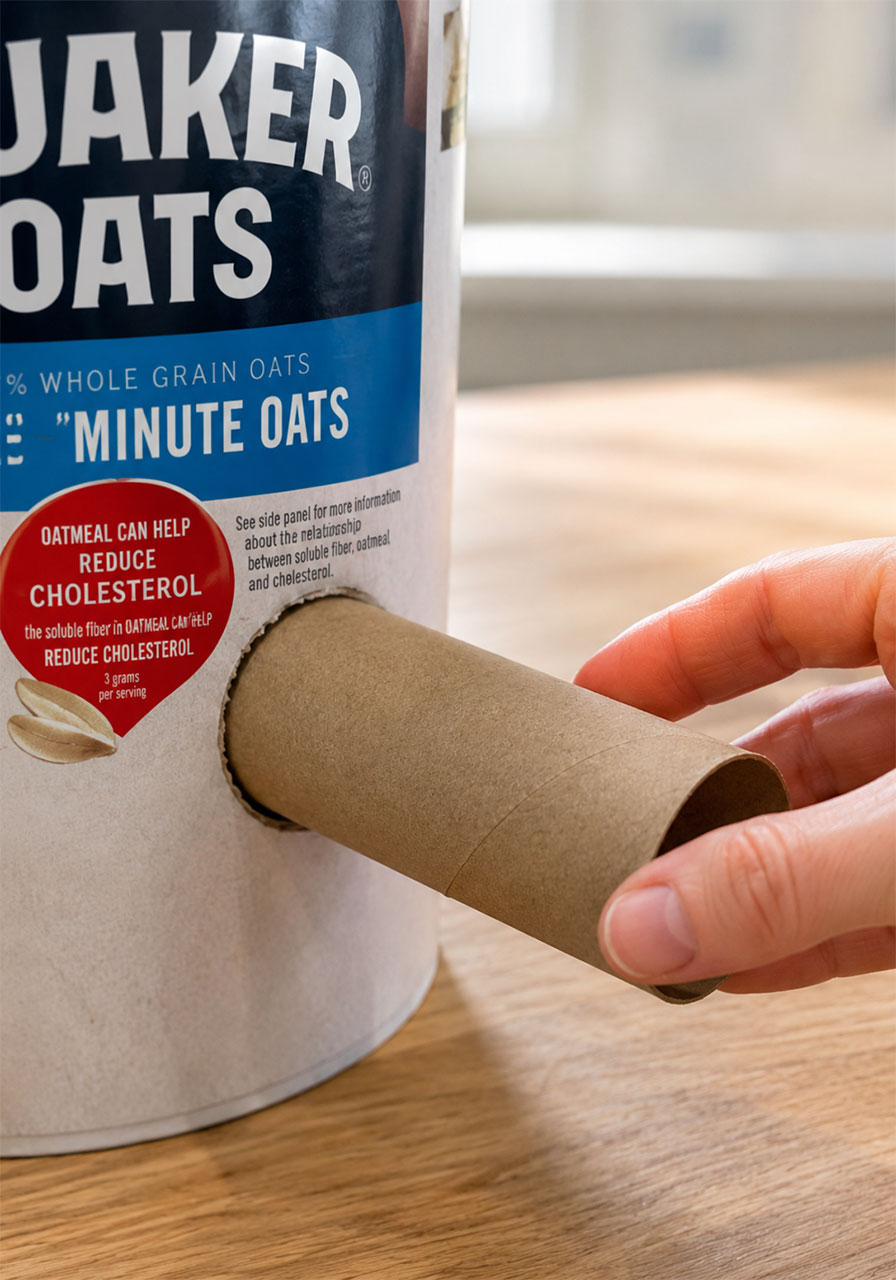
Step 2: Insert the tube.
Push your smaller tube into the hole you just cut, so it sticks out from the side of the container like a little horn. This is the tube your students will speak or sing into, so make sure it’s snug enough to stay in place.
Step 3: Prep your balloon.
Before you cut anything, inflate the balloon fully and let the air out a couple of times. This stretches the rubber out and makes it far easier to work with in the next step. Skipping this step is the number one reason people struggle to get the balloon over the container.
Step 4: Cut the neck off.
Snip the narrow neck off the balloon, leaving yourself with a big stretchy circle of rubber.
Step 5: Stretch it over the top.
Pull the balloon tight over the open top of your large cylinder, like a drum head. It needs to be taut, with no slack or wrinkles, or the pattern won’t form well.
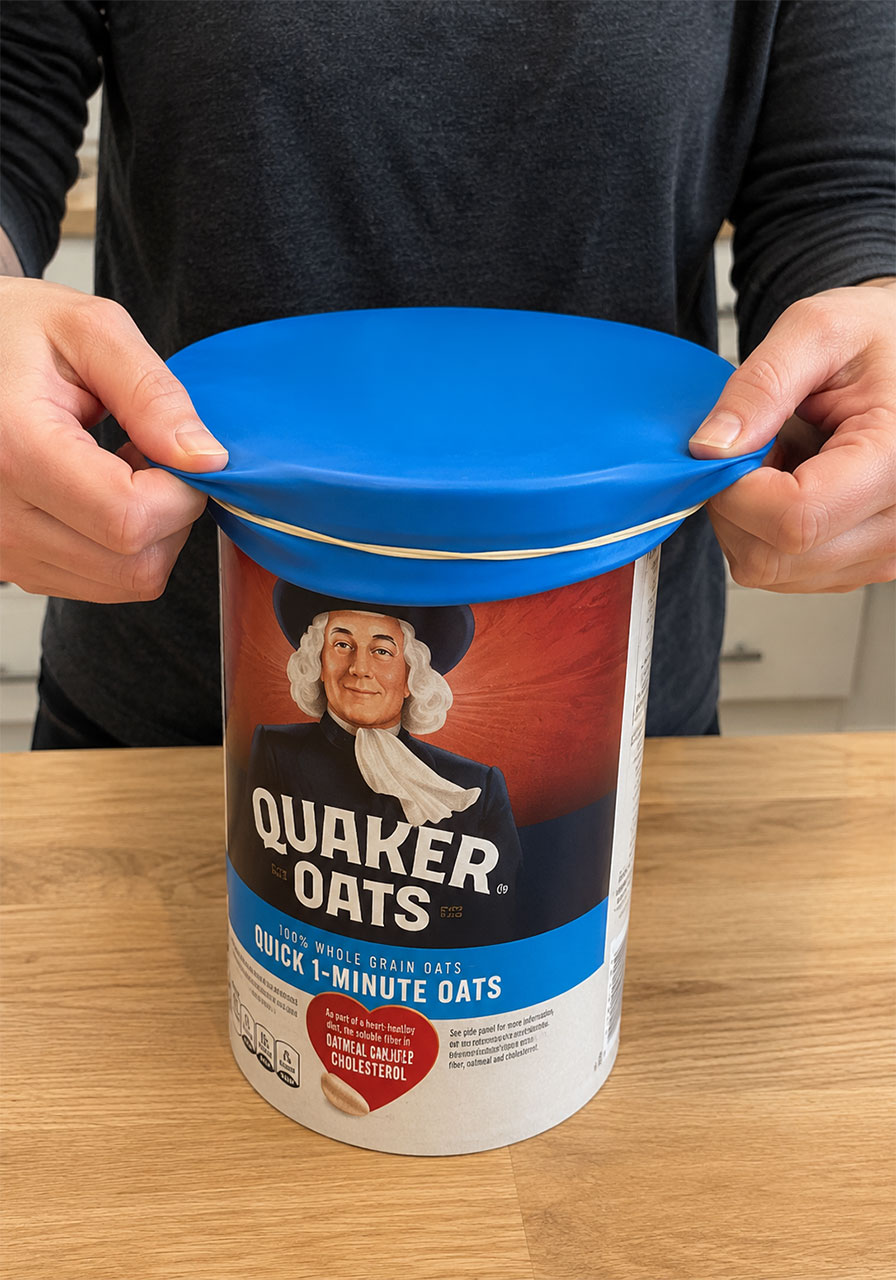
Step 6: Secure it.
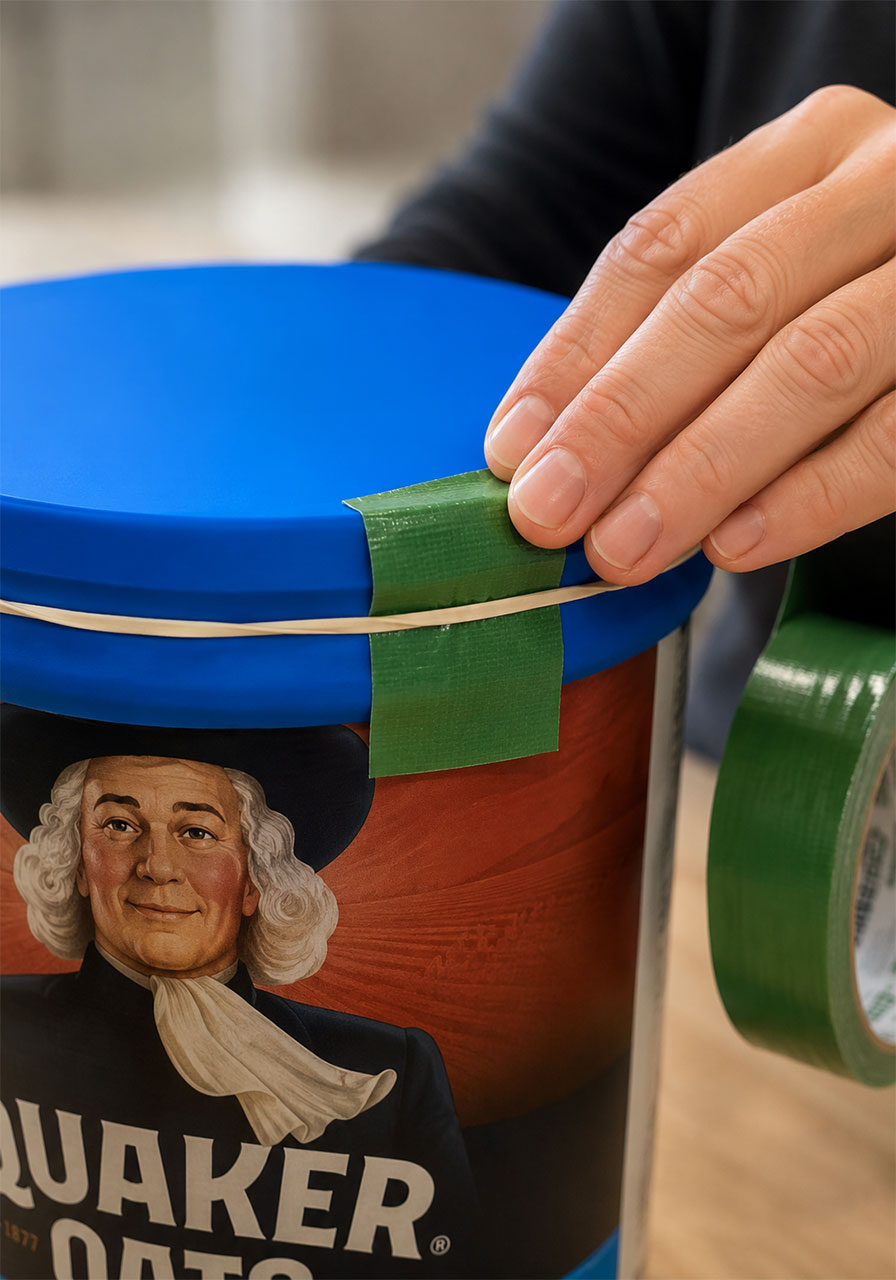
Wrap a rubber band around the top edge to hold the balloon in place, then reinforce it with a strip of tape going around the outside. This double-hold keeps the balloon from slipping loose mid-activity, which is exactly what you want with a room full of enthusiastic singers.
Pro Tip: Test the tension by gently pressing the center of the balloon with one finger. It should feel firm and springy, almost like a real drum. If it feels loose or saggy, pull it tighter and re-secure.
How to Run the Activity
Now for the fun part.
Step 1: Sprinkle a light, even layer of salt across the top of the balloon. You don’t need much, just enough to see it clearly against the balloon color.
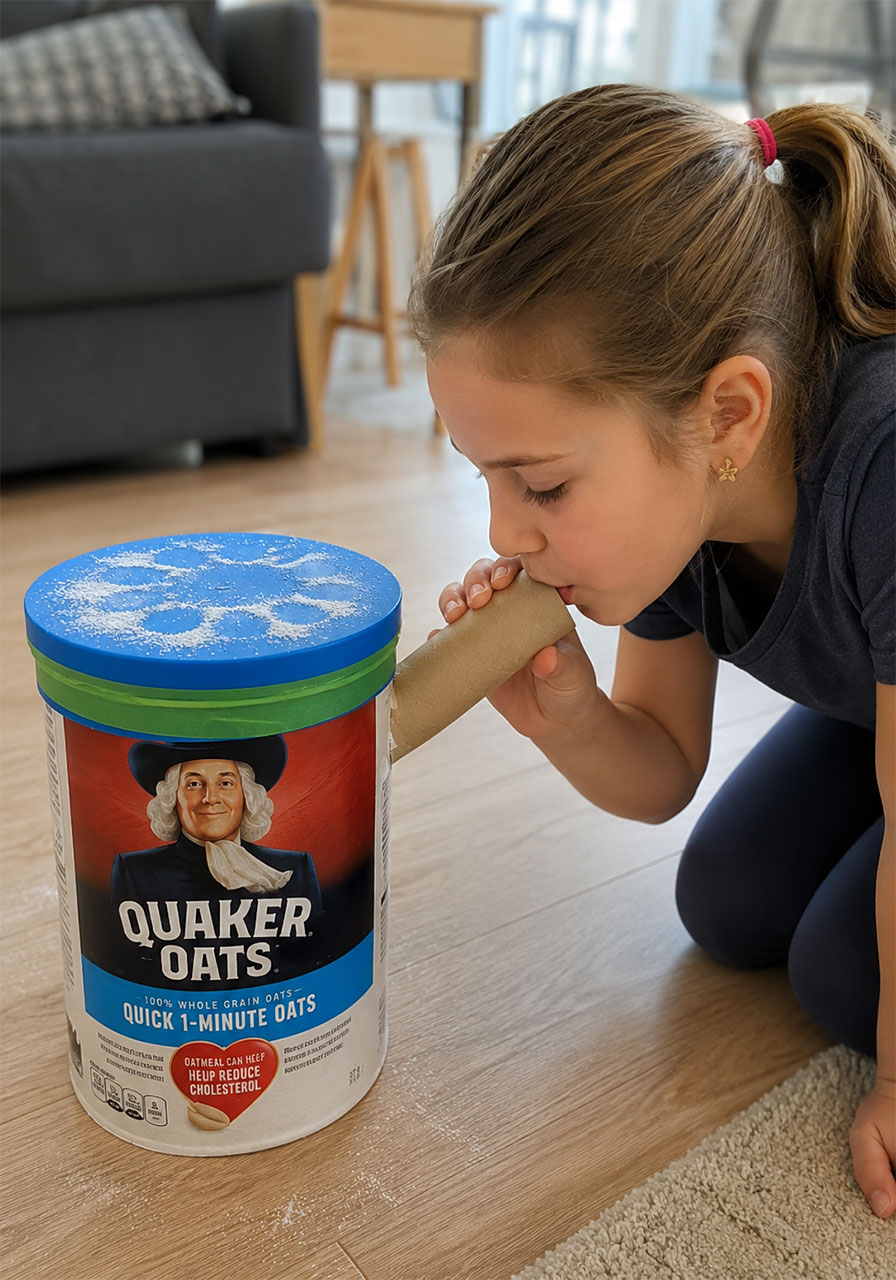
Step 2: Have one student speak or sing directly into the small tube.
Step 3: Watch the salt jump, shift, and settle into a pattern.
Step 4: Try again with a completely different pitch, and compare the new pattern to the last one.
That’s the whole activity, and it never gets old. Kids will ask to try it again and again, each time chasing a “cooler” pattern with a different pitch or volume.
What the Patterns Actually Look Like
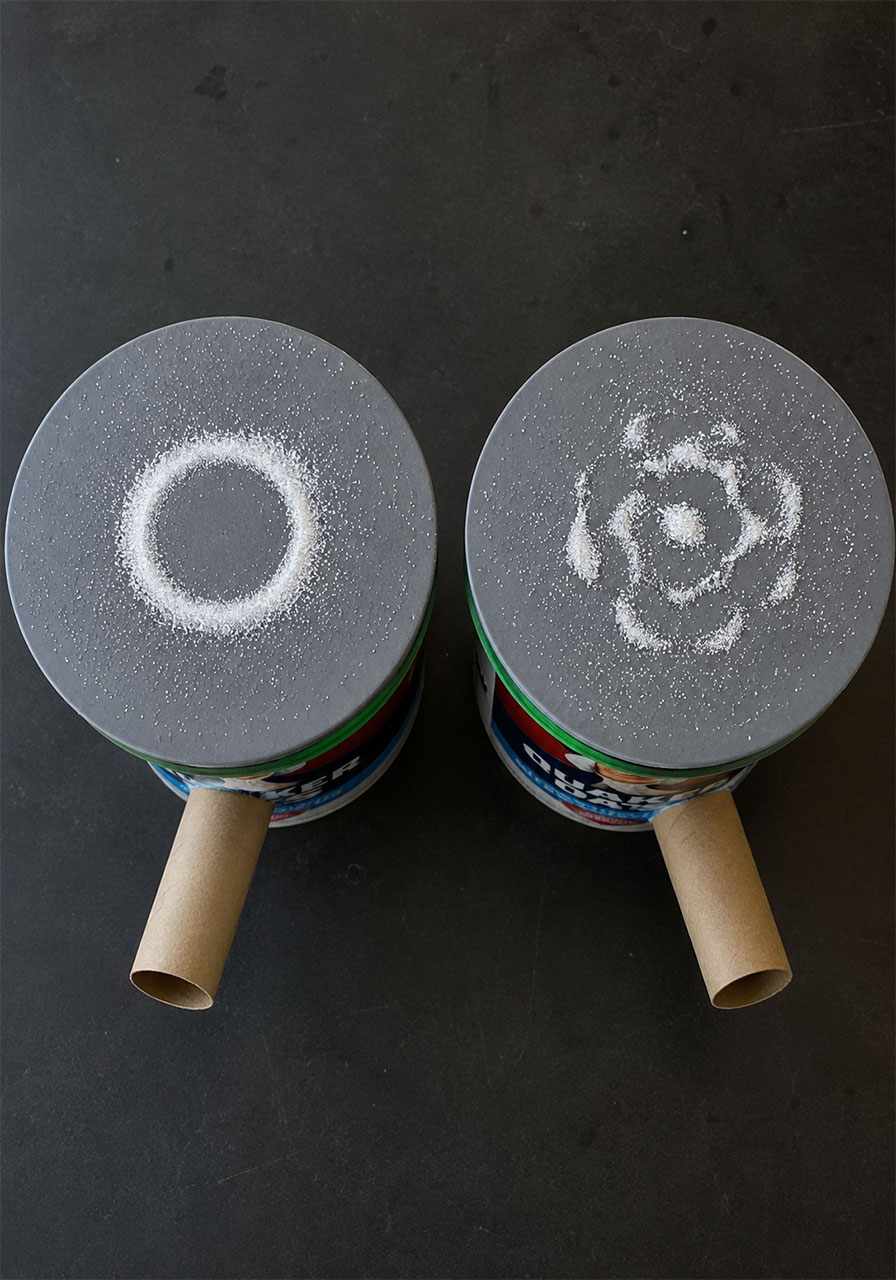
Every voice creates something a little different, which is part of what makes this so fun to repeat. Some sounds produce a clean ring, almost like a target. Others create a cluster of small blobs scattered around the center. A steady hum can pull the salt into a rose-like shape with several rounded petals, while a wavering note might scatter it into long, curved streaks.
No two kids will get the exact same pattern from the exact same word, which is a great jumping-off point for a group discussion. Ask them: why did your “ahhh” look different from your friend’s “ahhh”?
The Science Behind It: Why This Actually Works
Sound is vibration, full stop. Every time you speak or sing, your vocal cords vibrate and push waves of air outward.
When those sound waves hit the stretched balloon, they make it vibrate too, just like a real drum. But here’s the key part: different pitches vibrate the balloon in different patterns.
Some spots on the balloon move a lot. Other spots barely move at all, or don’t move at all. Those still spots are called nodes, and this is where it gets visually satisfying.
Salt sitting on a spot that’s vibrating hard will bounce and hop away from it. Salt sitting on a node, one of those still spots, stays put or gets nudged there by all the surrounding movement. Over just a couple of seconds, the salt naturally collects along these quiet lines, tracing out the invisible vibration pattern for everyone to see.
Change the pitch, and you change the vibration pattern, which means you change where the nodes are, which means the salt rearranges into a brand new shape. That’s the entire mechanism, and it’s the same basic principle behind why different musical notes sound and even physically behave differently.
Troubleshooting: If Your Patterns Aren’t Forming
If you sing into the tube and nothing much happens, check these three things before giving up.
Is the balloon tight enough? A loose, saggy balloon absorbs vibration instead of transmitting it. Re-stretch and re-secure if needed.
Is there too much salt? A thick layer of salt is harder to move. Start with a thin, even sprinkle and add more only if needed.
Is the singer close enough to the tube? The sound needs to travel directly down the tube to hit the balloon with enough energy. Have kids get their mouths right up close.
Fun Variation: Try a Different Shape
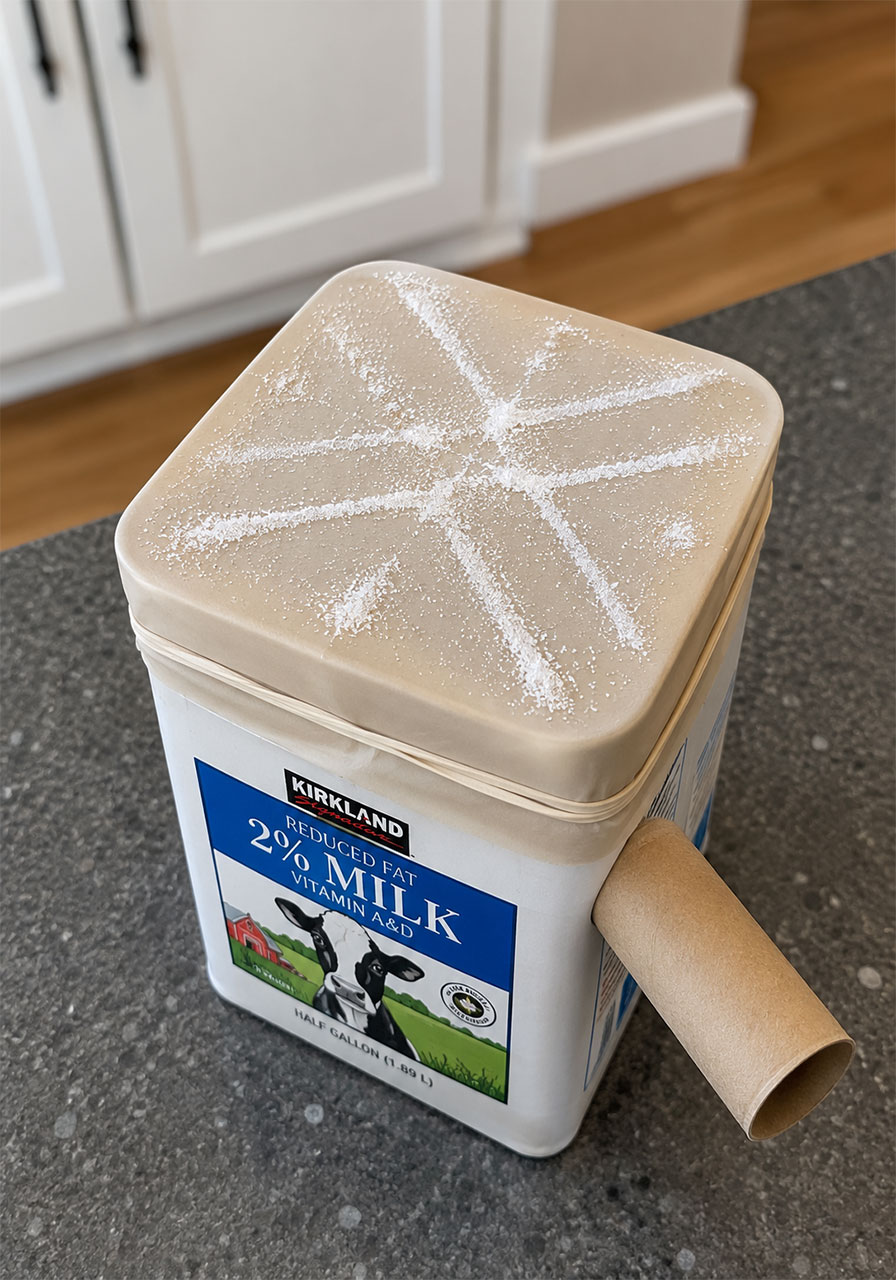
Once your class has mastered the round oatmeal canister version, switch things up with an empty milk carton with the top cut off instead. This gives you a square Chladni plate rather than a round one, and square plates tend to form different pattern shapes entirely, more angular and grid-like compared to the curves you get on a round surface.
Comparing the round version’s patterns to the square version’s patterns is a great way to extend this into a longer science lesson about how shape affects vibration.
A Little History: Meet the Man Behind the Plate
This activity is named after a real scientist, which is a fun detail to share with older kids who love a good “this was invented by an actual person” story.
Ernst Chladni was a German physicist who lived from 1756 to 1827. He’s often called the “father of acoustics” because of how much foundational work he did on sound and vibration.
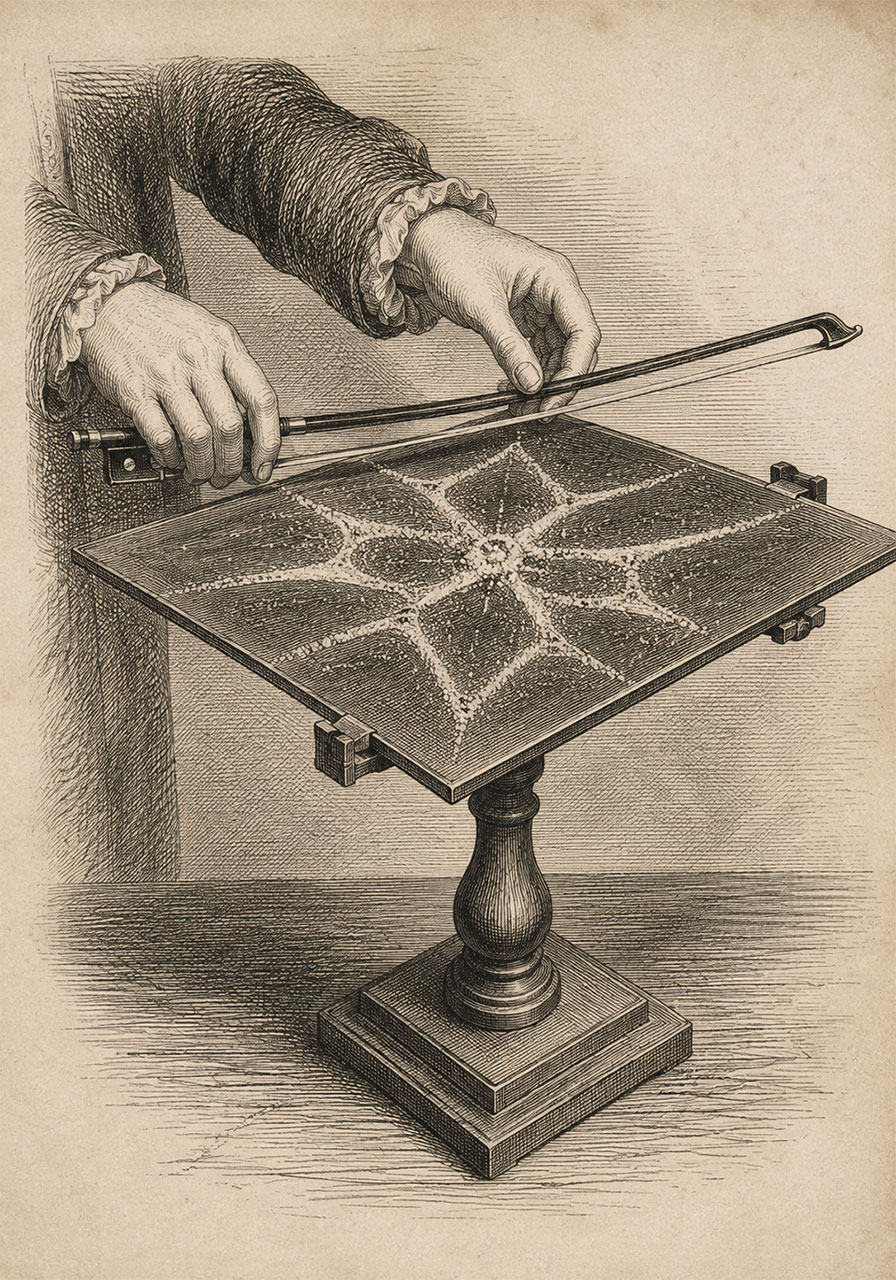
His original method didn’t use a balloon and salt like ours does. Instead, he sprinkled sand across a flat metal plate and dragged a violin bow along the edge, causing the plate to vibrate and the sand to collect into intricate geometric patterns. Audiences at the time found it almost magical, since nobody had ever watched sound “draw” anything before.
Chladni was also fascinated by meteorites, and he’s credited with helping prove that rocks really could fall from space, which was a controversial idea at the time. He made enough of a mark on the field that a mineral found primarily inside meteorites, chladniite, was named after him.
Why This Belongs in Your STEM Rotation
A great STEM activity doesn’t need a kit, a battery, or a screen. It needs a real question kids actually want the answer to, and “how do I make cooler patterns?” is exactly that kind of question.
This one costs almost nothing, sets up in under 15 minutes, and gets repeated by kids on their own without any prompting from you. That combination is rare, and it’s exactly why this activity has earned a permanent spot in classrooms and living rooms alike.
Build it once, and you’ll find yourself pulling it back out for birthday parties, science fair demos, rainy afternoons, and every single “I’m bored” moment in between.
