
If you’re a teacher or parent hunting for a hands-on STEM activity that actually teaches something, this one is a total win. You’ll build real, working gears using bottle caps, popsicle sticks, and a cardboard box you probably already have lying around.
Best of all, these gears really turn, really mesh together, and really demonstrate how motion transfers from one gear to the next. This isn’t a craft that just looks like science. It genuinely is science, in action, on your kitchen table or classroom desk.
Kids get to see, touch, and turn real mechanical concepts instead of just reading about them in a textbook. That kind of hands-on discovery is exactly what makes a simple machines unit click for young learners.
Best for: Ages 5 and up, homeschool science, classroom STEM stations, simple machines units, rainy day activities.
Time to Build: 30-45 minutes.
Group Size: Works for one child or a whole classroom of them.
Why This Project Is a Teacher and Parent Favorite
This activity checks every box on a STEM lesson plan. Kids practice fine motor skills while gluing, they problem-solve when a gear won’t turn, and they get an up-close look at how engineers design real machinery.
It’s also budget-friendly. You are not buying an expensive gear kit. You are reusing an Amazon box, some spare bottle caps, and popsicle sticks that likely cost a dollar or two.
And it holds attention. Because the gears actually spin and mesh, kids want to keep experimenting with the layout long after the glue has dried. That built-in replay value is what makes this one of our most requested STEM activities.

What You’ll Need
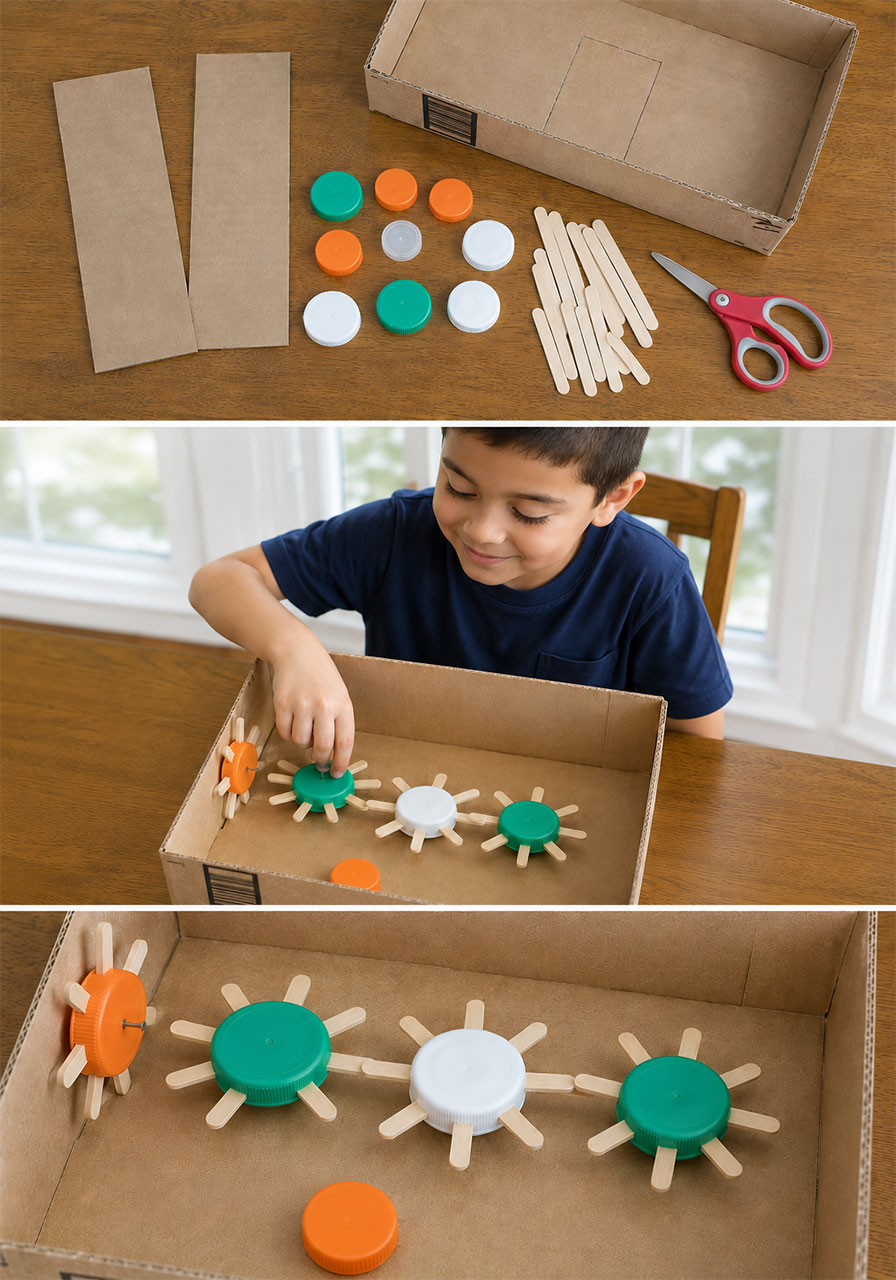
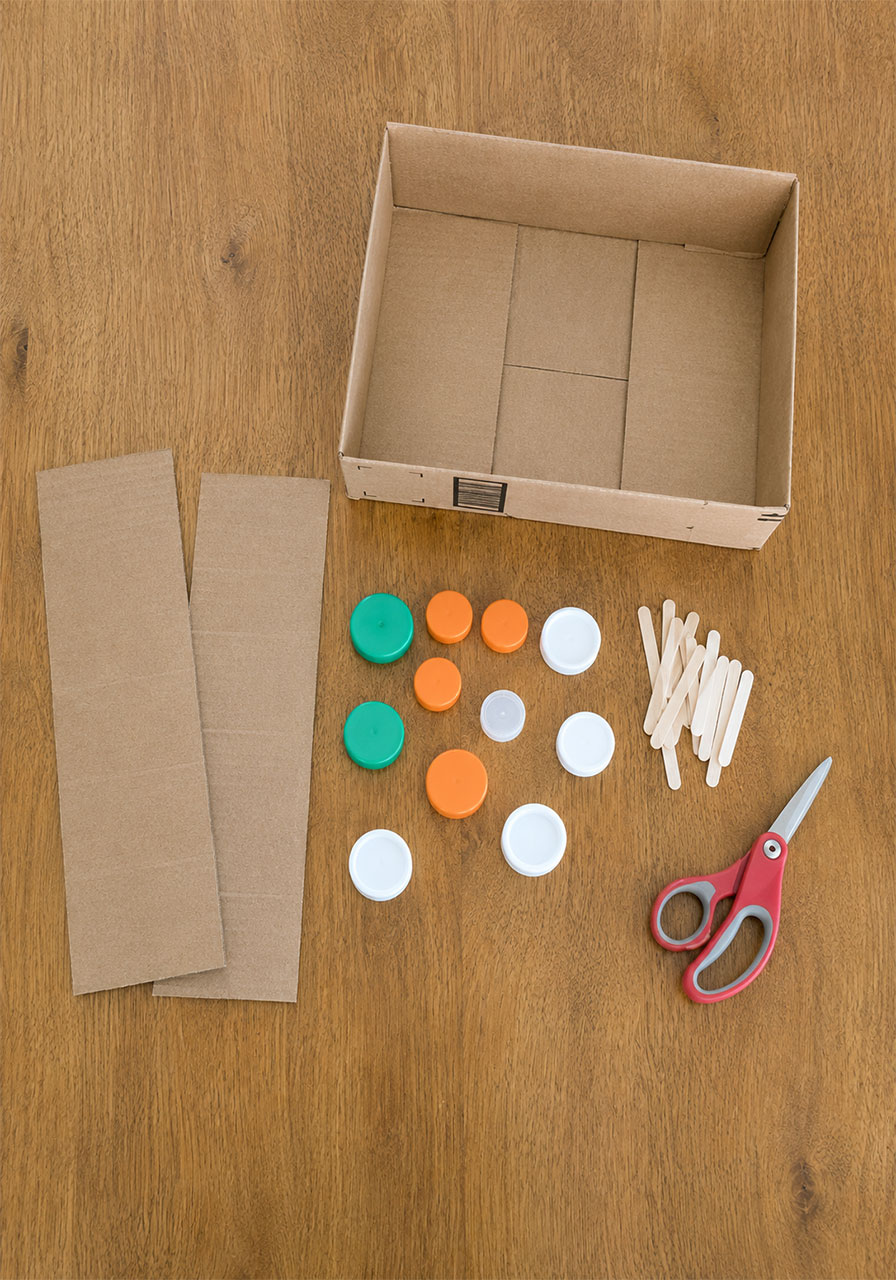
A sturdy cardboard box (an Amazon box or shoebox works great)
An assortment of plastic bottle caps and lids in a few different sizes
A few extra small bottle caps (these become the axle posts on the box floor)
Mini popsicle sticks (regular popsicle sticks work fine too)
Scissors, to trim the popsicle sticks into short teeth segments
A hot glue gun (a low-temp glue gun lets kids help with this step safely)
One small nail (adult-only step, optional, for a side-mounted gear)
A hammer (adult-only, for the nail step)
Step 1: Prep Your Box and Materials
Start by folding down or cutting your cardboard box so it has a flat, open interior floor. You want plenty of open surface area where gears can sit and turn.
Gather your bottle caps into two groups. Set aside a few small caps to use as axle posts. Set aside your larger caps to become the actual turning gears.
Cut your popsicle sticks into short, even segments, about one to one and a half inches long. Each gear will need eight of these segments, so cut plenty ahead of time to keep the building process moving.
Step 2: Build Each Gear
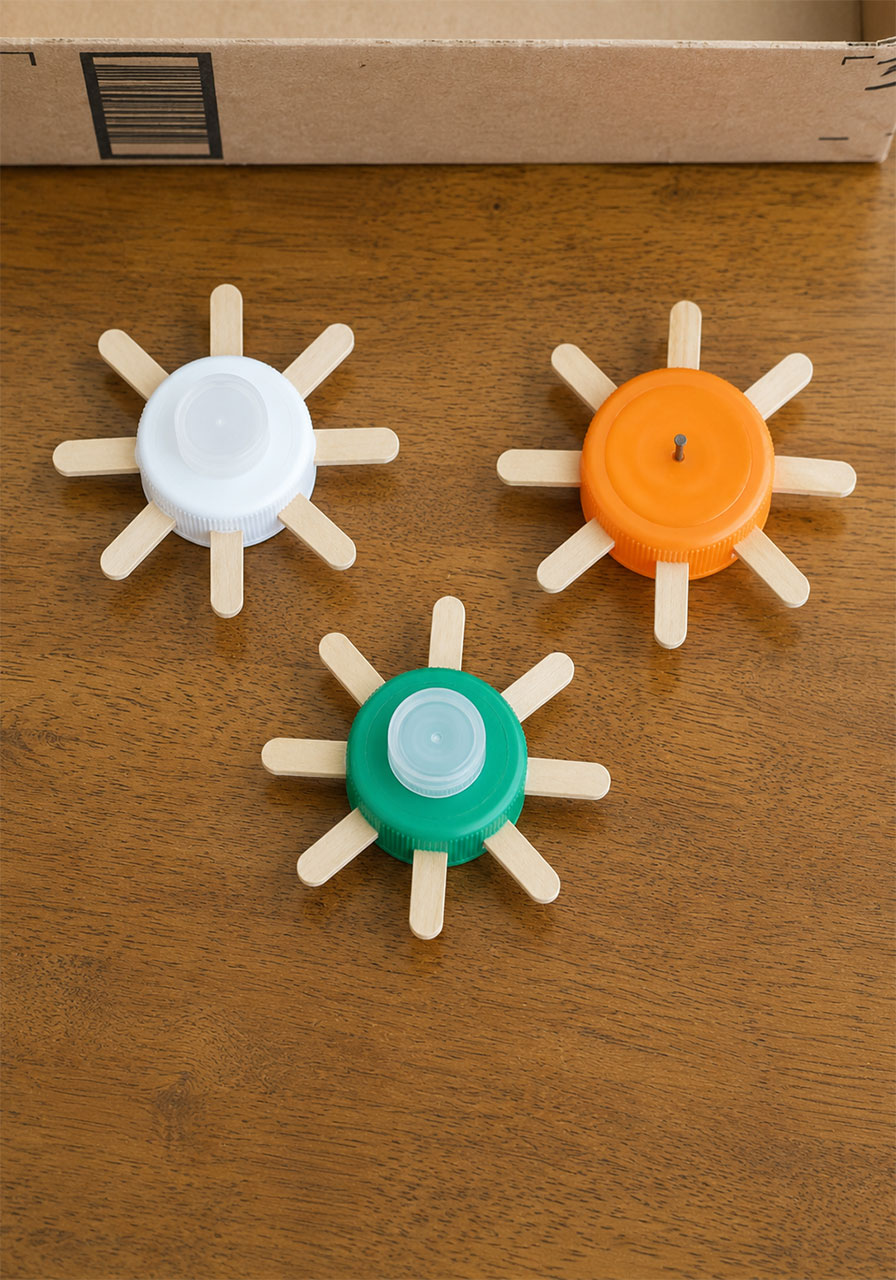
Take one larger bottle cap and lay it flat, top side up. This will be the base of your gear.
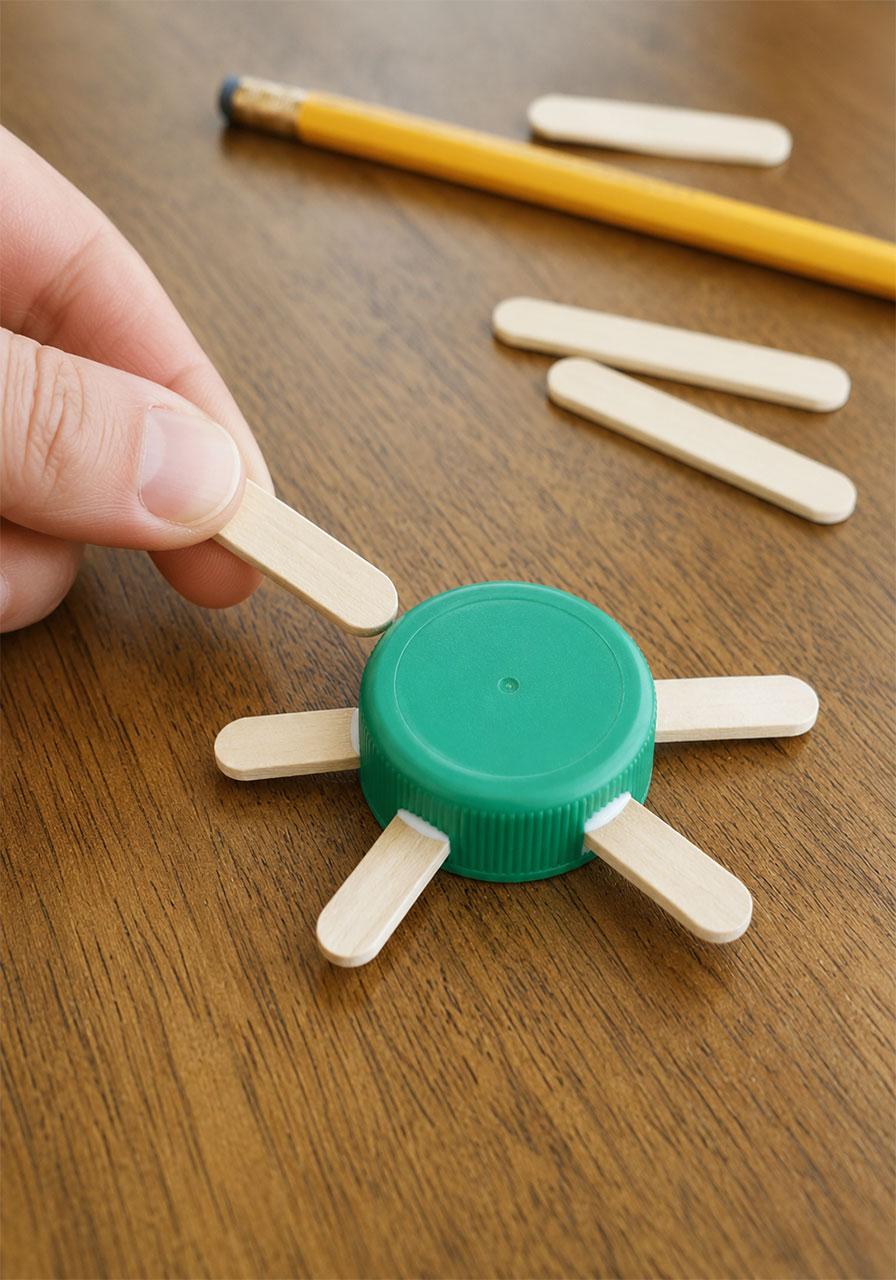
Glue eight popsicle stick segments evenly around the outer edge of the cap, like spokes on a wheel or rays on a sun. These segments become the “teeth” that let one gear catch and turn the next.
Space the segments as evenly as you can. Even spacing is what allows the teeth to mesh smoothly with a neighboring gear instead of catching or skipping.
For an extra-secure grip, glue a smaller bottle cap on top of the center of the gear. This gives little fingers something easy to hold onto when they spin the gear later.
Repeat this process to build three or four gears total. Three gears is the sweet spot for smooth turning, but building a few extra lets kids experiment with different layouts.
Step 3: Mount the Axle Posts Inside the Box
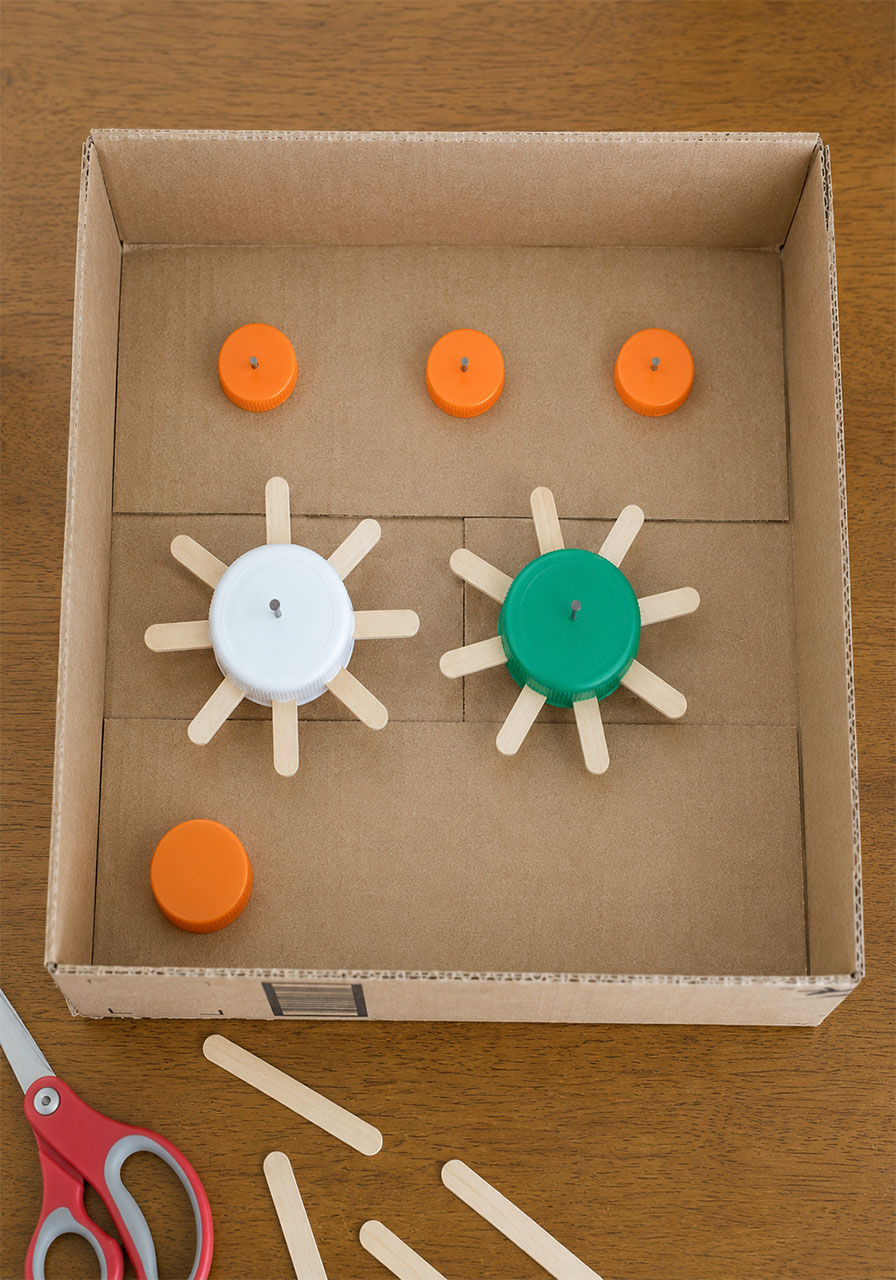
Here is the engineering trick that makes this whole project work. Glue your small, spare bottle caps directly onto the floor of the cardboard box in a row, spacing them so your finished gears will sit close enough to touch.
These small caps act as axle posts. Each finished gear will sit on top of one of these posts.
This is important: do not glue the gears themselves down to the box. The axle post underneath needs to stay smaller than the gear sitting on top of it. That gap is what lets the gear spin freely while still staying anchored in place.
If you glue the gears directly to the box, they won’t turn at all. It’s a great “aha” moment to let kids test this themselves and figure out why a stuck gear doesn’t work.
Step 4: Set the Gears in Place and Test the Motion
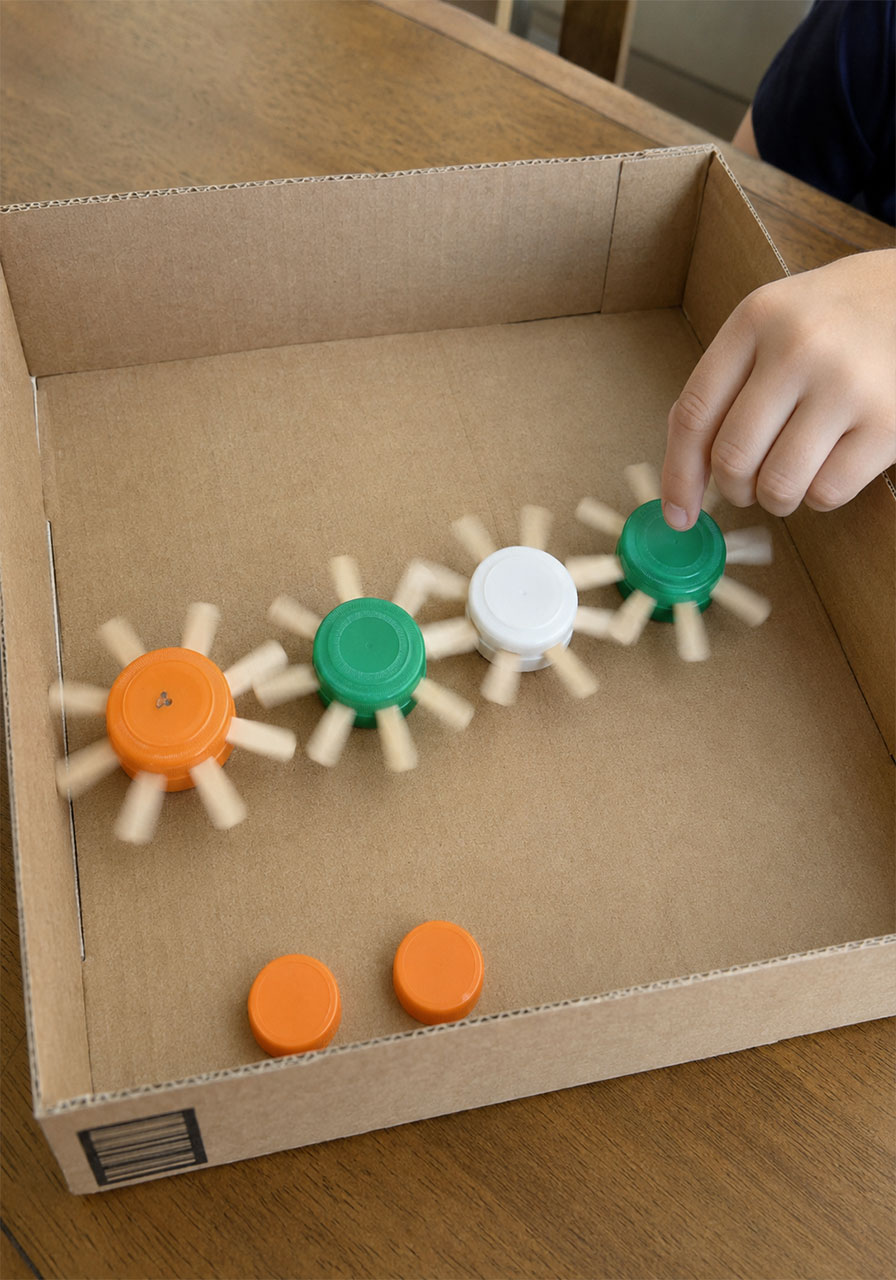
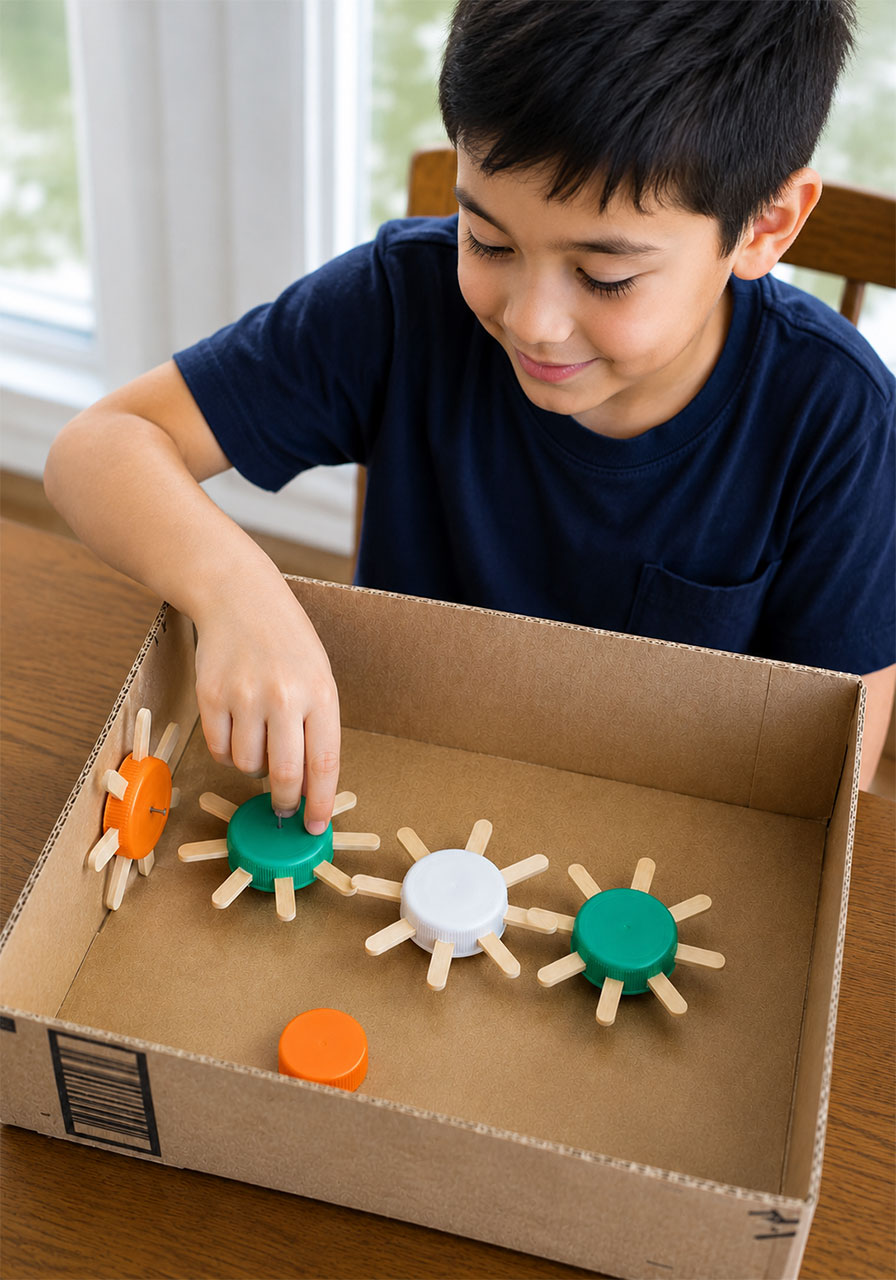
Place each finished gear on top of an axle post so the teeth of neighboring gears overlap slightly and touch.
Turn the first gear by hand. Watch as it catches the teeth of the next gear, which then turns the next one, and so on down the line.
This is the exact moment kids fall in love with the project. Watching motion travel visibly from one gear to the next, entirely from things you built yourself, makes the concept of mechanical motion click instantly.
Optional: Add a Side-Mounted Gear to Show Direction Change
Want to take the lesson one step further? You can demonstrate how gears change the direction of motion, not just pass it along.
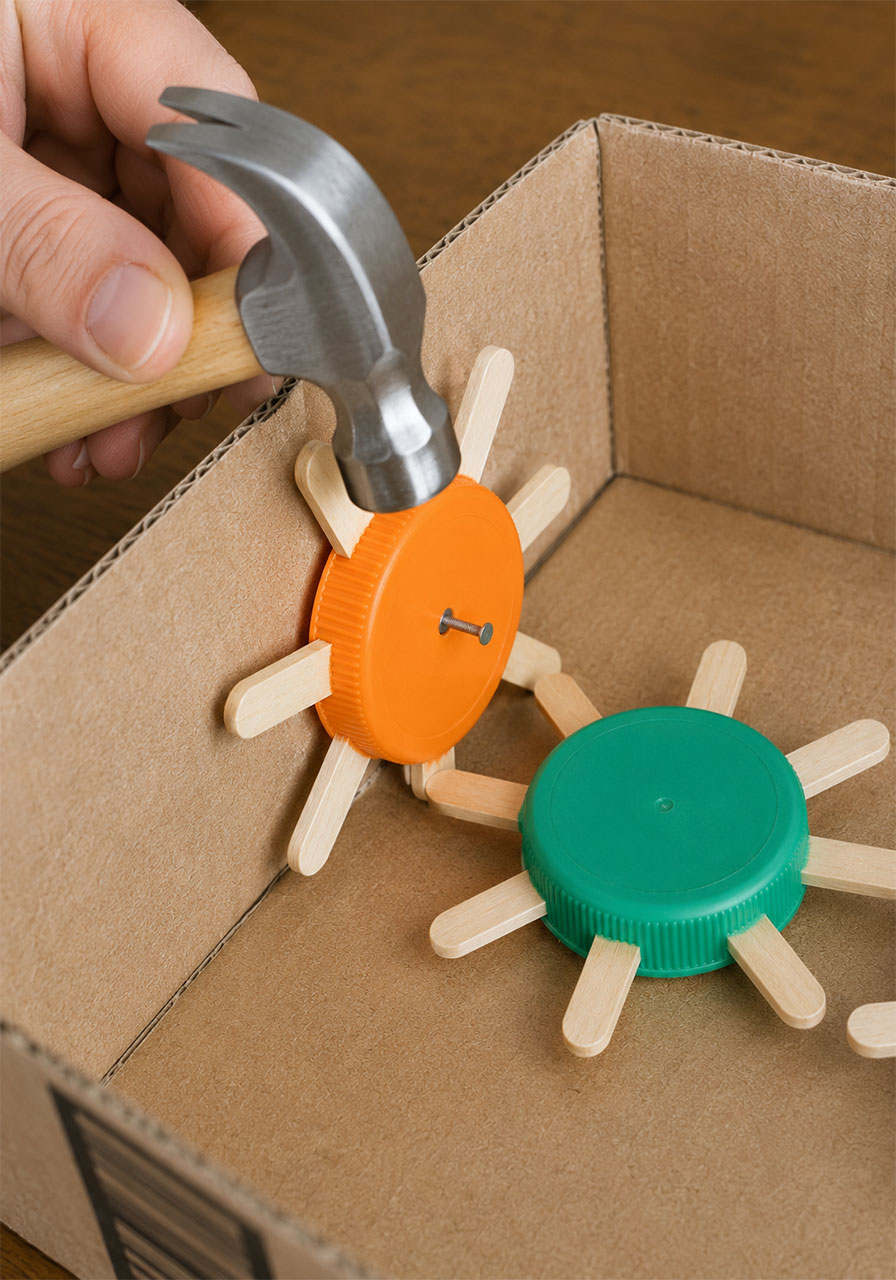
To do this, an adult should hammer a small nail through the center of one gear, then poke that nail through a hole in the side wall of the box. This mounts a gear vertically instead of flat on the box floor.
When that vertical gear meshes with a flat gear on the box floor, kids can see motion shift direction as it moves from one gear to the next. This one small addition takes the project from “fun craft” to genuine engineering demonstration.
A quick safety note: the nail point will stick out slightly on the back side of the box wall. This step is best handled by an adult, and we’d recommend this particular variation for ages 5 and up with supervision, rather than for very young children working solo.
Pro Tip
Stick to three gears in a row for the smoothest turning experience. Once you add a fourth gear, there often isn’t enough torque left to turn that final gear reliably.
Gluing down a few extra axle posts is a smart move too. It lets kids rearrange and experiment with different gear layouts without needing to rebuild the whole box.
Fun Variation
Turn this into a full engineering challenge by asking kids to design their own gear train layout before you glue anything down. Have them sketch it on paper first, then build it and test whether their plan actually works.
This adds a design-and-test loop to the project, which is exactly how real engineers approach problems. It’s a simple way to stretch this activity for older kids or a full classroom STEM lesson.
Why This Belongs in Your STEM Lineup
Projects like this one are exactly why hands-on learning sticks with kids longer than a worksheet ever could. There’s real problem-solving here, real cause and effect, and a real sense of accomplishment when those gears finally spin together.
It’s also endlessly adaptable. Swap in different sized caps, change the number of gears, or add the side-mounted gear challenge to keep the activity fresh for repeat STEM days throughout the school year.
