
Get ready to deck your halls with vintage charm! These handmade decorations are proof that DIY doesn’t have to mean “disaster in yarn form”.
Looking for Christmas decorations that won’t make your guests politely ask, “Oh, did you… make that yourself?”. You’ve come to the right place. We’re talking genuine vintage charm meets actually-pretty results. No glitter explosions, no Pinterest fails – just cozy, old-fashioned decorations that’ll make your home feel like a holiday movie set.
The best part? Most of these use materials you already have lying around (yes, those oranges in your fruit bowl are about to become décor), and none require a degree in advanced crafting. Whether you’re looking to fill an afternoon with the kids or create Instagram-worthy holiday style on a budget, these timeless projects deliver big on charm and nostalgia.
Let’s make something you’ll actually be proud to display.
Quick Tips Before You Start:
Embrace the imperfections. Old-fashioned charm is all about that handmade, slightly wonky look – it’s what makes each piece special.
Natural is your friend. Pine cones, dried fruit, and twine keep costs down while cranking up the cozy factor.
Get the kids involved. Simple projects like popcorn garlands and paper snowflakes are perfect for little hands (and big memories).
No fancy supply runs needed. Most of these use stuff you already have: paper, glue, string, and a bit of creativity.
Think eco-friendly. Natural materials mean less waste and easier storage – plus, many can be composted when the season’s over.
Ready? Let’s turn your home into a vintage winter wonderland.

1. Spiced Orange Pomander Balls
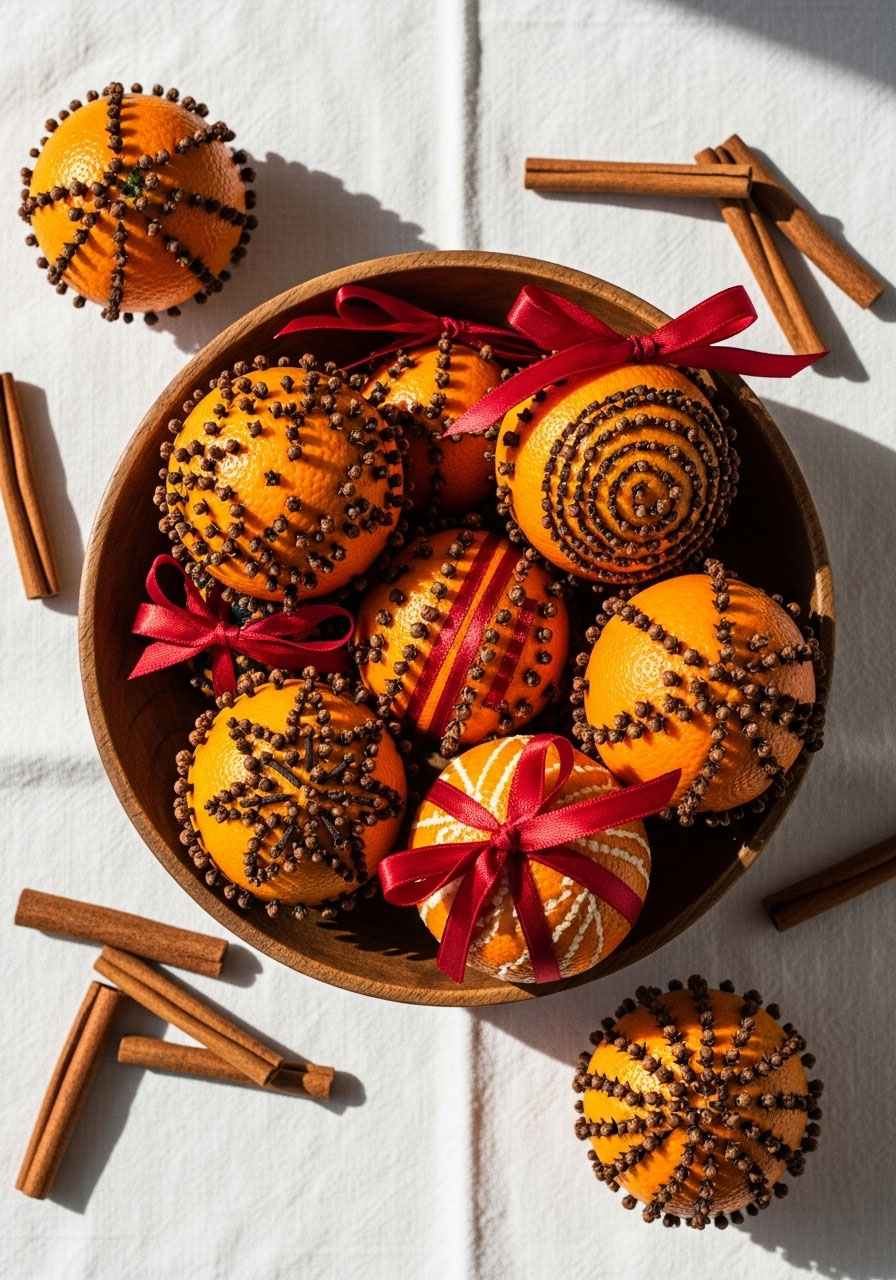
Nothing says “cozy Christmas” quite like the smell of oranges and cloves wafting through your home. These beauties are ridiculously easy to make and work double-duty as décor and natural air fresheners.
Best for: Centerpieces, bowl fillers, or hanging from ribbon on your tree
Time to Make: 15-20 minutes (plus drying time)
What You’ll Need:
- Fresh oranges
- Whole cloves
- Ribbon (optional)
- Ground cinnamon and nutmeg (optional, for rolling)
How to Make:
- Grab your oranges and start poking whole cloves into the skin in whatever pattern strikes your fancy – rows, spirals, or random dots all work great.
- Cover as much or as little of the orange as you like. More cloves = stronger scent.
- Optional: Roll your studded orange in a mix of cinnamon and nutmeg for extra fragrance.
- Let them dry in a cool, dry spot for a few weeks. They’ll shrink slightly and harden, lasting for months.
- Display them in a bowl, on your mantel, or tie ribbon around them to hang.
Pro Tip: Make a whole batch at once – they look stunning grouped together and make fantastic hostess gifts!

Indoor Christmas Scavenger Hunt Printable for Kids
25 ready-made clues = zero stress for you – Just print, hide, and watch kids stay engaged for hours while you actually enjoy your coffee
Instant download, works today – Get it in minutes, print on regular paper, create Christmas magic in under 15 minutes of setup
Saves Christmas on bad weather days – Perfect indoor activity when kids are bouncing off walls and you need them happily occupied
One purchase, use it every year – Blank templates let you customize for different ages or create new versions as kids grow

Outdoor Christmas Scavenger Hunt Printable for Kids
Gets kids outside and active – Burns energy while solving 25 riddles and challenges around the yard (lifesaver when they’re hyped on holiday sugar)
Instant download, 15-minute setup – Print, hide clues, done. Perfect last-minute activity that looks like you planned for weeks
Works with your yard decorations – Turns your Christmas lights and lawn decor into part of the adventure kids will beg to do again
Reusable every year – Blank templates let you customize for different ages or add new challenges as kids grow
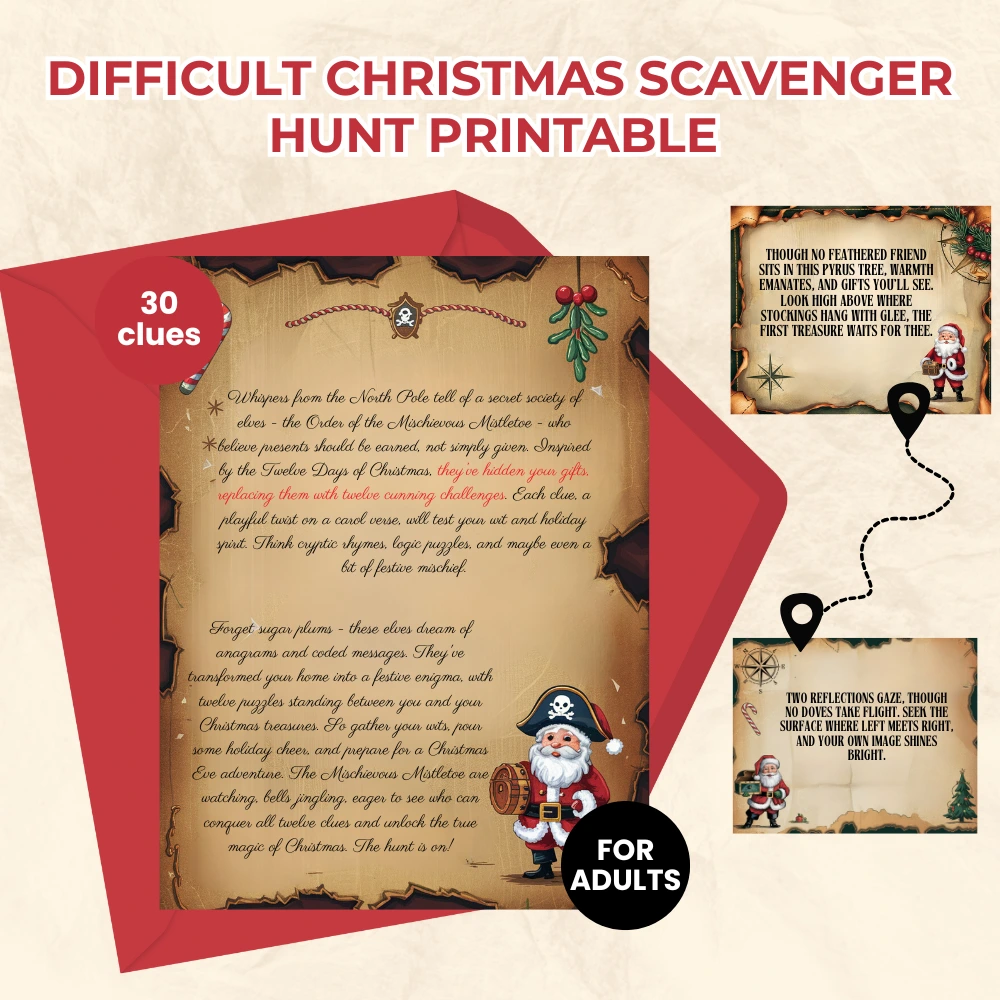
Difficult Christmas Scavenger Hunt Printable for Adults – Twelve Days of Christmas
Actually challenging puzzles for adults – 30 clever clues including ciphers, logic puzzles, and cryptic riddles that will genuinely stump your smartest friends
Print and play in minutes – Download, print, hide. Setup takes less time than wrapping gifts, but creates hours of laughter and memories
Flexible for any group – Pick 12 clues for a quick adventure or all 30 for an epic night. Customize with blank cards for personal inside jokes
2. Vintage Wooden Thread Spool Ornament
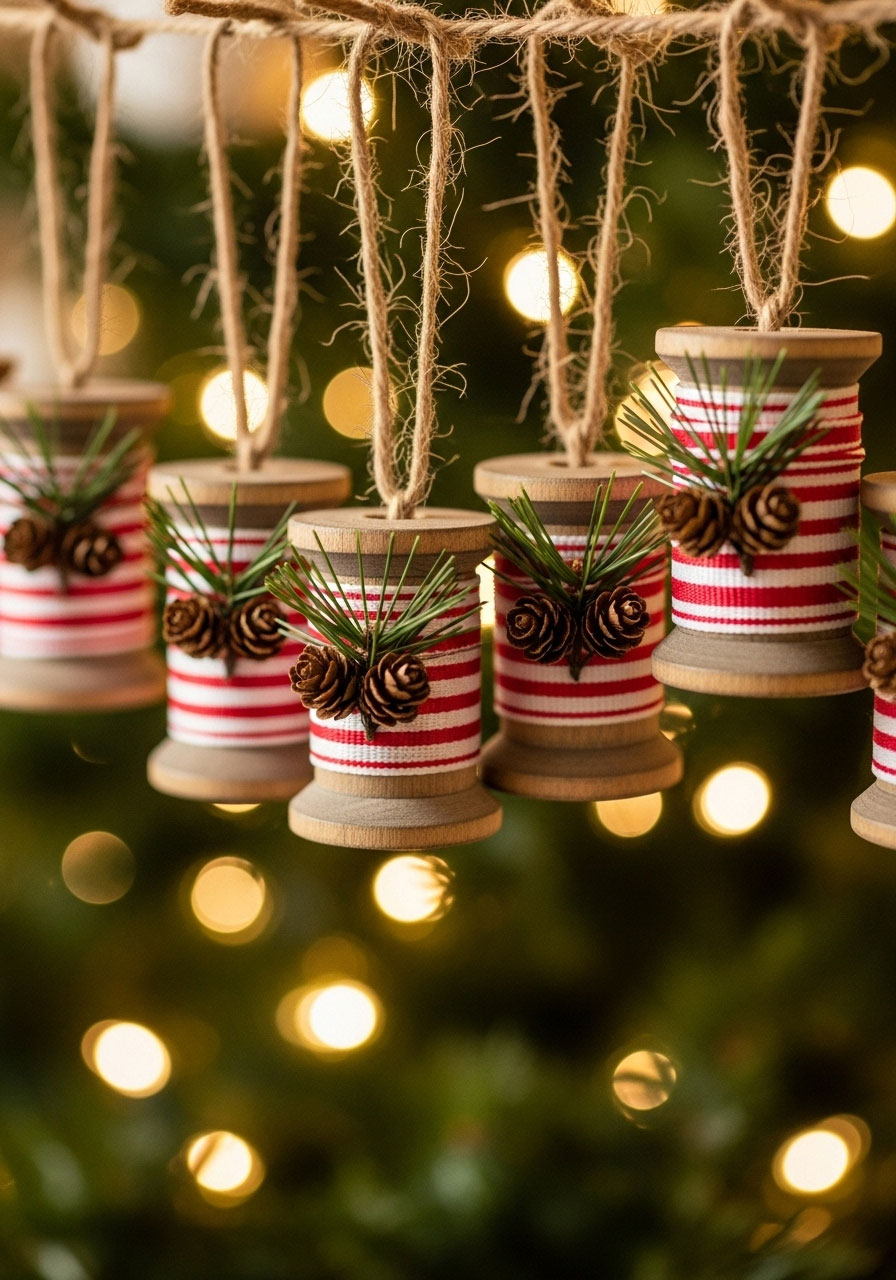
Got old wooden thread spools gathering dust? Time to give them a festive makeover! These adorable little ornaments bring serious vintage vibes with almost zero effort.
Best for: Tree ornaments, gift toppers, garland accents
Time to Make: 5-10 minutes per ornament
What You’ll Need:
- Wooden thread spools (empty or vintage finds)
- Festive ribbon or twine
- Small sprigs of artificial greenery or tiny pine cones
- Hot glue gun
- Twine or thin ribbon for hanging
How to Make:
- Wrap ribbon or twine around the center of your spool, securing with a dab of hot glue.
- Add a tiny sprig of greenery or a mini pine cone to the top with more glue.
- Thread some twine through the spool’s center hole to create a hanging loop.
- Hang and admire your adorable retro creation!
Pro Tip: Hit up thrift stores for vintage wooden spools – they add even more authenticity and charm.
3. Dried Apple Wreath
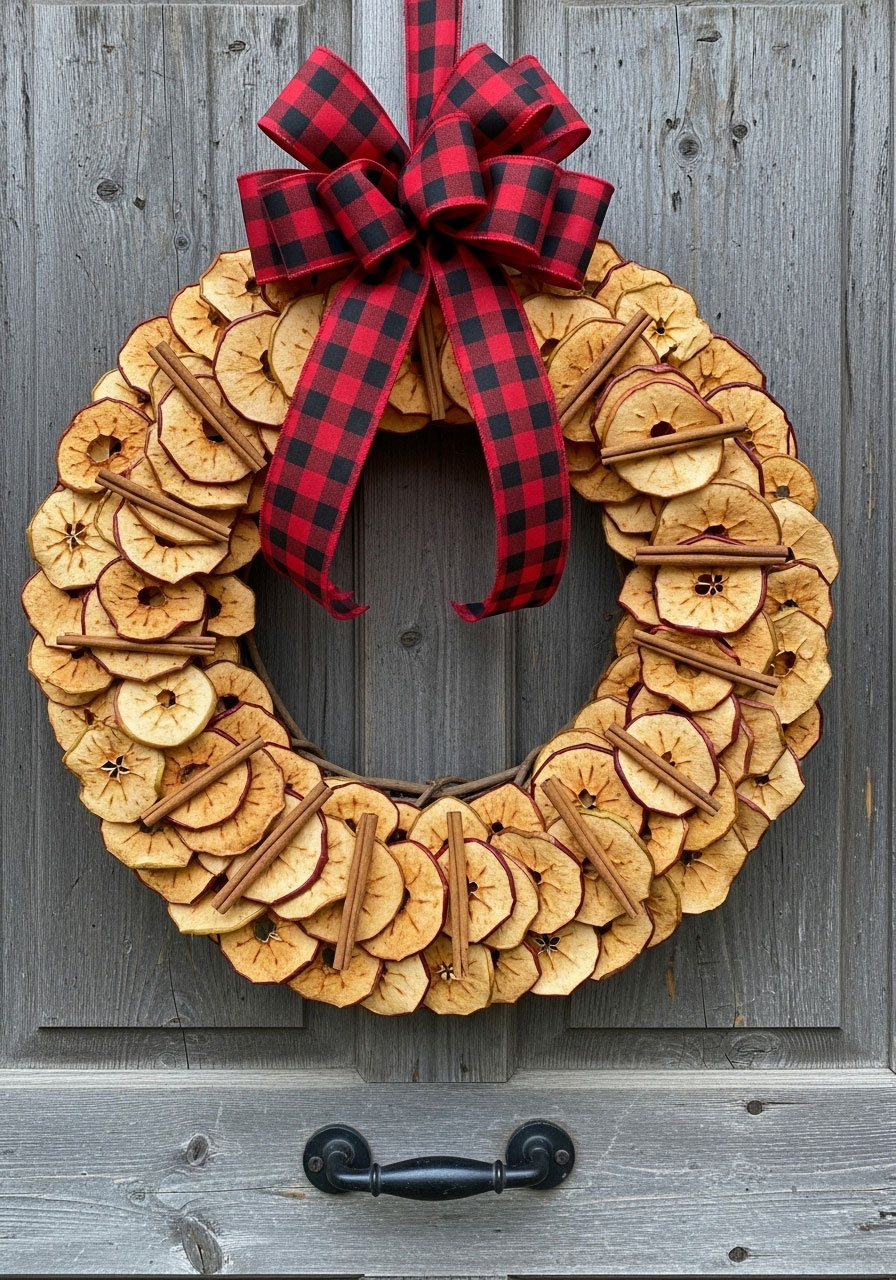
Dried fruit is having a major moment, and for good reason – it’s gorgeous, natural, and smells amazing. This apple wreath brings rustic elegance to your door or wall.
Best for: Front door, above the mantel, kitchen décor
Time to Make: 30 minutes (plus drying time for apples)
What You’ll Need:
- 4-5 apples, sliced thin (about ¼ inch)
- Wreath form (wire or grapevine)
- Hot glue gun
- Optional: cinnamon sticks, ribbon, greenery
How to Make:
- Slice your apples horizontally into thin rounds and pat dry with paper towels.
- Dry them out by baking at 200°F for 2-3 hours, flipping halfway, until they’re fully dried but not burnt.
- Arrange the dried slices on your wreath form, overlapping slightly, and secure with hot glue.
- Add accents like cinnamon sticks or a bow if you’re feeling fancy.
- Hang it up and bask in the compliments!
Pro Tip: Mix in dried orange slices for extra color variation and visual interest.
4. Homemade Paper Snowflakes
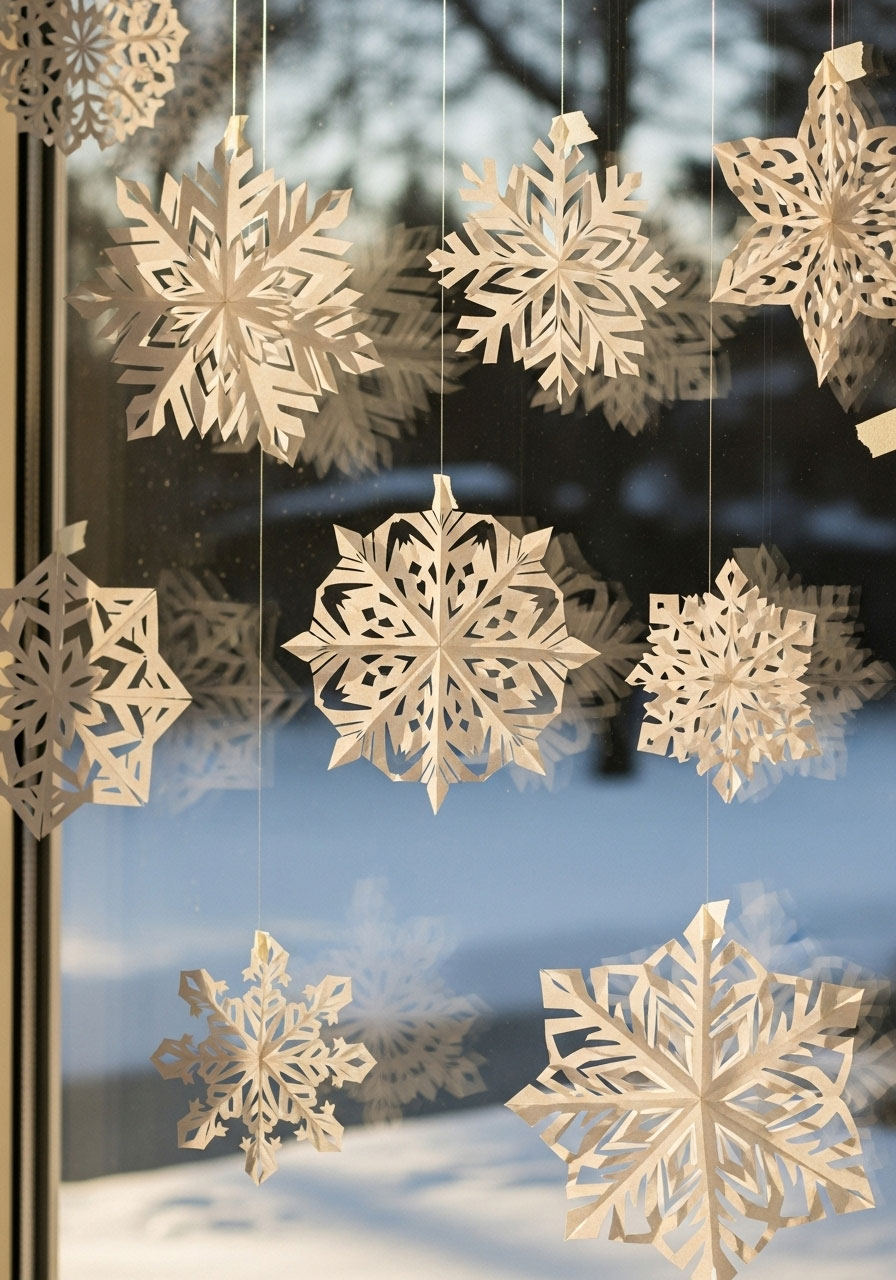
The ultimate classic! Paper snowflakes are easy, free, and endlessly customizable. Plus, they’re a guaranteed kid-pleaser.
Best for: Windows, walls, tree décor, gift wrapping accents
Time to Make: 5 minutes per snowflake
What You’ll Need:
- White paper (regular copy paper or coffee filters work great)
- Scissors
- String or tape for hanging
How to Make:
- Fold your paper into quarters, then fold diagonally to create a triangle.
- Start snipping! Cut shapes along the edges – triangles, curves, tiny notches – whatever you like.
- Unfold carefully to reveal your unique snowflake design.
- Hang them in windows with tape or string them together for a garland.
Pro Tip: No two snowflakes are the same, just like the real thing! Make a bunch in different sizes for dimension.
5. DIY Mercury Glass Ornaments

Want that expensive antique glass look without the price tag? This clever technique transforms plain glass ornaments into vintage treasures.
Best for: Christmas tree, bowl fillers, window displays
Time to Make: 20 minutes (plus drying time)
What You’ll Need:
- Clear glass ornaments
- Mirror-effect spray paint (or metallic silver)
- Water in a spray bottle
- Paper towels
How to Make:
- Remove the ornament top and spray water inside the glass ball.
- Immediately spray a bit of mirror-effect paint inside.
- Swirl it around to coat unevenly (this creates the antique look).
- Pour out excess paint and let dry upside down.
- Reattach the top once fully dry.
Pro Tip: The more uneven the coating, the more authentic the mercury glass effect. Embrace those splotches!
6. DIY Hand-Lettered Holiday Wrapping Paper

Why buy expensive wrapping paper when you can create custom, charming designs yourself? This project is easier than you think and way more impressive.
Best for: Gift wrapping, table runners, wall art
Time to Make: 15-30 minutes depending on how many sheets you need
What You’ll Need:
- Brown kraft paper or butcher paper
- Black marker or paint pen
- Ruler (optional)
How to Make:
- Roll out your kraft paper and cut to desired lengths.
- Write festive phrases in simple hand lettering – “Merry & Bright”, “Joy”, “Ho Ho Ho”, etc.
- Add simple doodles like stars, trees, or holly leaves between words.
- Let dry and wrap your gifts!
Pro Tip: Practice your lettering on scrap paper first, or use a pencil to sketch before committing with marker.
7. Yarn Pom-Pom & Ornament Garland

Fluffy, cozy, and oh-so-festive! This garland combines soft yarn pom-poms with your favorite ornaments for texture that pops.
Best for: Mantels, banisters, tree garland, photo backdrops
Time to Make: 45 minutes to 1 hour
What You’ll Need:
- Yarn in festive colors
- Small ornaments
- Twine or string
- Scissors
- Pom-pom maker (or DIY with cardboard)
How to Make:
- Make yarn pom-poms using a pom-pom maker or by wrapping yarn around your fingers, tying the center, and cutting the loops.
- String your twine through the ornaments and tie pom-poms in between at intervals.
- Space them evenly or go random for a more organic look.
- Drape your garland wherever you need a dose of cozy charm!
Pro Tip: Mix different-sized pom-poms for visual interest and texture variation.
8. Salt Dough Ornaments
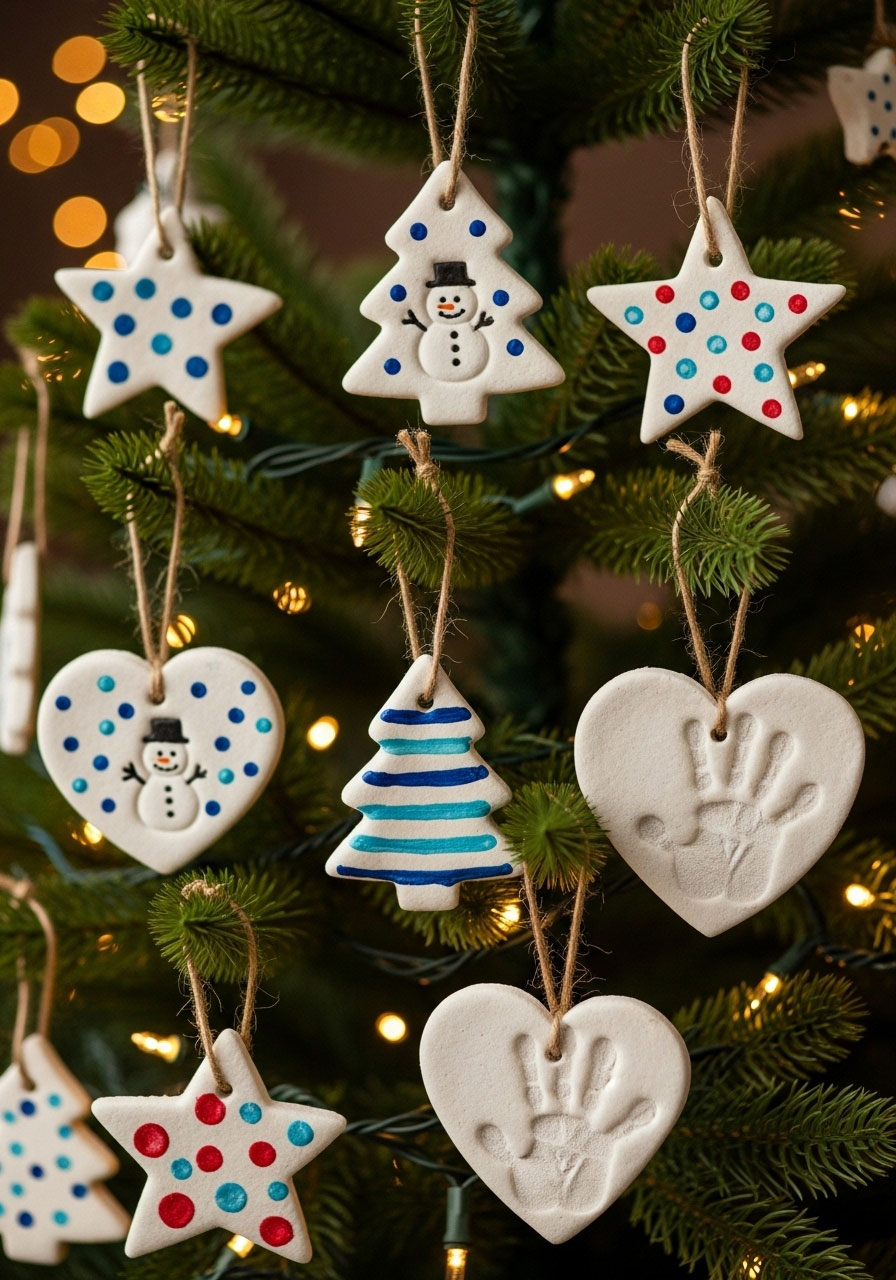
A DIY classic that never goes out of style! These simple, customizable ornaments are perfect for making with kids and cherishing for years.
Best for: Tree ornaments, gift tags, keepsakes
Time to Make: 1 hour (includes baking time)
What You’ll Need:
- 2 cups all-purpose flour
- 1 cup salt
- 1 cup water
- Cookie cutters
- Straw or toothpick (for hanging holes)
- Paint, markers, or stamps for decorating
How to Make:
- Mix flour, salt, and water in a bowl until a dough forms.
- Roll out the dough to about ¼-inch thickness.
- Cut shapes with cookie cutters and poke a hole at the top with a straw.
- Bake at 250°F for 2-3 hours until completely hard.
- Decorate once cooled with paint, markers, or leave natural for a rustic look.
- Thread ribbon through the hole and hang!
Pro Tip: Press family members’ fingerprints or pet paw prints into the dough before baking for ultra-sentimental keepsakes.
9. Woven Ribbon Bird Christmas Ornament
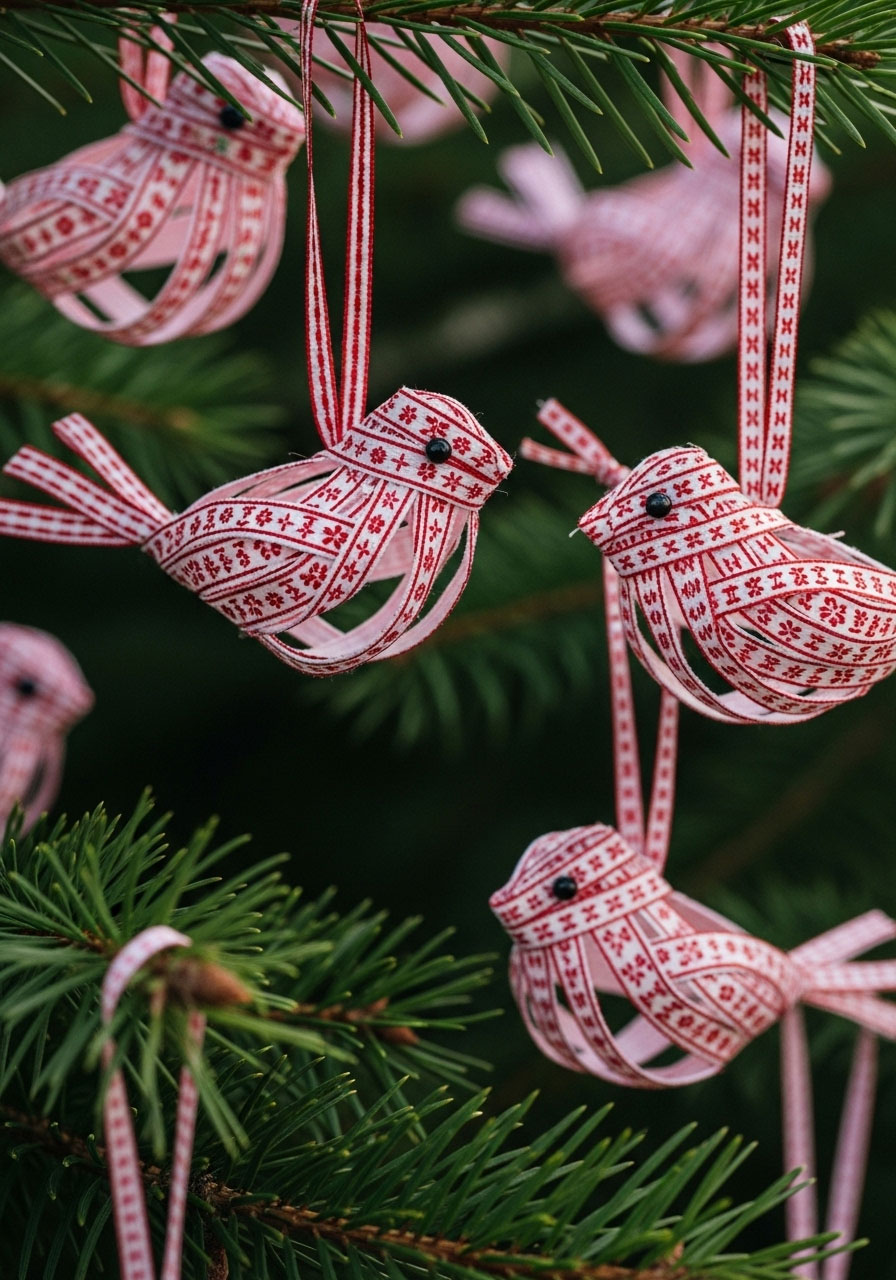
These whimsical little birds bring a sweet, handcrafted touch that’s totally unique. Plus, they’re lightweight and look amazing catching the light.
Best for: Tree ornaments, gift toppers, window displays
Time to Make: 15-20 minutes per bird
What You’ll Need:
- Ribbon in two coordinating colors
- Scissors
- Hot glue gun
- Small bead or button for the eye
- Twine for hanging
How to Make:
- Cut ribbon strips (instructions vary by specific pattern – look up a simple folded ribbon bird tutorial for visual guidance).
- Weave and fold the ribbons according to your pattern to create a bird shape.
- Glue strategically to hold the shape together.
- Add a tiny bead for an eye.
- Attach twine for hanging.
Pro Tip: Make a whole flock in different colors – they look stunning grouped together on the tree!
10. Dried Orange Slices
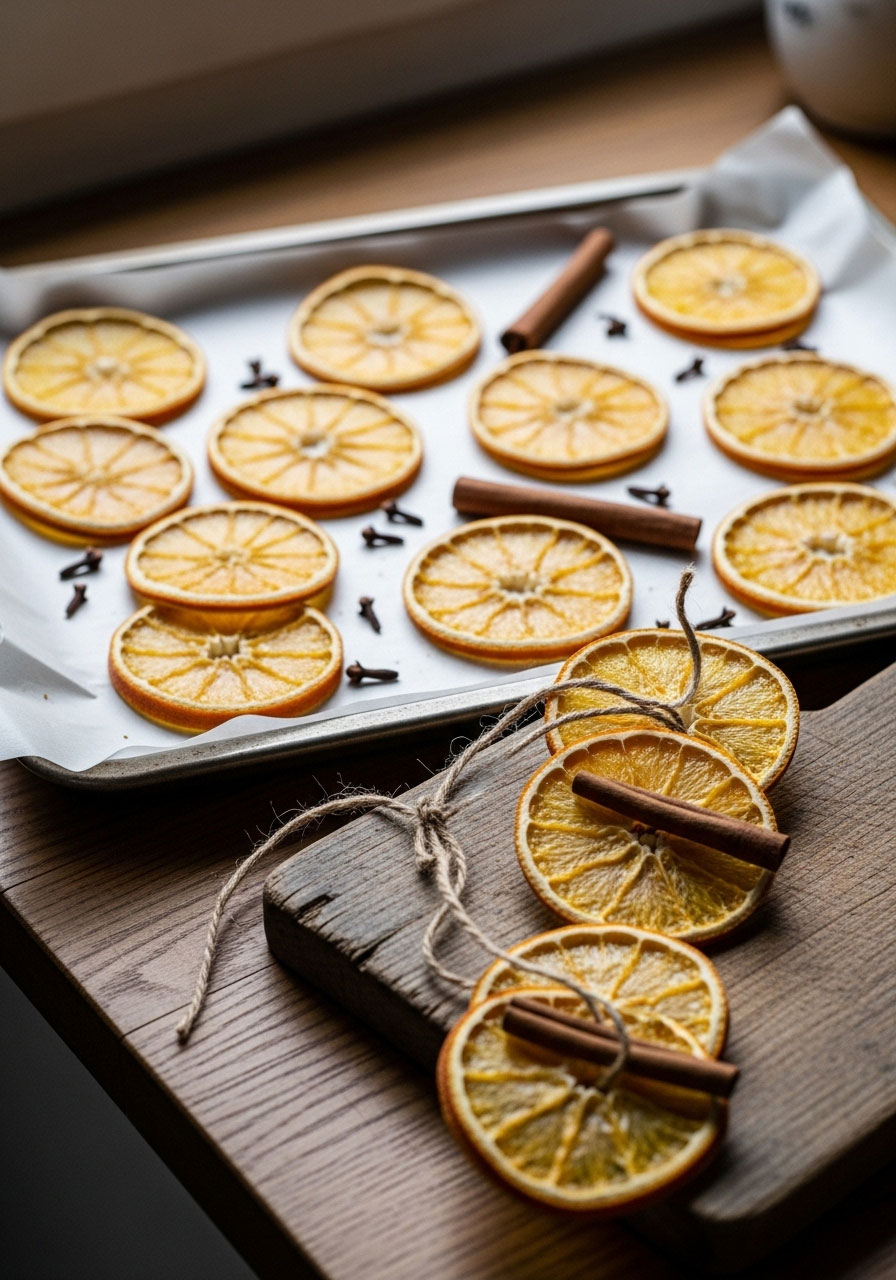
The Swiss Army knife of Christmas decorations! These beauties work in garlands, wreaths, cocktails, and more.
Best for: Garlands, ornaments, wreath accents, potpourri
Time to Make: 3-4 hours (mostly hands-off baking time)
What You’ll Need:
- Oranges (or other citrus – lemons and grapefruits work too!)
- Sharp knife
- Baking sheet
- Parchment paper
How to Make:
- Slice oranges into ¼-inch rounds, as evenly as possible.
- Pat dry with paper towels to remove excess juice.
- Arrange on a parchment-lined baking sheet without overlapping.
- Bake at 200°F for 3-4 hours, flipping halfway through, until fully dried.
- Let cool completely before using.
Pro Tip: Make extras – they smell amazing and you’ll find a million uses for them throughout the season!
11. Pinecone Wreath
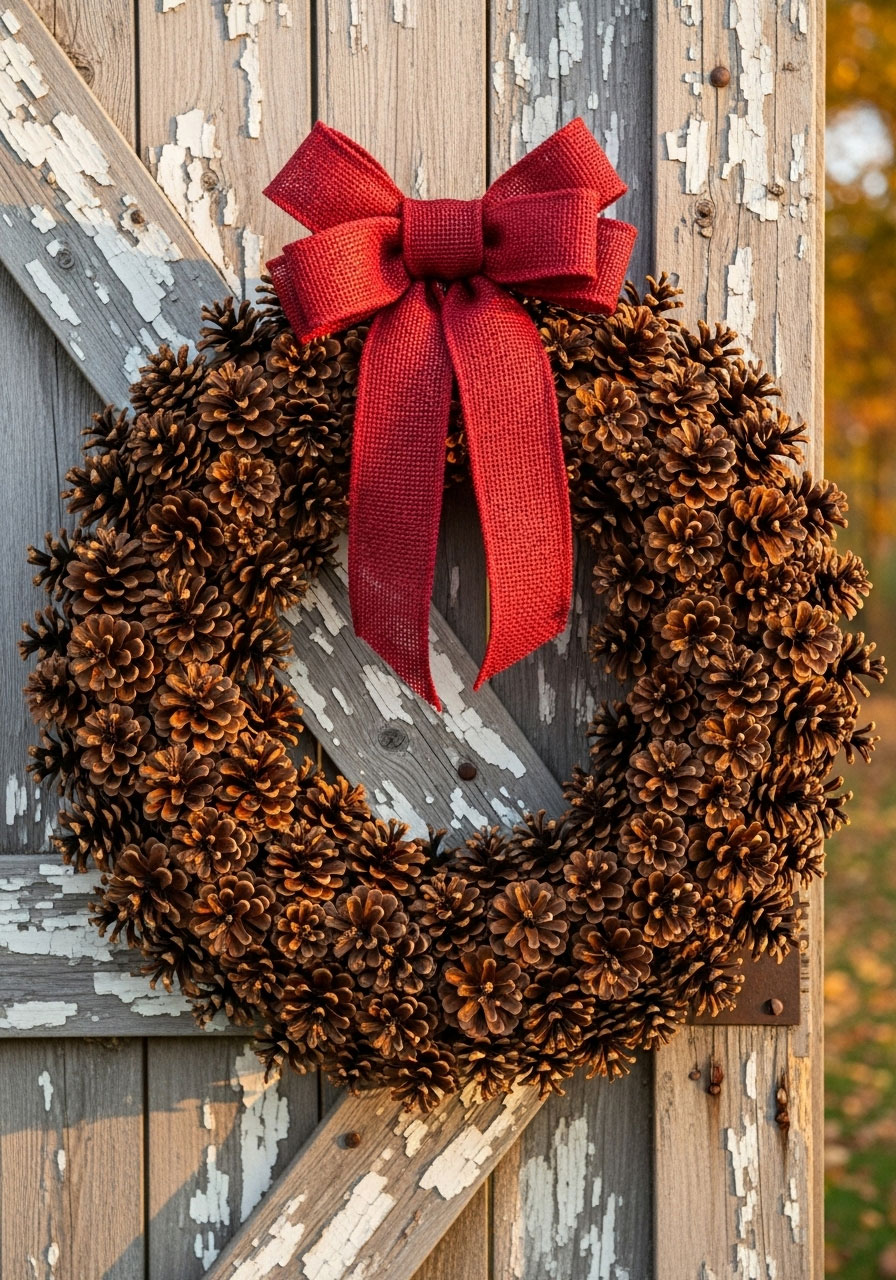
Nothing screams “rustic elegance” like a pinecone wreath. It’s nature’s way of making your door look amazing with minimal effort.
Best for: Front door, above the mantel, wall décor
Time to Make: 1-2 hours
What You’ll Need:
- Wire wreath form
- Lots of pinecones (go on a nature walk!)
- Hot glue gun
- Optional: spray paint, glitter, ribbon
How to Make:
- Collect pinecones of various sizes (or buy them pre-cleaned).
- Start gluing pinecones to your wreath form, working in one direction.
- Overlap and layer pinecones to cover the form completely and create dimension.
- Add embellishments if desired – spray with gold paint, add a bow, or keep it natural.
- Hang and enjoy for months – this wreath works through winter!
Pro Tip: Bake your pinecones at 200°F for 30 minutes first to kill any bugs and open them up fully.
12. Cinnamon Stick Santa Ornament

These adorable little Santas smell as good as they look! It’s a craft that engages multiple senses.
Best for: Tree ornaments, gift tags, aromatic décor
Time to Make: 10-15 minutes per Santa
What You’ll Need:
- Cinnamon sticks
- Red felt or fabric scraps
- White pom-pom or cotton ball
- Small wooden bead (flesh-colored)
- Hot glue gun
- Black marker or tiny googly eyes
- Twine for hanging
How to Make:
- Glue the wooden bead to the top of a cinnamon stick for Santa’s head.
- Cut a small triangle of red felt for the hat and glue it on top of the bead.
- Add a white pom-pom to the hat tip.
- Draw a face with a black marker or glue tiny eyes.
- Glue a strip of white (cotton or felt) as a beard below the face.
- Attach twine to hang.
Pro Tip: These make fantastic gift toppers that double as ornaments – two gifts in one!
13. Homemade Dried Orange Slice Garland
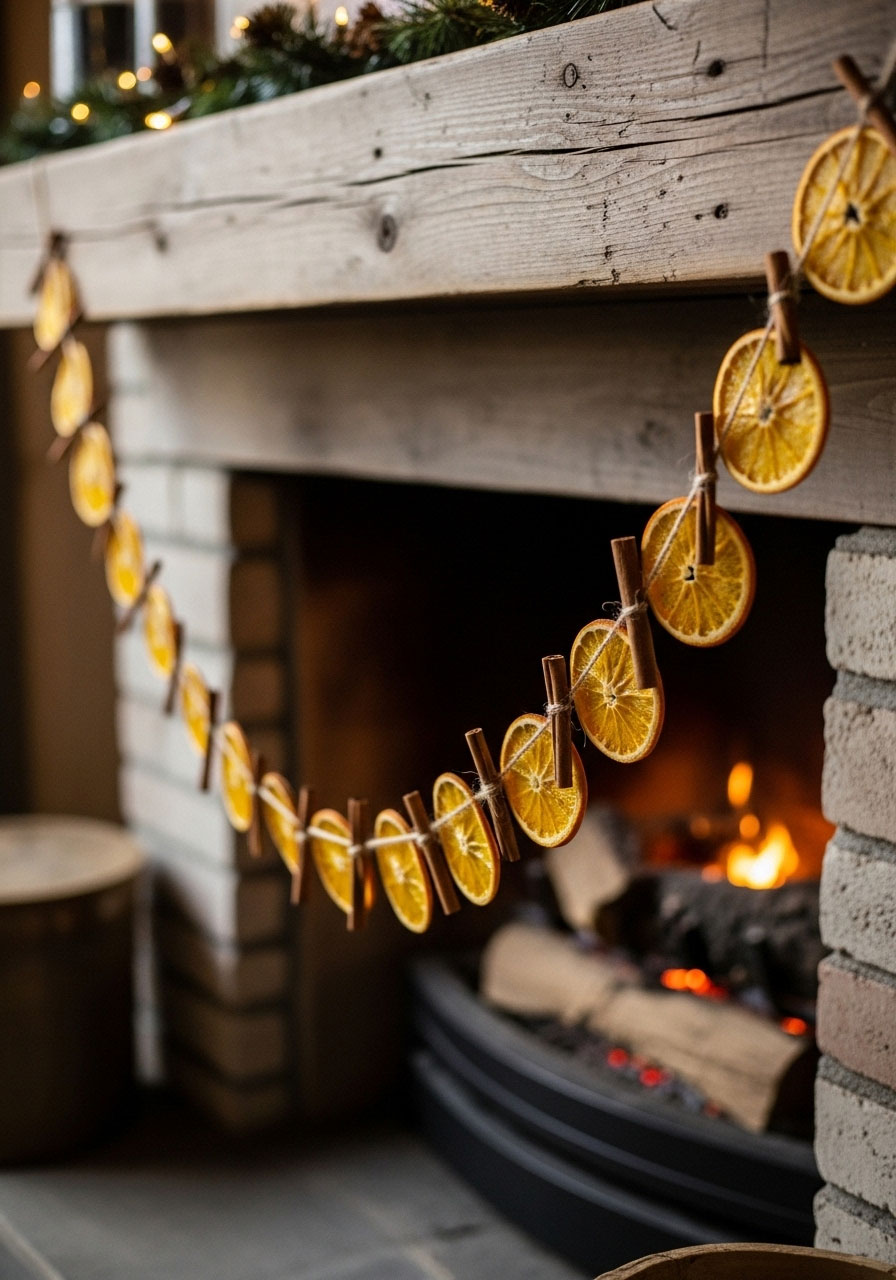
Take those beautiful dried orange slices and string them into a garland that’s equal parts gorgeous and eco-friendly.
Best for: Mantels, windows, tree garland, table runners
Time to Make: 30 minutes (after oranges are dried)
What You’ll Need:
- Dried orange slices (see #10)
- Twine or jute string
- Needle (optional, but helpful)
- Scissors
How to Make:
- Thread your needle with twine (or just use the twine if your orange holes are big enough).
- Poke the needle through each dried orange slice near the edge.
- Space them evenly along the twine, tying knots if needed to keep them in place.
- Add greenery or cinnamon sticks between oranges if you want extra texture.
- Hang your garland and marvel at your natural handiwork!
Pro Tip: Layer multiple strands at different lengths for a more dramatic, dimensional look.
14. Baking Soda Dough Gingerbread Ornaments

All the charm of gingerbread without the temptation to eat your decorations! These scented ornaments last for years.
Best for: Tree ornaments, gift tags, aromatic room décor
Time to Make: 1 hour (includes drying time)
What You’ll Need:
- 1 cup baking soda
- ½ cup cornstarch
- ¾ cup water
- Cinnamon and ginger for scent
- Cookie cutters
- Puff paint or markers for decorating
How to Make:
- Mix baking soda, cornstarch, and water in a pot over medium heat, stirring constantly until it forms a dough.
- Add spices for that authentic gingerbread smell.
- Roll out on a floured surface and cut with cookie cutters.
- Poke holes for hanging with a straw.
- Let air dry overnight or bake at 175°F for 30 minutes.
- Decorate with puff paint to look like iced gingerbread!
Pro Tip: These smell amazing and last for years if stored properly – make them a new annual tradition!
15. Cinnamon Stick Candles

Transform plain pillar candles into rustic masterpieces with this ridiculously easy trick.
Best for: Table centerpieces, mantel décor, hostess gifts
Time to Make: 10 minutes per candle
What You’ll Need:
- Pillar candles
- Cinnamon sticks (same length as or slightly shorter than your candle)
- Twine, jute, or ribbon
- Hot glue gun (optional)
How to Make:
- Arrange cinnamon sticks vertically around your candle.
- Wrap twine tightly around the middle to hold them in place.
- Optional: Add a dab of hot glue between each stick and the candle for extra security.
- Tie a bow with the twine or add a ribbon.
- Light and enjoy the cozy cinnamon scent!
Pro Tip: Use LED candles if you’re worried about fire safety – they still look gorgeous!
16. Homemade Felt Ornaments

Soft, colorful, and endlessly customizable – felt ornaments are perfect for crafters of all skill levels.
Best for: Tree ornaments, garlands, gift tags
Time to Make: 20-30 minutes per ornament
What You’ll Need:
- Felt sheets in various colors
- Scissors
- Needle and embroidery thread
- Stuffing (optional, for 3D ornaments)
- Hot glue gun
- Ribbon or twine for hanging
How to Make:
- Cut shapes from felt – stars, trees, stockings, candy canes, whatever you like!
- Layer and sew two pieces together, leaving a small opening if you want to stuff them.
- Add stuffing for dimension, then finish sewing.
- Embellish with embroidery, sequins, or smaller felt cutouts glued on.
- Attach a ribbon loop for hanging.
Pro Tip: Kids love this project! Pre-cut shapes for them and let them glue on decorations.
17. Easy Mason Jar Lanterns

Mason jars + candles = instant cozy vibes. This is about as foolproof as DIY gets.
Best for: Tables, mantels, walkways, outdoor décor
Time to Make: 5-10 minutes per lantern
What You’ll Need:
- Mason jars (any size)
- Battery-operated tea lights or small candles
- Twine, ribbon, or wire for handles
- Optional: greenery, cranberries, fake snow
How to Make:
- Clean your mason jars and remove labels.
- Add your candle or tea light to the bottom.
- Optional: Add greenery, cranberries, or fake snow around the candle for extra festivity.
- Wrap twine around the rim or create a wire handle for carrying.
- Light them up and place wherever you need ambiance!
Pro Tip: Fill jars with Epsom salt to mimic snow and nestle tea lights inside – it’s magical!
18. Vintage Recycled Card Ornaments
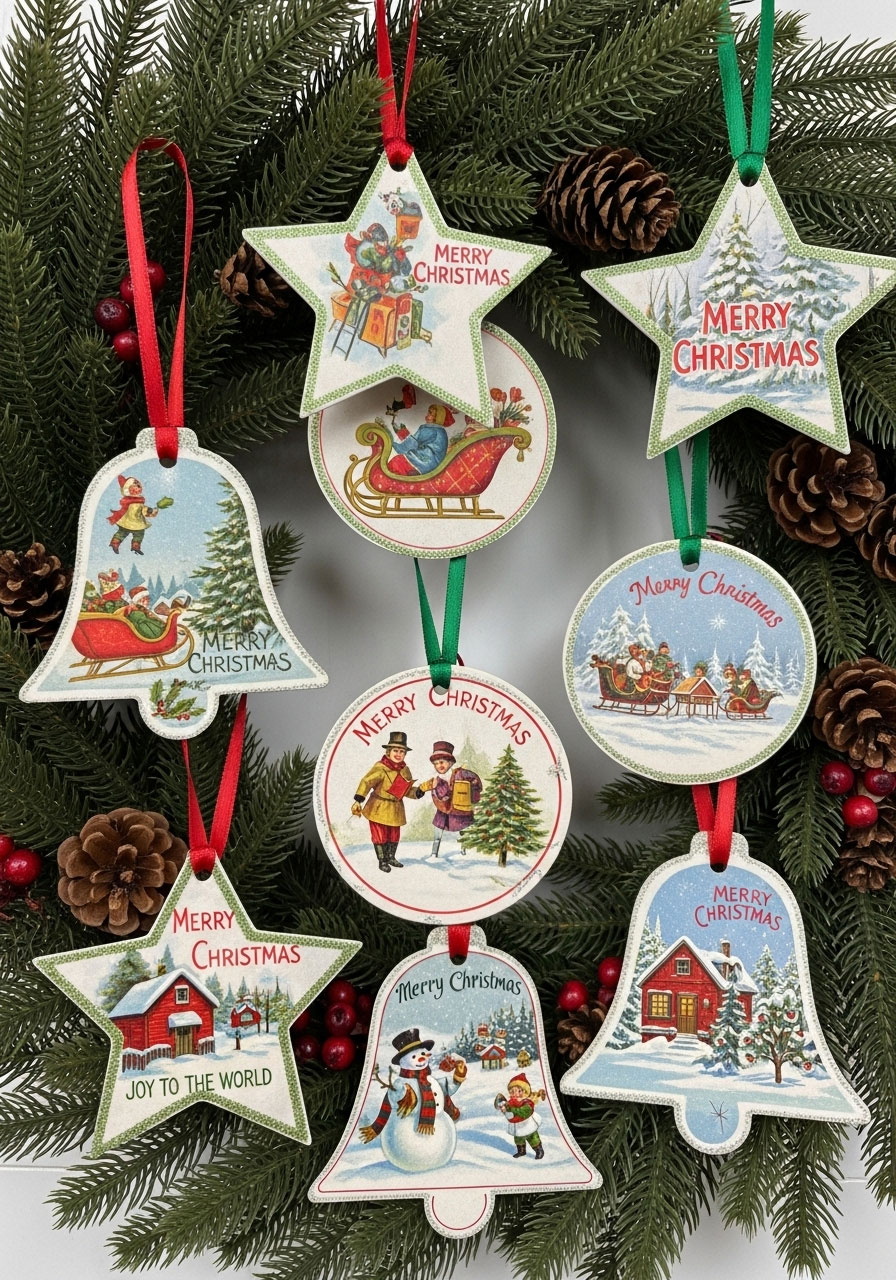
Give old Christmas cards a second life as charming ornaments with vintage appeal.
Best for: Tree ornaments, gift tags, nostalgic décor
Time to Make: 10-15 minutes per ornament
What You’ll Need:
- Vintage or old Christmas cards
- Scissors or craft knife
- Hot glue gun
- Ribbon or twine for hanging
- Optional: glitter, sequins
How to Make:
- Cut shapes from old cards – circles, stars, trees, or just interesting images.
- Layer pieces for dimension, gluing them together.
- Add a ribbon loop at the top for hanging.
- Optional: Edge with glitter or add embellishments.
- Hang and enjoy the nostalgia!
Pro Tip: Ask family members for their old cards – you might find treasures from decades past!
19. Clothespin Snowflake Ornaments

Who knew clothespins could be so stylish? These geometric snowflakes are surprisingly chic.
Best for: Tree ornaments, package toppers, rustic décor
Time to Make: 20 minutes per snowflake
What You’ll Need:
- Wooden clothespins (traditional style)
- Hot glue gun
- White paint (optional)
- Glitter or pearl accents (optional)
- Ribbon for hanging
How to Make:
- Take apart clothespins to separate the two wooden pieces from the spring.
- Arrange pieces in a snowflake pattern – typically 8 pieces radiating from a center point.
- Glue together carefully and let dry completely.
- Paint white if desired, or leave natural for rustic charm.
- Add glitter to the tips for sparkle.
- Attach ribbon and hang!
Pro Tip: These are sturdy enough for kids to make with adult supervision – and they love painting them!
20. Cranberry Popcorn Garland

Nothing says “old-fashioned Christmas” quite like this edible (and beautiful!) garland strung by hand.
Best for: Tree garland, mantel draping, window swags
Time to Make: 1-2 hours
What You’ll Need:
- Fresh cranberries
- Popped popcorn (un-buttered!)
- Needle and strong thread or fishing line
- Scissors
How to Make:
- Thread your needle with a long piece of strong thread or fishing line.
- Alternate poking through cranberries and popcorn, creating whatever pattern you like.
- Keep going until you reach your desired length.
- Tie off the ends securely.
- Drape on your tree or around your home!
Pro Tip: This is the perfect rainy afternoon activity with kids – put on a holiday movie and get stringing!
21. Christmas Scented Sachets

These little fabric bags pack a big aromatic punch and make thoughtful gifts or stocking stuffers.
Best for: Drawers, closets, gift additions, stocking stuffers
Time to Make: 15 minutes per sachet
What You’ll Need:
- Small fabric squares or organza bags
- Dried orange peel
- Cinnamon sticks (broken)
- Whole cloves
- Star anise
- Ribbon or twine
How to Make:
- Cut fabric into squares (about 5×5 inches) or use pre-made organza bags.
- Mix your spices in a bowl – dried orange peel, cinnamon pieces, cloves, and star anise.
- Spoon mixture into the center of fabric or into bags.
- Gather the top and tie with ribbon or twine.
- Tuck into drawers or attach to gifts!
Pro Tip: Make a batch of these for party favors – everyone loves a home that smells like Christmas!
22. Homemade Rag Wreath

Cozy, textured, and perfect for using up fabric scraps. This wreath is forgiving and full of rustic charm.
Best for: Front door, wall décor, farmhouse-style rooms
Time to Make: 2-3 hours
What You’ll Need:
- Foam or wire wreath form
- Fabric strips (about 1 inch wide, 6 inches long)
- Scissors
- Optional: ribbon for bow
How to Make:
- Cut fabric into strips – mix patterns and colors for a scrappy look or keep it monochromatic.
- Tie strips onto the wreath form, knotting them tightly.
- Continue until the entire form is covered with fluffy fabric.
- Fluff and trim any uneven ends.
- Add a bow if desired and hang!
Pro Tip: Use flannel for extra coziness, or choose red and white for classic Christmas vibes.
23. Wood Slice Ornaments

Rustic, natural, and totally on-trend – wood slice ornaments bring the outdoors in beautifully.
Best for: Tree ornaments, gift tags, rustic-themed décor
Time to Make: 20-30 minutes per ornament
What You’ll Need:
- Wood slices (buy pre-cut or slice branches yourself)
- Sandpaper
- Paint, markers, or wood-burning tool
- Twine or ribbon
- Drill with small bit (for hanging hole)
How to Make:
- Sand your wood slices until smooth.
- Drill a small hole near the top edge for hanging.
- Decorate with paint (snowflakes, trees, names, dates) or use a wood burner for a rustic look.
- Optional: Leave natural with just a clear coat for a minimalist vibe.
- Thread twine through the hole and hang!
Pro Tip: Personalize with names and dates to create family keepsakes or wedding favors.
24. Holiday Terrarium

Create a miniature winter wonderland under glass – it’s easier than it looks and totally enchanting.
Best for: Centerpieces, side tables, mantel displays
Time to Make: 30 minutes
What You’ll Need:
- Glass container (bowl, jar, or actual terrarium)
- Faux snow or Epsom salt
- Miniature trees, deer, or holiday figurines
- Small ornaments or pinecones
- Optional: battery-operated string lights
How to Make:
- Layer faux snow or Epsom salt in the bottom of your container.
- Arrange miniature trees and figurines to create a scene.
- Add small pinecones or tiny ornaments for detail.
- Optional: Wind battery-operated fairy lights through the scene.
- Close it up (or leave open) and display!
Pro Tip: Change the scene seasonally – this same container works for Easter, fall, and more!
25. Fabric Scrap Tree Skirt
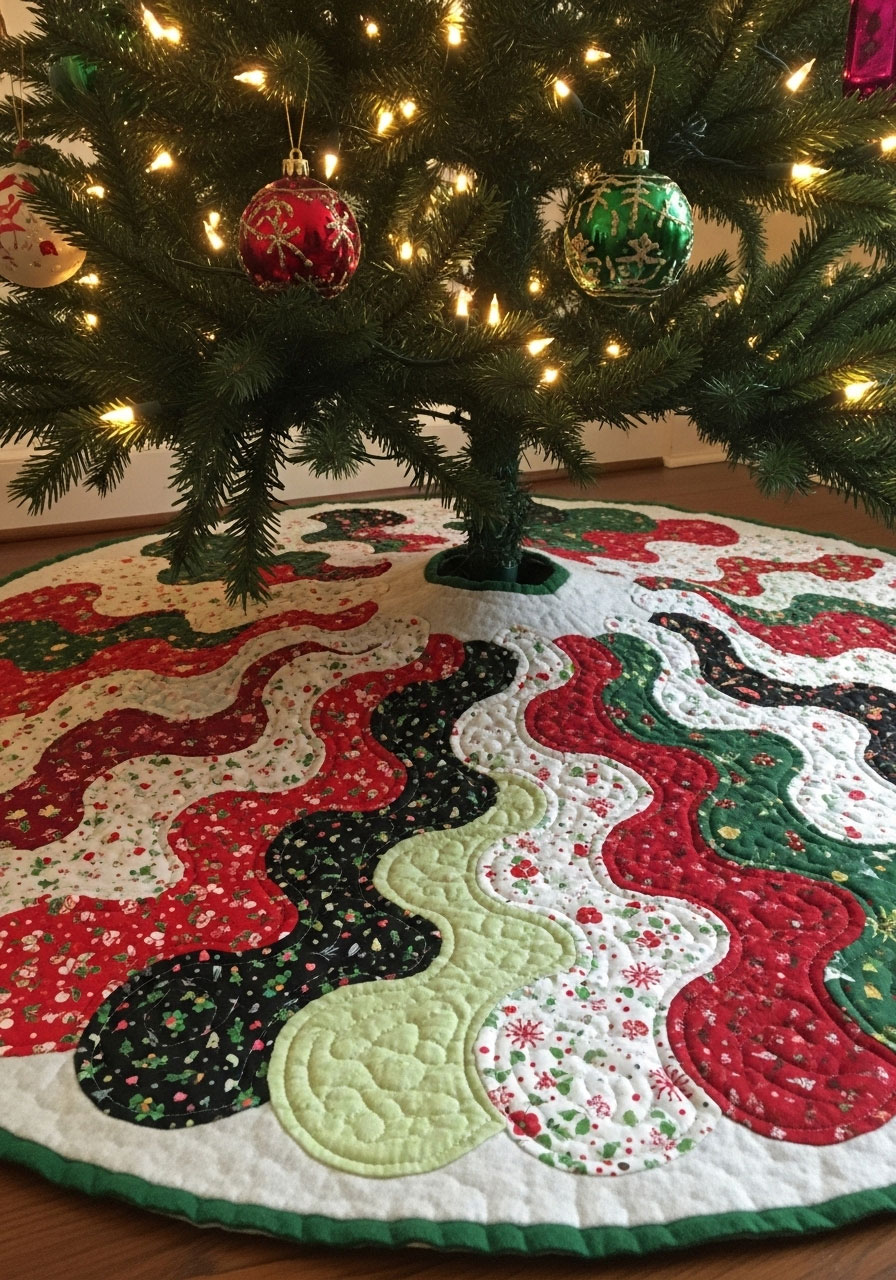
Turn leftover fabric into a one-of-a-kind tree skirt that’s eco-friendly and totally customizable.
Best for: Christmas tree base, photo prop
Time to Make: 3-4 hours
What You’ll Need:
- Fabric scraps in various patterns
- Felt or canvas base circle (about 40-50 inches diameter)
- Scissors
- Hot glue gun or sewing machine
- Ribbon or ties
How to Make:
- Cut your base circle from felt or canvas with a slit from edge to center and a center circle cut out for the trunk.
- Cut fabric scraps into various shapes – squares, strips, or organic shapes.
- Layer and glue (or sew) fabric pieces onto the base, overlapping for texture.
- Cover the entire base surface.
- Add ties or Velcro at the slit opening to wrap around the tree.
Pro Tip: This is a great way to use up old holiday fabrics or repurpose outgrown kids’ clothes for sentimental value!
26. Yarn-Wrapped Candy Cane Ornaments

Soft, colorful, and totally kid-friendly – these yarn candy canes are safe for little ones and adorable on the tree.
Best for: Tree ornaments, classroom crafts, toddler-safe décor
Time to Make: 20 minutes per candy cane
What You’ll Need:
- Cardboard or foam board
- Red and white yarn
- Scissors
- Hot glue gun
- Ribbon for hanging
How to Make:
- Cut a candy cane shape from cardboard or foam board.
- Apply glue to the back of your cutout.
- Wrap red yarn around part of the candy cane, then switch to white, alternating stripes.
- Secure ends with glue.
- Attach a ribbon loop for hanging.
Pro Tip: Let kids choose their color combos – pink and white, blue and white, or rainbow stripes all look amazing!
27. Miniature Gingerbread Houses

These tiny houses are almost too cute to eat! Perfect for décor, dessert displays, or hot cocoa toppers.
Best for: Table settings, dessert displays, edible gifts
Time to Make: 2-3 hours (includes baking and decorating)
What You’ll Need:
- Gingerbread dough (store-bought or homemade)
- House template (or graham crackers for quick version)
- Royal icing
- Small candies for decorating
- Piping bags
How to Make:
- Bake gingerbread pieces according to your recipe and let cool completely.
- Assemble the house using royal icing as “glue”, letting each section dry before adding the next.
- Decorate with icing and small candies – get creative with windows, doors, and rooflines.
- Let dry completely before displaying.
- Dust with powdered sugar for a snowy effect!
Pro Tip: Use graham crackers instead of gingerbread for a faster, kid-friendly version – they’re easier to work with!
28. Burlap and Lace Ornaments

Combine rustic burlap with delicate lace for ornaments that are farmhouse-chic perfection.
Best for: Tree ornaments, gift toppers, rustic-themed décor
Time to Make: 15 minutes per ornament
What You’ll Need:
- Burlap fabric
- Lace trim or doilies
- Styrofoam balls or shapes
- Hot glue gun
- Ribbon, twine, or jute for hanging
- Optional: buttons, pearls, or small embellishments
How to Make:
- Cut burlap to cover your Styrofoam shape.
- Wrap and glue the burlap around the shape, tucking edges neatly.
- Add lace trim around the middle or in strips for contrast.
- Glue on embellishments like buttons or pearls.
- Attach twine or ribbon for hanging.
Pro Tip: These look stunning in cream and white for an elegant, monochromatic display.
29. Pinecone Fire Starters

These do double duty as décor and function! Beautiful to look at and perfect for cozy fires.
Best for: Hearth displays, hostess gifts, functional décor
Time to Make: 30 minutes (plus drying time)
What You’ll Need:
- Pinecones
- Wax (paraffin or old candles melted down)
- Wicks or cotton string
- Essential oils (optional, like cinnamon or pine)
- Double boiler or makeshift version
- Wax paper
How to Make:
- Tie a wick around the top of each pinecone.
- Melt wax in a double boiler (never directly on heat!).
- Optional: Add a few drops of essential oil to the melted wax.
- Dip each pinecone into the wax, coating the lower petals.
- Place on wax paper to dry completely.
- Display in a basket or give as gifts!
Pro Tip: Arrange these in a decorative bowl by your fireplace – they’re gorgeous and functional!
30. Vintage Book Page Ornaments

Give old, damaged books a new purpose with these literary-inspired ornaments that book lovers will adore.
Best for: Tree ornaments, book club gifts, library-themed décor
Time to Make: 15 minutes per ornament
What You’ll Need:
- Pages from old books (damaged books only – never destroy a good book!)
- Scissors or craft knife
- Hot glue gun
- Styrofoam balls or cardboard shapes
- Twine or ribbon for hanging
- Optional: Mod Podge for sealing
How to Make:
- Cut book pages into strips or circles depending on your design.
- If using strips: Fold and glue strips accordion-style around a Styrofoam ball to create a rosette pattern.
- If using circles: Layer and glue book page circles in decreasing sizes to form a tree or flower shape.
- Seal with Mod Podge if you want extra durability and a slight sheen.
- Attach twine or ribbon for hanging.
Pro Tip: Use pages from vintage Christmas carols or poetry for extra thematic charm – guests love spotting familiar verses!
Bonus Idea #31: Cinnamon Applesauce Ornaments

We couldn’t stop at 30! These aromatic ornaments smell incredible and last for years.
Best for: Tree ornaments, gift tags, scented sachets
Time to Make: 45 minutes (plus drying time)
What You’ll Need:
- 1 cup applesauce
- 1 cup ground cinnamon
- Cookie cutters
- Rolling pin
- Straw (for hanging holes)
- Ribbon
How to Make:
- Mix applesauce and cinnamon until a dough forms (add more cinnamon if too sticky).
- Roll out to about ¼-inch thickness.
- Cut shapes with cookie cutters.
- Poke holes for hanging with a straw.
- Let air dry for 3-5 days, flipping daily, until completely hard.
- Thread ribbon through and hang!
Pro Tip: These smell AMAZING for months. Store in an airtight container between seasons to preserve the scent!
How to Use These Handmade Decorations:
Now that you’ve created these beauties, here’s how to show them off:
- Create stunning centerpieces by grouping several projects together – try pomanders in a bowl with pinecone fire starters
- Deck your mantel with garlands, candles, and terrariums for major visual impact
- Give as heartfelt gifts that actually mean something (bonus: they’re budget-friendly!)
- Dress up windowsills with lanterns, snowflakes, and small ornaments
- Bring festivity to your workspace with mini ornaments and sachets
- Transform guest rooms into cozy retreats with coordinating décor
- Donate to local charities or nursing homes to spread holiday cheer beyond your own walls
FAQs
Do I need to be crafty to make these?
Not even a little bit! These projects celebrate the handmade, slightly imperfect look. If you can glue, tie, or string things together, you’re golden. The charm is in the homemade feel, not perfection.
What if I don’t have all the supplies?
Get creative! Most of these use simple household items or natural materials you can find outside. No fancy craft store haul required – though a hot glue gun is definitely your friend here.
How long will these decorations last?
Most will last the entire season and many can be stored and reused for years. Dried fruit, salt dough, and felt ornaments are particularly durable. Natural items like fresh greenery will have a shorter lifespan but look gorgeous while they last!
Can kids really help with these?
Absolutely! Projects like paper snowflakes, popcorn garlands, salt dough ornaments, and yarn crafts are perfect for little hands. Just supervise with hot glue guns and keep sharp scissors out of reach.
Will these work with my décor style?
Yes! While they naturally lean farmhouse and rustic, these timeless decorations adapt beautifully. They add warmth to modern spaces, charm to traditional homes, and authenticity anywhere. Mix them with your existing style – they’re surprisingly versatile.
I’m not crafty – will these actually turn out okay?
Here’s the secret: old-fashioned Christmas décor is supposed to look handmade! Those “imperfections” you’re worried about? They’re actually what makes each piece special and one-of-a-kind. Embrace the wonky snowflakes and slightly crooked bows – that’s the whole charm.
Final Thoughts
There you have it – 30+ vintage-inspired Christmas decorations that prove DIY doesn’t have to mean disaster. These projects bring cozy, nostalgic charm to your home without requiring a Pinterest-perfect skill level or breaking the bank. Better yet, you’ll create memories and traditions while you craft, especially if you rope in the kids or make it a fun gathering with friends.
The beauty of old-fashioned Christmas décor is that it’s forgiving, eco-friendly, and full of heart. Each handmade piece tells a story and adds warmth that store-bought decorations just can’t match. Whether you tackle one project or all of them, you’re creating something special that makes your home uniquely yours.
So grab those oranges, dig out that yarn stash, and get ready to transform your space into a vintage winter wonderland. Your home is about to become the cozy, festive retreat you’ve been dreaming of – and you made it happen yourself!
Now get crafting, and enjoy every imperfectly perfect moment of it.
More Christmas Party Ideas to Keep the Fun Rolling:
30 Little Cabin Christmas Ideas to Transform Your Home into a Cozy Winter Wonderland
23 Best Adult Christmas Craft Ideas for the Holidays
The Ultimate White Elephant Gift Auction: Turn Your Gift Exchange Into a Hilarious Bidding War
33 Epic Christmas Activities for Adults That’ll Make This Your Best Holiday Season Yet
30 Hilarious Christmas Games Guaranteed to Make Your Family Howl with Laughter
The Reindeer Poop Game: Turn Your Guests Into Chocolate Detectives This Christmas
How To Play The Candy Bar Game
Christmas Fish Bowl Game: The Ultimate Holiday Party Hit (Plus Free Word List!)
40 Hilarious Christmas Party Games for Adults That’ll Make Your Holiday Party Legendary
