Who says crafting is just for kids? This holiday season, it’s time to unleash your inner artist and create some seriously Instagram-worthy Christmas decorations. Whether you’re a seasoned DIY pro or someone who can barely glue two popsicle sticks together, these adult Christmas craft ideas will have you crafting like a holiday hero in no time.
From elegant ornaments to rustic wreaths and homemade gifts that’ll make you look like you spent a fortune, we’ve got 23 creative projects that are equal parts fun and festive. Grab your glue gun, pour yourself some hot cocoa (or something stronger), and let’s transform your home into a winter wonderland – one craft at a time.
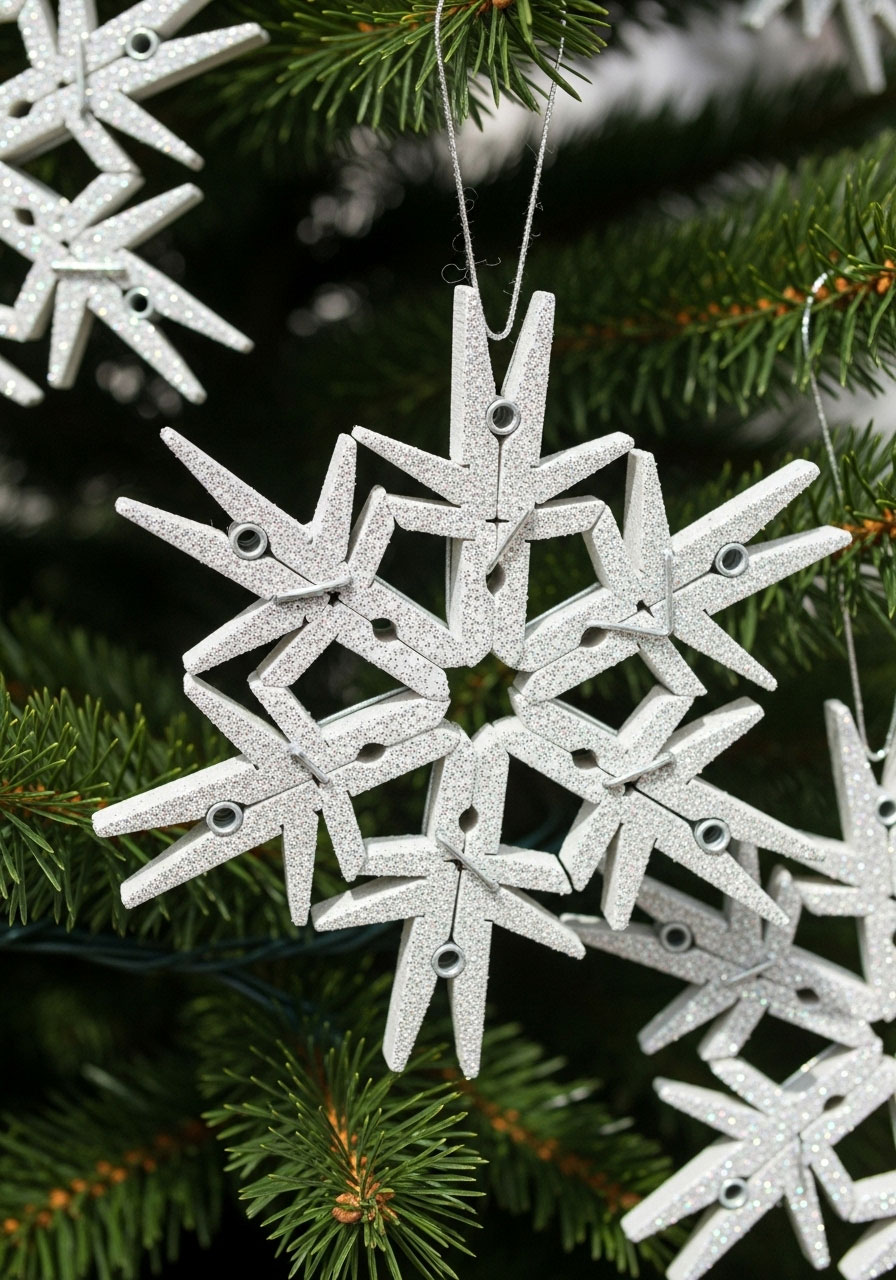
1. Snowflake Ornaments
Best for: Elegant tree decor, gift toppers, window hangings
Time to Craft: 20-30 minutes
Skill Level: Beginner-friendly
There’s something magical about snowflakes, and these clothespin snowflake ornaments bring that wintry wonder straight to your Christmas tree. They’re surprisingly easy to make and look like you bought them from a fancy boutique.
What You’ll Need:
- Wooden clothespins (about 8 per snowflake)
- Hot glue gun
- White or silver spray paint
- Glitter (optional, but highly recommended)
- Ribbon or twine for hanging
How to Make It:
- Carefully pull apart your clothespins so you have individual wooden pieces.
- Arrange them in a snowflake pattern on a flat surface – think six or eight “arms” radiating from the center.
- Once you’re happy with the design, hot glue the pieces together at the center point.
- Let the glue dry completely, then spray paint your snowflake white or silver.
- While the paint is still tacky, sprinkle glitter over it for that fresh-snow sparkle.
- Attach a ribbon loop to the top for hanging.
Pro Tip: Make a whole collection in different sizes and hang them at varying heights from your ceiling for a stunning snowfall effect!

Indoor Christmas Scavenger Hunt Printable for Kids
25 ready-made clues = zero stress for you – Just print, hide, and watch kids stay engaged for hours while you actually enjoy your coffee
Instant download, works today – Get it in minutes, print on regular paper, create Christmas magic in under 15 minutes of setup
Saves Christmas on bad weather days – Perfect indoor activity when kids are bouncing off walls and you need them happily occupied
One purchase, use it every year – Blank templates let you customize for different ages or create new versions as kids grow

Outdoor Christmas Scavenger Hunt Printable for Kids
Gets kids outside and active – Burns energy while solving 25 riddles and challenges around the yard (lifesaver when they’re hyped on holiday sugar)
Instant download, 15-minute setup – Print, hide clues, done. Perfect last-minute activity that looks like you planned for weeks
Works with your yard decorations – Turns your Christmas lights and lawn decor into part of the adventure kids will beg to do again
Reusable every year – Blank templates let you customize for different ages or add new challenges as kids grow
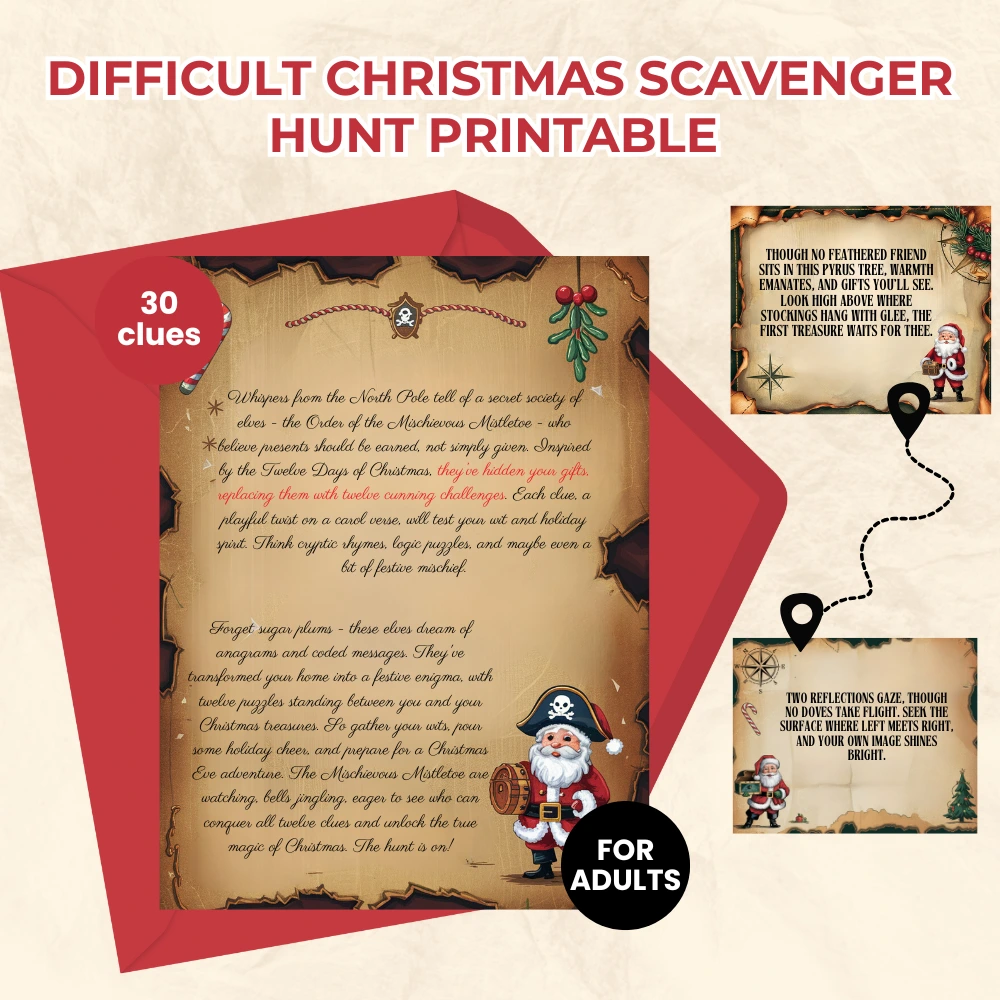
Difficult Christmas Scavenger Hunt Printable for Adults – Twelve Days of Christmas
Actually challenging puzzles for adults – 30 clever clues including ciphers, logic puzzles, and cryptic riddles that will genuinely stump your smartest friends
Print and play in minutes – Download, print, hide. Setup takes less time than wrapping gifts, but creates hours of laughter and memories
Flexible for any group – Pick 12 clues for a quick adventure or all 30 for an epic night. Customize with blank cards for personal inside jokes


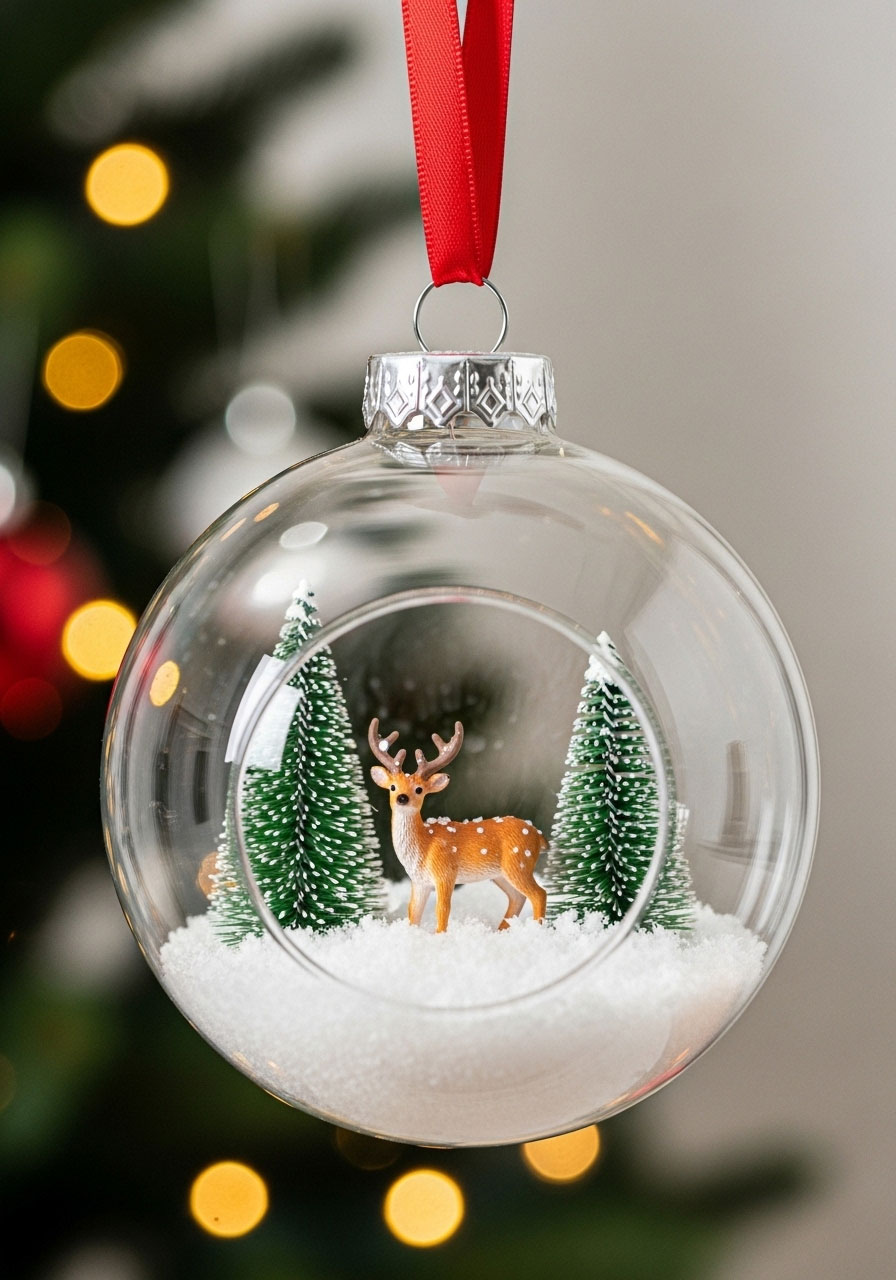
2. DIY Waterless Snow Globe Ornament
Best for: Personalized tree ornaments, mantel decor, gifts
Time to Craft: 15-20 minutes
Skill Level: Easy
Forget the mess of water and glitter leaks – these waterless snow globes are all the charm with none of the chaos. Fill them with tiny treasures that tell your holiday story.
What You’ll Need:
- Clear plastic or glass ornament balls
- Miniature figurines (reindeer, trees, Santa, etc.)
- Fake snow or white glitter
- Hot glue gun
- Ribbon
How to Make It:
- Remove the top cap from your clear ornament ball.
- Add a small amount of fake snow or glitter to the bottom.
- Select your miniature figurine and hot glue it to the inside bottom of the ornament.
- Let the glue dry completely before replacing the cap.
- Add a festive ribbon through the top for hanging.
Fun Variation: Create a themed set – one for each family member with figurines that represent their hobbies or interests!
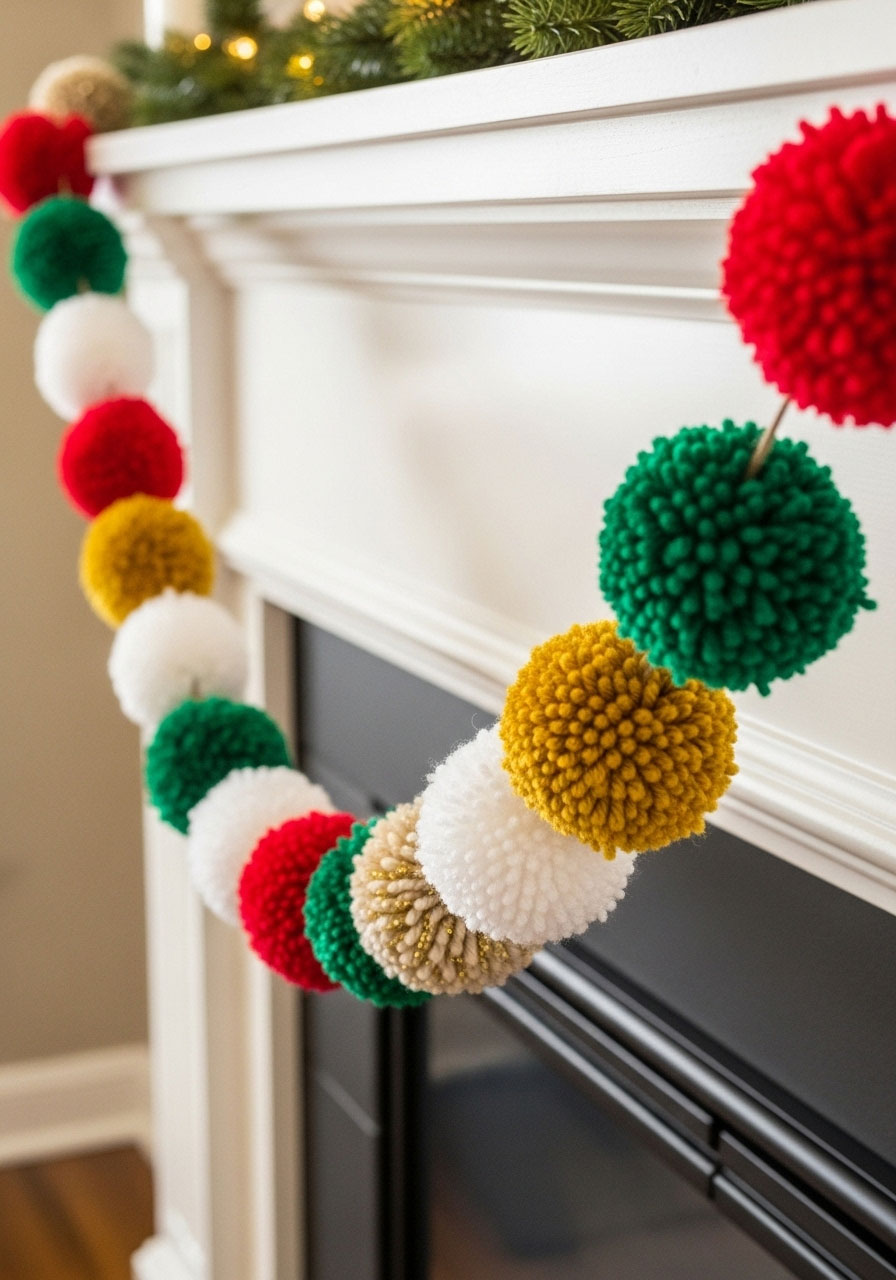
3. Pom Pom Christmas Garland
Best for: Mantel decor, staircase railings, doorway accents
Time to Craft: 45 minutes to 1 hour
Skill Level: Beginner
This fluffy, colorful garland is about to become your new holiday obsession. It’s ridiculously fun to make (seriously therapeutic) and adds the perfect pop of playful color to any space.
What You’ll Need:
- Yarn in Christmas colors (red, green, white, gold)
- Pom pom maker or cardboard circles
- Scissors
- Thick twine or ribbon
- Large needle
How to Make It:
- Make pom poms in various sizes using your pom pom maker or the cardboard method (YouTube is your friend here).
- Create at least 20-30 pom poms for a decent-length garland.
- Thread your large needle with twine or ribbon.
- String the pom poms onto the twine, spacing them evenly or clustering them for a fuller look.
- Tie knots between pom poms if you want them to stay in place.
- Hang your garland and prepare for the compliments!
Pro Tip: Mix in some metallic gold or silver pom poms for an extra-fancy touch that catches the light beautifully.
4. Christmas Tree Twig Ornament
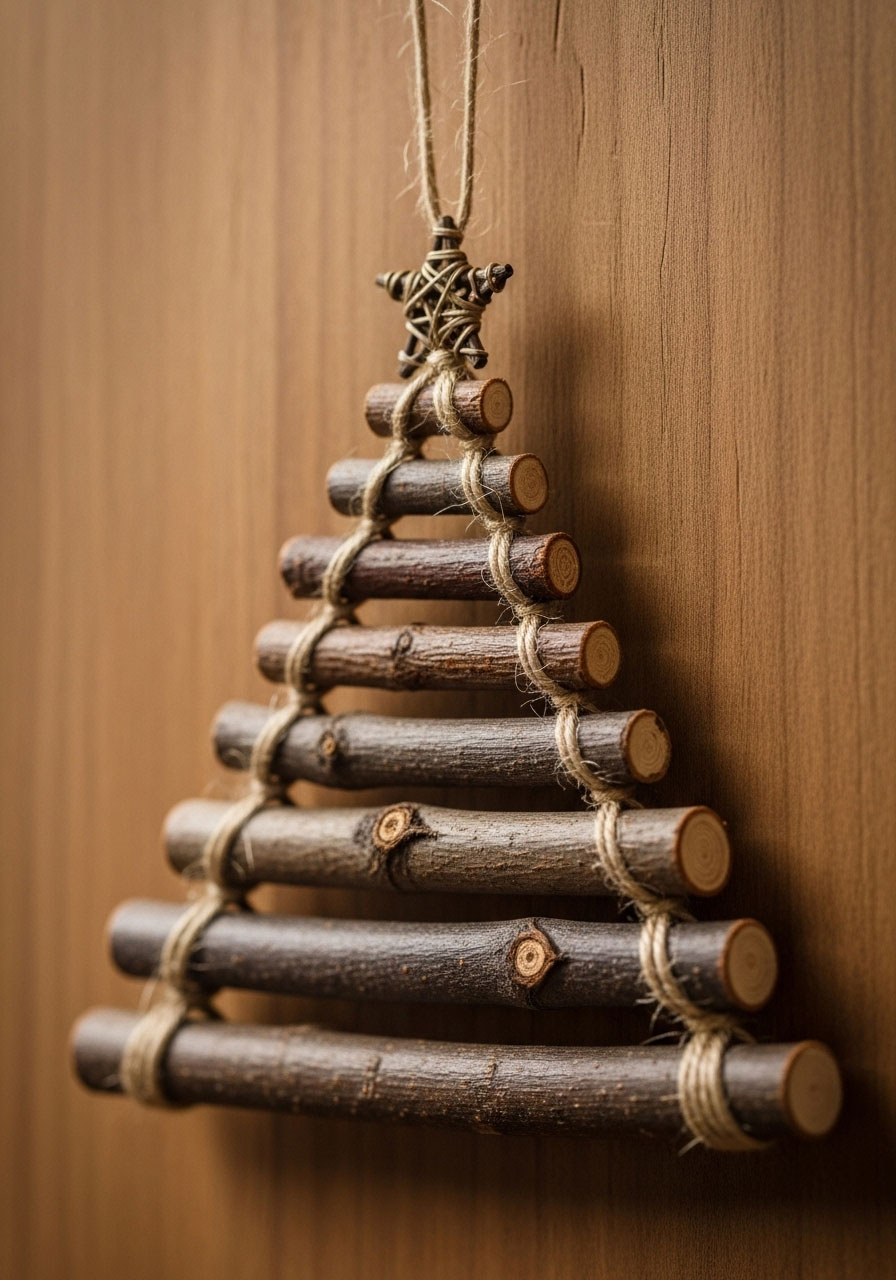
Best for: Rustic decor lovers, nature-inspired trees, porch displays
Time to Craft: 15-20 minutes
Skill Level: Super easy
Mother Nature just became your craft supplier! These charming twig ornaments bring an organic, woodland vibe to your holiday decor, and they cost almost nothing to make.
What You’ll Need:
- Twigs or small branches (from your yard or craft store)
- Pruning shears or sturdy scissors
- Hot glue gun or twine
- Small decorative elements (mini stars, beads, ribbon)
- Twine for hanging
How to Make It:
- Gather or purchase twigs in graduated sizes – you’ll need about 5-7 twigs per ornament.
- Cut them to different lengths, from shortest to longest, to form a tree shape.
- Arrange them vertically with the longest at the bottom.
- Hot glue them onto a vertical twig “trunk” or tie them together with twine.
- Add tiny decorations like a star on top or mini bead “ornaments”.
- Attach a twine loop for hanging.
Fun Variation: Spray paint your twigs white or gold before assembling for a more polished, modern look!
5. Vintage Ornament Wall Decor Tree
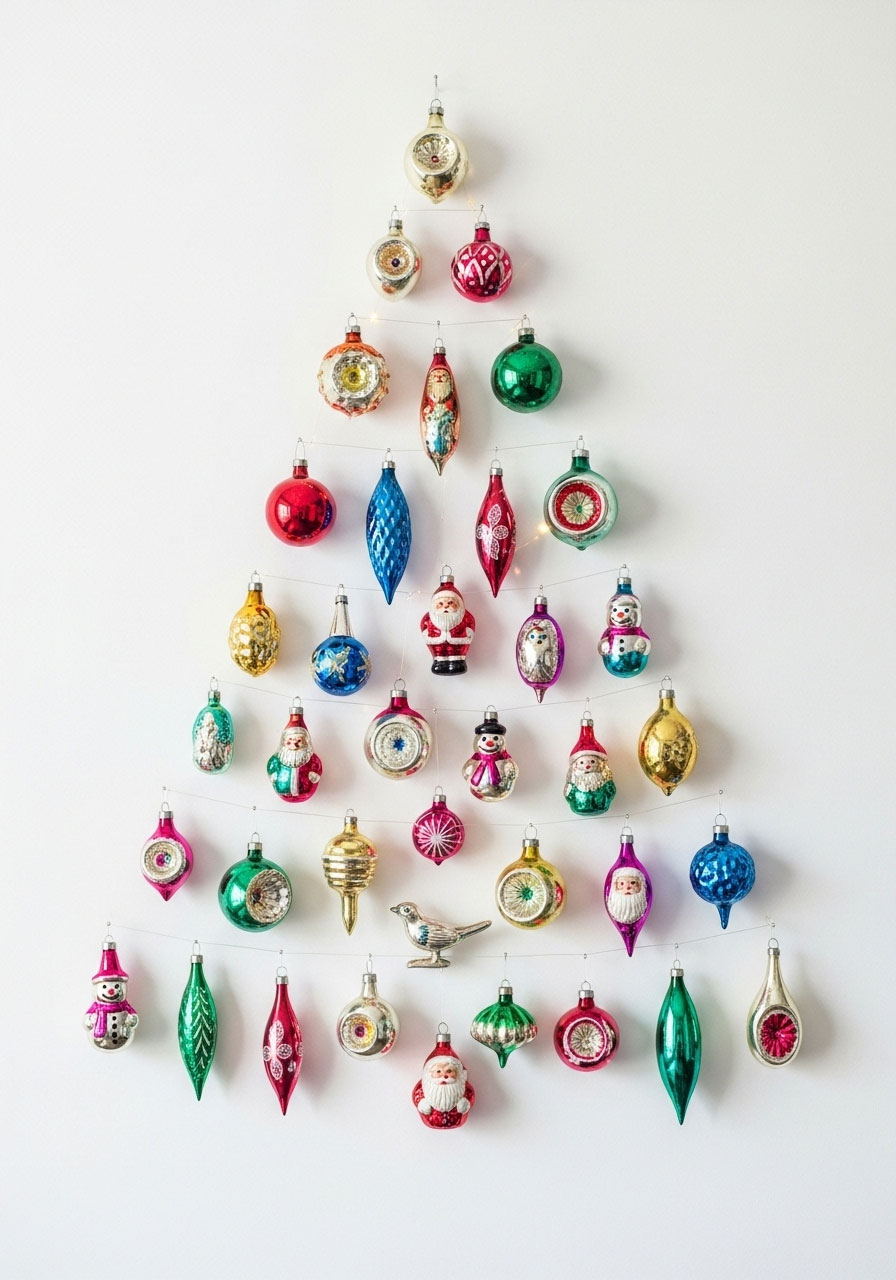
Best for: Apartment dwellers, alternative tree displays, vintage decor fans
Time to Craft: 30-45 minutes
Skill Level: Easy
Got a collection of vintage ornaments gathering dust? Transform them into a stunning wall-mounted Christmas tree that’s equal parts nostalgic and chic. No real tree required!
What You’ll Need:
- Assorted vintage ornaments (at least 20-30)
- Command hooks or small nails
- Fishing line or clear wire
- Measuring tape
How to Make It:
- Map out your tree shape on the wall using painter’s tape as a guide.
- Arrange your ornaments from largest at the bottom to smallest at the top.
- Install command hooks or nails in a tree formation on your wall.
- Hang ornaments from the hooks using fishing line at varying lengths.
- Step back and adjust until you’re satisfied with the shape.
- Remove the painter’s tape guide.
Pro Tip: Use ornaments in a cohesive color scheme (all silver, all blue, etc.) for a more sophisticated look, or go full rainbow for maximum vintage charm!
6. Small Wooden Christmas Tree
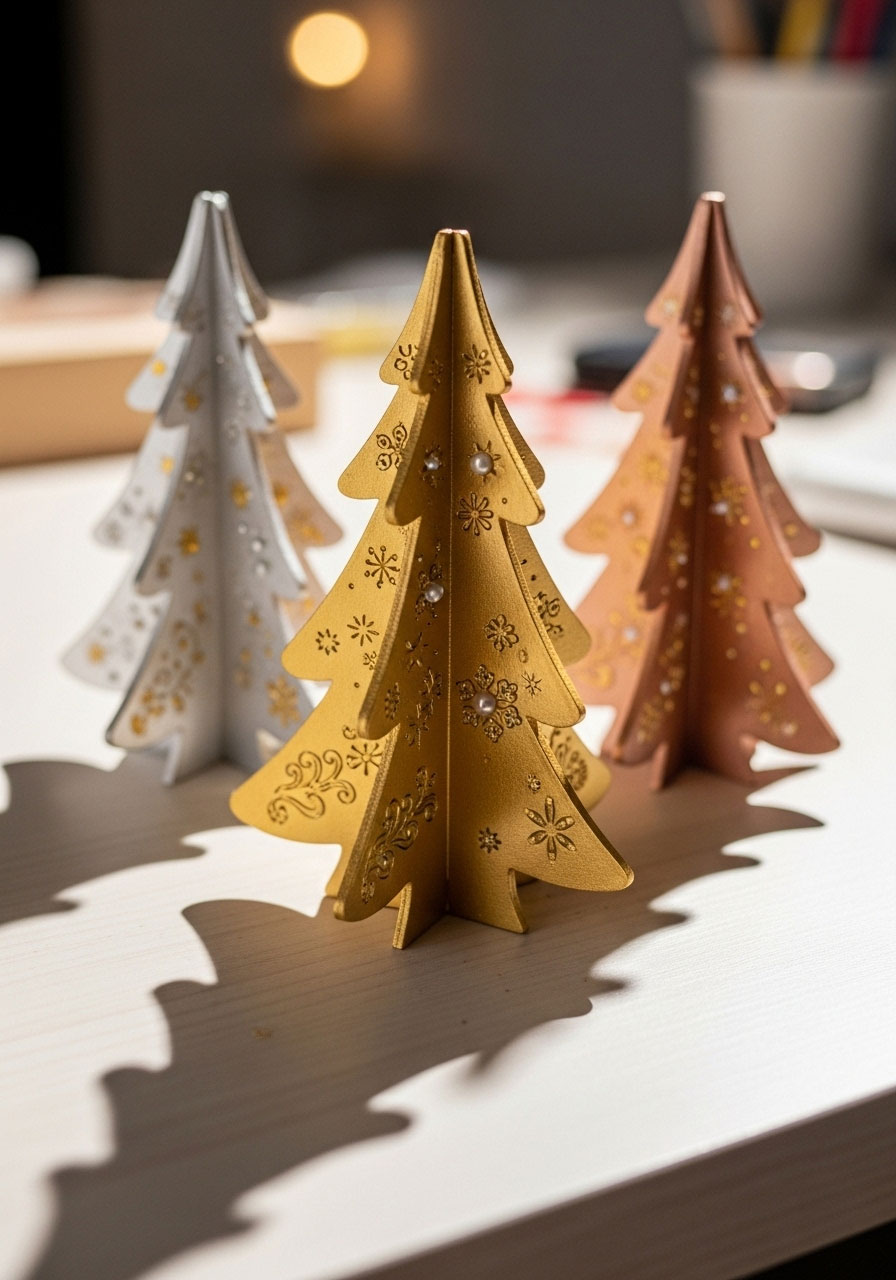
Best for: Desk decor, tiered tray styling, gift giving
Time to Craft: 20-30 minutes
Skill Level: Easy
These adorable mini wooden trees are so addictive to make, you’ll end up with an entire forest on your mantel. Fair warning: you might not be able to stop at just one!
What You’ll Need:
- Laser-cut wooden tree pieces (from craft stores)
- Acrylic paint (green, white, or metallics)
- Small paintbrushes
- Gold or silver paint pens for details
- Clear spray sealer (optional)
How to Make It:
- Assemble your wooden tree pieces according to package instructions (usually they slot together).
- Paint your tree in your chosen color – go classic green or modern white.
- Once dry, add details with metallic paint pens: dots for “ornaments”, lines for “garland”.
- For extra sparkle, add tiny rhinestone stickers or glitter accents.
- Seal with a clear spray if desired.
- Display solo or create a mini tree village!
Fun Variation: Paint each tree a different metallic color (copper, gold, silver) for a trendy ombré forest effect!
7. Christmas Cookie Cutter Wreath
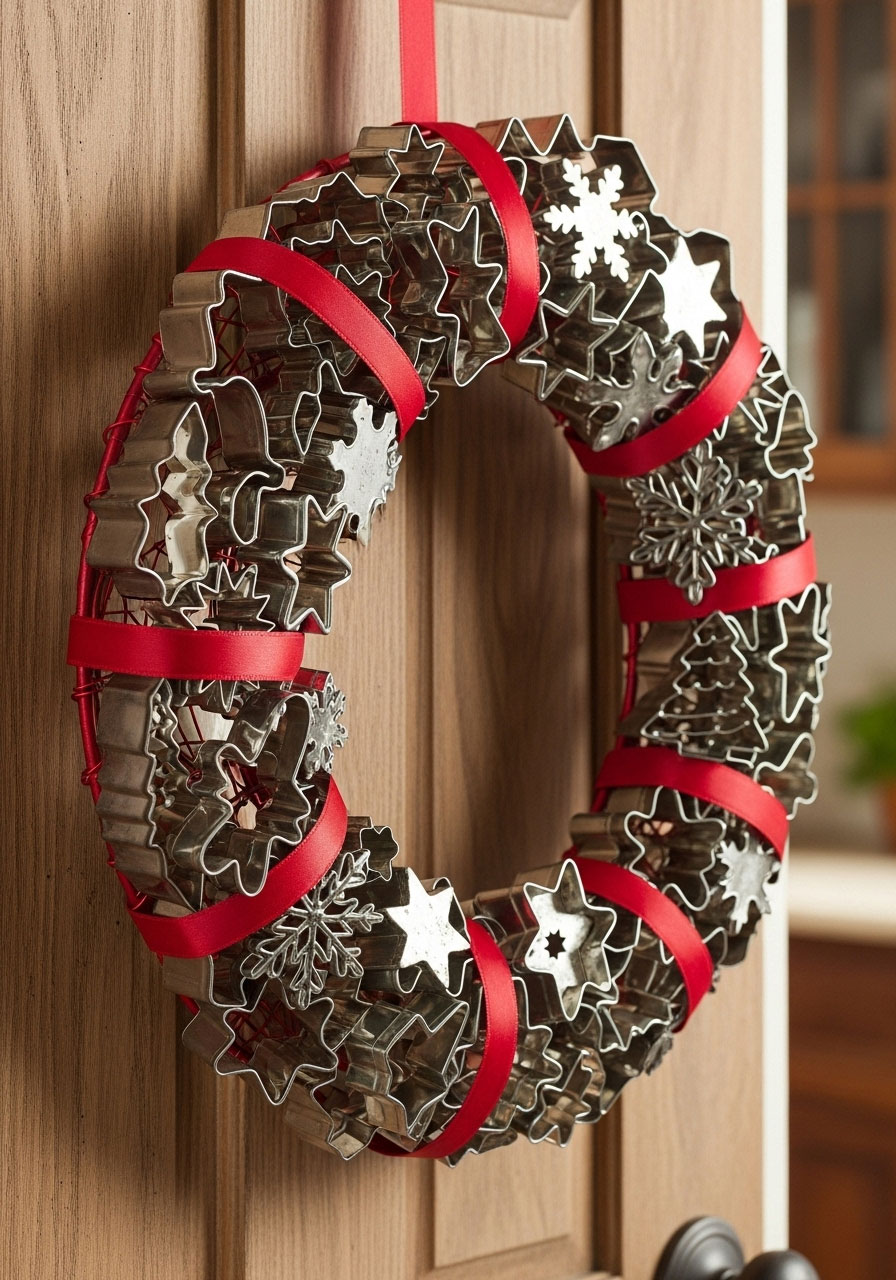
Best for: Kitchen decor, baking enthusiasts, whimsical displays
Time to Craft: 30-40 minutes
Skill Level: Easy
Here’s a sweet way to repurpose those cookie cutters that only see daylight once a year. This playful wreath celebrates the baker in you while looking absolutely adorable!
What You’ll Need:
- Wire wreath form (12-14 inches)
- Assorted Christmas cookie cutters (15-20)
- Ribbon (2-3 yards)
- Hot glue gun
- Decorative bow for finishing
How to Make It:
- Wrap your wire wreath form completely with ribbon, securing the ends with hot glue.
- Arrange your cookie cutters around the wreath to plan your design.
- Hot glue the cookie cutters onto the ribbon-wrapped form, overlapping them slightly.
- Fill in any gaps with smaller cookie cutters or ribbon loops.
- Add a large decorative bow at the top or bottom.
- Hang in your kitchen or on your front door!
Pro Tip: Use all vintage metal cookie cutters for a nostalgic look, or mix metals with bright red cookie cutters for a classic Christmas color scheme.
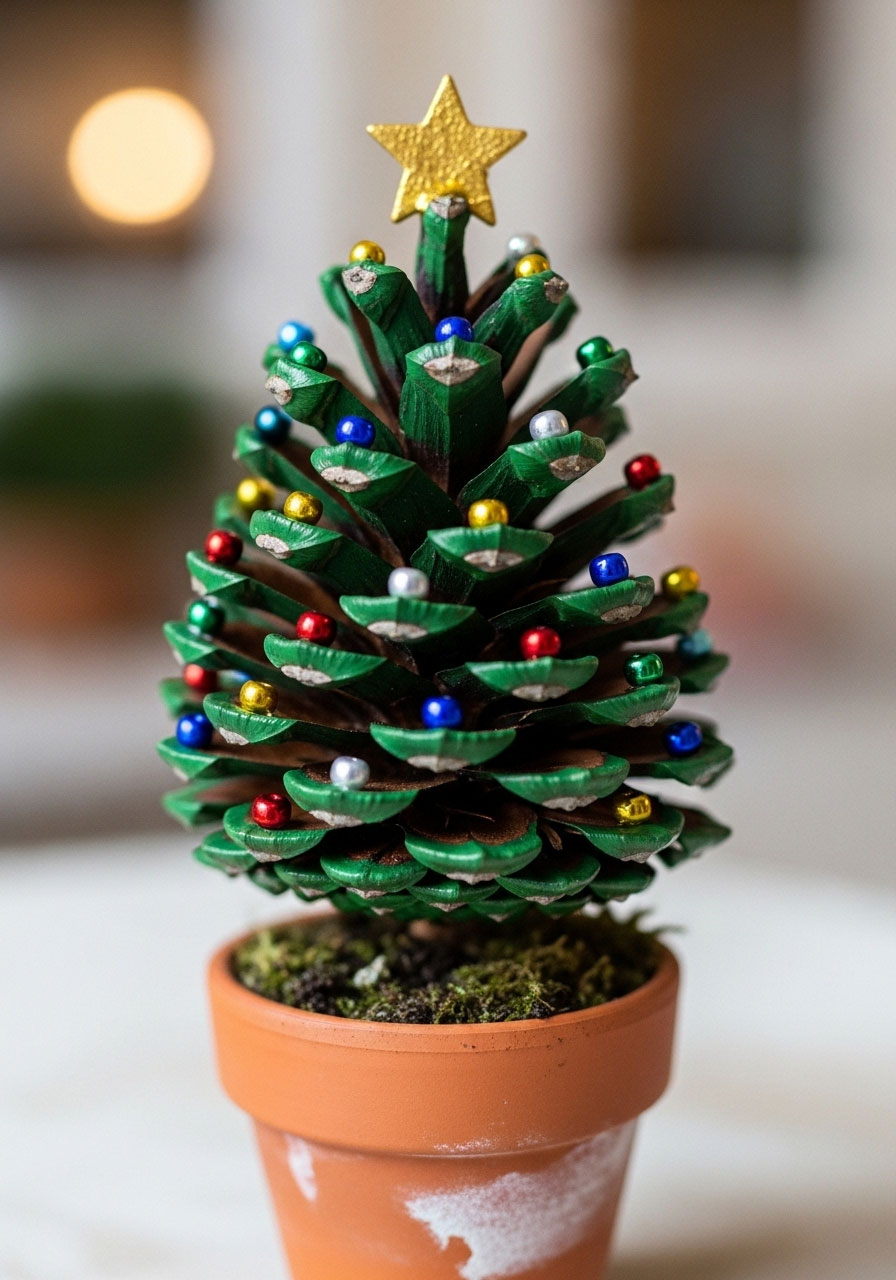
8. Pinecone Christmas Tree
Best for: Nature lovers, centerpieces, budget-friendly decor
Time to Craft: 25-35 minutes
Skill Level: Easy
Take a walk in the woods and come back with the supplies for these charming mini Christmas trees. They’re eco-friendly, cost-effective, and have that cozy cabin vibe we all crave during the holidays.
What You’ll Need:
- Large pinecones (one per tree)
- Small terracotta pots or wooden slices for bases
- Green spray paint or acrylic paint
- Paintbrush
- Hot glue gun
- Mini pom poms, beads, or sequins for “ornaments”
- Small star for the top
How to Make It:
- Clean your pinecones and let them dry completely (bake at 200°F for 30 minutes to kill any bugs).
- Paint your pinecones green, getting paint between the “branches”. Let dry.
- Hot glue the pinecone to your pot or wooden base.
- Use hot glue to attach tiny decorations between the pinecone scales.
- Top with a mini star attached with hot glue.
- Optional: Add “snow” by dabbing white paint on the tips of the scales.
Fun Variation: Skip the paint and embrace the natural brown pinecone for a rustic, woodland look—just add the tiny ornaments!
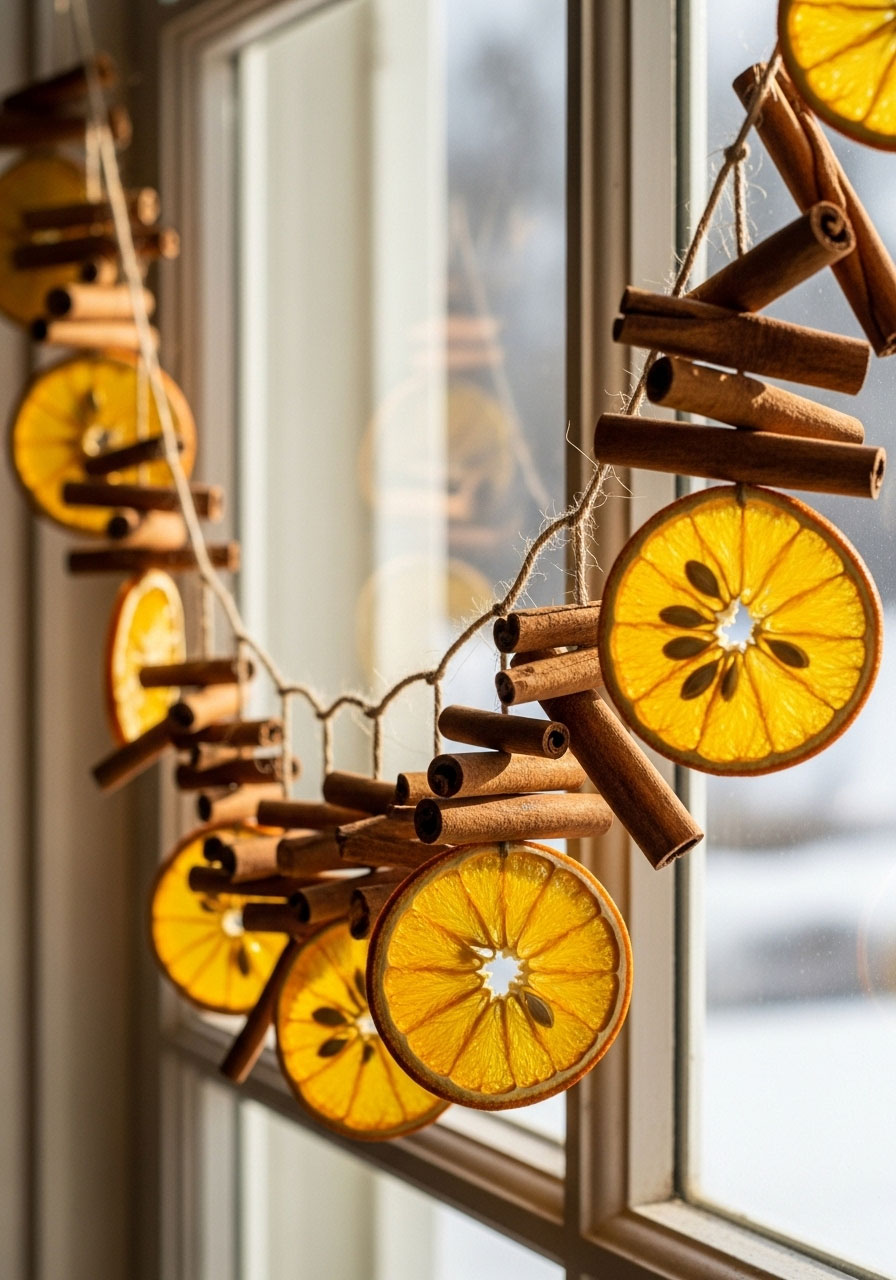
9. Dried Orange Garland
Best for: Natural decor, farmhouse style, scented decorations
Time to Craft: 3-4 hours (mostly drying time)
Skill Level: Very easy
This gorgeous garland looks expensive but costs practically nothing. Plus, your home will smell like a citrus dream while you’re making it. Talk about a win-win!
What You’ll Need:
- 4-5 oranges
- Sharp knife
- Baking sheets
- Parchment paper
- Twine or ribbon
- Large needle
- Optional: cinnamon sticks, bay leaves, cranberries
How to Make It:
- Slice oranges into ¼-inch thick rounds.
- Pat dry with paper towels to remove excess juice.
- Arrange on parchment-lined baking sheets without overlapping.
- Bake at 200°F for 2-3 hours, flipping halfway through, until completely dried.
- Let cool completely.
- Thread your needle with twine and string the dried oranges, spacing them evenly.
- Add cinnamon sticks and bay leaves between oranges for extra charm.
Pro Tip: Make these a few days ahead – the drier they are, the longer they’ll last. Store in an airtight container until you’re ready to string them!
10. Gingerbread Ornaments

Best for: Scented tree decor, gift tags, kitchen displays
Time to Craft: 1 hour (plus cooling time)
Skill Level: Easy
These aren’t for eating, but they’ll make your tree smell absolutely amazing! These DIY gingerbread ornaments look bakery-fresh and add that cozy, homemade touch to your holiday decor.
What You’ll Need:
- Gingerbread cookie dough (your favorite recipe)
- Christmas cookie cutters
- Straw or skewer (for making holes)
- Baking sheets
- Ribbon or twine
- Optional: Royal icing for decorating
How to Make It:
- Roll out your gingerbread dough to about ¼-inch thickness.
- Cut out shapes using cookie cutters – stars, trees, gingerbread people, whatever you love!
- Before baking, use a straw to punch a hole near the top for hanging.
- Bake according to your recipe instructions until firm.
- Let cool completely – this is crucial!
- Decorate with royal icing if desired, or leave them plain for a rustic look.
- Thread ribbon through the holes and hang on your tree.
Fun Variation: Add a clear coat of Mod Podge after baking to preserve them for years to come. They’ll last through many holiday seasons!
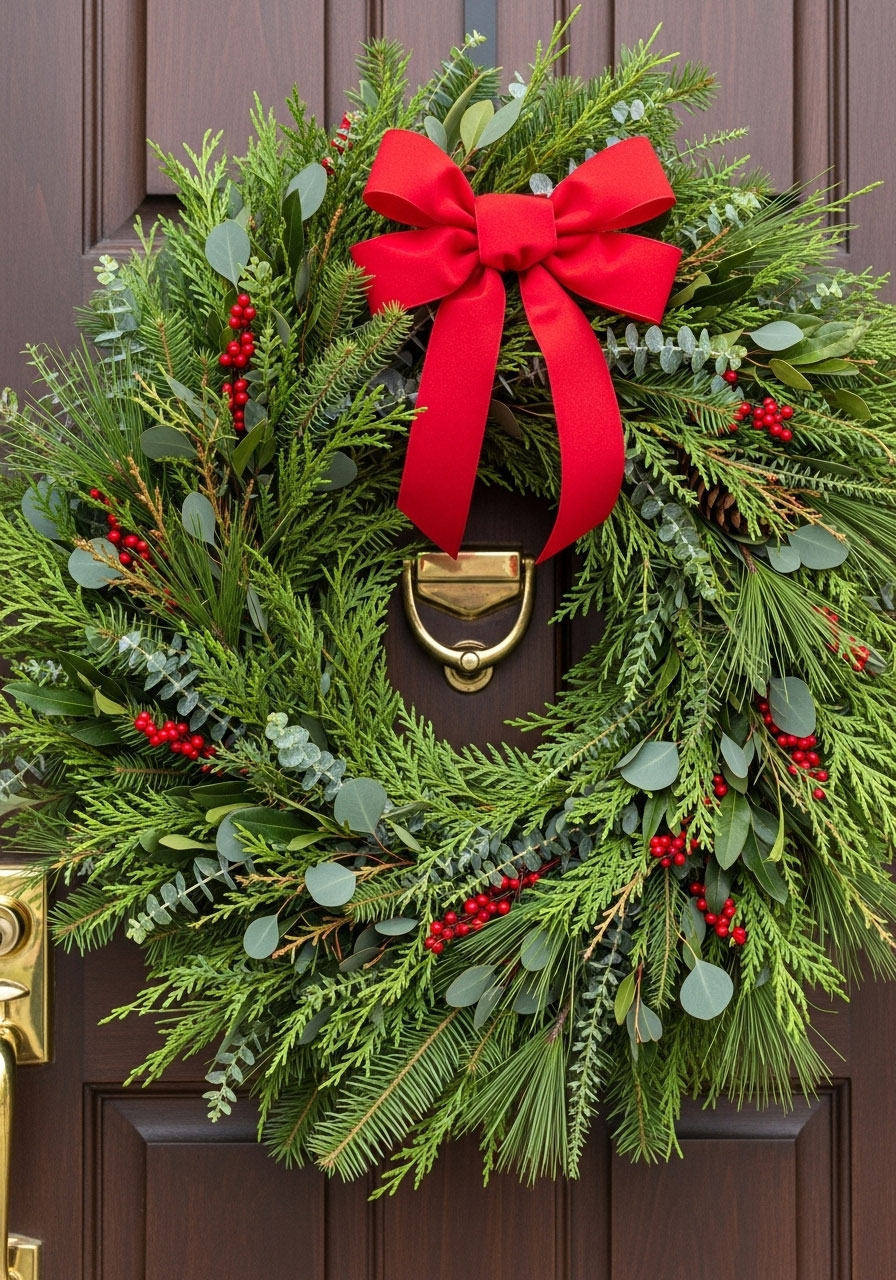
11. Fresh Greenery Wreath
Best for: Front doors, traditional decor, impressive DIY projects
Time to Craft: 45 minutes to 1 hour
Skill Level: Intermediate
Nothing says “Christmas” quite like the scent of fresh pine greeting you at your front door. Making your own wreath is easier than you think, and the result looks like it came from a high-end florist.
What You’ll Need:
- Wire wreath frame (14-18 inches)
- Fresh greenery (pine, cedar, fir, eucalyptus)
- Floral wire
- Wire cutters
- Ribbon for bow
- Optional: pinecones, berries, ornaments
How to Make It:
- Cut your greenery into 6-8 inch pieces.
- Create small bundles of mixed greenery (3-4 stems per bundle).
- Secure the first bundle to the wreath frame with floral wire.
- Add the next bundle, overlapping the stems of the first, and wire it in place.
- Continue around the entire wreath, always working in the same direction.
- Fill in any sparse areas with extra greenery.
- Add decorative elements like pinecones or a ribbon bow.
Pro Tip: Mist your wreath daily to keep it fresh longer, and hang it somewhere shaded if it’s outdoors. A fresh wreath can last 3-4 weeks with proper care!
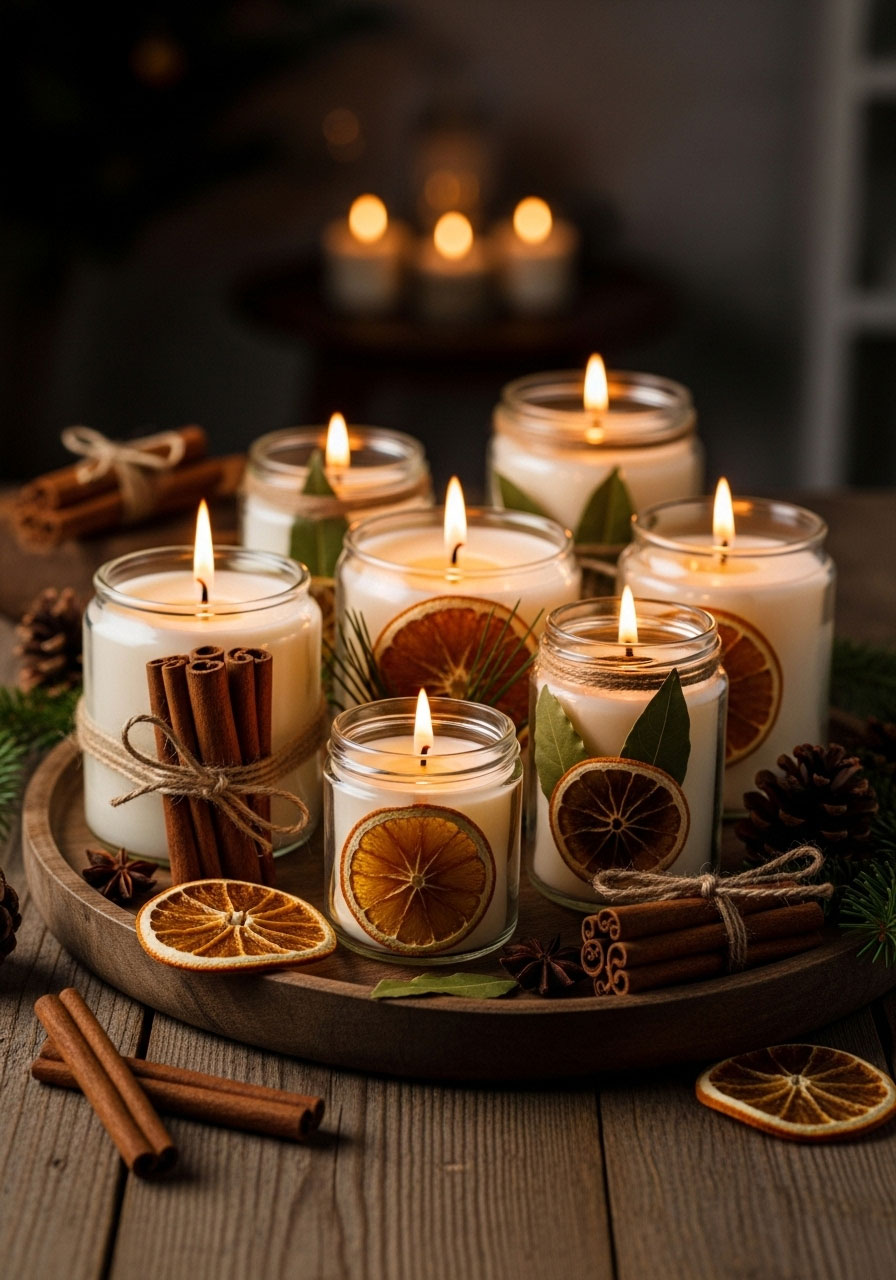
12. Homemade Scented Candles
Best for: Gift giving, ambiance, holiday scenting
Time to Craft: 1 hour (plus cooling time)
Skill Level: Intermediate
Transform your home into a holiday haven with candles that smell like Christmas in a jar. These make incredible gifts, too – people will be asking where you bought them!
What You’ll Need:
- Soy wax flakes or beeswax
- Candle wicks with metal tabs
- Glass jars or tins
- Essential oils (cinnamon, pine, orange, clove)
- Double boiler or microwave-safe bowl
- Clothespins or pencils (to hold wicks)
- Optional: dried orange slices, cinnamon sticks for decoration
How to Make It:
- Secure the wick to the bottom center of your jar using a dab of melted wax.
- Use a clothespin or pencil across the jar’s top to hold the wick straight.
- Melt your wax in a double boiler or microwave (follow package directions).
- Once melted, remove from heat and add 30-40 drops of essential oils per cup of wax.
- Let cool slightly (2-3 minutes), then pour carefully into your prepared jars.
- Let set completely (4-6 hours) before trimming the wick to ¼ inch.
- Optional: Glue dried orange slices or cinnamon sticks to the outside of the jar.
Pro Tip: Try a blend of cinnamon, orange, and clove for the ultimate “Christmas morning” scent. It’s impossible to resist!
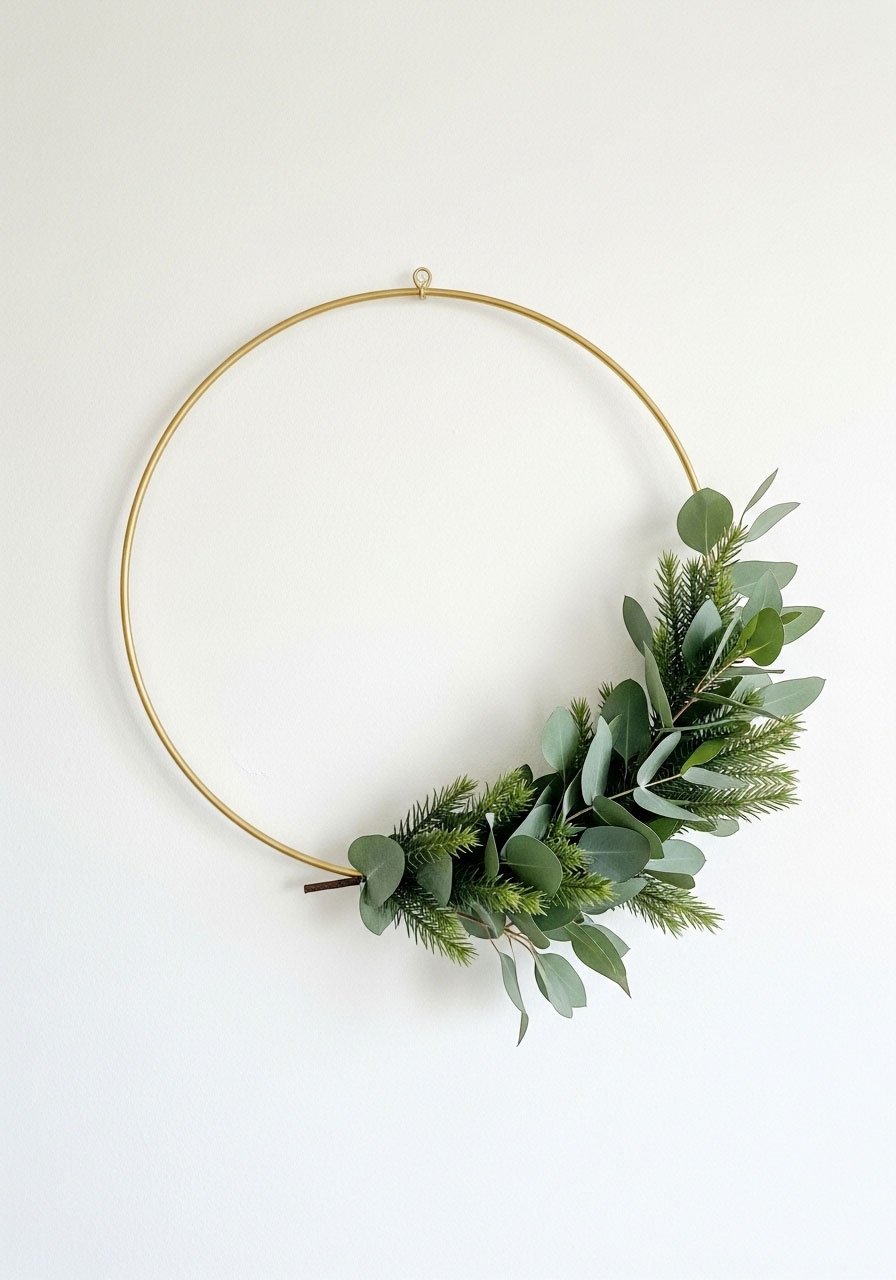
13. Brass Ring Wreath
Best for: Modern decor, minimalists, apartment-friendly hanging
Time to Craft: 30-40 minutes
Skill Level: Easy
This contemporary take on the traditional wreath is sleek, simple, and seriously stylish. It’s perfect for anyone whose aesthetic leans more “West Elm” than “Winter Wonderland”.
What You’ll Need:
- Large brass or gold metal ring (8-12 inches)
- Fresh or faux greenery (eucalyptus works beautifully)
- Floral wire or hot glue
- Leather cord or velvet ribbon for hanging
- Optional: small ornaments, bells
How to Make It:
- Cut your greenery into manageable pieces (4-6 inches).
- Arrange greenery around a portion of the ring (usually the bottom two-thirds).
- Secure with floral wire or hot glue as you go.
- Layer the greenery to create depth, leaving the top portion of the ring exposed.
- Add any decorative touches like small ornaments or bells.
- Attach leather cord or ribbon to the top for hanging.
Fun Variation: Go full minimalist with just three or four eucalyptus stems attached to one side of the ring – sometimes less really is more!
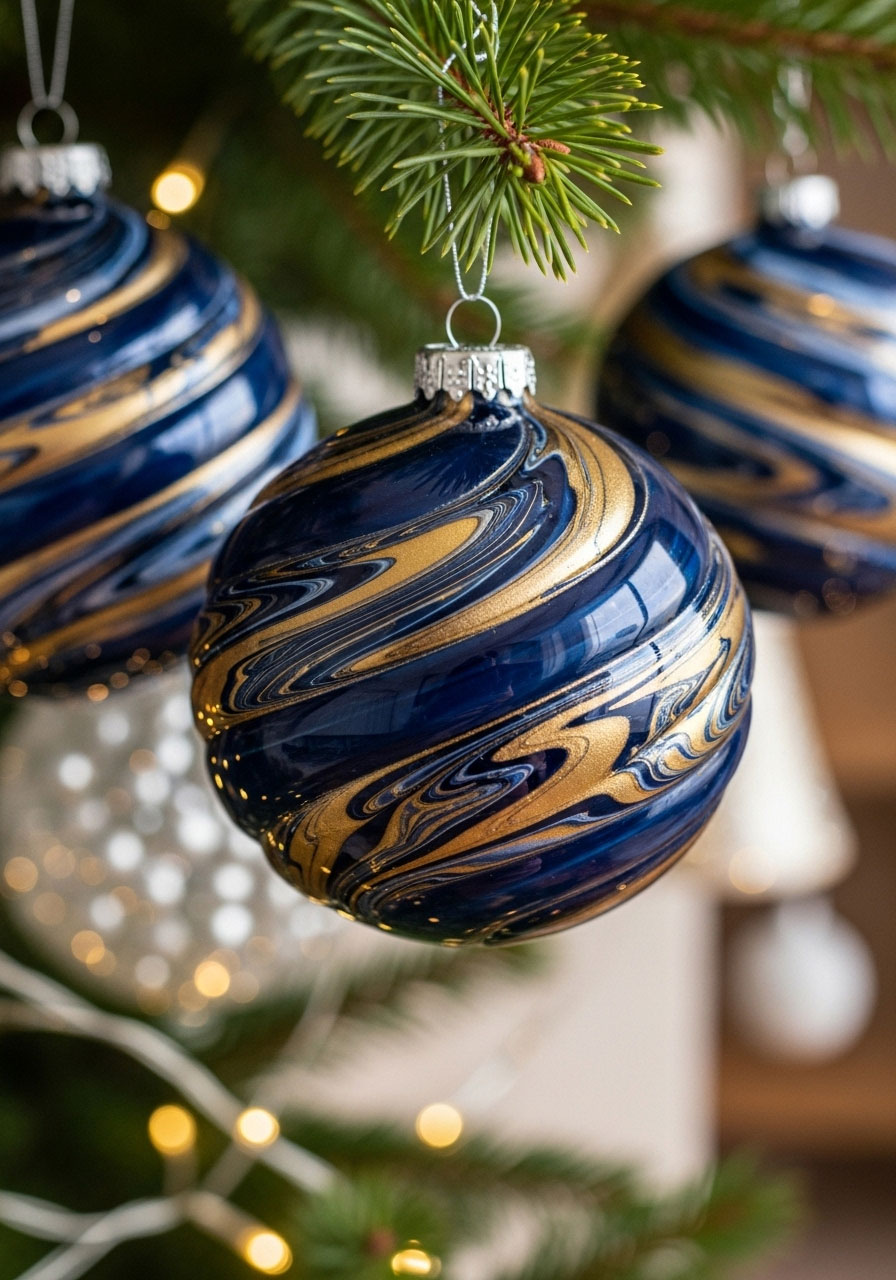
14. Marbled Ornaments
Best for: Custom tree decor, artistic projects, unique gifts
Time to Craft: 30-40 minutes
Skill Level: Easy to intermediate
These swirly, gorgeous ornaments look like works of art (because they are!). Each one turns out completely unique, and the marbling technique is surprisingly foolproof.
What You’ll Need:
- Clear glass or plastic ornament balls
- Acrylic paint in 2-3 complementary colors
- Small cups or bowls
- Paper plates
- Ribbon for hanging
- Optional: glitter, gold leaf flakes
How to Make It:
- Remove the top cap from your ornament.
- Pour a small amount of each paint color into the ornament (start with just a tablespoon).
- Replace the cap and gently swirl the ornament around, letting the colors mix and marble.
- Continue swirling until the inside is coated to your liking.
- Remove the cap and turn the ornament upside down on a paper plate to let excess paint drip out.
- Let dry completely (24 hours) with the cap off.
- Add glitter or gold leaf before the paint fully dries for extra sparkle!
Pro Tip: Use colors that blend well together – like navy and gold, or red and white – to avoid muddy results. And don’t over-swirl, or you’ll lose the marbled effect!
15. Paper Straw Ornaments

Best for: Kid-friendly crafting, colorful trees, budget projects
Time to Craft: 20-30 minutes
Skill Level: Very easy
These cheerful little wreaths bring major color and personality to your tree! They’re so simple to make that you can whip up a dozen while binge-watching your favorite holiday movies.
What You’ll Need:
- Colorful paper straws (at least 15-20 per ornament)
- Scissors
- Twine or ribbon
- Large beads
- Hot glue gun or needle and thread
How to Make It:
- Cut paper straws into 1-2 inch pieces.
- Thread them onto twine or ribbon, alternating with beads.
- Once you have enough to form a circle (about 8-10 inches of stringing), tie the ends together to create a wreath shape.
- Create a loop at the top for hanging.
- Add a small bow where you tied the ends for a finished look.
Fun Variation: Use holiday-themed straws (red and white striped, gold, green) or create an ombré effect by gradually changing colors around the wreath!
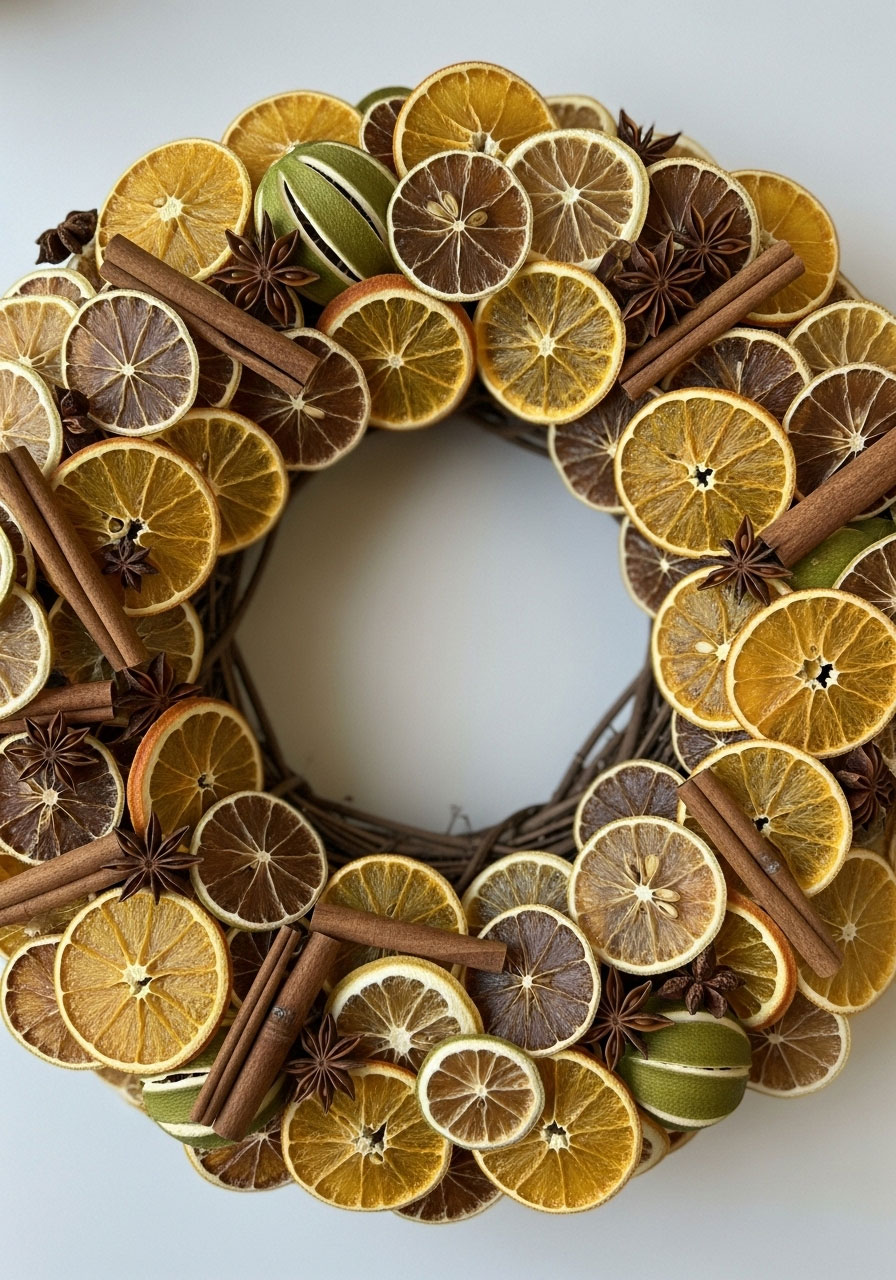
16. Dried Citrus Wreath
Best for: Fragrant decor, kitchen displays, natural style
Time to Craft: 4-5 hours (mostly drying time)
Skill Level: Easy
This stunning wreath is a feast for the eyes and nose! The jewel-toned citrus slices look like stained glass, and the natural fragrance is a delightful bonus.
What You’ll Need:
- Assorted citrus fruits (oranges, lemons, limes, grapefruits)
- Sharp knife
- Baking sheets and parchment paper
- Grapevine or wire wreath form
- Hot glue gun
- Optional: cinnamon sticks, star anise, bay leaves
How to Make It:
- Slice your citrus fruits into ¼-inch thick rounds.
- Pat dry with paper towels.
- Arrange on parchment-lined baking sheets.
- Bake at 200°F for 2-3 hours, flipping once, until completely dried.
- Let cool completely.
- Hot glue the dried citrus slices all around your wreath form, overlapping them slightly.
- Fill gaps with cinnamon sticks, star anise, or bay leaves.
- Let dry and hang!
Pro Tip: The more variety in your citrus, the more visually interesting your wreath will be. Mix oranges, blood oranges, lemons, and limes for a beautiful color palette!
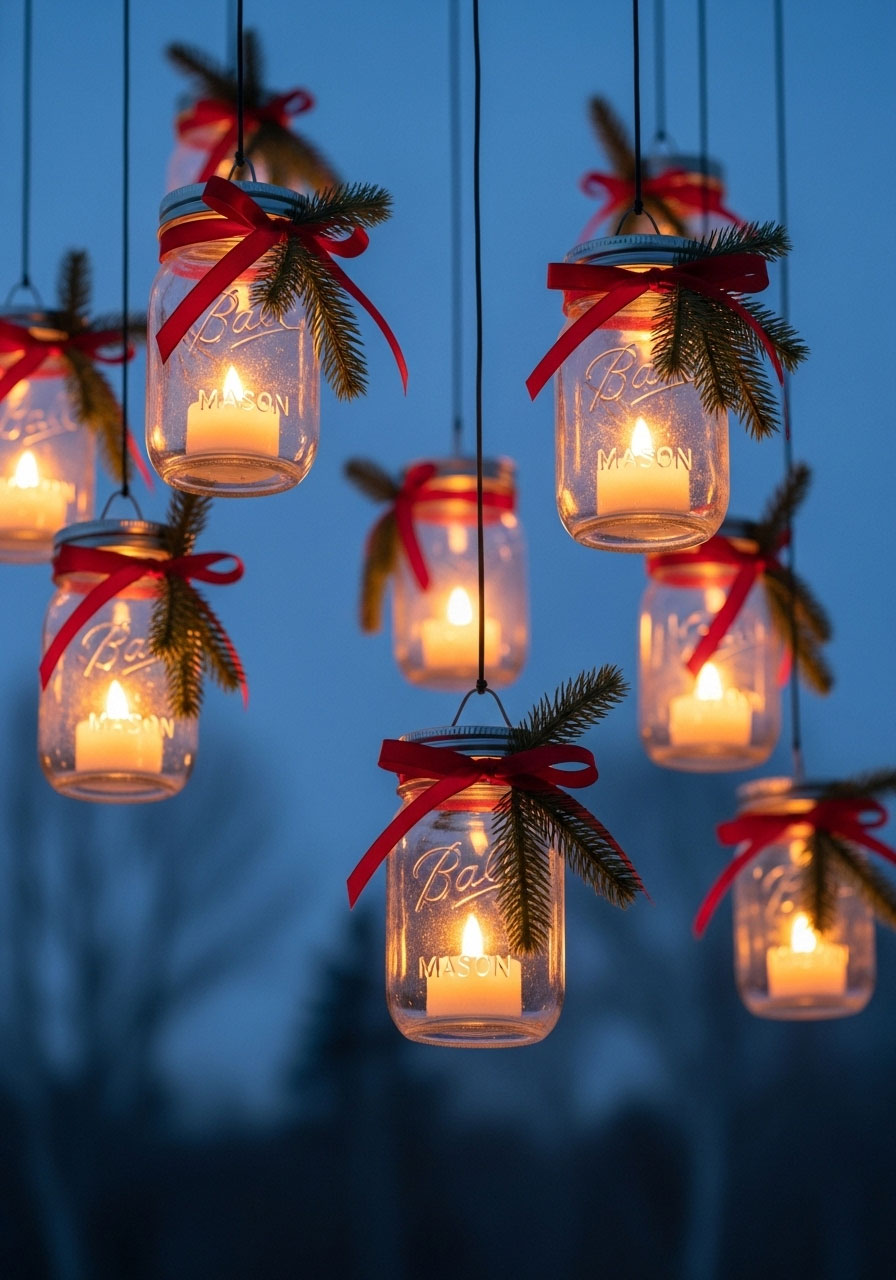
17. Mason Jar Lanterns
Best for: Outdoor decor, pathway lighting, porch displays
Time to Craft: 20-30 minutes
Skill Level: Easy
These charming hanging lanterns add instant warmth and ambiance to any space. They’re perfect for outdoor holiday gatherings or creating a cozy glow on your porch.
What You’ll Need:
- Mason jars (pint or quart size)
- Wire for handles
- Battery-operated tea lights or string lights
- Optional: frosted glass spray, ribbon, greenery
How to Make It:
- If desired, spray the outside of your jars with frosted glass spray and let dry.
- Wrap wire around the neck of the jar and twist to secure.
- Create a handle by extending the wire upward and over, attaching to the opposite side.
- Place battery-operated lights or tea lights inside the jars.
- Tie ribbon or attach small sprigs of greenery to the neck of the jar.
- Hang from shepherd’s hooks, tree branches, or porch hooks.
Fun Variation: Fill the bottom of the jars with fake snow, cranberries, or Epsom salt before adding the lights for extra visual interest!
18. Paper Bag Stars
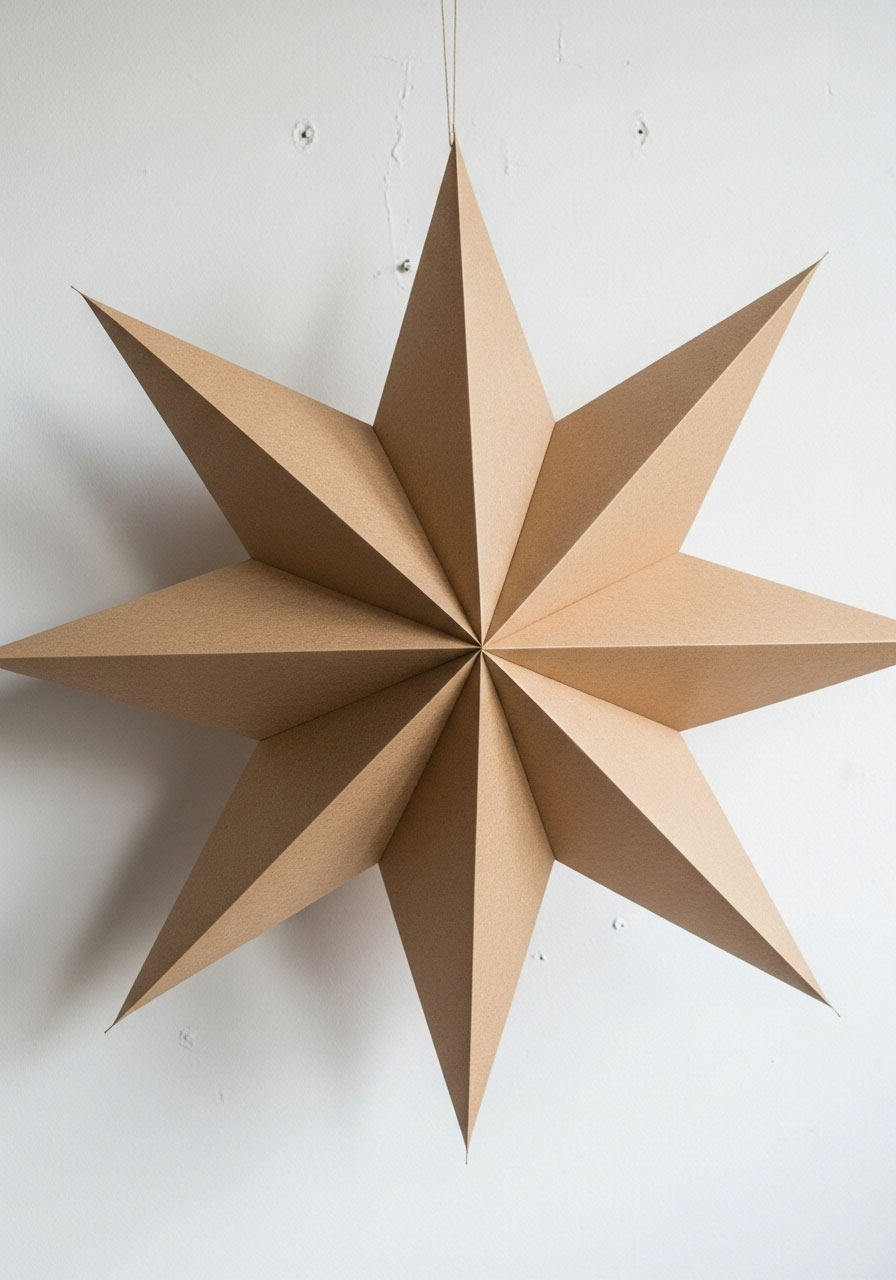
Best for: Scandinavian decor, budget crafts, statement pieces
Time to Craft: 15-25 minutes
Skill Level: Easy
These dimensional stars look incredibly intricate, but they’re made from simple paper bags! They’re perfect for creating that trendy Nordic Christmas look without spending a fortune.
What You’ll Need:
- 7-8 brown paper lunch bags
- Glue stick
- Scissors
- String or ribbon for hanging
- Optional: star-shaped pattern template
How to Make It:
- Stack your paper bags on top of each other, making sure they’re aligned.
- Glue the bags together – apply glue to the entire surface of one bag, then press the next bag on top.
- Continue until all bags are glued together in a stack.
- Draw or trace a star pattern on the top bag (the star should touch all four edges).
- Cut through all layers along your star outline.
- Fan open the bags and glue the first and last bag together to form a 3D star.
- Attach string through one point for hanging.
Pro Tip: Use white paper bags for a clean, modern look, or leave them natural brown for rustic charm. You can also lightly coat them with glitter before assembling!
19. Frosted Christmas Luminaries
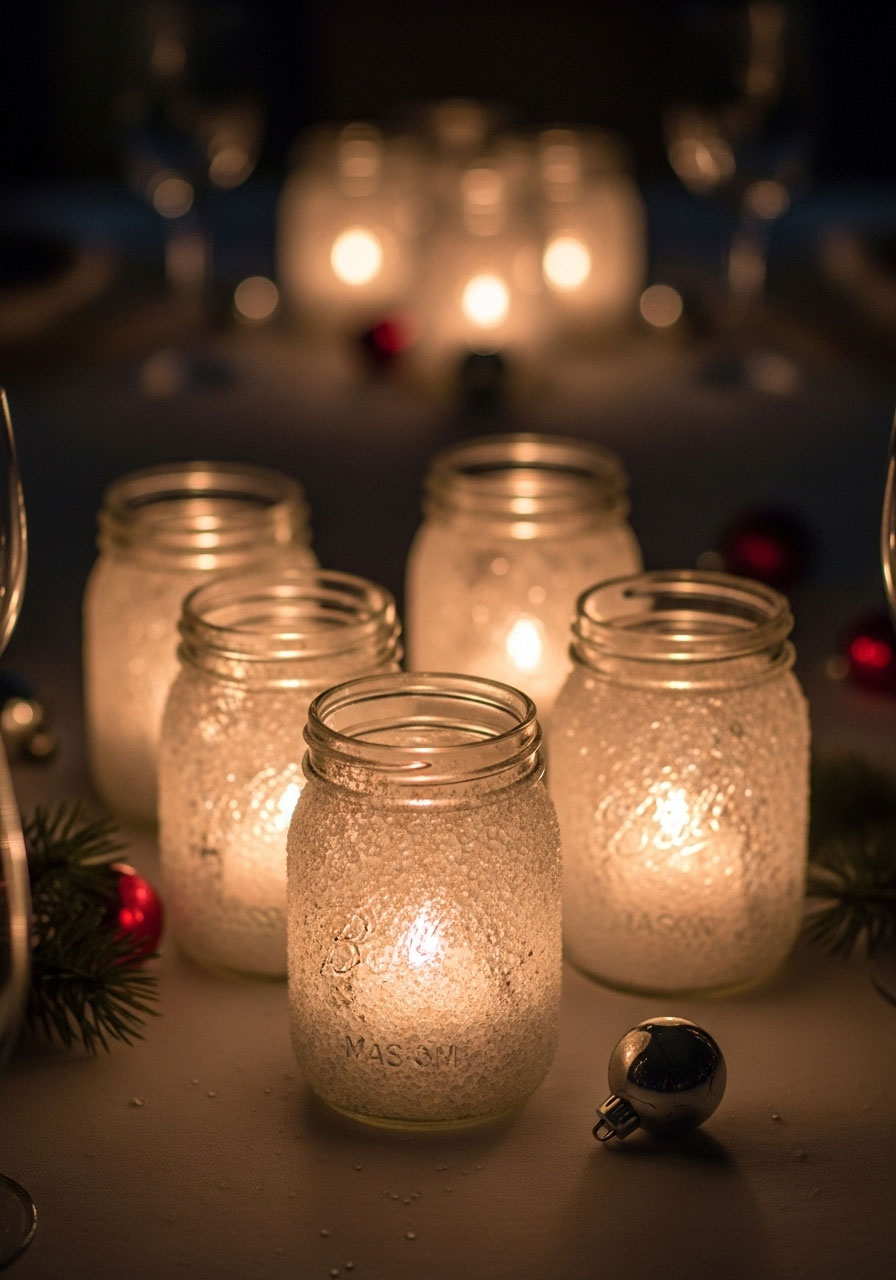
Best for: Table centerpieces, window displays, elegant ambiance
Time to Craft: 30 minutes
Skill Level: Very easy
These frosty luminaries look like they’re covered in fresh snow and create the most magical, romantic glow. They’re perfect for a holiday dinner party or just cozying up your everyday decor.
What You’ll Need:
- Mason jars or glass containers
- Mod Podge
- Epsom salt
- Foam brush
- Battery-operated tea lights
- Optional: ribbon, twine, small ornaments
How to Make It:
- Clean and dry your jars thoroughly.
- Apply a generous layer of Mod Podge to the outside of the jar using a foam brush.
- While the Mod Podge is still wet, roll the jar in Epsom salt or sprinkle the salt over it.
- Make sure to cover the entire jar evenly.
- Let dry completely (about 1 hour).
- Add decorative touches like ribbon or twine around the neck.
- Place battery-operated tea lights inside for a soft, flickering glow.
Fun Variation: Before applying the Mod Podge, use vinyl stickers to create snowflake or tree patterns on the jar. Remove them after the salt dries for a stunning reverse-stencil effect!
20. DIY Christmas Magnets
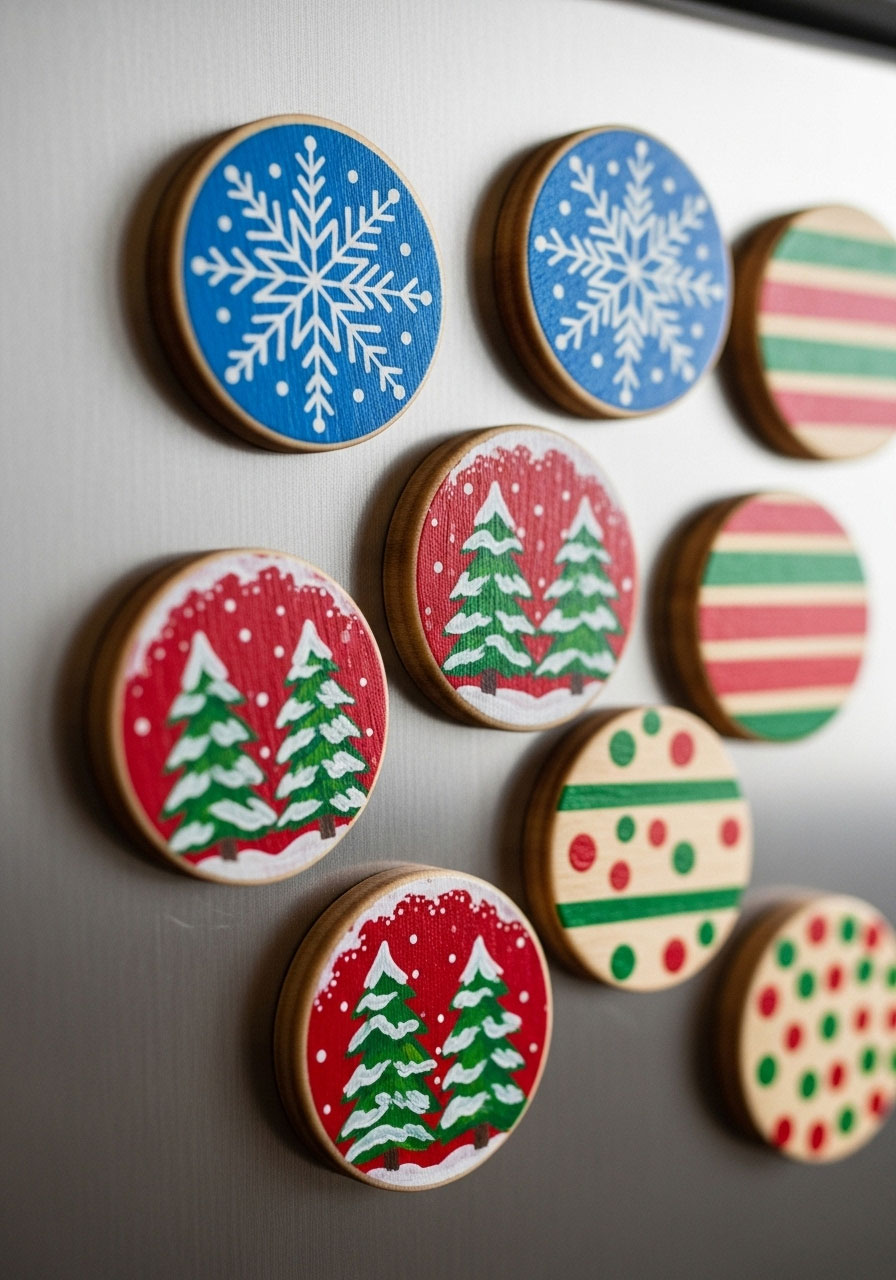
Best for: Gift giving, stocking stuffers, kitchen decor
Time to Craft: 30-45 minutes
Skill Level: Easy
These adorable little magnets are perfect for gifting to neighbors, teachers, or coworkers. They’re quick to make in bulk, which means you can craft while catching up on your holiday movies!
What You’ll Need:
- Small wooden shapes (circles, squares, trees, stars)
- Acrylic paint
- Small paintbrushes
- Holiday stencils
- Mod Podge or clear sealer
- Strong magnets
- Hot glue gun
How to Make It:
- Paint your wooden shapes with a base color (white, red, green, gold).
- Let dry completely.
- Use stencils to add holiday designs (snowflakes, trees, words like “Joy” or “Merry”).
- Add details with a small brush or paint pen.
- Seal with Mod Podge or clear sealer once dry.
- Hot glue a strong magnet to the back of each piece.
- Let dry completely before gifting or using.
Pro Tip: Make sets of 3-4 magnets with coordinating designs and package them in small cellophane bags with ribbon for the perfect budget-friendly gift!
21. Felt Christmas Ornaments
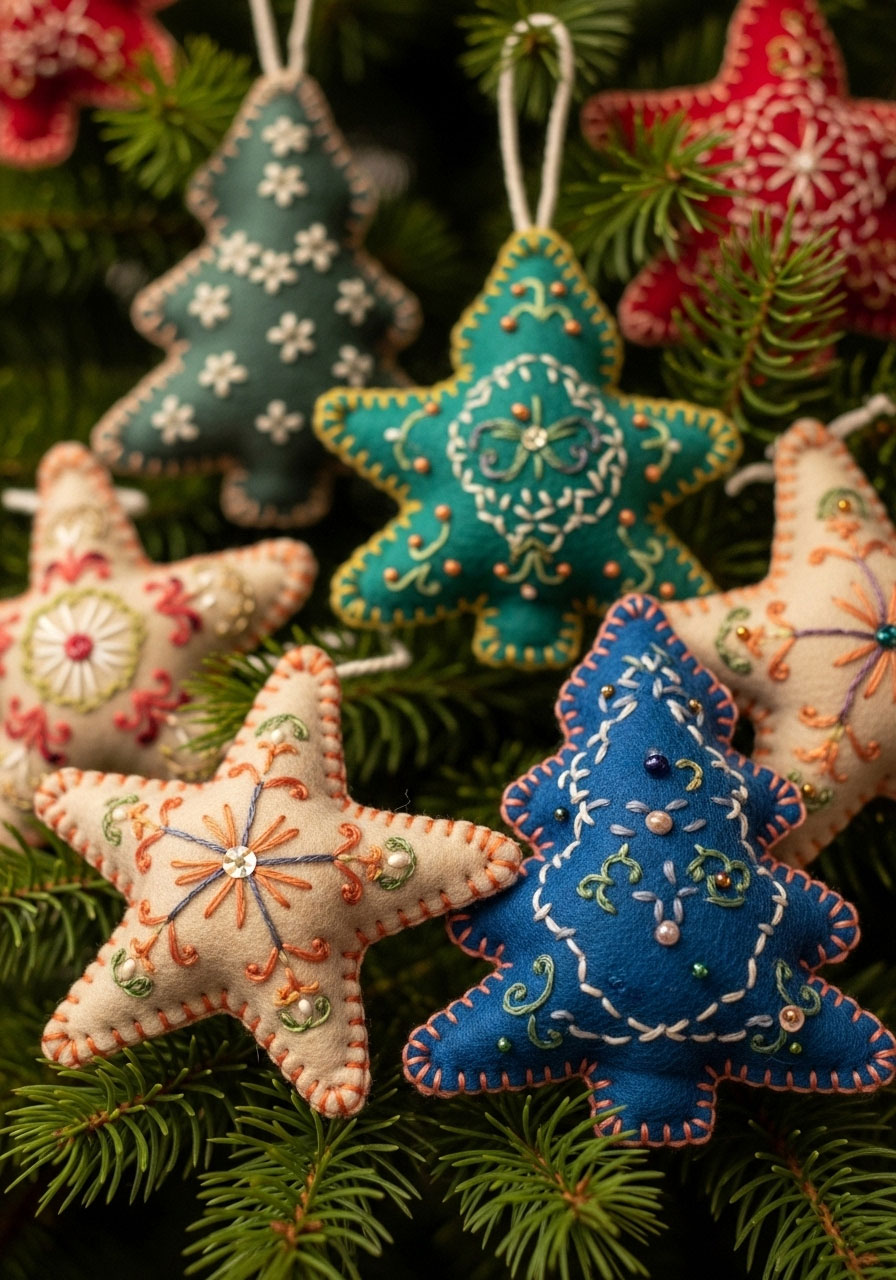
Best for: Soft tree decor, family crafting, handmade gifts
Time to Craft: 30-45 minutes per ornament
Skill Level: Easy to intermediate
These charming felt ornaments have that handcrafted, heirloom quality that makes your tree feel extra special. Plus, they’re unbreakable – perfect if you have kids, pets, or are just naturally clumsy!
What You’ll Need:
- Felt sheets in assorted holiday colors
- Scissors or fabric rotary cutter
- Needle and embroidery thread
- Fiberfill or cotton stuffing
- Ribbon for hanging
- Optional: sequins, beads, buttons
How to Make It:
- Cut two identical shapes from felt (stars, trees, gingerbread people, stockings).
- Place them together and use a blanket stitch around the edges with embroidery thread.
- Leave a small opening and stuff lightly with fiberfill.
- Finish stitching the opening closed.
- Add decorative details with embroidery, beads, or sequins.
- Attach a ribbon loop to the top for hanging.
Fun Variation: Create a whole nativity scene or “12 Days of Christmas” set – one ornament for each character or item. It’s a project that can span the entire holiday season!
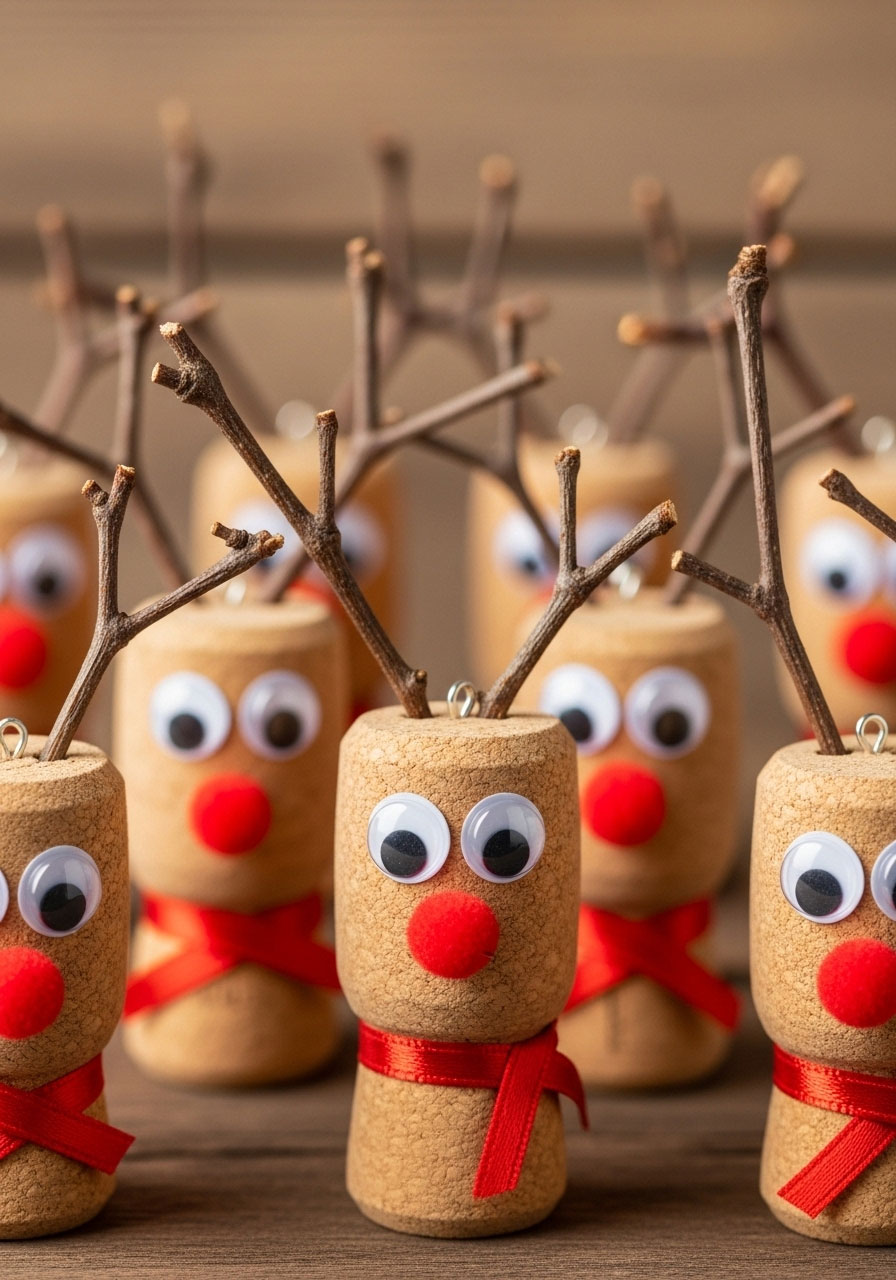
22. Wine Cork Reindeer
Best for: Wine lovers, rustic decor, ornament exchanges
Time to Craft: 20-30 minutes
Skill Level: Easy
Finally, a use for all those wine corks you’ve been hoarding! These adorable reindeer ornaments are quirky, cute, and give major rustic-chic vibes.
What You’ll Need:
- Wine corks
- Small twigs or pipe cleaners (for antlers)
- Mini googly eyes
- Small red pom poms (for noses)
- Brown ribbon or twine
- Hot glue gun
- Drill with small bit (optional)
How to Make It:
- If using twigs for antlers, drill two small holes in the top of the cork. If using pipe cleaners, just poke them directly into the cork.
- Insert antlers and secure with a dot of hot glue if needed.
- Glue on googly eyes.
- Attach a red pom pom nose.
- Tie ribbon or twine around the middle of the cork like a scarf.
- Attach a loop of ribbon to the top for hanging.
Pro Tip: Use champagne corks for a slightly different look, or paint the corks brown before decorating for a more polished finish!
23. Embroidery Hoop Christmas Art

Best for: Wall decor, modern farmhouse style, gallery walls
Time to Craft: 45 minutes to 1 hour
Skill Level: Intermediate
Transform simple embroidery hoops into stunning wall art that’s equal parts cozy and contemporary. These make gorgeous, personalized gifts too!
What You’ll Need:
- Embroidery hoops (various sizes)
- Fabric (holiday prints or solid colors)
- Scissors
- Iron-on or hand-drawn holiday designs
- Embroidery thread and needle
- Hot glue gun
- Optional: ribbon for hanging
How to Make It:
- Iron your fabric to remove wrinkles.
- Place fabric in the embroidery hoop, pulling tight and securing with the hoop screw.
- Trim excess fabric, leaving about 1 inch around the hoop.
- Add your design using iron-on transfers, hand embroidery, or fabric paint.
- Create simple holiday scenes: snowflakes, “Joy”, Christmas trees, or wreaths.
- Hot glue the excess fabric to the back of the hoop for a clean finish.
- Hang as-is or attach ribbon to the top for a decorative hanger.
Fun Variation: Create a set of three hoops in different sizes with coordinating designs – like “Merry”, “Christmas”, and a snowflake – and hang them together as a cluster!
Make This Your Most Creative Christmas Yet!
With these 23 adult Christmas craft ideas in your arsenal, you’re ready to deck the halls like never before. The best part? You don’t need to be a Pinterest expert or have a craft room the size of a small warehouse to pull these off. Just grab your supplies, crank up the holiday tunes, and let your creativity run wild.
Whether you’re transforming pinecones into mini trees, creating luminaries that cast the perfect glow, or stringing together garlands that’ll have everyone asking “Where did you get that?” – these crafts are all about making your space feel uniquely yours. Plus, there’s something incredibly satisfying about saying “I made that!” when guests compliment your decor.
So pour yourself some eggnog, fire up that glue gun, and get ready to create some seriously festive magic. Your most memorable, handmade holiday is just a craft session away. Now get out there and make something beautiful!
Happy crafting, and may your holidays be merry, bright, and delightfully handmade!
More Christmas Party Ideas to Keep the Fun Rolling:
The Ultimate White Elephant Gift Auction: Turn Your Gift Exchange Into a Hilarious Bidding War
33 Epic Christmas Activities for Adults That’ll Make This Your Best Holiday Season Yet
30 Hilarious Christmas Games Guaranteed to Make Your Family Howl with Laughter
The Reindeer Poop Game: Turn Your Guests Into Chocolate Detectives This Christmas
How To Play The Candy Bar Game
Christmas Fish Bowl Game: The Ultimate Holiday Party Hit (Plus Free Word List!)
40 Hilarious Christmas Party Games for Adults That’ll Make Your Holiday Party Legendary