
Ready to throw a fall baby shower that’ll have everyone asking “How did you pull this off on a budget?”
You’re in the right place! We’re about to turn you into the host with the most – without breaking the bank.
I’ve been to my fair share of baby showers, and let me tell you, the ones that stick with you aren’t the ones with the fanciest decorations. They’re the ones that feel warm, personal, and downright cozy. That’s exactly what we’re creating today with these budget-friendly fall baby shower ideas that look way more expensive than they actually are.
Get ready to impress your guests with pumpkin centerpieces, DIY balloon garlands, and autumn-inspired treats that’ll make everyone feel like they’re wrapped in the coziest fall blanket. The best part? Most of these ideas cost less than $15 each, and 10 of them are completely free!
1. Create Your Perfect Fall Color Palette (Without Buying New Stuff!)
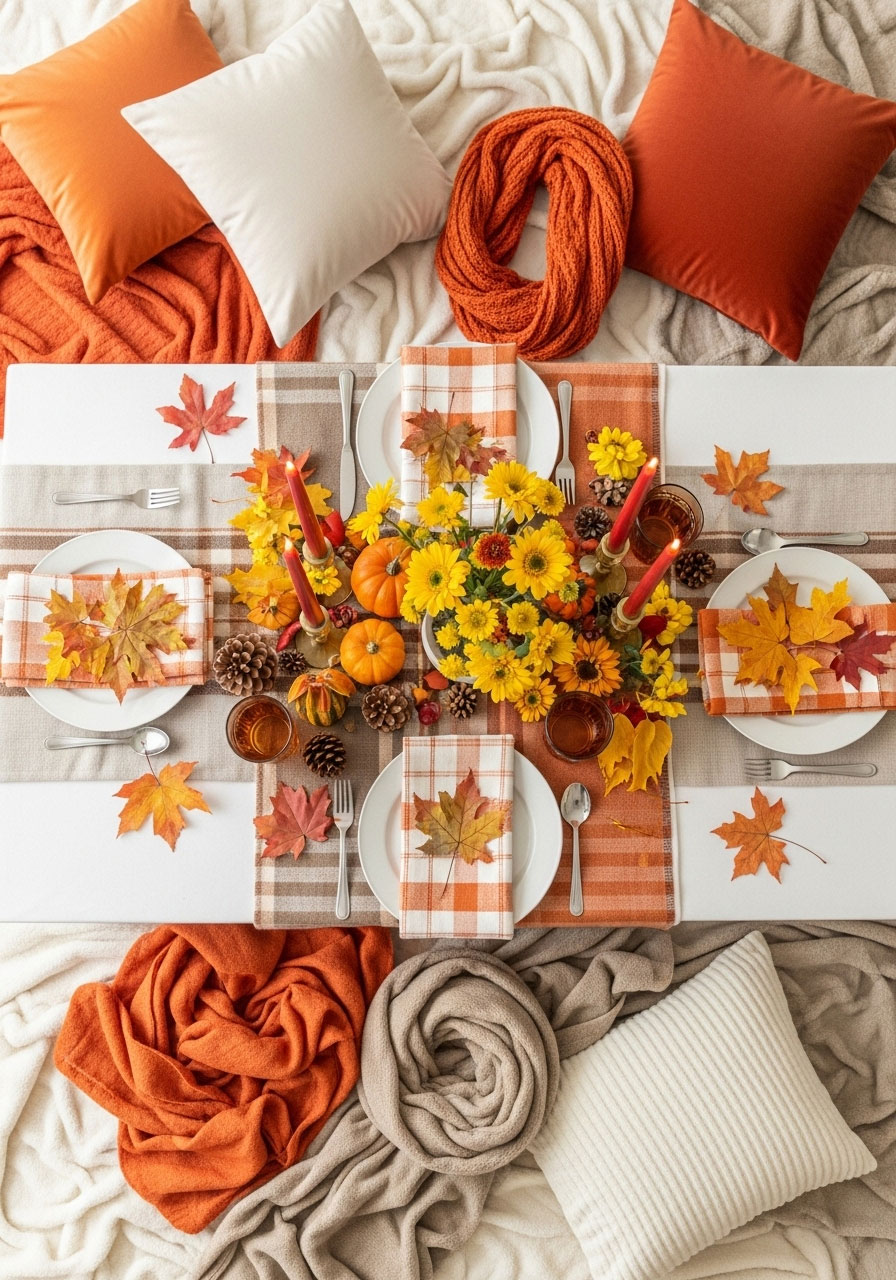
This is where the magic starts, and it won’t cost you a dime if you’re smart about it.
Best for: Setting the entire mood of your shower
Time to Set Up: 15 minutes
Budget: $0-15
What You’ll Need:
- Items you already own (blankets, scarves, fabric scraps)
- Mini pumpkins from the dollar store
- Dried leaves from your yard
- Any cream, taupe, burnt orange, or mustard-colored items
How to Create Your Palette:
- Start with neutrals as your base (60% of your decor). Grab cream or taupe blankets, napkins, or table runners you already have.
- Add your fall tones (30% of your look). Think burnt orange, rust, and warm browns from throw pillows or scarves.
- Pop in your accent colors (10% for that wow factor). Mustard yellow flowers or deep red candles work perfectly.
- Scatter natural elements everywhere – mini pumpkins, pinecones, and colorful leaves tie it all together without spending extra.
Pro Tip: Raid your linen closet first! That plaid throw blanket makes an amazing table runner, and those autumn-colored dish towels become instant napkins.

2. Turn Dollar Store Pumpkins Into Designer Centerpieces
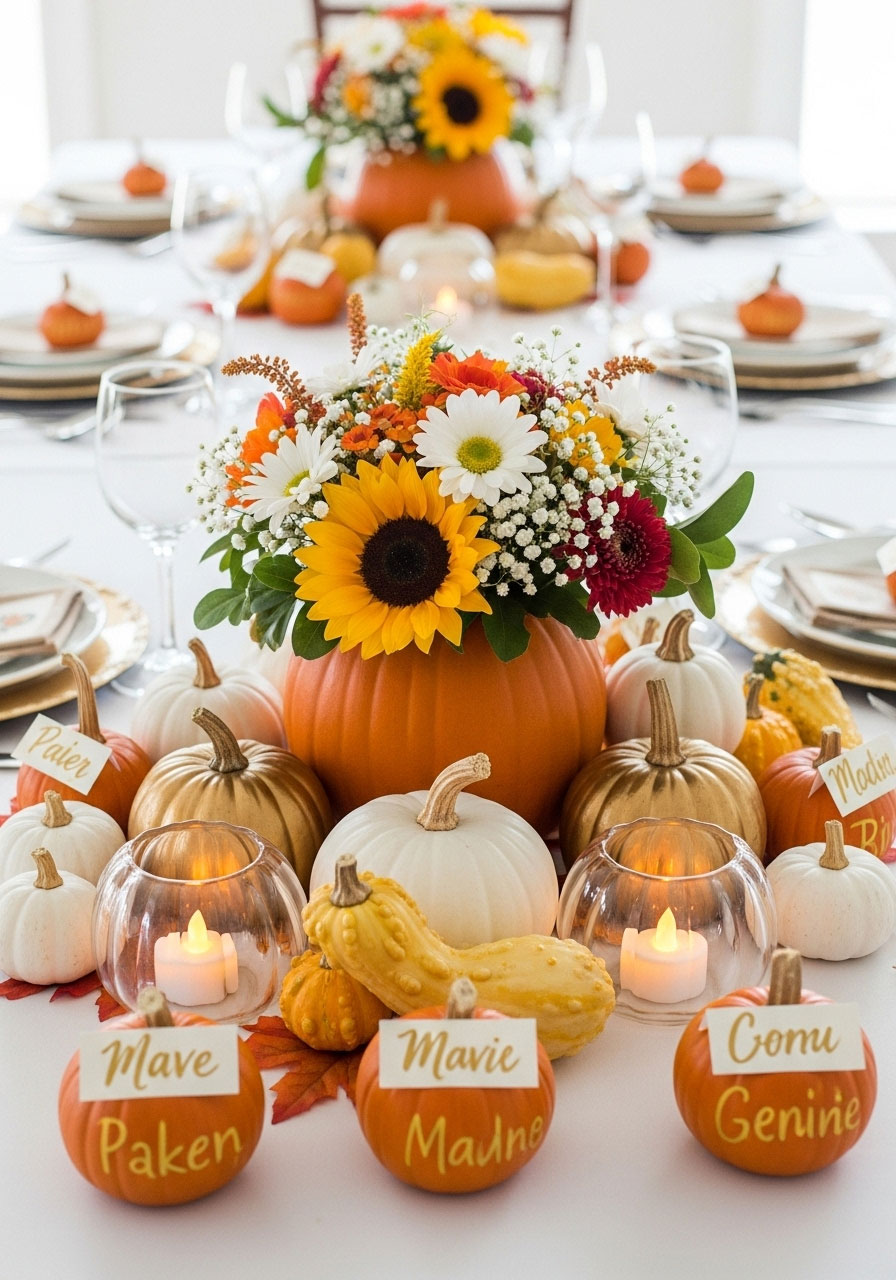
Nothing says “fall baby shower” like pumpkins, and we’re about to make them look like they came from a fancy boutique.
Best for: Table centerpieces and scattered decor
Time to Create: 20 minutes per centerpiece
Budget: $3-8 per table
What You’ll Need:
- Mini pumpkins and gourds (dollar store or farmer’s market)
- White or gold spray paint (optional)
- Small glass vases or mason jars
- Battery-operated tea lights
How to Create Designer Pumpkin Centerpieces:
- Group pumpkins in odd numbers (3 or 5 look most natural) on each table.
- Paint a few white or gold for variety – let them dry completely before arranging.
- Hollow out one larger pumpkin per table and drop in a small vase with fall flowers or baby’s breath.
- Scatter mini pumpkins around place settings as adorable name cards.
- Add battery tea lights inside clear pumpkins for a magical glow.
Fun Variation: Write guests’ names on mini pumpkins with a gold marker – instant place cards that double as take-home favors!
3. Create a Stunning Balloon Garland (That Looks Professionally Made)
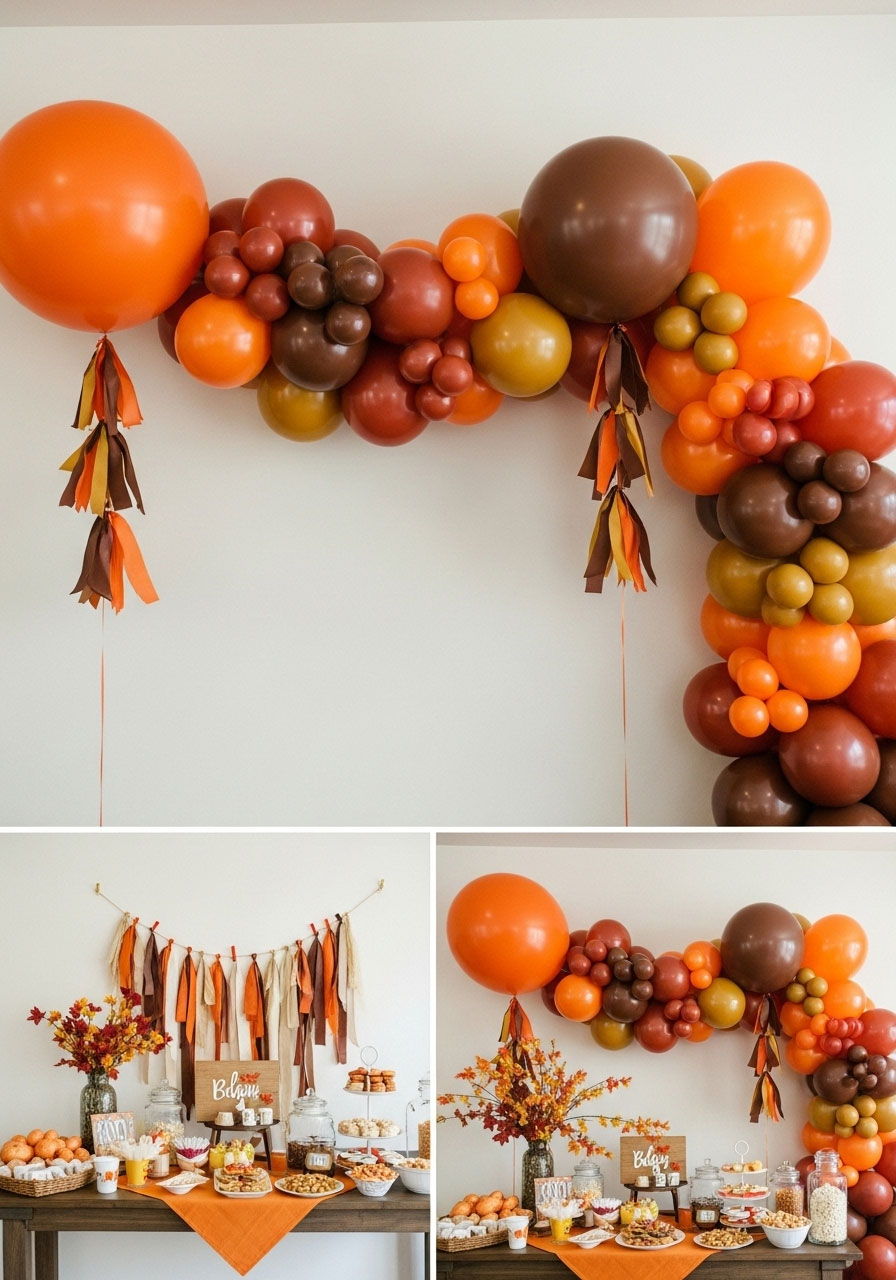
This one’s going to blow your guests away, and they’ll never guess how easy it was to make.
Best for: Photo backdrop or snack table accent
Time to Create: 45 minutes
Budget: $10-15
What You’ll Need:
- Fall-colored balloons in 3 sizes (large, medium, small)
- Fishing line or balloon decorating strip
- Command hooks for hanging
- Balloon pump (trust me on this one!)
How to Build Your Garland:
- Inflate balloons in clusters of 4 – mix sizes for that organic, expensive look.
- Tie clusters together using fishing line, alternating colors as you go.
- Start with your largest balloons as anchors, then fill gaps with medium and small ones.
- Hang using Command hooks – no holes in the wall, no angry landlord!
- Step back and add more balloons wherever you see gaps.
Pro Tip: Slightly under-inflate a few balloons for that perfectly imperfect, organic shape that screams “professional party planner”.
4. Set Up a Fall Snack Board That Screams Autumn
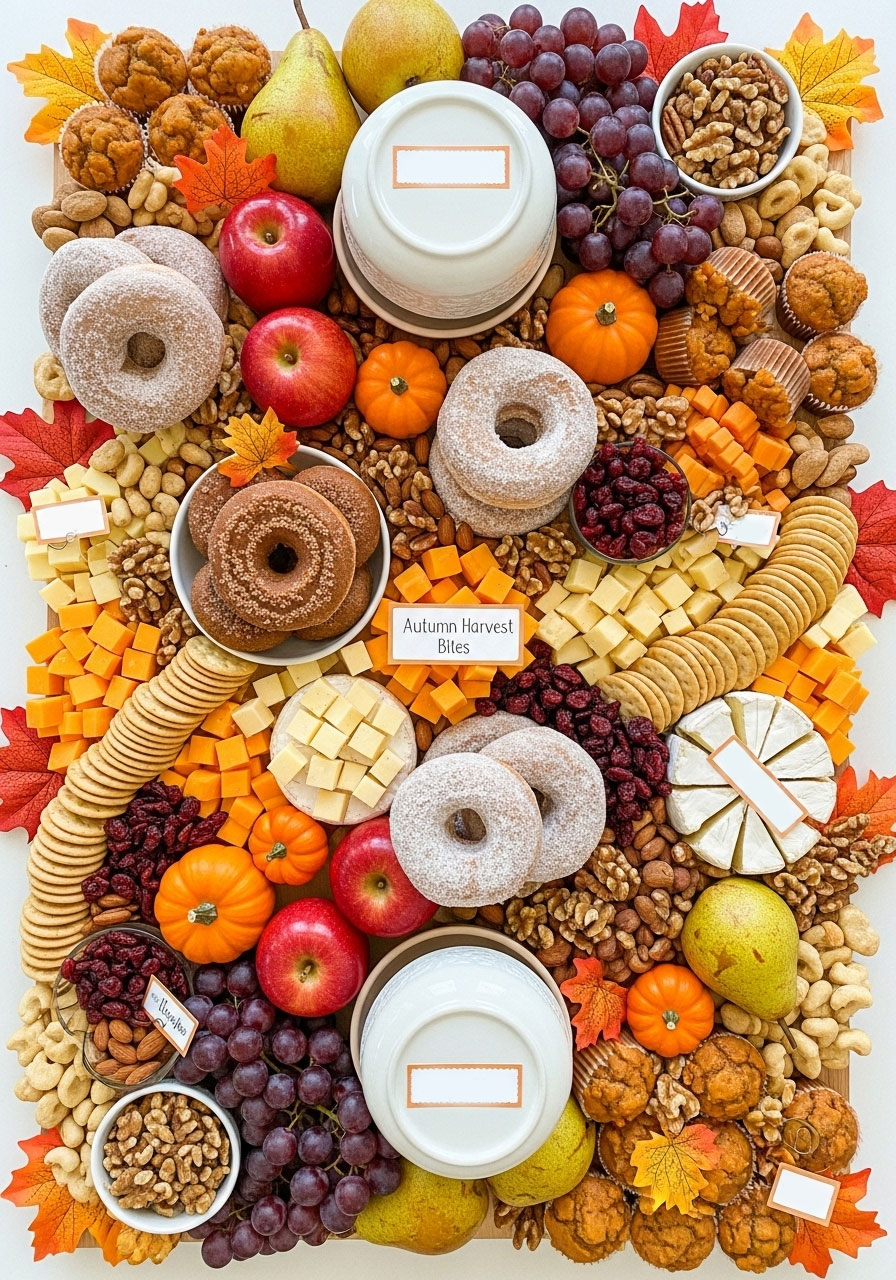
Get ready for some serious “oohs” and “ahhs” when guests see this spread.
Best for: Easy entertaining with minimal cleanup
Prep Time: 30 minutes
Budget: $25-35 for 15 guests
What You’ll Include:
- Seasonal fruits (apples, pears, grapes)
- Fall-themed treats (cinnamon donuts, mini pumpkin muffins)
- Cheese and crackers
- Mixed nuts and dried cranberries
- Mini pumpkins as decoration
How to Build Your Board:
- Start with your largest items first – place cheese wheels and bowls for nuts.
- Add your baked goods in small clusters around the board.
- Fill gaps with fresh fruit cut into bite-sized pieces.
- Scatter mini pumpkins and fall leaves between food items.
- Create height with small bowls turned upside down under your serving pieces.
Fun Twist: Label everything with cute fall names like “Autumn Harvest Bites” and “Pumpkin Spice Dreams” – it adds charm without adding cost!
5. DIY a Cozy Drink Station That Smells Like Heaven
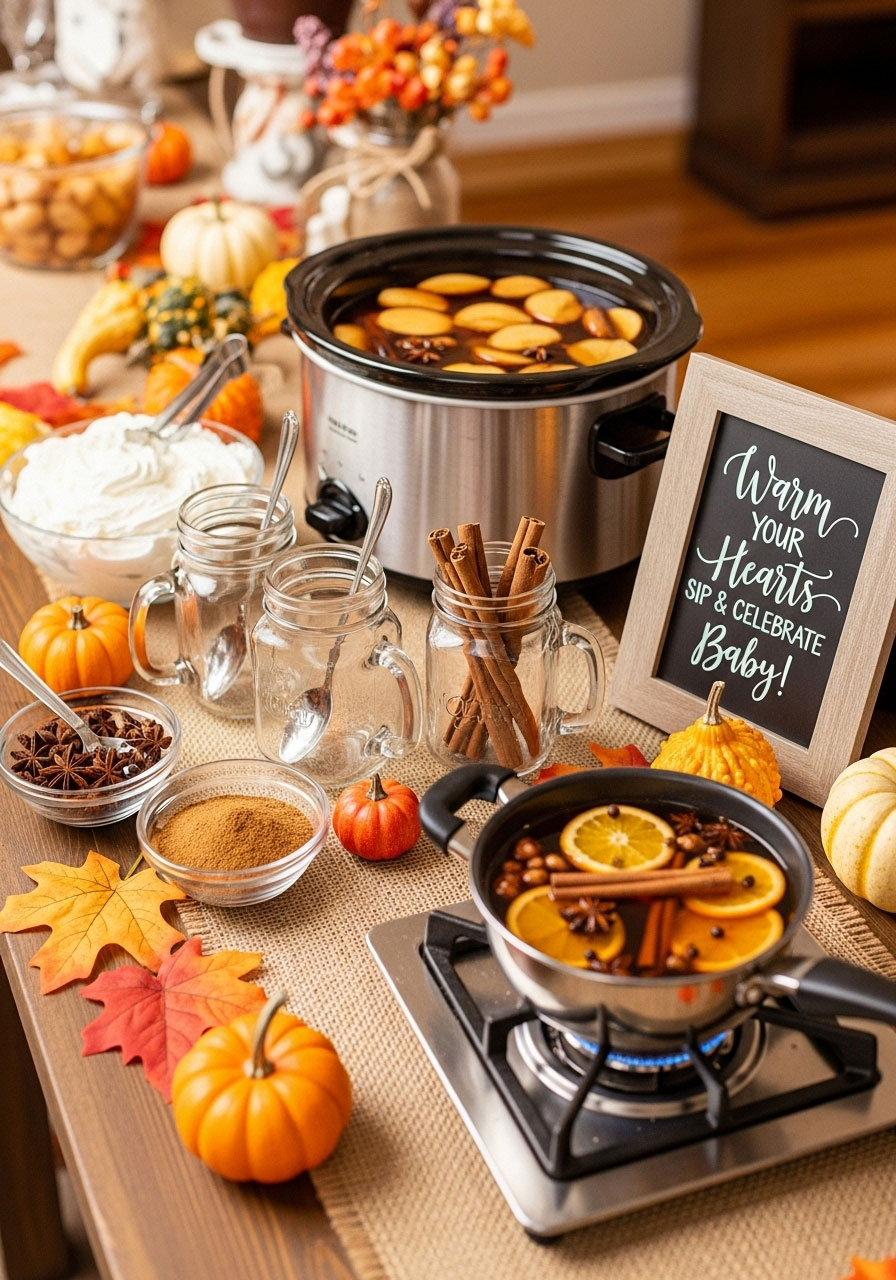
Nothing makes a party feel more welcoming than the aroma of warm, spiced drinks filling the air.
Best for: Creating that cozy fall atmosphere
Setup Time: 15 minutes
Budget: $8-12
What You’ll Need:
- Apple cider or chai tea bags
- Cinnamon sticks and star anise
- Whipped cream
- Mason jars as mugs
- Cute “Sip & Celebrate” sign
How to Create Your Drink Station:
- Brew your drinks in a large pot and keep warm in a slow cooker.
- Set up a self-serve station with mason jars, cinnamon sticks, and toppings.
- Add a handwritten sign that says “Warm Your Hearts” or “Sip & Celebrate Baby!”
- Place cinnamon sticks in a small vase for stirring and extra aroma.
Pro Tip: Make a stovetop potpourri while you prep – simmer orange slices, cloves, and cinnamon. Your guests will walk in and immediately feel the fall vibes!
6. Onesie Decorating Station: The Interactive Hit of the Party

This activity is pure gold – guests love it, and the mom-to-be gets adorable keepsakes.
Best for: Interactive fun that creates lasting memories
Activity Time: 20-30 minutes
Budget: $15-20
What You’ll Need:
- Plain white onesies (buy in bulk online)
- Fabric markers in fall colors
- Iron-on fall shapes (leaves, pumpkins)
- Cardboard to place inside onesies
How to Set It Up:
- Create a designated crafting area with good lighting and comfortable seating.
- Place cardboard inside each onesie to prevent marker bleed-through.
- Arrange markers by color and add a few example designs for inspiration.
- Set up an “inspiration board” with simple fall designs guests can copy.
Game-Changer Tip: Have guests sign their names small on the back of their creation – the baby will have clothing with love from everyone who celebrated them!
7. Mason Jar Magic: One Item, Endless Possibilities
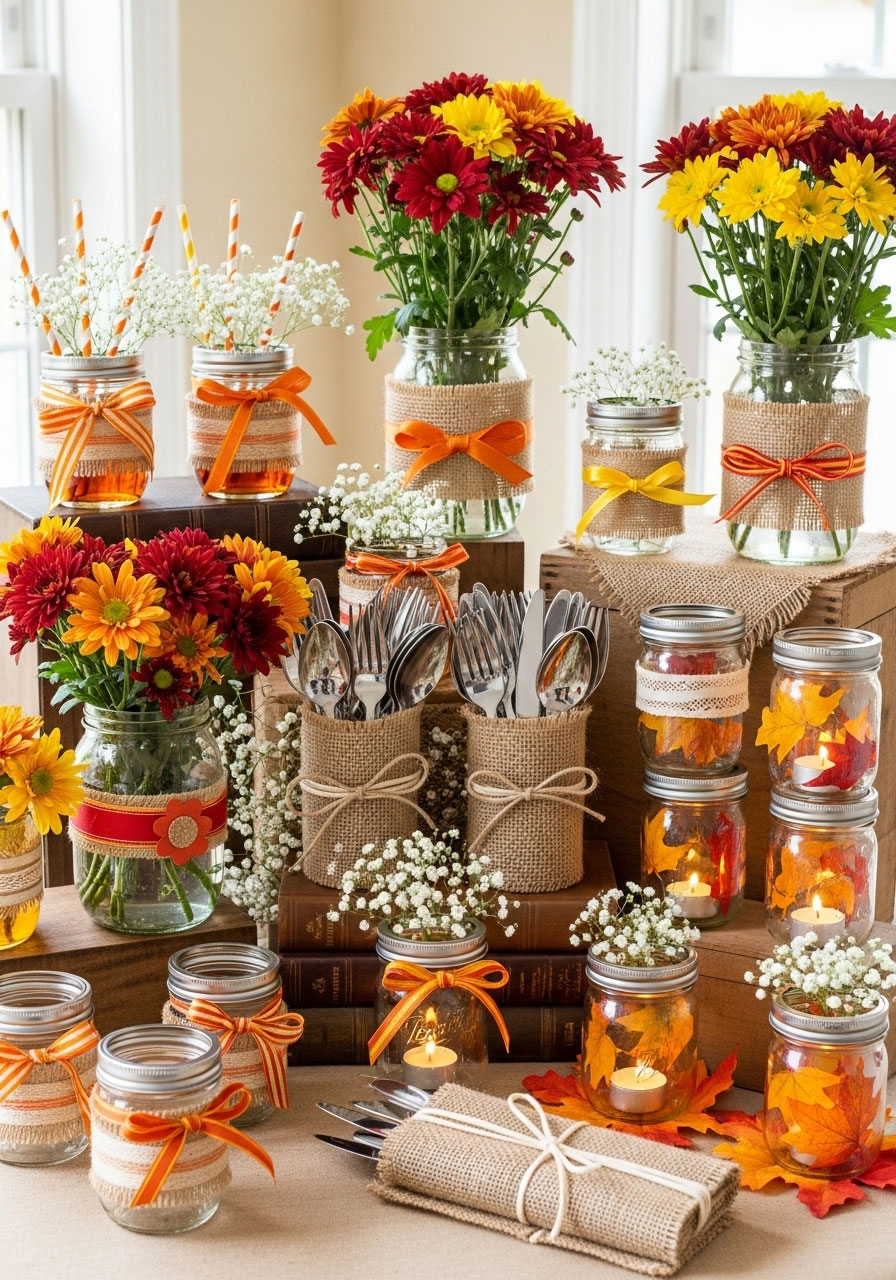
Mason jars are the ultimate party planning hack, and here’s how to use them like a pro.
Best for: Unified decor that looks intentional
Setup Time: 20 minutes total
Budget: $8-15
Creative Mason Jar Uses:
- Drink glasses with fall-colored ribbon around the rim
- Flower vases filled with grocery store mums
- Utensil holders wrapped in burlap
- Tea light holders with autumn leaves inside
How to Style Them:
- Wrap each jar with burlap, twine, or fall-colored ribbon.
- Add a sprig of baby’s breath or small fall leaf for elegance.
- Group them in odd numbers throughout your space.
- Mix heights by placing some on books or small boxes.
8. Budget-Friendly Diaper Cake That Doubles as Decor
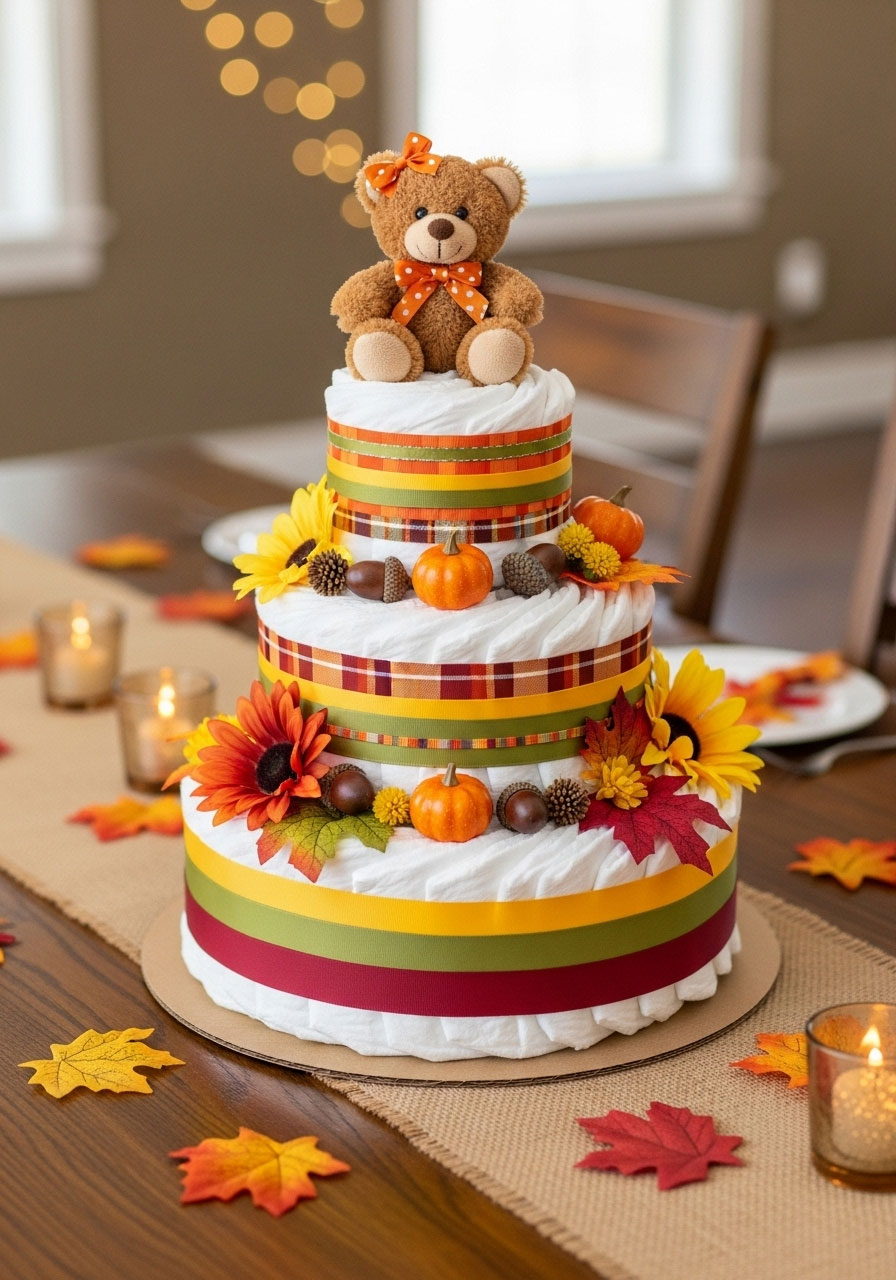
This classic baby shower centerpiece looks expensive but costs less than $25 to make.
Best for: Practical gift that serves as stunning decor
Creation Time: 45 minutes
Budget: $20-25
What You’ll Need:
- 2-3 packs of newborn diapers
- Fall-colored ribbon (2-3 different widths)
- Rubber bands
- Mini pumpkins and fake fall flowers
- Cardboard circle for base
How to Build Your Cake:
- Roll diapers individually and secure with small rubber bands.
- Arrange in circles to create 3 tiers – large, medium, small.
- Wrap each tier with ribbon to hide rubber bands.
- Decorate with mini pumpkins and fall flowers between layers.
- Top with a cute stuffed animal or baby bottle.
Money-Saving Secret: Buy diapers when they’re on sale and store them for the party – you’ll save money and create a gift the new parents actually need!
9. Fall Favor Bags That Look Like They Came From a Boutique
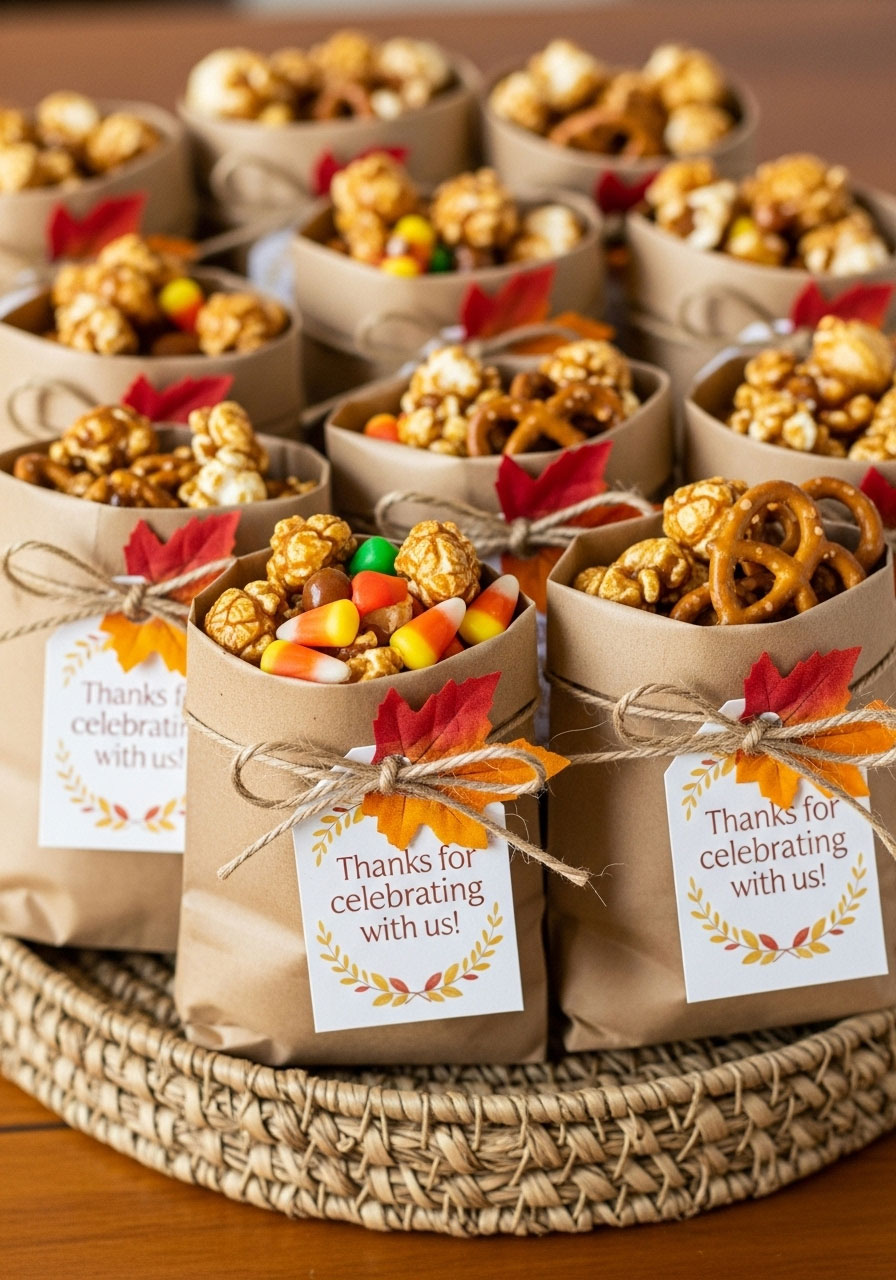
Send guests home with something sweet that reminds them of your perfect fall celebration.
Best for: Thank-you gifts that tie into your theme
Prep Time: 30 minutes for 15 bags
Budget: $12-18
What You’ll Include:
- Small kraft paper bags
- Caramel popcorn or candy corn
- Mini cinnamon pretzels
- Fall-themed tags with twine
How to Create Boutique-Style Favors:
- Fill bags with 2-3 different treats for variety.
- Fold bag tops down twice for that professional bakery look.
- Add personalized tags that say “Thanks for celebrating with us!”
- Tie with twine and add a small fall leaf for that finishing touch.
10. Free Printable Games That Get Everyone Laughing
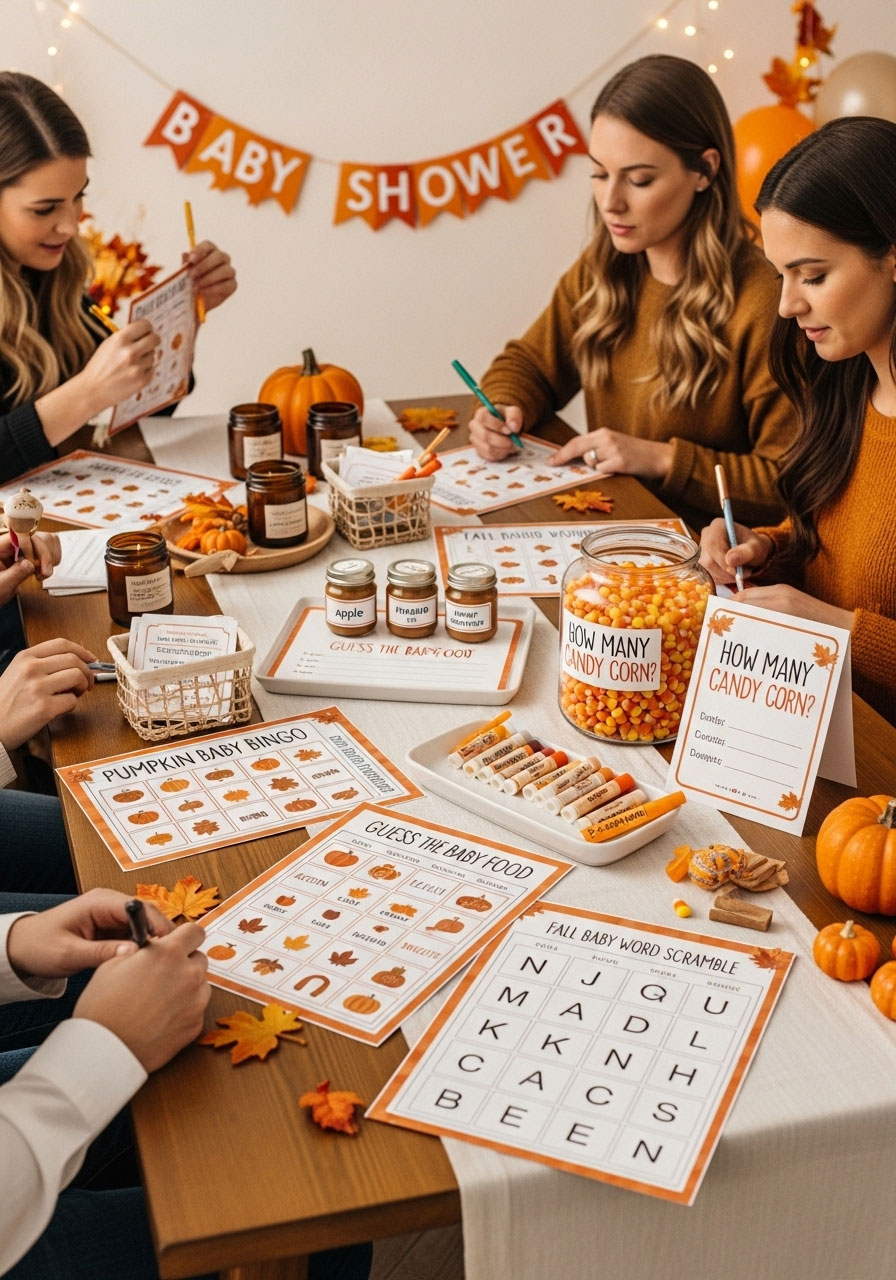
Why spend money on games when you can create memorable fun for free?
Best for: Interactive entertainment that brings everyone together
Game Time: 15-20 minutes each
Budget: $0 (just printing costs)
Must-Try Fall Baby Shower Games:
- Pumpkin Baby Bingo with fall-themed squares
- Guess the Baby Food with autumn flavors
- “How Many Candy Corn?” guessing game
- Fall Baby Word Scramble with seasonal terms
How to Make Them Special:
- Download free templates and customize with your color scheme.
- Print on cardstock for a more professional feel.
- Offer small fall-themed prizes – candles, lip balm, or mini pumpkins.
- Create a “Game Station” where guests can play at their own pace.
11. Transform Your Space with Free Nature Decor
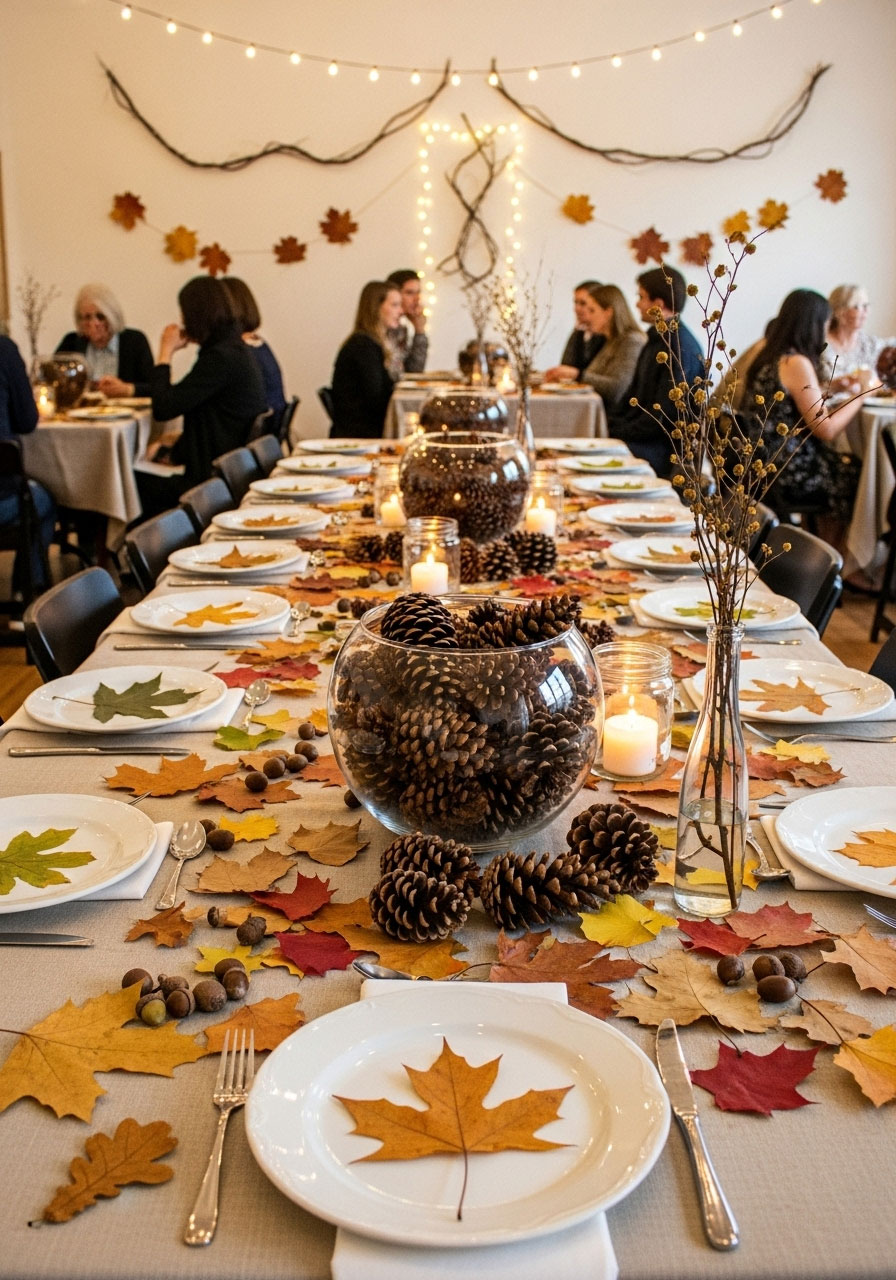
Mother Nature provides the most beautiful decorations, and they’re completely free!
Best for: Adding natural texture and autumn vibes
Gathering Time: 30 minutes
Budget: $0
What to Collect:
- Colorful fall leaves (press them between books first)
- Pinecones of various sizes
- Small branches with interesting shapes
- Acorns and seed pods
How to Use Natural Elements:
- Scatter pressed leaves across tables as confetti.
- Fill glass bowls with pinecones as simple centerpieces.
- Create place settings with a single beautiful leaf at each plate.
- Use branches in tall vases for dramatic height.
Pro Tip: Collect these items a week before your party and let them dry completely – this prevents any unwanted critters from joining your celebration!
12. Keep Your Menu Simple But Spectacular
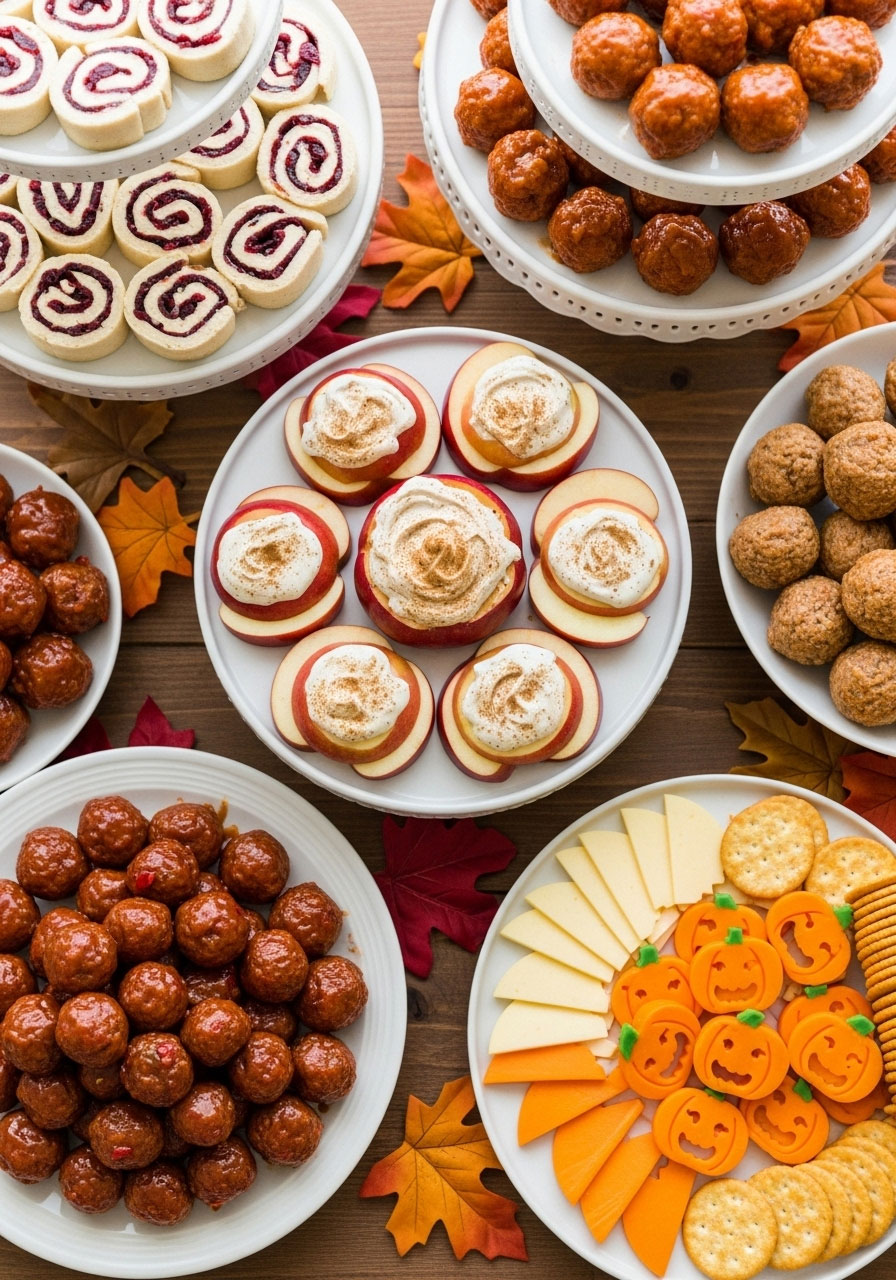
The secret to stress-free entertaining? Finger foods that look fancy but require minimal effort.
Best for: Easy hosting with maximum impact
Prep Time: 1 hour total
Budget: $30-40 for 15 guests
Crowd-Pleasing Menu Ideas:
- Cranberry and cream cheese pinwheels
- Apple slices with cinnamon cream cheese dip
- Mini meatballs with sweet and sour glaze
- Pumpkin-shaped cheese and crackers
Smart Menu Strategy:
- Choose 4-5 items that can be made ahead of time.
- Focus on finger foods that don’t require utensils.
- Add fall colors to everything – orange cheese, red apples, golden crackers.
- Create height with tiered serving trays or cake stands.
13. DIY Fall-Scented Atmosphere (Better Than Expensive Candles)
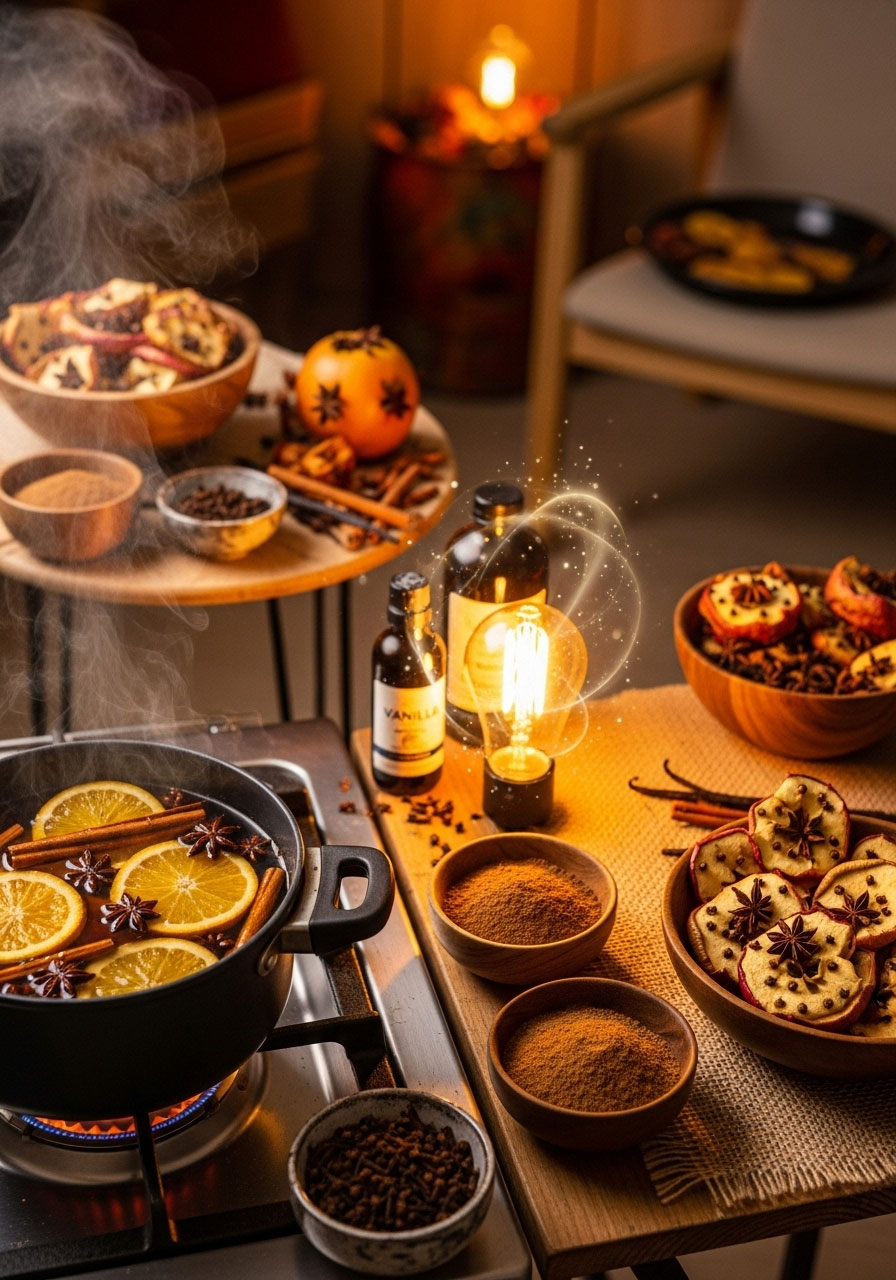
Create an instant autumn ambiance that welcomes guests the moment they walk in.
Best for: Setting the mood without spending on expensive candles
Prep Time: 10 minutes
Budget: $3-5
Natural Scent Options:
- Stovetop potpourri with orange slices and cinnamon
- Apple peels simmering with cloves and star anise
- Vanilla extract on warm light bulbs
- Small bowls of ground cinnamon near heat sources
How to Scent Your Space:
- Start your stovetop potpourri 30 minutes before guests arrive.
- Place small dishes of potpourri around the party area.
- Add a drop of vanilla to warm light bulbs for subtle sweetness.
- Keep the scent light – you want it noticeable but not overwhelming.
14. Create Your Own Invitations (That Look Professionally Designed)
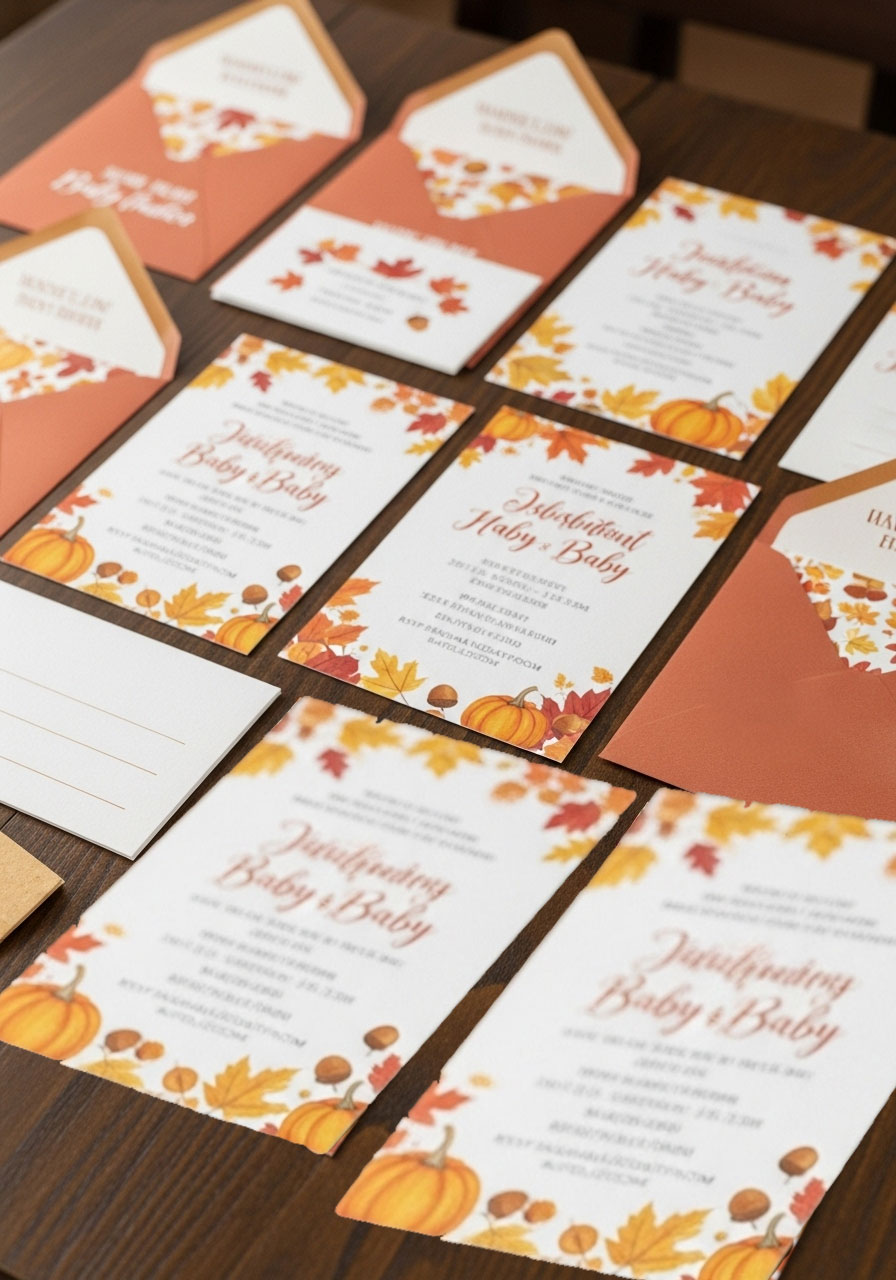
Why pay for expensive invitations when you can design gorgeous ones yourself?
Best for: Personalized invites that set the tone
Design Time: 30 minutes
Budget: $5-8 for printing
Design Elements to Include:
- Fall color palette (your signature colors)
- Cute pumpkin or leaf graphics
- All the essential party details
- A warm, welcoming message
How to Design Like a Pro:
- Use free platforms like Canva with fall baby shower templates.
- Match your invitation colors to your party palette.
- Add a personal touch with a custom message about the mom-to-be.
- Print at home on cardstock or send digitally to save on postage.
15. Thrift Store Treasure Hunting (Your Secret Weapon)
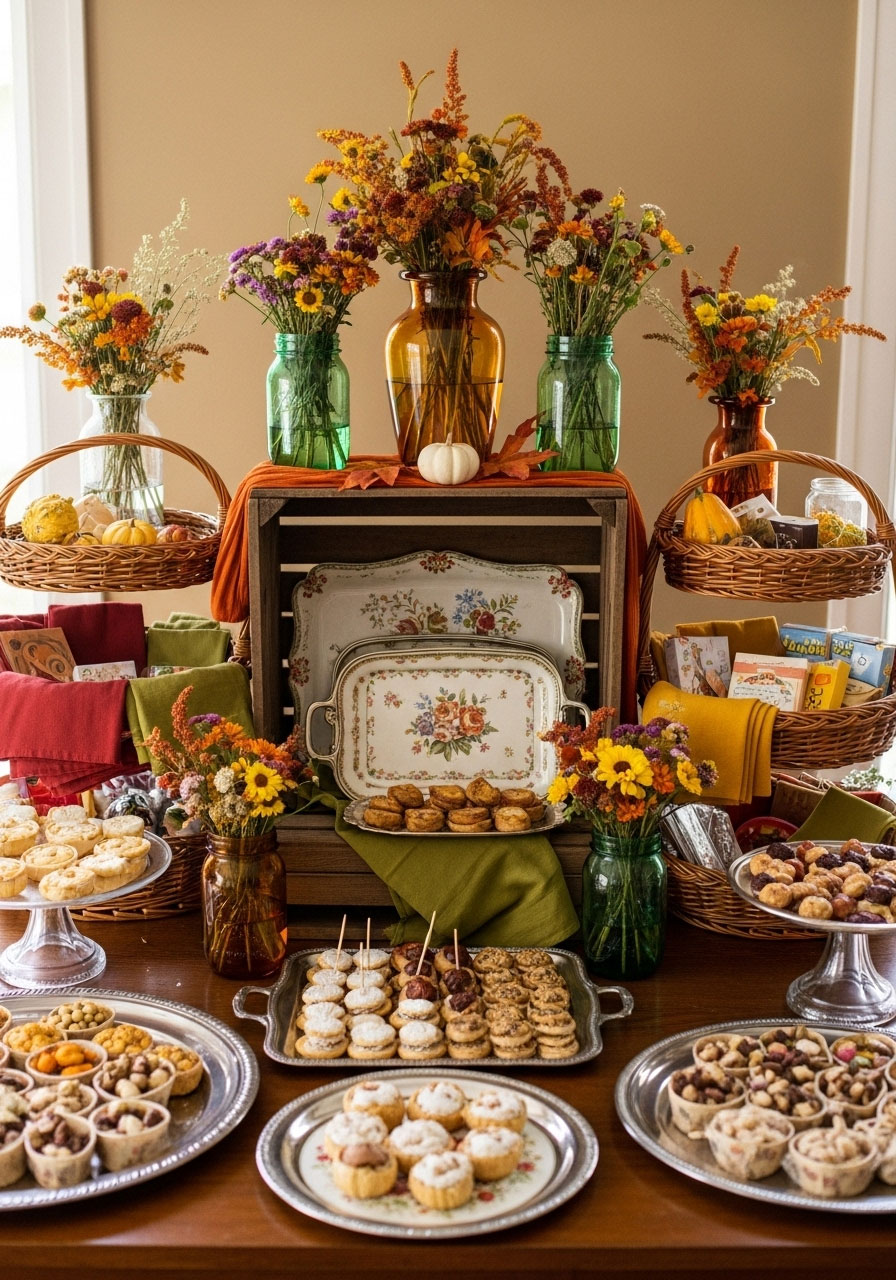
The best party planners know that thrift stores are goldmines for unique, budget-friendly finds.
Best for: Unique serving pieces and decor
Shopping Time: 1-2 hours
Budget: $15-25
What to Look For:
- Mismatched vintage serving trays (the more eclectic, the better!)
- Glass vases and mason jars
- Wicker baskets for display
- Fall-colored linens and napkins
Thrifting Success Tips:
- Shop 2-3 weeks before your party for the best selection.
- Think creatively – that old wooden crate becomes a perfect display stand.
- Don’t worry about perfect matches – eclectic looks more expensive than matching sets.
- Bring your phone to check if similar items cost more retail.
16. Paper Leaf Garland That Screams Professional

Who needs expensive decorations when you can create stunning garlands with just paper and scissors?
Best for: Wall decor and photo backdrops
Creation Time: 45 minutes
Budget: $3-5
What You’ll Need:
- Fall-colored cardstock or construction paper
- Leaf templates (print from free online sources)
- String or fishing line
- Scissors and a hole punch
How to Create Your Garland:
- Print or draw leaf templates in various sizes on different colored paper.
- Cut out 20-30 leaves mixing shapes like maple, oak, and birch.
- Punch holes at the top of each leaf for threading.
- String leaves together spacing them 2-3 inches apart.
- Hang at different heights for a cascading effect.
Money-Saving Hack: Use old magazines or wrapping paper instead of cardstock – the varied patterns actually look more interesting than solid colors!
17. Transform Dollar Tree Finds Into Luxury Centerpieces
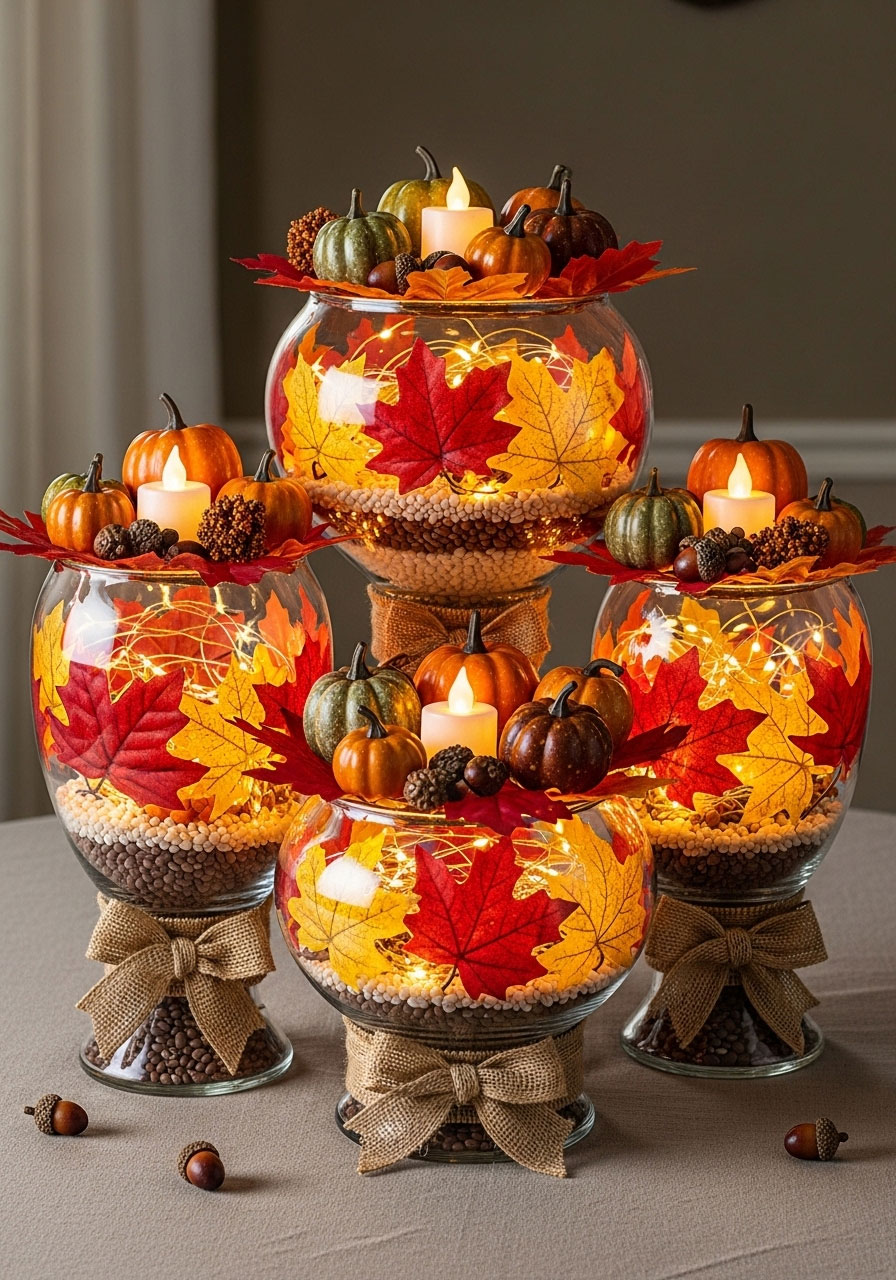
This is where your creativity pays off big time – turning $1 items into $20 looks.
Best for: Multiple table centerpieces on a tiny budget
Shopping & Setup Time: 1 hour total
Budget: $4-6 per centerpiece
Dollar Store Gold Mine Items:
- Clear glass vases or bowls
- Battery-operated string lights
- Artificial fall leaves
- Small pumpkin decorations
How to Create Expensive-Looking Centerpieces:
- Fill clear vases halfway with dried beans, rice, or coffee beans.
- Layer artificial leaves around the inside edges of the vase.
- Add battery string lights weaving them through the leaves.
- Top with small pumpkins or battery tea lights.
- Wrap vase bases with burlap ribbon from the dollar store.
Pro Tip: Buy vases in different heights and group them together – the varied heights trick the eye into thinking they’re much more expensive than they are!
18. Free Photo Booth Props That’ll Have Everyone Posing
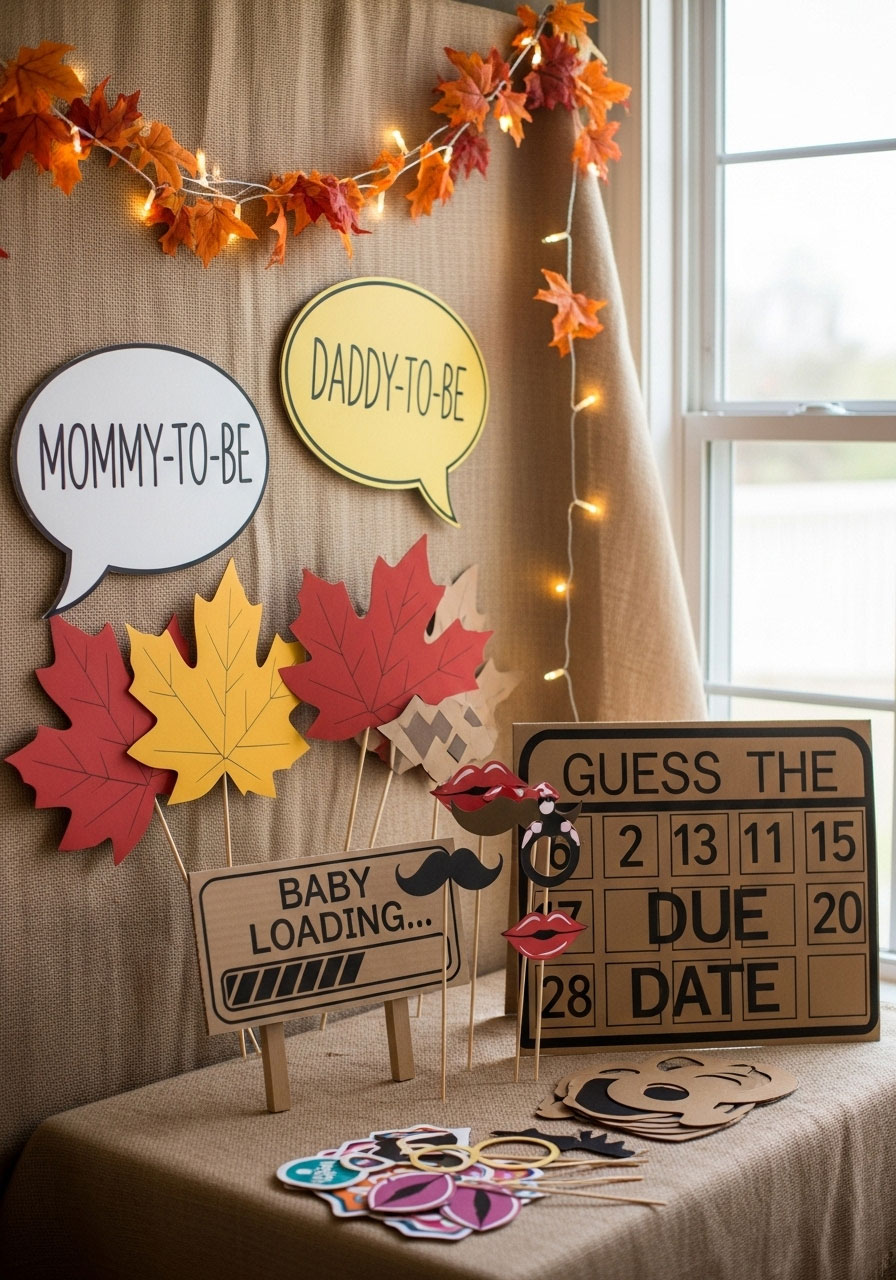
Skip the $50 photo booth prop sets and make your own hilarious collection.
Best for: Interactive fun and Instagram-worthy moments
Creation Time: 30 minutes
Budget: $0 (using cardboard you have)
DIY Prop Ideas:
- “Mommy-to-Be” and “Daddy-to-Be” speech bubbles
- Oversized fall leaves on sticks
- “Baby Loading…” signs
- Funny mustaches and lips
How to Make Professional Props:
- Use Amazon boxes or cereal boxes as your cardboard base.
- Draw or print designs and trace onto cardboard.
- Cut out with scissors or a craft knife.
- Attach wooden skewers or chopsticks with tape.
- Set up a designated photo area with good lighting.
Bonus Idea: Create a “Guess the Due Date” calendar prop where guests can point to their prediction!
19. Candy Corn Guessing Game (With a Sweet Prize)
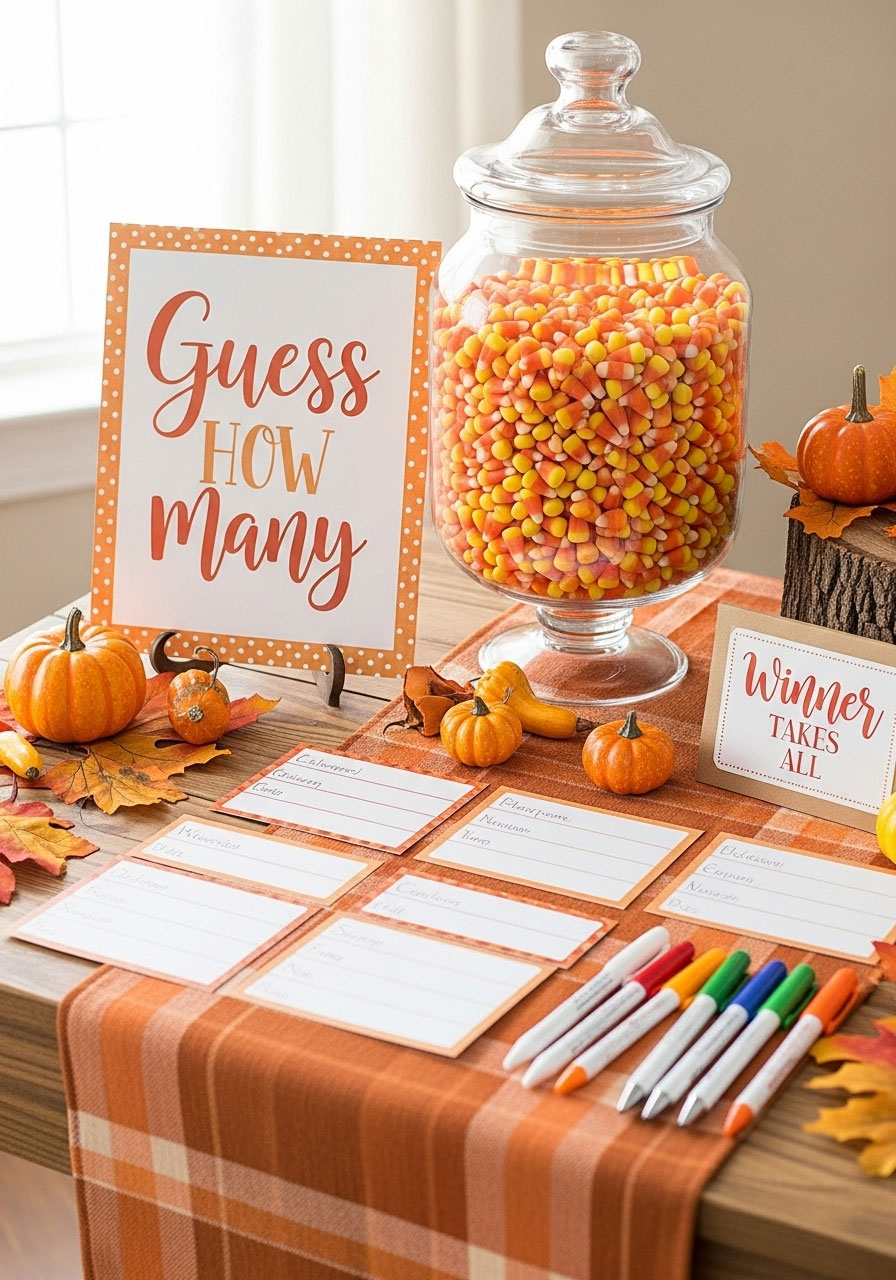
Turn a simple jar of candy into an engaging party activity that costs almost nothing.
Best for: Easy entertainment that requires zero preparation
Setup Time: 5 minutes
Budget: $2-3
What You’ll Need:
- Large glass jar or clear vase
- Bag of candy corn
- Small pieces of paper and pens
- A cute “Guess How Many” sign
How to Set It Up:
- Fill your jar completely with candy corn, counting as you go.
- Write the actual number on a slip of paper and hide it.
- Place paper and pens nearby for guest guesses.
- Create a simple sign that says “Guess How Many Candy Corn!”
- Announce the winner during cake time – they get to keep the jar!
Smart Twist: Use the candy corn in your fall snack mix afterward – nothing goes to waste!
20. Napkin Ring Crafts That Look Store-Bought
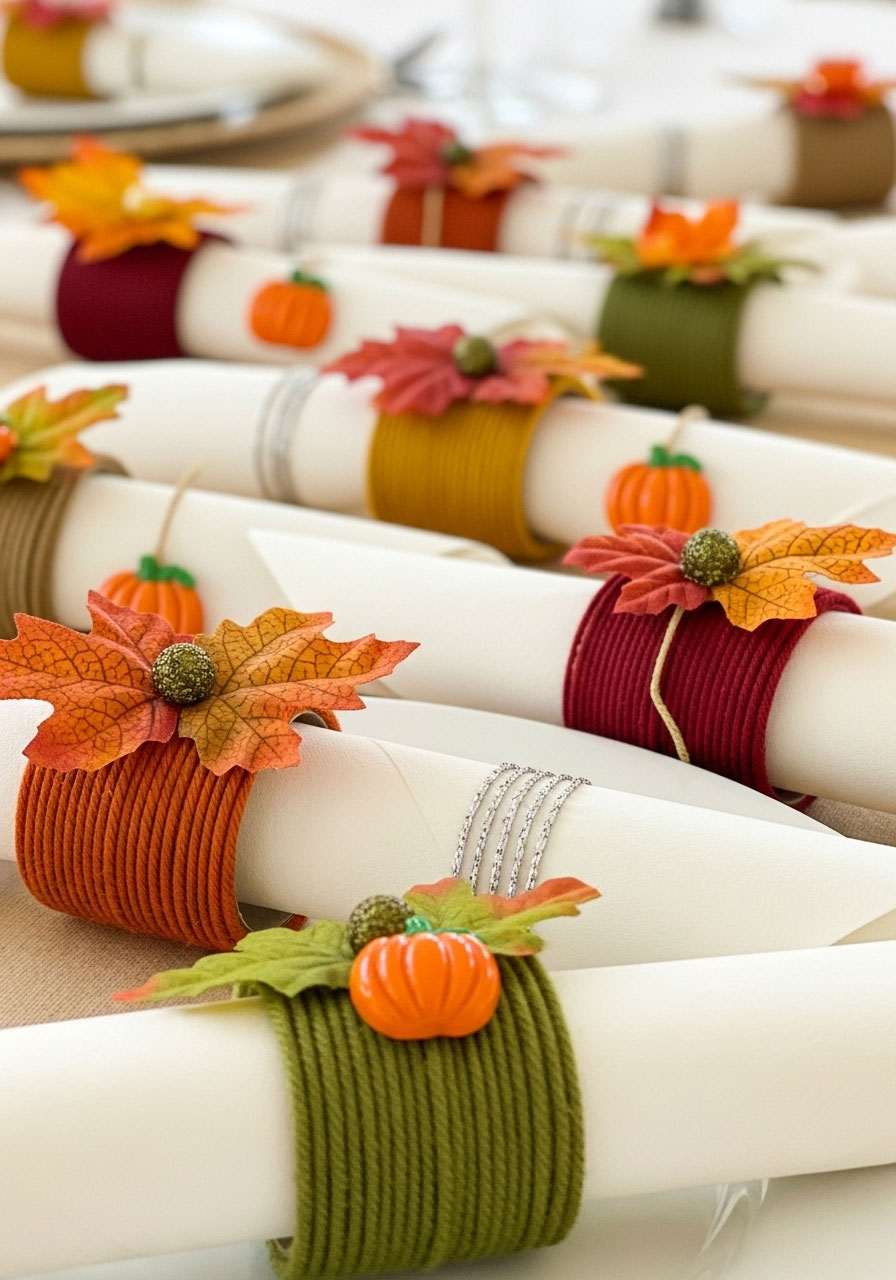
These tiny details make such a big impact, and guests will think you spent a fortune on table settings.
Best for: Elegant table settings that wow guests
Creation Time: 20 minutes for 15 rings
Budget: $3-5
What You’ll Need:
- Toilet paper rolls (save them up!)
- Fall-colored yarn or twine
- Small artificial leaves or flowers
- Hot glue gun or craft glue
How to Make Designer Napkin Rings:
- Cut toilet paper rolls into 1.5-inch wide rings.
- Wrap tightly with yarn securing ends with glue.
- Attach a small leaf or flower to each ring.
- Let dry completely before threading napkins through.
Fancy Upgrade: Use metallic yarn or add a tiny pumpkin charm for extra elegance!
21. Fall Leaf Bowl Masterpiece (Seriously Impressive!)
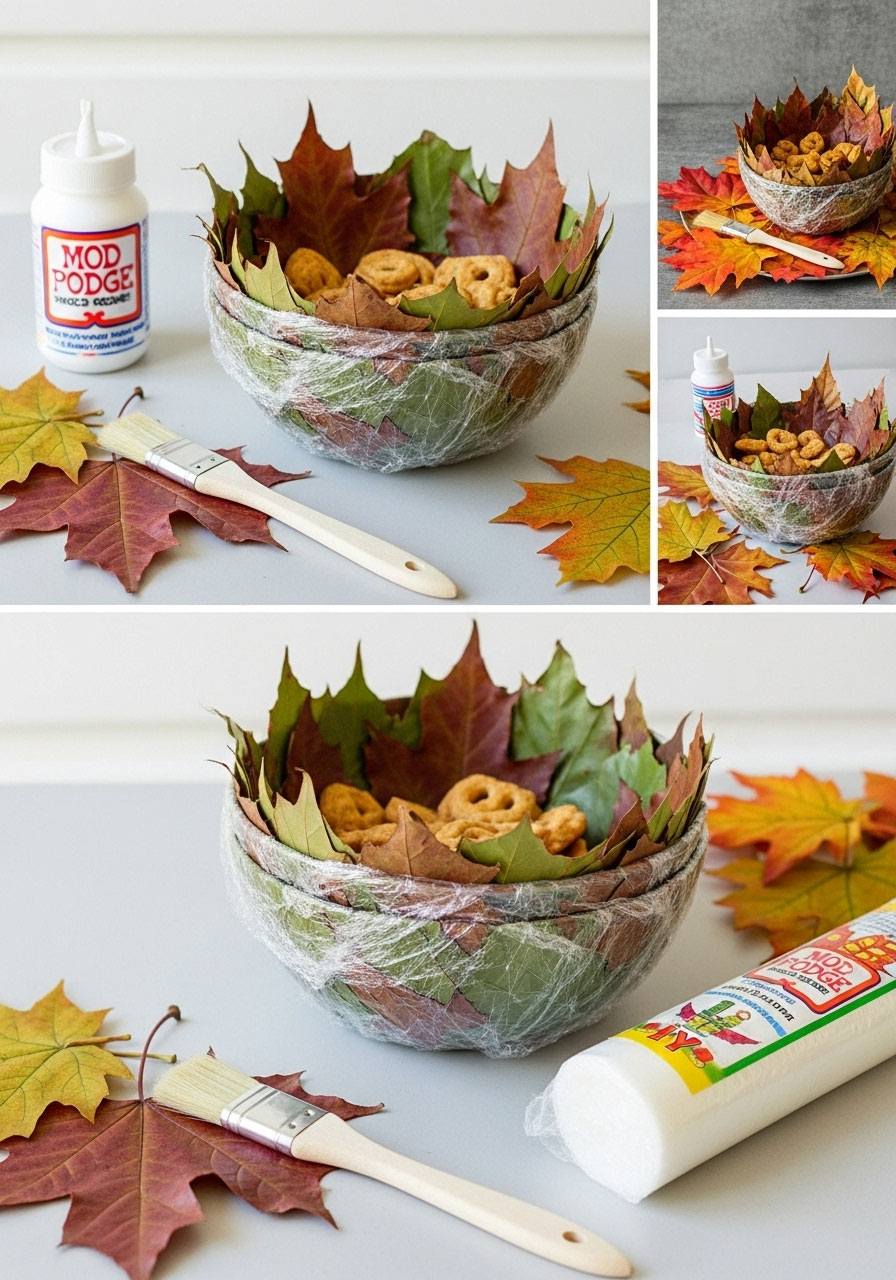
This craft looks like it came from a high-end boutique, but it costs less than $5 to make.
Best for: Serving snacks or holding party favors
Creation Time: 2 hours (mostly drying time)
Budget: $4-6
What You’ll Need:
- Real fall leaves (various sizes)
- Mod Podge or white glue mixed with water
- A bowl to use as a mold
- Foam brush
- Plastic wrap
How to Create Your Leaf Bowl:
- Cover your mold bowl with plastic wrap.
- Brush leaves with glue mixture and layer them overlapping around the outside of the bowl.
- Apply 2-3 layers for strength, letting each dry completely.
- Let sit overnight to cure fully.
- Carefully remove from mold and peel off plastic wrap.
Pro Tip: Make 2-3 bowls in different sizes for a stunning tiered display that’ll have everyone asking where you bought them!
22. Free Playlist Creation for Perfect Atmosphere
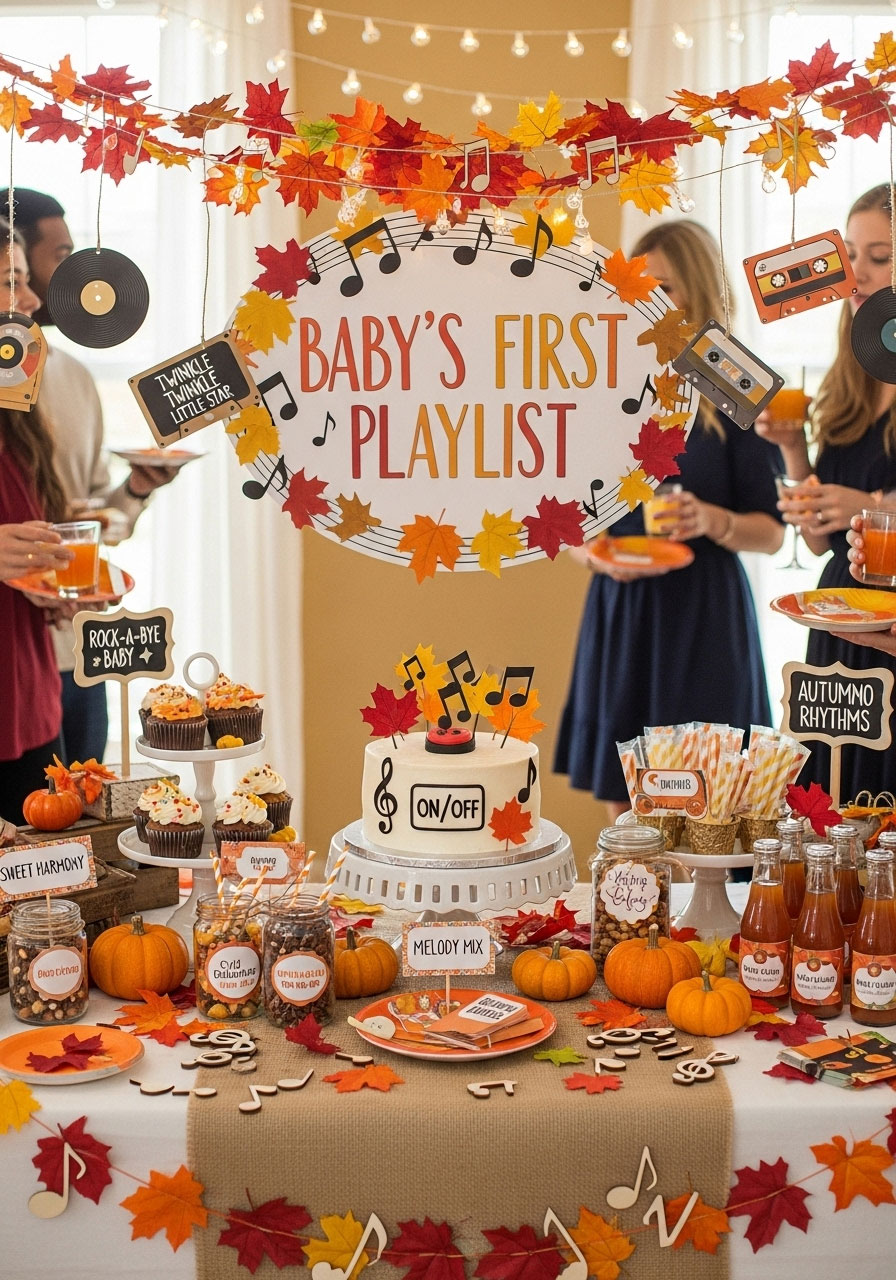
Music sets the mood better than any decoration, and it doesn’t cost a single penny.
Best for: Background ambiance that keeps energy flowing
Creation Time: 30 minutes
Budget: $0
Perfect Fall Baby Shower Playlist Mix:
- Soft acoustic covers of popular songs
- Light jazz and bossa nova
- Instrumental versions of lullabies
- Feel-good folk music
How to Curate the Perfect Mood:
- Create a 2-3 hour playlist so music never stops.
- Test volume levels beforehand – music should enhance conversation, not overpower it.
- Include a few crowd favorites that might spark sing-alongs.
- Save offline so you don’t worry about internet issues.
Secret Sauce: Add a few Disney lullabies mixed in – they’re nostalgic and perfect for a baby celebration!
23. Baby Food Jar Luminaries (Upcycling at Its Finest)
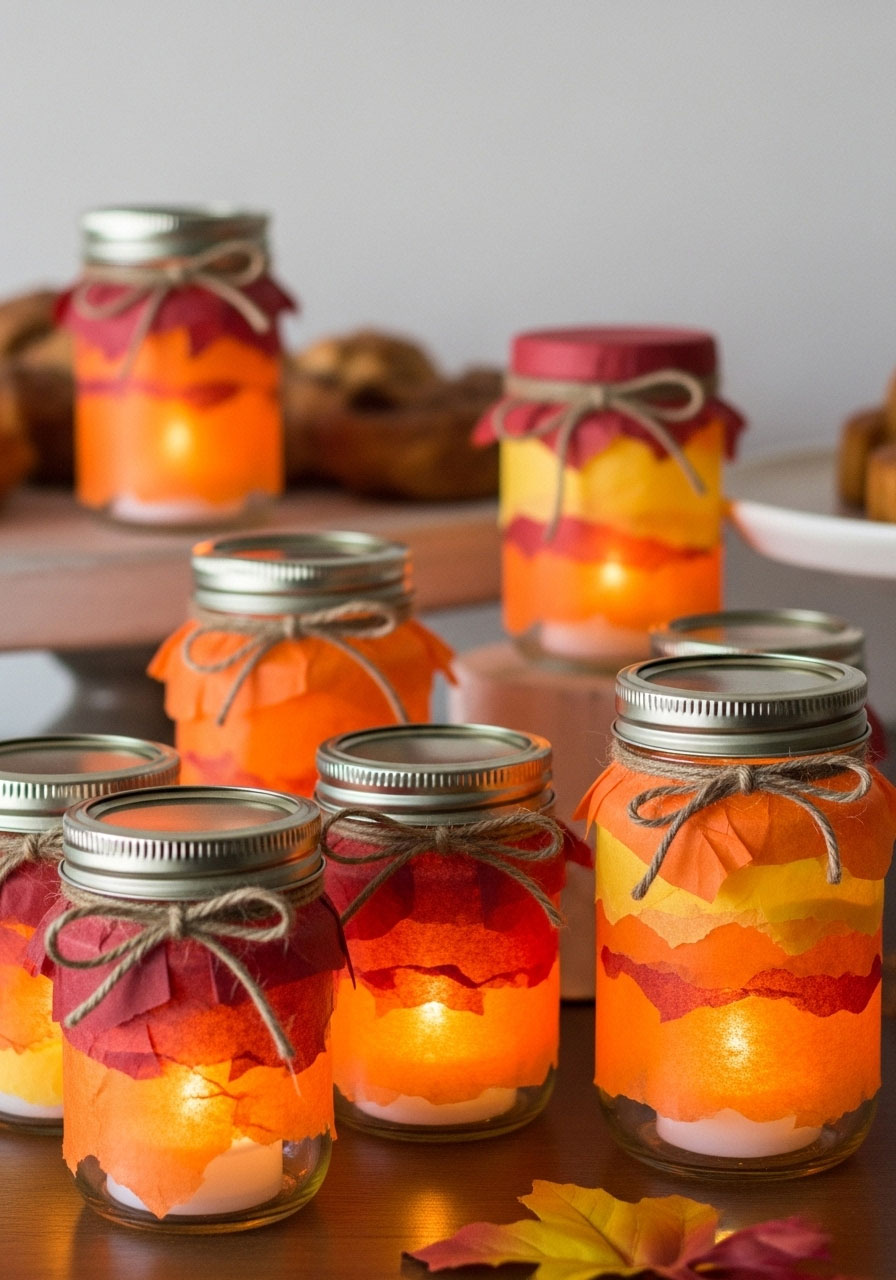
Transform empty jars into magical lighting that creates the coziest atmosphere.
Best for: Warm, ambient lighting throughout your space
Creation Time: 45 minutes
Budget: $2-4 (just for supplies)
What You’ll Need:
- Empty baby food jars (ask friends to save them!)
- Tissue paper in fall colors
- Mod Podge or white glue
- Battery tea lights
- Twine for hanging
How to Create Magical Luminaries:
- Clean jars thoroughly and remove labels.
- Tear tissue paper into small pieces in autumn colors.
- Apply glue to jar exterior and layer tissue paper pieces, overlapping.
- Let dry completely then add battery tea lights inside.
- Wrap twine around jar rim for rustic charm or hanging.
Brilliant Display Idea: Group them at different heights on your food table – the warm glow makes everything look more appetizing!
24. Clothespin Photo Display Timeline
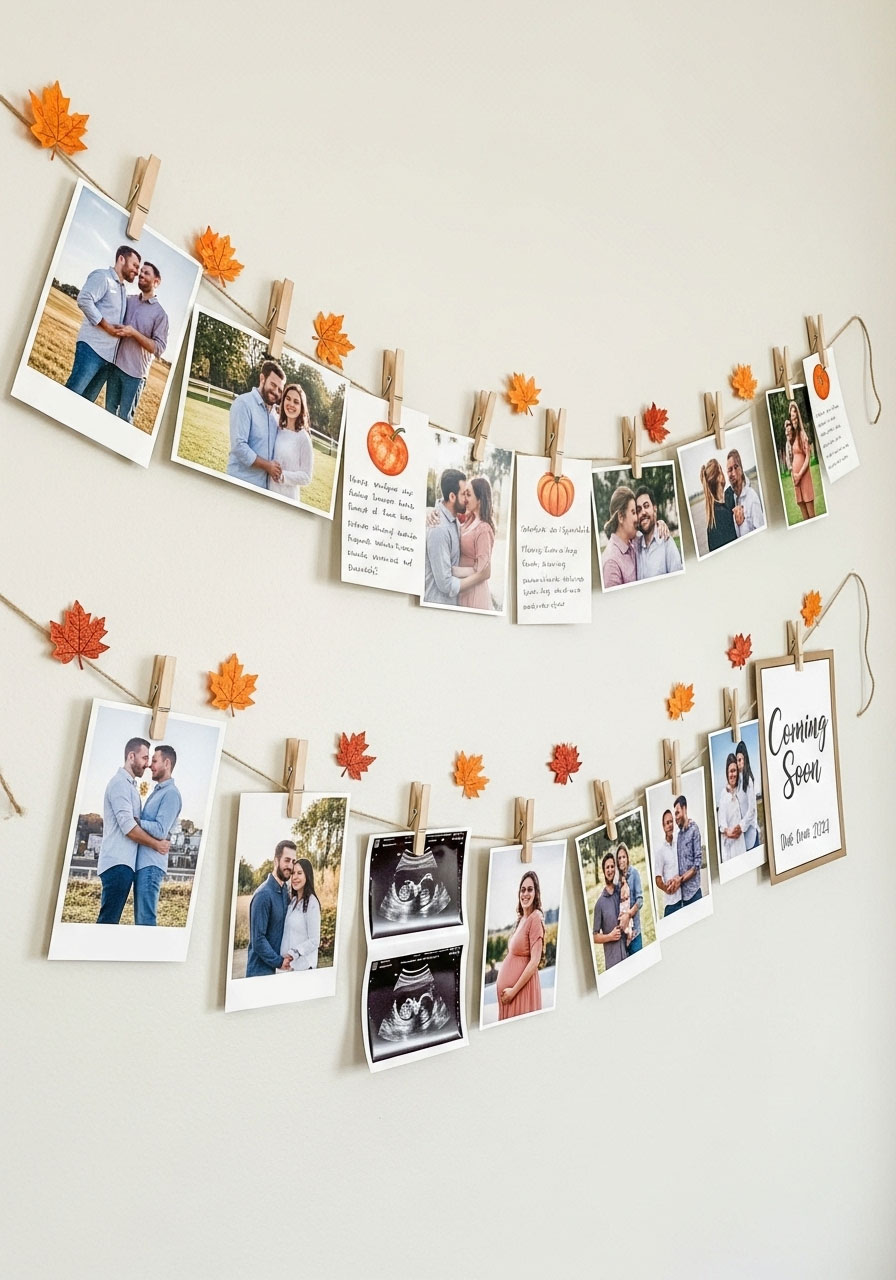
Create a heartwarming display of the parents-to-be’s journey without spending on expensive frames.
Best for: Personal touch that tells their love story
Setup Time: 20 minutes
Budget: $3-5
What You’ll Need:
- Twine or string
- Wooden clothespins
- Photos printed at home or pharmacy
- Small fall leaves or stickers
How to Create Your Timeline:
- String twine across a wall or between two chairs.
- Gather photos from dating, engagement, wedding, and pregnancy.
- Attach photos with clothespins in chronological order.
- Decorate clothespins with small leaves or fall stickers.
- Add a “Coming Soon” card at the end with baby’s due date.
Tear-Jerker Addition: Include ultrasound photos and handwritten notes about their excitement for baby’s arrival!
25. Leftover Transformation Station (Waste Nothing!)
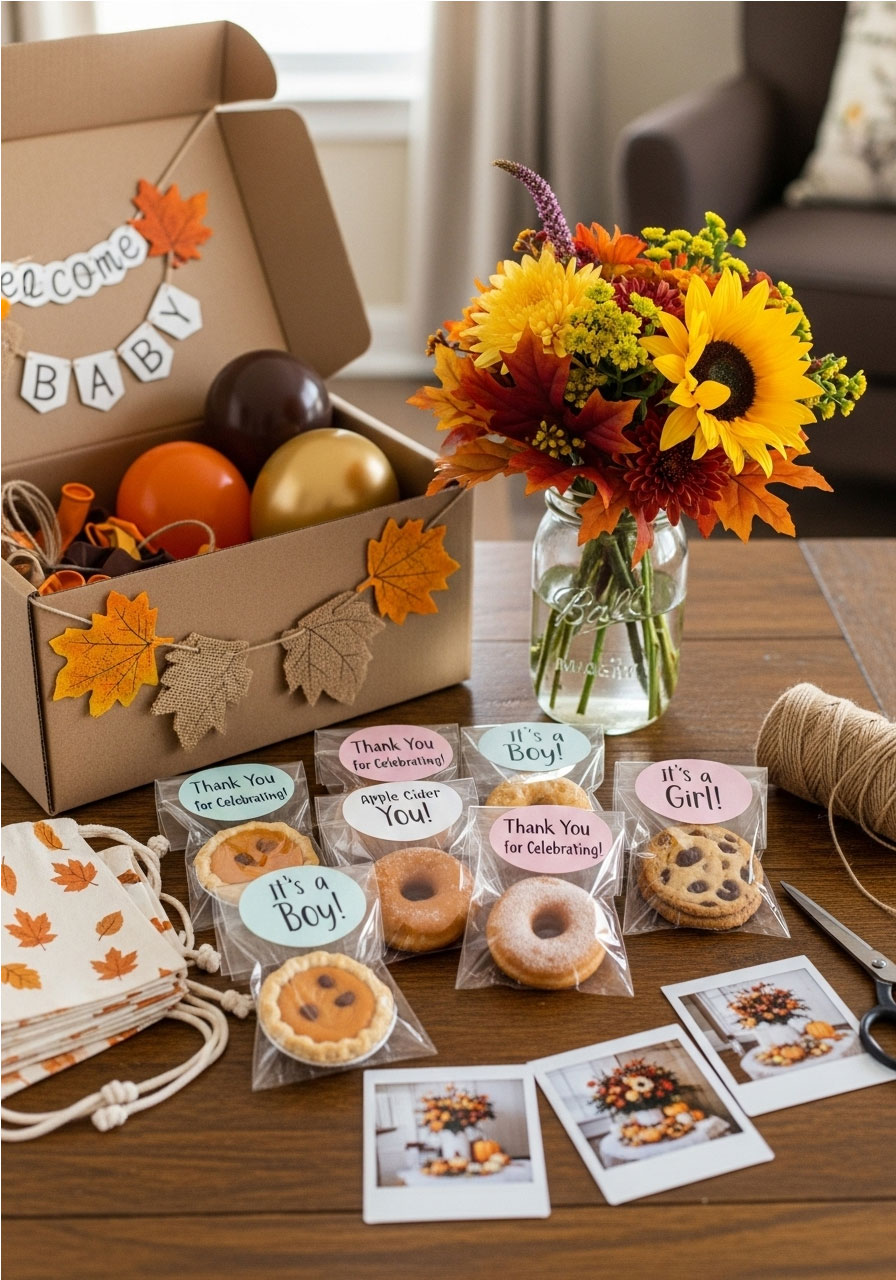
Turn your party leftovers into gifts for the mom-to-be – because nothing should go to waste!
Best for: Extending the party magic beyond the event
Prep Time: 15 minutes
Budget: $0 (using leftover supplies)
What to Save and Transform:
- Extra flowers become a “Congratulations” bouquet
- Leftover snacks get packaged as “first week survival kit”
- Unused decorations become nursery decor
- Extra favor bags become storage for baby items
How to Create Lasting Memories:
- Pack leftover flowers in a mason jar with a “For Your Hospital Room” note.
- Bundle remaining snacks with a card saying “For Those Late-Night Feedings”.
- Save decorations in a box labeled “Baby’s First Fall Decorations”.
- Take photos of all the decorations before packing them up.
Heartwarming Touch: Create a small photo album during cleanup showing all your beautiful decorations – the new parents will treasure seeing how loved their baby already is!
Your Complete 25-Idea Success Strategy
With 25 budget-friendly ideas at your fingertips, you can mix and match to create the perfect celebration that fits your specific budget and style. Here’s how to make the most of these ideas:
Ultra-Budget Party (Under $30 total): Choose ideas 1, 11, 13, 16, 18, 20, 22, and 25 – you’ll have decorations, activities, ambiance, and lasting memories.
Comfortable Budget Party ($50-75 total): Add ideas 2, 3, 5, 6, 8, 12, and 19 to your ultra-budget foundation for a more elaborate celebration.
Splurge-Within-Reason Party ($75-100 total): Include all 25 ideas and watch your guests marvel at what they think was a much more expensive party!
Your Fall Baby Shower Success Checklist
Ready to pull it all together? Here’s your game plan for throwing the most memorable fall baby shower on a budget:
Two Weeks Before:
- Create your color palette using items you own
- Go thrift store shopping for unique pieces
- Order balloons and basic supplies online
- Design and send invitations
One Week Before:
- Gather natural decorations (leaves, pinecones, branches)
- Make diaper cake and any crafts
- Plan your menu and shop for non-perishables
- Download and print games
Day Before:
- Set up all decorations
- Prep snack board items
- Create favor bags
- Set up activity stations
Day Of:
- Start stovetop potpourri
- Set up drink station
- Add fresh flowers to arrangements
- Take photos and enjoy your beautiful party!
Final Thoughts: It’s All About the Heart Behind the Celebration
Here’s what I’ve learned from throwing dozens of parties on a budget: your guests won’t remember how much you spent, but they’ll never forget how the celebration made them feel.
The magic isn’t in expensive decorations or catered food – it’s in the thoughtful touches, the warm atmosphere, and the joy of celebrating a new little life with people you love.
With these 25 budget-friendly fall baby shower ideas, you’re not just saving money; you’re creating something personal, meaningful, and absolutely unforgettable. Your guests will be talking about this party long after the last pumpkin decoration is put away.
So grab those dollar store pumpkins, raid your linen closet, and get ready to throw a fall baby shower that proves the best parties come from the heart, not the wallet!
Which of these budget-friendly ideas are you most excited to try? Drop a comment below and let us know how your fall baby shower planning is going – we love hearing about your creative party wins!
