
So, you’re planning a baby shower for a sweet baby girl, and your Pinterest board is overflowing, but your budget is… well, not? Don’t sweat it! You don’t need a blank check to throw a stunning, memorable party that will have the mom-to-be beaming.
We’re here to be your party-planning headquarters for fun. These DIY ideas are creative, super simple, and guaranteed to make you look like the host with the most. Let’s dive in and craft an unforgettable day for a very special little lady!
1. The Showstopper Diaper Cake
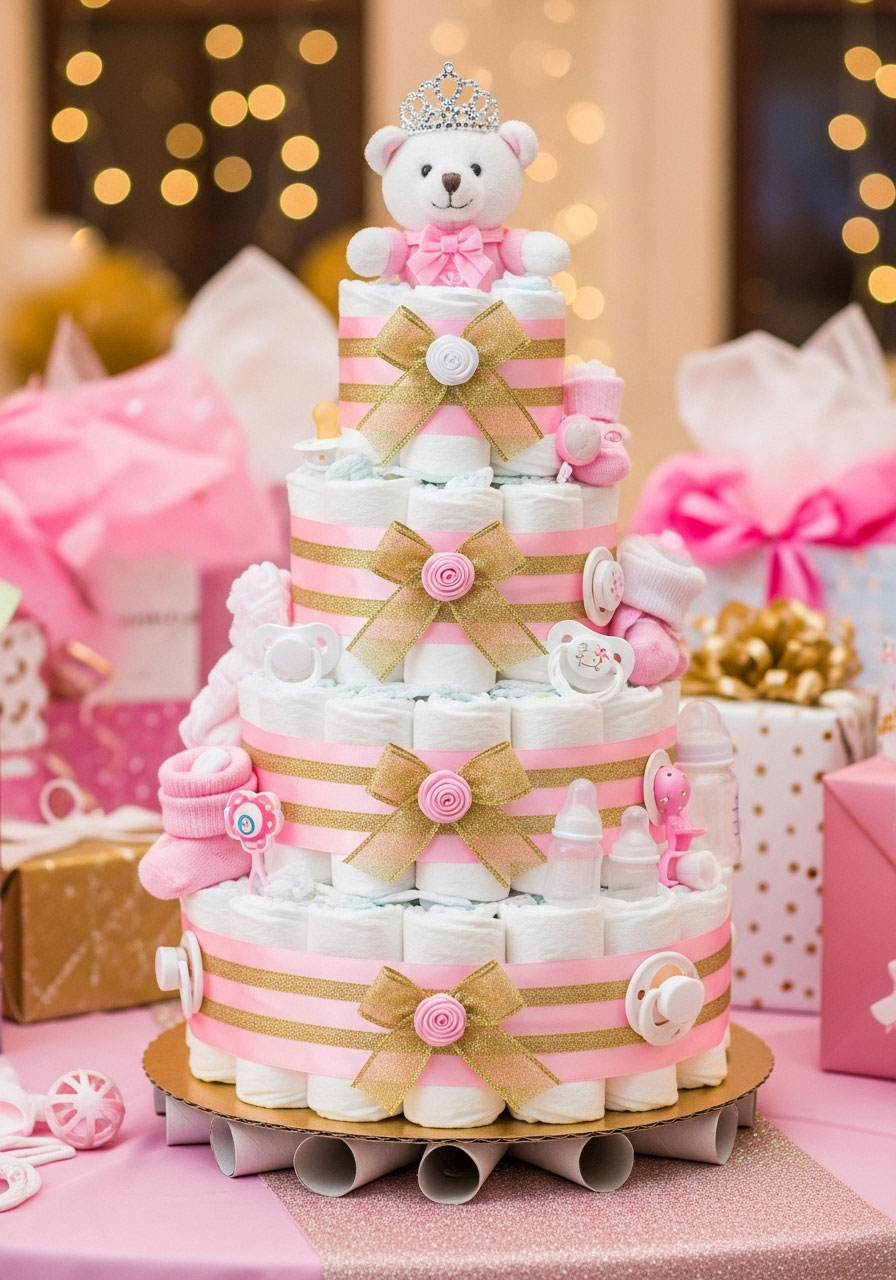
It’s a gift, it’s a centerpiece, it’s the ultimate DIY project that makes you look like a baby shower pro. This diaper cake is a total showstopper and surprisingly simple to assemble, making it the perfect focal point for your gift table.
Best for: A stunning centerpiece, a practical group gift.
Time to Make: 30-45 minutes.
What You’ll Need:
A large box of diapers (Size 1 or 2 is best)
Rubber bands (small and large)
A sturdy cardboard circle for the base
Paper towel or wrapping paper tubes
Decorative ribbon in your theme colors (pink, gold, lavender, etc.)
A cute cake topper (like a stuffed animal, baby shoes, or a tiara)
Hot glue gun
How to Make It:
1. Start by rolling each diaper tightly from the open end inwards and secure it with a small rubber band. You’ll need about 50-60 rolled diapers for a three-tier cake.
2. For the bottom tier, stand a paper towel tube in the center of your cardboard base. Arrange rolled diapers around it until you have a large, tight circle. Secure the entire tier with a large rubber band.
3. Create a second, smaller tier of diapers on top of the first one and secure it with another large rubber band.
4. Make the third, smallest tier and place it on top.
5. Time to decorate! Wrap each tier with a wide, beautiful ribbon to hide the rubber bands. Secure the ribbon in the back with a dab of hot glue.
6. Place your adorable stuffed animal or topper on the very top.
Pro Tip: Tuck small baby items like socks, pacifiers, or travel-sized lotions between the diaper layers for extra surprises when the mom-to-be disassembles it!

2. “Ready to POP!” Popcorn Favors
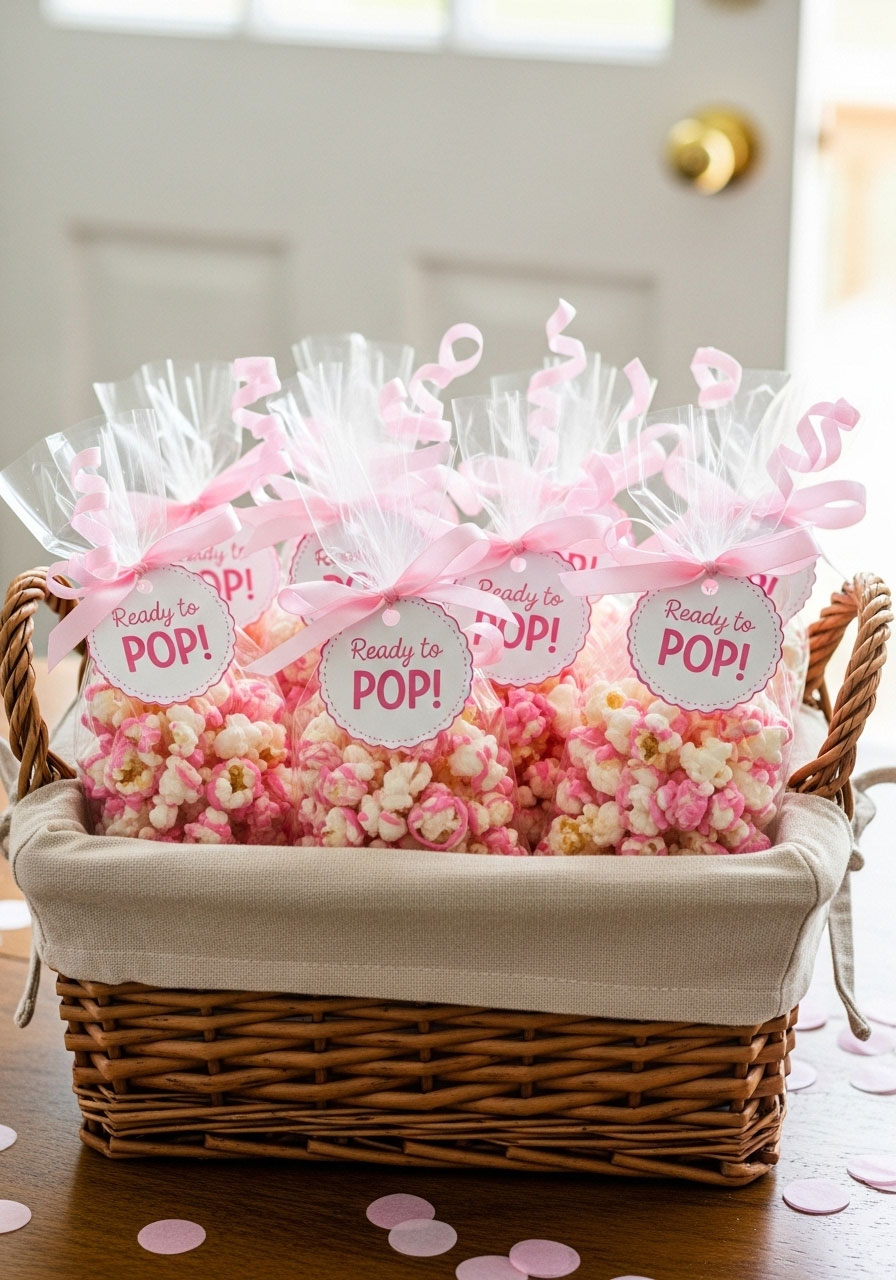
Want a party favor that’s adorable, delicious, and won’t break the bank? These “Ready to POP!” bags are the perfect send-off for your guests. It’s the easiest way to say “thanks for celebrating with us!”
Best for: Budget-friendly favors, a last-minute idea.
Time to Make: 15 minutes.
What You’ll Need:
Clear cellophane bags
Popcorn (store-bought or homemade)
Pink satin ribbon
Cardstock and a printer for the “Ready to POP!” tags
How to Make It:
1. Fill each cellophane bag with a generous handful of popcorn.
2. Tie each bag securely with a piece of pink ribbon, finishing it with a pretty bow.
3. Print or handwrite your “Ready to POP!” tags and attach one to the ribbon of each bag.
4. Arrange them in a basket or on a cute cupcake stand by the door for guests to grab as they leave.
Fun Variation: Use different types of popcorn! Kettle corn, caramel corn, or even popcorn drizzled with pink candy melts can match your theme perfectly.
3. The “Don’t Say ‘Baby'” Game
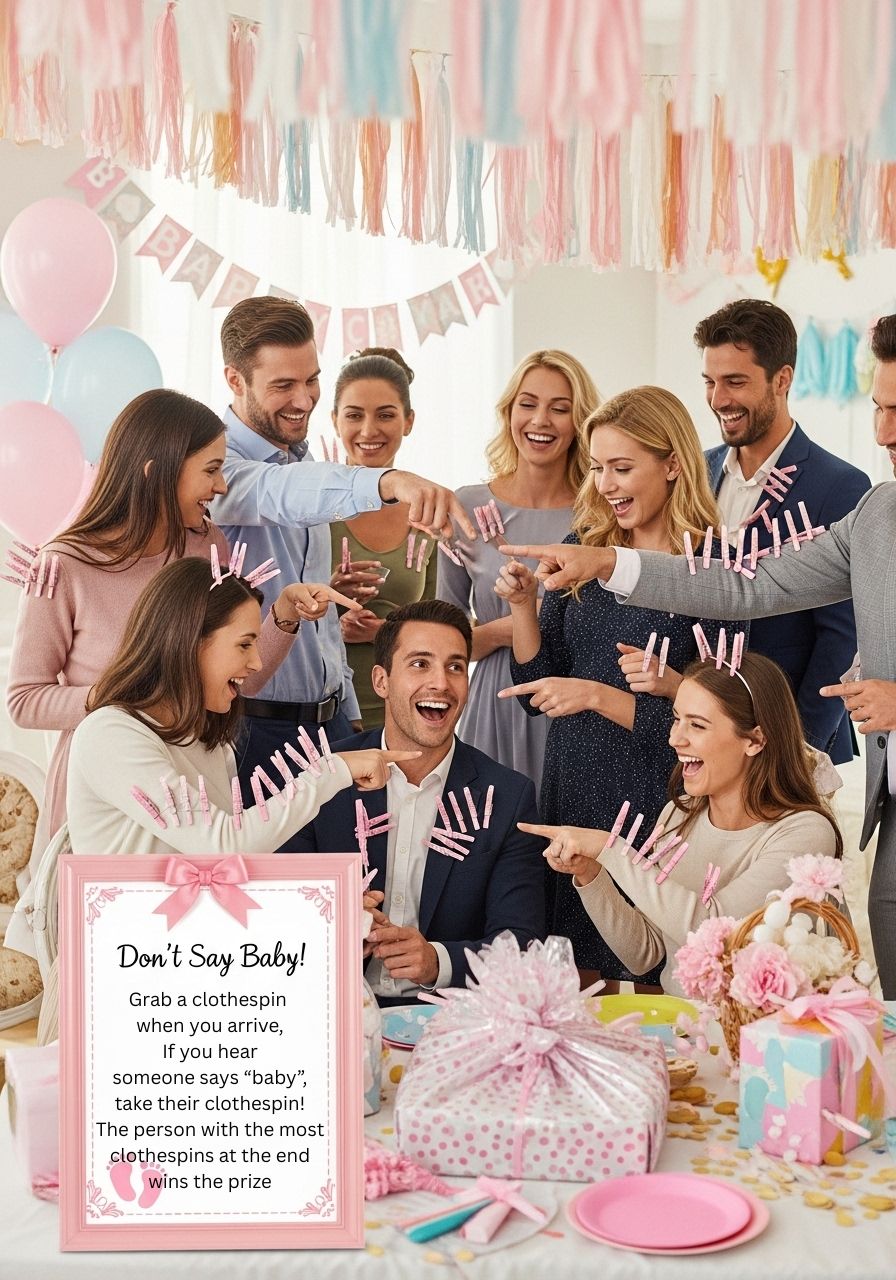
Ready for some friendly competition? This game is a guaranteed hit for getting guests mingling and listening closely. It’s hilariously simple and gets surprisingly intense as the party goes on!
Best for: Icebreakers, all-ages fun, a game that runs the whole party.
Players: Everyone!
What You’ll Need:
Clothespins (one for each guest)
Pink paint or glitter (optional)
How to Play:
1. Before the party, give your plain clothespins a makeover with a coat of pink paint or some glitter to make them festive.
2. As each guest arrives, give them one clothespin and explain the one simple rule: You can’t say the word “baby”.
3. Guests should clip their clothespin somewhere visible on their outfit.
4. If anyone hears another guest say the forbidden word, they get to steal that person’s clothespin!
5. At the end of the shower, the person who has collected the most clothespins wins a prize.
Pro Tip: Up the ante by adding more forbidden words like “cute” or the baby’s name. Watch the chaos unfold!
4. DIY “BABY GIRL” Blocks
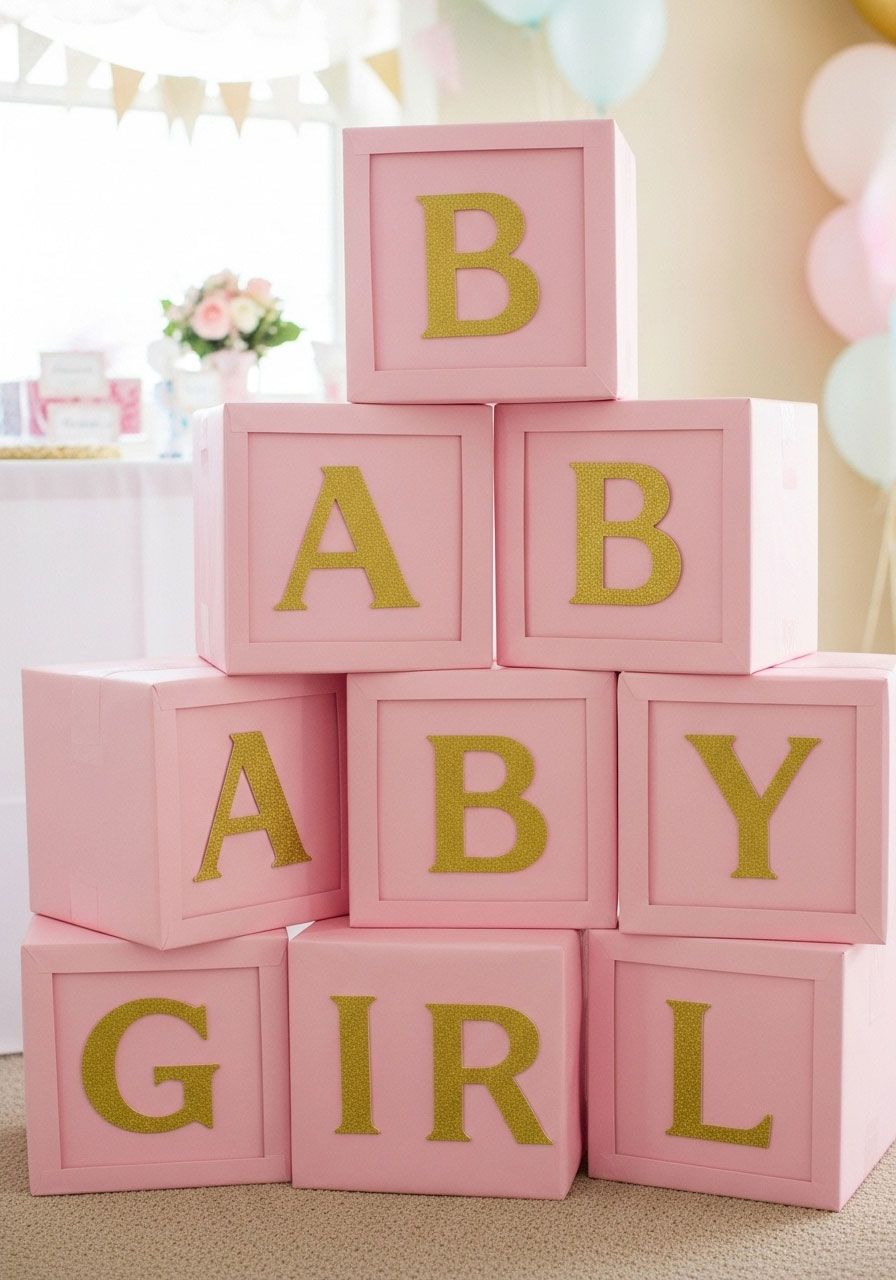
Need some high-impact decor that costs next to nothing? These giant baby blocks are perfect for stacking near the gift table or creating a fantastic photo backdrop.
Best for: Photo backdrops, budget-friendly decor.
Time to Make: 20-30 minutes.
What You’ll Need:
Square cardboard boxes (diaper boxes work perfectly!)
Wrapping paper in your theme’s colors
Gold glitter cardstock
Scissors and tape
How to Make It:
1. Carefully wrap each square box with the wrapping paper, just like a present.
2. From the gold glitter cardstock, cut out the letters you need (e.g., B-A-B-Y G-I-R-L).
3. Tape or glue one letter to the center of each box.
4. Stack them up and get ready for the compliments to roll in!
Pro Tip: If you can’t find square boxes, you can use different-sized boxes for a more whimsical, “topsy-turvy” look.
5. The Price Is Right: Baby Edition!
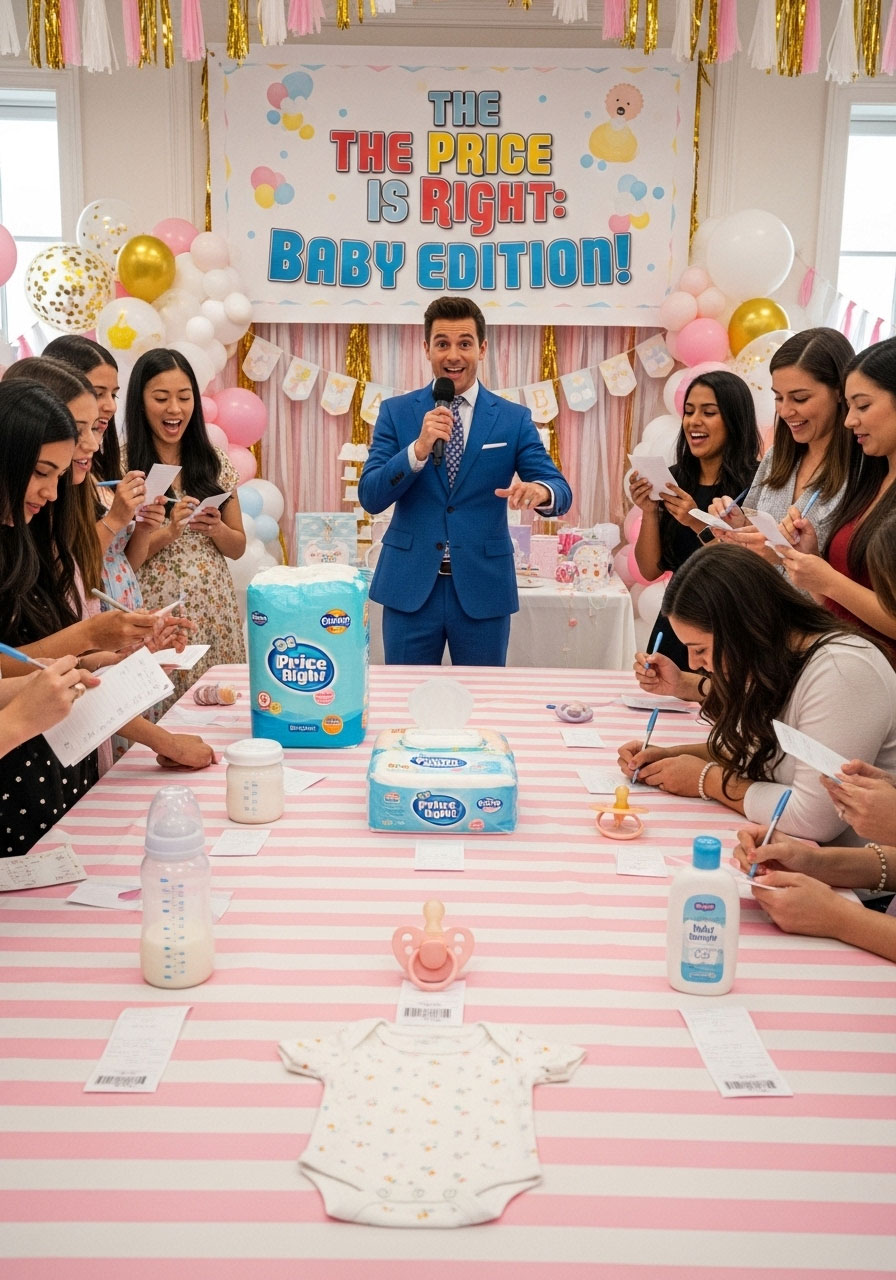
Come on down! This game brings the fun of a classic TV game show right to your living room. It’s a fantastic way to get everyone laughing and see who really knows the cost of baby gear.
Best for: An interactive game, co-ed crowds.
Time to Play: 15-20 minutes.
What You’ll Need:
5-7 common baby items (e.g., a pack of diapers, baby wipes, bottle, pacifier, onesie, baby shampoo)
Paper and pens for each guest
The receipt for the baby items!
How to Play:
1. Before the party, purchase your baby items and keep the receipt hidden.
2. Display all the items on a table for everyone to see.
3. Give each guest a sheet of paper and a pen.
4. Have them write down their guess for the retail price of each item.
5. After everyone has their guesses, reveal the actual prices one by one from the receipt.
6. The guest who guesses the closest to the actual total cost of all the items without going over is the winner! The mom-to-be gets to keep all the baby items.
Pro Tip: Use a fun, energetic friend as your “announcer” to reveal the items and prices to really capture the game show vibe!
6. The Adorable Rattle Cupcake “Cake”
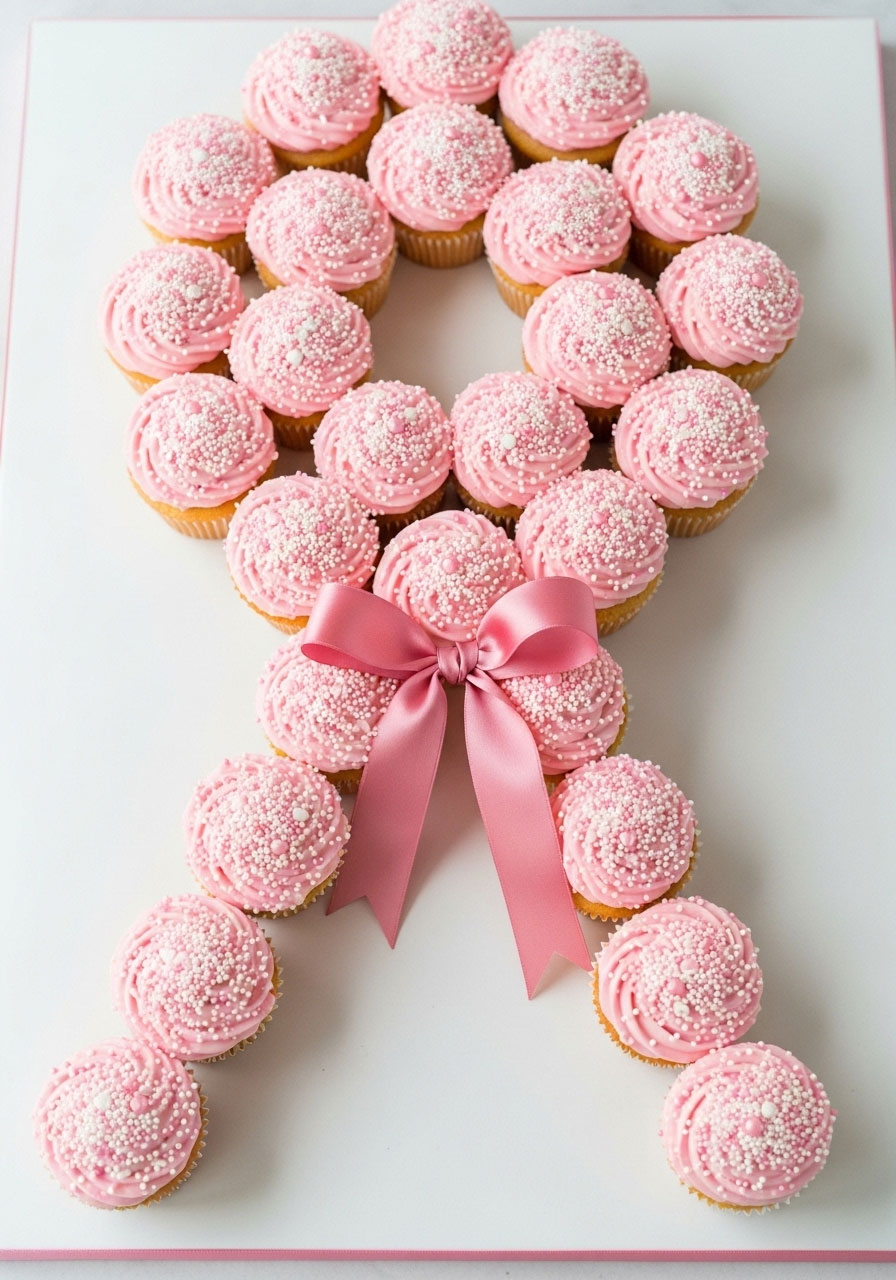
Scared of cake-cutting catastrophes? Ditch the knife and go for this genius tear-apart rattle cake! It’s made from simple cupcakes, serves a crowd with zero fuss, and looks absolutely darling on the dessert table.
Best for: Easy serving, a clever dessert centerpiece, bakers of all skill levels.
Time to Make: 20 minutes (plus cupcake baking time).
What You’ll Need:
24 pre-made or boxed-mix cupcakes, cooled
A large batch of pink (or white) frosting
A large cake board or platter
Sprinkles
A decorative ribbon for a bow
How to Make It:
1. Grab a large, round bowl and use it to lightly trace a circle onto your cake board. This will be your guide!
2. Arrange about 16-18 cupcakes tightly together inside the circle to form the main part of the rattle.
3. Line up the remaining 6-8 cupcakes in a straight line extending from the circle to create the handle.
4. Load up a piping bag (or a Ziploc bag with the corner snipped off) with frosting. Generously frost the top of all the cupcakes, spreading the frosting between them so they look like one cohesive cake.
5. Before the frosting sets, go wild with the sprinkles!
6. Tie a beautiful ribbon bow around the “handle” for the perfect finishing touch.
Pro Tip: To make it even easier, buy pre-made, unfrosted cupcakes from a local grocery store bakery. All the fun of decorating with none of the baking mess!
7. The Sweetest & Simplest Candy Buffet
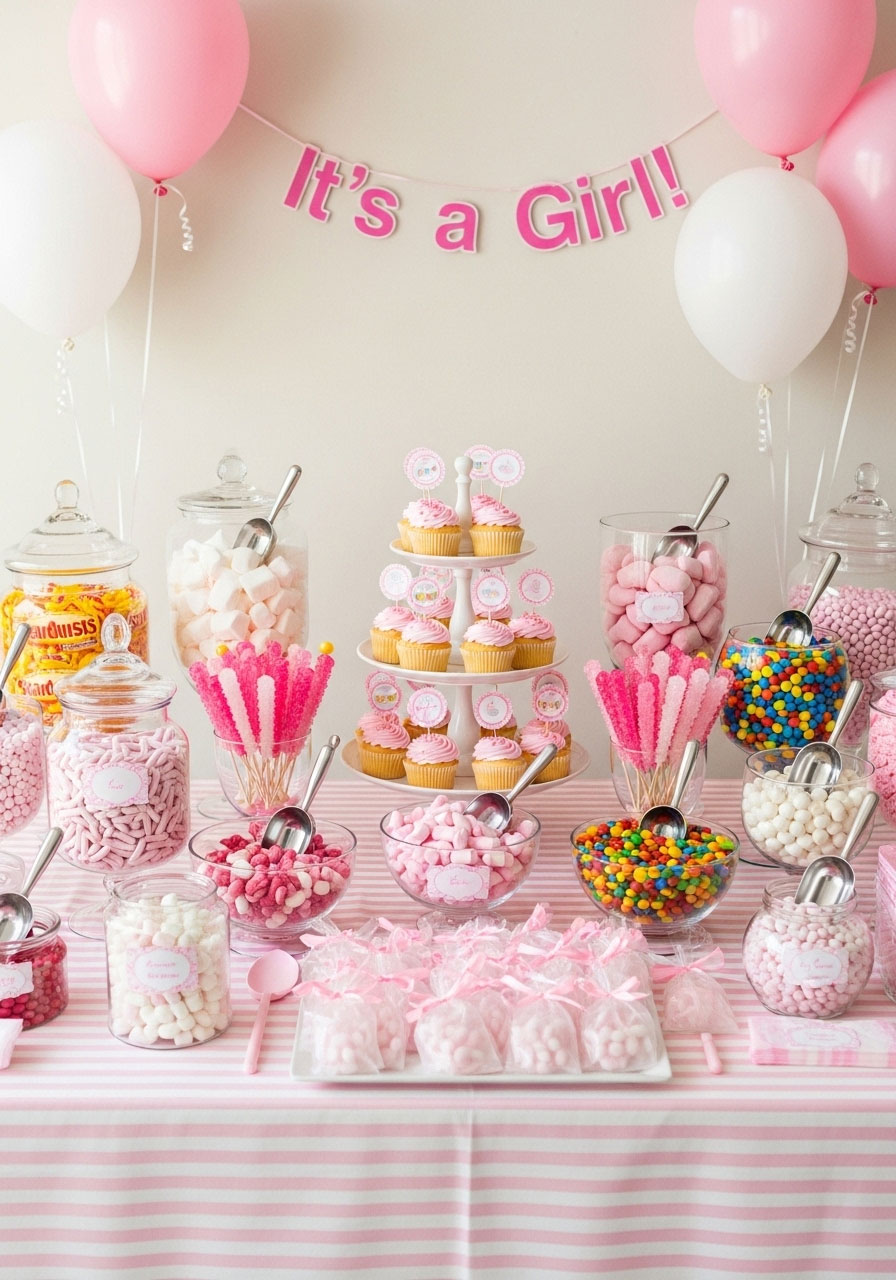
Unleash everyone’s inner child with a colorful candy buffet. It doubles as a stunning decoration and a delicious activity where guests can create their own take-home favor. Plus, it’s one of the easiest “wow” features you can set up.
Best for: A beautiful focal point, an interactive party favor.
Time to Set Up: 15 minutes.
What You’ll Need:
Glass jars, vases, and bowls in various shapes and sizes
Scoops and tongs
Small cellophane bags with twist ties
A tablecloth in a matching color
An assortment of candy in your color scheme (think pink Starbursts, white marshmallows, strawberry bonbons, pink and white M&Ms, etc.)
How to Set It Up:
1. Cover your designated table with a beautiful tablecloth.
2. Arrange your empty jars and bowls, placing taller ones in the back and shorter ones in the front to create depth.
3. Fill each container with a different type of candy.
4. Place a scoop or a set of tongs in each of the larger jars.
5. Set out a stack of cellophane bags at one end of the table so guests can help themselves!
Pro Tip: Hit up the dollar store or a thrift store for your jars and scoops. You can create a high-end, coordinated look for a super low cost!
8. Chic Painted Mason Jar Centerpieces

Who knew a simple glass jar could look so elegant? These painted mason jars are the ultimate DIY decor hack. They’re versatile, ridiculously inexpensive, and add a touch of rustic charm to every single table.
Best for: Budget-friendly table decor, a rustic or shabby-chic theme.
Time to Make: 5 minutes per jar (plus drying time).
What You’ll Need:
Mason jars (as many as you need for your tables)
Pink chalk paint (or any color that fits your theme)
A paintbrush
Twine or ribbon
Faux flowers (like baby’s breath, roses, or hydrangeas)
How to Make It:
1. Make sure your jars are clean and dry.
2. Apply a thin, even coat of chalk paint to the outside of each jar. Let it dry completely. Apply a second coat if needed for full coverage.
3. Once the paint is totally dry, tie a piece of twine or a satin ribbon into a bow around the neck of the jar.
4. Fill the jars with your favorite faux flowers and arrange them on your tables. Voilà!
Fun Variation: For a touch of glam, use metallic gold or rose gold spray paint instead of chalk paint. It completely changes the vibe and adds a modern sparkle!
9. The “Hello, Baby!” Diaper Wreath

Let guests know they’ve arrived at the cutest party on the street with this adorable diaper wreath. It’s a fun twist on a traditional door decoration and, bonus, all the diapers are usable for the new mom!
Best for: A welcoming front door decoration, another practical gift idea.
Time to Make: 30 minutes.
What You’ll Need:
A 12-inch or 16-inch wire wreath frame
About 20-30 diapers (Size 1)
Small rubber bands
Wide, decorative ribbon
Hot glue gun
Other decorative elements (optional: silk flowers, a small wooden letter of the baby’s first name, pacifiers)
How to Make It:
1. Roll each diaper tightly (just like for the diaper cake) and secure it with a small rubber band.
2. Tuck each rolled diaper through one of the sections of the wire wreath frame so that the rubber band is hidden behind the wires. You want the diaper to be held snugly.
3. Continue adding diapers, pushing them tightly together until the entire wreath frame is full and fluffy.
4. Wrap the wide, decorative ribbon around the entire wreath, pulling it between the diapers for a pop of color.
5. Use your hot glue gun to add any final embellishments, like a big bow at the bottom or flowers tucked in among the diapers.
Pro Tip: Make a smaller version to hang on the hospital door after the baby is born. It’s a super sweet and thoughtful touch that the new parents will love.
10. The Hilarious Onesie Decorating Station

Want an activity that’s part-game, part-gift, and 100% fun? Set up a onesie decorating station! You’ll unleash your guests’ creativity and stock the baby’s closet with one-of-a-kind outfits. The results range from heart-meltingly cute to absolutely hilarious.
Best for: A creative crowd, a memorable activity, stocking the baby’s wardrobe.
Time to Set Up: 10 minutes.
What You’ll Need:
A pack of plain white baby onesies in various sizes (newborn, 0-3 months, etc.)
Non-toxic fabric markers or fabric paint pens in various colors
Pieces of cardboard to place inside the onesies (this prevents the ink from bleeding through!)
A small clothesline and clothespins to display the masterpieces
How to Set It Up:
1. Designate a table as the “Design Studio”. Lay out the onesies, markers, and cardboard inserts.
2. Create a little sign that says something fun like, “Future Fashionista in Training: Design a Onesie for the Baby Girl!”
3. As guests mingle, they can grab a onesie, slip a piece of cardboard inside, and let their inner artist run wild.
4. Once a design is finished, have them hang it on the clothesline for everyone to admire. It becomes part of the decor!
Pro Tip: Provide a few simple stencils (like hearts, stars, or animals) for guests who claim they “aren’t artistic.” It’s a great way to help everyone feel included and confident!
11. The Sweetest “Wishes for Baby” Guestbook Jar

Ditch the boring, traditional guestbook that just collects dust. This “Wishes for Baby” jar is an interactive and heartfelt way to capture sweet messages and advice that the mom-to-be will actually cherish and read for years to come.
Best for: A meaningful keepsake, a simple guestbook alternative.
Time to Set Up: 5 minutes.
What You’ll Need:
A large, pretty glass jar
Decorative cardstock or pre-cut slips of paper (in pinks, creams, or golds)
A few nice pens
A small, framed sign explaining what to do
How to Set It Up:
1. Place the jar, paper slips, and pens on a small table near the entrance where guests will see it when they arrive.
2. Display your sign. A simple “Share Your Sweet Wishes & Advice for the Baby Girl!” is perfect.
3. That’s it! Guests can write down a memory, a hope, or a funny piece of parenting advice at their leisure. The new parents will have so much fun reading these later.
Fun Variation: Instead of a jar, use a children’s storybook like Guess How Much I Love You. Guests can write their wishes on the inside covers and blank pages for a beautiful, readable keepsake.
12. The Easiest High-Impact Tassel Garland

Need to fill a blank wall or jazz up your dessert table? This DIY tassel garland is your secret weapon! It looks professionally made, costs just a few dollars to create, and adds a huge pop of color and texture to your party space.
Best for: Filling large spaces, a photo backdrop, budget decorating.
Time to Make: 20-30 minutes.
What You’ll Need:
Tissue paper in your theme colors (e.g., light pink, hot pink, gold, white)
A long piece of string or twine
Scissors
How to Make It:
1. Take a sheet of tissue paper and fold it in half lengthwise, then in half widthwise.
2. Cut thin strips towards the folded edge, stopping about an inch from the top to keep it all connected. This creates the fringe.
3. Unfold the paper once (widthwise). You should have a fringe on both ends with a solid section in the middle.
4. Carefully roll the sheet up tightly.
5. Once rolled, twist the solid center section firmly until it forms a loop.
6. Thread your tassels onto the long piece of twine, spacing them out as desired.
Pro Tip: Don’t worry about making every tassel or every cut perfect! The slight variations are what give it that charming, handmade look. Mix and match colors for a beautiful, custom effect.
13. Adorable Butterfly Candy Favors

Send your guests home with a little flutter of sweetness! These butterfly candy favors are almost too cute to eat and are a breeze to put together. They’re a memorable and charming way to say thank you for celebrating.
Best for: Inexpensive favors, a spring or garden-themed shower.
Time to Make: 15 minutes for a dozen.
What You’ll Need:
Small, resealable sandwich bags
Colorful, small candies (M&Ms, Skittles, or pastel jelly beans work great)
Wooden clothespins
Pink paint and a small brush
Black pipe cleaners, cut into 2-inch pieces
How to Make It:
1. First, paint your wooden clothespins pink and let them dry completely.
2. Fill each sandwich bag about halfway with candy. Don’t overfill!
3. Seal the bag, then gently squish the candy so it’s evenly divided on the left and right sides, leaving the middle empty.
4. Pinch the empty middle of the bag and clip it with a painted clothespin. The two sides of the bag will now look like butterfly wings!
5. Fold a 2-inch piece of pipe cleaner into a “V” shape to create the antennae. Pinch it inside the top of the clothespin clip.
Pro Tip: This is the perfect task to delegate! It’s a fun, simple craft that older kids or helpful friends can easily manage while you focus on bigger party-prep tasks.
14. Baby Sock Rose Bouquet

Create a beautiful bouquet that will never wilt with these adorable baby sock roses! This is a guaranteed “aww”-inducer. Simply roll pink, white, and floral-patterned baby socks tightly from the cuff down to the toe, then tuck the toe part under the cuff to hold the rosebud shape. You can attach them to green floral wire stems and arrange them in a vase for a stunning centerpiece that doubles as a super practical gift for the mom-to-be.
15. “Ready to Pop” Drink Tags

Add a pop of fun to your drink station with “Ready to Pop!” tags. This is one of the easiest DIYs for a huge impact. Just get some cute cardstock, write the punny phrase, punch a hole, and tie them around bottles of sparkling cider, mini champagne, or even bubbly water with a pink ribbon. It’s a super simple detail that makes your drink table look instantly festive and thoughtfully planned.
16. Late-Night Diaper Messages Station

Give the gift of a 3 AM giggle with a late-night diaper message station. Set out a basket of diapers (out of the package) and some colorful permanent markers with a sign that says, “Leave a message for the new parents!” Guests can write encouraging notes or hilarious jokes on the front of the diapers for the parents to discover during those future late-night changes. It’s a free, personal, and unforgettable touch.
17. DIY Photo Booth Fun

Get ready for some seriously silly selfies with a DIY photo booth station. You don’t need an expensive kit! Just print fun baby-themed shapes like bottles, pacifiers, rubber duckies, and “It’s a Girl!” speech bubbles on cardstock. Cut them out and tape them to wooden skewers or paper straws. Arrange them in a jar next to a simple backdrop (like your tassel garland!) and watch as your guests create hilarious and memorable photos.
18. The Bow-Making Station
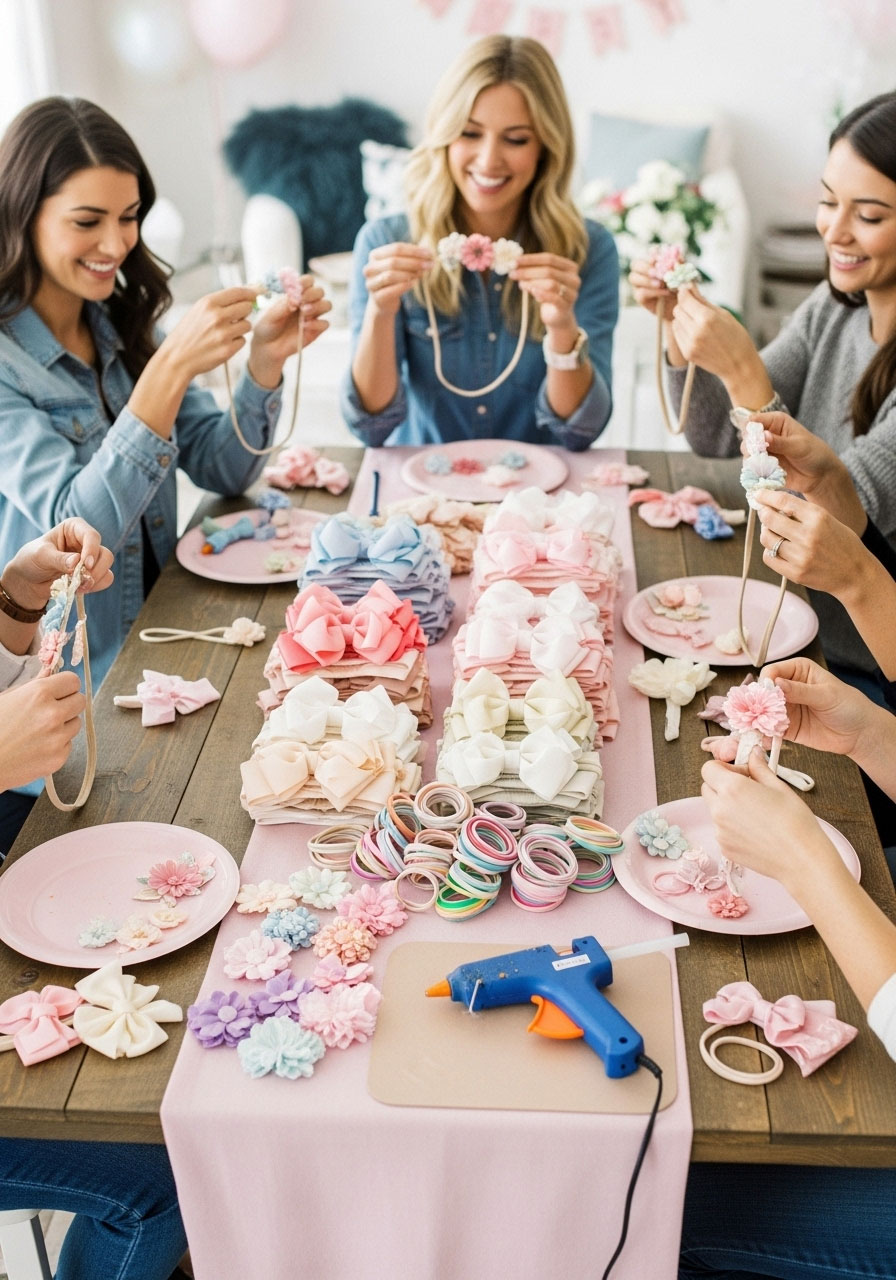
Let your guests channel their inner designer at an adorable headband-making station. Set out a variety of pre-made bows, elastic bands, and fabric flowers with a hot glue gun (manned by a helpful host). Guests can mix and match to create custom headbands for the new baby girl. It’s a fun, interactive activity that leaves the mom-to-be with a whole collection of beautiful, handmade accessories.
19. The Bubbly “Mom-osa” Bar

Cheers to the mom-to-be with a fun and festive “Mom-osa” Bar! It’s a guaranteed hit and couldn’t be easier to set up. Simply provide a few bottles of chilled sparkling cider or prosecco alongside carafes of different fruit juices like orange, cranberry, and peach nectar. Add some bowls of fresh berries for garnish, and let guests create their own perfect bubbly concoction.
20. The Epic Balloon Garland
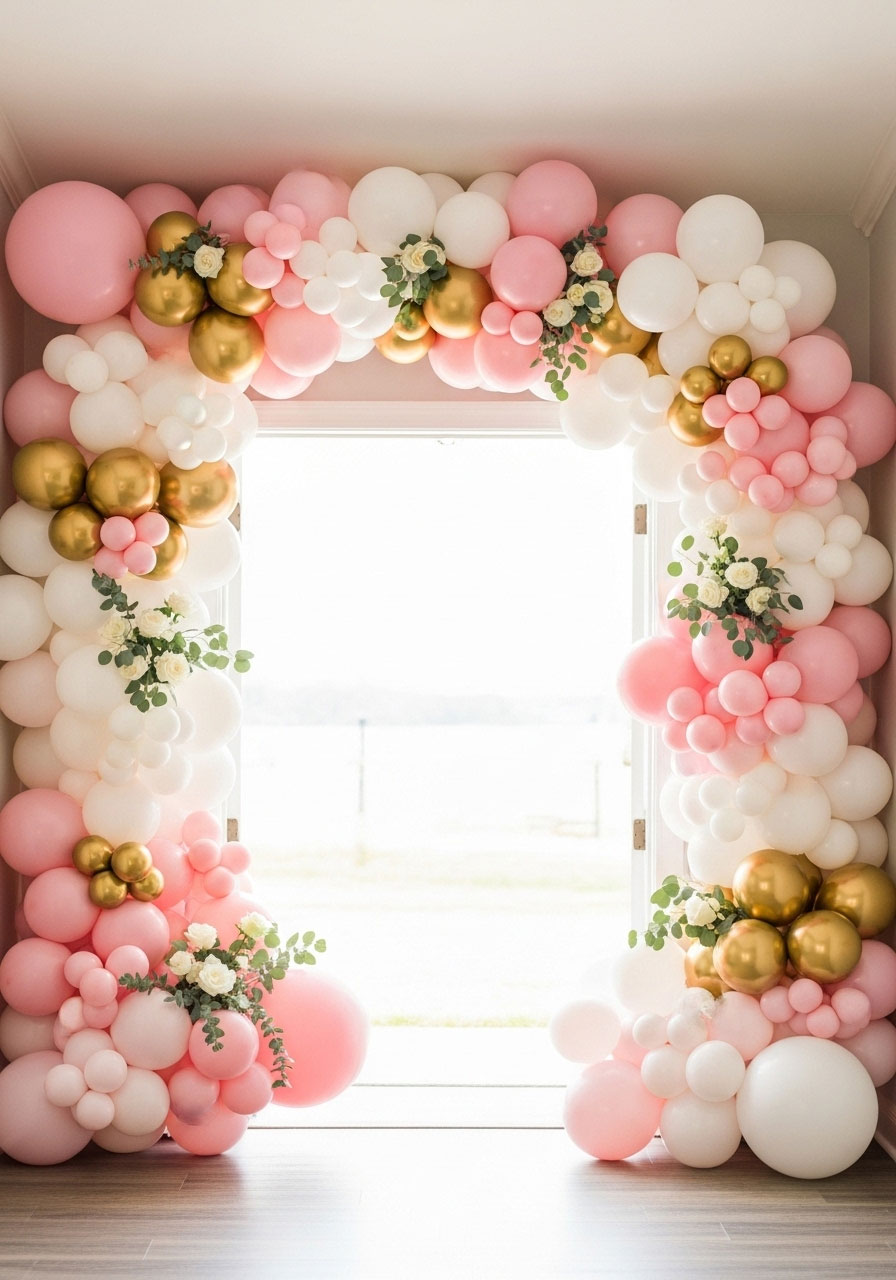
Think those huge, gorgeous balloon garlands are for pros only? Think again! Grab a simple balloon garland kit or just some balloon decorating strip tape online. Inflate balloons in various sizes within your color scheme (like pink, white, and gold) and simply push the knots through the holes on the strip. It’s the easiest way to create an epic photo backdrop or entryway decoration that looks like you spent a fortune.
21. The Win-Win Diaper Raffle

Help the new parents stock up on the one thing they’ll need most with a super simple diaper raffle. Just write a little note on the invitation asking guests to bring a pack of diapers in any size to be entered into a raffle. Set up a cute jar and some slips of paper at the party for guests to write their names on, and draw a winner for a fun prize at the end!
22. The “Guess the Baby Food” Game

Get ready for some hilarious faces and questionable taste-testing! The “Guess the Baby Food” game is a classic for a reason. Buy 5-7 different jars of baby food, remove the labels (and number the lids!), and have guests see if they can identify the flavors by sight, smell, or a brave taste. It’s a simple, cheap, and guaranteed laugh-out-loud moment.
23. Whimsical Pom-Pom Cake Topper

Instantly upgrade a plain store-bought cake with a whimsical DIY pom-pom topper. All you need is some yarn in your party colors to make a few small, fluffy pom-poms. Attach them to wooden skewers of varying lengths and arrange them on top of the cake. It adds a pop of color, texture, and a fun, custom-made feel in just minutes.
24. Tutu-Cute Utensil Wraps

Add a touch of ballerina flair to your food table with these tutu-cute utensil wraps. Simply roll a set of cutlery into a pink napkin and tie it in the middle with a piece of fluffy pink or white tulle, creating a little “tutu”. It’s an adorable, inexpensive detail that makes your place settings look extra special and perfectly on-theme.
25. The Frantic Baby Name Race

Need a game you can set up in 30 seconds flat? The Baby Name Race is your answer! Give everyone a pen and paper and have them write the letters A through Z down the side. On “go”, they have to race to think of a girl’s name for every single letter. The first person to complete their list shouts “Done!” and wins bragging rights.
26. A Wishing Tree for Baby

Create a beautiful and interactive centerpiece with a “Wishing Tree”. Find a small branch from your yard and place it in a vase filled with sand or stones to keep it steady. Set out decorative tags and pens, inviting guests to write their hopes and wishes for the baby girl and hang them on the branches. It becomes a meaningful keepsake the parents can display in the nursery.
27. No-Sew Fabric Scrap Banner

Create a beautiful, rustic banner without a single stitch for a touch of shabby-chic charm. Gather strips of fabric, ribbon, and lace in your party’s color scheme and simply tie them in basic knots along a long piece of twine. This banner adds wonderful texture and color behind the dessert table or along a mantel, and it’s a perfect way to use up leftover craft supplies.
28. DIY Sugar Scrub Favors

Thank your guests with a little bit of pampering they can take home. A DIY sugar scrub is incredibly easy to make by mixing sugar, coconut oil, and a few drops of a skin-safe essential oil like lavender or rose. Portion the scrub into small baby food jars, add a custom label, and tie a pink ribbon around the lid for a beautiful, useful, and sweet-smelling reminder of a beautiful day.
29. “Don’t Drop the Baby” Balloon Toss

For a dose of hilarious, high-stakes fun (especially at an outdoor shower), try the “Don’t Drop the Baby” game. Have guests pair up and give each team a water balloon “baby”. The partners start close and toss the balloon back and forth, taking a step back after each successful catch. The last team with their “baby” intact wins. Get ready for some shrieks and laughter!
30. The Great Pacifier Hunt

Get your guests mingling and searching high and low with a super simple Pacifier Hunt. Before everyone arrives, hide a handful of plastic pacifiers around the main party area – on bookshelves, under pillows, or tucked into plants. Announce that the hunt is on, and the person who finds the most pacifiers by the end of the party wins a prize. It’s a low-effort game that keeps everyone engaged.
31. “My Water Broke!” Ice Cube Game

This is the perfect icebreaker to kick off the party with a laugh. Before the shower, freeze tiny plastic babies (found at most craft stores) inside an ice cube tray. As guests arrive, give one baby-filled ice cube to each person in their drink. The first person whose ice cube melts completely, freeing the baby, must shout, “My water broke!” to win.
32. Creative Themed Food Names

Instantly elevate your food spread without spending an extra dime by giving everything a cute, baby-themed name. Use small, folded cardstock signs to label your snacks: “Buns in the Oven” for mini sliders, “Fruit Womb” for a fruit salad, or “Labor-ade” for the party punch. It’s a simple, witty touch that shows off your creativity and ties the theme together.
33. The “Guess How Many” Candy Jar

Set up a classic guessing game that doubles as cute decor on your gift table. Fill a large clear baby bottle or a glass jar with pink and white candies like jellybeans, M&Ms, or Hershey’s Kisses, making sure to count them first! Have guests write their name and their best guess on a slip of paper. The person with the closest guess wins the whole jar of candy.
34. Gorgeous Paper Fan Backdrop

Create a stunning photo backdrop in minutes using a collection of paper fans. Simply buy a multi-pack of decorative paper fans in your party’s colors, open them up, and use tape or sticky tack to attach them to a wall in a clustered pattern. It’s a ridiculously easy way to make a big visual statement behind the dessert or gift table.
35. Advice for the Parents Coasters
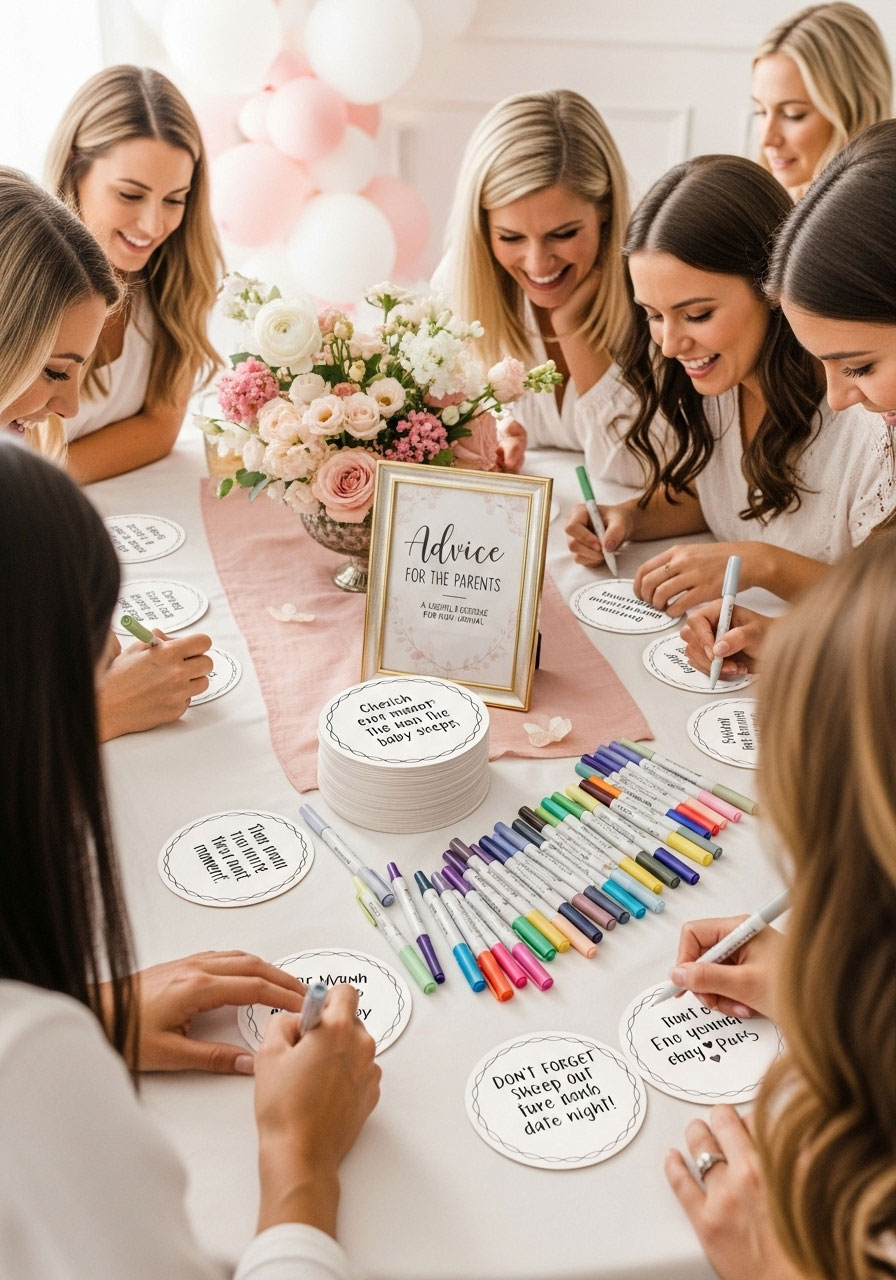
Turn your guests’ wisdom into a practical gift with an “Advice for the Parents” station. Set out a stack of blank, absorbent paper coasters and some fine-tipped permanent markers. Guests can write down their best parenting tips or words of encouragement, creating a set of heartfelt and useful coasters the new parents can actually use during late-night feedings.
36. Elegant Floral Ice Cubes
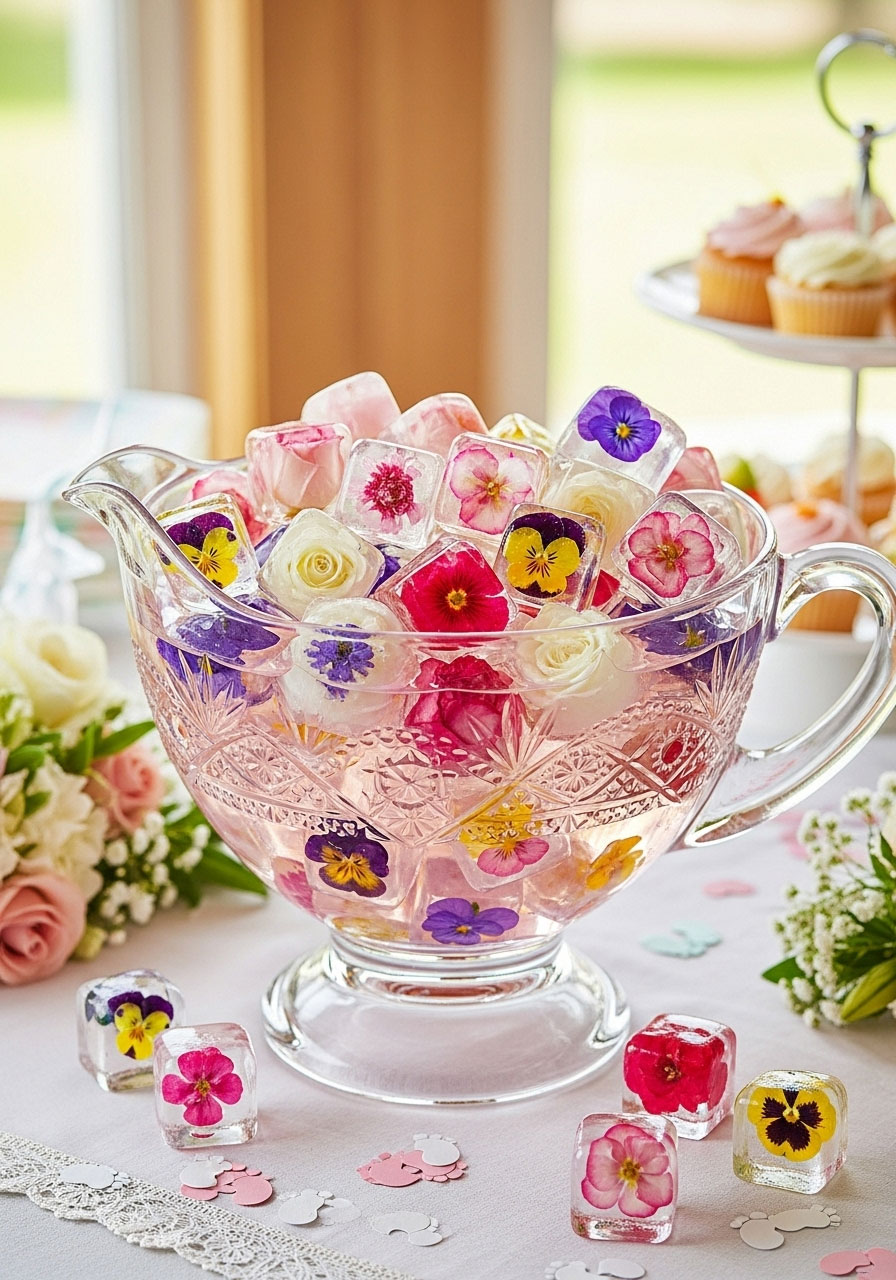
Make your drink station extra beautiful with elegant floral ice cubes. Just place small, edible flowers (like pansies or rose petals) into an ice cube tray, fill with water, and freeze. Adding these to a clear pitcher of water or a punch bowl adds an instant touch of class and sophistication that your guests will definitely notice.
37. “A Baby is Brewing” Tea Favors

For a charming and sophisticated favor, create “A Baby is Brewing” tea packets. Buy a box of individually wrapped tea bags (like chamomile or a pink herbal tea) and create a custom tag to staple over the existing one. It’s a simple, cozy, and elegant way to thank your guests for coming to celebrate the mom-to-be.
38. “Who’s That Baby?” Photo Game

Get everyone laughing and reminiscing with this personal and hilarious game. On the invitation, ask each guest to bring a baby photo of themselves. Assign a number to each photo and display them on a corkboard. Guests can then write down their guesses on who’s who, and the person with the most correct matches wins a prize. It’s a fantastic conversation starter!
39. Custom Water Bottle Wraps

Give basic water bottles a major upgrade with custom wraps. Simply remove the existing labels and replace them with your own decorative paper or a printable label that says “It’s a Girl!” or features the baby’s name. Secure it with a piece of tape, and suddenly, even the hydration station is perfectly on-theme. It’s a super cheap way to make every detail feel special.
40. The Baby Animal Matching Game

Test your guests’ animal knowledge with this sweet and simple game. Create a worksheet or find a free printable online that lists adult animals in one column and has a blank space next to them. The first person to correctly write down all the corresponding baby animal names (e.g., Cow -> Calf, Goose -> Gosling) wins. It’s a charming game that’s perfect to play while guests are snacking.
41. A “Time Capsule” for the Baby Girl
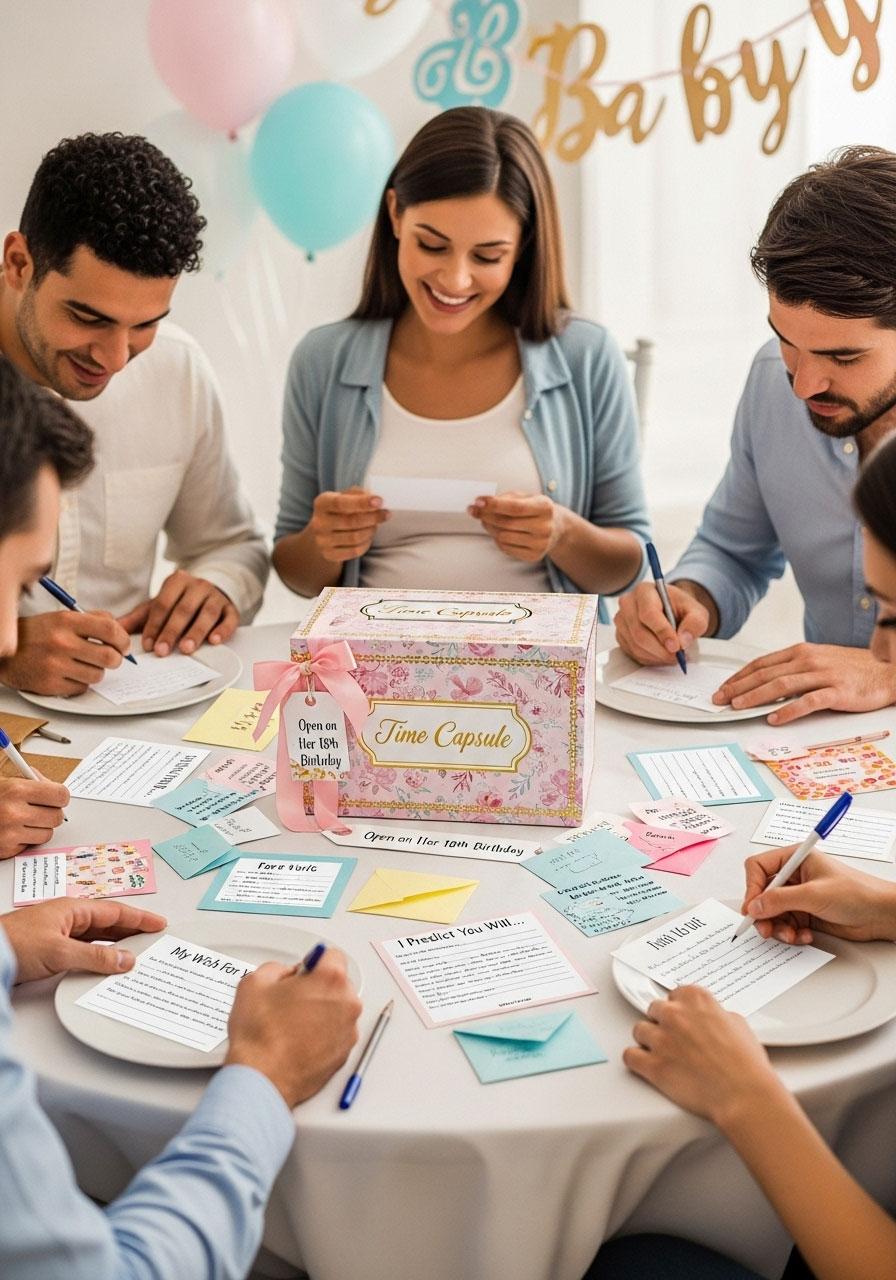
Create an incredibly meaningful keepsake with a “time capsule” box. Provide guests with nice paper and pens to write letters of advice, memories, or predictions for the baby to read on her 18th birthday. Collect the notes in a decorated keepsake box for the parents to seal until the big day. It’s a priceless gift the child will cherish forever.
42. Sweet Lollipop Tree Centerpiece

For a centerpiece that’s both adorable and delicious, create a lollipop tree. Get a small styrofoam block or half-sphere from a craft store and cover it with tissue paper or paint. Then, simply stick the lollipops (like pink and white swirl pops or Cake Pops) into the foam until it’s full. It’s a colorful, interactive decoration that guests can enjoy at the end of the party.
43. Hospital Bag Encouragement Notes
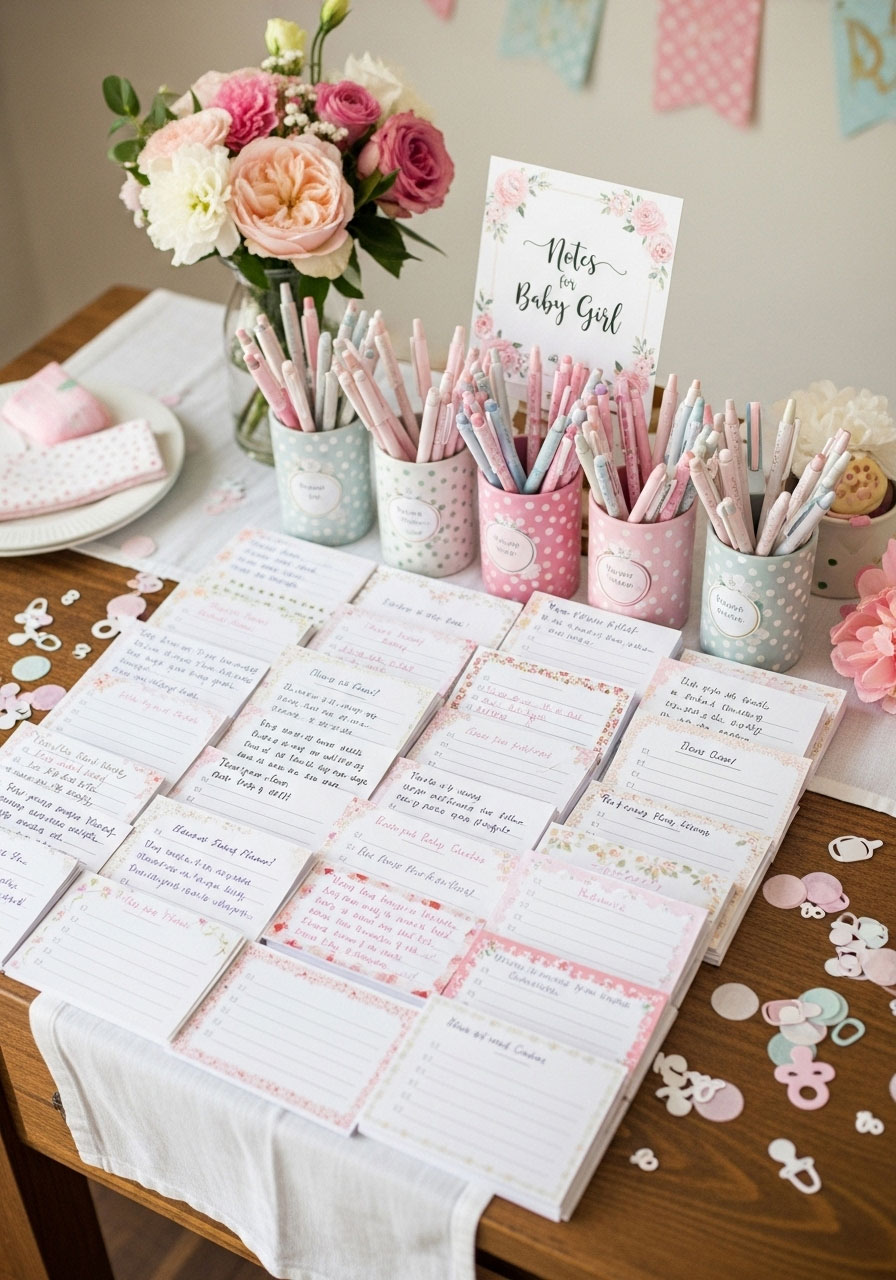
Offer some love and support for the big day by setting up a “Notes for the Hospital Bag” station. Provide small note cards and pens, and have guests write short, encouraging messages for the parents-to-be to read at the hospital while they’re waiting for the baby to arrive. It’s a truly thoughtful touch that they will deeply appreciate.
44. Five-Minute Cupcake Toppers
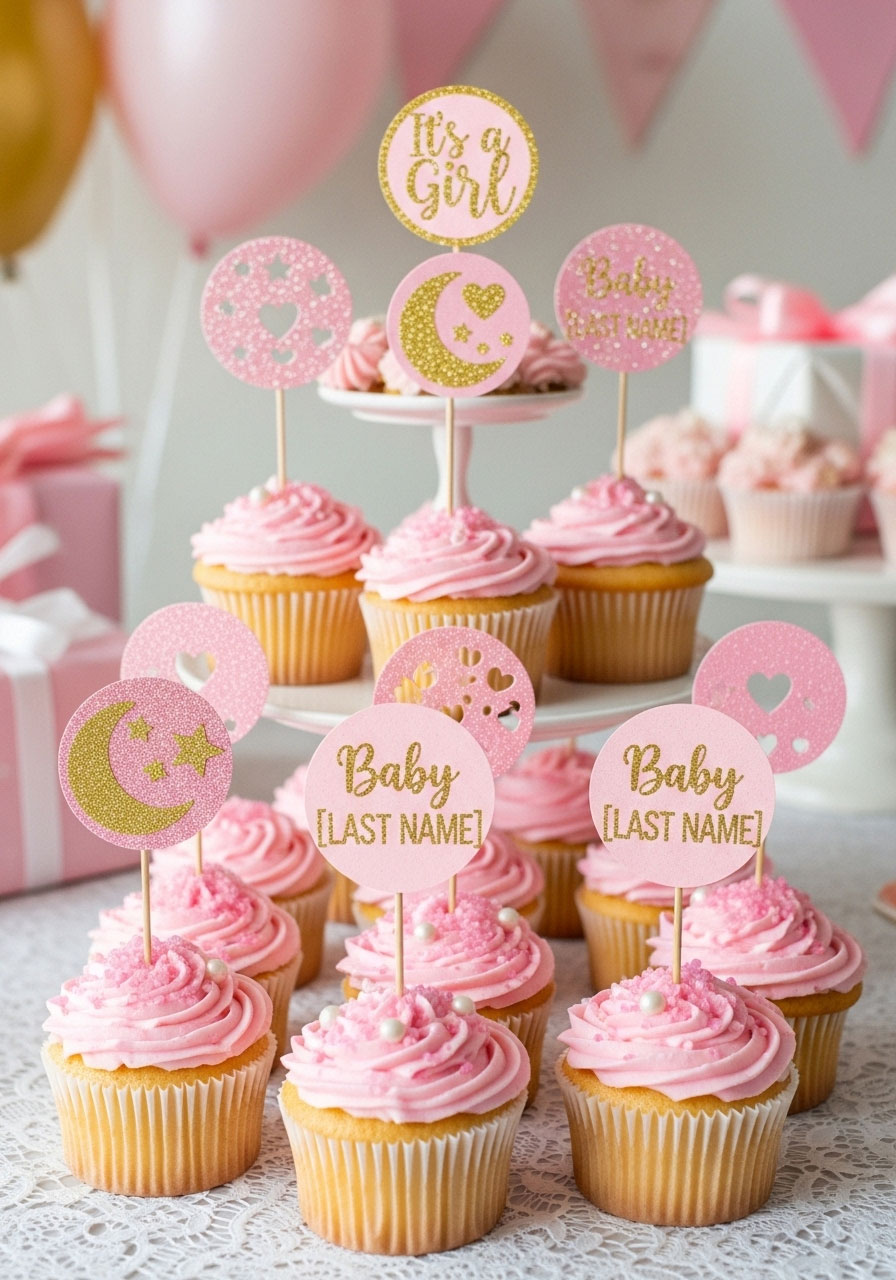
Make store-bought cupcakes look completely custom with your own DIY toppers. Use a 1-inch circle punch to cut out shapes from pink and gold glitter cardstock, then simply hot glue them to the top of a toothpick. Sticking these into your cupcakes is a five-minute craft that instantly personalizes your dessert table and makes it look extra chic.
45. “Dirty Diaper” Candy Bar Game
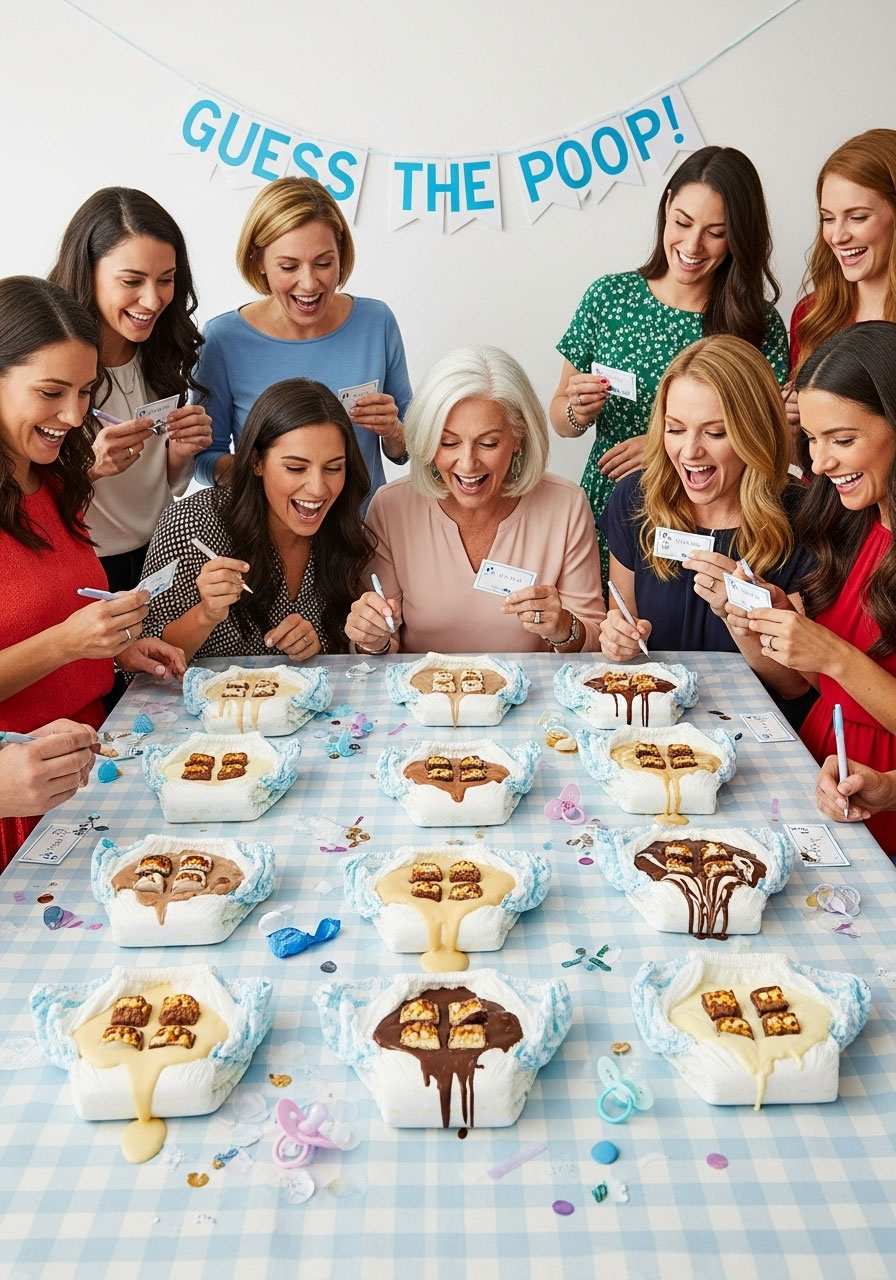
If your crowd loves a good laugh, the “Dirty Diaper” game is a must. Melt different types of chocolate bars (like Snickers, Milky Way, etc.) in several newborn diapers and have guests “sniff” or inspect the “dirty” diaper to guess which candy bar it is. It’s gloriously gross, unforgettable, and absolutely hilarious every time.
46. The Bump Size String Game
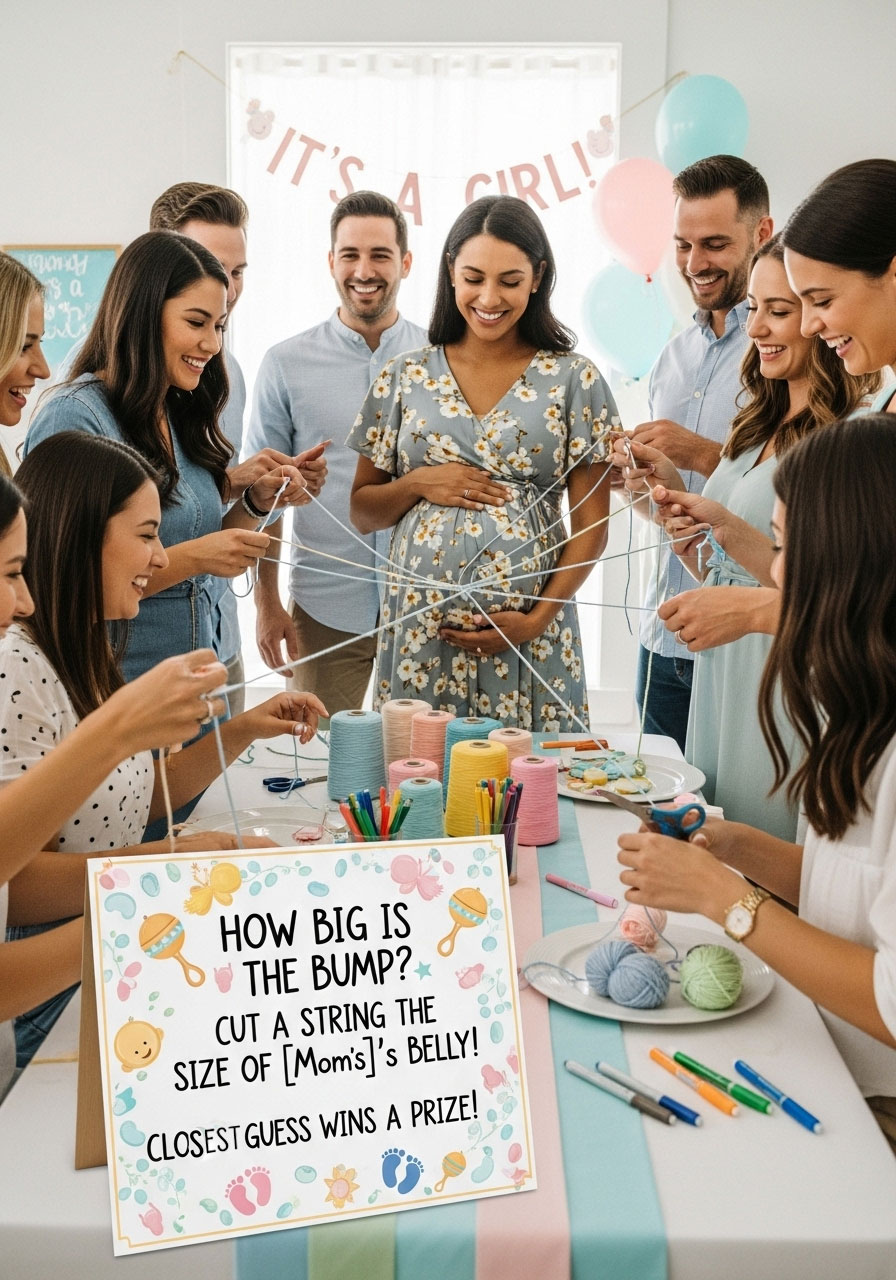
This is one of the oldest and easiest baby shower games in the book! Pass around a ball of yarn and a pair of scissors, and have each guest cut a piece of string to the length they believe will fit perfectly around the mom-to-be’s baby bump. Once everyone has their string, they can take turns measuring it against her belly. The person with the closest length wins!
47. “Baby’s First Alphabet” Book
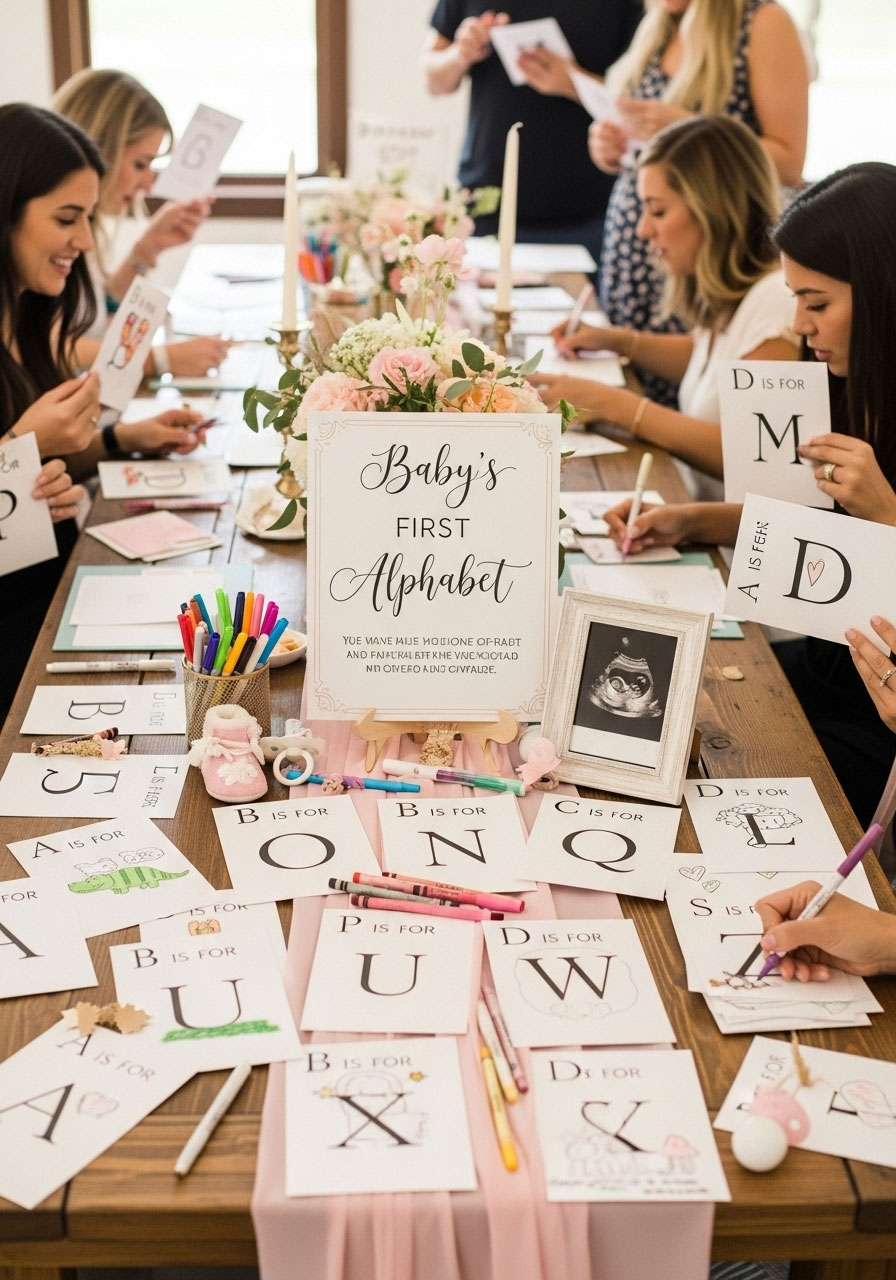
Create a one-of-a-kind keepsake book with an alphabet station. Provide 26 blank cards or a blank board book, along with markers and stickers. Assign one letter to each guest (or have them pick) and have them draw a picture of something that starts with that letter (A is for Apple, B is for Bear, etc.). It becomes the baby’s very first, and most personal, alphabet book.
48. Duck Pond Party Punch
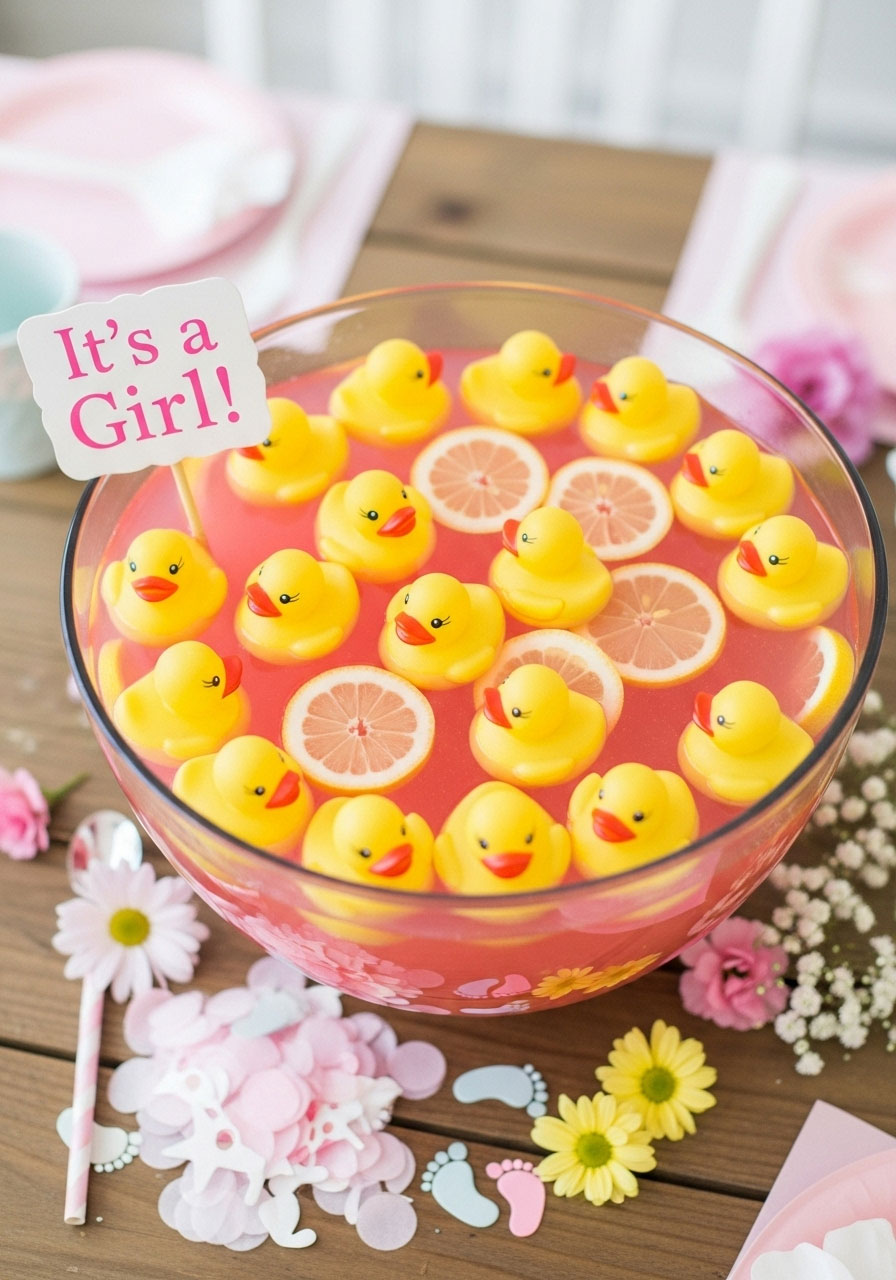
Make your party punch the talk of the shower with this adorable and easy trick. Simply whip up a batch of pink lemonade in a large punch bowl and float a few mini rubber duckies on top. It’s a super cute and whimsical touch that brings a “baby bath” theme to life with zero extra effort, and it looks fantastic in photos.
49. The “Baby Shower” Purse Raid

Find out who has the most prepared purse with a hilarious “Baby Shower Purse Raid”. As the host, create a list of common items found in a handbag, assigning points for each (e.g., lipstick = 1 point, hand sanitizer = 2 points). Give bonus points for baby-related items guests might have, like a spare diaper or teething toy. Call out the items and have guests rummage through their bags – the person with the most points wins!
50. Fluffy Cloud & Raindrop Garland
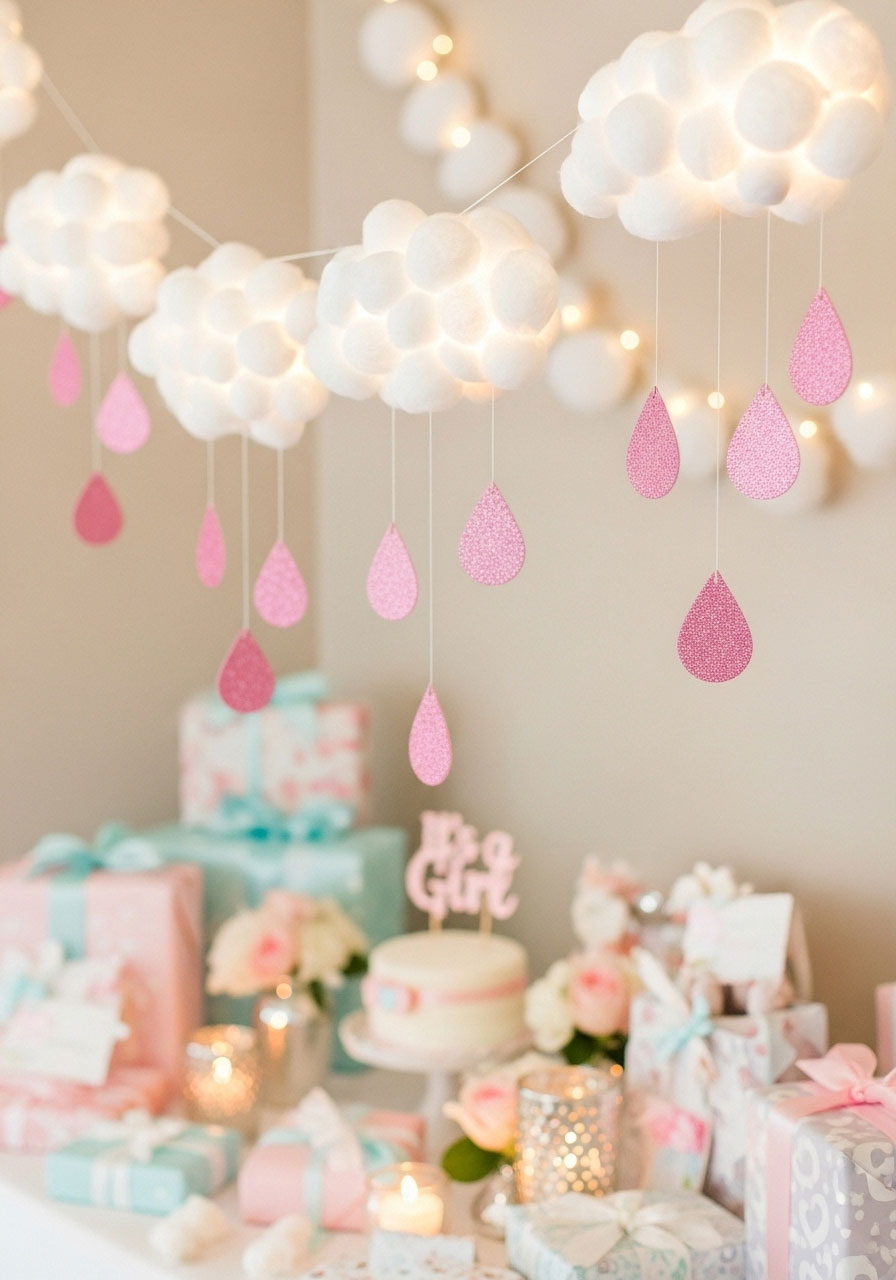
Create a dreamy “April Showers” vibe with a DIY cloud and raindrop garland. Gently stretch out cotton balls to create fluffy, cloud-like shapes and string them onto a piece of thread. Then, cut raindrop shapes out of pink and silver glitter cardstock and hang them from the clouds with more thread. It’s an adorable decoration to hang over the gift table.
51. Baby Stats Prediction Board

Turn a fun guessing game into a piece of interactive decor with a Baby Stats Prediction Board. Use a chalkboard, whiteboard, or a large framed poster where guests can write down their predictions for the baby’s official arrival date, time, weight, and length. The mom-to-be can take it home as a fun keepsake to see who was the closest!
52. The Watermelon Baby Carriage

Wow your guests with a show-stopping, edible centerpiece by making a watermelon baby carriage! Carefully carve a large watermelon to look like a baby bassinet on wheels, scoop out the fruit, and then refill the “carriage” with a fresh, colorful fruit salad. It’s a healthy, beautiful, and impressive addition to any food table that guests will rave about.
53. Marshmallow Pop Baby Rattles

For a sweet treat that’s almost too cute to eat, make marshmallow pop baby rattles. Just stick a large marshmallow on the end of a decorative paper straw, dip the marshmallow in pink melted candy wafers, and cover it in sprinkles before the coating dries. Tie a little ribbon at the base of the marshmallow for the perfect, rattle-like finishing touch.
54. Gift Opening Bingo
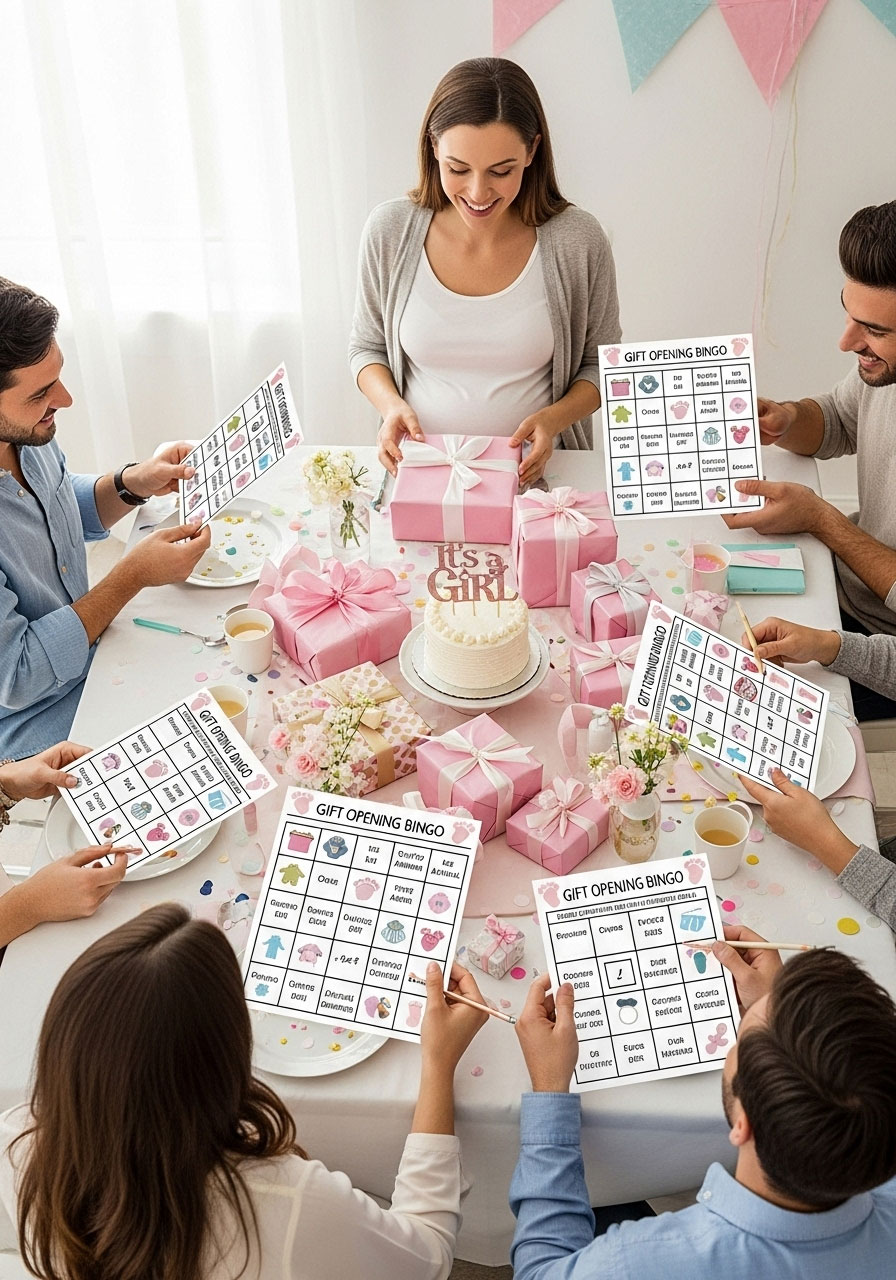
Keep guests engaged during the gift-opening portion of the party with a round of Baby Shower Bingo! Find free, printable bingo cards online with squares for common gifts like “Diapers”, “Onesie”, “Stuffed Animal”, and “Books”. Guests can mark off the squares as the mom-to-be opens her presents, and the first person to shout BINGO wins a prize.
55. “From Our Shower to Yours” Favors

Play on the “shower” theme for your party favors by giving guests mini soaps, bath bombs, or travel-sized shower gels. Attach a simple tag that reads, “From our shower to yours, thank you for coming!”. It’s a practical, witty, and totally charming way to thank your guests for celebrating the mom-to-be.
56. DIY “Mom-to-Be” Corsage

Make the guest of honor feel extra special with a beautiful DIY corsage she can proudly wear. Instead of real flowers, create a little bloom using a rolled-up pair of baby socks or a pretty silk flower as the centerpiece. Hot glue it to a wide, pink satin ribbon and add a small pacifier charm for the final touch. It’s a sweet keepsake she can save from her special day.
57. Emoji Nursery Rhyme Game

Put a modern spin on a classic with ‘Guess the Nursery Rhyme: Emoji Edition!’ Type out a list of popular nursery rhymes using only emojis (like a star emoji + a sheep emoji for “Baa, Baa, Black Sheep”) and print it out. Guests will have a blast decoding the picture puzzles, and the first person to get them all right wins.
58. Elegant Tulle-Wrapped Balloons

Instantly transform standard pink and white balloons into dreamy, elegant decorations. Just inflate your balloon, then wrap it in a large square of white or glittery tulle. Gather the fabric at the base and tie it securely with a beautiful satin ribbon that trails down. This simple trick adds a soft, ethereal texture that makes your decor look incredibly chic.
59. Baby Sock “Cupcakes”

Gift a bunch of adorable baby socks in the cutest way possible by making ‘sock cupcakes’. Tightly roll each pair of socks from the toe to the cuff to look like a rosebud, then place each one into a pretty paper cupcake liner. Arrange a dozen of them in a bakery box for a gift that looks like a sweet treat but is actually a super practical present.
60. Gorgeous Floral Letter Decor

Create a stunning, personalized piece of decor with a floral letter. Purchase a large cardboard or wooden letter of the baby’s first initial from a craft store. Then, use a hot glue gun to completely cover the front surface with faux flowers and greenery. It’s a beautiful focal point for the party and doubles as a lovely decoration for the nursery wall.
61. The Modern “What’s in Your Phone?” Game

Get your guests laughing with a game that requires zero prep: What’s in Your Phone? Create a list of prompts and assign points for each, like “You have a pink phone case”, “Your background is a person or pet”, or “You have a baby-related app”. Guests check their phones and tally their points, and the person with the highest score wins!
62. The “Baby Item ABCs” Game

Challenge your guests’ creativity with the fast-paced “Baby Item ABCs” game. Give everyone a piece of paper with the alphabet written down the side. The goal is to be the first to list a baby-related item for every single letter (A is for applesauce, B is for bottle…). It sounds easy, but watch as everyone gets hilariously stumped on letters like X and Z!
63. “Little Cutie” Orange Favors

For a favor that’s healthy, sweet, and perfectly punny, give out “Little Cutie” oranges. Simply place a basket of clementines near the exit and attach a sign or individual tags that say, “A little cutie is on the way! Thanks for celebrating with us”. It’s an adorable, budget-friendly, and refreshingly simple thank you gift.
64. Effortless Baby’s Breath Bouquets

For a centerpiece that is effortlessly elegant and incredibly budget-friendly, fill several small glass jars or vases with big bunches of baby’s breath. This delicate flower looks absolutely stunning on its own and can fill a room with a soft, romantic vibe for just a few dollars. It’s beautiful proof that the simplest ideas are often the most effective.
65. “Sign the Onesie” Guestbook Keepsake

Create a guestbook the parents can actually display by setting up a “Sign the Onesie” station. Stretch a plain white 0-3 month onesie inside a large embroidery hoop to keep it flat, and provide a few fine-tipped fabric markers. Guests can sign their names and leave short well-wishes, creating a beautiful piece of art for the nursery wall.
66. Practical Hand Sanitizer Favors

Give a favor that’s both practical and perfectly on-theme with personalized hand sanitizers. Buy a pack of mini hand sanitizer bottles, then peel off the labels and replace them with your own printable ones that say, “Here for the baby girl germs!” or “A little something for your diaper bag, too!” It’s a thoughtful and genuinely useful gift for every guest.
67. “Who Knows Mommy Best?” Game

See who’s been paying the most attention with a fun round of “Who Knows Mommy Best?” Before the party, create a list of questions about the mom-to-be (like her biggest pregnancy craving or her favorite childhood cartoon). Guests fill out their answers, and then you have the guest of honor reveal the correct ones. It’s a great way to share stories and get everyone laughing.
68. The Hilarious Candy Bar Game
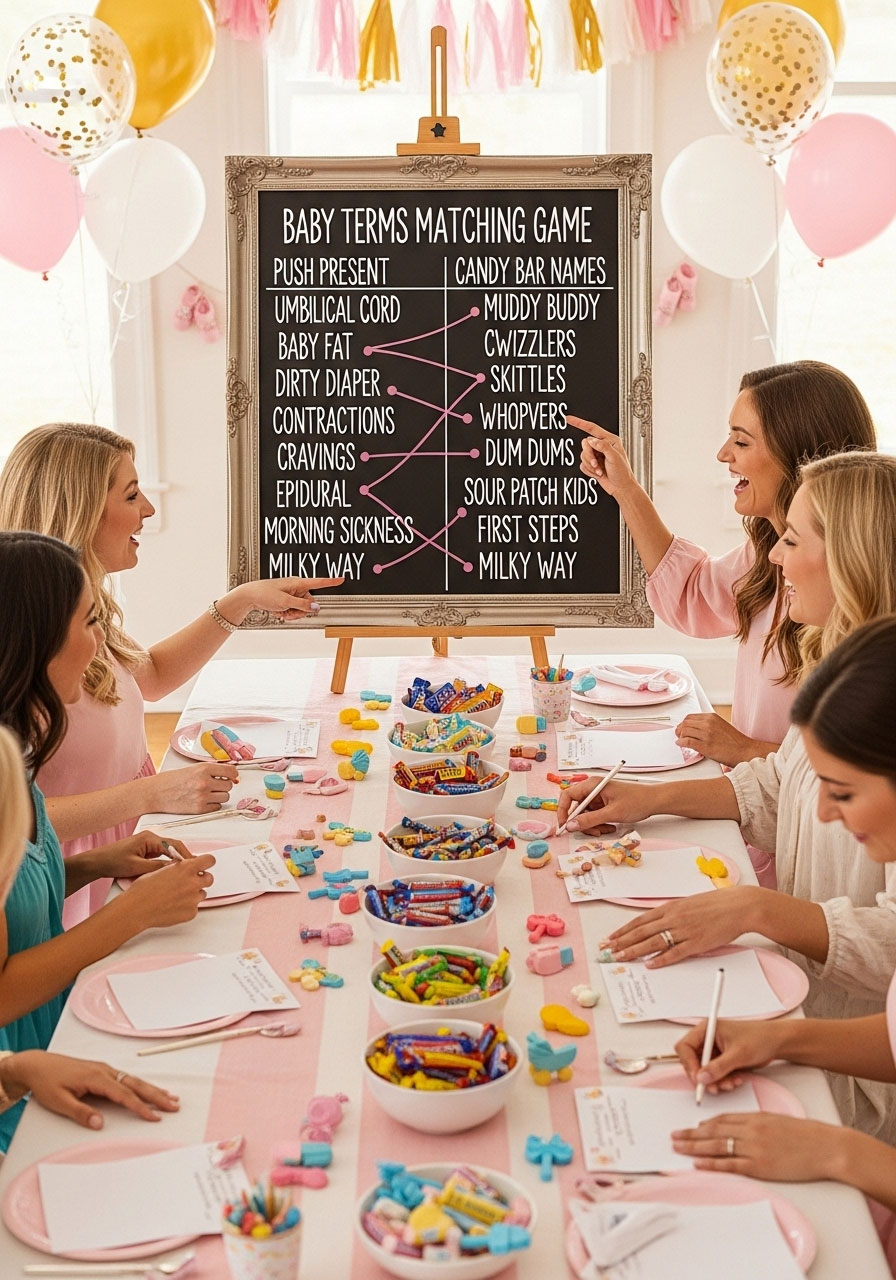
Test your guests’ candy knowledge with this funny matching game. Create a list of pregnancy or baby-related terms in one column and a list of candy bars in the other. Guests have to match them up (e.g., “Hospital Bills” = 100 Grand, “Baby’s Laugh” = Snickers, “Contractions” = Whoppers). It’s a guaranteed way to get everyone thinking and giggling.
69. The “Diaper Pong” Challenge

Bring a bit of friendly, competitive fun to the party with a game of “Diaper Pong”. Set up 10 large, open diapers on a table in a triangle formation (just like beer pong, but way cuter). Give guests ping pong balls and have them try to toss them into the diapers from a distance. You can even assign different point values to each diaper for an extra challenge.
70. Pretty Paper Straw Flags
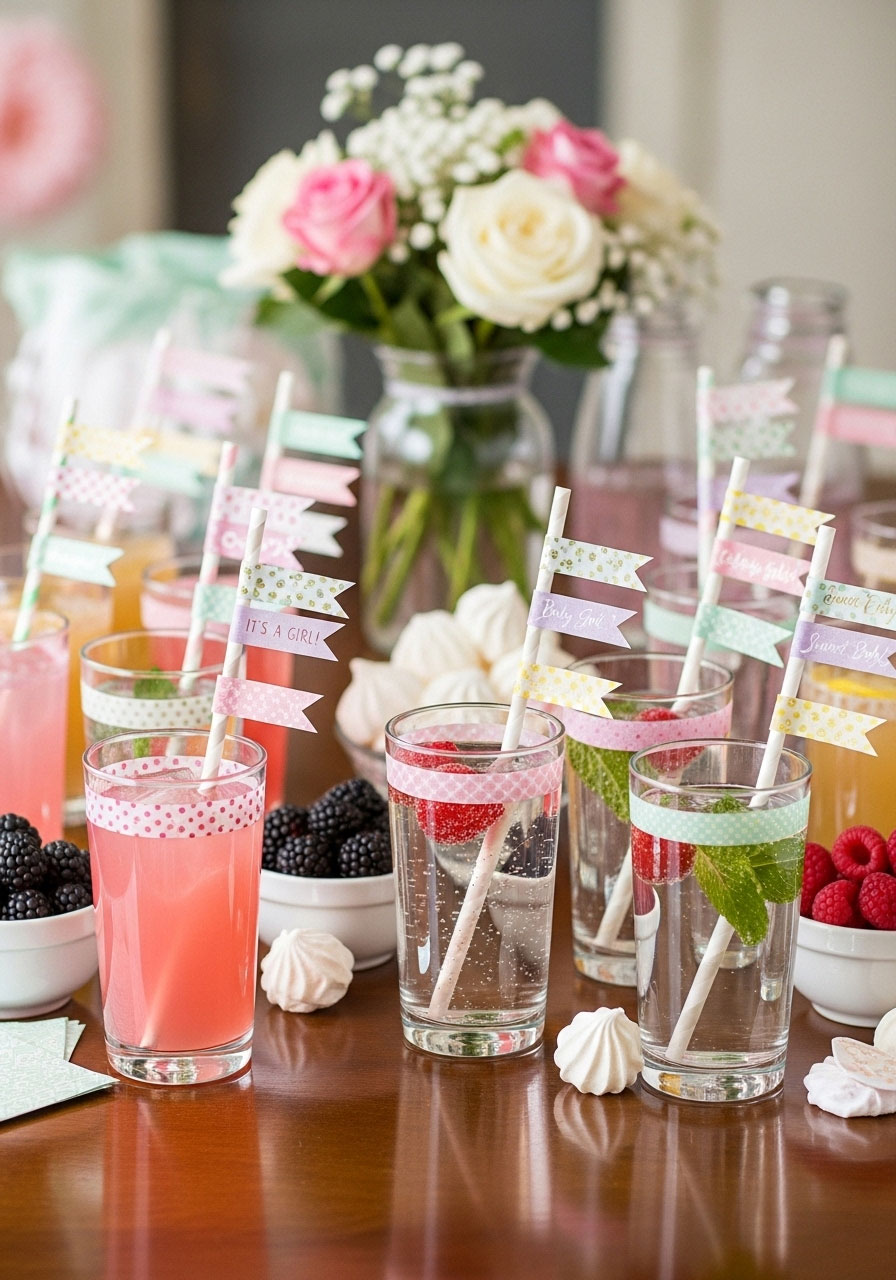
Add a tiny, festive touch to every drink with DIY straw flags. Simply take a small strip of cute, patterned washi tape and fold it around the top of a paper straw, trimming the end into a ‘v’ shape to create a miniature flag. It’s an easy, inexpensive detail that makes your drink station look perfectly polished and coordinated with your theme.
71. Mini Felt Diaper Favors

Send your guests home with the cutest little candy pouch they’ve ever seen. Cut small rectangles of pink or white felt, fold them up just like a miniature diaper, and secure the ‘tabs’ with a tiny safety pin. You can tuck a few chocolates, mints, or jelly beans inside for a sweet surprise that’s crafty, memorable, and perfectly on-theme.
72. The “Build a Library” Book Request
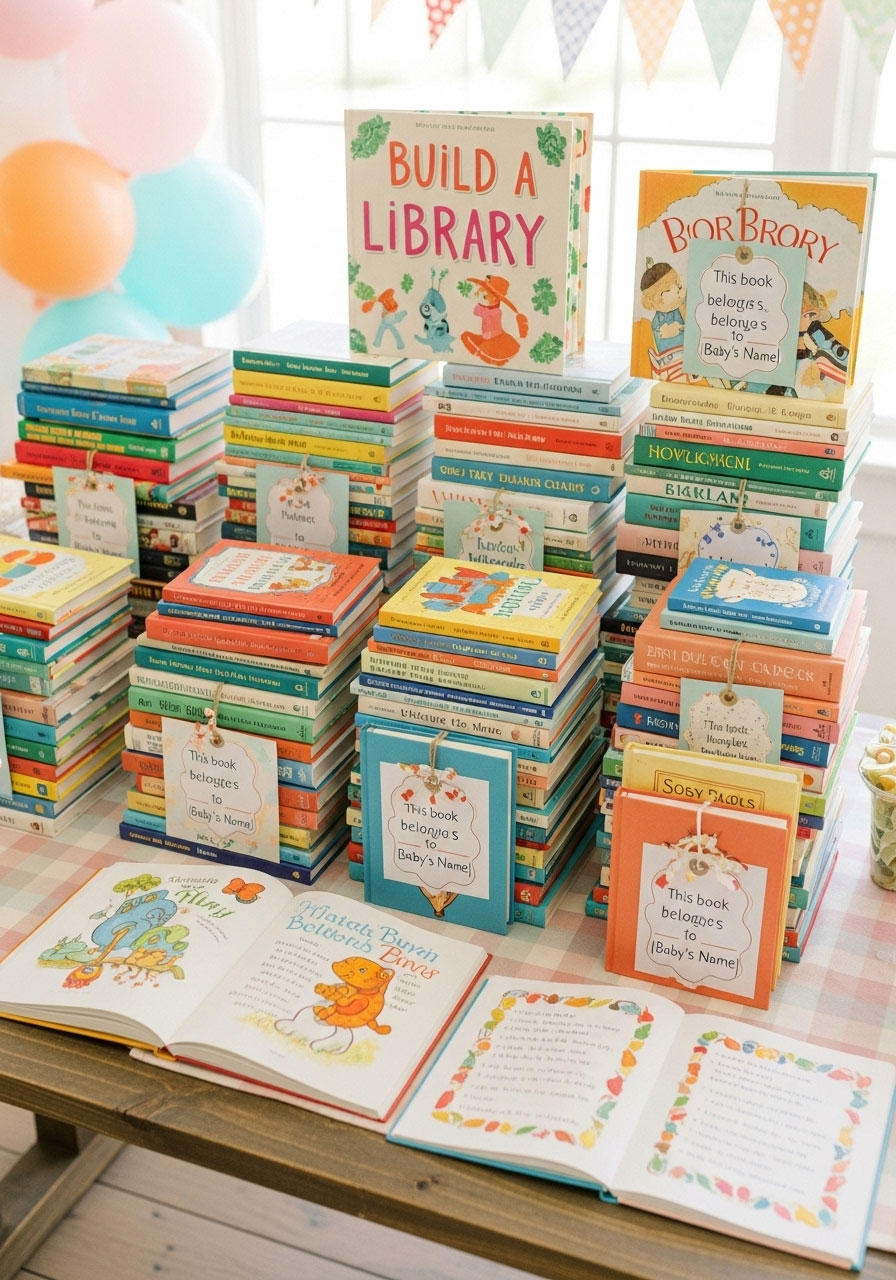
Help build the baby’s very first library with a simple and heartfelt request. Include a small note with your invitations asking guests to bring their favorite children’s book instead of a card, and to write a sweet message on the inside cover. It’s a beautiful way to give a meaningful gift that the family will read and treasure for years.
73. The “Don’t Cross Your Legs” Game

Here’s a hilarious twist on the classic clothespin game that everyone can play while sitting down. As guests arrive, give them a clothespin or a plastic diaper pin and announce that crossing their legs is forbidden for the entire party! Anyone who spots someone with their legs crossed gets to steal their pin. It’s a surprisingly tricky game that guarantees a lot of laughter.
74. A Special “Throne” for the Mom-to-Be

Make the mom-to-be’s seat the best in the house by creating a special “throne” for her. Simply tie long, trailing ribbons, strips of lace, and strands of pink tulle to the back of her chair. This no-fuss decoration makes her feel celebrated and creates the perfect, picture-ready spot for her to sit while opening her gifts.
75. “Guess the Baby Song” Challenge

Get your guests humming along with a fun ‘Guess the Baby Song’ challenge. Create a playlist of popular songs that have the word ‘baby’ in the title (like ‘…Baby One More Time’ or ‘Always Be My Baby’). Play just a 5-10 second snippet of each song, and have guests race to write down the correct song title and artist.
76. A “Build-a-Block” Keepsake Station
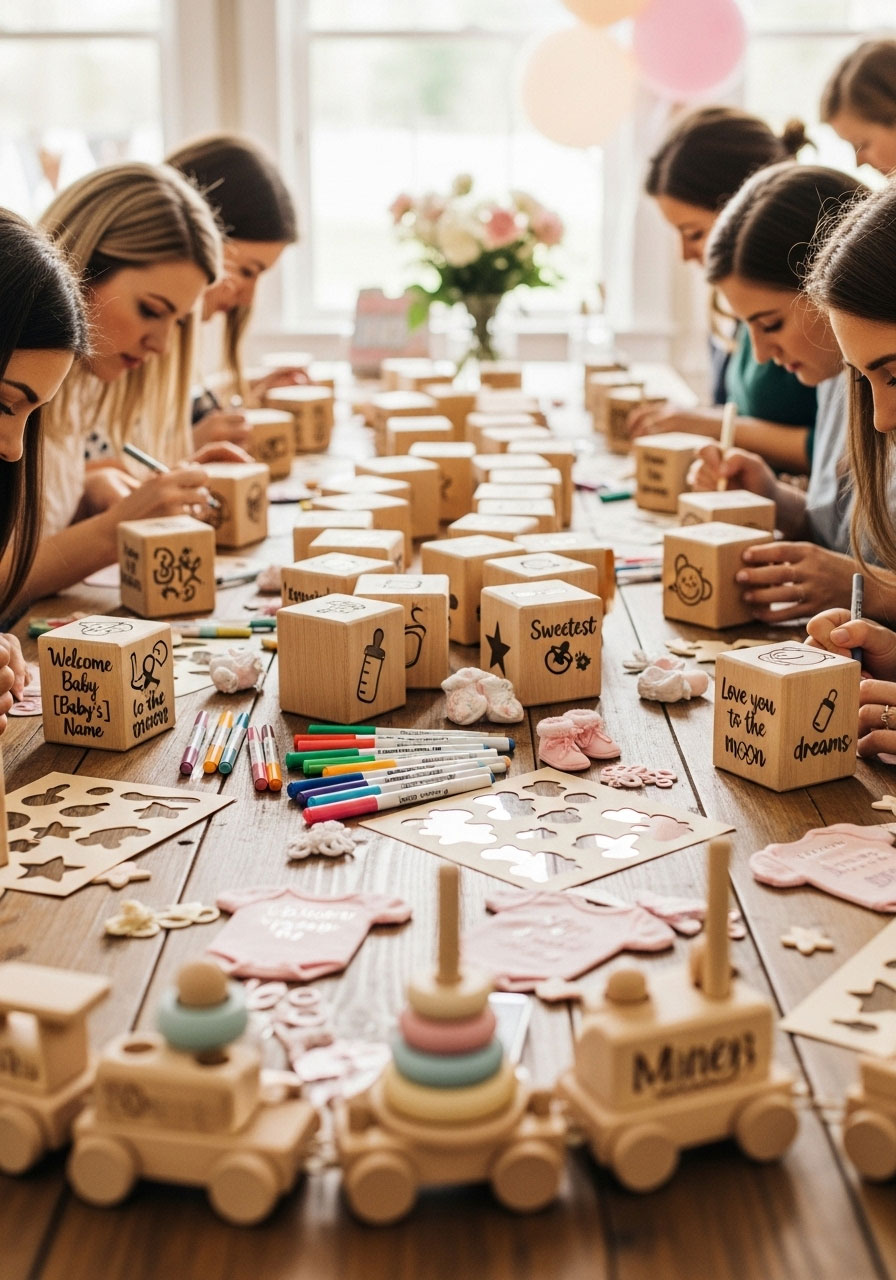
Create a timeless, personalized toy with a ‘Build-a-Block’ station. Set out a collection of plain wooden blocks and some colorful, non-toxic permanent markers. Each guest can decorate one or two sides of a block with a letter, a number, a simple drawing, or just their name. Together, you’ll create a one-of-a-kind block set full of love.
77. Interactive Confetti Bar

Add a little sparkle to the celebration with a DIY confetti bar. Set out bowls of different types of paper confetti, glitter, and sequins in your party’s colors, along with small bags or clear tubes. Guests can create their own custom confetti mix to toss for a fun photo op or to take home as a festive, shimmery party favor.
78. “Sweet as a Peach” Themed Treats

For a fresh and charming theme, go with “Sweet as a Peach”. This idea is all about the food! Decorate with pastel shades of peach and mint green, and serve peach-themed treats like peach iced tea, mini peach tarts, and a candy bar with peach-colored gummy candies. It’s a sweet, cohesive theme that’s both modern and timeless.
79. A Touch of Edible Glitter
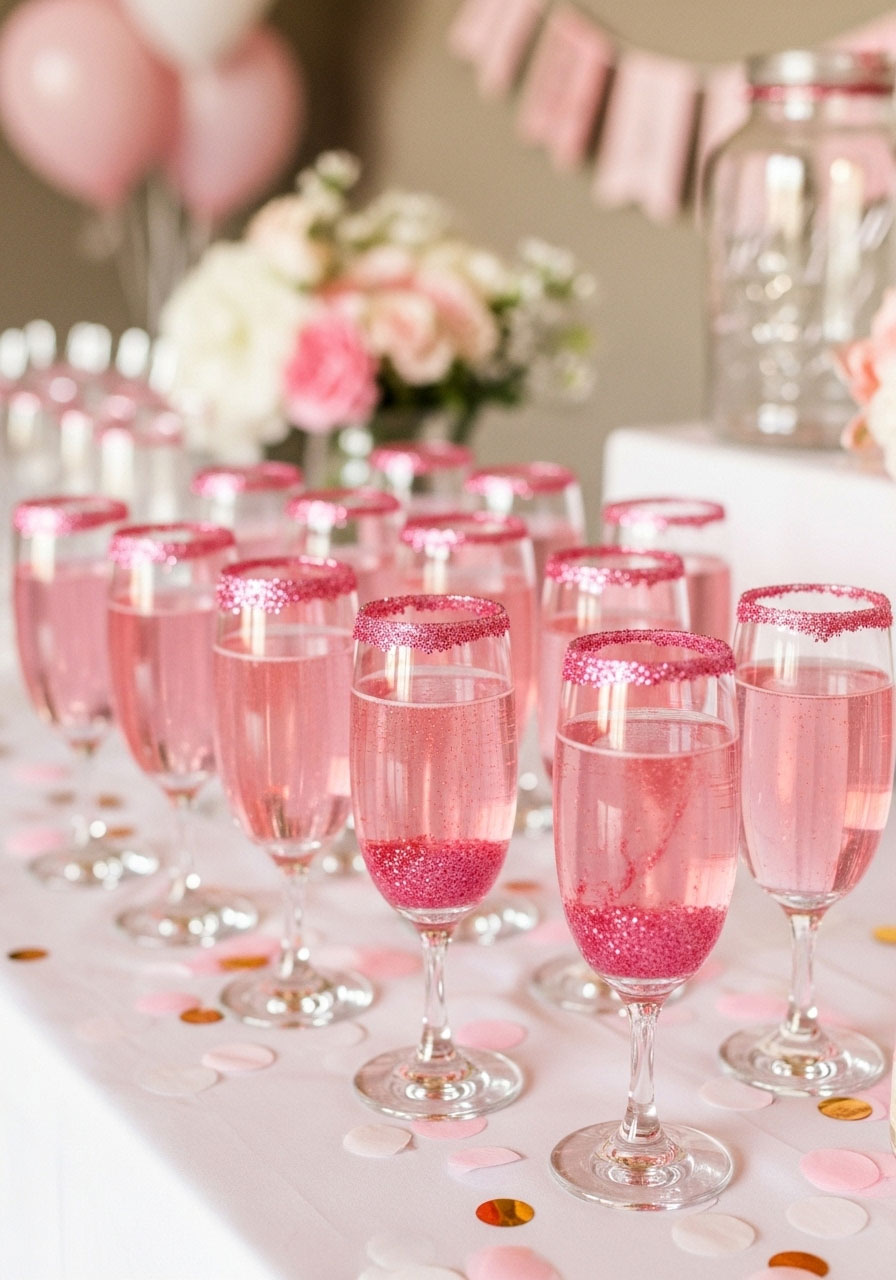
Give your drinks a magical, girly sparkle with a dash of edible glitter. You can buy it at most craft or baking supply stores. Simply rim your glasses with it or stir a tiny pinch into a clear beverage like sparkling cider or lemonade. This tiny, inexpensive detail is a total showstopper and makes every single sip feel like a special celebration.
