
So, you’re hosting a baby shower. Awesome! You’ve got the honor of celebrating a super-special mom-to-be. But let’s be real, between the Pinterest pressure and the party store price tags, the budget stress can get intense. You want to throw an epic party, not take out a second mortgage.
What if we told you the secret weapon to a stunning, fun-filled baby shower is hiding in plain sight at your local dollar store? That’s right. With a little creativity and our foolproof guide, you’re about to transform dollar-aisle finds into pure party gold. Get ready to host a bash that looks like a million bucks – your guests will be wowed, and your wallet will thank you. Let’s dive in!
1. The Epic Balloon Garland

Forget a few lonely balloons floating around. A balloon garland is a high-impact statement piece that screams “this is a special event!”
What You’ll Need: A ton of balloons in your chosen colors (at least 30-40), balloon decorating strip or string, and tape.
How to Make It:
- Blow up your balloons to various sizes – some big, some medium, some small. This is key for a professional look!
- Pull the knotted ends of the balloons through the holes in the decorating strip, alternating colors and sizes.
- If you don’t have a strip, tie small clusters of 3-4 balloons together with string, then tie those clusters onto one long central string.
- Hang your masterpiece behind the gift table or create a killer photo booth backdrop.
Pro Tip: Grab some faux greenery or flowers from the dollar store and poke them into the gaps in your garland to make it look extra luxe.

2. The Diaper Cake Centerpiece

This isn’t just décor; it’s also a super practical gift the parents-to-be will absolutely love. It’s the ultimate win-win!
What You’ll Need: A pack of diapers, rubber bands (small and large), and wide ribbon in your party’s theme colors.
How to Make It:
- Tightly roll each diaper and secure it with a small rubber band.
- Bundle a group of rolled diapers together to form your bottom “cake” layer and secure the whole thing with a large rubber band.
- Create two more, progressively smaller layers.
- Stack the layers and wrap each one with a wide ribbon to hide the rubber bands.
Pro Tip: Top your cake with a cute dollar store find, like a rubber ducky, a pair of baby booties, or a small stuffed animal.
3. Faux-Luxe Floral Arrangements

Every party needs a touch of green. Skip the pricey florist and create your own gorgeous arrangements that will last forever.
What You’ll Need: A variety of glass vases, jars, and bottles from the dollar store, plus a selection of their faux flowers and greenery.
How to Make It:
- Grab a mix of container shapes and sizes for visual interest.
- Trim the stems of the faux florals to fit your vases.
- Arrange small bouquets and place them on the food table, gift table, and anywhere else that needs a pop of color.
Pro Tip: For a chic, modern look, grab a can of gold or white spray paint and give a few of the glass vases a quick coat before adding your flowers.
4. The Ultimate Candy Buffet
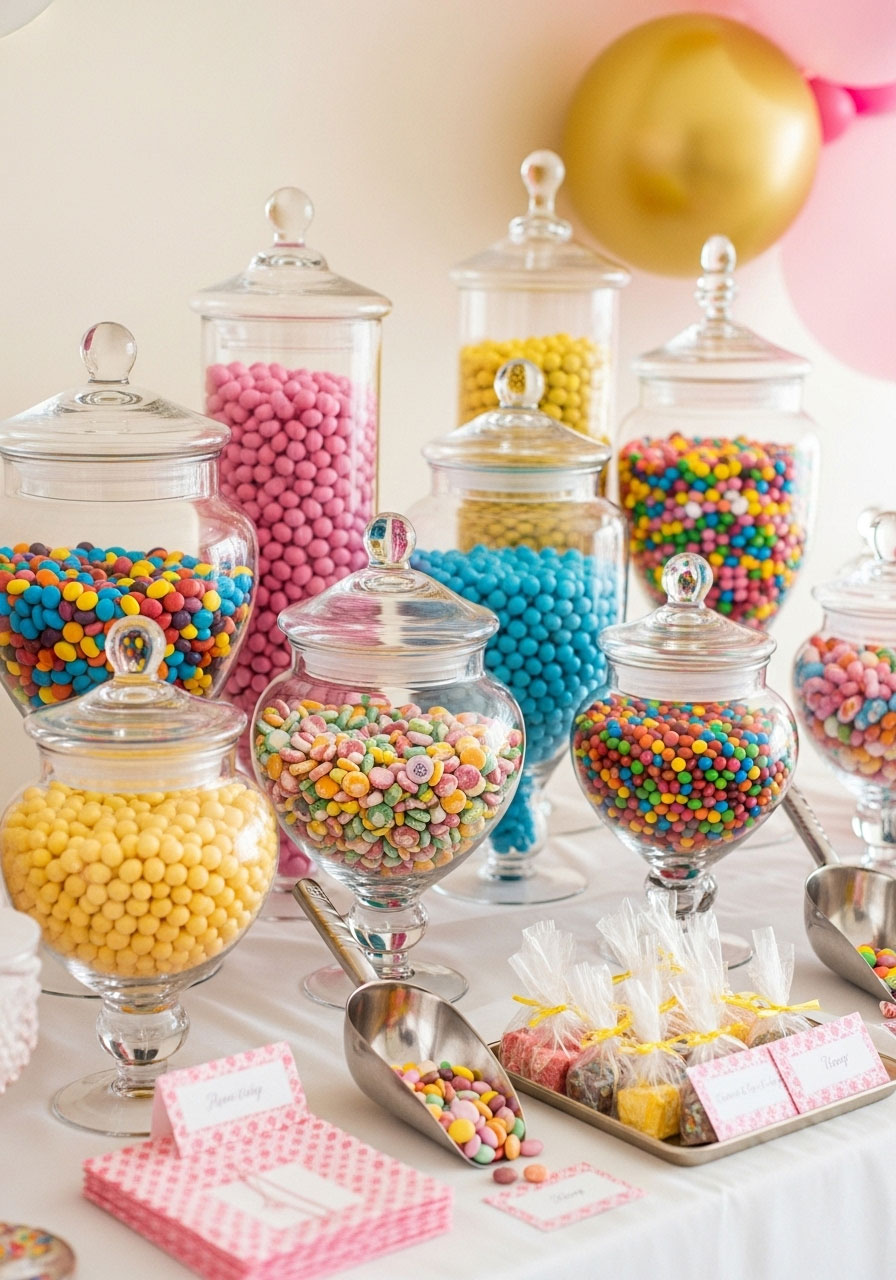
A candy bar is pure interactive fun. Guests love filling up a little bag with treats to take home as a party favor.
What You’ll Need: A variety of glass jars and containers with lids, scoops, small cellophane favor bags, and lots of candy in your theme colors (pinks, blues, yellows, greens).
How to Set It Up:
- Fill each jar with a different type of candy.
- Arrange the jars at different heights to create a dynamic display.
- Set out the scoops and favor bags and let guests go to town!
Pro Tip: Print out some cute, free labels online for your jars to give the buffet a custom, polished look.
5. The “Gourmet” Chip & Dip Station
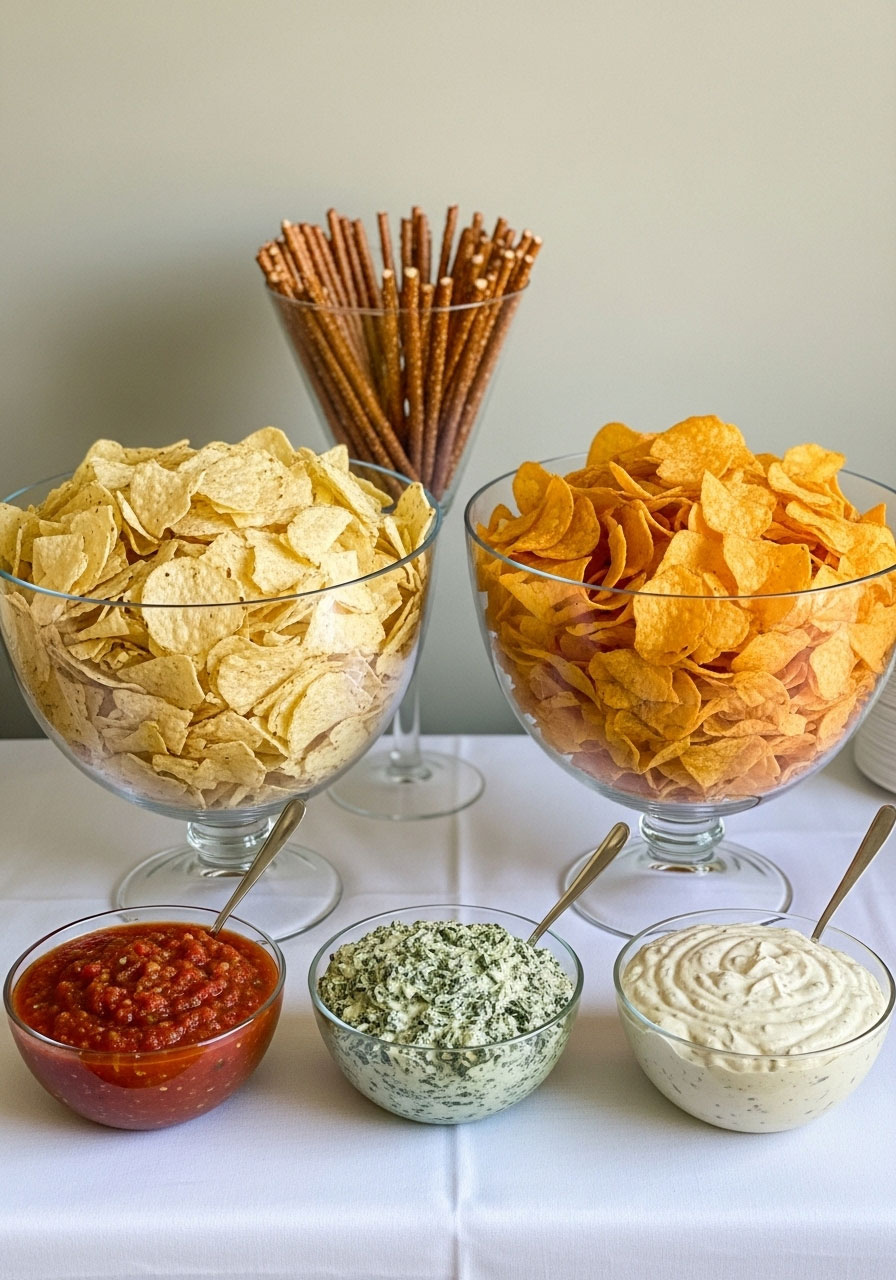
Everyone loves chips and dip. Elevate this party staple from a bag on the counter to a full-blown snack station.
What You’ll Need: Several large plastic or glass bowls, a variety of chips (tortilla, potato, pretzels), and dips.
How to Set It Up:
- Pour each type of chip into its own big bowl.
- Score pre-made salsa and other dips from the dollar store, or whip up a quick crowd-pleaser like a hot spinach dip.
- Serve the dips in smaller matching bowls for a clean, cohesive look.
6. Don’t Say “Baby”!
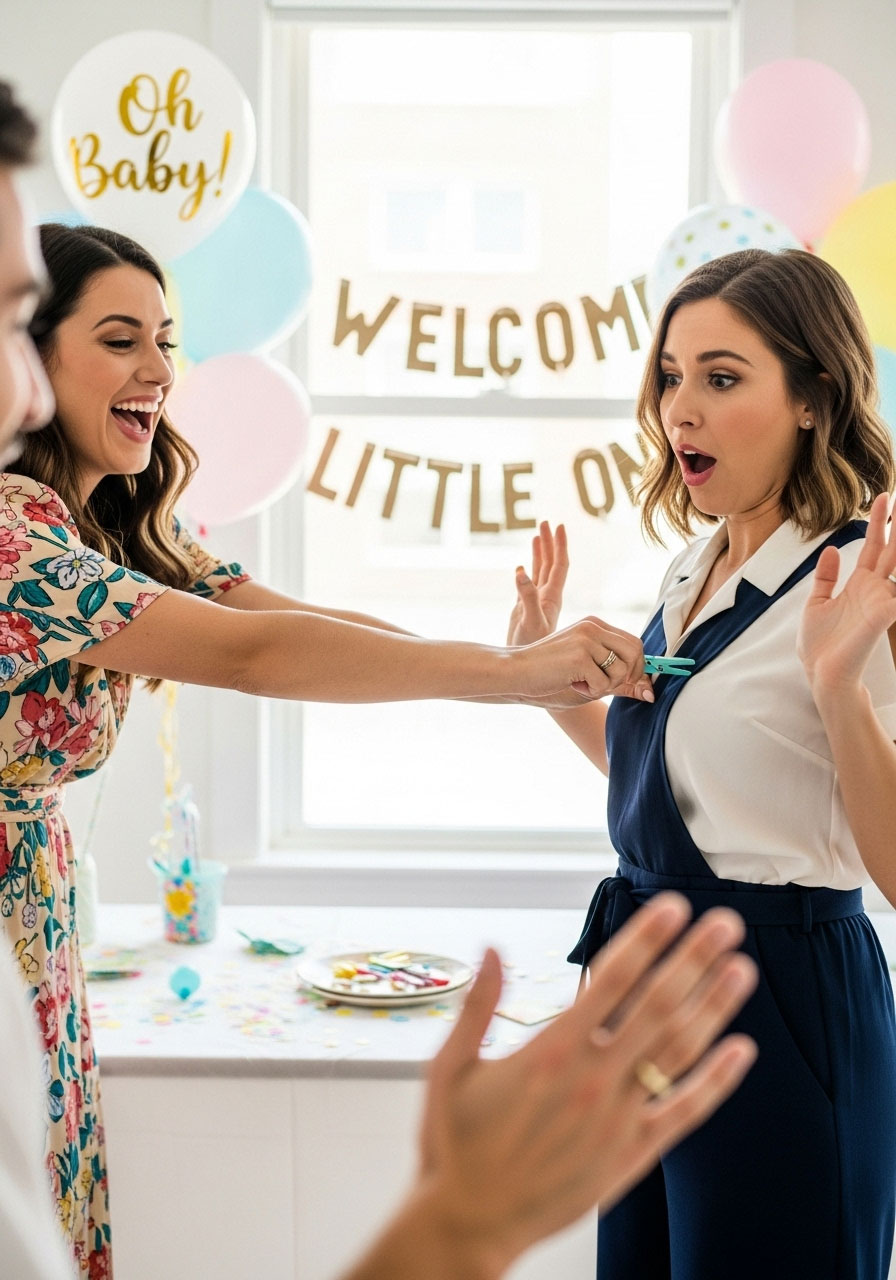
This game runs for the whole party and turns normal conversation into a hilarious minefield. It’s the perfect icebreaker to get guests talking from the moment they arrive.
Best for: Icebreakers, getting guests to mingle.
Time to Play: The entire duration of the shower.
Players: Everyone!
What You’ll Need: A pack of clothespins or diaper pins from the dollar store.
How to Play:
- As each guest arrives, give them one clothespin to clip onto their shirt.
- Explain the one forbidden word: “BABY”.
- If a guest hears someone else say the word, they get to steal that person’s clothespin.
- At the end of the party (or right before opening gifts), the person who has collected the most pins wins!
Pro Tip: Announce a reminder about the game halfway through the party to reignite the competition.
7. How Big is Mommy’s Belly?

This is a classic for a reason! It’s a quick, simple, and funny way to put the mom-to-be right in the spotlight.
Best for: A quick and easy laugh, all ages.
Time to Play: 5-10 minutes.
Players: The whole group.
What You’ll Need: A ball of yarn or string and a pair of scissors (all available at the dollar store).
How to Play:
- Pass the ball of yarn and the scissors around the room.
- Each guest must cut a piece of yarn to the length they think will fit perfectly around the mom-to-be’s belly. No measuring on the mom allowed!
- Once everyone has their piece, have each guest bring their string up to the guest of honor and wrap it around her belly.
- The person whose string fits the best (or comes the closest without going over) wins the prize!
8. The Mystery Baby Bag
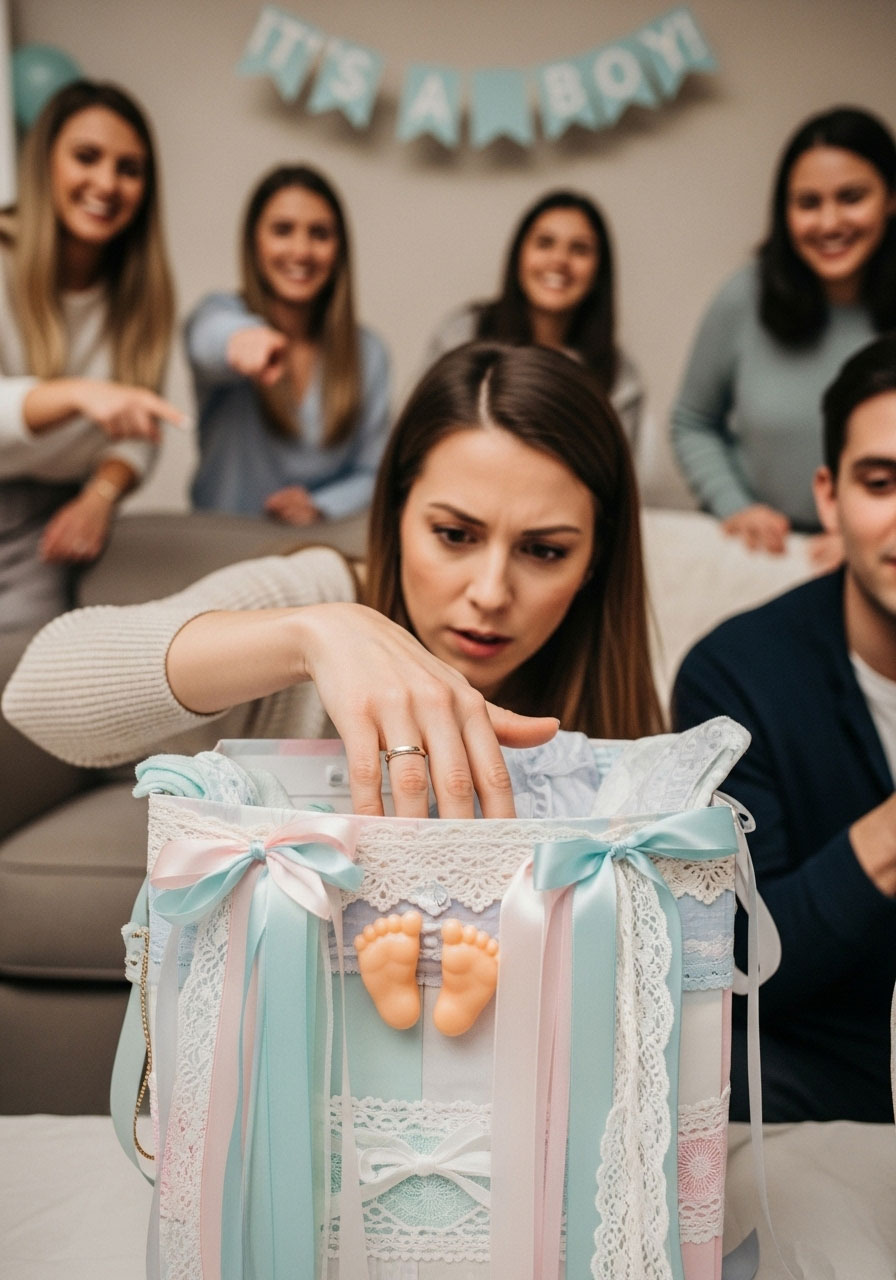
Get ready to test your guests’ baby gear knowledge! This tactile guessing game is way more fun – and challenging – than it sounds.
Best for: Groups of any size, a simple tabletop game.
Time to Play: 10-15 minutes.
Players: Everyone.
What You’ll Need: A non-see-through gift bag, pen and paper for each guest, and 10-15 common baby items from the dollar store (e.g., a pacifier, bib, rattle, baby socks, teething ring, bottle).
How to Play:
- Place all the baby items inside the bag before the guests arrive.
- Give each guest a pen and paper.
- Pass the bag around the circle. Each person gets about 30 seconds to stick their hand inside (no peeking!) and feel the objects.
- Guests write down as many items as they can identify.
- After the bag has made it all the way around, reveal the items one by one. The guest with the most correct guesses wins!
9. The Streamer Spectacular Photo Wall

A blank wall is a sad wall. Turn it into the party’s main event with a ridiculously easy and cheap streamer backdrop. It’s the perfect spot for guests to snap pics with the mom-to-be.
What You’ll Need: Streamers in 3-4 theme colors, tape, and a pair of scissors.
How to Make It:
- Cut long, equal lengths of your streamers (long enough to go from the ceiling to the floor).
- Tape the top of the streamers to the wall in a repeating color pattern.
- For a fun twist, take every other streamer and give it a few twists before taping the bottom to the floor to create a cool spiral effect.
Pro Tip: Add a few balloons or a dollar store “Oh Baby!” banner over the top of the streamers to complete the look.
10. Dressed-Up Dining Tables
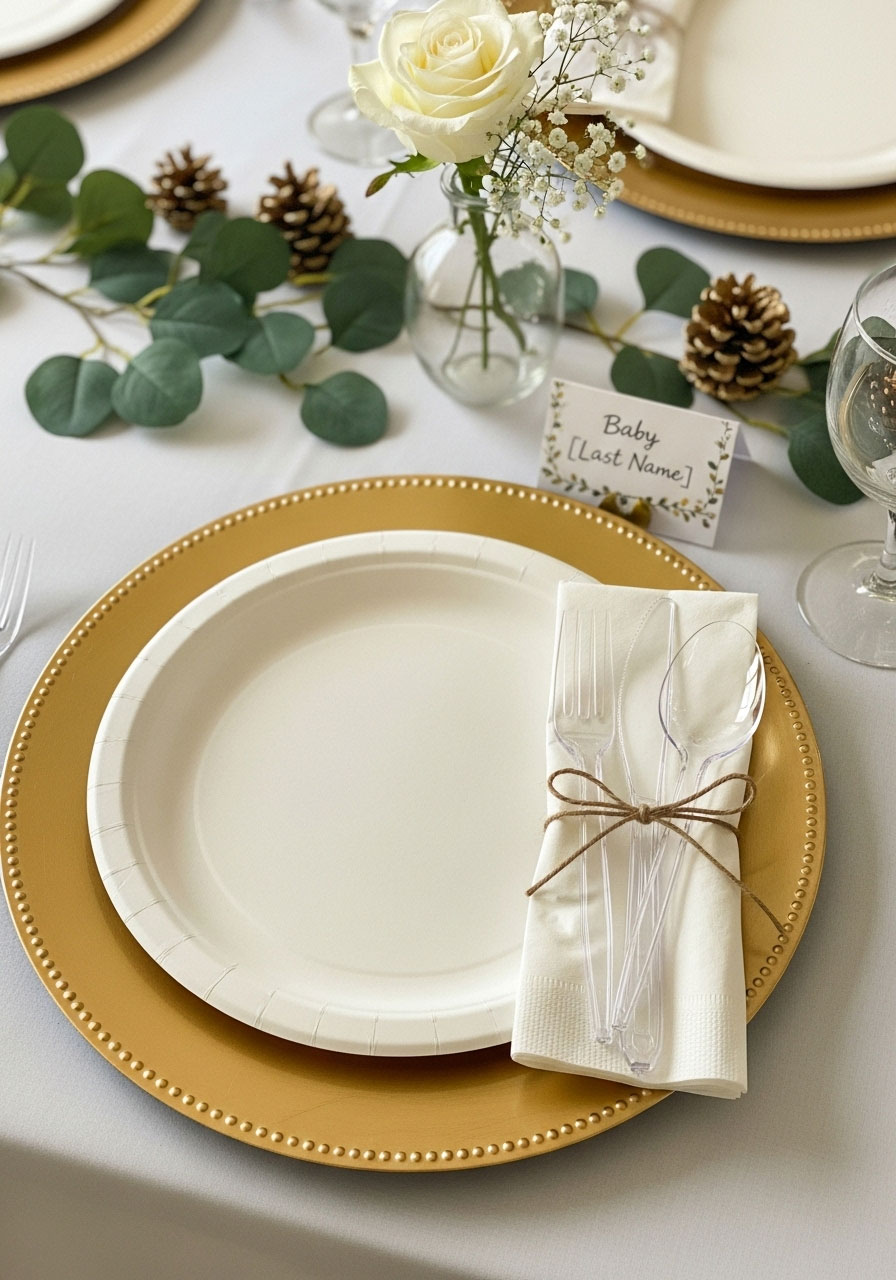
Paper plates and plastic cutlery can look a little… basic. But not on your watch! A few simple additions will make your tablescape look intentional and chic.
What You’ll Need: Solid color paper plates, plastic cutlery, paper napkins, and decorative ribbon or twine. For bonus points, grab some plastic chargers (often in gold or silver).
How to Set It Up:
- Place a charger at each setting. This instantly elevates the entire look.
- Put your paper plate on top of the charger.
- Bundle a fork, spoon, and knife together, wrap a napkin around them, and tie the bundle with a piece of ribbon or twine. It’s a small detail with a huge impact.
11. The Easiest Custom Banner

Personalize your space in minutes. This is your chance to shout out the mom-to-be or share a cute baby-themed message.
What You’ll Need: A pack of plain paper doilies (or cardstock cut into circles/triangles), letter stickers, and a long piece of twine or ribbon.
How to Make It:
- Use the letter stickers to spell out your message, placing one letter on each doily (e.g., “SWEET BABY GIRL”).
- Fold the top edge of each doily over the twine and secure it with a dab of glue or a piece of tape.
- Space the letters out evenly and hang your custom banner for all to see!
12. The Price is Right: Baby Edition!

Who has the best handle on the cost of baby gear? This game is a reality check for some and a moment of glory for seasoned parents. It’s fast, fun, and super competitive.
Best for: A quick game, sparking conversation.
Time to Play: 10-15 minutes.
Players: The whole group, individually or in teams.
What You’ll Need: 5-7 common baby items from the dollar store (think diapers, wipes, baby powder, a bottle, etc.), paper, and pens for each guest.
How to Play:
- Display all the baby items on a table for everyone to see. Keep the receipt hidden!
- Give each guest a sheet of paper and have them write down what they think the total cost of all the items is.
- Once everyone has their guess locked in, reveal the actual price of each item one by one and announce the grand total.
- The guest who guessed closest to the actual total without going over is the winner!
13. Guess the “Gourmet” Baby Food
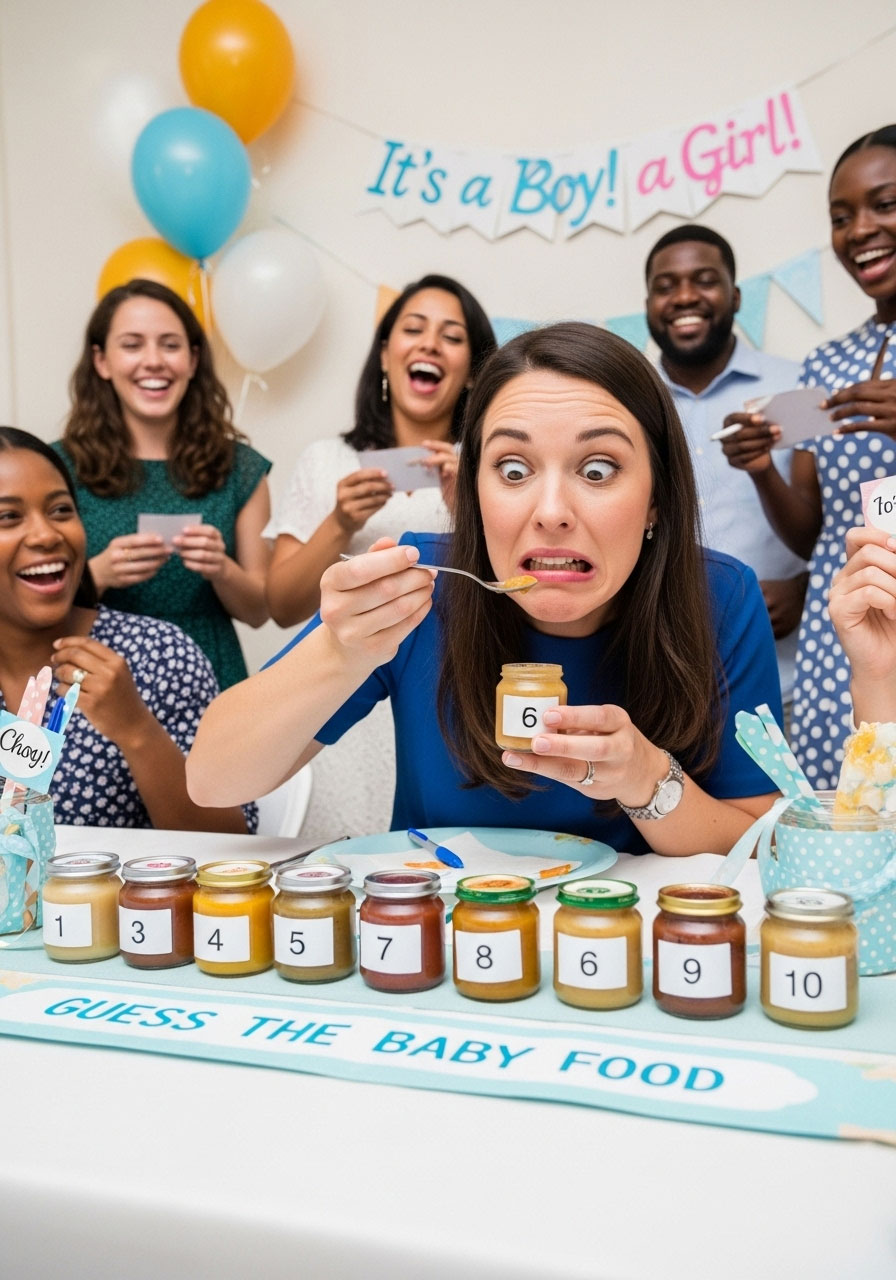
Get ready for some truly hilarious faces! This is the ultimate taste-test challenge where guests have to identify mystery mush. It’s a little gross, a little funny, and 100% memorable.
Best for: Getting huge laughs, adventurous groups.
Time to Play: 15 minutes.
Players: Everyone who is brave enough.
What You’ll Need: 5-7 jars of different baby foods (make sure to get a mix of sweet and savory!), spoons for everyone, paper, and pens.
How to Play:
- Remove the labels from the baby food jars. Use a marker to number the bottom of each jar.
- Keep a separate piece of paper with the corresponding number and flavor for yourself.
- Give each guest a sheet of paper and a spoon.
- Pass the first jar around and have everyone take a tiny taste (or even just a sniff!). They then write down their guess for what flavor it is.
- Continue with all the jars. At the end, reveal the correct flavors and see who has the most sophisticated baby-food-palate!
14. “Ready to Pop” Popcorn Favors

This favor is the king of puns! It’s a cute, easy, and edible thank you for your guests.
What You’ll Need: A bag of popcorn kernels, small cellophane bags, ribbon, and paper for tags.
How to Assemble:
- Fill each cellophane bag with a single serving of popcorn kernels.
- Tie each bag closed with a pretty ribbon.
- Attach a small tag that says, “Thanks for popping by!” or “Ready to Pop!”
15. The Spa-in-a-Jar
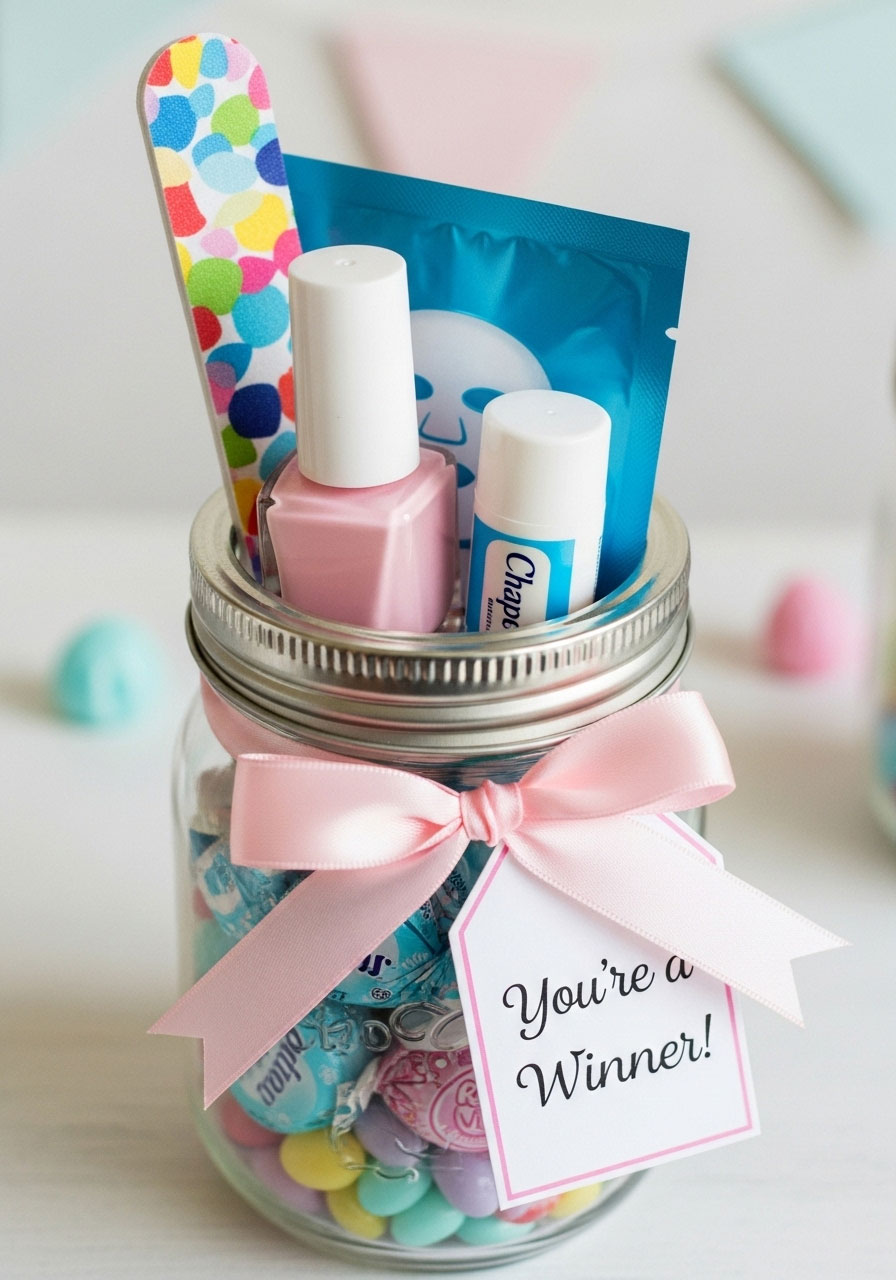
Everyone loves a little pampering. This DIY prize looks incredibly thoughtful and can be assembled entirely from dollar store finds.
What You’ll Need: A mason jar or other cute glass jar, nail polish, a nail file, a chapstick, a face mask, and some candy or a tea bag.
How to Assemble:
- Carefully arrange all the items inside the jar. It’s like a mini gift basket!
- Tie a ribbon around the top and add a tag that says, “A little treat for you!”
- Award it to a lucky game winner who will be seriously impressed with their prize.
16. The Onesie Decorating Station

Unleash your guests’ inner artists! This isn’t just an activity; it’s a way to create a collection of adorable, one-of-a-kind onesies for the new baby. Plus, every time the baby wears one, the parents will think of a friend.
What You’ll Need: A pack of plain white onesies (you may need to source these from a craft or department store, but they’re inexpensive!), fabric markers or non-toxic permanent markers from the dollar store’s craft aisle, and a few pieces of cardboard.
How to Set It Up:
- Set up a dedicated table for the craft station.
- Lay out the markers and onesies.
- Place a piece of cardboard inside each onesie before decorating to prevent the markers from bleeding through.
- Leave a little sign that says “Design a Bodysuit for the Best Dressed Baby!” and let your guests’ creativity run wild.
Pro Tip: For less artistic crowds, grab a few simple stencils from the craft aisle to help guide their designs.
17. The Signature Guest Book Frame
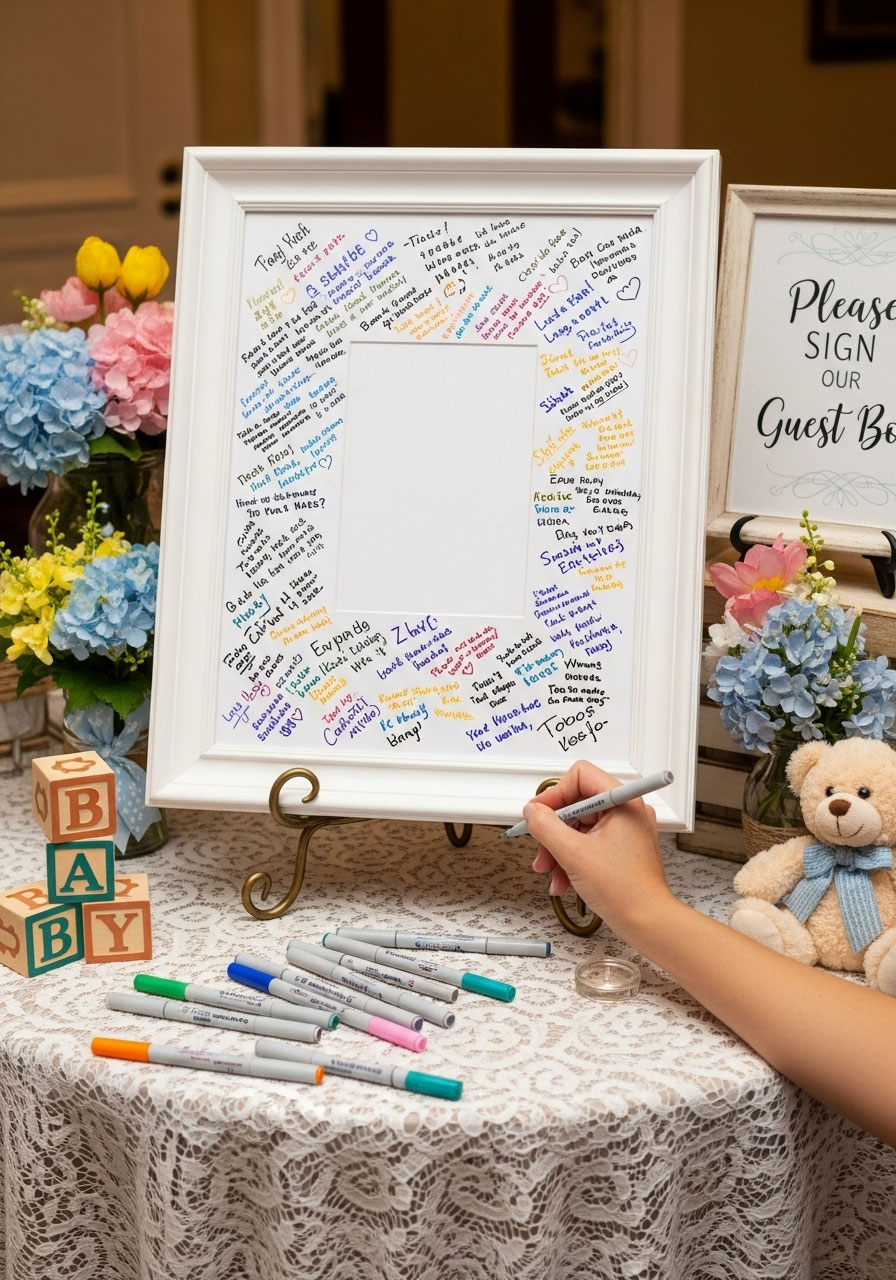
A traditional guest book is sweet, but it often ends up in a box. Create a piece of art the new parents can actually hang in the nursery!
What You’ll Need: A simple picture frame (8×10 or larger) with a wide white mat inside, and a few fine-tipped permanent markers.
How to Set It Up:
- Remove the glass from the frame and set it aside. Place the frame with just the mat on a welcome table.
- Leave a sign instructing guests: “Please sign the mat for Baby [Last Name]! Your sweet wishes will hang in the nursery”.
- After the party, the host can add a beautiful maternity photo or one of the first baby pictures to the frame before putting the glass back on. It’s a heartfelt gift and keepsake in one.
18. The “Mom-mosa” Bar (Baby-Friendly!)
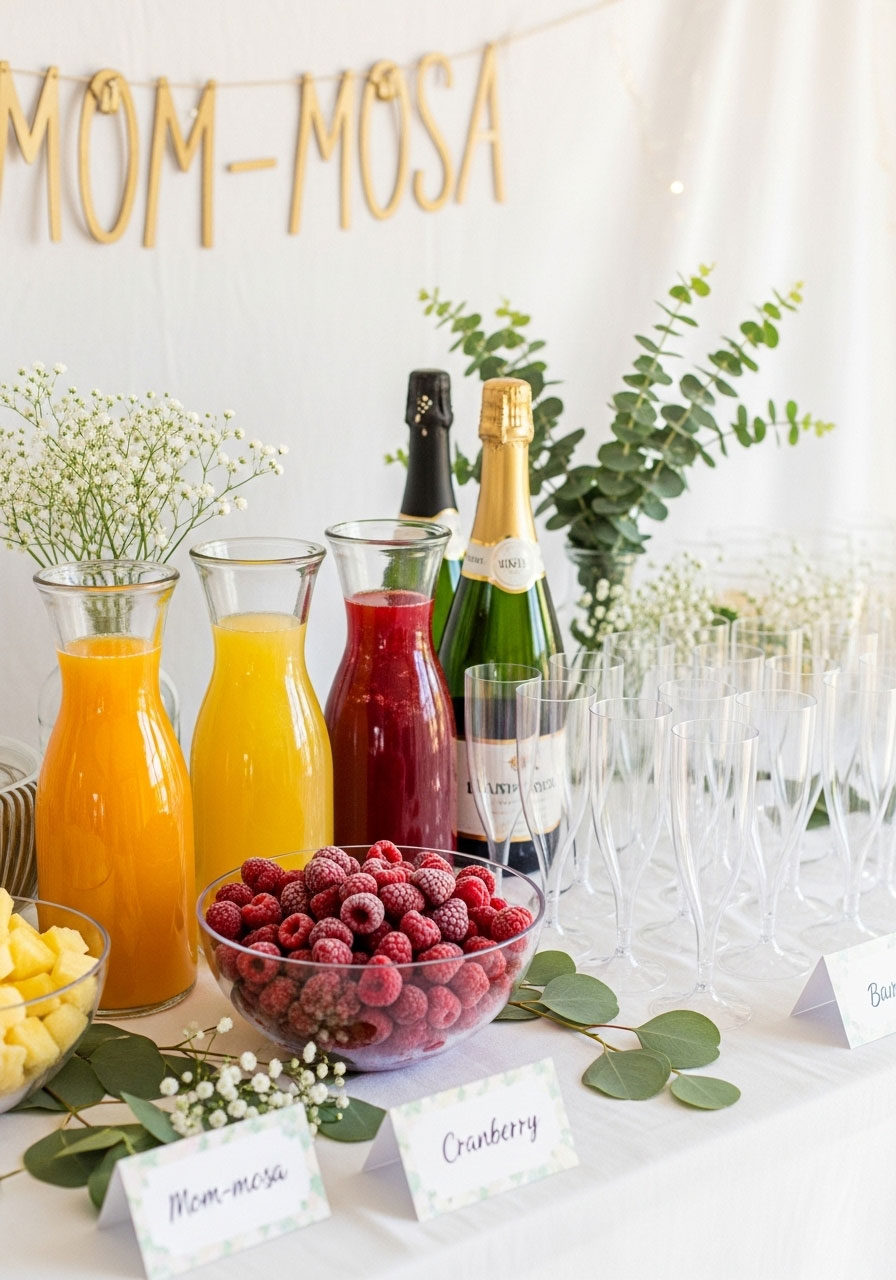
Who doesn’t love a fancy drink? This non-alcoholic mimosa bar is a fun, interactive station that makes everyone feel a little fancy.
What You’ll Need: Plastic champagne flutes, a few different kinds of fruit juice (orange, cranberry, pineapple), a bottle of sparkling white grape juice or ginger ale, and some frozen fruit like raspberries or blueberries for garnish.
How to Set It Up:
- Pour each type of juice into a separate glass carafe or pitcher (also at the dollar store!).
- Put the frozen fruit into a small, cute bowl.
- Line up the sparkling cider, juices, fruit, and flutes so guests can create their own custom “Mom-mosa” concoctions.
19. Baby Animal Match-Up
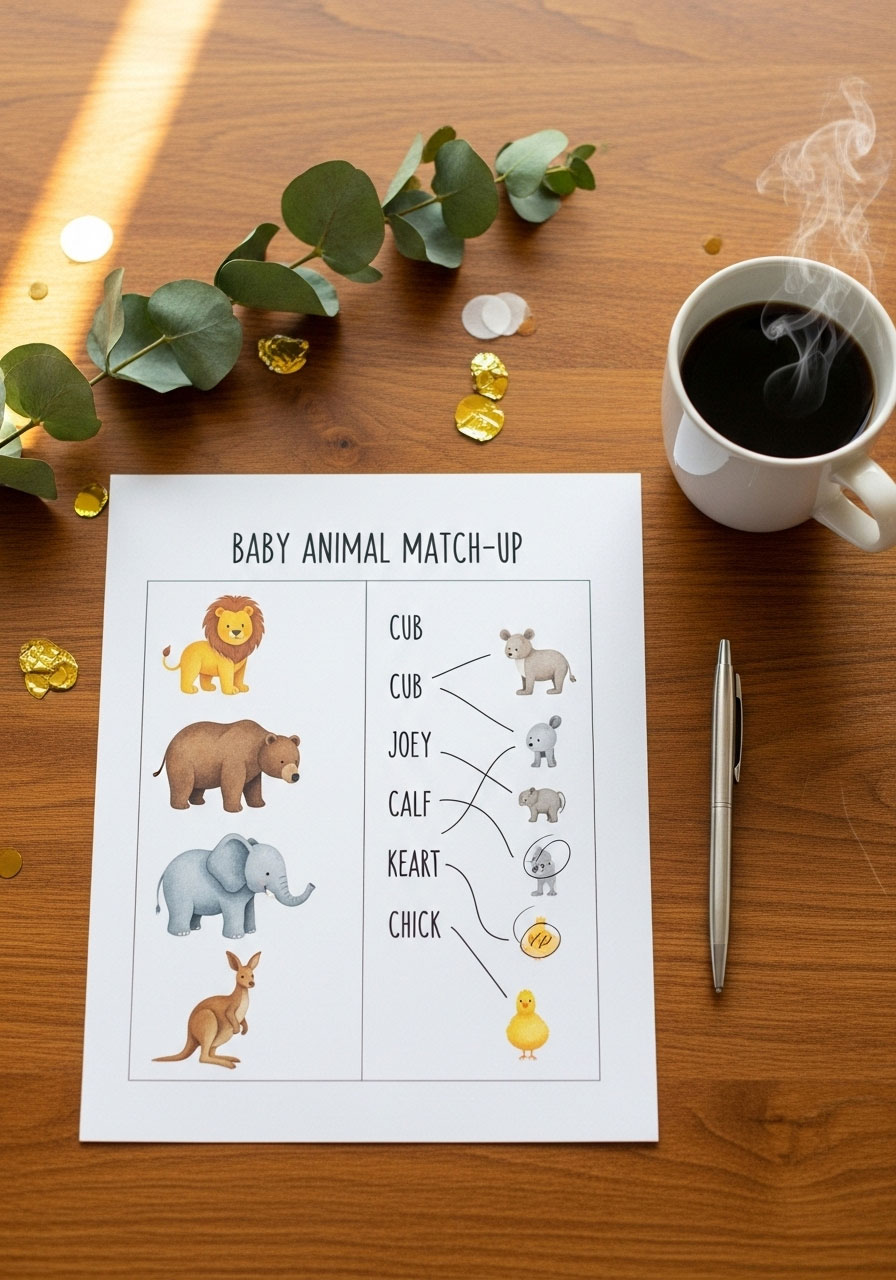
Time for a brain teaser! This simple pen-and-paper game is a low-key challenge that will get guests thinking. It’s the perfect game to play while people are snacking.
Best for: A calm activity, all ages.
Time to Play: 5-10 minutes.
Players: The whole group.
What You’ll Need: Pre-made game sheets (you can find tons of free printables online!) or DIY versions on index cards, and pens for everyone.
How to Play:
- The game sheet will have a list of adult animals in one column (e.g., Cat, Dog, Sheep) and a jumbled list of their corresponding baby names in another column (e.g., Lamb, Kitten, Puppy).
- Hand out the sheets and give everyone three minutes to match as many parent-and-baby pairs as they can.
- When time is up, read the correct answers aloud. The person with the most correct matches wins!
Fun Variation: Make it a team effort! Have tables work together to fill out one sheet, turning it into a collaborative icebreaker.
20. The Diaper Raffle
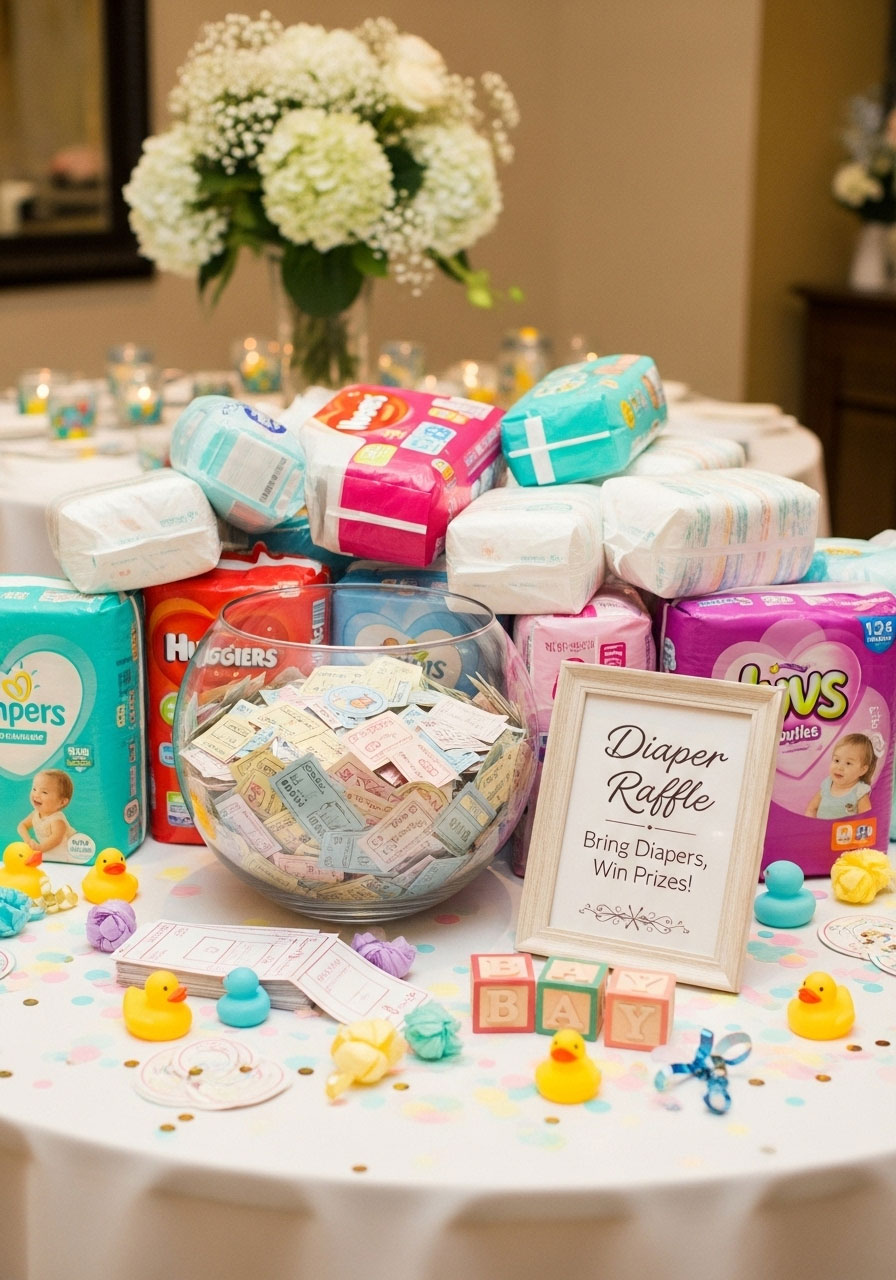
This isn’t just an activity; it’s a legendary hack for helping the parents-to-be stock up on the #1 thing they’ll need: diapers! The incentive? One lucky guest will win an awesome grand prize.
How to Set It Up:
- On the baby shower invitation, include a little note: “Bring a pack of diapers of any size for a chance to win a special prize!”
- As guests arrive with their diapers, give them one raffle ticket for each pack they brought.
- Near the end of the party, draw one ticket from the bowl and announce the lucky winner of your grand prize!
Pro Tip: Assemble a “Movie Night” or “Coffee Lover’s” basket using only dollar store goodies as the grand prize. It looks impressive and keeps the entire event perfectly on budget.
21. What’s in Your Purse?

This is the ultimate no-prep, zero-cost game that delivers guaranteed laughs. It’s a fast-paced scavenger hunt where guests dig through their purses to find common (and not-so-common) items. You’ll be shocked at what people carry around!
Best for: A last-minute game, high-energy fun.
Time to Play: 10 minutes.
Players: The whole group.
What You’ll Need: A pre-made list of items and a point system (you can find these online or make one up!), a pen for the host. Absolutely nothing from the dollar store is needed!
How to Play:
- Have your guests get their purses ready.
- As the host, call out items one by one from your list. Start with simple things (“a lipstick,” “a credit card”) and get progressively weirder (“a safety pin”, “a toy car”, “a single stray earring”).
- Assign points to each item. Common items are worth 1 point, while rare finds are worth 5 or 10.
- Guests shout out when they have an item and hold it up for proof. They tally their own points.
- The person with the most points at the end wins a prize for being the most prepared person in the room!
22. The “Wishes for Baby” Jar

Here’s another heartwarming activity that becomes a precious keepsake. Guests get to share their wisdom, hopes, and funny advice for the baby and the new parents.
What You’ll Need: A large glass jar, slips of colorful paper or small note cards, pens, and a small decorative sign.
How to Set It Up:
- Decorate the jar with a ribbon. Place it on a table with the slips of paper and pens.
- Create a small sign that says, “Share Your Wishes for the Baby!”
- Guests can write down a piece of advice, a happy memory, or a sweet hope for the baby’s future and place it in the jar.
- After the party, give the jar to the parents-to-be. They can read the notes for a pick-me-up during those late-night feedings.
Pro Tip: Use dollar store popsicle sticks instead of paper for a unique twist. Guests can write their wishes on the sticks and drop them in the jar.
23. Hilarious “Dirty Diaper” Treats

Want to get a guaranteed giggle out of your guests? This food hack is slightly gross, totally hilarious, and fits the baby theme perfectly.
What You’ll Need: A tube of crescent roll dough, and mini chocolate bars (like Snickers or Milky Way).
How to Make Them:
- Unroll the crescent dough and separate the triangles.
- Place a mini chocolate bar at the wide end of each triangle.
- Roll them up and pinch the sides to look like a little diaper.
- Bake according to the package directions. The chocolate will melt inside, creating the “dirty diaper” surprise when a guest bites in!
24. The Cutest Card Clothesline
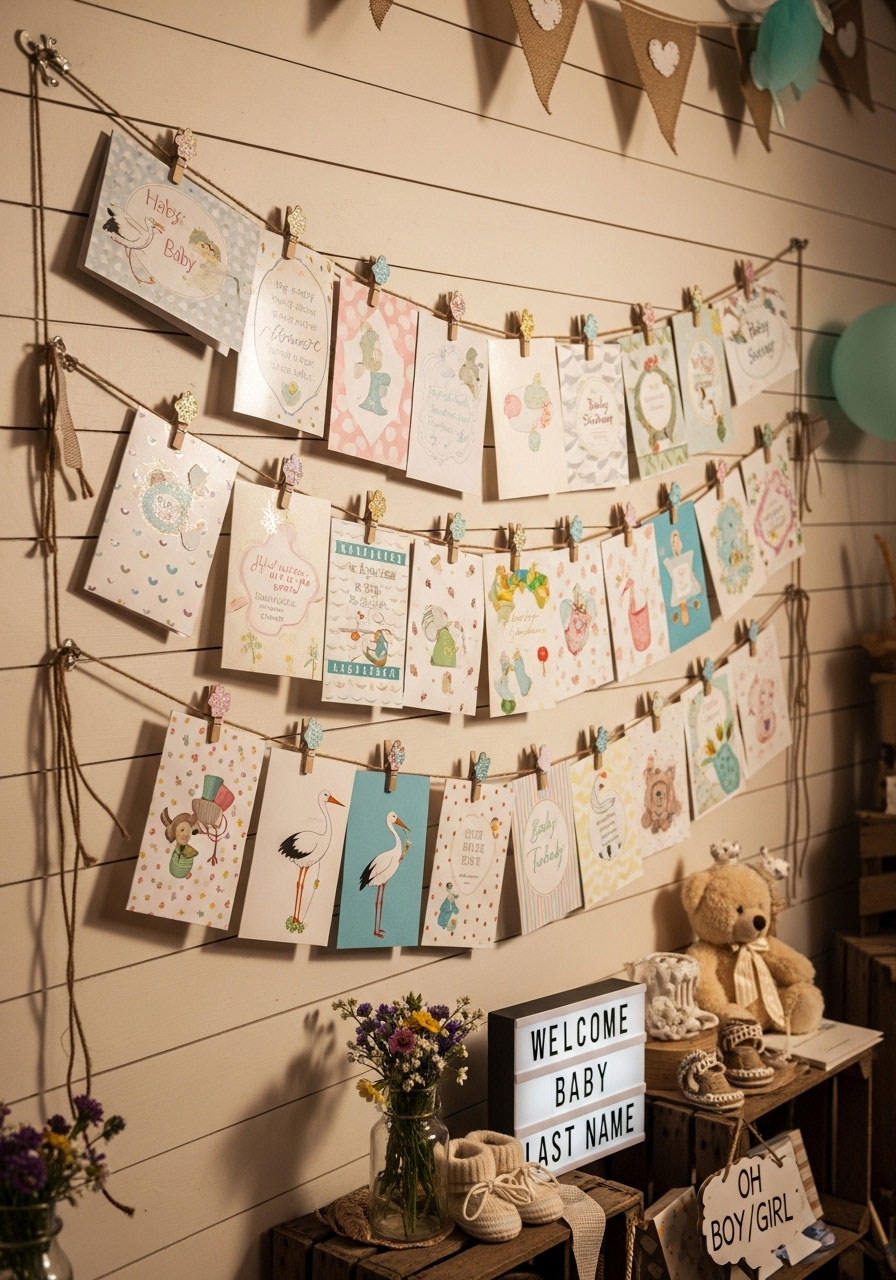
Don’t just pile those beautiful greeting cards on a table! Turn them into a piece of the party décor with this simple and charming display hack.
What You’ll Need: A long piece of twine or ribbon, and a pack of small clothespins (you can find cute decorative ones in the craft aisle).
How to Set It Up:
- String the twine across a blank wall, above a doorway, or along the front of a mantelpiece.
- As guests arrive and hand over their cards, use the clothespins to hang them along the line.
- It adds a personal, colorful touch to the décor, and everyone can enjoy seeing the sweet messages.
Pro Tip: After the shower, bundle the clothespins and twine with the cards as a gift for the mom-to-be so she can display them at home.
25. Baby’s First Portrait

Prepare for artistic chaos! This game challenges your guests to draw a portrait of the baby, with one hilarious catch: they have to do it with a paper plate on top of their head. The results are modern-art masterpieces of mayhem.
Best for: Guaranteed laughs, a quick and silly activity.
Time to Play: 5 minutes.
Players: The whole group.
What You’ll Need: A sturdy paper plate and a marker for each guest.
How to Play:
- Hand out a paper plate and a marker to everyone.
- Instruct them to place the paper plate on top of their head.
- Once the plates are in position, give them a series of instructions: “First, draw the baby’s head… now draw the eyes… now add a cute little smile…” and so on. They must do this without looking!
- After the final instruction (maybe “draw a pacifier!”), have everyone bring their plates down to reveal their “portraits.”
- The mom-to-be gets to judge the artwork and award a prize to her favorite (or the most disastrously funny) portrait!
26. The Tiered Treat Tower
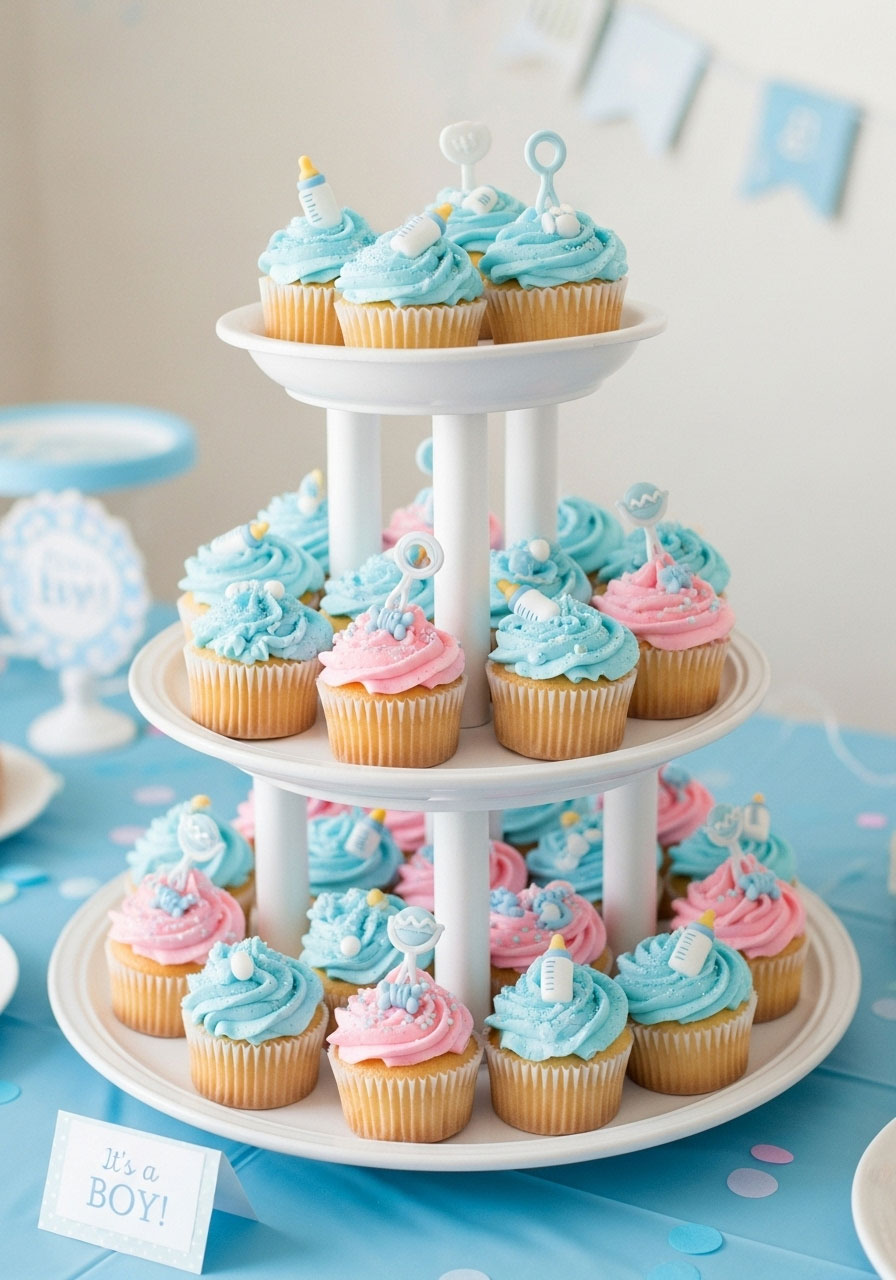
Make your cupcakes or cookies the star of the show with a DIY tiered stand that looks like it came from a fancy kitchen store. This is the ultimate dollar store glow-up.
What You’ll Need: Two or three plates in varying sizes (e.g., a dinner plate and a salad plate), and one or two sturdy glass candlesticks. You’ll also need a strong glue like E6000 (often in the craft aisle).
How to Make It:
- Place your largest plate down. Find the exact center and apply a circle of glue.
- Firmly press the bottom of a candlestick onto the glue and let it dry completely (this is important!).
- Apply glue to the top rim of the candlestick, find the center of your next-smallest plate, and press it down firmly.
- Repeat if you want to create a third tier. Once it’s fully cured, you have a stunning stand for your treats!
27. The Great Baby Sock Hunt

It’s a well-known fact that baby socks have a magical ability to disappear. This game turns that frustration into a high-speed, high-stakes matching challenge!
Best for: A minute-to-win-it style challenge, a burst of energy.
Time to Play: 2-3 minutes per round.
Players: One or two players at a time.
What You’ll Need: At least 10-15 pairs of baby socks (get a variety of colors and patterns!), and one large laundry basket or box.
How to Play:
- Unpair all the baby socks and mix them up in the laundry basket. This is your sock chaos pile.
- Challenge the first player to stand in front of the basket.
- When you shout “Go!”, they have 60 seconds to match as many complete pairs of socks as they can.
- After a minute, count up the number of correct pairs they made. The person who matches the most pairs is the sock-master champion!
28. The “Winning Ticket” Prize Bouquet
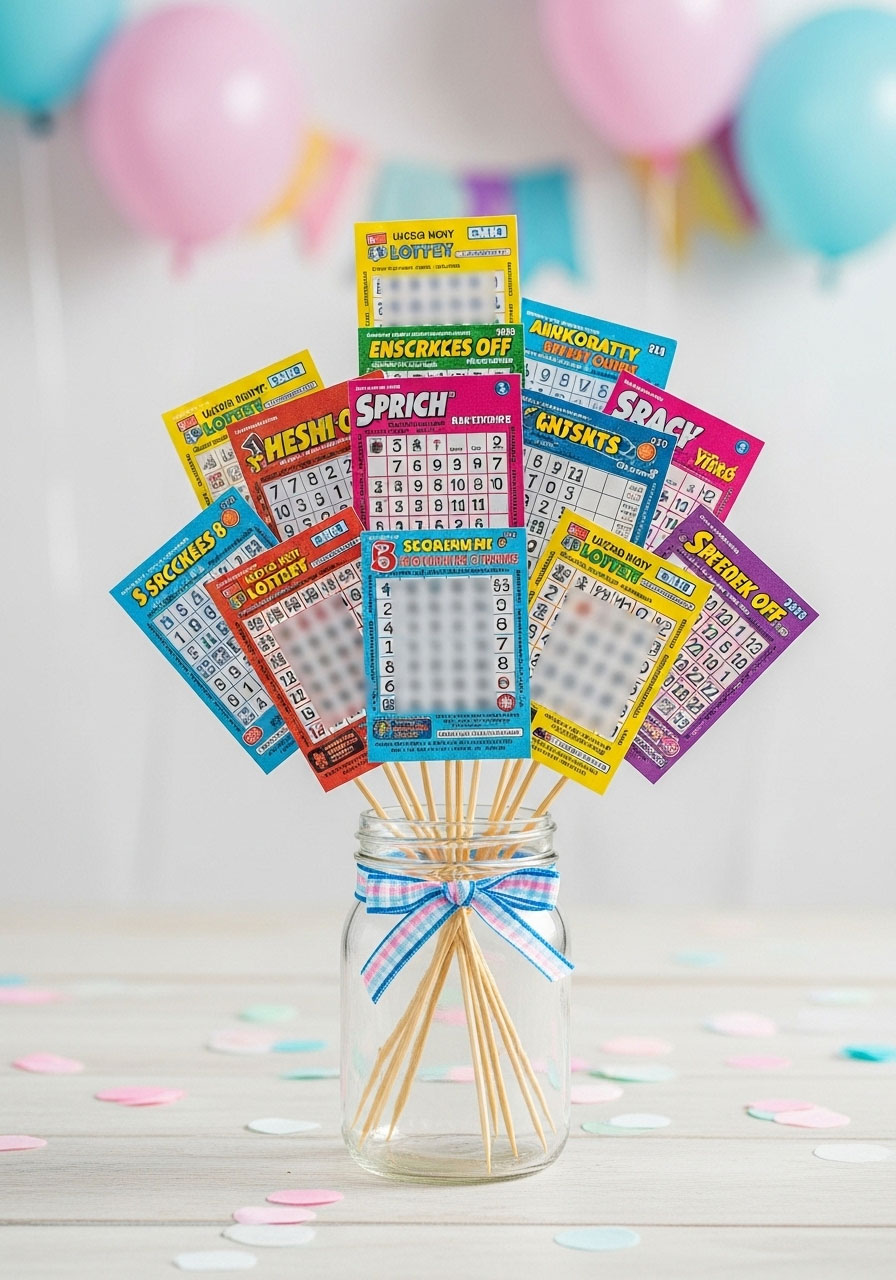
Everyone loves the thrill of a lottery ticket. Instead of just handing one over, present it in a fun bouquet that makes the prize feel ten times more special.
What You’ll Need: A few scratch-off lottery tickets, a small mason jar or vase, a floral foam block, and a few wooden skewers.
How to Assemble:
- Cut the floral foam to fit snugly inside your jar.
- Carefully tape a lottery ticket to the top of each wooden skewer.
- Arrange the skewers in the foam to look like a blooming bouquet of possibility! It’s a prize that will have everyone hoping their ticket gets drawn.
29. The Ultimate Photo Booth Prop Station
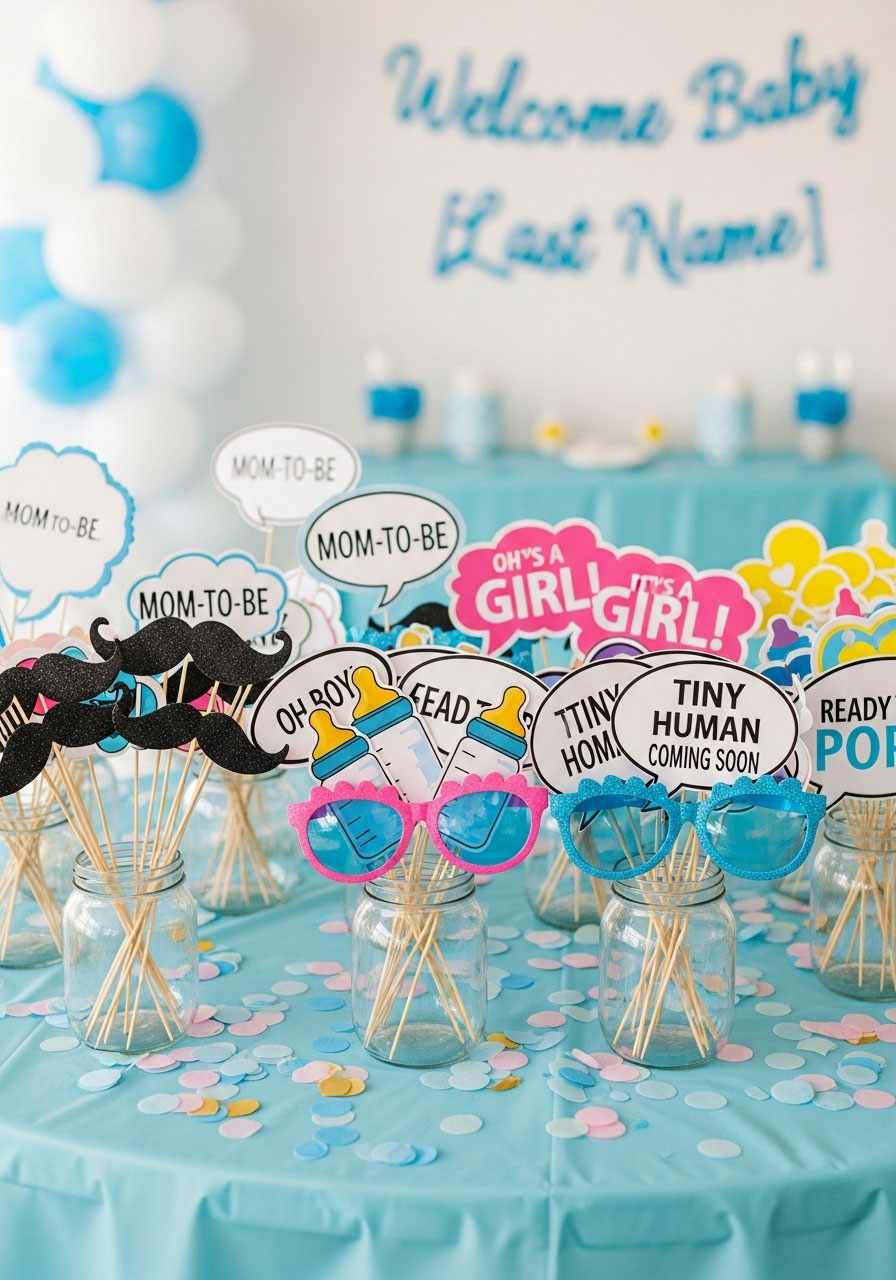
A photo booth is a must-have, but you don’t need to rent expensive equipment. A wall, a phone, and a table of hilarious props are all you need for guests to create priceless memories.
What You’ll Need: A few sheets of poster board or foam board, wooden skewers or dowels, scissors, a glue gun or strong tape, and lots of fun craft supplies like glitter, markers, and feather boas.
How to Set It Up:
- On the poster board, draw and cut out classic photo prop shapes: mustaches, big lips, eyeglasses, baby bottles, pacifiers, and speech bubbles.
- Go wild decorating them with glitter and markers. On the speech bubbles, write funny phrases like “Future BFF”, “Team Girl”, or “Poppin’ Bottles!”.
- Securely attach a skewer to the back of each prop to serve as a handle.
- Set all your props out in a jar or vase near your photo backdrop and let the selfie-fest begin!
30. “Don’t Drop the Baby!” (Water Balloon Toss)

If you’re hosting an outdoor or backyard shower, this is the perfect game to get everyone moving and laughing. It’s a classic field-day game with a silly, baby-themed twist.
Best for: Outdoor showers, warm weather, an energetic crowd.
Time to Play: 10-15 minutes.
Players: The whole group, in pairs.
What You’ll Need: A pack of water balloons (blue or pink!), and a permanent marker.
How to Play:
- Before the party, fill the water balloons. On each balloon, carefully draw a simple baby face with the marker. These are your “babies”.
- Have guests partner up and stand facing each other, about three feet apart.
- Give one person in each pair a water balloon “baby”. They must toss the “baby” to their partner.
- If the team successfully catches it, both players take one big step backward.
- The goal is to see which pair can get the farthest apart without dropping their baby! Any team that drops and breaks their “baby” is out. The last pair standing wins!
31. Guess the Nursery Rhyme: Emoji Edition

Put a modern spin on a classic game! This is a fun and surprisingly tricky brain-teaser that’s perfect for guests to work on while they’re enjoying snacks.
Best for: A low-key activity, all ages.
Time to Play: 5-10 minutes.
Players: The whole group, individually or in teams.
What You’ll Need: A printable game sheet (search for “emoji nursery rhyme game”) or a whiteboard/chalkboard from the dollar store to write your own.
How to Play:
- The game consists of a series of emojis that represent the title or lyrics of a famous nursery rhyme.
- Give guests about five minutes to decipher as many of the emoji riddles as they can.
- Read the answers aloud and have them score their own sheets. The person with the most correct answers wins!
32. A “Time Capsule” for the Baby
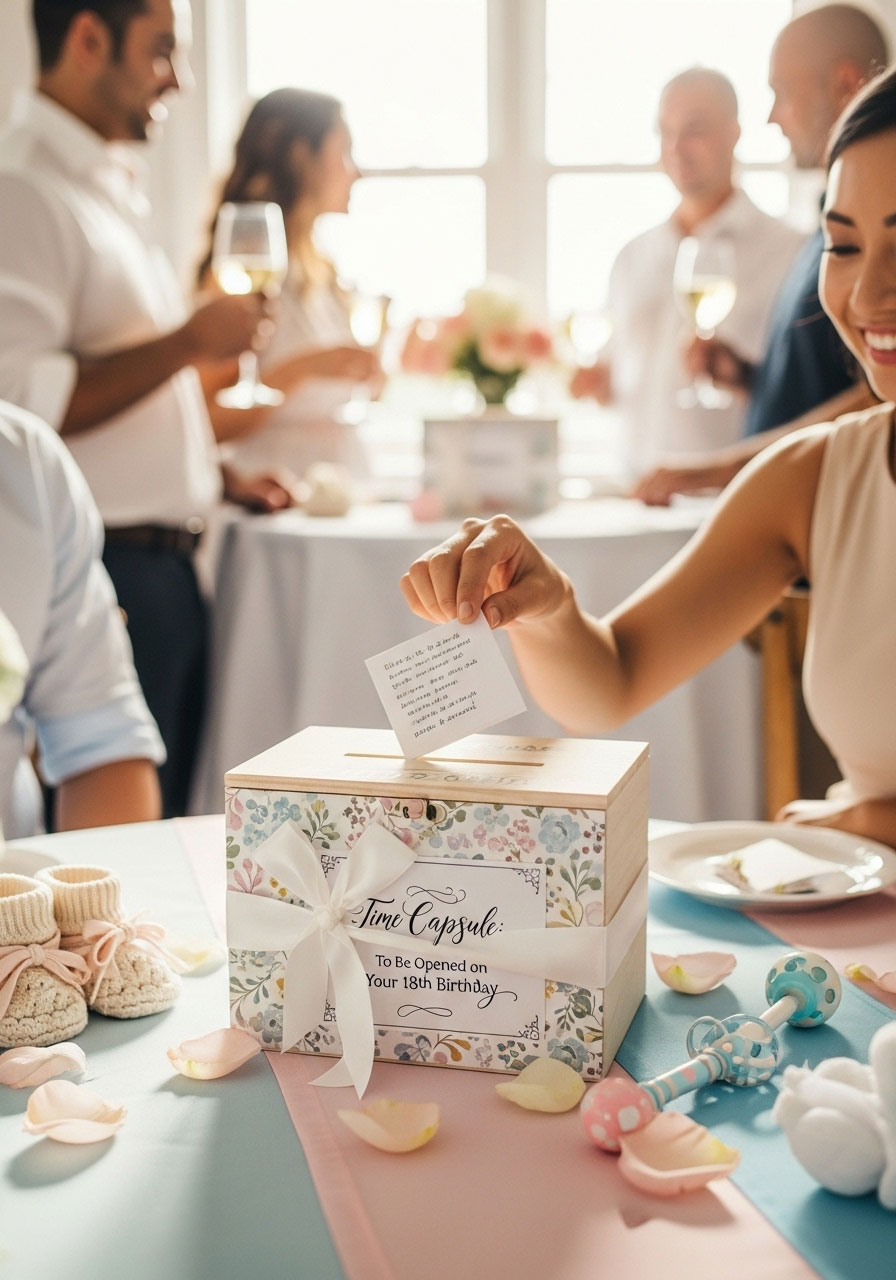
End the shower on a truly sentimental note with an activity that will become a cherished gift years down the road. Guests contribute to a time capsule for the baby to open on their 18th birthday.
What You’ll Need: A decorative box, small note cards, pens, and a sign.
How to Set It Up:
- Set up a table with the box and a sign that reads: “Time Capsule: To Be Opened on Your 18th Birthday”.
- Instruct guests to write a note to the baby’s future self. They can share a memory from the day, a piece of life advice, a funny story about their parents, or their hopes for the future.
- The parents-to-be can also add a few special items from the year – a newspaper clipping, a popular trinket, or a personal letter – before sealing the box. It’s a gift of memories that will only get better with time.
You’re Ready to Host the Best Shower Ever!
And there you have it – a complete playbook for throwing a gorgeous, fun, and memorable baby shower without emptying your bank account. The dollar store is packed with potential, and with these ideas, you’re not just saving money; you’re creating a personalized celebration filled with clever touches and hilarious moments.
Remember, the goal is to celebrate the wonderful parents-to-be and make them feel loved. With these games in your back pocket and a few décor hacks up your sleeve, you’re ready to host a party your friends will be talking about for weeks. Because the best parties are the ones filled with laughter, and you’re about to deliver big time.
