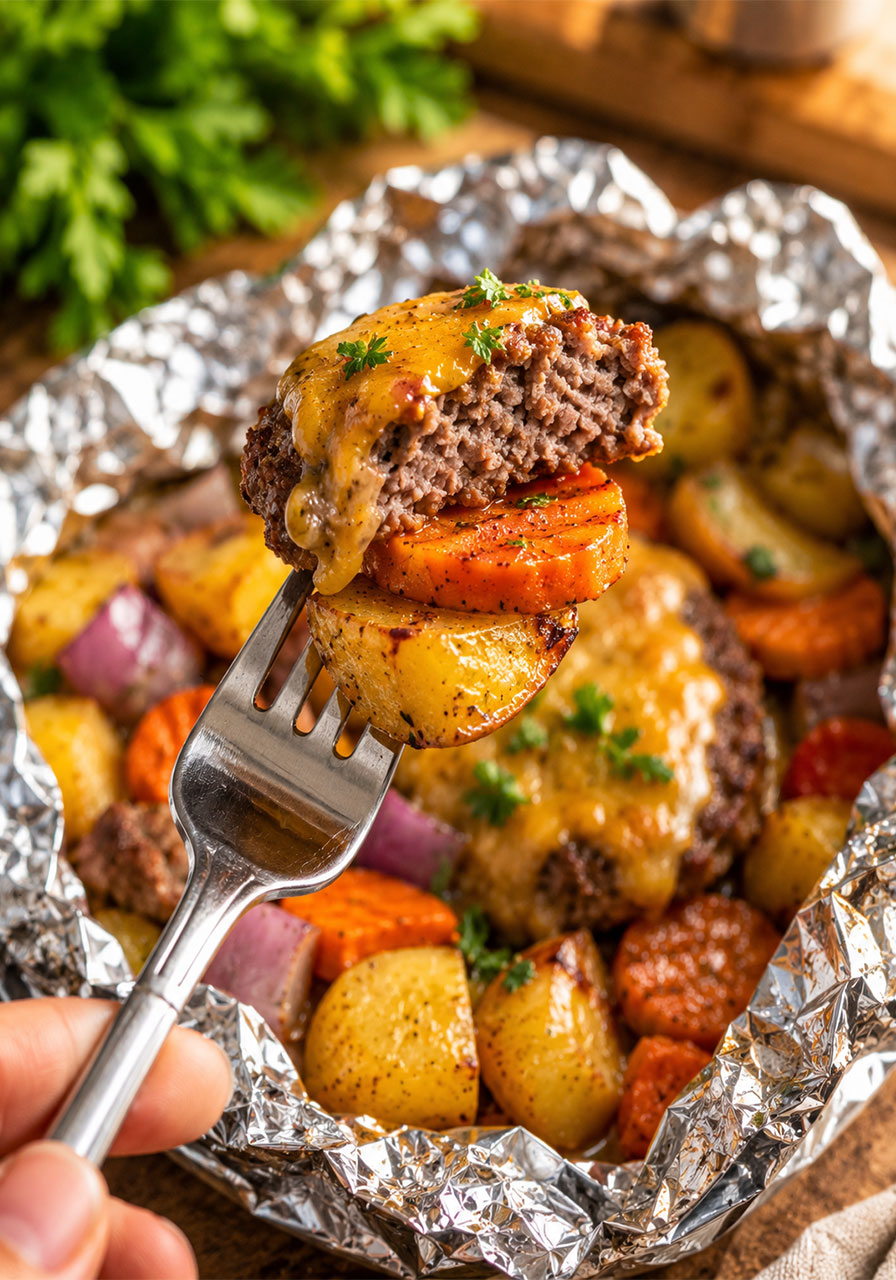
Let me paint you a picture: the sun is setting, the kids are running around, and somehow – somehow – you’ve managed to serve up a hot, hearty, cheesy dinner with zero pots, zero pans, and barely any cleanup. That’s the magic of Campfire Cheeseburger Hobo Packets.
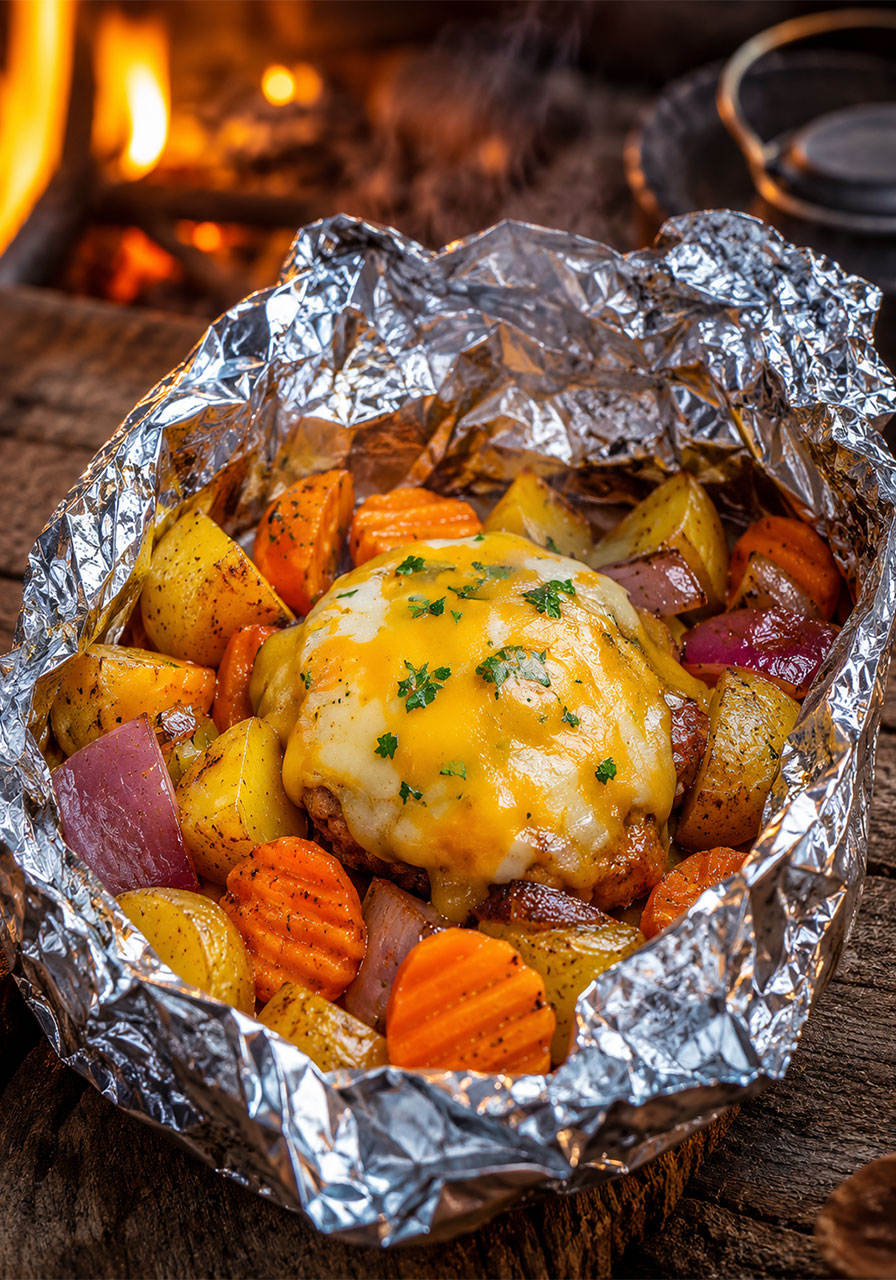
These little foil pouches are a total game-changer, whether you’re hosting a backyard cookout, planning a camping trip with friends, or just trying to survive a chaotic Tuesday night without doing the dishes. A seasoned beef patty steams right on top of golden potatoes, sweet carrots, and savory red onion – all tucked inside its own personal foil pouch. And then comes the melty Colby Jack cheese on top, and honestly? It’s a full-on comfort food moment.
I first made these on a camping trip where I had exactly one cooler, zero kitchen counter space, and a very hungry group of friends. They were an instant hit. The foil does all the work, and everyone gets their own little packet to unwrap – which, trust me, feels way more fun than it sounds.
Once you try these, they’ll become your go-to for camping, grilling, and busy weeknights alike. Let’s get into it.
Why You’ll Absolutely Love These Hobo Packets
Here’s the thing about these packets – they check every single box.
Zero cleanup. The foil is the cooking vessel AND the serving dish. You literally just toss it when you’re done. No scrubbing, no soaking, no sad pile of dishes at the end of the night.
Cook them anywhere. Oven, grill, campfire – these packets do it all. If it produces heat, these packets can work with it.
A complete meal in one tidy little pouch. Protein and veggies, all perfectly seasoned and cooked together. No sides to stress over, no separate pots to watch.
Everyone gets their own. Each guest unwraps their own personalized packet, which makes dinner feel festive and fun – even on a Wednesday night.
Totally customizable. Swap veggies, change the cheese, add a sauce, mix up the protein. These packets are incredibly forgiving and easy to tailor to your crowd.


What You’ll Need
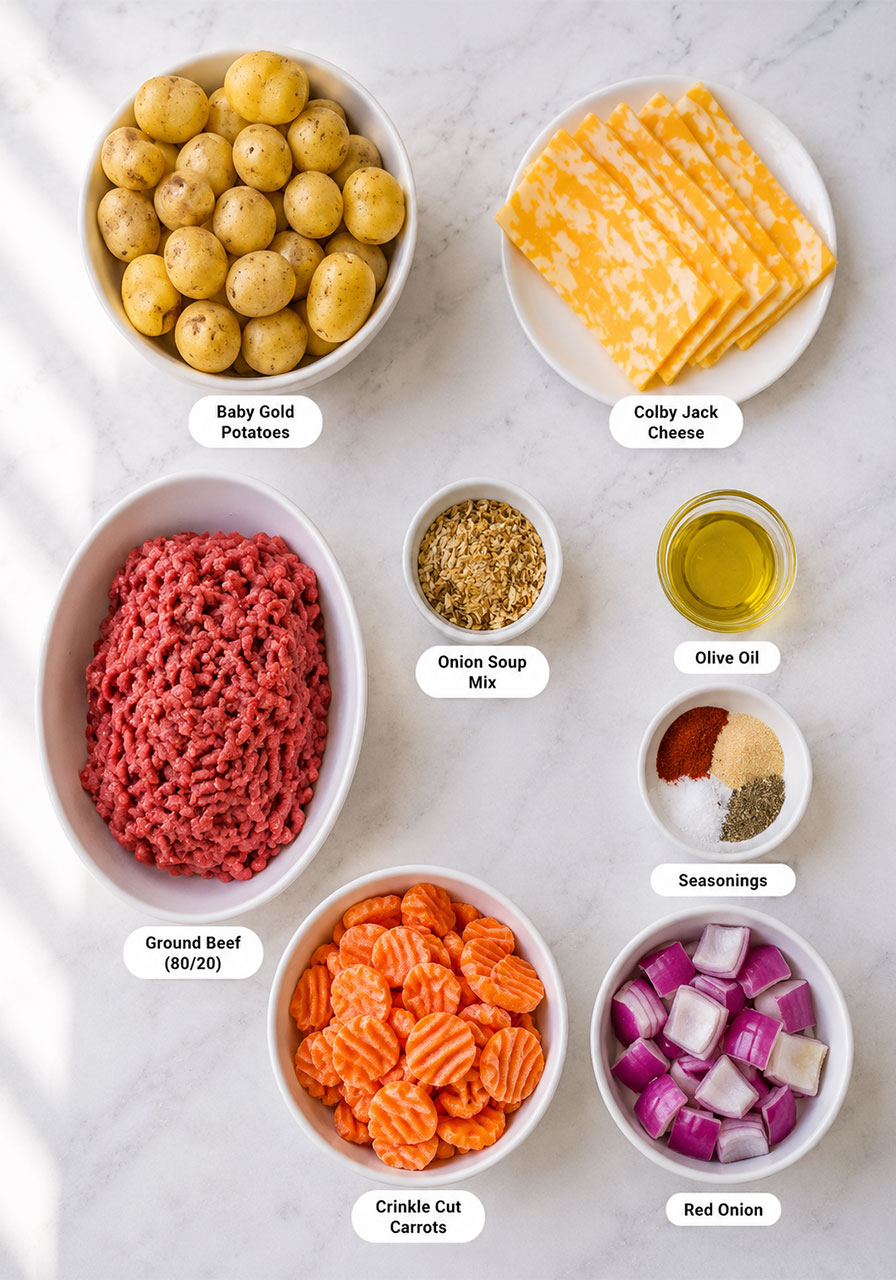
The ingredients list is short, simple, and probably already in your kitchen.
Lean ground beef – The hearty, satisfying base. Shape it into patties so it cooks evenly right inside the packet.
Dried onion soup mix – This is the secret weapon. One packet adds deep, savory, oniony flavor to the beef without any extra chopping or effort.
Baby gold potatoes – Quarter them small so they cook through in the same time as the beef. These get beautifully tender and soak up all that savory goodness.
Frozen crinkle-cut carrots – Convenient, colorful, and perfectly tender by the time everything else is done.
Red onion – Adds a little sweetness and a pop of color. Cut it in large chunks so it doesn’t disappear into the packet.
Olive oil – Helps the veggies roast up instead of just steaming, and keeps everything from sticking.
Seasonings – Garlic powder, kosher salt, black pepper, and smoked paprika. Simple, classic, and absolutely delicious together.
Colby Jack cheese – Added at the very end for that gooey, melty finish. This is the moment everyone waits for.
Heavy duty aluminum foil – Don’t skip the heavy duty version. It holds up to the heat and the juices without tearing. If you only have regular foil, just double up.
Cooking spray – A quick spritz on the foil keeps everything from sticking. Don’t skip this step!
Variations and Substitutions
One of the best things about hobo packets is how flexible they are. Here are some easy ways to make them your own:
Swap the veggies. Green beans, corn, bell peppers, mushrooms, or zucchini all work beautifully. Just cut everything to a similar size so it cooks evenly.
Change the cheese. Cheddar, pepper jack, mozzarella, or good old American all melt like a dream. Go with whatever your crowd loves.
Use a different protein. Ground turkey, Italian sausage, or even boneless chicken thighs work great in place of beef. Just adjust your cook time and always check for the right internal temperature.
Add a sauce inside. A spoonful of barbecue sauce, a pat of garlic butter, a drizzle of Worcestershire sauce, or even a dollop of cream of mushroom soup tucked in before sealing adds incredible flavor and keeps everything extra moist.
Make it spicy. Add diced jalapeños or a pinch of cayenne to the veggie mix for a kick.
How to Make Campfire Cheeseburger Hobo Packets
This recipe comes together faster than you’d think. Here’s exactly how to do it, step by step.
Step 1: Season the Beef
Preheat your oven to 350°F (or get your grill or campfire ready – more on that below).
In a large mixing bowl, combine the ground beef and the full packet of dried onion soup mix. Mix until everything is well incorporated – your hands are honestly the best tool here.
Divide the mixture into 6 equal portions and shape each one into a patty. Set them aside on a plate while you prep the veggies.
Step 2: Season the Vegetables
In a second large bowl, toss together the quartered baby gold potatoes, frozen crinkle-cut carrots, and large-diced red onion.
Drizzle with olive oil and sprinkle on the garlic powder, kosher salt, black pepper, and smoked paprika. Stir everything well until every piece of veggie is nicely coated. This is what makes the vegetables taste so good – don’t rush this step.
Step 3: Assemble the Packets
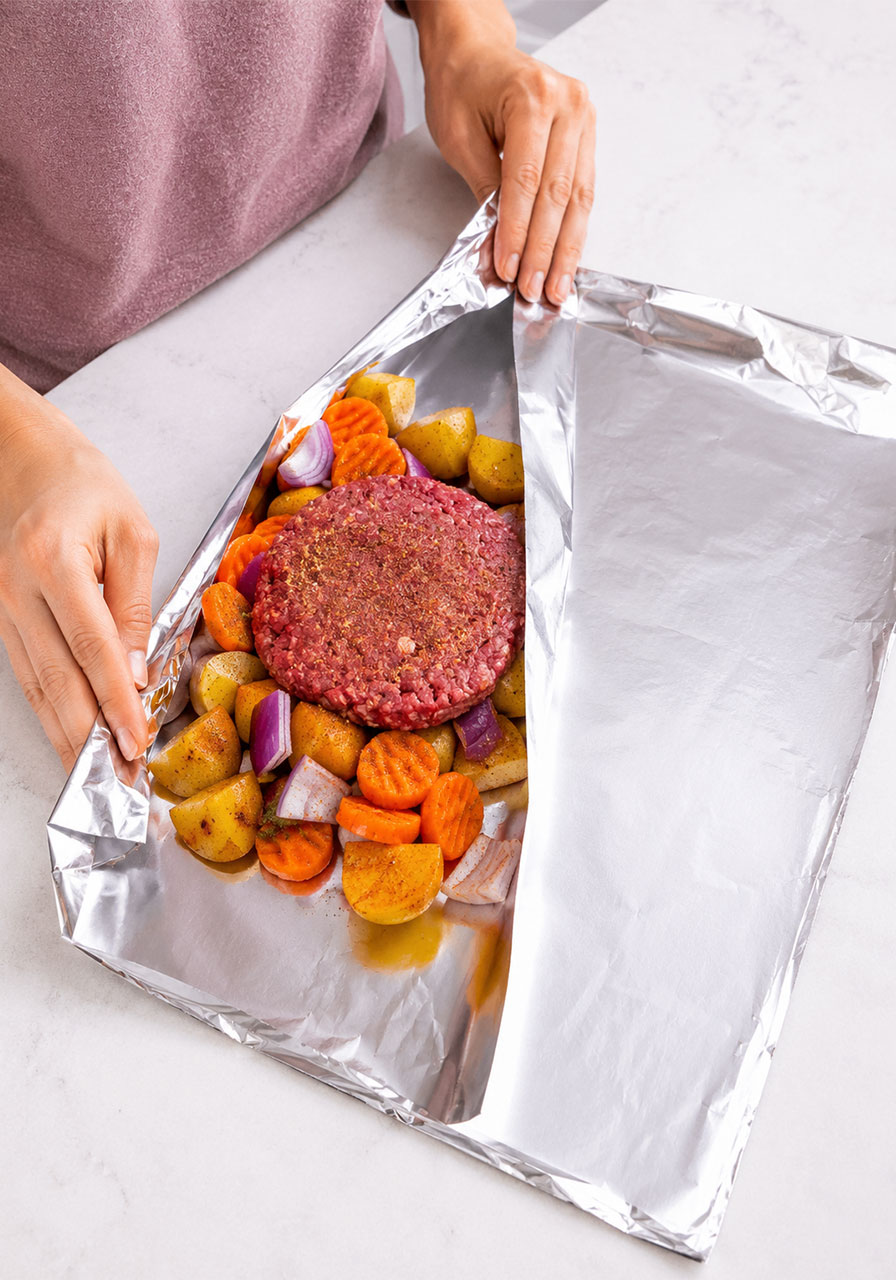
Tear off a 12×18-inch piece of heavy duty aluminum foil for each packet. Give the center a spritz of cooking spray – this is important for preventing sticking.
Place one-sixth of the veggie mixture in the center of the foil. Then lay one beef patty right on top of the veggies.
Fold the foil up and around the ingredients, crimping the edges tightly to form a sealed pouch. You want a snug seal – this traps the steam that cooks everything perfectly from the inside out.
Repeat for all 6 packets.
Step 4: Cook the Packets
Arrange the sealed packets on a baking sheet and slide them into the oven. Bake for about 45 minutes, until the potatoes are fork-tender and the beef has reached an internal temperature of 160°F.
Pro tip: Use a meat thermometer to check. Oven temperatures vary, and you want to be sure that beef is fully cooked before digging in.
Step 5: Add the Cheese
Here’s the best part. Carefully open each packet – and please do this slowly, because the steam inside is HOT. Unfold the foil away from your face.
Place a slice of Colby Jack cheese right on top of the patty. Loosely re-cover each packet with the foil and let everything steam for about 5 more minutes, until the cheese is perfectly melty and gooey.
Serve straight from the foil, with your favorite dipping sauce on the side. That’s it. Dinner is served.

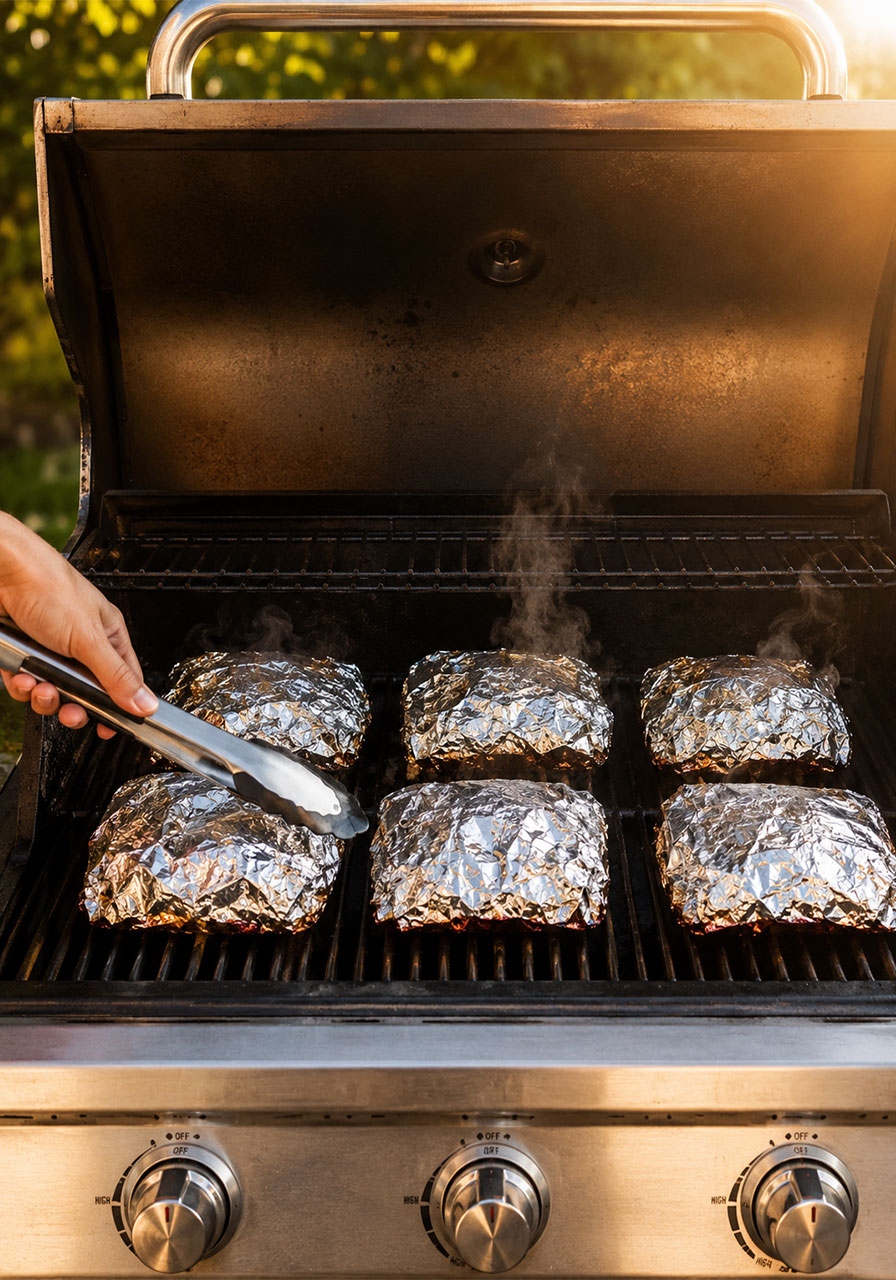
How to Cook These on the Grill
Grilling these hobo packets is just as easy as baking them, and the grill adds a subtle smoky flavor that takes them to the next level.
Preheat your grill to medium heat. Place the sealed packets directly on the grill grates and close the lid to trap the heat. Cook for about 25 to 30 minutes, flipping the packets halfway through with a pair of tongs.
Keep that lid closed as much as possible – the heat circulation is what gets the potatoes tender. Check that the beef hits 160°F before adding the cheese and calling it done.
How to Cook These Over a Campfire
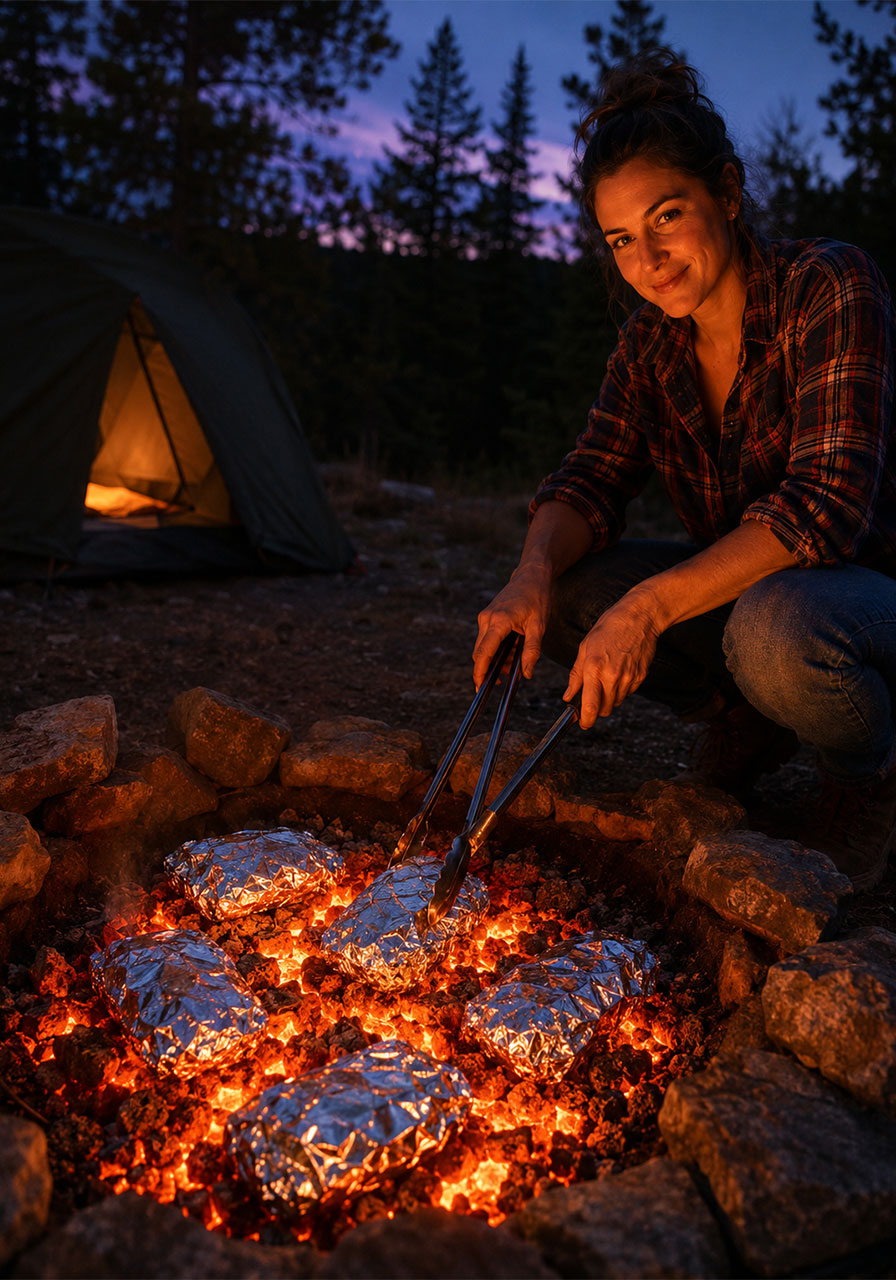
This is the original hobo packet experience, and honestly, it’s the most fun way to eat them.
Wait until your campfire has burned down to a good bed of hot coals. You want glowing, steady heat – not active flames, which will scorch the outside before the inside cooks through.
Using tongs, place the sealed packets directly on the hot coals. Cook for about 15 to 20 minutes per side, flipping carefully halfway through. The cooking time will vary depending on how hot your coals are, so use a meat thermometer to check that the beef reaches 160°F and the potatoes are fork-tender before serving.
One camping tip I swear by: assemble the packets at home before the trip, keep them sealed in the cooler, and they’re ready to go straight onto the coals when you arrive. That’s less time prepping and more time enjoying the outdoors.
Can You Cook These in a Smoker?
You absolutely can – and the results are incredible.
Set your smoker to 225 to 250°F and smoke the sealed packets for about an hour, or until the beef is fully cooked through. The low, slow smoke works its way into the beef and vegetables in the most delicious way. It adds a depth of flavor that you just can’t get from the oven.
This method is perfect for a lazy weekend afternoon when you’ve got time to let the smoker do its thing.
Tips for the Best Hobo Packets Every Single Time
These are the little things that make a big difference:
Use heavy duty foil. It holds up to the heat and the juices without tearing. If all you have is regular foil, just double-wrap each packet – problem solved.
Cut your potatoes small. Quarter the baby potatoes so they’re roughly the same size as the carrot pieces. This way everything cooks through at the same rate and nothing ends up underdone.
Don’t skip the cooking spray. A quick spritz on the foil prevents sticking and makes it so much easier to open the packets cleanly after cooking.
Seal the packets tightly. A good, snug seal keeps all the steam trapped inside, which is what makes the veggies tender and the beef so juicy. If your seal is loose, you’ll lose too much moisture.
Always use a meat thermometer. Oven and grill temperatures vary, and the only way to know for sure that your beef is safely cooked is to check for 160°F. A cheap instant-read thermometer is a total game-changer for this recipe.
Open packets away from your face. The steam trapped inside is seriously hot. Unfold the foil slowly and point it away from you – your face will thank you.
Make-Ahead and Storage Tips
One of the best things about this recipe is how well it works as a make-ahead meal.
Make ahead: Assemble the packets up to a day in advance, seal them tightly, and keep them in the fridge until you’re ready to cook. This makes them absolutely perfect for prepping before a camping trip or a packed weeknight schedule.
Freeze for later: You can freeze the assembled, uncooked packets for up to 3 months. Seal them well in the foil, then store in a zip-top freezer bag for extra protection. When you’re ready to use them, thaw overnight in the fridge and add a few extra minutes to the cook time.
Store leftovers: Transfer cooled leftovers to an airtight container and refrigerate for up to 3 days. Reheat in the oven, air fryer, or microwave until warmed through.
Bonus idea: Leftover filling makes an amazing breakfast hash the next morning. Just chop everything up and crisp it in a skillet with a little butter. Top with a fried egg and you have a completely new meal with zero extra effort.
Serving Ideas
These packets are truly a complete meal on their own – beef, potatoes, and veggies, all in one tidy pouch. Most of the time, I just serve them straight from the foil with a selection of dipping sauces on the table and let everyone customize their own experience.
Some crowd-pleasing sauce options: ketchup, barbecue sauce, ranch dressing, hot sauce, steak sauce, or a simple garlic aioli. Set them all out and let people mix and match.
If you want to round out the table for a bigger gathering, a simple green salad, some crusty bread, or a bowl of corn on the cob are all easy additions that don’t require extra cooking.
For a full-on comfort food spread, these pair beautifully with cheeseburger sliders or a big pot of chili for a crowd that really wants to eat well.
Frequently Asked Questions
Can I cook these Hobo Packets over a campfire?
Yes! Place sealed packets on hot coals (not direct flames) and cook for about 15 to 20 minutes per side, flipping with tongs. Heat varies by fire, so always check that the beef reaches 160°F and the potatoes are fork-tender before serving.
Can I make these on the grill?
Absolutely. Grill over medium heat with the lid closed for about 25 to 30 minutes, flipping halfway through. Keeping the lid closed traps heat and ensures the potatoes cook through. Always check for doneness with a thermometer.
Can I make these in a smoker?
Yes! Smoke at 225 to 250°F for about an hour, until the beef is cooked through. The low smoke adds incredible depth of flavor to both the beef and vegetables.
Can I make these ahead of time?
Definitely. Assemble the packets up to a day ahead and refrigerate until ready to cook. You can also freeze assembled, uncooked packets for up to 3 months. Thaw overnight in the fridge before cooking, and add a few extra minutes to the cook time.
Can I add a sauce inside the packet?
Yes, and it’s a great idea! A drizzle of barbecue sauce, a pat of garlic butter, a splash of Worcestershire sauce, or a spoonful of cream of mushroom soup tucked in before sealing adds amazing flavor and keeps everything extra moist. You can also serve extra sauce on the side.
How do I store leftover Hobo Packets?
Store cooled leftovers in an airtight container in the fridge for up to 3 days. Reheat in the oven, air fryer, or microwave. The flavors actually meld and deepen overnight, so leftovers are genuinely delicious – maybe even better than day one. And don’t forget the breakfast hash trick: chop up the leftovers and crisp them in a skillet the next morning for an easy, no-recipe-needed breakfast.
Ready to Make These Tonight?
Whether you’re heading to the campsite this weekend, firing up the grill for friends, or just trying to get dinner on the table without losing your mind – these Campfire Cheeseburger Hobo Packets have got you covered.
They’re hearty, cheesy, completely hands-off, and genuinely fun to eat. The kind of meal that makes everyone happy and makes you look like you totally have it together – even if you threw the whole thing together in 15 minutes.
Give them a try and let us know how it goes! Leave a comment below with your favorite add-ins or sauce combos – we love hearing how you make these your own.
Campfire Cheeseburger Hobo Packets
Ingredients
- 2 pounds lean ground beef
- 1 packet (about 1 oz) dried onion soup mix
- 1½ pounds baby gold potatoes, quartered
- 12 ounces frozen crinkle-cut carrots
- 1 medium red onion, large diced
- 1 tablespoon olive oil
- 1 teaspoon garlic powder
- 1 teaspoon kosher salt
- ½ teaspoon black pepper
- ½ teaspoon smoked paprika
- 6 slices Colby Jack cheese
- Cooking spray
- Heavy duty aluminum foil
Instructions
- Preheat oven to 350°F.
- In a large bowl, combine the ground beef and dried onion soup mix. Mix until fully incorporated. Divide into 6 equal portions and shape each into a patty. Set aside.
- In a second large bowl, combine the quartered potatoes, frozen carrots, diced red onion, olive oil, garlic powder, salt, pepper, and smoked paprika. Stir well until all vegetables are evenly coated.
- Tear off a 12×18-inch sheet of heavy duty aluminum foil for each packet. Spray the center of each sheet with cooking spray.
- Place one-sixth of the vegetable mixture in the center of each foil sheet. Top with one beef patty.
- Fold the foil tightly around the ingredients to form a sealed pouch, crimping the edges well to trap the steam.
- Place all 6 packets on a baking sheet. Bake for approximately 45 minutes, until the potatoes are fork-tender and the beef has reached an internal temperature of 160°F.
- Carefully open each packet (steam is hot – unfold away from your face). Place one slice of Colby Jack cheese on top of each patty. Loosely re-cover with the foil and let steam for 5 minutes, until the cheese is fully melted.
- Serve straight from the foil with your favorite dipping sauce on the side.
Notes
- Grill instructions: Cook sealed packets over medium heat with the lid closed for 25–30 minutes, flipping halfway through. Check for 160°F internal temperature before adding cheese.
- Campfire instructions: Place sealed packets on hot coals (not open flames) for 15–20 minutes per side. Cooking time varies; always verify with a thermometer.
- Smoker instructions: Smoke at 225–250°F for approximately 1 hour, until beef is fully cooked.
- Make ahead: Assemble and refrigerate sealed packets up to 24 hours before cooking. Freeze uncooked assembled packets for up to 3 months; thaw overnight in the fridge before cooking.
- Storage: Refrigerate leftovers in an airtight container for up to 3 days. Reheat in oven, air fryer, or microwave.
- Tip: Cut potatoes small so they finish cooking at the same time as the beef. Always use heavy duty foil or double-wrap with regular foil.
- Variation tip: Add a spoonful of barbecue sauce, garlic butter, or cream of mushroom soup inside the packet before sealing for extra flavor and moisture.