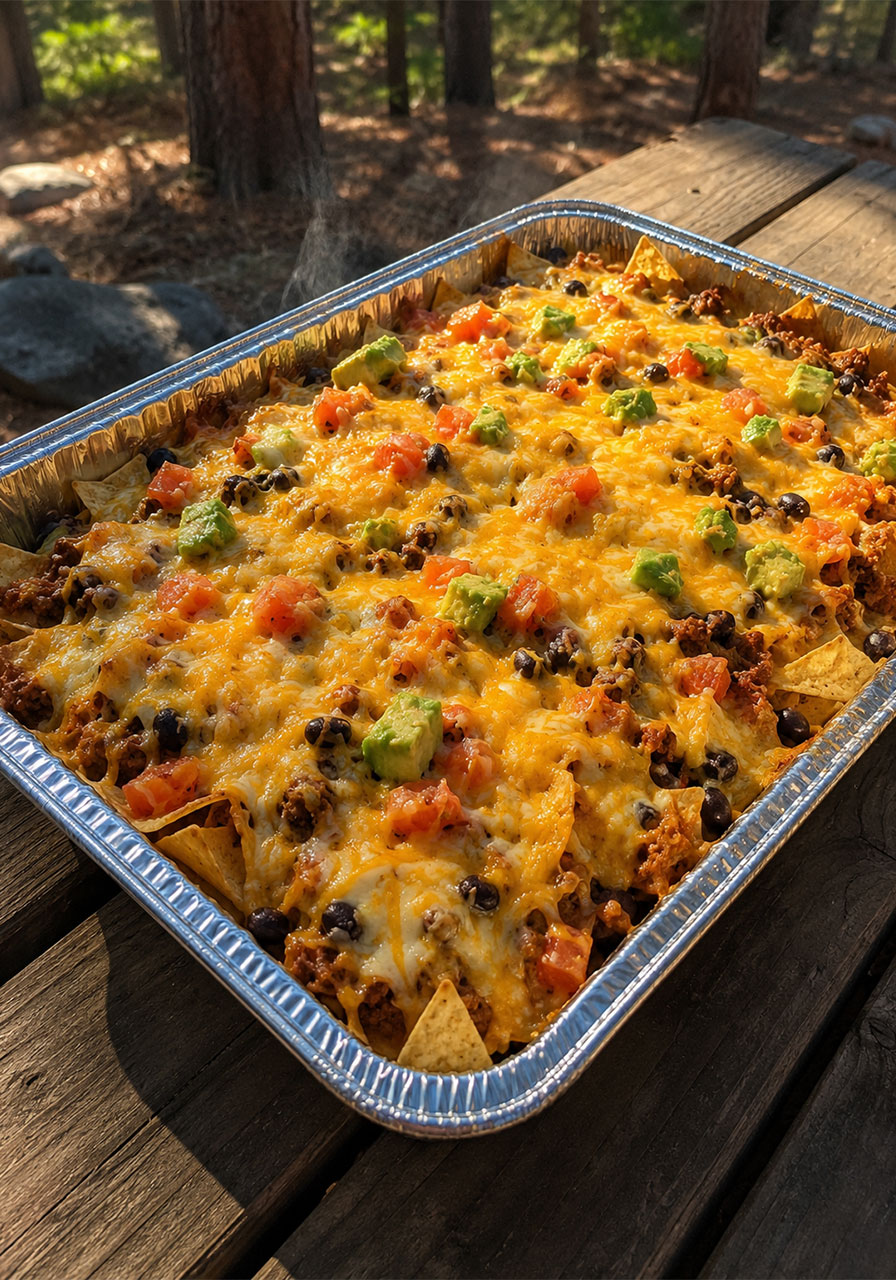
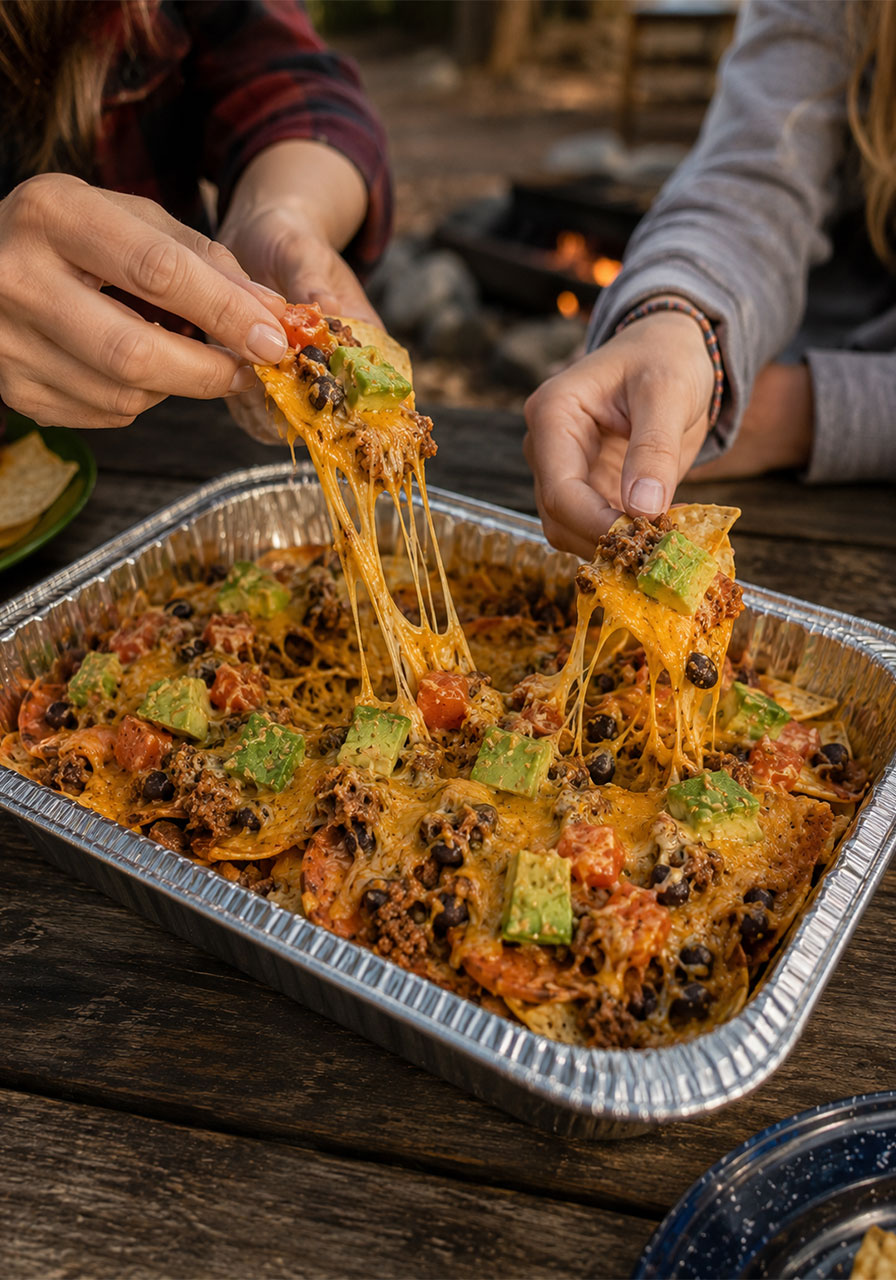
Can we talk about the most satisfying camping meal you will ever make over a fire? These campfire grilled nachos are the real deal – cheesy, loaded, and completely customizable for every single person at your campsite.
Whether you are planning a girls’ camping trip, a family weekend in the woods, or just a backyard bonfire with your crew, this recipe is your new go-to. No oven. No mess. No stress.
Just grab a foil pan, pile on your favorite toppings, and let the campfire do the work.
I will be honest – the first time I made these, I was not sure how they would turn out. Nachos on a campfire? But the moment that first melted, golden, cheesy pan came off the grate, we were hooked. These have been on every camping trip since.
The best part? Everyone gets to build their own pan exactly the way they like it. Meat lovers, vegetarians, spice fanatics, picky kids – everyone wins.
Let’s dive into everything you need to know to make the most epic campfire nachos of your life.
Why You Will Love This Campfire Nachos Recipe
This is not just another “throw chips in a pan” situation. These grilled nachos are a full, satisfying meal that happens to be incredibly easy to pull off outdoors.
Here is why this recipe is an absolute winner for any camping trip or outdoor gathering:
Zero dishes to wash. You cook in a foil pan and eat straight from it. Done.
Completely customizable. Every person builds their own pan with their own toppings – no arguments at the campsite.
Works over a campfire or on the grill. No special equipment needed beyond what you already have.
Ready in under 30 minutes once you have your toppings prepped.
Crowd-pleasing for all ages. Kids love chips and cheese. Adults love a fully loaded nacho situation. Everyone is happy.
This recipe also works at home if you want to make it on your backyard grill. Same method, same incredible results.


Campfire Nachos vs. Regular Nachos: What Makes Them Different?
Great question! Regular nachos go into an oven or under a broiler. Campfire nachos go on a grate over a fire or grill, covered with foil so the heat circulates and melts everything evenly.
The foil cover is the secret weapon here. It traps the heat inside the pan, almost like a little oven, so the cheese melts perfectly and the toppings get warm and tender all the way through.
The result is nachos that are deeply melty, slightly smoky, and just a little bit magical.
What You Need to Make Campfire Grilled Nachos
One of the best things about this recipe is that the ingredient list is completely flexible. Use what you love and skip what you do not. Here is what we typically use:
The Base
- Tortilla chips (corn or flour – your pick)
- Or thinly sliced sweet potato for a lower-carb version (more on this below!)
The Protein
- Ground turkey or ground beef, cooked with taco seasoning
- Shredded rotisserie chicken works great too – super easy camping hack
- Skip the meat entirely for a vegetarian version – the beans and toppings carry it beautifully
The Toppings
- Shredded cheese (a Mexican blend or cheddar melts best)
- Black beans (canned and drained)
- Diced tomatoes
- Diced onion
- Avocado, chopped
- Green chiles
- Jalapeños (if you like heat!)
- Pinto beans or refried beans
The Equipment
- Disposable foil pans (one per person or one large shared pan)
- Heavy-duty aluminum foil to cover
- A campfire grate or grill grate
- Tongs or oven mitts – these pans get HOT
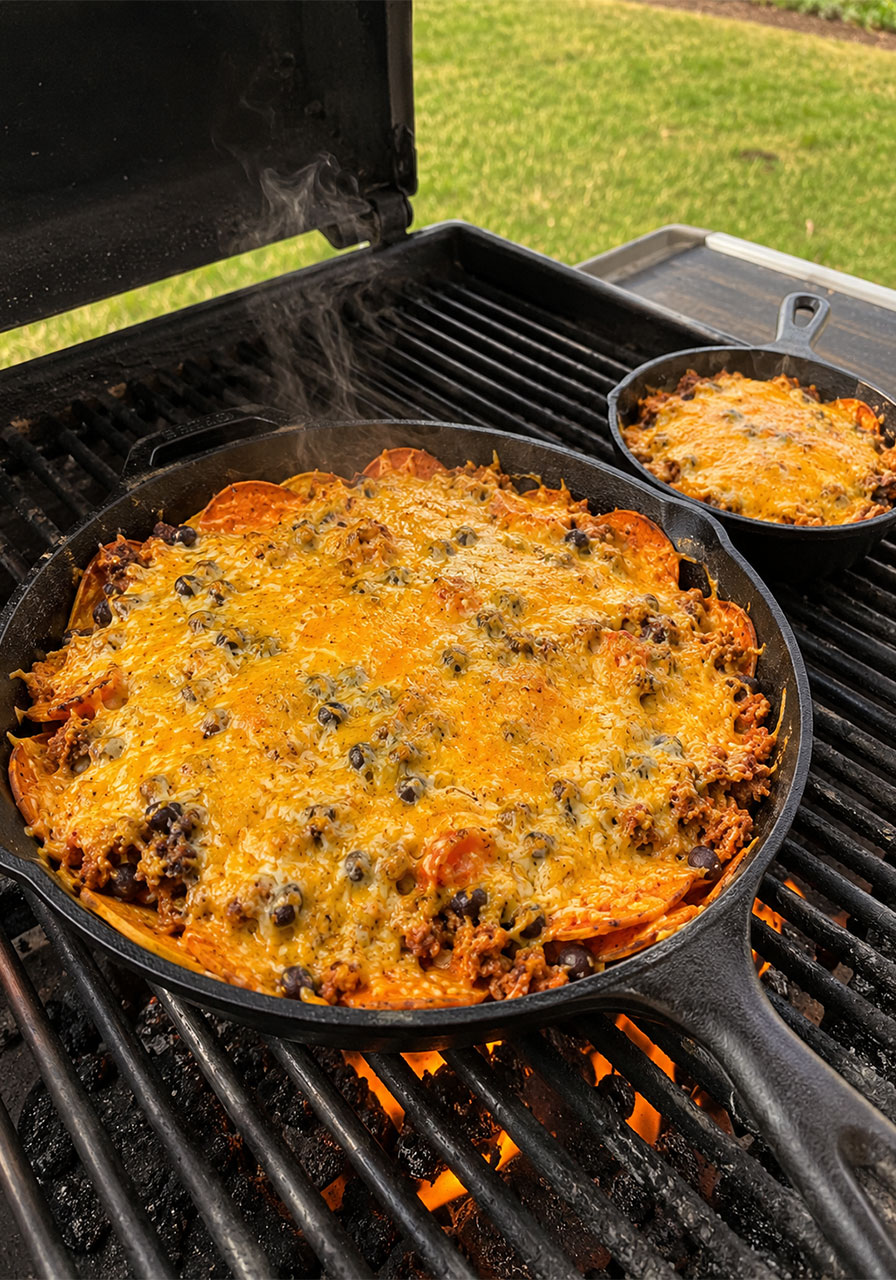
You can also make these in a cast iron skillet directly on the grill, which gives the nachos slightly crispier edges. Just note that cast iron holds heat much longer, so be extra careful when handling.
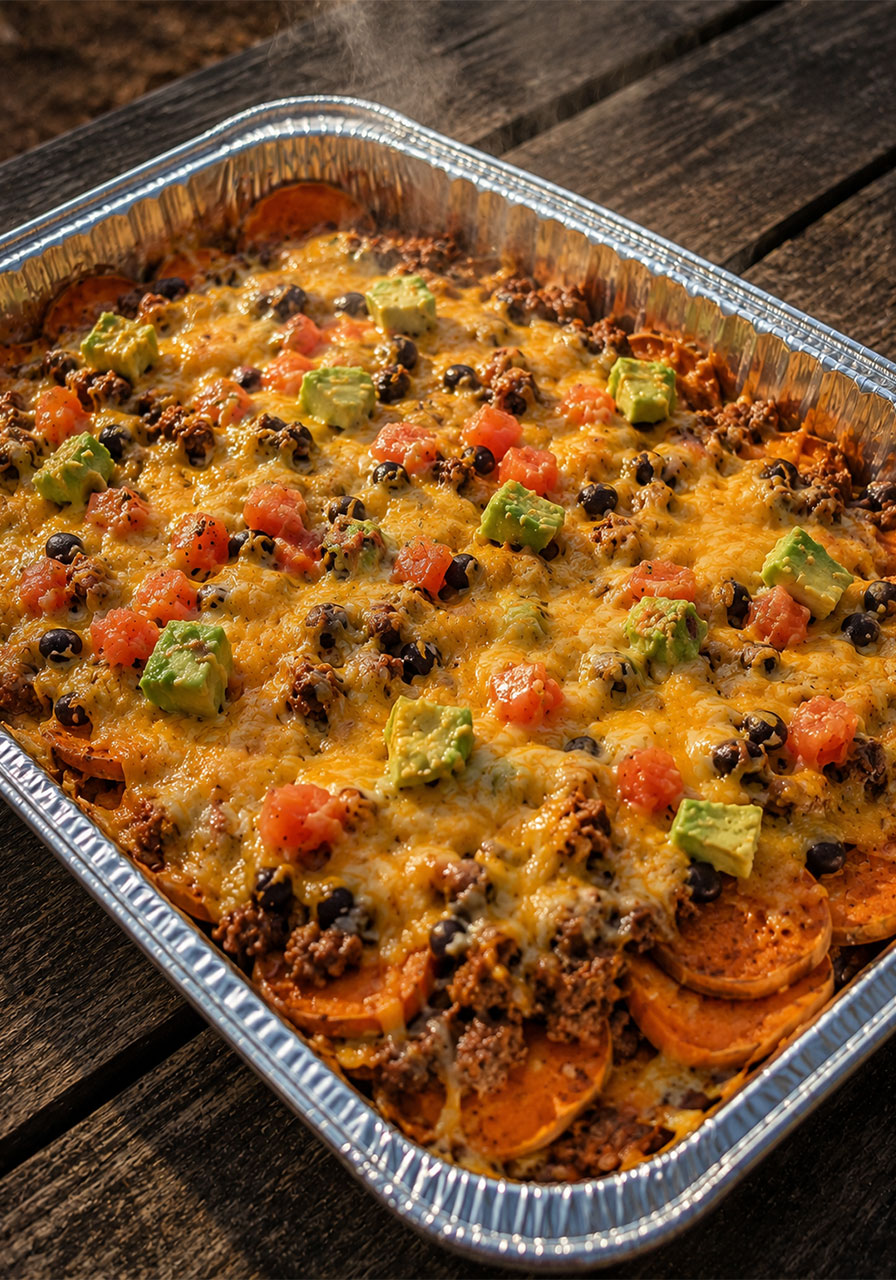
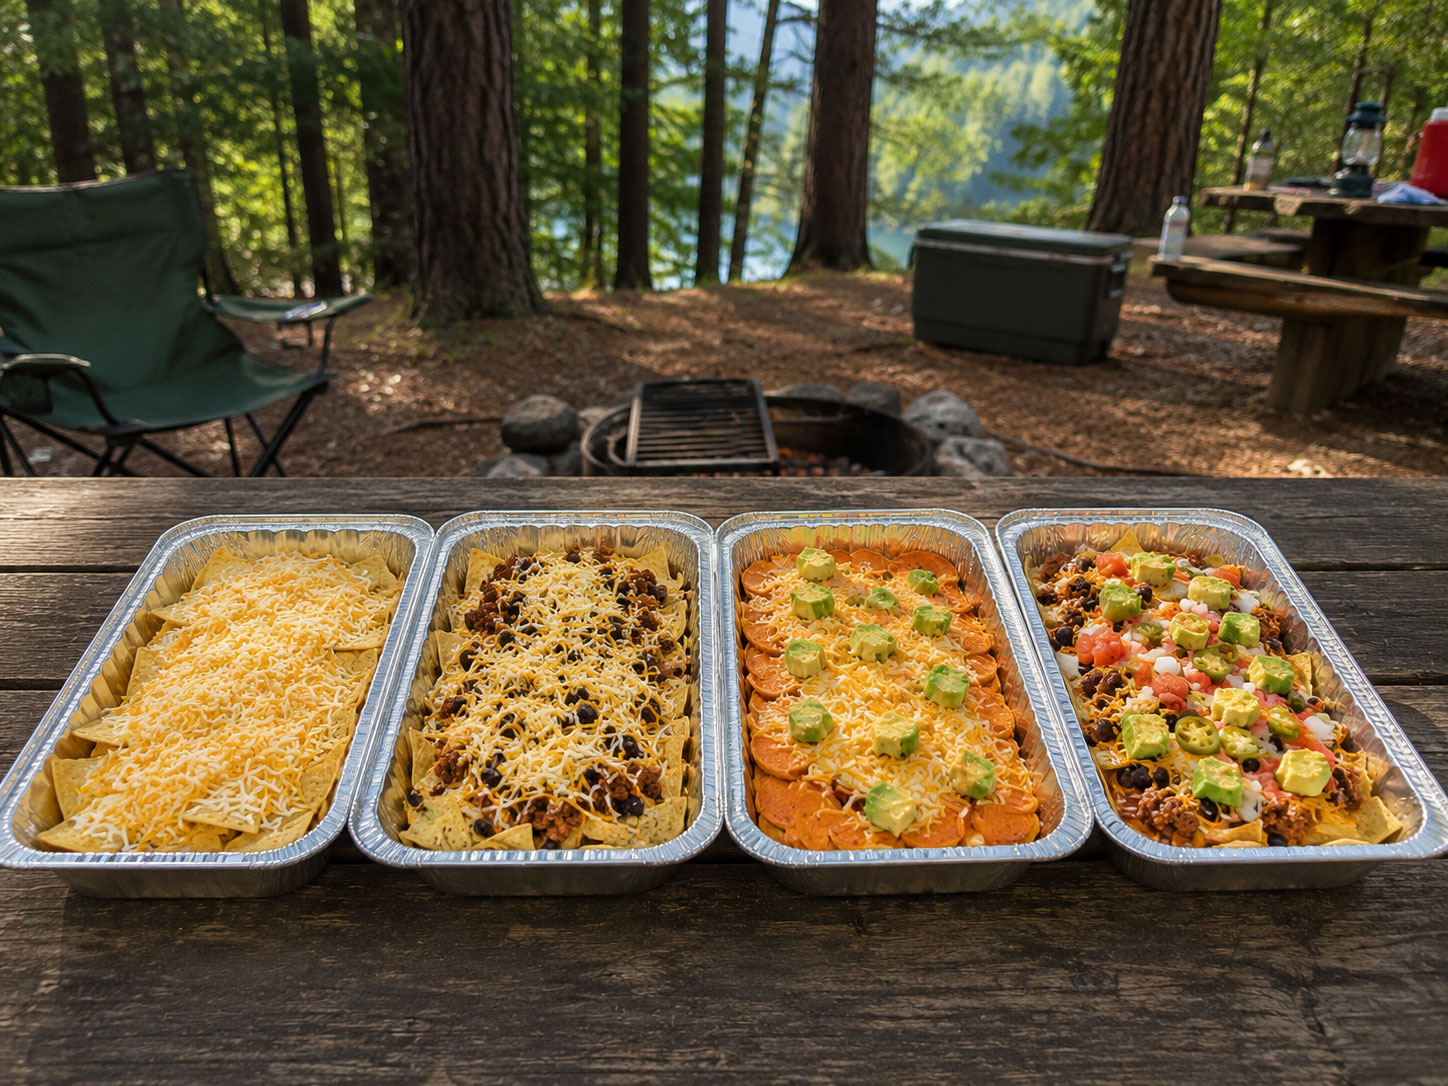
The Sweet Potato Nacho Option (Low-Carb and Absolutely Delicious)
If you are looking to cut carbs or just try something a little different, the sweet potato version of this recipe is a total game changer.
Instead of tortilla chips, you layer thinly sliced sweet potatoes as the base. They get tender and slightly caramelized from the fire, and they hold up beautifully under all those toppings.
The sweet potato version takes a bit longer to cook – plan for closer to 25 to 30 minutes – since the slices need time to soften. But trust me, the result is worth every extra minute of waiting.
We have made both versions on the same camping trip (chips for the kids, sweet potato for the adults), and both pans got completely wiped out. That tells you everything you need to know.
How to Make Campfire Grilled Nachos: Step by Step
This is where it all comes together. Follow these steps and you will have perfect campfire nachos every single time.
Step 1: Prep Your Protein at Home (or at Camp)
If you are using ground meat, cook it ahead of time with your favorite taco seasoning. You can do this at home and just reheat it at camp, which saves so much time and mess.
If you are using rotisserie chicken, just shred it and you are ready to go. No cooking required.
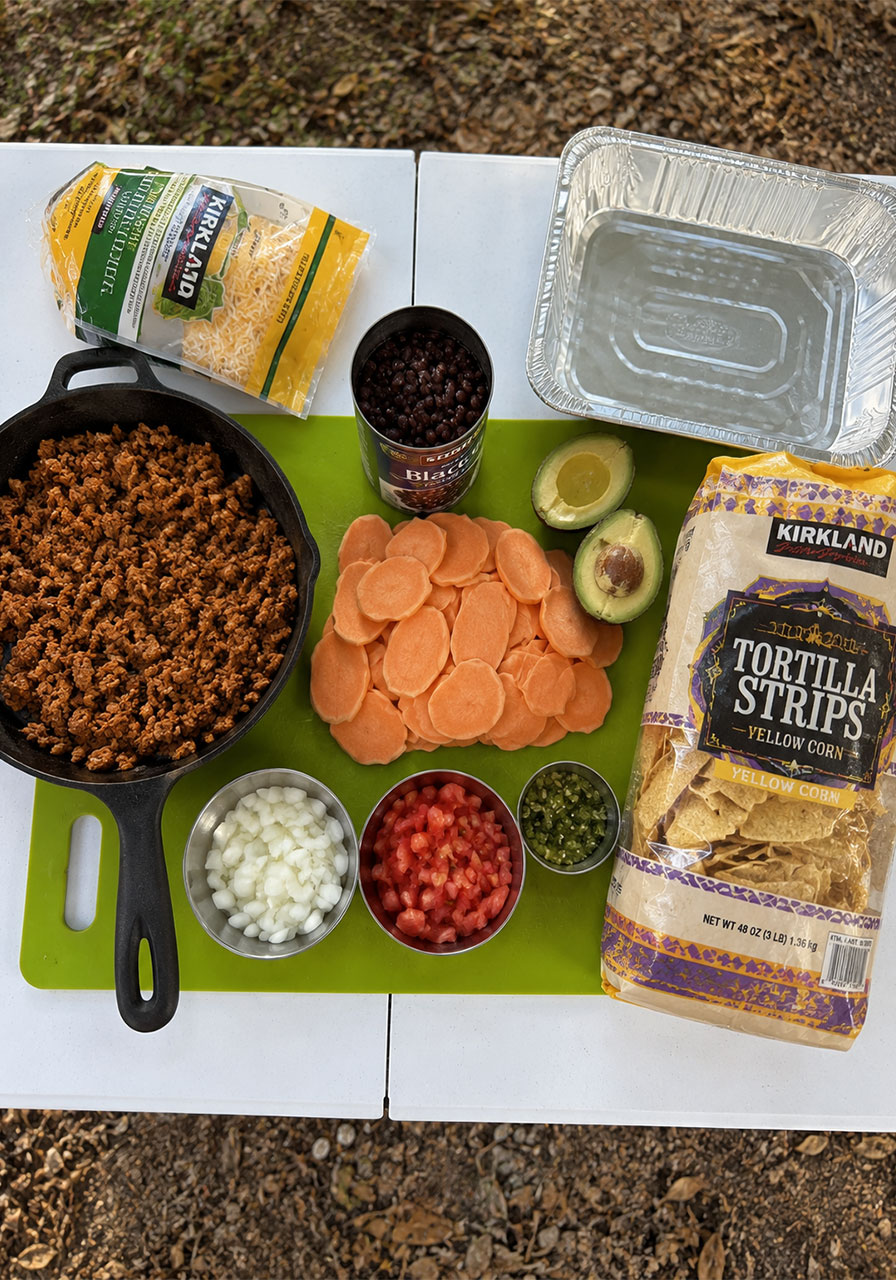
Step 2: Chop All Your Toppings
Dice your tomatoes, onions, and avocado. Open and drain your canned beans. Lay everything out on a cutting board or camp table so assembly is fast and easy.
This “mise en place” moment at the campsite is actually really fun – everyone gets excited when they see all the toppings lined up.
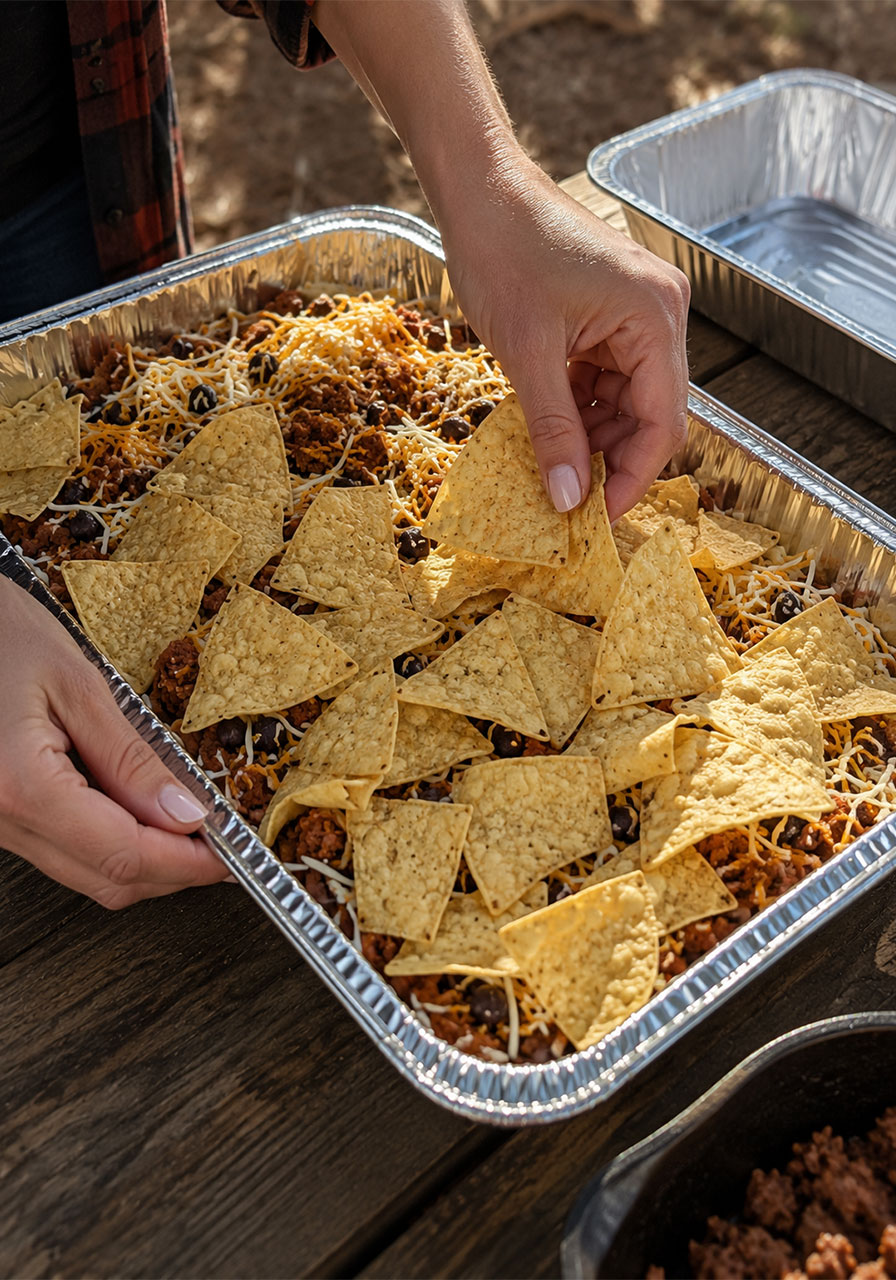
Step 3: Build Your Nacho Pans
Here is the fun part! Give everyone their own foil pan so they can customize their nachos.
1. Start with a layer of tortilla chips (or sweet potato slices) covering the bottom of the pan.
2. Add a layer of your toppings – meat, beans, veggies – over the chips.
3. Add a layer of shredded cheese.
4. Repeat the layers: chips, toppings, cheese.
5. Finish with a generous, thick layer of cheese on top. Do not be shy here. This is the melty golden blanket that ties everything together.
Step 4: Cover Tightly with Foil
Tear off a piece of heavy-duty aluminum foil large enough to cover the top of your pan with some overhang. Press it down firmly and crimp the edges all the way around so it is sealed. This traps the heat inside and melts everything evenly.
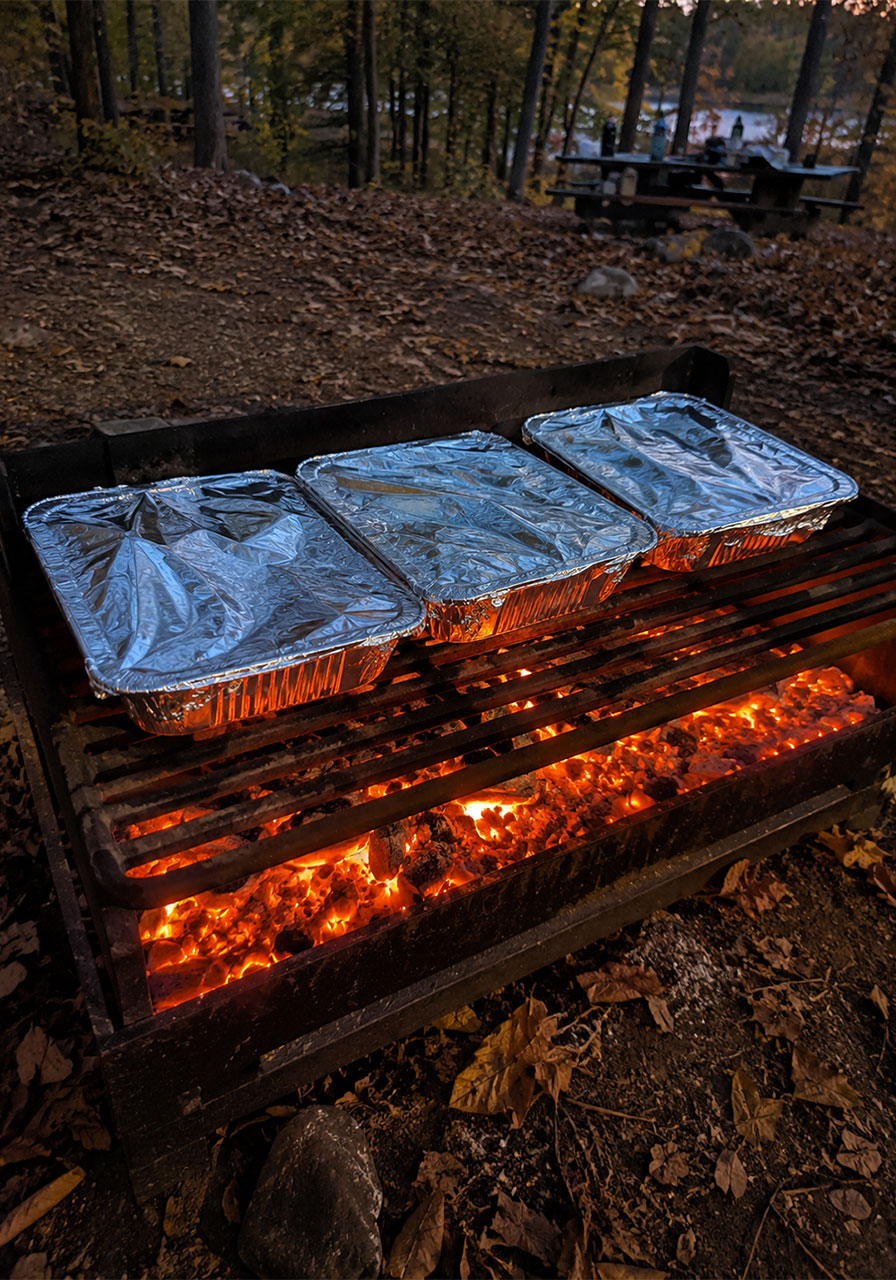
Step 5: Cook Over the Campfire or Grill
Place your covered pans on a grate over the campfire or on a grill. This part is important: do NOT place the pans directly over an open flame. The chips on the bottom will burn before the cheese on top has a chance to melt.
You want indirect, steady heat – like a bed of coals or a grill set to medium.
Cook for 15 to 30 minutes depending on the heat of your fire and whether you are using chips or sweet potato slices.
Step 6: Check and Serve
Carefully peel back a corner of the foil to check on your nachos. The cheese should be fully melted and bubbling, and the toppings should be hot and tender.
Once they look perfect, use tongs or oven mitts to pull the pans off the fire. Be careful – the pans and the foil are very hot.
Let the nachos cool for a few minutes before diving in. They cool down fairly quickly in the foil pan, but the first person to grab a chip always gets a little surprise! Consider yourself warned.
Tips for the Best Campfire Nachos Every Time
A few things we have learned from making this recipe on many, many camping trips:
Do not skip the foil cover. Seriously. Without it, the tops will not get melty and the chips on the bottom will burn. The cover is what makes this work.
Use heavy-duty foil. Regular foil can tear or shift when you are handling hot pans. Heavy-duty holds up much better over the fire.
Watch your fire temperature. A roaring fire is too hot for nachos. Let the flames die down to a nice bed of glowing coals before you put the pans on. If you are using a grill, medium heat is ideal.
Make individual pans for picky eaters. This is one of the greatest things about this recipe. One kid wants only cheese and chips? Easy. Another wants everything? Done. No fighting, no compromises.
Add cold toppings after cooking. If you love sour cream, fresh salsa, or extra guacamole, add those after the pan comes off the fire. Cold toppings on hot nachos – perfection.
The cast iron option gives extra crunch. If you have a cast iron skillet along for the camping trip, use it for slightly crispier nacho edges. Just remember that cast iron stays hot for a long time after it comes off the fire, so set it somewhere safe and give people a heads-up before they reach for it.
How Long Do Campfire Nachos Take to Cook?
This really depends on two things: the heat of your fire and what you used as your base.
Tortilla chip nachos cook faster and are typically ready in about 15 to 20 minutes over medium-high heat.
Sweet potato nachos take longer – closer to 25 to 30 minutes – because the slices need time to actually cook through and become tender.
The best way to check is the peek method: carefully lift a corner of the foil and take a look. If the cheese is melted and bubbling and the toppings look hot, you are good to go.
Can You Make Campfire Nachos at Home?
Absolutely! This recipe is not only for the campsite. You can make grilled nachos at home on your backyard grill using the exact same method.
Set the grill to medium heat, assemble the nachos in a foil pan, cover tightly, and place on the grill. Check after about 15 to 20 minutes. The result is just as delicious as the campfire version – maybe even a little more consistent since you can control the heat more easily.
You can also make these in the oven at home if needed. Just place the covered pan in a 375°F oven for about 20 to 25 minutes until the cheese is melted and everything is hot.
Make-Ahead Tips for Easy Camping Prep
Want to make your life even easier at the campsite? Here is what you can prep at home before you leave:
- Cook and season your taco meat. Store in a zip-lock bag or container. Just reheat at camp.
- Pre-dice your onions and tomatoes and store in separate containers or bags.
- Pre-slice your sweet potatoes if using the low-carb version. Store in a bag with a little water to prevent browning.
- Shred your cheese at home and store in a bag. Way faster than grating at camp.
With all of this prepped in advance, assembling the nachos at camp takes about 10 minutes. Then you can sit back, enjoy the fire, and wait for the best camping meal of your life to be ready.
What to Serve With Campfire Nachos
Honestly, these nachos are a full meal on their own. But if you want to round out the spread, here are a few easy ideas:
- Store-bought guacamole or salsa on the side for dipping
- A simple green salad if you packed salad greens
- Cold drinks – lemonade, sparkling water, or whatever your crew prefers
- Campfire dessert after dinner – think foil pan brownies, dump cake, or classic s’mores
Because after a pan of loaded campfire nachos, you absolutely deserve a s’more. That is just the rule.
Campfire Nachos for a Crowd: Scaling the Recipe
One of the best things about this recipe is how easily it scales. Making nachos for two people? One foil pan. Feeding a group of ten? Set up an assembly line and make as many pans as you need.
For large groups, we recommend setting up a topping station and letting everyone build their own pan. It turns nacho-making into part of the fun, and everyone ends up with exactly what they want.
You can cook multiple pans at the same time on the grate as long as there is room. Just make sure they all have good indirect heat and are not stacked on top of each other.
Frequently Asked Questions About Campfire Nachos
Can I use flour tortilla chips instead of corn?
Yes! Both corn and flour tortilla chips work great in this recipe. It comes down to personal preference. Corn chips tend to hold up a little better under the toppings and heat, but flour tortilla chips give a slightly softer, chewier result.
Can I make these without meat?
Absolutely. Just skip the taco meat and load up on beans, cheese, and all the veggie toppings. A fully vegetarian pan of campfire nachos is just as satisfying and delicious.
What if I do not have a campfire grate?
Most campfire rings at established campgrounds have a grate already built in. If you are at a more rustic site, a small portable camping grate works perfectly. You can find them at most outdoor and sporting goods stores.
My nachos burned on the bottom – what happened?
The most common reason is that the fire or grill was too hot, or the pan was placed directly over an open flame. Make sure you are cooking over indirect heat – a bed of glowing coals rather than active flames. Also, check on your nachos after 15 minutes to catch them before they overcook.
Can I make these in a cast iron skillet?
Yes! Cast iron gives you slightly crispier nacho edges and works beautifully on the grill. Just be very careful handling the skillet – cast iron gets extremely hot and holds that heat for a long time after coming off the fire.
Final Thoughts on Campfire Grilled Nachos
These campfire nachos are the kind of meal that turns a good camping trip into a great one. They are easy, fun, completely customizable, and genuinely delicious.
Whether you go the classic tortilla chip route or try the sweet potato version, whether you load them with taco meat or keep it vegetarian – you really cannot go wrong here.
The best part might actually be the cleanup: one foil pan, no dishes, and happy campers all around.
Make these once on your next camping trip or backyard grill night, and I promise they will become a regular request. Your crew will be talking about these nachos long after the fire has gone out.
Now go build those pans. The campfire is waiting.
Campfire Grilled Nachos
Equipment
- Disposable foil pans (one per person for individual pans, or one large pan to share)
- Heavy-duty aluminum foil
- Campfire grate or grill grate
- Tongs or oven mitts
Ingredients
- Tortilla chips (corn or flour) – or thinly sliced sweet potato for a low-carb version
- 1 lb ground meat (ground turkey or ground beef), cooked with taco seasoning – or shredded rotisserie chicken
- 1 can (15 oz) black beans, drained and rinsed
- 2 cups shredded cheese (Mexican blend or cheddar recommended)
- 1 medium tomato, diced
- 1/2 medium onion, diced
- 1 avocado, diced
- 1 can (4 oz) green chiles
- Optional: jalapeños, pinto beans, refried beans, sour cream, salsa
Instructions
- Prepare your taco meat or protein according to your preferred method. Cook ground meat with taco seasoning in a skillet until fully cooked. If using rotisserie chicken, simply shred it.
- Chop all your toppings: dice the tomato, onion, and avocado. Drain and rinse the canned beans. Set everything out so assembly is fast and easy.
- Place a single layer of tortilla chips (or thinly sliced sweet potato) on the bottom of your foil pan.
- Add a layer of your desired toppings over the chips, including the taco meat, beans, onion, tomato, avocado, and green chiles.
- Add a layer of shredded cheese over the toppings.
- Repeat the layering – chips, toppings, cheese – until the pan is full.
- Finish with a thick, generous layer of shredded cheese on the very top.
- Cover the pan with a piece of heavy-duty aluminum foil and crimp it tightly around all the edges to seal in the heat.
- Place the covered pan on a grate over the campfire or on a grill set to medium heat. Do NOT place it directly over an open flame, or the bottom will burn.
- Cook for 15 to 30 minutes depending on the temperature of your fire. Sweet potato nachos will need closer to 25 to 30 minutes. Tortilla chip nachos are typically ready in 15 to 20 minutes.
- Carefully peel back a corner of the foil to check doneness. The cheese should be fully melted and bubbling, and all toppings should be hot and tender.
- Use tongs or oven mitts to carefully remove the pan from the fire. Allow to cool for a few minutes before serving – the pan will be very hot.
- Add any cold toppings such as sour cream, fresh salsa, or extra guacamole right before eating. Serve directly from the foil pan.
Notes
- Always use indirect heat – a bed of coals rather than active flames – to prevent burning.
- Cast iron skillets also work great for this recipe and give a slightly crispier result. Handle with extreme care as cast iron holds heat for a long time.
- For camping trips, prep the taco meat, diced veggies, and shredded cheese at home before you leave to speed up assembly at the campsite.
- To make this recipe vegetarian, simply skip the meat and add extra beans and veggies.
- The sweet potato version is a delicious low-carb alternative – thinly slice the sweet potato and use in place of tortilla chips.