
Let’s be honest – the campfire is fun, the fresh air is lovely, and the stars are beautiful. But nothing seals a perfect day outdoors quite like something warm, sweet, and gooey in your hands.
These camping desserts are the perfect ending to your day outdoors. Whether you’ve been hiking all afternoon, chasing kids around a lake, or simply sitting in a camp chair soaking in the peace and quiet – you deserve a treat that’s as satisfying as the whole day was.
The best part? You don’t need a full kitchen, a fancy oven, or a pastry degree to pull these off. Most of these ideas need just a handful of ingredients, minimal prep, and a campfire (or a cooler and some self-control).
I’ve camped enough weekends to know that the right dessert can completely transform the vibe around the fire. These are the ones I keep coming back to – and the ones that always get the loudest “oh wow” from everyone at the campsite.
Get your foil ready. Let’s make some magic.
Camp Dessert Gear Worth Packing
Before we dive into the recipes, here’s the short list of gear that makes all of this effortless. You don’t need all of it – but trust me, once you’ve used a cast iron sandwich maker over a fire, you’ll never leave home without one.
Collapsible Marshmallow Roasting Sticks – Ditch the random twig hunt. These are telescoping, safe, and so much easier for kids and adults alike.
Heavy-Duty Aluminum Foil – The MVP of campfire cooking. Get the thick kind. Cheap foil tears and you’ll end up with caramel apples in the fire.
Cast Iron Sandwich Maker – Looks simple, works like a dream. It goes straight on the fire grate and turns any sandwich or dessert filling into something incredible in minutes.
Soft-Sided Cooler – Keeps your strawberries fresh, your yogurt cold, and your chocolate from turning into a puddle before dinner even ends.
Leak-Proof Containers – For your energy bites, chia pudding, or anything you made ahead. These save your camp bag every time.

Classic Campfire Desserts 🔥
There’s a reason these have been campfire staples for decades. They’re simple, they’re crowd-pleasers, and they hit every single time.
1. S’mores 2.0
You already love s’mores. But have you ever made them with a Reese’s Peanut Butter Cup instead of a plain Hershey bar? Or slipped in a Ghirardelli caramel square? That’s the upgrade your taste buds have been waiting for.
The classic formula stays the same – graham cracker, chocolate, toasted marshmallow – but swapping out the chocolate is where the real fun begins. Try dark chocolate, a peppermint patty, or even a square of white chocolate with strawberry jam.

What You’ll Need:
- Graham crackers
- Your choice of chocolate (Reese’s, Ghirardelli, dark chocolate, etc.)
- Large marshmallows
- Marshmallow roasting sticks
How to Make It:
- Break your graham crackers into pairs and set your chocolate on one half of each pair.
- Thread a marshmallow onto your roasting stick and hold it over the fire, rotating slowly until golden brown (or full-on flaming – your call, no judgment).
- Slide the toasted marshmallow onto the chocolate side and press the top cracker down firmly as you pull the stick out.
- Give it 10 seconds to melt the chocolate. Then try not to inhale it in one bite. Good luck.
Pro Tip: Keep a small variety pack of different chocolates at camp and make it a “build your own s’more bar” moment. Everyone gets their own version. Instant hit.
2. Campfire Banana Boats
This one is almost embarrassingly easy – and yet it never fails to blow people away. You’re essentially turning a banana into its own dessert bowl, loading it with good things, and letting the fire do the rest.
The result is warm, gooey, caramelized, and absolutely perfect. Think banana split without the bowls or the mess.

What You’ll Need:
- Ripe bananas (one per person)
- Mini marshmallows
- Mini chocolate chips
- Optional: peanut butter chips, crushed graham crackers, caramel bits
- Heavy-duty foil
How to Make It:
- Without peeling, slice the banana lengthwise down the center – cut through the peel but stop just before the bottom so it stays intact like a little boat.
- Gently pull the cut edges apart to create a pocket.
- Fill the pocket generously with mini marshmallows and chocolate chips (plus anything else you love).
- Wrap the whole banana tightly in foil and place it directly on warm coals or the fire grate.
- Let it cook for 8 to 10 minutes. Unwrap carefully – it’ll be hot! Eat straight from the peel with a spoon.
Pro Tip: The riper the banana, the sweeter and creamier the result. Those spotty bananas you brought that nobody wants to eat on day two? Perfect for banana boats.
3. Campfire Cones
Think of this as a s’more’s fun, portable cousin. You fill a waffle cone with all your favorite sweet things, wrap it in foil, and heat it until everything inside melts together into one glorious bite.
Kids go absolutely wild for these. Adults do too, they’re just quieter about it.

What You’ll Need:
- Waffle cones
- Mini marshmallows
- Chocolate chips
- Optional fillings: sliced strawberries, peanut butter chips, crushed Oreos, banana slices, caramel bits
- Heavy-duty foil
How to Make It:
- Stand each cone upright and start filling from the bottom – layering chocolate chips and marshmallows as you go. Add any extra fillings you like in between the layers.
- Once the cone is full, wrap it completely in foil, twisting the top closed.
- Place on the grate over medium heat for 5 to 8 minutes, turning once halfway through.
- Unwrap carefully (steam alert!) and eat while warm. A spoon helps with the melty bits at the bottom.
Fun Variation: Set out a bunch of filling options and let everyone build their own cone. It’s a low-effort activity that feels like a whole moment.
4. Roasted Cinnamon Apples
This one is for the days when you want something that feels wholesome and indulgent at the same time. Warm apples, cinnamon, a little sugar, and a buttery crumble on top? It tastes like fall in a foil packet.
It also happens to be one of the most comforting things you can eat after a full day of hiking. Your body will thank you.

What You’ll Need:
- 2 to 3 apples, sliced (Honeycrisp or Fuji work great)
- 2 tablespoons brown sugar
- 1 teaspoon cinnamon
- 1 tablespoon butter, cut into small pieces
- Optional: granola, caramel sauce, chopped walnuts
- Heavy-duty foil
How to Make It:
- Slice your apples and toss them with brown sugar and cinnamon right in the foil – fewer dishes, more camping.
- Dot the top with small pieces of butter.
- Fold the foil up into a sealed packet, leaving a little room for steam.
- Place on the fire grate and cook for 12 to 15 minutes, or until the apples are tender and the juices are bubbling.
- Open carefully, add granola or a drizzle of caramel if you’re going all in, and eat straight from the packet.
Pro Tip: Pre-slice the apples at home and store them in a zip-lock bag with a squeeze of lemon juice to keep them from browning. Even less work at camp.
5. Grilled Nutella & Marshmallow Sandwiches
If you haven’t made one of these yet, please understand that your camping life is about to be split into “before” and “after.” Nutella and mini marshmallows, sandwiched between two slices of bread and pressed in a cast iron sandwich maker over the fire until golden and crispy on the outside, molten and dreamy on the inside.
It’s a s’more that went to culinary school.

What You’ll Need:
- Sandwich bread (brioche or thick white bread is incredible here)
- Nutella
- Mini marshmallows
- Butter or cooking spray for the sandwich maker
- Cast iron sandwich maker
How to Make It:
- Preheat your sandwich maker over the fire for a couple of minutes.
- Spread a generous layer of Nutella on one slice of bread. Pile on mini marshmallows.
- Close the sandwich, trim the edges if needed, and place it in the greased sandwich maker.
- Press closed and hold over medium heat for 2 to 3 minutes per side until golden brown and toasted.
- Open carefully – the marshmallows will be lava-hot inside. Wait 60 seconds. Then absolutely devour it.
Fun Variation: Add sliced bananas or a few fresh raspberries inside for a next-level version that feels absolutely gourmet.
No-Bake Camping Desserts 🥜
No fire? No problem. These require zero heat and still deliver on the sweet-treat promise. They’re also the most grab-and-go friendly options for trail desserts or mid-afternoon snack attacks.
6. Peanut Butter & Chocolate Energy Bites
These little guys are doing the most. They taste like a no-bake cookie, they travel perfectly, and they’re packed with real ingredients that actually give you energy – not just a sugar crash. Make them the night before you leave and you’ll be snacking happily all weekend.

What You’ll Need:
- 1 cup rolled oats
- ½ cup peanut butter
- ⅓ cup honey
- ½ cup mini chocolate chips
- 1 teaspoon vanilla extract
- Optional: flax seeds, chia seeds, shredded coconut
How to Make It:
- Mix all ingredients together in a bowl until fully combined. The mixture should be sticky but holdable.
- Refrigerate for 30 minutes so they firm up and are easier to roll.
- Roll into 1-inch balls using your hands.
- Store in a sealed container in your cooler. They keep well for up to 5 days.
Pro Tip: Double the batch. Seriously, they disappear faster than you think. Also great for morning hikes when you want something sweet but substantial.
7. No-Bake S’mores Bars
All the flavors of s’mores – graham crackers, chocolate, marshmallows – in a neat, press-and-chill bar you can make at home and bring in a container. No fire required, no sticky fingers around the campsite. Well, maybe a few.

What You’ll Need:
- 2 cups crushed graham crackers
- 2 cups mini marshmallows
- 1½ cups chocolate chips
- 4 tablespoons butter
How to Make It:
- Melt butter and chocolate chips together in a saucepan over low heat, stirring until smooth.
- Remove from heat and stir in crushed graham crackers and mini marshmallows.
- Press the mixture firmly into a parchment-lined pan.
- Refrigerate for at least 2 hours until set. Cut into bars and store in a container with a lid.
Pro Tip: Press parchment into the pan before adding the mixture – makes removing and cutting the bars so much easier without any sticking.
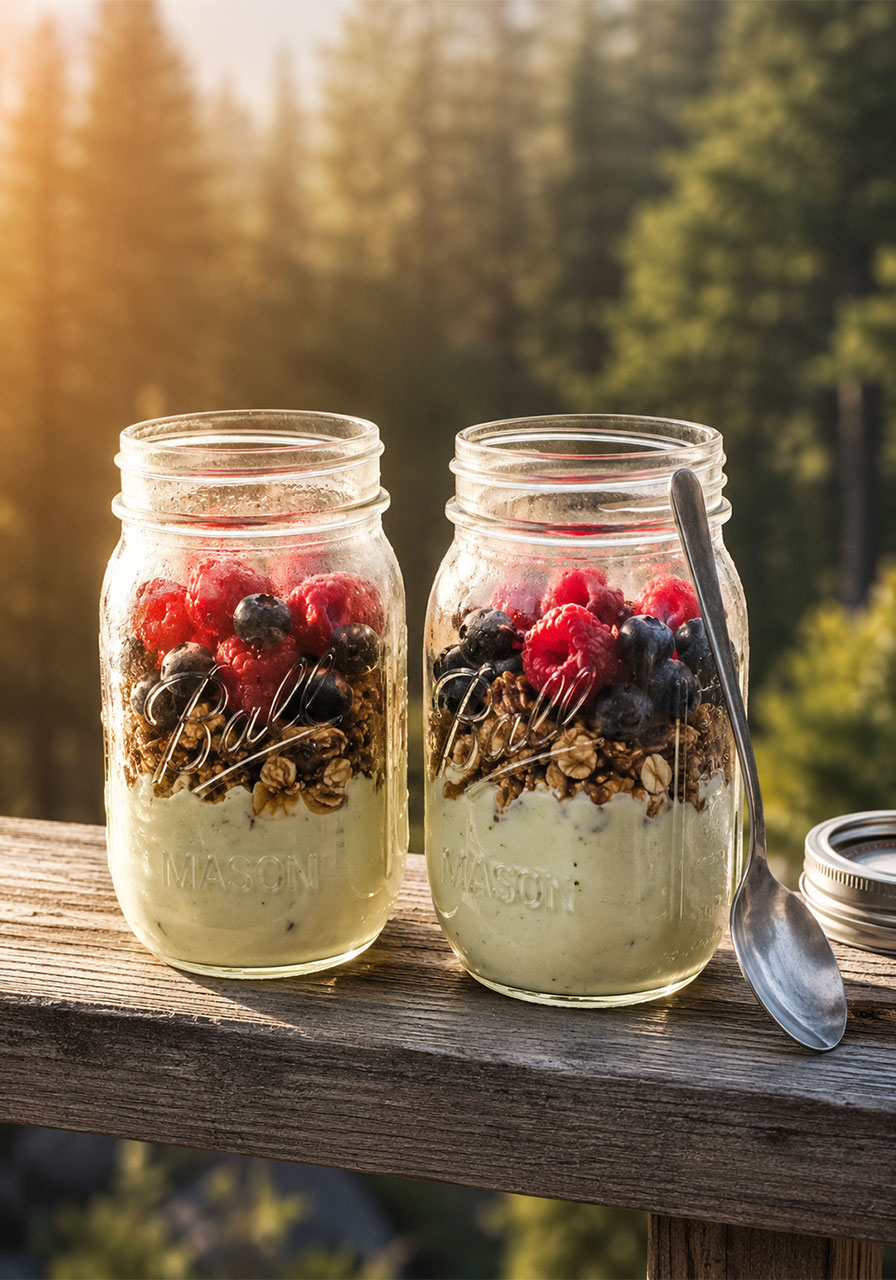
8. Yogurt Parfaits in Mason Jars
These look way more impressive than the effort they require. Layer yogurt, fresh fruit, and granola in individual mason jars at home, seal them, and tuck them in the cooler. They work as dessert, they work as breakfast, and honestly they work as a mid-afternoon “I deserve this” treat.

What You’ll Need:
- Greek yogurt (vanilla or plain)
- Fresh berries or fruit
- Granola
- Honey (optional)
- Mason jars with lids
How to Make It:
- Spoon a layer of yogurt into the bottom of each jar.
- Add a layer of fruit, then a layer of granola.
- Repeat the layers until the jar is full. Drizzle honey on top if you like.
- Seal with the lid and refrigerate or pack straight in the cooler.
- Eat within 24 to 48 hours for the best texture (the granola softens over time).
Pro Tip: Keep the granola in a separate small bag if you’re packing for more than one day. Add it right before eating so it stays crunchy.
9. Chocolate-Dipped Strawberries
This is the one that makes everyone at the campsite ask “wait, you made these?” And you just smile, because the secret is they took you about 20 minutes the night before you left. Melt chocolate, dip, chill, pack. Done.
They feel romantic and indulgent and a little fancy – which is exactly the kind of treat you deserve after a day in nature.

What You’ll Need:
- Fresh strawberries, washed and dried completely
- 1 cup dark or semi-sweet chocolate chips
- 1 teaspoon coconut oil (helps the chocolate melt smoothly)
- Optional: white chocolate for drizzle, crushed graham crackers for dipping
How to Make It:
- Make sure your strawberries are completely dry – any moisture causes the chocolate to seize.
- Melt chocolate chips and coconut oil together in the microwave in 30-second intervals, stirring between each, until silky smooth.
- Dip each strawberry by the stem, letting excess chocolate drip off. Place on a parchment-lined tray.
- Drizzle with white chocolate or sprinkle with toppings if desired.
- Refrigerate until the chocolate sets (about 30 minutes), then pack in a container in your cooler.
Pro Tip: Pair these with a glass of red wine by the campfire and you have officially won camping. You’re welcome.
10. Coconut Date Balls
Don’t let the “healthy” label fool you – these are genuinely delicious. Dates are naturally caramel-sweet, and when you blend them with almonds and roll them in shredded coconut, the result is a little truffle-like bite that satisfies every sweet craving without weighing you down.
Perfect for women who want to feel good in their body while still treating themselves – which is every day, by the way.

What You’ll Need:
- 1 cup Medjool dates, pitted
- 1 cup raw almonds
- 1 cup shredded coconut (divided)
- Pinch of salt
- Optional: 1 tablespoon cacao powder for a chocolate version
How to Make It:
- Add almonds to a food processor and pulse until they become coarse crumbs.
- Add dates, half the shredded coconut, and a pinch of salt. Process until the mixture sticks together and forms a dough.
- Roll into small balls using your hands.
- Roll each ball in the remaining shredded coconut to coat.
- Refrigerate until firm and pack in a sealed container for camp.
Pro Tip: If your dates feel dry, soak them in warm water for 10 minutes before blending. It makes the dough smoother and much easier to roll.
Foil Packet & Dutch Oven Desserts 🍫
These are the showstoppers. Pull out a Dutch oven peach cobbler at the end of a camp dinner and you will become an instant legend at every campsite within earshot.
11. Campfire Peach Cobbler
This one is almost too easy for how impressive it looks and tastes. Canned peaches, a box of yellow cake mix, and butter – and your Dutch oven does the rest over the coals. The top gets golden and crumbly, the peaches underneath get syrupy and sweet, and the whole thing smells like a bakery in the woods.
I cannot stress enough: bring a big spoon and extra bowls.

What You’ll Need:
- 2 cans (15 oz each) sliced peaches in syrup, undrained
- 1 box yellow cake mix
- ½ cup (1 stick) butter, sliced into thin pats
- Optional: cinnamon, vanilla ice cream (if your cooler is cold enough)
How to Make It:
- Pour both cans of peaches (liquid and all) into the bottom of your Dutch oven.
- Sprinkle the dry cake mix evenly over the top – do not stir.
- Lay the butter pats across the cake mix in a single layer.
- Cover with the lid and place over a bed of hot coals. Add a few coals on top of the lid too for even heat.
- Cook for 25 to 30 minutes, checking at 20 minutes, until the top is golden and the edges are bubbling. Serve hot.
Pro Tip: You can prep the peach layer at home and pour it into a zip-lock bag. At camp, just dump it in the Dutch oven and go from there. Saves time and dishes.
12. Chocolate Lava Cake in a Dutch Oven
Yes. You can make chocolate lava cake in the woods. It sounds wildly ambitious, but it’s genuinely one of the most achievable camp desserts on this list – and the payoff is completely ridiculous in the best way. Rich, fudgy cake with a molten chocolate center. Under the stars. In a Dutch oven.
What You’ll Need:
- 1 box chocolate cake mix + ingredients listed on box
- 1 box chocolate instant pudding mix
- 2 cups hot water
- Parchment paper to line the Dutch oven
How to Make It:
- Line your Dutch oven with parchment paper and spray lightly with cooking spray.
- Prepare the cake batter according to box directions and pour it into the Dutch oven.
- Sprinkle the dry pudding mix over the top of the batter – do not stir.
- Carefully pour hot water over the pudding layer – again, do not stir. It will look messy. That’s perfect.
- Cover and cook over coals (with coals on top of the lid) for 35 to 45 minutes until the top is set but still slightly jiggly in the center.
- Scoop into bowls – you’ll hit that gooey molten layer underneath. Eat immediately.
Pro Tip: Mix the dry cake batter ingredients together in a zip-lock bag at home. At camp, just add the wet ingredients. One less bowl to wash.
13. Grilled Pound Cake with Berries
This is the elegant option – the one that feels like something you’d get at a nice brunch but requires approximately zero culinary skill. Toast slices of store-bought pound cake directly on the fire grate until you get those gorgeous golden grill marks, then top with fresh berries. Simple, beautiful, delicious.

What You’ll Need:
- 1 store-bought pound cake, sliced about ¾ inch thick
- 1 cup fresh mixed berries (strawberries, blueberries, raspberries)
- Whipped cream in a can (optional but highly recommended)
- Honey or powdered sugar for drizzle
How to Make It:
- Place pound cake slices directly on a clean, hot grill grate over medium heat.
- Grill for about 2 minutes per side until you get golden grill marks and the edges start to crisp slightly.
- Transfer to a plate and top with fresh berries right away.
- Add a swirl of whipped cream and a drizzle of honey if you’re going full treat-yourself mode.
Pro Tip: Macerate your berries at home before the trip – just toss them with a tablespoon of sugar and let them sit for 30 minutes. They’ll release their juices and taste even more intensely sweet and flavorful.
Healthy Camping Desserts 🥭
Good food nourishes your body and your soul – and these options do both. They’re light enough that you won’t feel sluggish on a morning hike, and satisfying enough that you don’t feel like you’re missing out on anything.
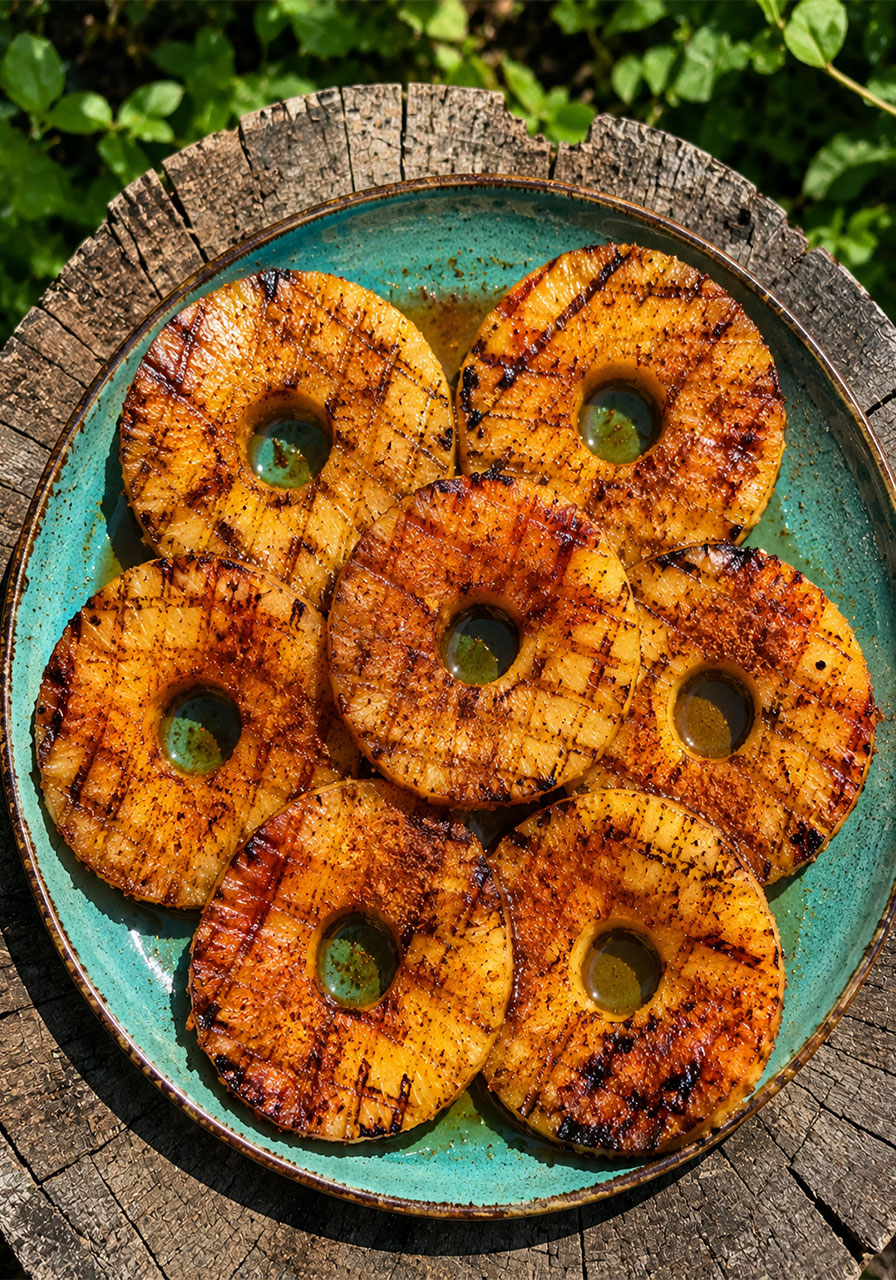
14. Campfire Grilled Pineapple
There’s something almost magical about what heat does to pineapple. The natural sugars caramelize against the grill, the edges get slightly charred, and the result is warm, sweet, and deeply satisfying. This is the dessert that makes people say “wait, this is just fruit?” with genuine disbelief.
What You’ll Need:
- 1 fresh pineapple, peeled and sliced into rings
- 1 teaspoon cinnamon
- 1 tablespoon brown sugar or honey
- Optional: coconut flakes, lime zest, a dollop of Greek yogurt
How to Make It:
- Pat the pineapple rings dry with a paper towel – this helps them caramelize rather than steam.
- Sprinkle each ring with a pinch of cinnamon and a little brown sugar.
- Place directly on the grill grate over medium-high heat.
- Grill for 2 to 3 minutes per side until golden and caramelized with visible grill marks.
- Serve warm as is, or top with coconut flakes and a squeeze of lime for extra brightness.
Pro Tip: Grill pineapple at the end of dinner while the fire is still hot – the timing works out perfectly and it feels like the whole meal was planned to perfection.
15. Chia Pudding with Berries
Mix it the night before your trip, pack it in the cooler, and you have a creamy, luscious dessert (or breakfast) waiting for you whenever you want it. Chia pudding is endlessly satisfying, packed with omega-3s and fiber, and somehow feels like a luxurious treat even though it’s made of about four things.

What You’ll Need:
- ¼ cup chia seeds
- 1 cup almond milk (or coconut milk for a richer version)
- 1 to 2 tablespoons honey or maple syrup
- ½ teaspoon vanilla extract
- Fresh berries for topping
How to Make It:
- Stir chia seeds, milk, sweetener, and vanilla together in a jar or container.
- Mix well, then stir again after 5 minutes to prevent clumping at the bottom.
- Seal and refrigerate overnight (or at least 4 hours).
- At camp, pull from the cooler and top with fresh berries right before eating.
Pro Tip: Make individual portions in mason jars so everyone has their own ready-to-eat serving. No scooping, no extra bowls – just pop the lid and enjoy.
Make-Ahead Camping Desserts 🍪
These are your secret weapons – the desserts that require zero effort at camp because all the work happened in your cozy kitchen before you left. Pack them up, tuck them in your snack bag, and enjoy the looks of appreciation from everyone around the fire.
16. Oatmeal Chocolate Chip Cookies
Is there anything more comforting than pulling a container of homemade oatmeal chocolate chip cookies out of your camp bag? These travel beautifully, stay chewy for days, and feel like a hug in cookie form after a long day on the trails.

What You’ll Need:
- Your favorite oatmeal chocolate chip cookie recipe (or a good store-bought mix)
- Rolled oats, flour, butter, sugar, eggs, vanilla, chocolate chips
- Airtight storage bag or container
How to Make It:
- Bake your cookies at home a day before the trip.
- Let them cool completely before packing – this keeps them from getting soggy.
- Store in a zip-lock bag or airtight container. They keep well at room temperature for 4 to 5 days.
Pro Tip: Slightly underbake by 1 to 2 minutes. They’ll firm up as they cool and stay perfectly chewy rather than dry – which matters even more when you’re eating them two days later at a campsite.
17. Brownie Bites
Rich, fudgy, perfectly portioned. Brownie bites are the dessert equivalent of a warm blanket. They’re easy to make, easy to pack, and easy to eat far too many of – which is exactly the right energy for a camping trip.

What You’ll Need:
- 1 box brownie mix (plus ingredients listed on box)
- Mini muffin tin
- Cooking spray
- Optional: chocolate chips folded in, or a swirl of peanut butter on top
How to Make It:
- Prepare brownie batter according to box directions.
- Spray a mini muffin tin generously and fill each cup about ¾ full.
- Bake at 350°F for 12 to 15 minutes until just set in the center.
- Let cool completely before removing. Store in an airtight container.
Pro Tip: Add a peanut butter chip or a single chocolate chip on top of each bite right when they come out of the oven. It melts in and looks completely intentional and beautiful.
18. Homemade Trail Mix Bars
These are the overlap between “dessert” and “fuel” – and they’re glorious for it. Packed with nuts, dried fruit, oats, and honey, they give you real sustained energy and taste sweet enough to feel like a treat. Make a pan before you go and you’ll have snacks for the whole trip.

What You’ll Need:
- 2 cups rolled oats
- 1 cup mixed nuts (almonds, cashews, peanuts)
- ½ cup dried fruit (cranberries, apricots, raisins)
- ⅓ cup honey
- ¼ cup peanut butter or almond butter
- Optional: mini chocolate chips, shredded coconut, pumpkin seeds
How to Make It:
- Preheat oven to 325°F. Line a 9×9 baking pan with parchment paper.
- Warm honey and nut butter together in a small saucepan until combined and pourable.
- Mix oats, nuts, and dried fruit in a large bowl. Pour the warm honey mixture over and stir to coat everything.
- Press firmly into the prepared pan – really press it down hard so the bars hold together.
- Bake for 18 to 22 minutes until golden on the edges. Let cool completely before cutting into bars.
Pro Tip: Refrigerate the pan for 30 minutes before cutting. Completely cold bars slice cleanly without falling apart.
19. Cinnamon Sugar Tortilla Chips
Churros are incredible, but nobody is deep-frying anything at a campsite. These cinnamon sugar tortilla chips are your effortless alternative – crispy, sweet, and perfect for dipping into chocolate sauce, apple butter, or just eating by the handful. Make them at home and bring them in a bag.

What You’ll Need:
- 4 to 6 flour tortillas
- 3 tablespoons butter, melted
- 3 tablespoons sugar
- 1½ teaspoons cinnamon
- Optional: chocolate dipping sauce, caramel dip, apple butter
How to Make It:
- Preheat oven to 375°F. Mix sugar and cinnamon together in a small bowl.
- Brush tortillas lightly with melted butter on both sides.
- Sprinkle the cinnamon sugar generously over one side.
- Cut each tortilla into wedges or strips and arrange in a single layer on a baking sheet.
- Bake for 10 to 12 minutes until crispy and golden. Let cool, then store in a bag or container.
Pro Tip: Pack a small container of Nutella alongside these for instant s’more-style dipping. That combo is dangerously good.
20. Rice Krispie Treats
Simple, nostalgic, universally loved. There’s not a person alive who doesn’t smile when they see a Rice Krispie treat. Make a big batch before you leave, cut them into generous squares, wrap them individually, and bring them along as the easy dessert everyone reaches for first.

What You’ll Need:
- 6 cups Rice Krispies cereal
- 4 cups mini marshmallows
- 3 tablespoons butter
- Optional: sprinkles, chocolate drizzle, a pinch of sea salt on top
How to Make It:
- Melt butter in a large pot over low heat. Add marshmallows and stir until completely melted and smooth.
- Remove from heat and add the cereal. Stir quickly to coat everything before it sets.
- Press into a buttered 9×13 pan. Use a piece of parchment to press firmly without sticking.
- Let cool completely (at least 30 minutes) before cutting into squares.
- Wrap individual squares in plastic wrap for easy grab-and-go servings.
Pro Tip: A pinch of flaky sea salt on top makes these taste genuinely elevated – salty-sweet is a magic combination that even kids love.
21. Fire-Roasted S’mores Dip
This one’s for when you want the full s’mores experience but without the individual roasting stick juggling act. Melt chocolate chips in the bottom of a cast iron skillet over the fire, pile mini marshmallows on top, and toast until golden and bubbly. Then everyone dips graham crackers straight into the skillet together. It’s communal, it’s messy, and it’s absolutely unforgettable.

What You’ll Need:
- 1½ cups chocolate chips
- 2 cups mini marshmallows
- Graham crackers for dipping
- Small cast iron skillet
How to Make It:
- Spread chocolate chips in the bottom of the skillet and place over medium fire heat until just melted, stirring gently.
- Pile mini marshmallows on top of the melted chocolate.
- Move to indirect heat (or the edge of the fire) and cover loosely with foil for 3 to 5 minutes until marshmallows are puffed and golden.
- Set in the center of the group with graham crackers for dipping. Eat immediately – it sets as it cools.
Pro Tip: Add peanut butter chips to the chocolate layer for a Reese’s-style dip that will have everyone completely obsessed.
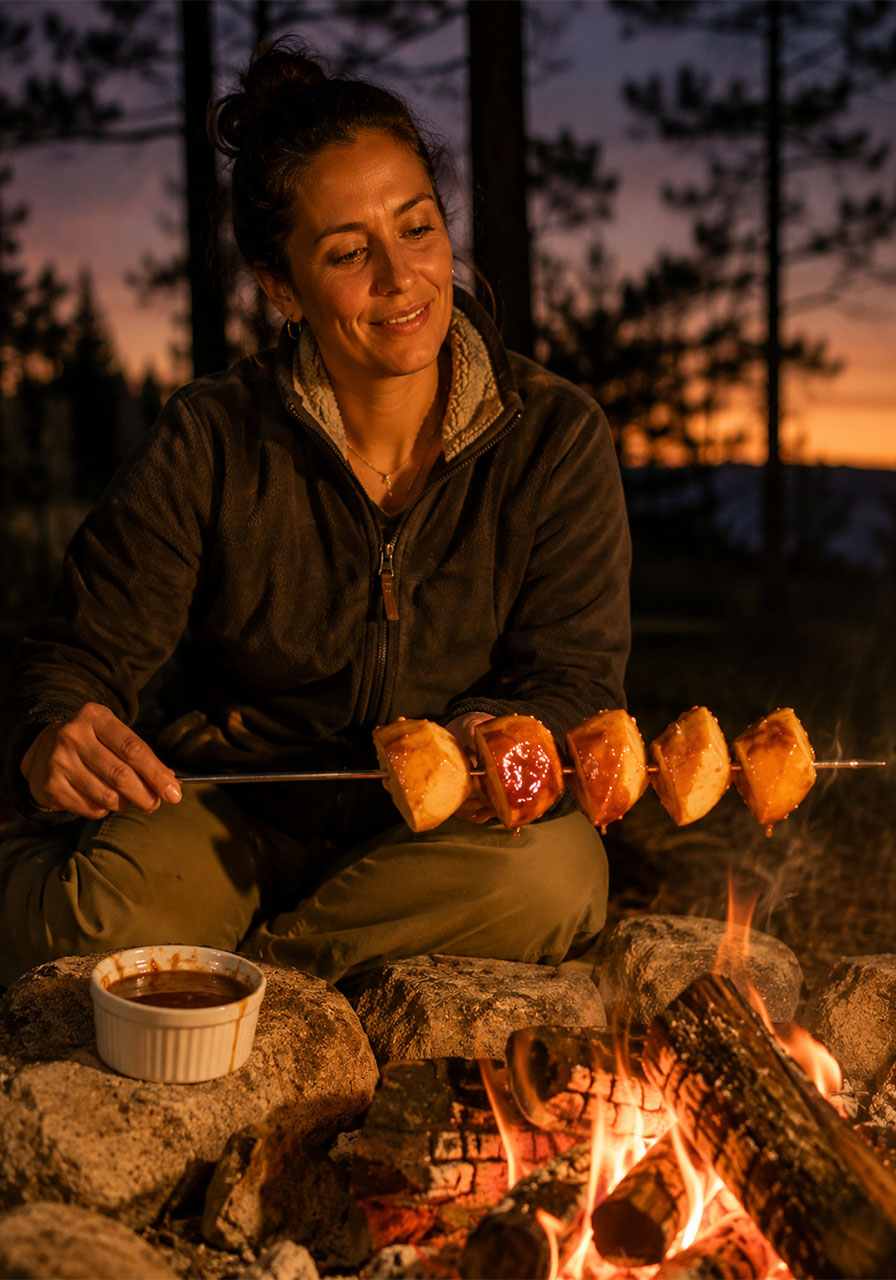
22. Campfire Cinnamon Sugar Apples on a Stick
Think candy apple meets campfire snack. Thread apple chunks onto skewers, brush with a cinnamon-butter glaze, and roast over the fire until caramelized and tender. They’re playful, easy for kids to hold, and taste like a fall festival in every single bite.
What You’ll Need:
- 3 apples, cut into large chunks
- 2 tablespoons melted butter
- 2 tablespoons brown sugar
- 1 teaspoon cinnamon
- Skewers or roasting sticks
How to Make It:
- Mix melted butter, brown sugar, and cinnamon in a small bowl.
- Thread apple chunks onto skewers, leaving a little space between each piece.
- Brush generously with the cinnamon butter on all sides.
- Hold over the fire, rotating slowly, for 5 to 8 minutes until the apples soften and the sugar caramelizes to a gorgeous golden brown.
- Let cool for one minute before eating – they get very hot inside.
Pro Tip: Dip the finished apple chunks in a small container of Greek yogurt or caramel sauce. It takes them from snack to full dessert territory in about two seconds.
23. Dark Chocolate Bark with Nuts & Dried Fruit
This is the most effortless make-ahead camping dessert on the entire list. Melt dark chocolate, pour it thin onto parchment, scatter your favorite toppings across the top, and let it harden. Break into pieces, pack in a bag, and enjoy a sophisticated little treat by the fire that also happens to be genuinely good for you.

What You’ll Need:
- 2 cups dark chocolate chips (70% cacao or higher)
- ¼ cup chopped almonds or pistachios
- ¼ cup dried cranberries or cherries
- Flaky sea salt for sprinkling
- Optional: pumpkin seeds, shredded coconut, orange zest
How to Make It:
- Melt chocolate chips in the microwave in 30-second intervals, stirring between each, until smooth.
- Pour onto a parchment-lined baking sheet and spread thin (about ¼ inch).
- Scatter nuts, dried fruit, and a pinch of flaky salt across the top immediately.
- Let harden at room temperature for 1 hour, or refrigerate for 30 minutes.
- Break into irregular pieces and store in a bag in your cooler or a cool, dark spot.
Pro Tip: Dark chocolate keeps much better in warm weather than milk chocolate. This is the smart choice for camping trips where the temperature isn’t entirely predictable.
24. Campfire Hot Chocolate with Whipped Cream
Okay, technically this is a drink – but when it’s rich and thick and topped with a generous cloud of whipped cream, it absolutely counts as dessert. Warming your hands around a camp mug of real hot chocolate at the end of a full day outdoors is one of life’s genuinely perfect simple pleasures.

What You’ll Need:
- 2 tablespoons unsweetened cocoa powder per mug
- 2 tablespoons sugar per mug
- 1 cup whole milk or oat milk per mug
- Pinch of salt
- Whipped cream in a can
- Optional: mini marshmallows, cinnamon, a splash of vanilla
How to Make It:
- Heat milk in a small camp pot over the fire until steaming but not boiling.
- Whisk in cocoa powder, sugar, and salt until fully dissolved and smooth.
- Pour into mugs and top generously with whipped cream.
- Add a sprinkle of cinnamon or a small handful of mini marshmallows on top.
- Wrap your hands around the mug, look up at the stars, and breathe.
Pro Tip: Pre-mix your cocoa powder, sugar, and salt at home in a small zip-lock bag – one bag per serving. At camp, you just dump and stir. No measuring cups needed.
Your Sweetest Camping Nights Start Here
There’s something deeply nourishing about ending a day outdoors with a dessert you made yourself – even if “made yourself” means you threw a banana in foil and tossed it in the fire. It’s the intention that counts. The sweetness. The moment of sitting around the fire with the people you love, sticky-fingered and smiling.
These camping dessert ideas are designed to meet you exactly where you are – whether you’re a seasoned outdoor chef or someone who normally counts granola bars as a cooking win. All it takes is a little prep, a good cooler, and a campfire with your name on it.
Bookmark this list, pack your foil, and go enjoy every last gooey, caramelized, chocolatey bite. You’ve more than earned it.
