
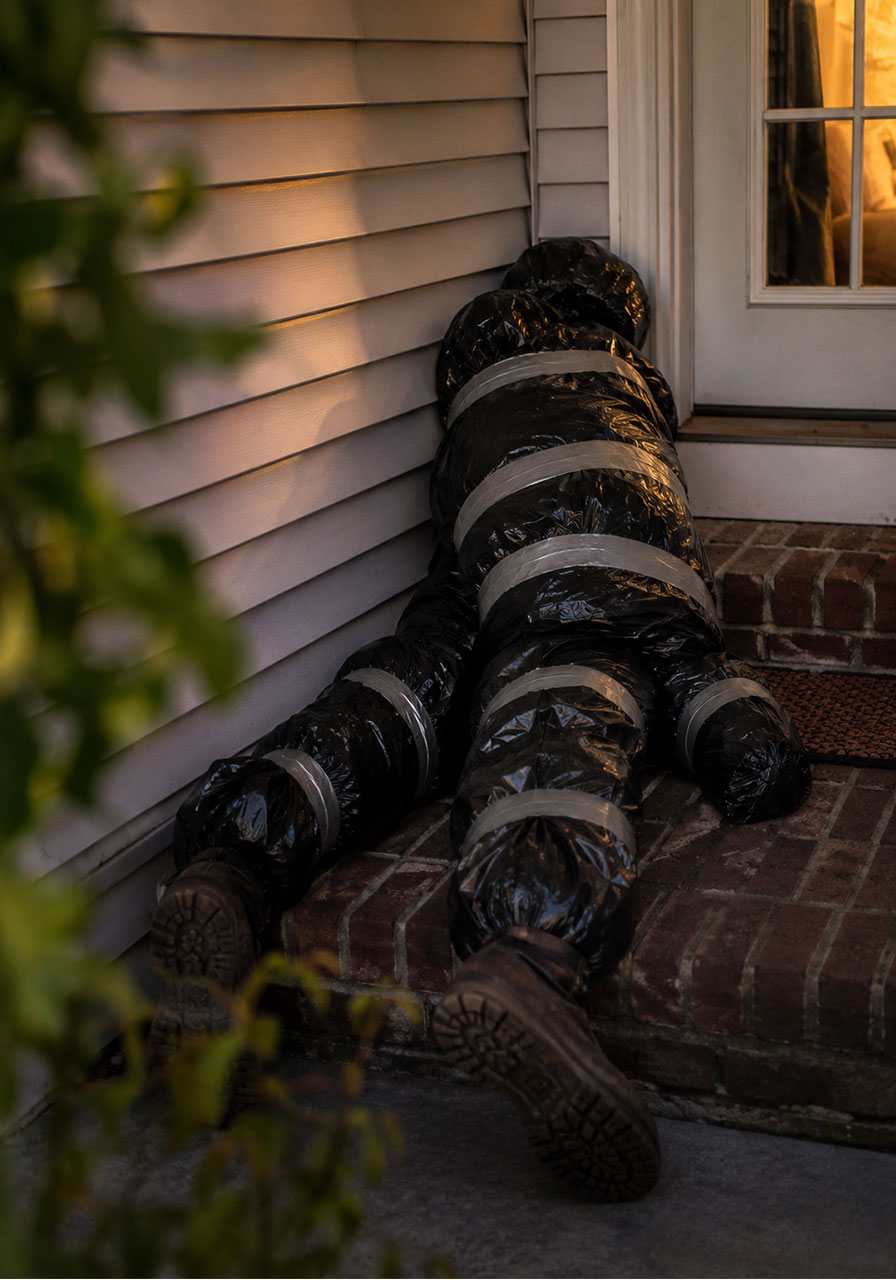
Want a Halloween prop that stops foot traffic, gets tagged in a hundred Facebook comments, and costs next to nothing? Say hello to the bagged body: a life-size “corpse” made from contractor bags, duct tape, and stuff you already have lying around the house.
This prop is a total showstopper because it looks unsettlingly real from the street, yet it comes together in an afternoon with zero carpentry skills required.
Below, we’re walking you through exactly how to build one, step by step, so there’s no guesswork and no “wait, what do I do with the head?” moment halfway through.
Why This Prop Works So Well
Here’s the thing about bagged bodies: they’re unnervingly convincing precisely because they’re so simple. The lumpy, uneven shape you get from stuffing bags with newspaper and taping them off in sections is exactly what makes it read as “human” instead of “obviously a prop.”
One host we know propped hers by the front door just to snap a photo for later. Her husband saw it first, assumed the worst, and posted it to Facebook before she’d even finished decorating. The phone did not stop buzzing for an hour.
That’s the kind of reaction you’re signing up for. Consider yourself warned.

Project Snapshot
Best for: Front porches, doorsteps, driveways, or anywhere trick-or-treaters and neighbors will walk by.
Time to make: About 1-2 hours per body.
Skill level: Beginner-friendly. No tools, no sewing, no power equipment.
Budget: Under $15 if you’re working with supplies you already have around the house.
What You’ll Need
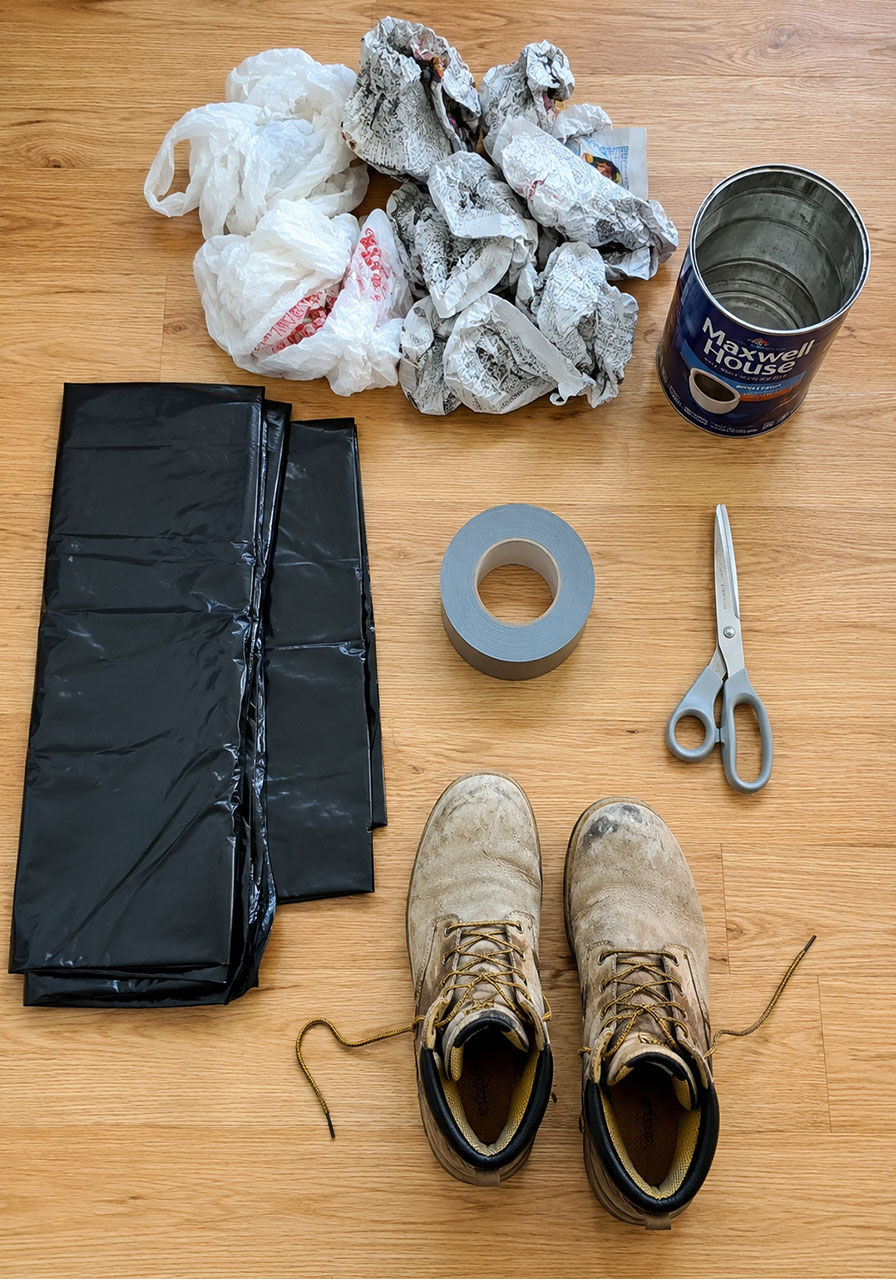
2 large contractor bags (heavy-duty black bags, not regular kitchen trash bags)
1 roll of duct tape
Scissors
A pair of old boots or shoes you don’t mind sacrificing
Stuffing material: newspaper, plastic grocery bags, paper bags, or packing bubbles all work great
A metal can or cylinder (an empty coffee can or food can is perfect)
How to Make Your Bagged Body
Step 1: Check your bag length.
Lay two contractor bags end to end on the floor and measure them against the approximate height of the body you’re creating. If two bags cover the length you need, you won’t need a third.
Step 2: Build the feet.
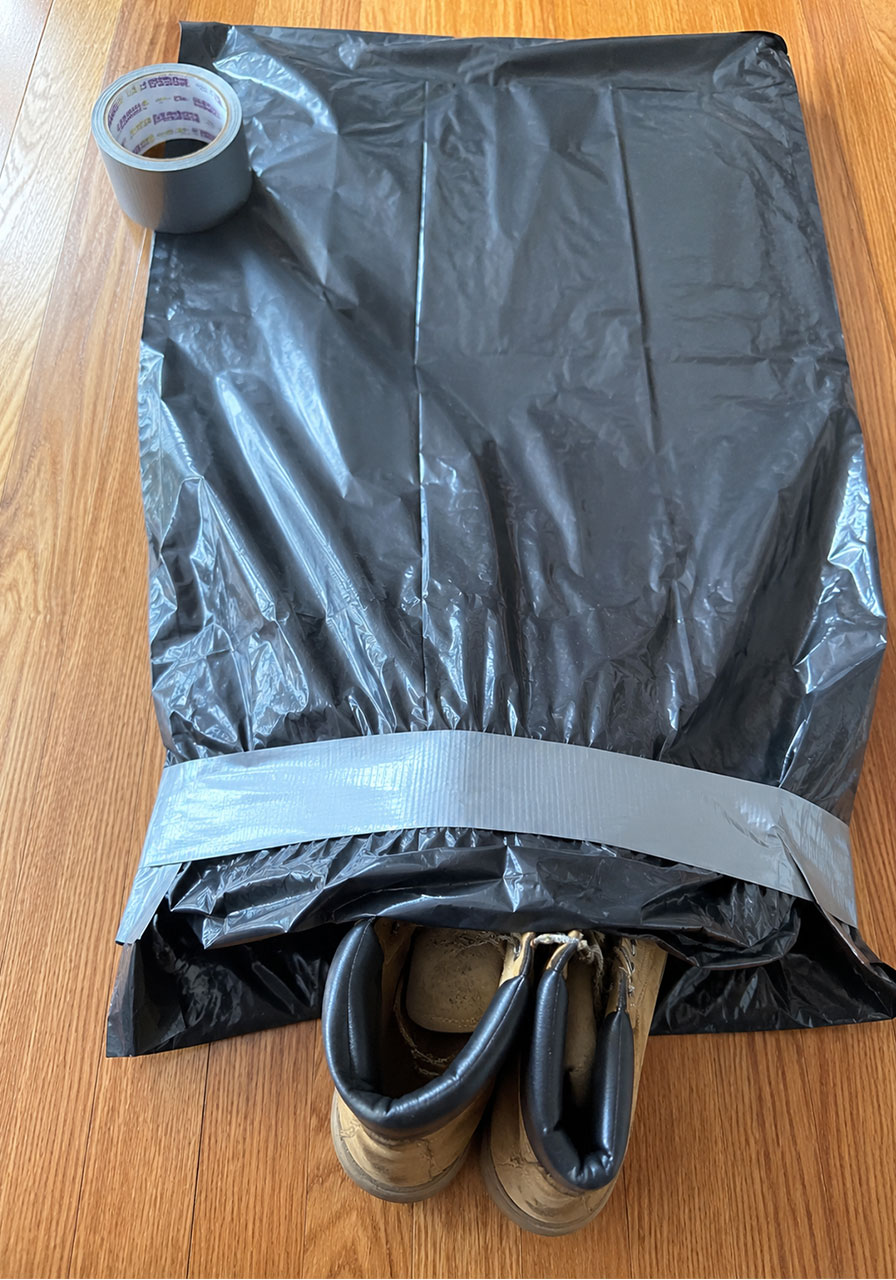
Open the first contractor bag and slide in a pair of old boots or shoes, positioning them at the very bottom of the bag. Heavier shoes work best here, since the weight helps keep your finished prop from blowing over or sliding around on a windy night.
Step 3: Tape off the ankles.
Once the shoes are in place, wrap duct tape tightly around the bag right above them to create a defined ankle shape. This is what starts turning a plastic bag into something that looks unmistakably like a leg.
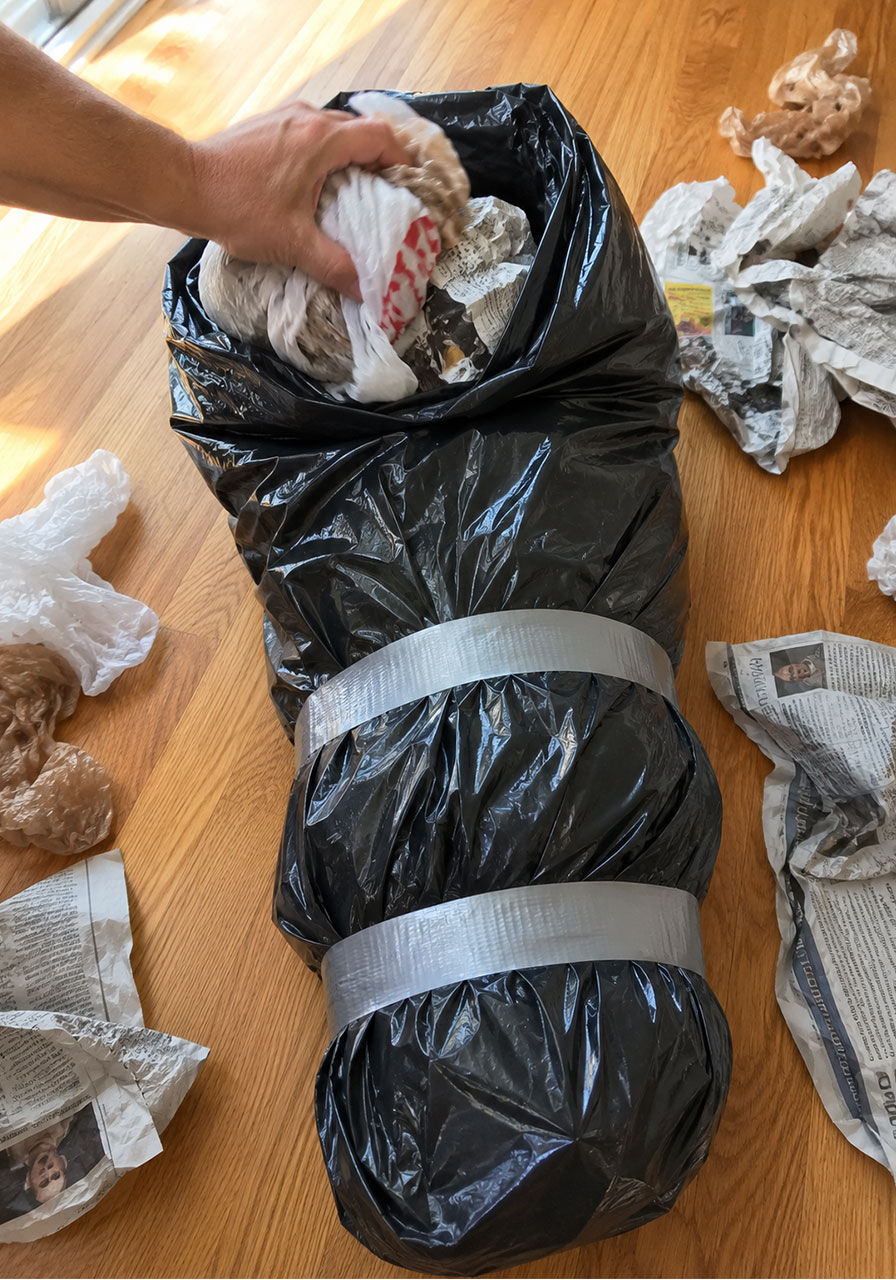
Step 4: Stuff the legs.
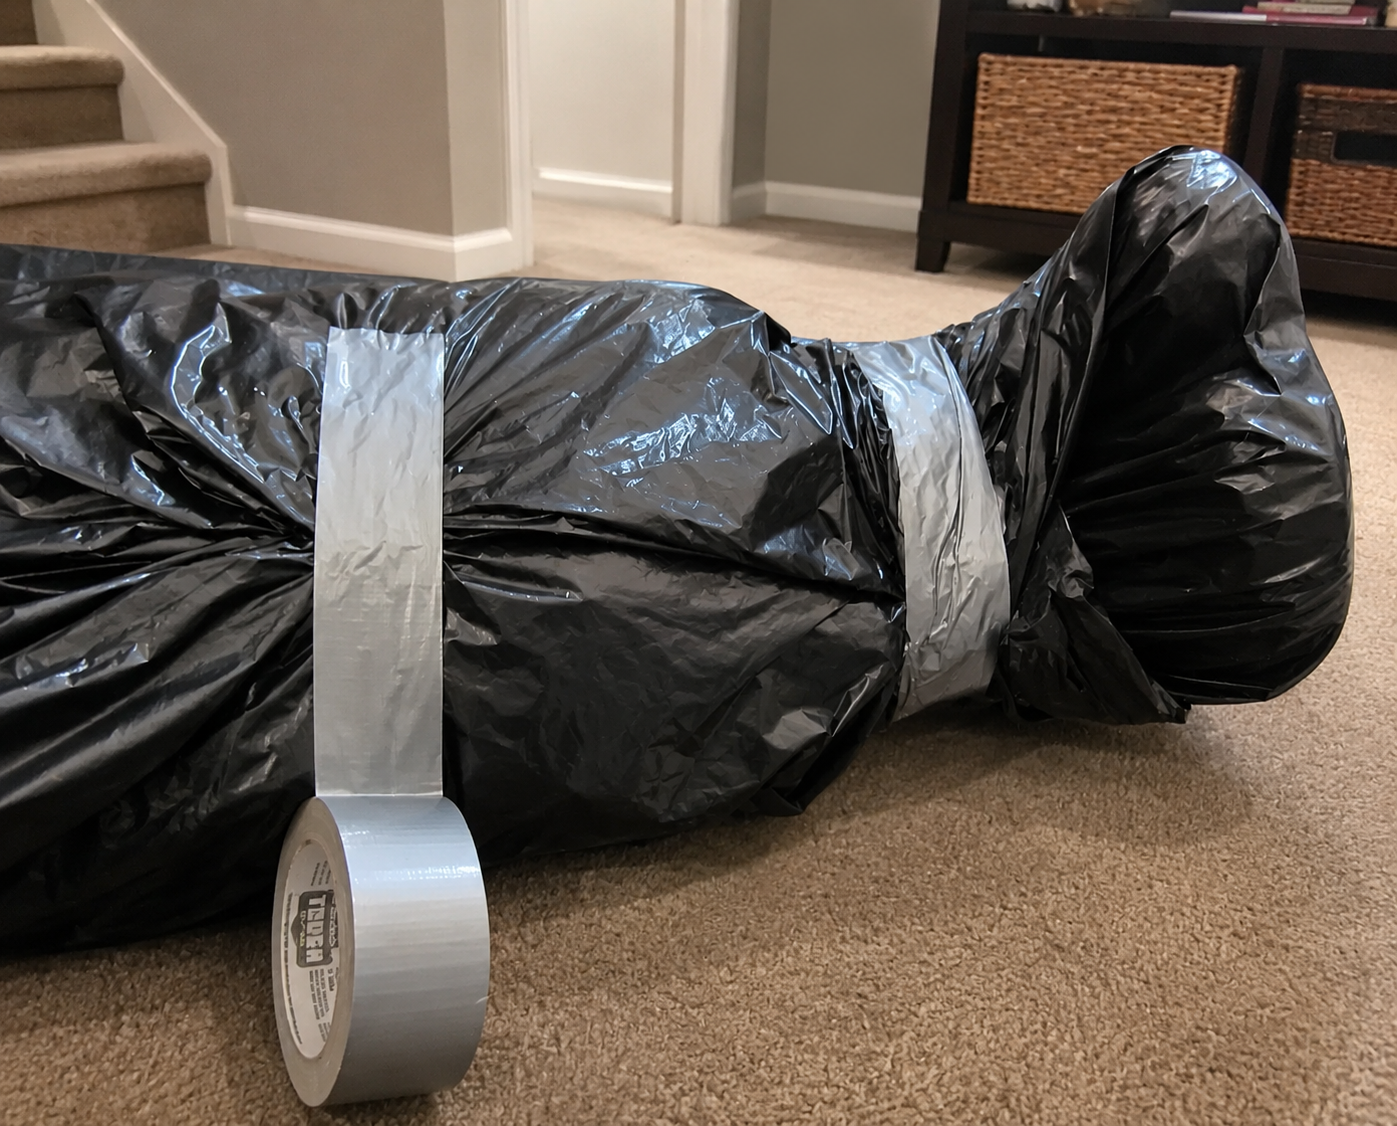
Start filling the bag above the ankle with your stuffing material. Newspaper, plastic bags, and packing bubbles all pack in nicely and give you a firm, body-like shape as you go.
Step 5: Tape and shape as you fill.
Add a few more strips of duct tape at intervals as you stuff. This does double duty: it keeps the width proportional to the feet below it, and it gives the whole leg that lumpy, uneven texture that sells the illusion.
Step 6: Build the head.
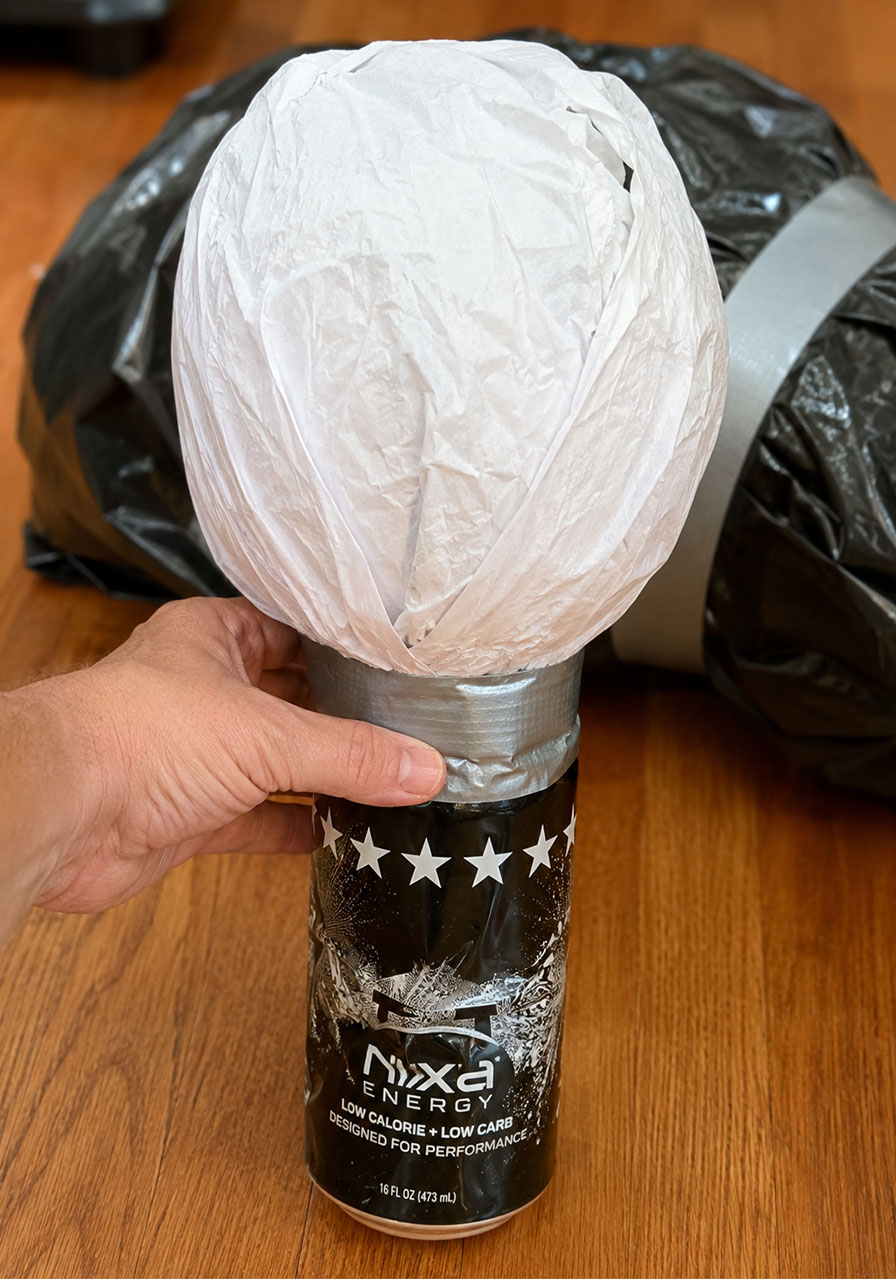
Grab your second contractor bag. Scrunch up a few sheets of paper into a tight, round ball about the size of a head. Insert the bottom of that paper ball into your metal can, then duct tape it in place. The can becomes the “neck,” giving your head shape somewhere to attach.
Step 7: Attach the head to the body.
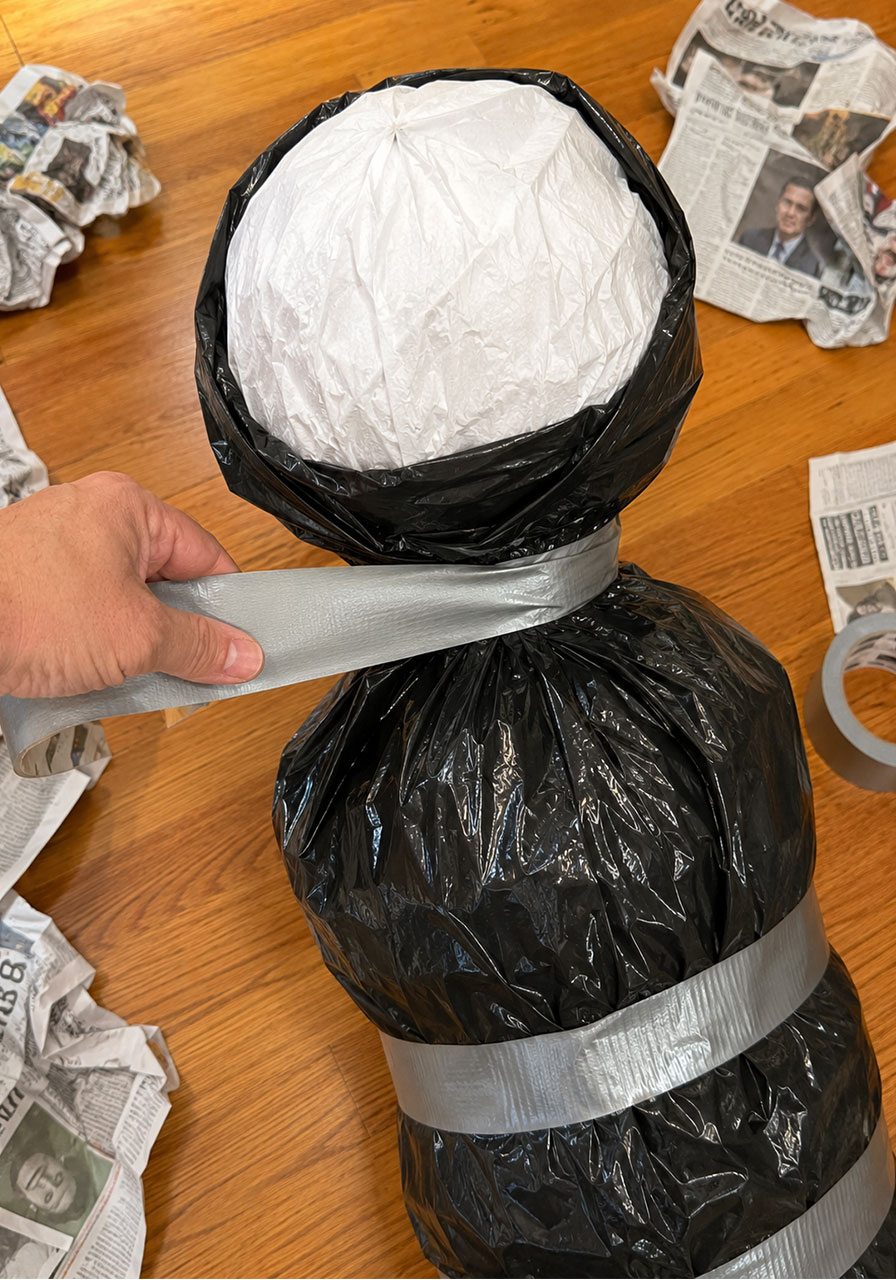
Slide your paper head-and-can piece into the top of the second contractor bag, then duct tape around the bag right where the neck should sit. From here, keep filling the bag downward with more stuffing to build out the torso.
Step 8: Connect the two halves.
Just before you finish stuffing the torso bag, slide the completed leg piece up inside it so the two sections overlap. Snip the flaps off the upper bag so it slides on cleanly, then duct tape around the overlap to join both bags into one continuous body.
Step 9: Add the final details.
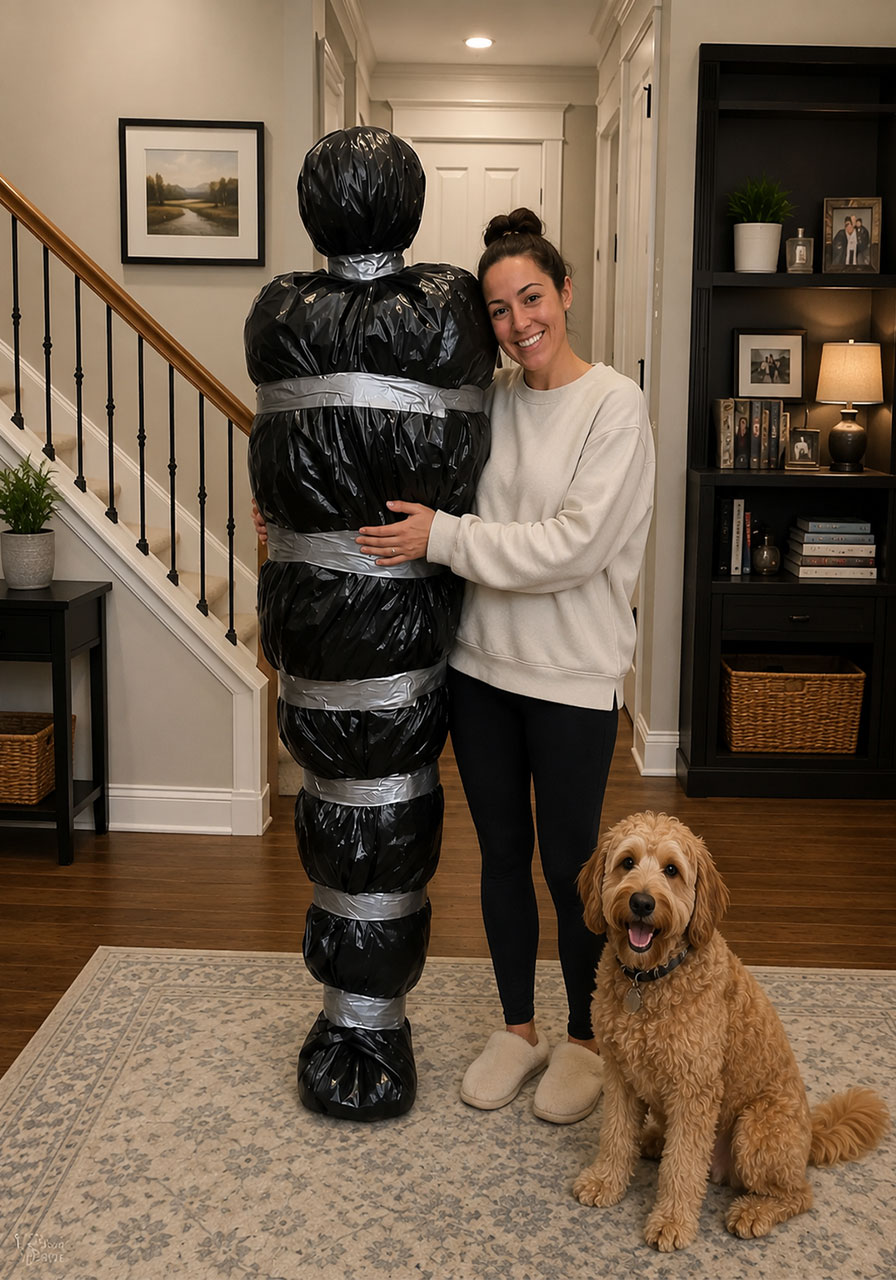
Wrap one strip of tape where the shoulders would be and another around the belly area. Stand back and admire your work. Congratulations, you’ve just built a corpse.
Pro Tip
Don’t skimp on the ankle and neck tape. Those two spots are what transform a shapeless bag into something with recognizable joints, and joints are what make the human eye read this as a body instead of a pile of trash bags.
Fun Variation
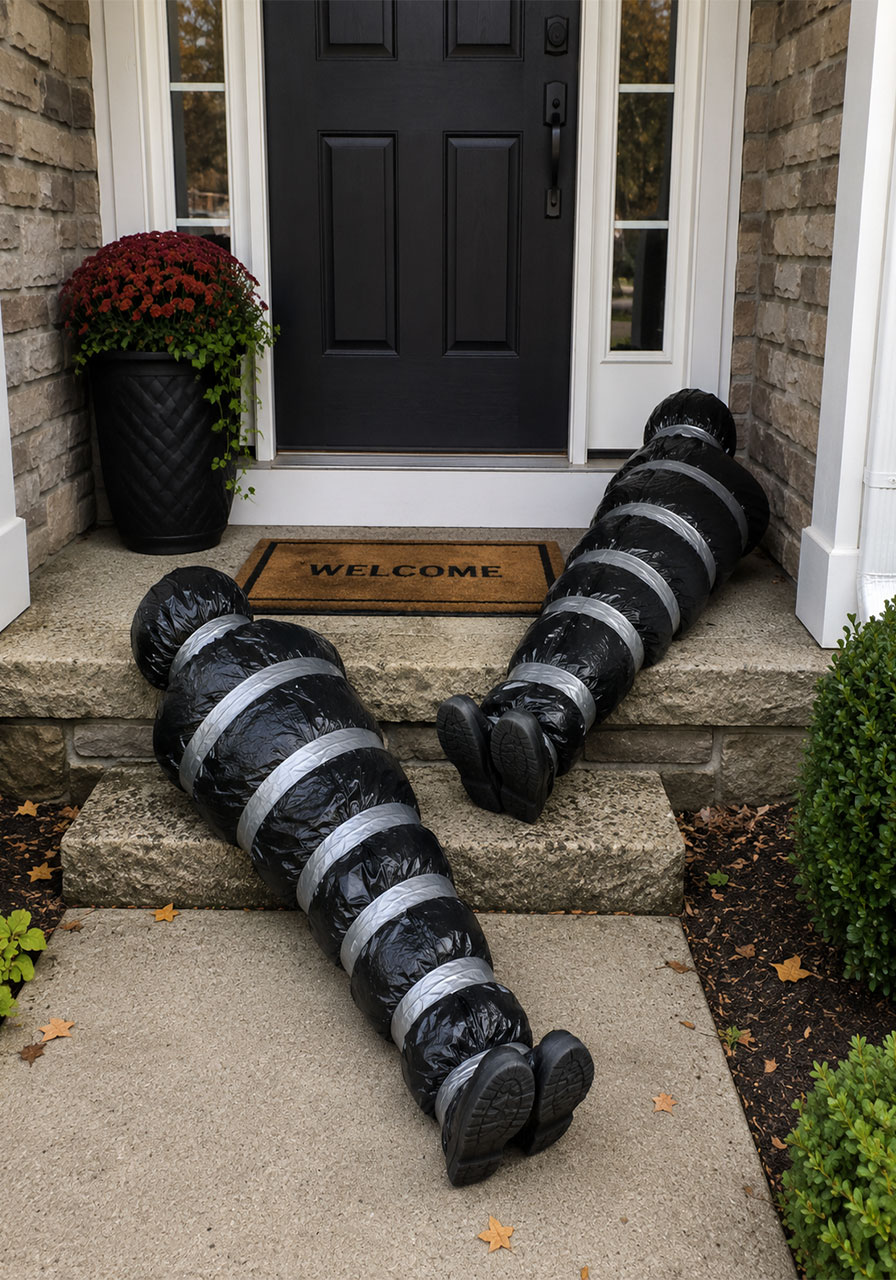
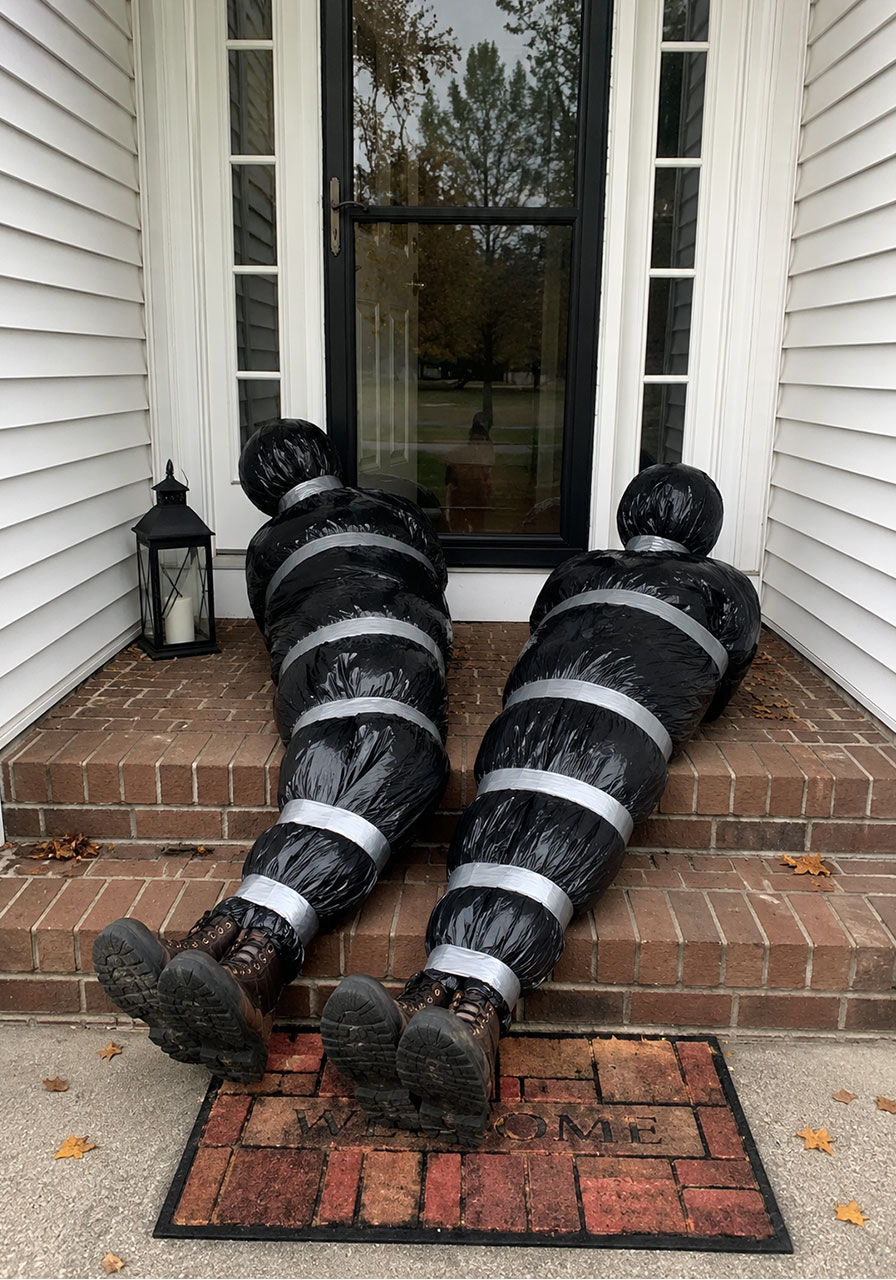
One body is creepy. Two is a scene. Once you’ve mastered the process, whip up a second bagged body using the exact same steps and prop them together near your door, like they collapsed side by side. It multiplies the effect without multiplying the effort much at all.
Where to Place It for Maximum Effect
This prop earns its scares based on placement just as much as construction. A few spots that work especially well:
- Slumped against your front door frame, as if someone tried to get inside and didn’t make it
- Lying across the porch steps so trick-or-treaters have to step around it
- Half-hidden behind a bush or planter near your front walkway
- Draped over a bench or rocking chair for a “resting” effect
Wherever you place it, aim for somewhere it’ll be seen from the street or sidewalk. This prop does its best work as a first impression.
A Quick Courtesy Reminder
This prop looks real. That’s the whole point, but it also means you should give your neighbors a heads-up before it goes on display, especially if you live somewhere with a lot of foot traffic. A quick note or a text saves everyone from an awkward call to the police over a very convincing pile of trash bags.
Frequently Asked Questions
How long will a bagged body prop last outside?
With standard contractor bags, this prop can typically hold up for a couple of weeks of outdoor display, though direct sun and heavy rain will speed up wear. If you’re setting up early in the season, check on it periodically and re-tape any loose seams.
What if I don’t have a metal can for the head?
Any sturdy cylindrical container works, including an empty food can, a plastic cup, or even a rolled section of cardboard taped into a tube.
Can I make this prop without contractor bags?
Contractor bags are worth seeking out because they’re thicker and larger than regular kitchen bags, which means fewer tears and a more convincing shape. If you’re in a pinch, doubling up regular trash bags can work as a substitute.
Is this prop kid-friendly to help build?
The stuffing and taping steps are genuinely fun for kids to help with under supervision. Just handle the scissors and any final placement yourself.
Wrap-Up
A bagged body prop is proof that you don’t need a big budget or a garage full of power tools to pull off a genuinely spooky Halloween display. With a couple of contractor bags, some tape, and about an hour of your time, you’ll have a doorstep that gets talked about well past November 1st.
Because the best Halloween setups are the ones your neighbors are still asking about next year.
