
Let’s be honest – your front porch always gets the Halloween glow-up. Your living room too.
But your kitchen? The room where every single one of your guests ends up standing around, drink in hand, snack in the other? It usually gets a lone pumpkin on the counter and calls it a day.
This year, we’re fixing that. Because nothing says “I actually planned this party” quite like walking into a kitchen dripping in classic orange-and-black Halloween magic the second your guests round the corner.
The secret weapon most hosts overlook? The space above your kitchen cabinets. It’s basically a free stage sitting right at eye level, and it’s begging for pumpkins, bats, and a little bit of spooky drama.
Below, we’re breaking down 16 orange-and-black kitchen decor ideas – including all the fan-favorites that partygoers can’t stop repinning, plus a handful of new ones we’re just as obsessed with. Grab your hot glue gun. Let’s get this kitchen party-ready.
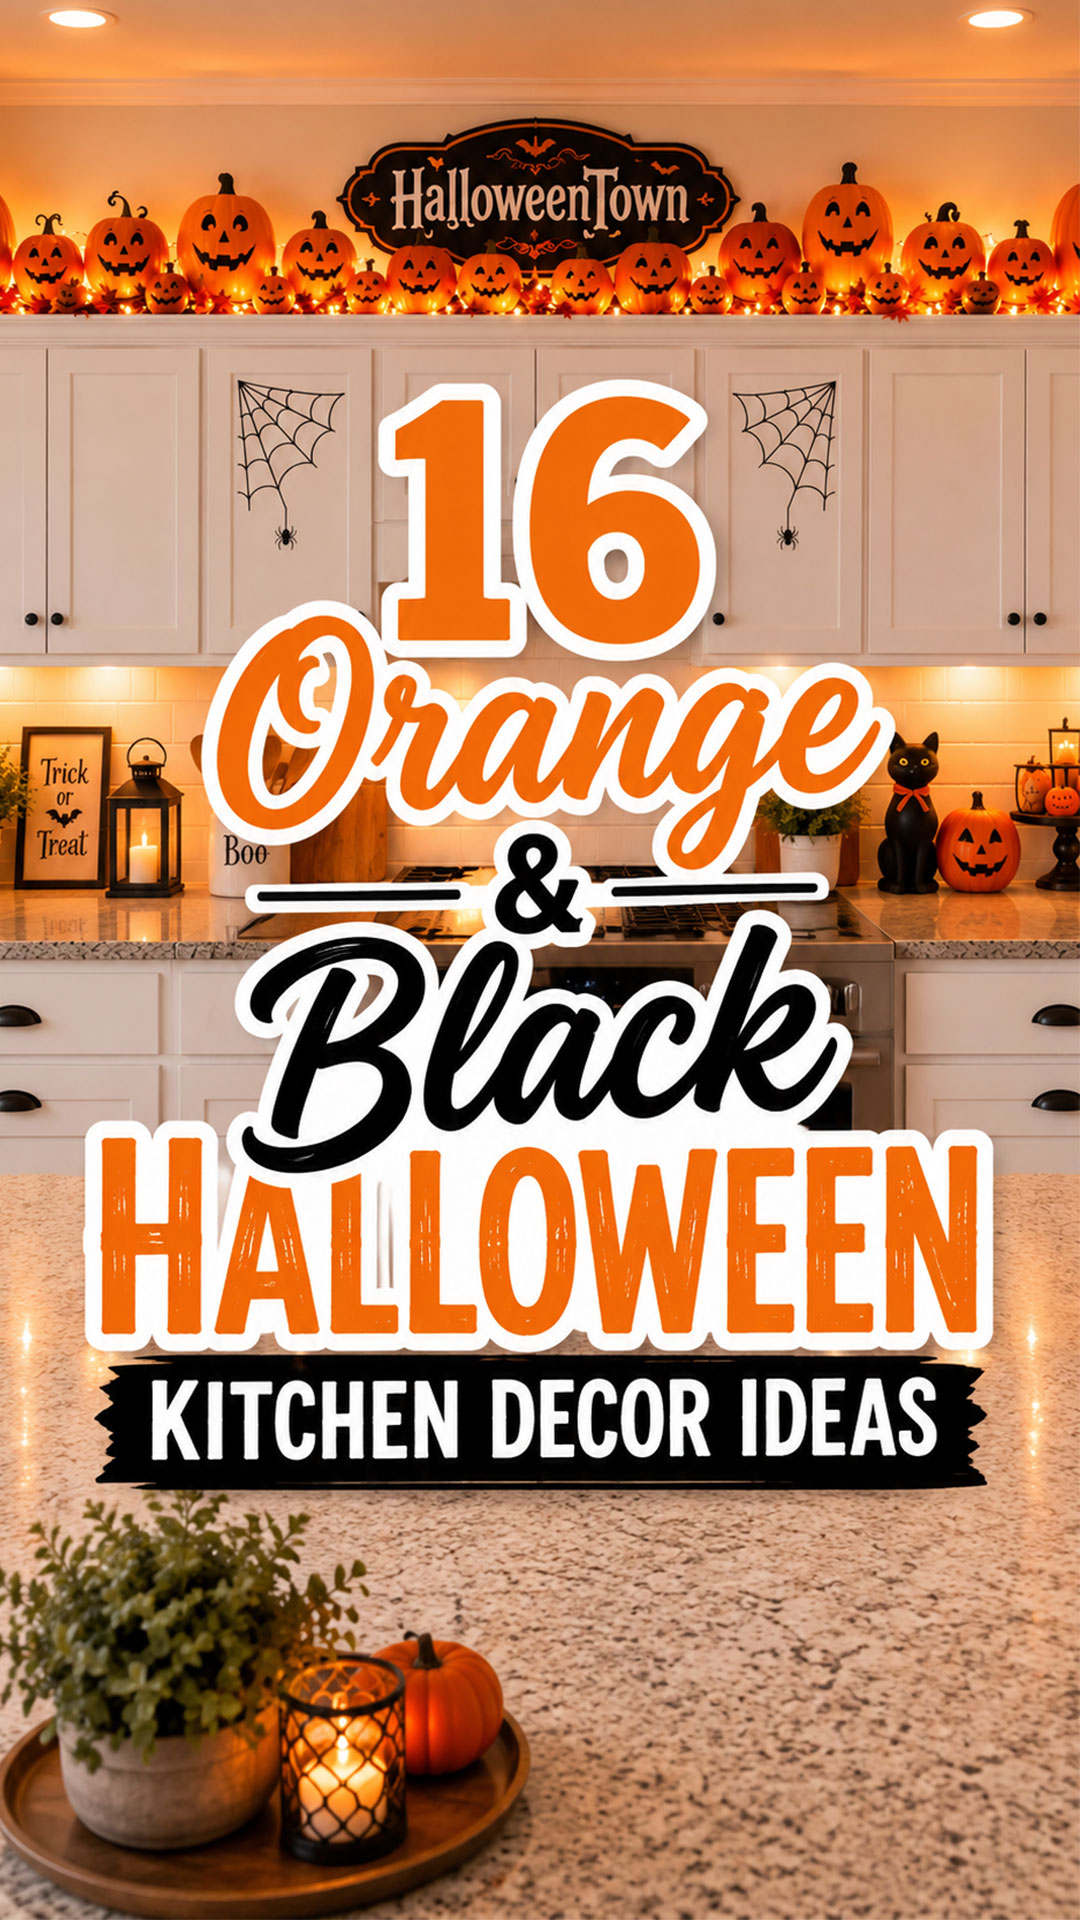
Why Above-the-Cabinet Decor Is Your New Favorite Party Trick
You’re Using Space That’s Currently Doing Nothing
That gap between your cabinets and the ceiling? It’s dead space 364 days a year.
Fill it with a lineup of grinning jack-o-lanterns or a cluster of black candlesticks, and suddenly it’s the first thing every guest notices when they walk in.
It Adds Instant Height and Drama
Decor at eye level is nice. Decor that climbs toward the ceiling? That’s a showstopper.
Layering orange and black pieces above your cabinets pulls the eye upward, makes your kitchen feel bigger, and gives your whole space a “wow, who did this” kind of energy.
It Ties Your Whole Halloween Theme Together
If your entryway is all black cats and your living room is full of orange string lights, your kitchen needs to be in on the joke too.
Carrying the orange-and-black color story into the kitchen means your whole house feels intentional, not like Halloween just happened to a few random rooms.
Ready for the ideas? Here’s your full lineup, organized so you can pick and choose based on your time, your budget, and how extra you’re feeling this year.

1. The Jack-o-Lantern Cabinet Topper Parade
This is the idea that made everyone say “wait, I need that” the second they saw it. A whole crew of orange pumpkins – some carved, some plain, all grinning – lined up in a row above your cabinets like they’re guarding your kitchen.
It’s dramatic, it’s easy, and it photographs beautifully for your Halloween party invites.
Best for: Kitchens with cabinets close to the ceiling. Time to Create: 20-30 minutes. Budget: Low to moderate, depending on how many pumpkins you grab.
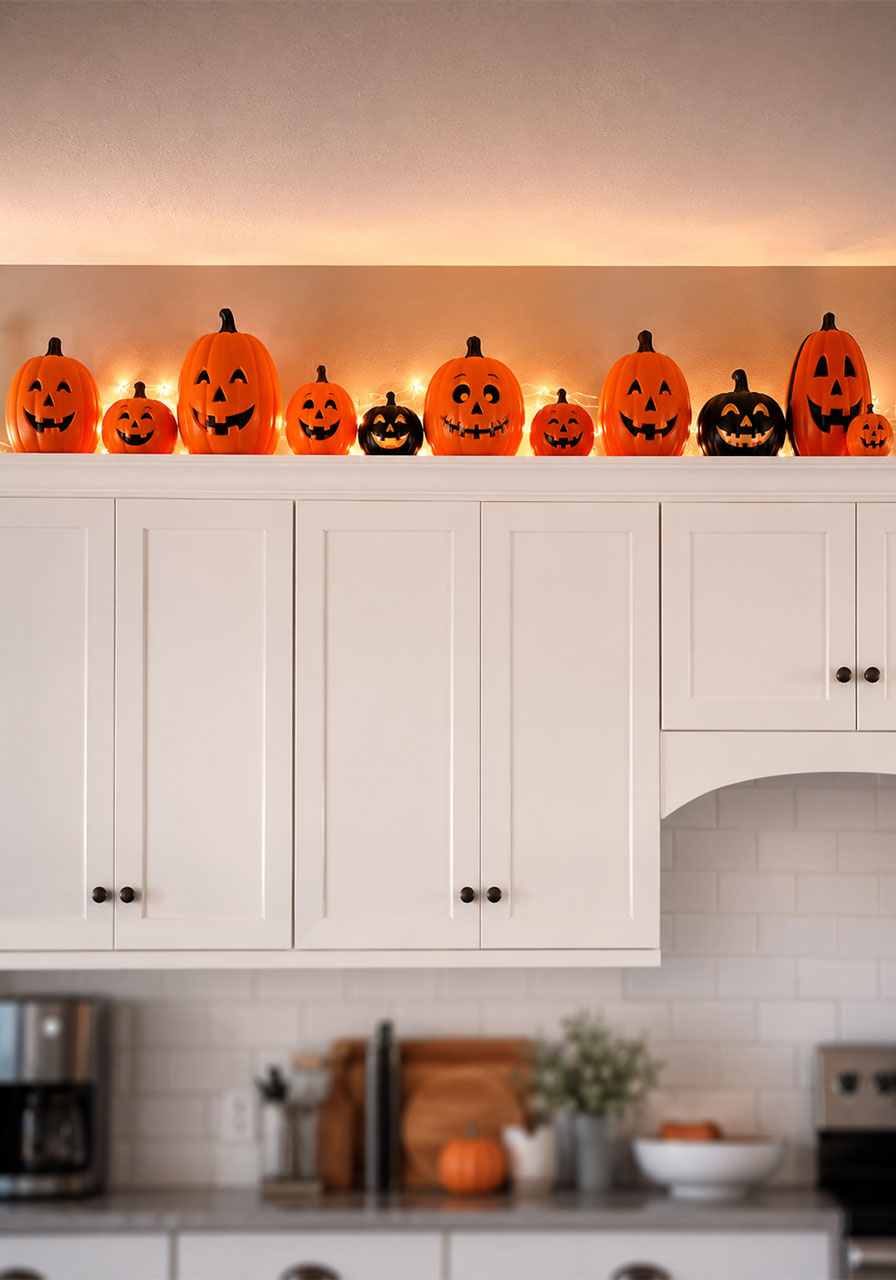
What You’ll Need:
- A mix of orange plastic or foam pumpkins in varying sizes
- 1-2 black pumpkins or black candlesticks to break up the orange
- A step stool (you’re going to need it)
How to Create It:
1. Start by placing your largest pumpkins toward the front corners of your cabinets – this frames the whole display.
2. Fill in the middle with a mix of medium and small pumpkins, alternating heights so it doesn’t look too uniform.
3. Tuck one or two black pumpkins into the lineup for contrast – this is what makes the display feel curated instead of thrown together.
4. Step back, squint at it from across the room, and adjust until the spacing feels balanced.
Pro Tip: Add battery-operated string lights underneath the pumpkins. Once the sun goes down, your cabinet tops will glow like a jack-o-lantern skyline.
2. The Hocus Pocus Orange Glow-Up
This look leans hard into warm, moody orange lighting paired with a “Hocus Pocus” sign and layered black-and-orange accessories along your backsplash. It’s the kind of kitchen that makes people whisper “okay this is actually kind of magical.”
If you want your kitchen to feel like it belongs in a Halloween movie, this is the one.
Best for: Hosts who want major visual impact without a total overhaul. Time to Create: 45 minutes. Budget: Moderate.
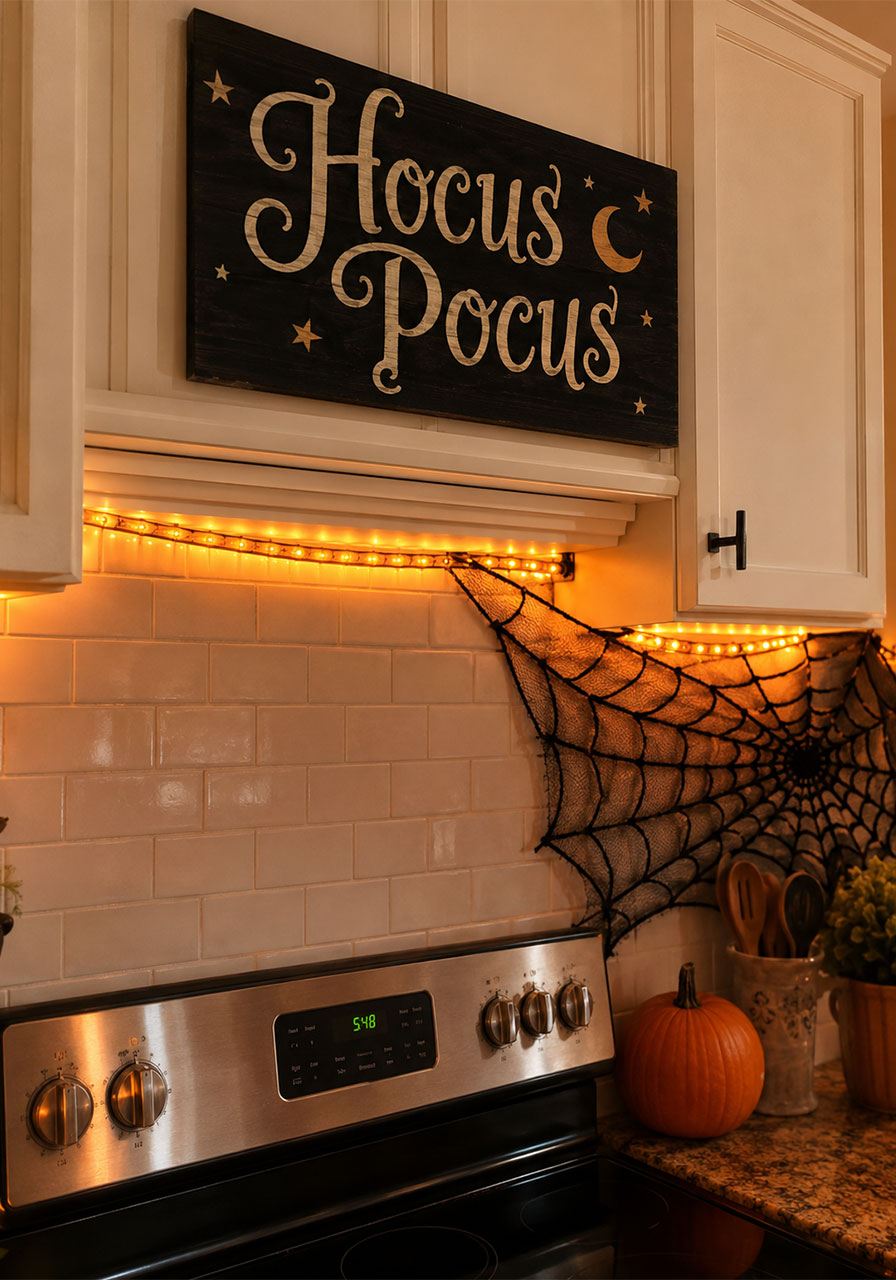
What You’ll Need:
- Orange or warm-toned LED string lights (rope lights work great tucked under upper cabinets)
- A “Hocus Pocus” or witch-themed sign for above the cabinets
- Black spiderweb decals or fabric webbing for your backsplash
- A themed dish towel or oven mitt to tie in the color scheme
How to Create It:
1. Run your string lights along the underside of your upper cabinets first – this sets the warm, glowy foundation for everything else.
2. Center your sign above the cabinets, ideally above the stove where it becomes a focal point.
3. Add spiderweb decals or fabric webbing directly onto your backsplash for texture.
4. Layer in small touches – a themed towel, a witch hat candy dish – near your stove or counter to finish the look.
Fun Variation: Swap the sign for one that says your last name plus “Manor” or “House of Horrors” for a personalized twist.
3. The Black Cat Witches Mantel Moment
Got a stove hood or mantel-style range? This idea turns it into main-character energy with a pair of witch figurines perched on either side and a garland of orange leaves draped across the middle.
It’s elegant, it’s spooky, and it makes your stove area look like it was styled by a professional.
Best for: Kitchens with a mantel-style range hood. Time to Create: 30 minutes. Budget: Moderate.
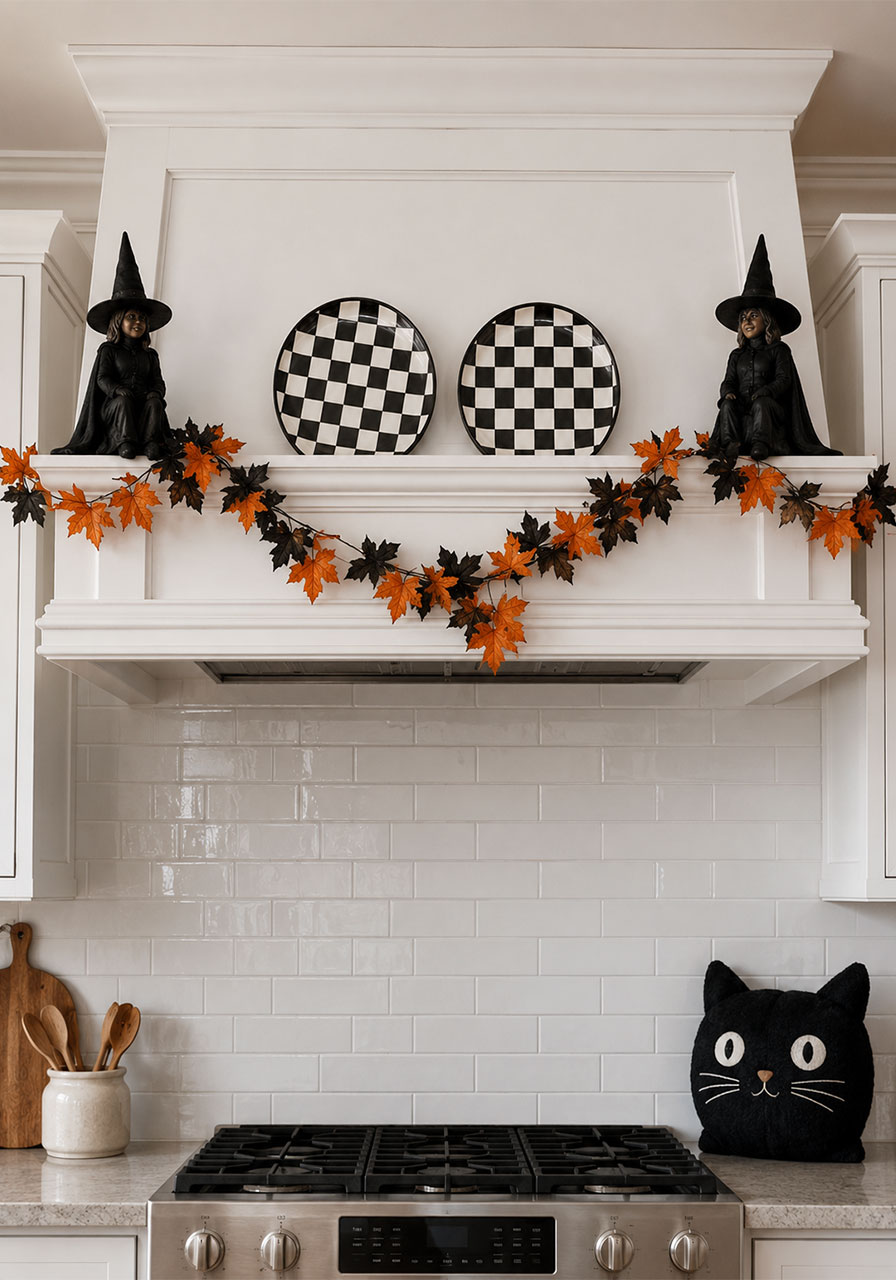
What You’ll Need:
- 2 matching witch or black cat figurines
- An orange and black leaf or ribbon garland
- 2-3 decorative plates or platters (black and white check works beautifully here)
- Small black cat pillows or plush accents for the counter below
How to Create It:
1. Set your figurines on opposite ends of your mantel or hood ledge – symmetry is what makes this display feel polished.
2. Drape your garland along the front edge, letting it dip slightly in the middle for movement.
3. Lean 2-3 decorative plates against the wall or a stand between the figurines.
4. Add small accent pieces below on the counter to bring the eye down and tie the display together.
Pro Tip: Symmetry is everything in this look. Whatever you put on the left side, mirror it on the right – your eye will thank you.
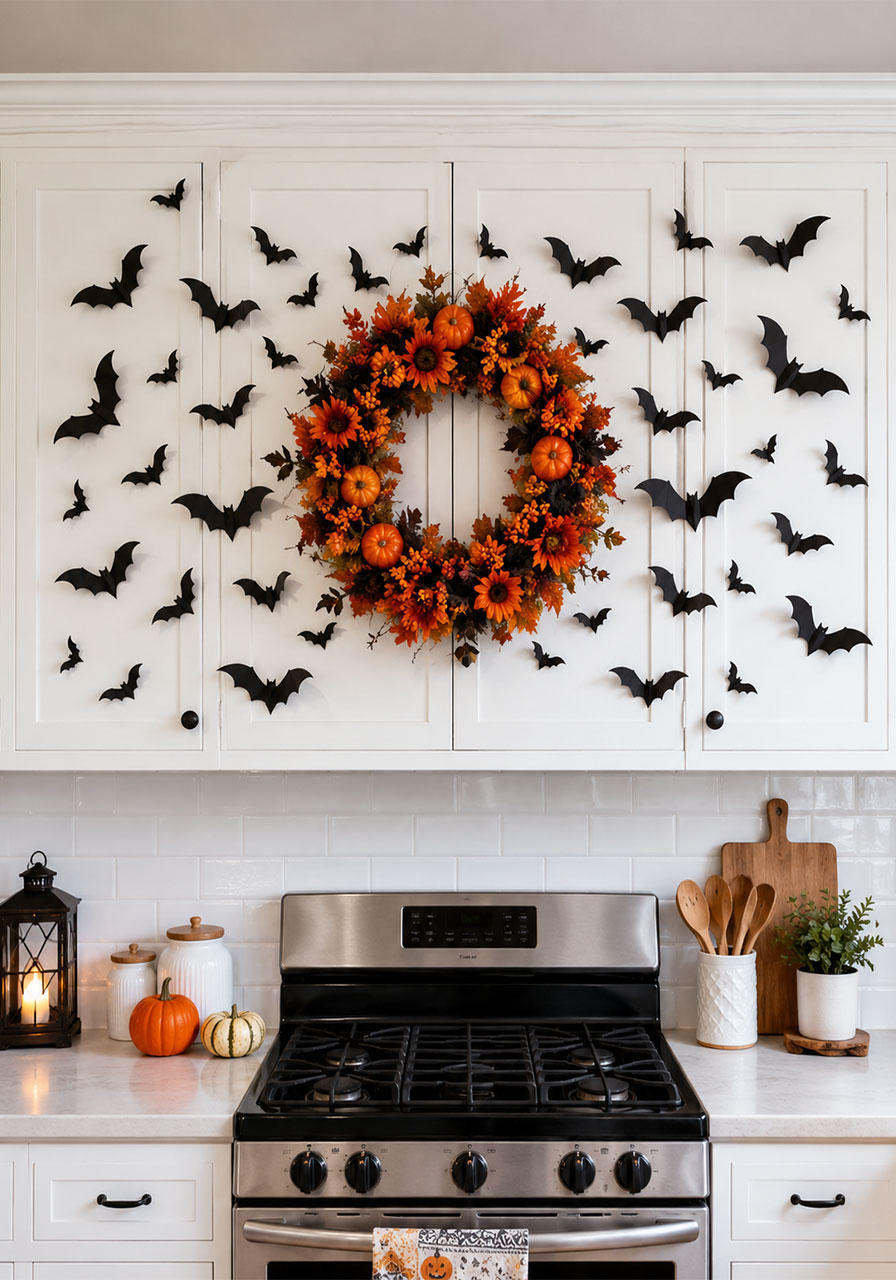
4. Bat Attack with an Orange Wreath Anchor
This one’s for hosts who want maximum drama with minimal spending. A swarm of black paper bats “flying” across your white cabinets, with a bold orange wreath as the anchor point.
The contrast of stark black bats against bright orange florals is what makes this idea so unforgettable.
Best for: White or light-colored cabinets (the contrast is the whole point). Time to Create: 40 minutes. Budget: Low.
What You’ll Need:
- A pack of 3D black bat wall decals (30-50 bats)
- 1 orange floral or pumpkin wreath
- Removable adhesive dots or Command strips
How to Create It:
1. Hang your wreath first, centered above your stove or range hood – this is your visual anchor.
2. Starting near the wreath, begin placing bats in a loose, scattered “flight path” outward across the cabinets.
3. Vary the bat sizes and angles as you go – some flying up, some down – so it looks like real movement, not a straight line.
4. Thin the swarm out as it gets farther from the wreath, ending with just one or two lone bats near the edges.
Pro Tip: Use removable adhesive so you don’t damage your cabinet finish. Command strips peel off clean every time.
5. The HalloweenTown Pumpkin Crown
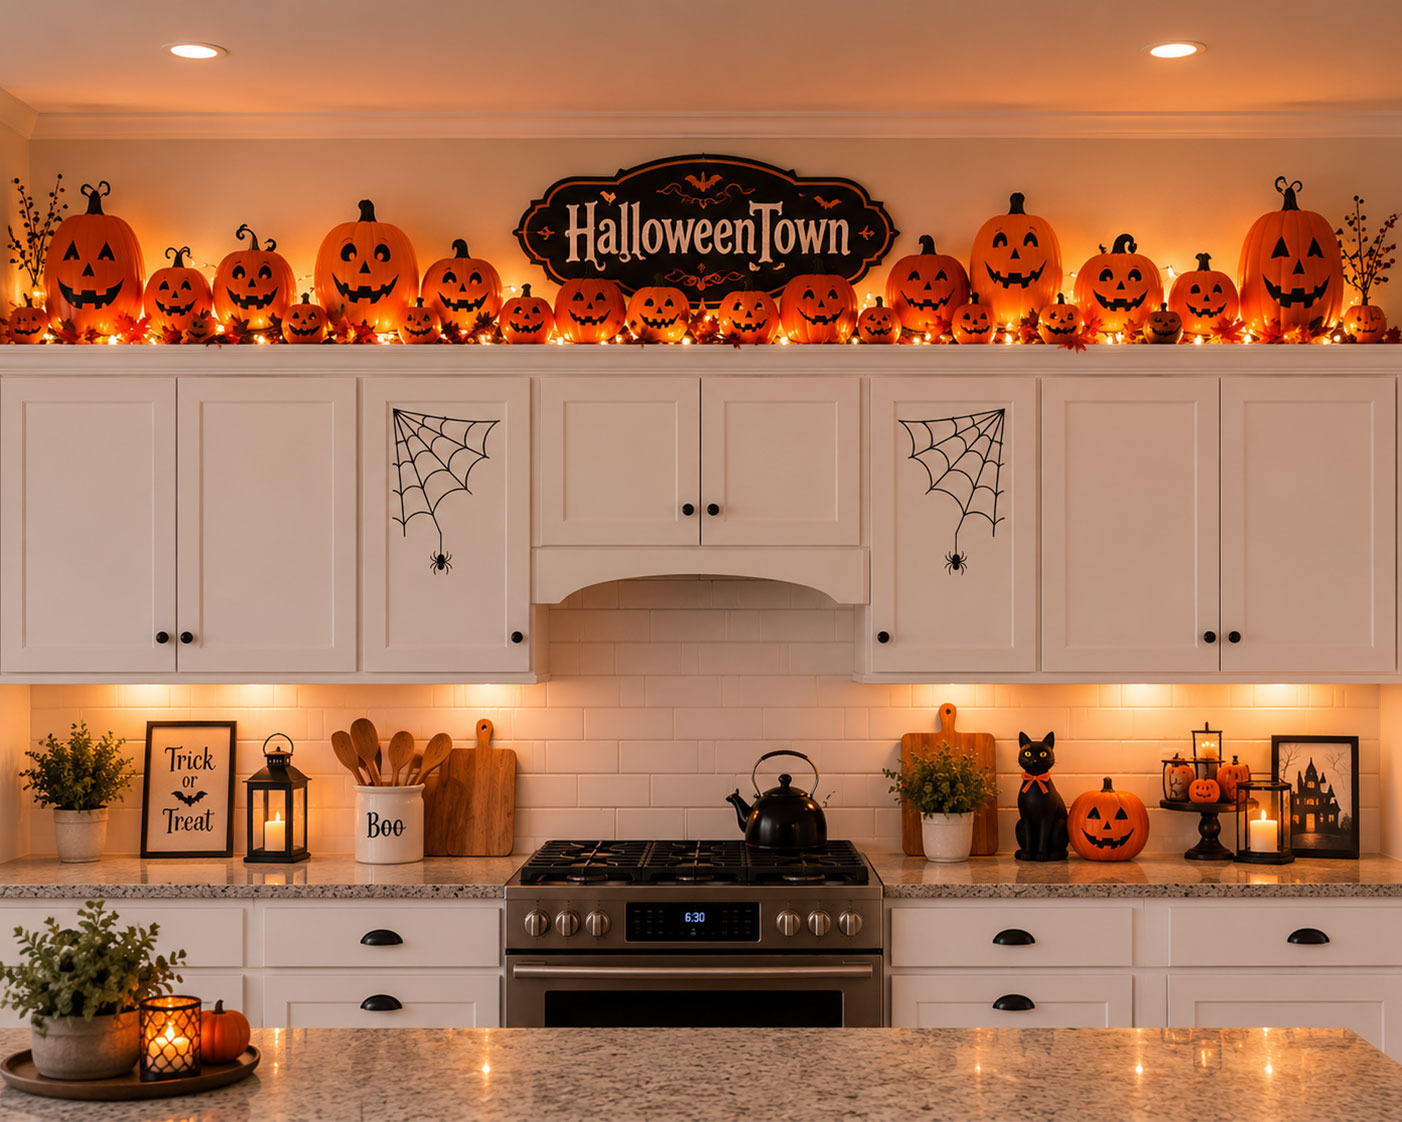
Think of this as the jack-o-lantern parade’s bigger, bolder cousin. A dense wall of glowing orange pumpkins topped with a “HalloweenTown” sign, plus warm string lights woven throughout your whole kitchen.
This is the go-big-or-go-home option, and it delivers every single time.
Best for: Hosts who are ready to fully commit to the theme. Time to Create: 1 hour. Budget: Moderate to high.
What You’ll Need:
- 15-20 orange pumpkins in mixed sizes
- A “HalloweenTown” or similar novelty sign
- Warm white or orange string lights (enough to run along your whole cabinet run)
- Spiderweb decals for accent cabinets
How to Create It:
1. Pack your pumpkins tightly across the entire top of your cabinets – don’t leave gaps, this look is about density.
2. Center your sign in the middle of the run, slightly elevated above the pumpkin line so it’s still visible.
3. Weave your string lights through and around the pumpkins so the glow peeks out between them.
4. Add spiderweb decals to one or two accent cabinet doors below for extra texture.
Fun Variation: Add a small black cat figurine sitting on the floor below, staring up at the display, for a candid, storybook moment guests will want to photograph.
6. The Skeleton Dance Party Cabinet Fronts
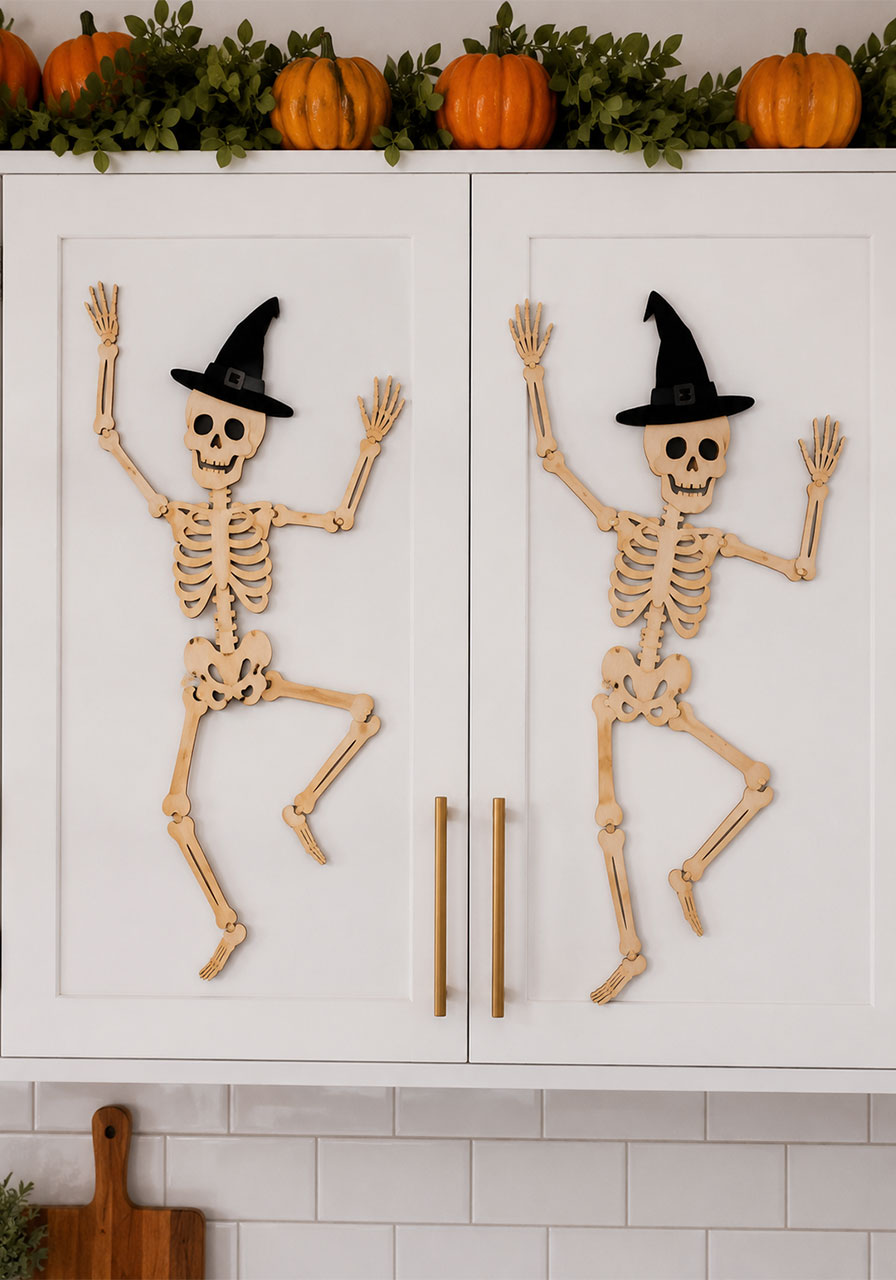
Instead of decorating the top of your cabinets, this idea flips the script and decorates the doors themselves. Wooden skeleton silhouettes in party hats “dance” across your cabinet fronts, paired with pumpkins up top.
It’s playful, it’s a little unexpected, and it gives your guests something to smile at every time they open a cabinet.
Best for: Flat-panel cabinet doors. Time to Create: 15 minutes. Budget: Low.
What You’ll Need:
- Flat wooden or cardboard skeleton cutouts (2 per cabinet door works well)
- Removable adhesive strips
- Orange pumpkins and greenery for the cabinet tops
How to Create It:
1. Lay your skeleton cutouts flat first to plan their poses before sticking anything down.
2. Attach them to your cabinet doors using removable adhesive, positioning arms and legs so they look like they’re mid-dance.
3. Finish the look by adding pumpkins and greenery above, so the display reads top-to-bottom instead of feeling disconnected.
Pro Tip: Pose your skeletons like they’re holding hands or mid-high-five between cabinet doors. It’s a small detail that gets a big reaction.
7. The Paper Pumpkin Garland Topper
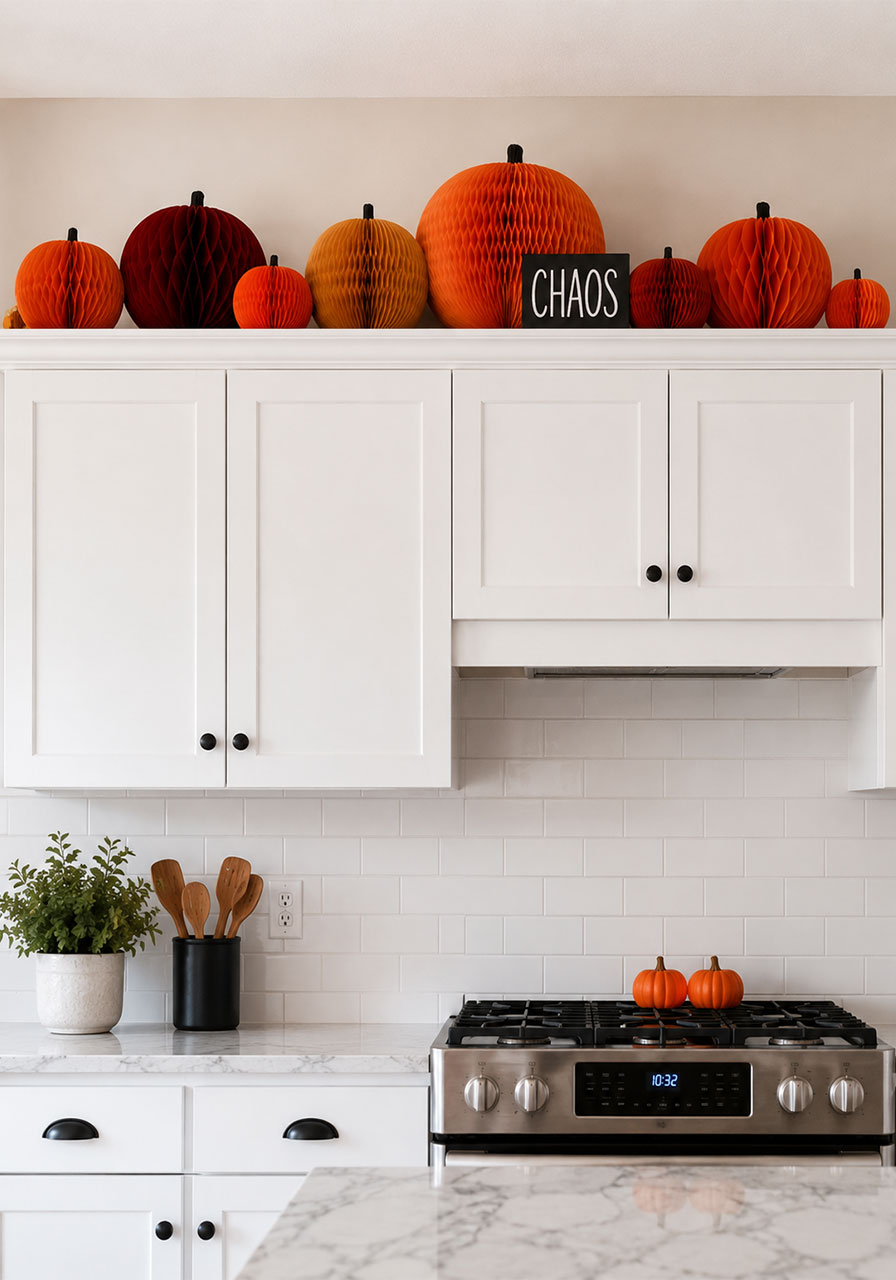
If you’re crafty (or just want to look like you are), this is your idea. Honeycomb paper pumpkins in bold orange and black strung together across the top of your cabinets – plus a bonus “CHAOS” or funny sign for personality.
It’s budget-friendly, endlessly customizable, and genuinely fun to put together.
Best for: Hosts on a budget who still want a big visual impact. Time to Create: 20 minutes. Budget: Low.
What You’ll Need:
- Honeycomb paper pumpkins (orange, with a couple in mustard or deep red for depth)
- A playful sign or banner
- Twine or fishing line for hanging
How to Create It:
1. Pop your honeycomb pumpkins open and let them fully expand before placing them.
2. Arrange them across your cabinet tops with your largest ones toward the center.
3. Lean your sign against the pumpkins or prop it slightly behind them so both are visible.
4. Add a few solid mini pumpkins on the counter below to ground the display.
Fun Variation: Swap the sign’s message every year – “CHAOS,” “BOO CREW,” or your family’s Halloween motto all work.
8. The Black & Orange Contrast Kitchen
Some kitchens are all black – hood, shelving, everything. If that’s you, don’t fight it. Lean all the way in with small, curated orange and black accents instead of trying to blanket the whole room.
This is proof that “less but bolder” can be just as impactful as a fully-loaded cabinet top.
Best for: Modern kitchens with black hardware or dark hoods. Time to Create: 20 minutes. Budget: Low to moderate.
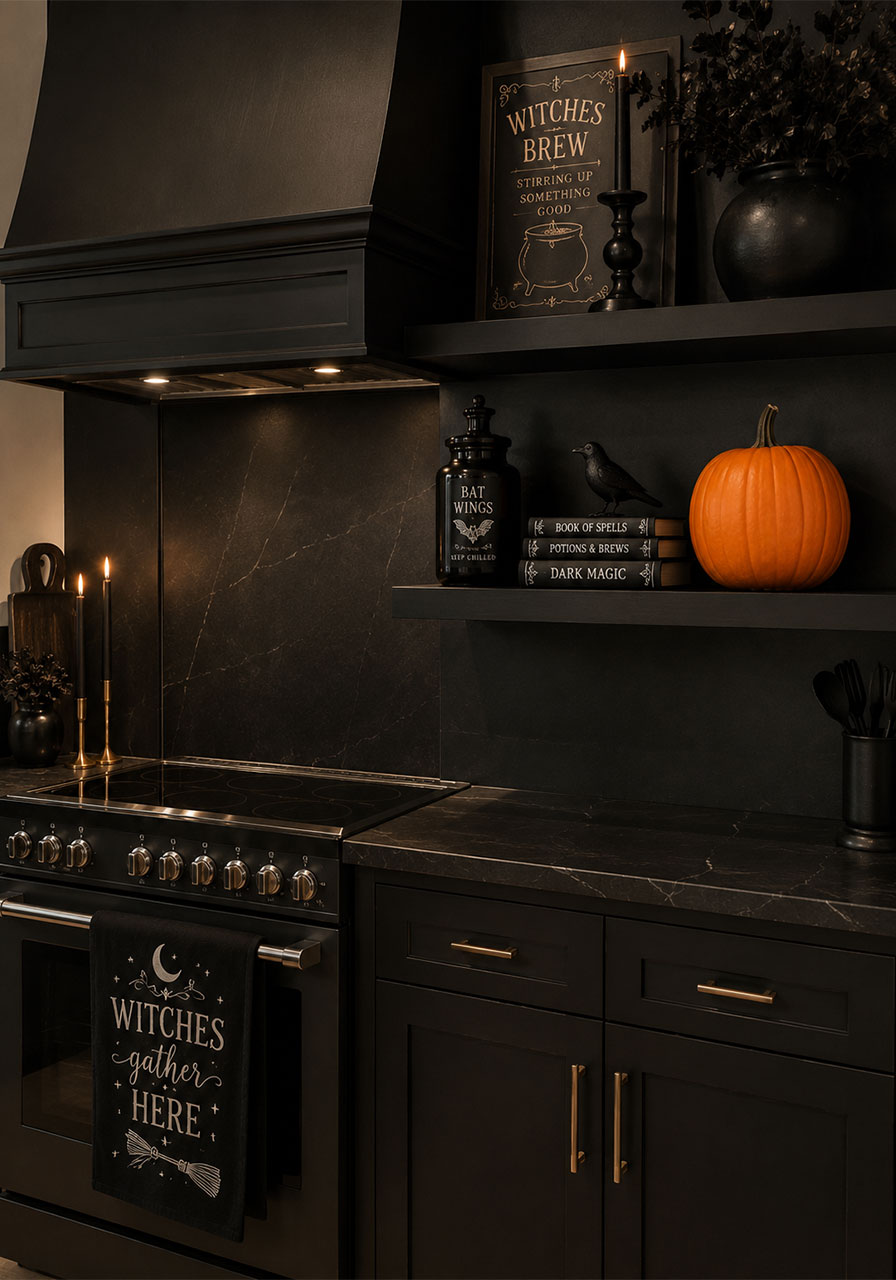
What You’ll Need:
- 2-3 black Halloween-themed accessories (jars, books, small figurines)
- 1 bold orange accent piece as your pop of color
- A themed dish towel with a witchy phrase
How to Create It:
1. Cluster your black accessories on any open shelf or counter space near your stove.
2. Place your single orange accent piece slightly off-center within the cluster – this becomes the focal point.
3. Hang your themed towel on the oven handle to reinforce the color story lower in the kitchen.
Pro Tip: In an all-black kitchen, one bold orange piece does more work than ten small ones. Resist the urge to overdecorate.
9. The Fall-o-ween Crow & Marigold Vignette
This idea blends Halloween with cozy fall styling – a black crow perched among orange marigolds, autumn leaves, and dark glass bottles above your cabinets. It’s Halloween decor that doesn’t scream “costume party,” it whispers “elevated fall gathering.”
Perfect if your Halloween party doubles as a harvest celebration.
Best for: Hosts blending Halloween and fall aesthetics. Time to Create: 30 minutes. Budget: Moderate.
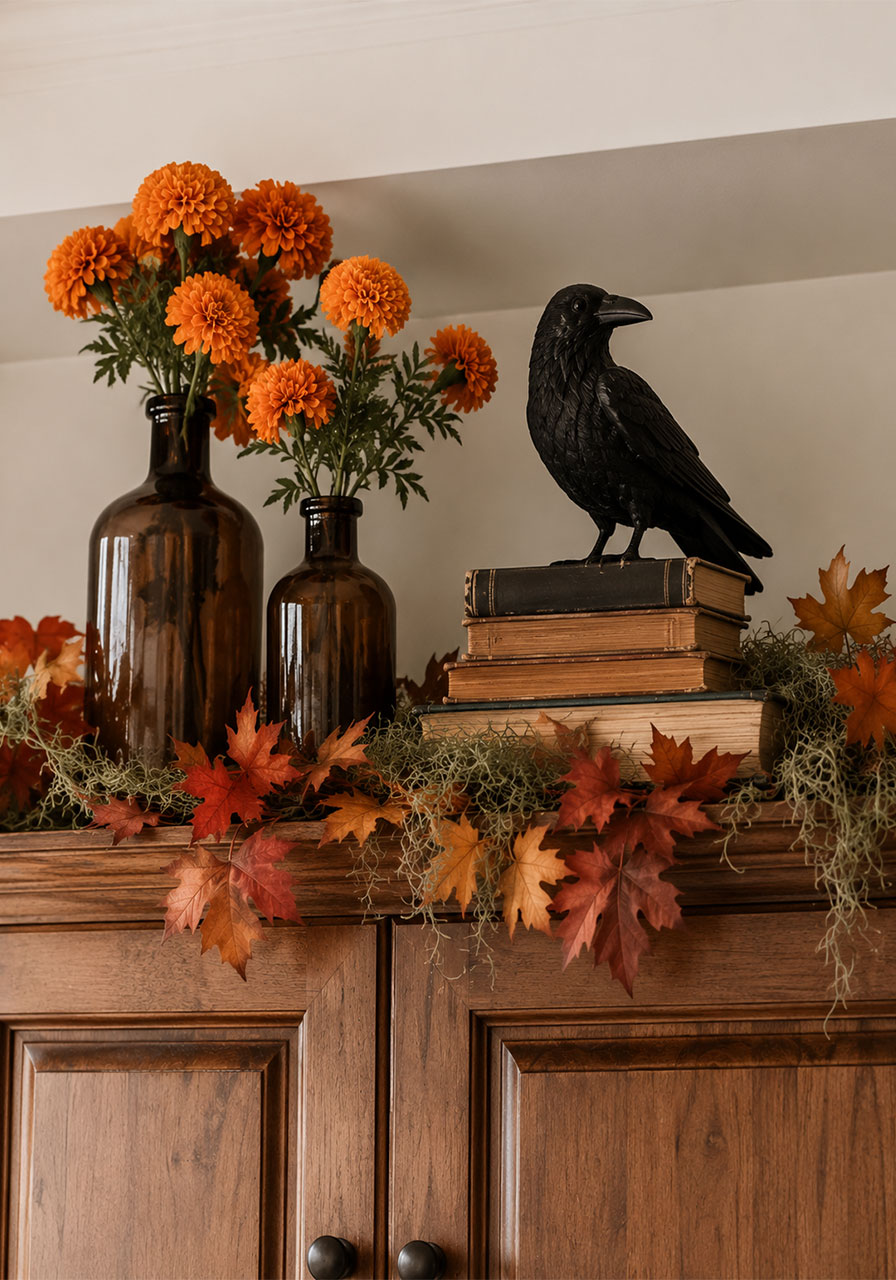
What You’ll Need:
- 1-2 black crow figurines
- Faux orange marigolds or mums
- Dark glass bottles or vases
- Faux autumn leaf garland and Spanish moss
How to Create It:
1. Place your bottles first, varying the heights, then add your florals into each one.
2. Perch your crow on top of a stack of books or a small pumpkin so it sits slightly higher than the rest of the display.
3. Drape moss or leaf garland along the front edge to soften the hard lines of the bottles.
Pro Tip: Use real dried leaves from your yard mixed in with the faux ones – it adds texture no store-bought garland can fully replicate.
10. The Spider Crawl Backsplash Takeover
Instead of decorating above your cabinets, this idea sends a swarm of black spiders crawling down your backsplash toward your stove, with a soft floral wreath caught in cobwebs as the centerpiece.
It’s unexpected, it’s a little creepy in the best way, and it works in literally any kitchen color scheme.
Best for: Kitchens with subway tile or a plain backsplash. Time to Create: 25 minutes. Budget: Low.
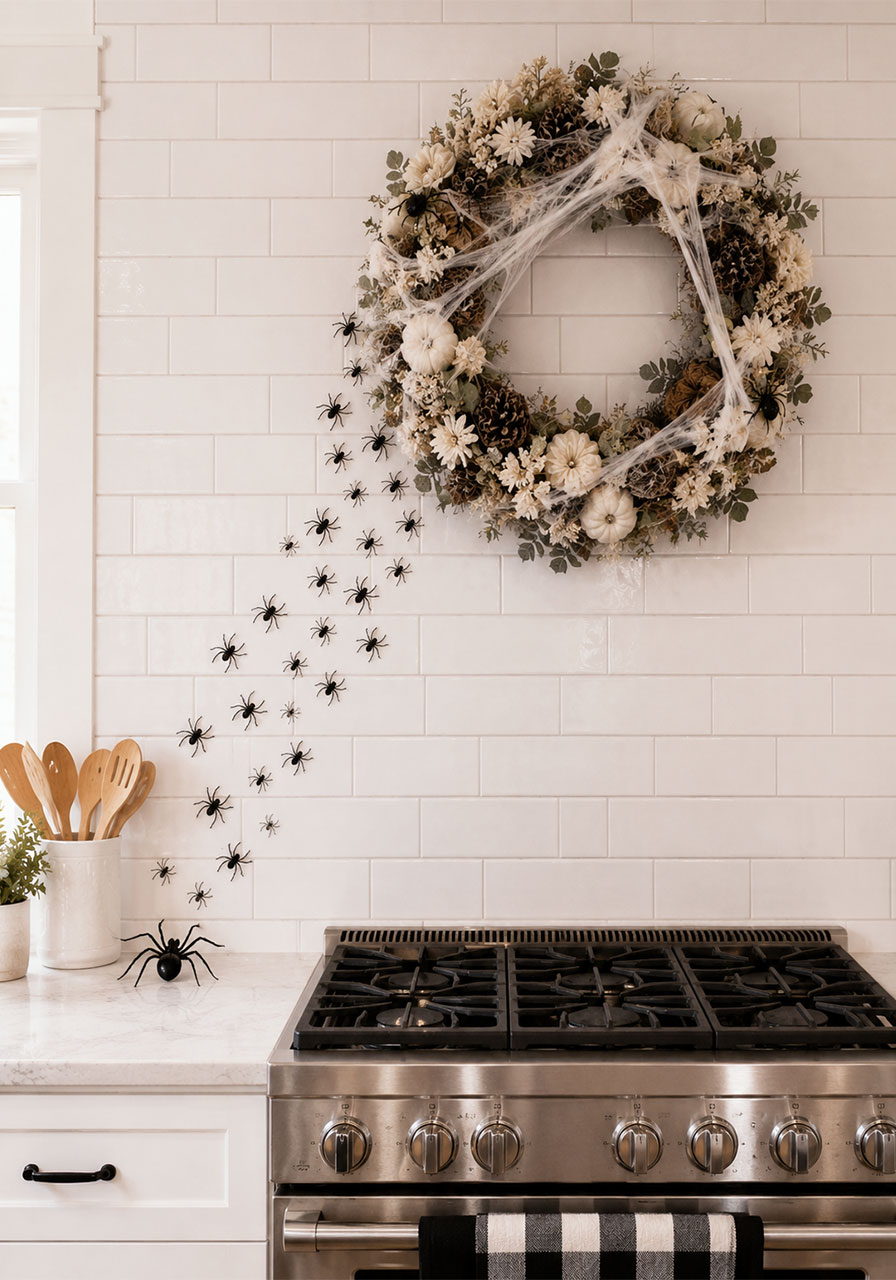
What You’ll Need:
- A pack of black spider wall decals (20-30 spiders in varying sizes)
- Stretchy spiderweb material
- 1 wreath (floral or pumpkin-themed)
How to Create It:
1. Hang your wreath first above your stove as the anchor point.
2. Stretch spiderweb material around and across the wreath, pulling it slightly so it looks naturally spun rather than draped.
3. Starting at the wreath, place spiders in a diagonal trail crawling down toward the counter, clustering more near the top and thinning out near the bottom.
Fun Variation: Add one oversized spider at the very bottom of the trail, like it just landed on your countertop. It’s a small surprise that always gets a laugh.
11. The Happy Halloween Banner Hood Display
A classic for a reason. A cursive “Happy Halloween” banner strung across your range hood, black and orange pumpkins lined up on top, and a pair of skeleton “helpers” lounging on the counter below.
It’s the kind of look that photographs beautifully for every Instagram-worthy party pic your guests will take.
Best for: Range hoods with a ledge or mantel-style shelf. Time to Create: 30 minutes. Budget: Moderate.
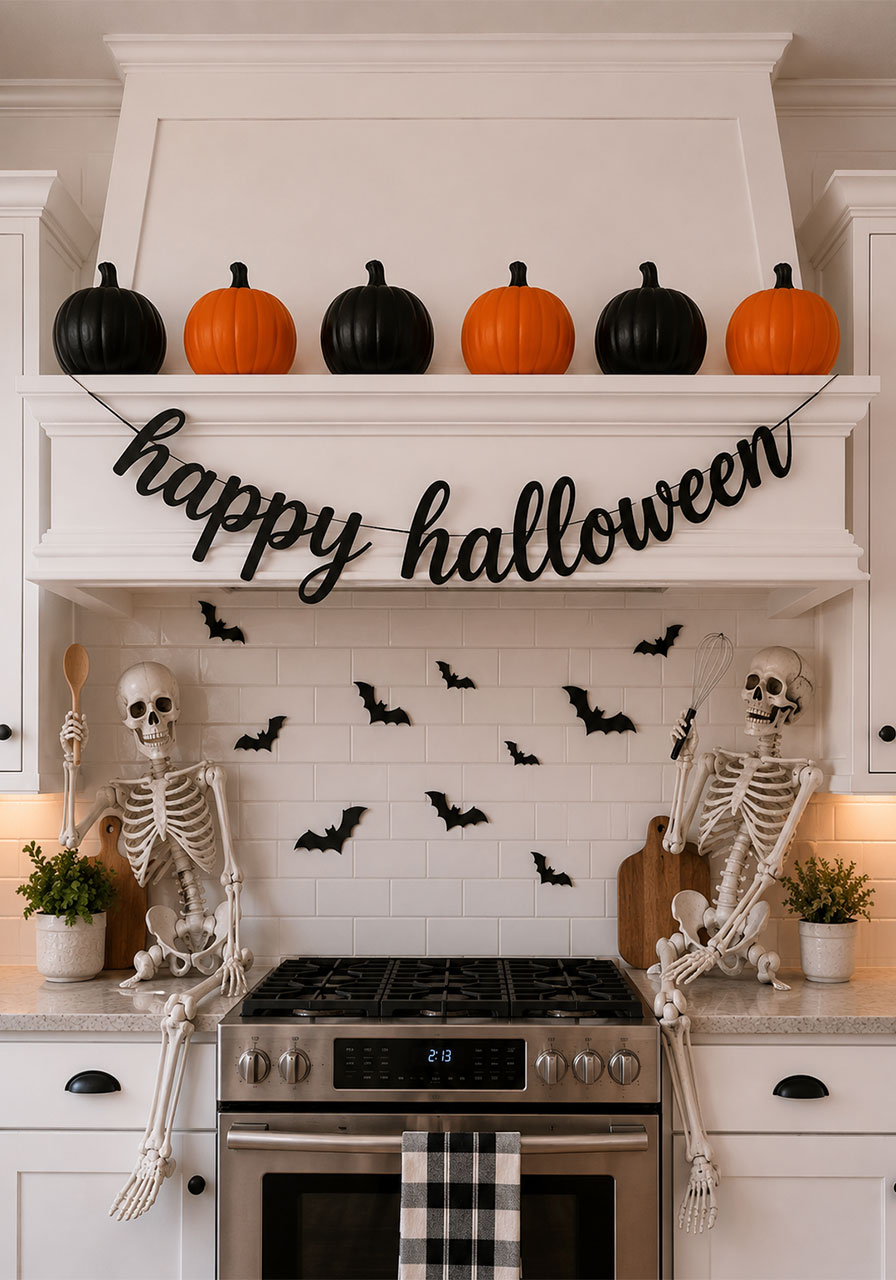
What You’ll Need:
- A “Happy Halloween” cursive banner
- 4-6 pumpkins in mixed black and orange
- 2 posable skeleton figures
- Small bat decals for the backsplash
How to Create It:
1. String your banner across the front of your hood first, letting it dip naturally in the middle.
2. Line your pumpkins up along the ledge above, alternating black and orange for rhythm.
3. Pose your skeletons on the counter below, leaning them against the cabinets like they’re hanging out at the party.
4. Add a few small bat decals to the backsplash between the skeletons for extra detail.
Pro Tip: Give each skeleton a tiny prop – a wooden spoon, a mini apron – to make them feel like part of your kitchen crew, not just decorations.
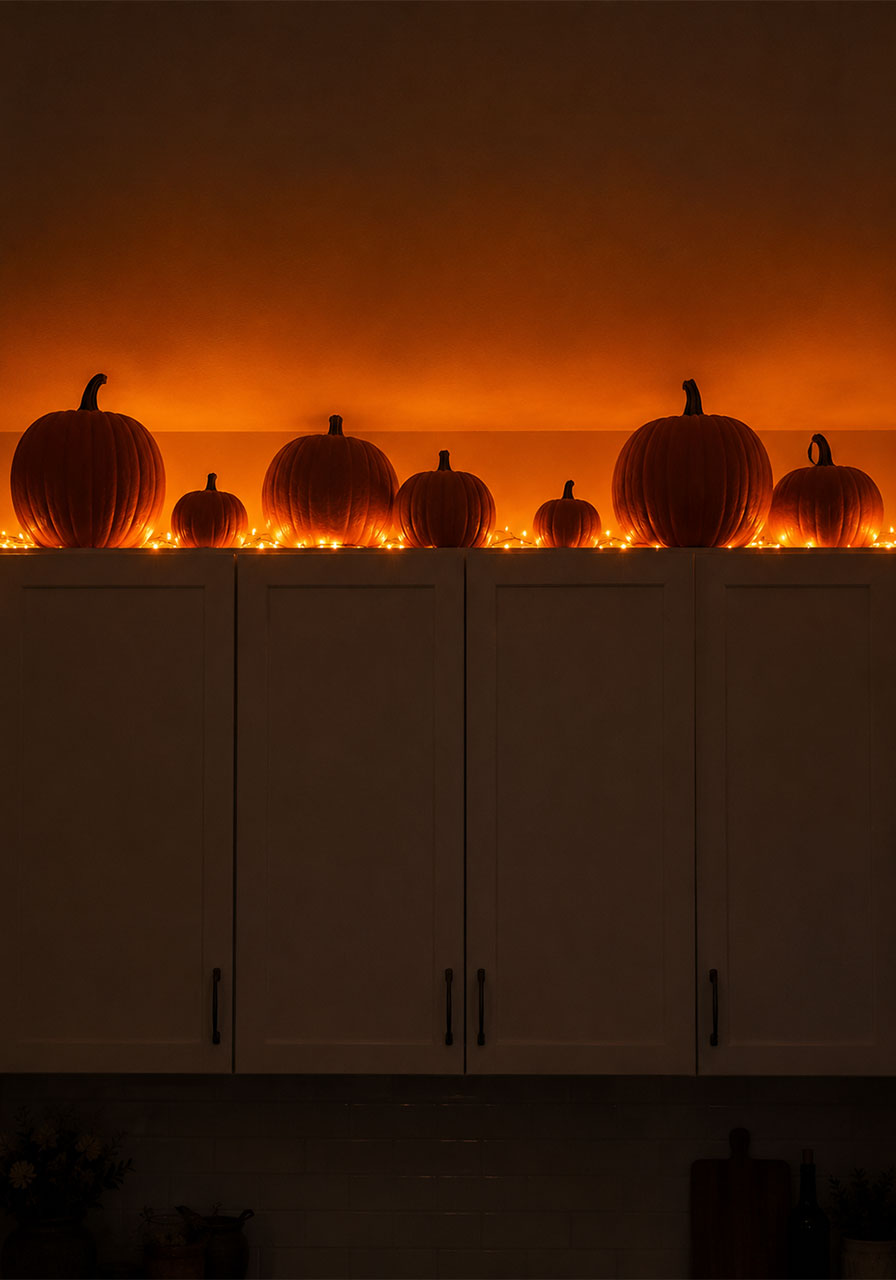
12. The Glow-Up String Light Pumpkin Line
Take the pumpkin parade idea and add a warm, golden-hour glow underneath it using rope lights tucked behind your pumpkins. Once it’s dark, your cabinet tops become the softest, coziest part of the whole party.
Best for: Evening or nighttime parties. Time to Create: 25 minutes. Budget: Low.
What You’ll Need:
- Warm white or orange battery-operated rope lights
- 5-8 pumpkins in mixed sizes
How to Create It:
1. Lay your rope lights across the back of your cabinet top first, pushed toward the wall.
2. Arrange your pumpkins in front of the lights so the glow peeks out from behind them.
3. Turn off your overhead kitchen lights and test the effect before your guests arrive.
Pro Tip: Put your rope lights on a cheap plug-in timer so they turn on automatically right as your party starts.
13. The Buffalo Check Bar Cart Runner
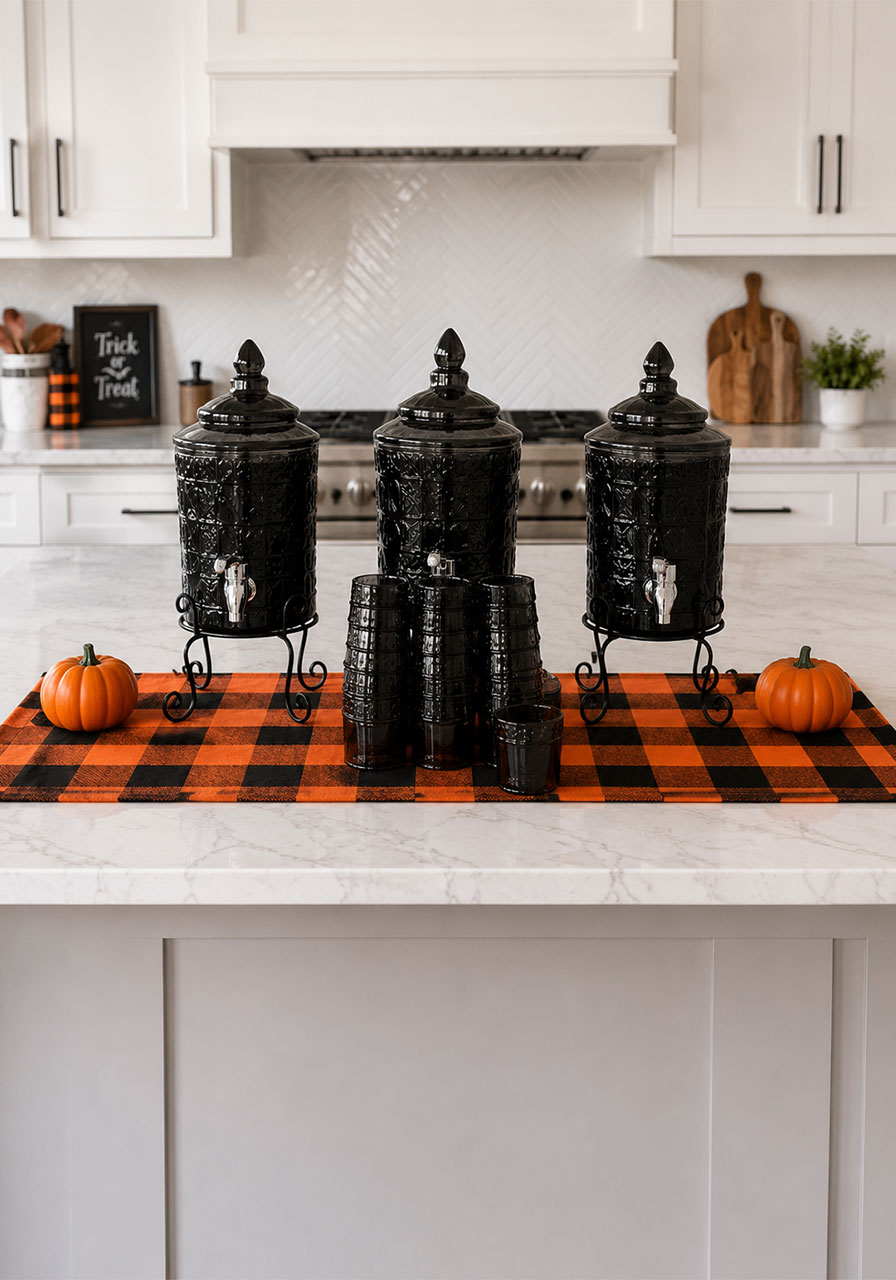
If you’re setting up a Halloween drink station, dress up your bar cart or counter with an orange-and-black buffalo check table runner. It instantly makes your drink setup feel styled instead of thrown together at the last minute.
Best for: Kitchen islands or drink stations. Time to Create: 10 minutes. Budget: Low.
What You’ll Need:
- 1 orange and black buffalo check runner
- Black glassware or drink dispensers
- A mini pumpkin or two for the ends
How to Create It:
1. Lay your runner down the center of your counter or island first.
2. Place your glassware and dispensers on top, spaced evenly.
3. Anchor each end of the runner with a small pumpkin so it doesn’t slide around during the party.
Pro Tip: This is the fastest idea on the entire list. Perfect for the host who’s already exhausted the day of the party.
14. The Mini Pumpkin Cabinet Knob Toppers
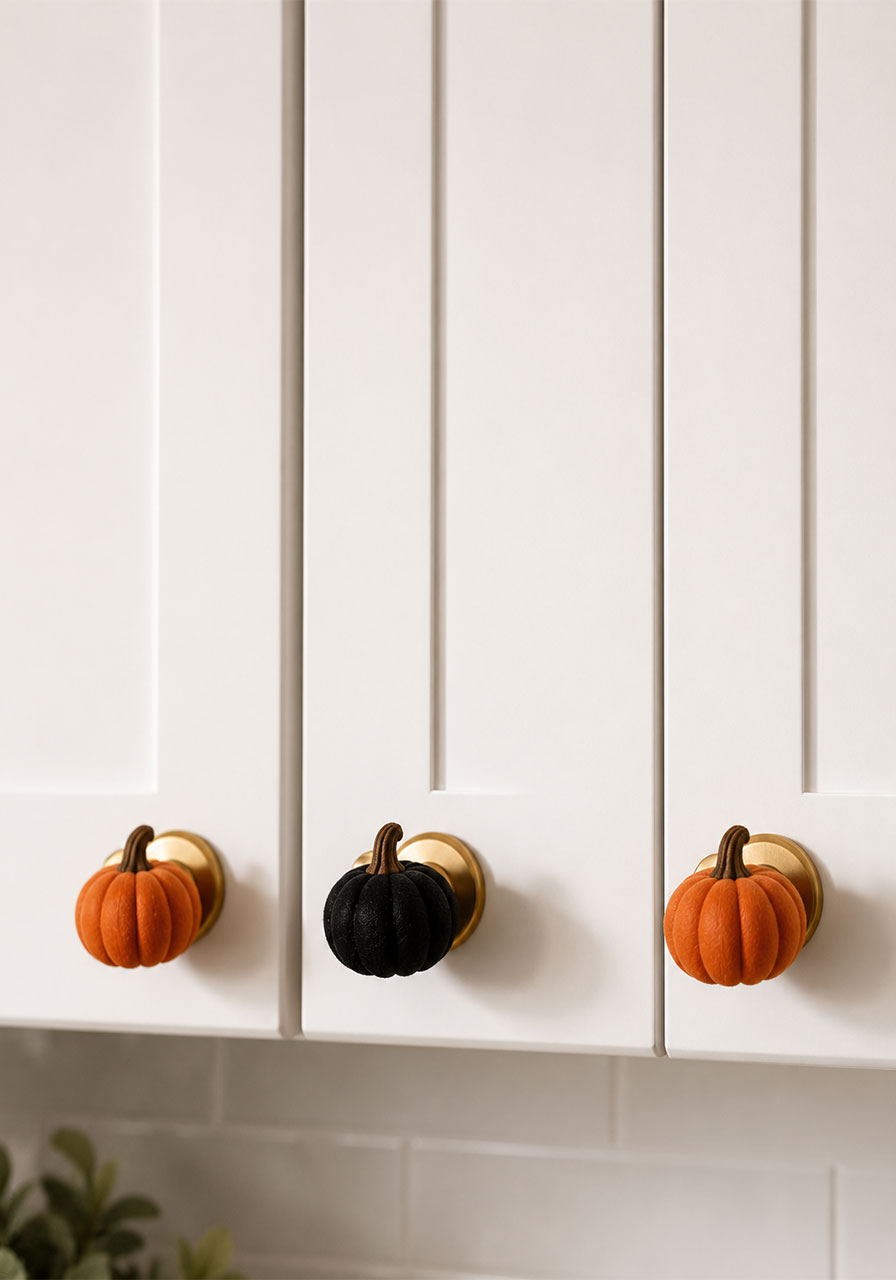
A tiny detail that gets a huge reaction. Slide small faux pumpkins or mini gourds onto your cabinet knobs so every single drawer and door feels like part of the theme, not just the top of your cabinets.
Best for: Adding detail without much effort. Time to Create: 10 minutes. Budget: Low.
What You’ll Need:
- Mini faux pumpkins with a small hole or soft foam base
- Cabinet knobs (yours, already installed)
How to Create It:
1. Choose pumpkins small enough to sit securely on your knobs without falling off.
2. Press or twist each pumpkin gently onto a knob until it holds in place.
3. Alternate orange and black pumpkins across your cabinets for a playful rhythm.
Fun Variation: Use this same trick with tiny spiders or mini skulls for a spookier finish.
15. The Ombré Pumpkin Ladder Display
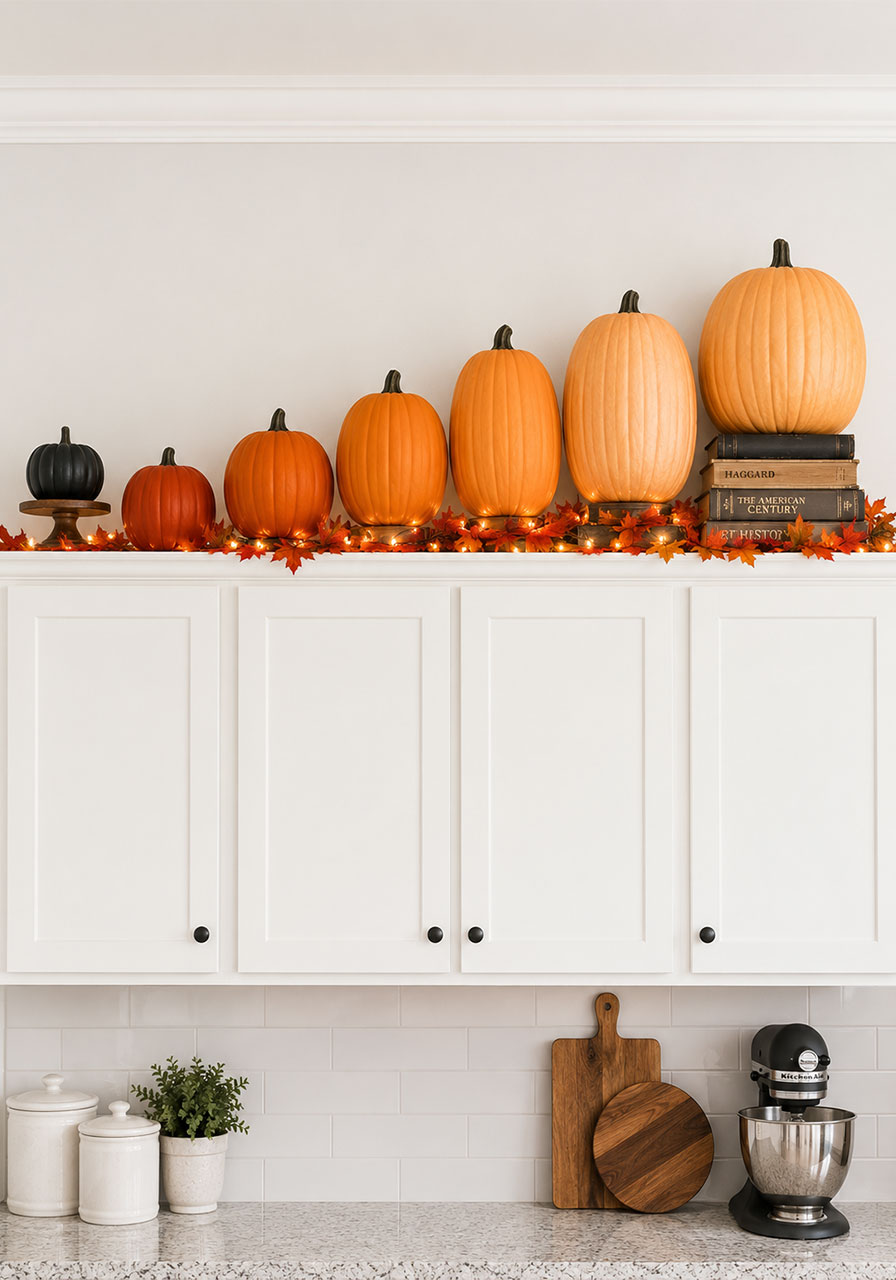
Instead of a flat row, stack your pumpkins in a rising “ladder” from smallest to largest, moving from deep black at one end to bright orange at the other. It creates a gradient effect that looks incredibly intentional for very little effort.
Best for: Hosts who love a design-forward look. Time to Create: 20 minutes. Budget: Moderate.
What You’ll Need:
- 6-8 pumpkins ranging from black through deep orange to light orange
- Small risers or books to vary height
How to Create It:
1. Sort your pumpkins by color first, from darkest to lightest.
2. Place your darkest pumpkin on the shortest riser at one end.
3. Work across your cabinet top, gradually increasing both the height and the orange tone of each pumpkin as you go.
Pro Tip: Take a photo from across the room as you build it – the gradient effect is much easier to judge in a photo than up close.
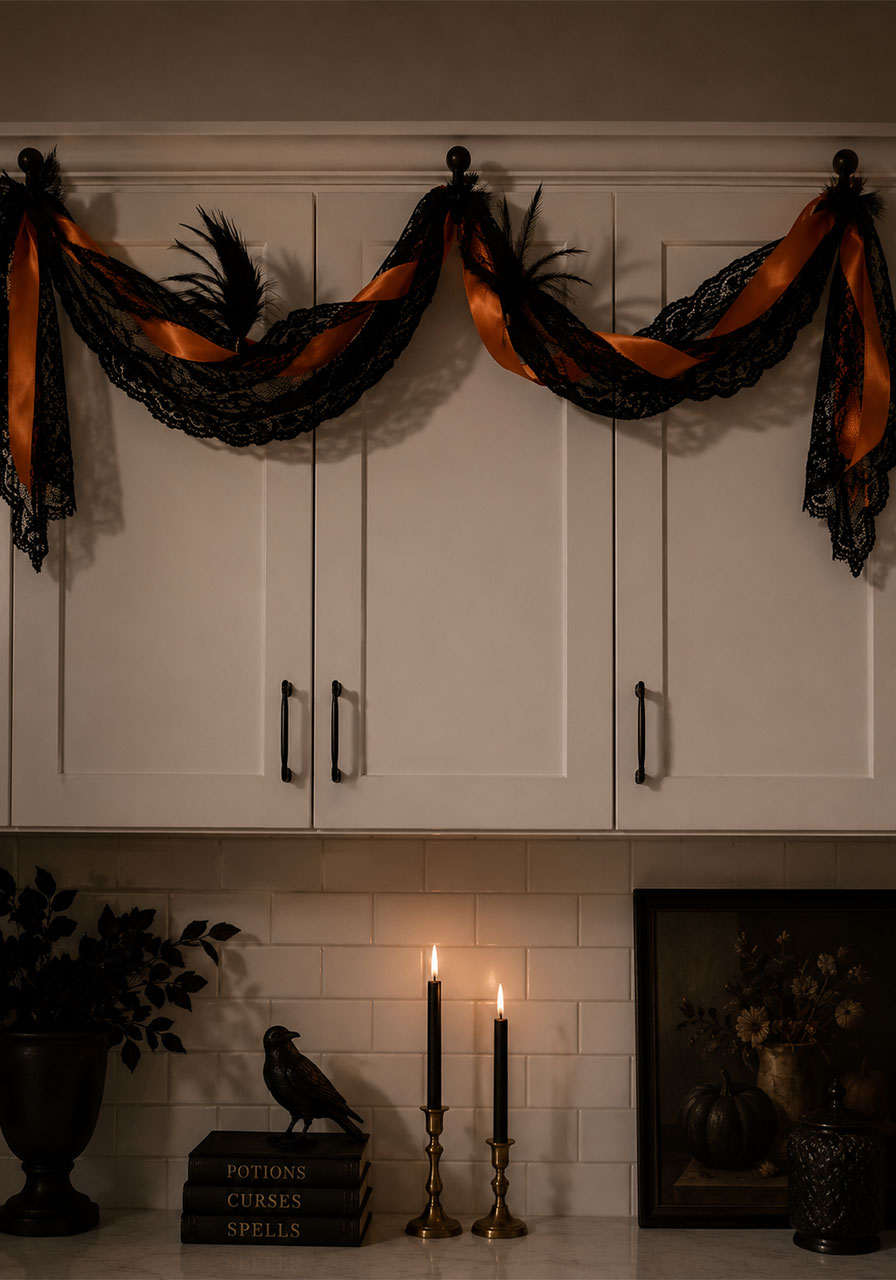
16. The Black Lace & Orange Ribbon Garland
A more elegant, grown-up take on Halloween garland. Black lace fabric twisted together with wide orange ribbon, draped along your cabinet tops for a look that feels more “haunted mansion” than “dollar store aisle.”
Best for: Hosts who want a sophisticated Halloween look. Time to Create: 20 minutes. Budget: Low.
What You’ll Need:
- 2-3 yards of black lace fabric
- 2-3 yards of wide orange ribbon
- Removable adhesive hooks
How to Create It:
1. Twist your lace and ribbon together loosely along their full length before hanging.
2. Hang adhesive hooks along the front edge of your cabinets at even intervals.
3. Drape your twisted garland across the hooks, letting it dip slightly between each one for a soft, swagged effect.
Fun Variation: Tuck a few faux black feathers into the twist for extra texture and movement.
Your Kitchen Is Officially Party-Ready
Sixteen ideas, one color story, zero excuses left. Whether you go all-in with a fully loaded cabinet-top pumpkin parade or keep it simple with a few knob toppers and a bold orange wreath, your kitchen is about to become the room your guests can’t stop talking about.
Pick two or three ideas that fit your time and budget, gather your supplies, and get decorating. Because the best parties are the ones where every single room – yes, even the kitchen – is in on the fun.
