
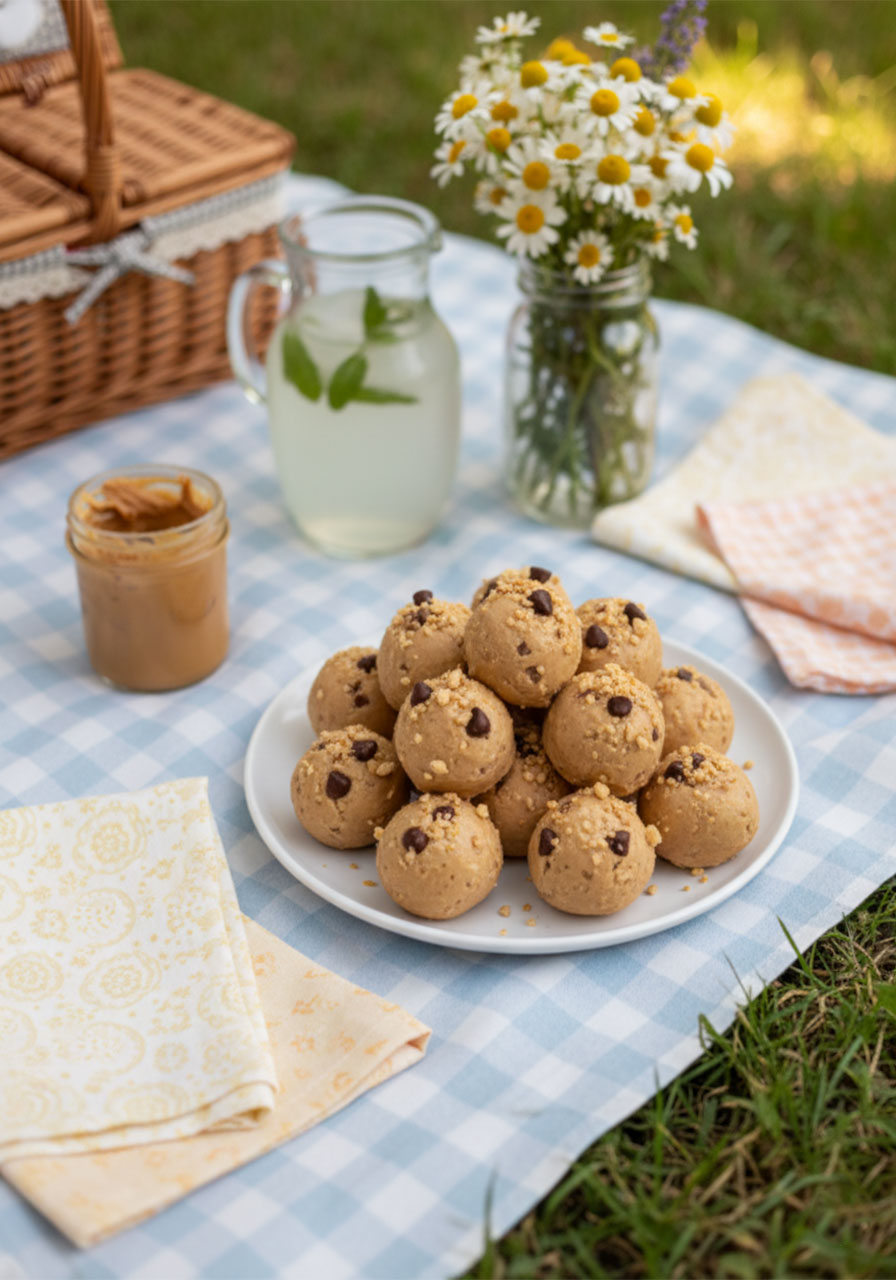
You know that moment when the kids come running in from outside, sweaty and demanding something sweet – and you want to say yes without feeling guilty about it?
That’s exactly why these Frozen Greek Yogurt Peanut Butter Bites have become a freezer staple in so many homes.
Creamy, satisfying, and packed with protein, they taste like a treat but work hard like a snack.
And the best part? You can make a whole batch in about 15 minutes, then let your freezer do the rest of the work.
Whether you’re a parent meal-prepping for the week, a teacher planning a classroom snack day, or just someone who loves a cold, creamy bite on a warm afternoon – this one’s for you.
Let’s dive in!
Why You’ll Love These Frozen Bites
Before we get into the how-to, here’s why this recipe is genuinely worth making – not just once, but again and again.
They’re ridiculously easy. No baking. No fancy equipment. Just a bowl, a spoon, and a baking sheet.
They’re actually nutritious. Greek yogurt brings the protein and probiotics. Peanut butter adds healthy fats that keep kids full longer.
Kids go absolutely crazy for them. They look like little frozen truffles. That alone is a win.
They’re totally customizable. Chocolate chips, crushed peanuts, a drizzle of honey – you can mix and match based on what your family loves.
They keep for weeks. Make a big batch on Sunday, and you’re stocked for the whole month.
Honestly, once you try these, you’ll wonder how your freezer ever survived without them.

What You’ll Need
The ingredient list is refreshingly short. Here’s everything you need to make about 18 bites:
For the Bites:
1 cup plain Greek yogurt (full-fat recommended – it freezes creamier)
1/2 cup creamy peanut butter (natural, unsweetened is best)
2 tablespoons maple syrup (or honey – adjust to your taste)
1/2 teaspoon pure vanilla extract
1/4 cup mini chocolate chips (optional but highly recommended)
Optional Toppings:
Chopped peanuts
A pinch of flaky sea salt
Extra mini chocolate chips
Equipment:
Mixing bowl
Spatula or spoon
Baking sheet
Parchment paper
Small cookie scoop (optional but makes life easier)
That’s it. Seriously – no blender, no mixer, nothing complicated.

How to Make Frozen Greek Yogurt Peanut Butter Bites
Ready? Let’s make these. The whole process takes about 15 minutes of active time, plus a few hours of freezer time.
Step 1: Mix Everything Together
In a medium mixing bowl, combine the Greek yogurt, peanut butter, maple syrup, and vanilla extract.
Stir everything together with a spatula until the mixture is completely smooth and uniform – no streaks of peanut butter hiding in there!
Once it looks creamy and gorgeous, gently fold in your mini chocolate chips if you’re using them.
Pro Tip: Taste the mixture before freezing! This is your chance to add a little more sweetener if you like things on the sweeter side, or more peanut butter if you want a richer flavor.

Step 2: Scoop Onto a Baking Sheet
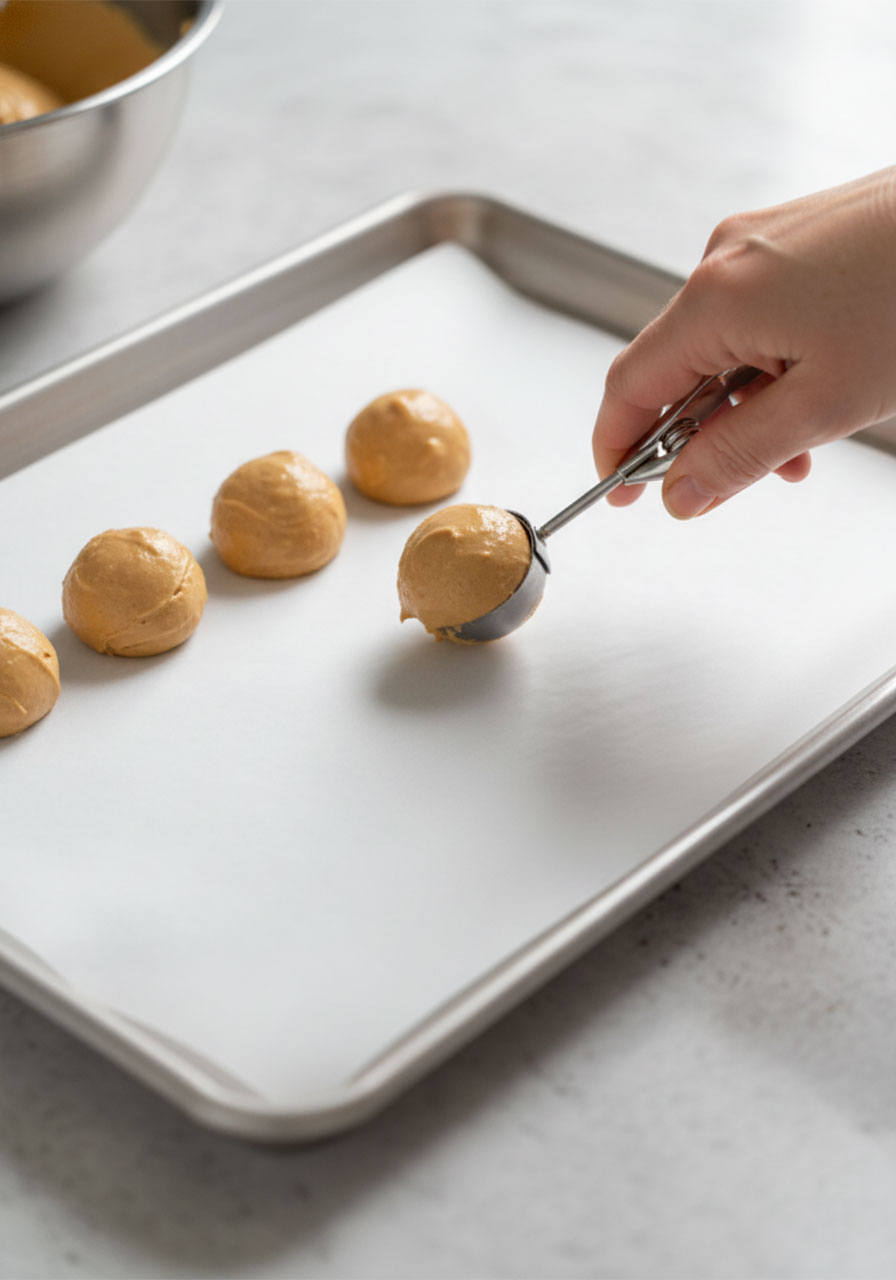
Line your baking sheet with parchment paper – this is non-negotiable, unless you enjoy chipping frozen bites off a metal tray.
Using a small cookie scoop (about 1 tablespoon) or two spoons, drop rounded dollops of the mixture onto the parchment.
Leave a little space between each bite. They don’t spread, but you’ll want room to pop them off easily later.
Step 3: Add Your Toppings
Now for the fun part! Sprinkle a few chopped peanuts or a tiny pinch of flaky sea salt on top of each bite.
This step is optional, but it adds a little texture and extra flavor that makes these feel extra special.
Kids especially love pressing a single chocolate chip into the top of each one.

Step 4: Freeze Until Solid
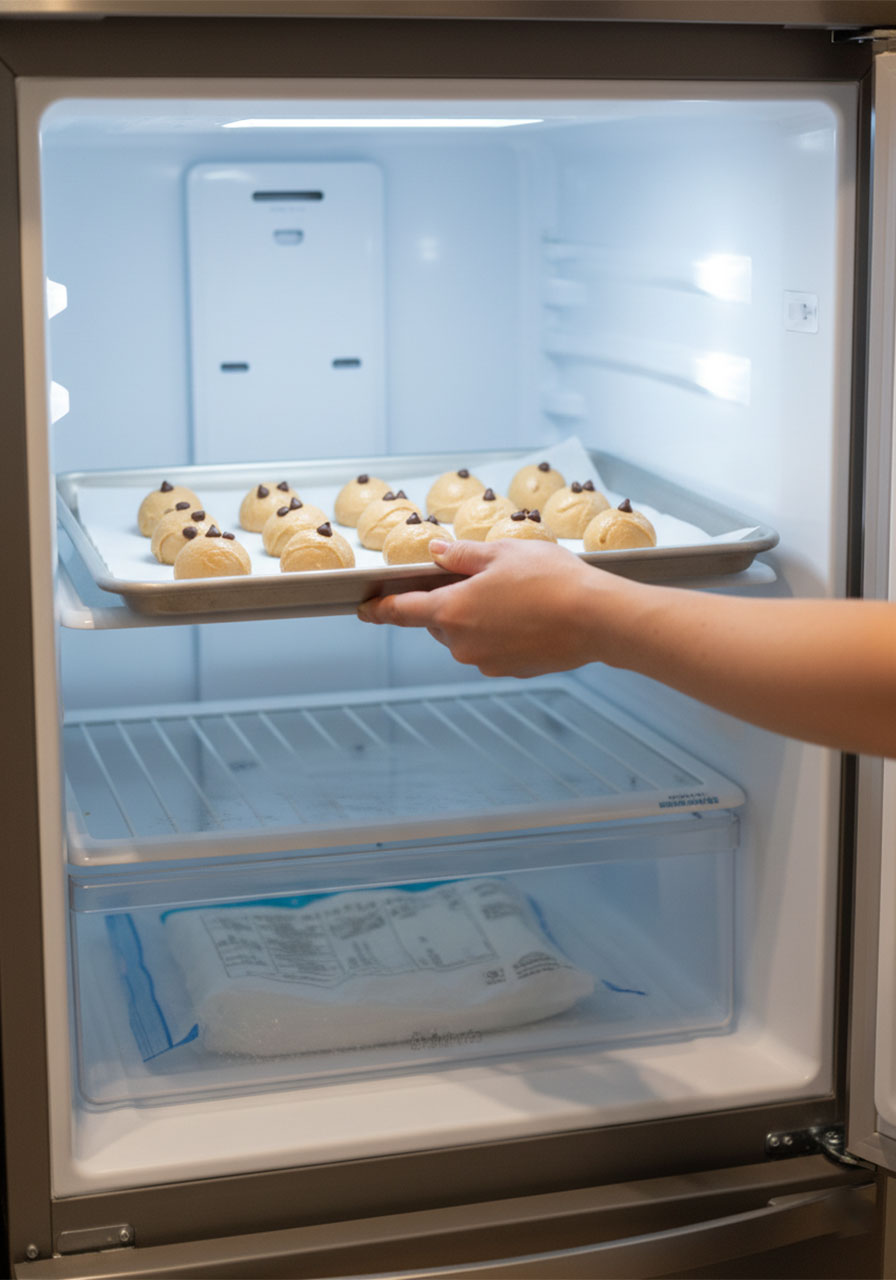
Slide the baking sheet into the freezer and let the bites chill for at least 2 to 3 hours, or until they’re completely firm and frozen through.
Resist the urge to rush this step! Fully frozen bites have the best texture – creamy and dense, not icy or mushy.
Step 5: Transfer and Store
Once frozen solid, transfer your bites into an airtight freezer-safe container or a large zip-lock freezer bag.
Stack them in a single layer at first, then pile them up once they’re fully hardened so they don’t stick together.
They’ll keep beautifully in the freezer for up to 2 to 3 weeks – though in most households, they disappear long before that!
Pro Tips for the Creamiest, Most Delicious Bites
A few small tweaks can make a big difference. Here’s what experience teaches you after making these a dozen times:
Always use full-fat Greek yogurt. Low-fat or non-fat versions tend to become icy when frozen. Full-fat stays creamy and smooth – and it tastes richer too.
Natural peanut butter works best. The kind where the oil separates at the top. It blends more smoothly into the yogurt and doesn’t add unnecessary sugar or hydrogenated oils.
Stir your peanut butter well before measuring. If the oil has separated in the jar, give it a good stir first. This keeps the texture even throughout your mix.
Use a cookie scoop for uniform bites. It makes portioning faster, keeps the sizes consistent, and means every single bite freezes evenly.
Don’t skip the parchment paper. Frozen yogurt sticks to everything. Parchment paper is your best friend here.

Fun Variations to Try
Once you’ve mastered the classic version, this recipe is a blank canvas for creativity. Here are some ideas your family will love:
Chocolate Lover’s Version
Stir in 2 tablespoons of cocoa powder to the base mixture before freezing. You get a deep chocolate-peanut butter flavor that tastes like a frozen Reese’s cup. Absolute magic.
Banana Peanut Butter Bites
Mash half a ripe banana and fold it into the mixture. It adds natural sweetness, a fruity flavor, and makes the bites even creamier. A crowd-pleaser for the little ones.
Almond Butter Swap
Not a peanut butter household? Swap in almond butter or cashew butter instead. Cashew butter especially has a subtle sweetness that kids tend to love.
Warm Spice Version
Add a pinch of cinnamon or pumpkin pie spice to the mix. Perfect for fall snack time, and it makes the whole batch smell amazing.
Berry Swirl Bites
Drop a small spoonful of strawberry jam or mashed raspberries on top of each bite before freezing. The sweet-tart burst of berry against the creamy peanut butter base is absolutely delightful.
Coconut Crunch Bites
Mix in 2 tablespoons of shredded unsweetened coconut before scooping. Adds a lovely chew and tropical flavor to the finished bite.
How to Serve These at a Party or Classroom Event
These bites are not just a weekday snack hero – they’re actually perfect for parties and school events too!
Set them out on a chilled plate right before serving so they don’t soften too quickly.
If you’re bringing them to a classroom or outdoor party, pack them in a small insulated bag with an ice pack.
For a fun party presentation, arrange them in mini cupcake liners on a tray. They look polished, professional, and totally irresistible.
You can also set up a little “topping station” for kids – let them choose their own mix-ins before you freeze the bites. Mini chocolate chips, crushed graham crackers, sprinkles – the options are endless and the kids absolutely love being part of the process.

Nutritional Benefits Worth Knowing
If you’re a parent or teacher who thinks carefully about what kids eat, here’s why these bites are a snack you can feel genuinely good about.
Greek yogurt is one of the best sources of protein you can add to a kid’s diet. It also contains calcium for strong bones and probiotics that support healthy digestion.
Peanut butter provides healthy unsaturated fats, vitamin E, magnesium, and more protein. It also helps kids feel full and satisfied longer – no energy crash 20 minutes later.
Maple syrup is a natural sweetener with trace minerals. Used in small amounts like this recipe calls for, it adds just enough sweetness without a sugar spike.
Each bite comes in at around 90 calories, making them a perfectly portioned, protein-packed treat that you can serve without guilt.
How to Store Your Bites (And Make Them Last)
Proper storage is the key to keeping these bites fresh and delicious for as long as possible.
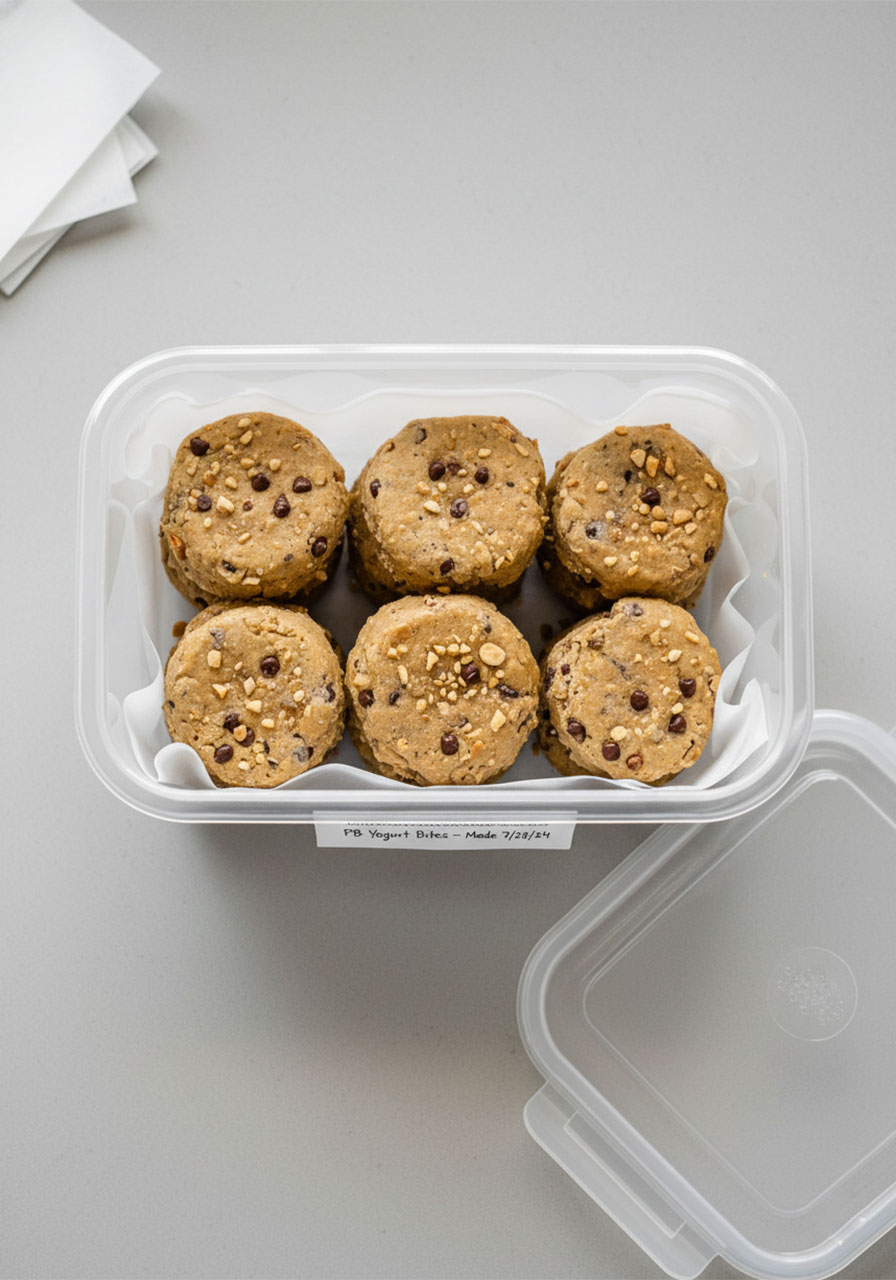
Once fully frozen on the baking sheet, transfer them to an airtight container or a freezer-safe zip-lock bag.
If you’re stacking them, place a small piece of parchment between layers to prevent sticking.
They’ll keep well in the freezer for up to 2 to 3 weeks.
Always serve them straight from the freezer – they soften quickly at room temperature and are best enjoyed cold.
If you’re making a big batch for the week, labeling your container with the date is a helpful habit so you always know what’s fresh.
Frequently Asked Questions
Can I make these ahead of time?
Absolutely – and honestly, you should! These are one of the best meal-prep snacks out there. Make a double batch on the weekend, freeze them, and you’ve got a ready-to-grab treat for the entire week. No fuss, no stress, just open the freezer and enjoy.
Can I use flavored Greek yogurt instead of plain?
You can, but keep in mind that flavored yogurts often have added sugar. If you use a vanilla or honey Greek yogurt, you may want to skip or reduce the maple syrup in the recipe so the bites don’t end up too sweet.
What if I have a peanut allergy in my classroom or family?
Great news – this recipe works just as well with sunflower seed butter or SunButter, which is completely nut-free. The flavor is slightly different but still delicious, and it makes the bites safe for nut-free environments.
My bites turned out icy instead of creamy – what went wrong?
This usually happens when low-fat or non-fat Greek yogurt is used. The higher the fat content, the creamier the frozen texture. Stick with full-fat Greek yogurt for the best results every single time.
Can I use a different sweetener?
Yes! Honey and agave nectar both work beautifully in place of maple syrup. Just taste the mixture before freezing and adjust the amount to your preferred sweetness level – every sweetener has a slightly different intensity.
How long can these stay at room temperature?
These are best enjoyed straight from the freezer. They start to soften within about 5 to 10 minutes at room temperature. For outdoor parties or classroom events, keep them in an insulated bag with an ice pack until it’s time to serve.
Are these safe for toddlers?
These bites are a wonderful snack for toddlers who are already eating solid foods and have no nut allergies. For very young children, you may want to cut the bites into smaller pieces to make them easier and safer to eat.
The Bottom Line
If you’re looking for a snack that checks every box – quick to make, genuinely nutritious, loved by kids, and easy to prep ahead – these Frozen Greek Yogurt Peanut Butter Bites are your answer.
They’re the kind of treat that makes parents feel like heroes and kids feel like they’re getting away with something.
Make a batch this weekend. Watch them disappear. Then make another.
Your freezer has never been more popular.

Frozen Greek Yogurt Peanut Butter Bites
Equipment
- Mixing bowl
- Spatula or spoon
- Baking sheet
- Parchment paper
- Small cookie scoop (optional)
Ingredients
For the Bites:
- 1 cup plain full-fat Greek yogurt
- 1/2 cup creamy natural peanut butter (unsweetened)
- 2 tablespoons maple syrup (or honey, adjusted to taste)
- 1/2 teaspoon pure vanilla extract
- 1/4 cup mini chocolate chips (optional)
Optional Toppings:
- 1 tablespoon chopped peanuts
- 1 teaspoon flaky sea salt
- Extra mini chocolate chips
Instructions
- In a medium mixing bowl, combine the Greek yogurt, peanut butter, maple syrup, and vanilla extract. Stir until completely smooth with no streaks.
- If using, gently fold in the mini chocolate chips until evenly distributed.
- Line a baking sheet with parchment paper.
- Using a small cookie scoop or two spoons, drop 1-tablespoon-sized rounded dollops of the mixture onto the parchment. Leave a small space between each bite.
- If desired, sprinkle chopped peanuts, sea salt, or a few extra chocolate chips on top of each bite.
- Place the baking sheet in the freezer for 2 to 3 hours, or until the bites are completely frozen and firm.
- Once frozen solid, transfer the bites to an airtight freezer-safe container or freezer bag. Store for up to 2 to 3 weeks.
- Serve straight from the freezer. Enjoy!
Notes
- Full-fat Greek yogurt is strongly recommended. Low-fat versions become icy when frozen rather than staying creamy.
- Stir your peanut butter thoroughly before measuring, especially if it’s a natural variety where the oil has separated.
- Taste the mixture before freezing and adjust sweetness to your preference.
- These bites soften quickly at room temperature. Always serve directly from the freezer.
- For nut-free households or classrooms, substitute sunflower seed butter for the peanut butter.
- Get creative with mix-ins: shredded coconut, mashed banana, cocoa powder, cinnamon, or a swirl of berry jam all work wonderfully.
