
Raise your hand if “what should we do today?” has ever sent you into a mild panic. If you’re nodding, this floating boat science experiment is about to become your new best friend.
This is a hands-on STEM activity perfect for kindergarten and Montessori classrooms, homeschool days, or a rainy afternoon at home. Kids build their own tiny boats out of everyday materials, then test how many coins each one can hold before it sinks.
It’s part engineering challenge, part science experiment, and 100% screen-free fun. Best of all, you probably already have most of these supplies sitting in a drawer right now.
Why This Activity Works So Well for Little Scientists
Kids get to build, test, fail, rebuild, and try again. That trial-and-error process is exactly how real engineers work, and it teaches kids that “it sank” is not a failure. It’s data.
Along the way, they’re practicing counting and sorting coins, comparing materials, and making predictions. Then they get to test those predictions in a tray of water. For a classroom or homeschool setting, that is a lot of learning packed into one simple activity.

What You’ll Need
You don’t need a special science kit for this one. Gather whatever combination of the following you have on hand:
- A foil tray or shallow container filled with water
- Food coloring (optional, but it makes the water so much more fun)
- Aluminum foil
- Printer paper
- LEGO bricks and flat tiles
- Magnetic tiles (we’ll explain why these are a fun fail below)
- Pennies, nickels, dimes, quarters, or any coins you have around
- Playdoh
- Paper straws and popsicle sticks (for flags or masts)
- Coloring pencils and a glue stick (optional, for decorating)
- Recyclable materials like bottle caps, cardboard, or yogurt cups
Pro Tip: Sort your coins into piles by type before you start. Kids will naturally want to count and organize them, and it turns cleanup into part of the activity instead of an afterthought.
1. LEGO Boats
This is the most popular option in our house, and it’s easy to see why. Kids can design, decorate, and rebuild their boat in seconds if the first version doesn’t float.
Best for: Kids who already have a LEGO collection at home.
Time to build: 10-15 minutes. Time to test: 10-15 minutes.
How to build it:
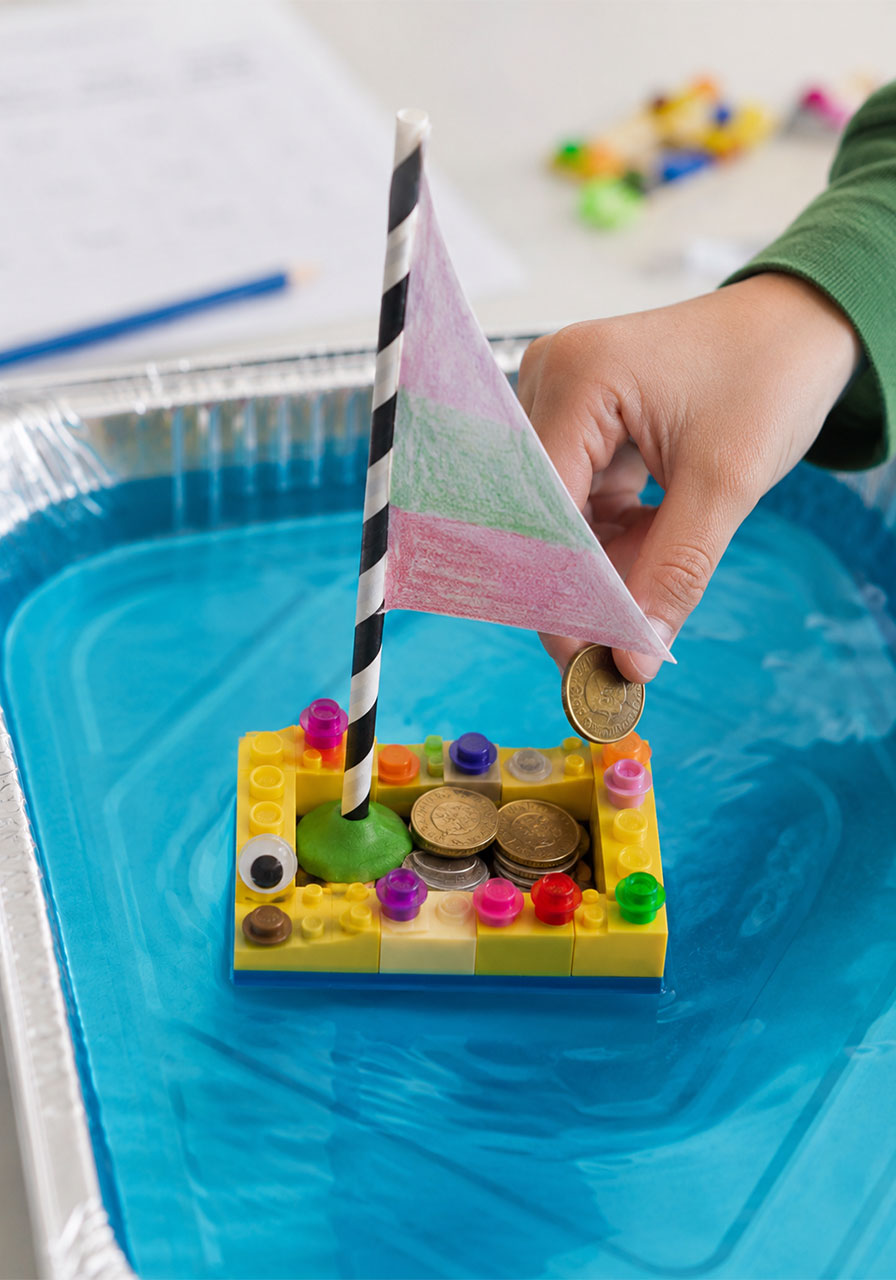
1. Start with a flat LEGO tile as the base of the boat.
2. Add LEGO bricks around the edges to build up the sides like walls. This keeps water from splashing over the top.
3. Decorate the boat with extra bricks, small figures, or fun details. Let kids get creative here.
4. To add a sail, press a small ball of playdoh into the center of the boat, then push a paper straw into it to stand upright.
5. Decorate a paper triangle for the sail and slide it onto the straw.
Once the boat is built, it’s time to test it. Lower it gently into the water and start adding coins one at a time, right in the center of the boat.
Here’s the twist we discovered: boats with a straw or pole sticking up actually held fewer coins than simple, closed boats without one. The pole seemed to throw off the balance and tip the boat over sooner.
We also built one fancy, open-sided LEGO structure just to see what would happen. It sank almost immediately, because water crept right in through the gaps between the bricks. That “failure” turned into one of the best learning moments of the whole activity, because it showed the kids exactly why solid, closed sides matter so much for a floating structure.
Pro Tip: Challenge kids to build the smallest boat possible with the tightest, most solid sides. In our tests, smaller boats with intact borders held the most coins by far.
2. Foil Boats
If you want a quick win with almost zero prep, start here. Foil boats were the easiest to make and, somehow, held the most coins in our experiment.
Best for: A no-fuss activity when you’re short on time.
Time to make and test: 10 minutes total.
How to make it:
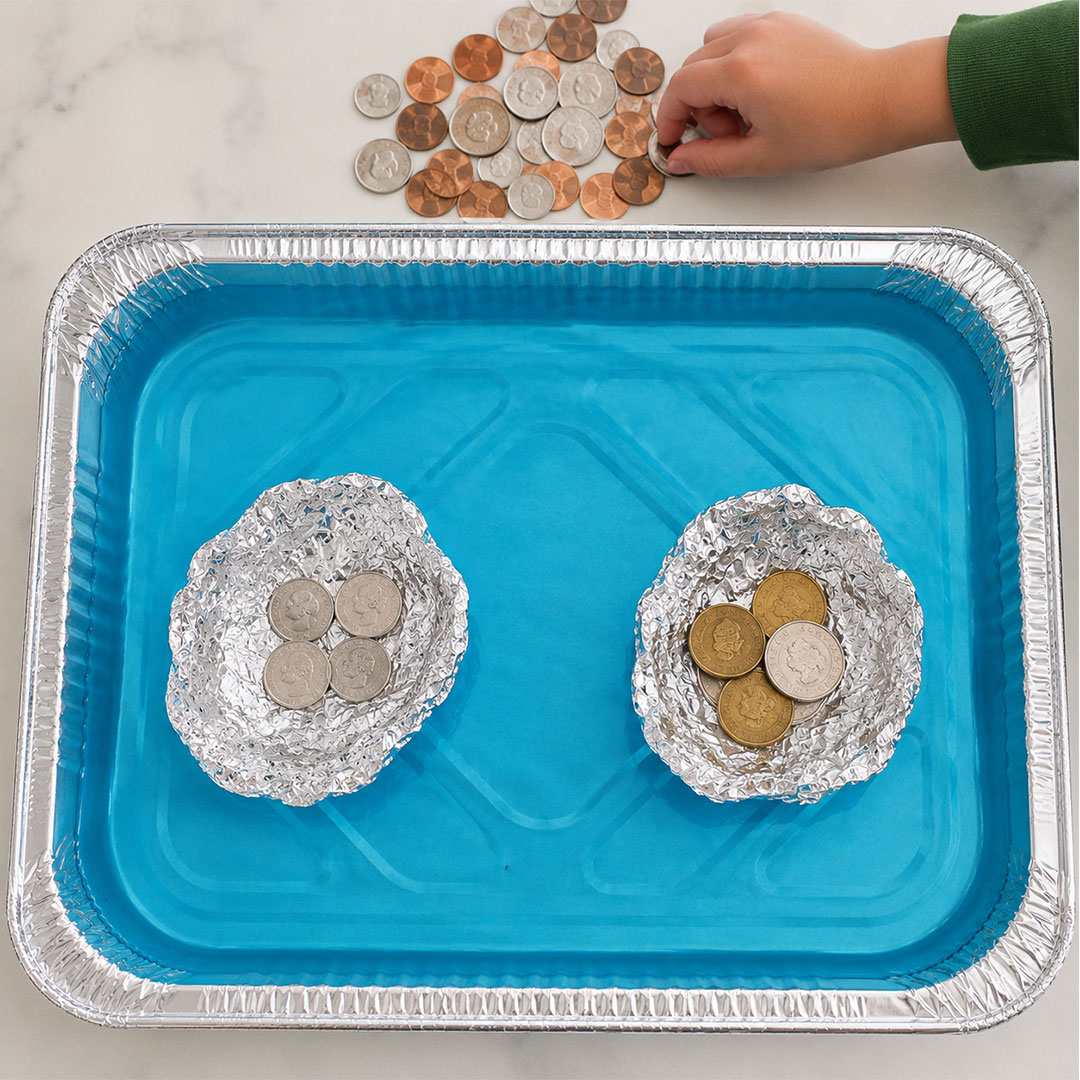
1. Tear off a sheet of aluminum foil.
2. Roll and pinch up the edges to form a small bowl or raft shape.
3. Make sure the bottom stays flat and the corners are sealed tight, so water can’t sneak in.
4. Set it in the water and start adding coins to the center.
Talk to your kids about why this worked so well. Aluminum foil is thin and lightweight, which is exactly what helps a boat float. Ask them to compare it to the heavier plastic LEGO bricks and guess which material they think will win before you even test it.
Pro Tip: Reinforce the corners of your foil boat with an extra pinch or fold. Weak corners are almost always where water gets in first.
3. Paper Boats
This one brings a little nostalgia. Folding a paper boat is a classic skill, and it doubles as a quick lesson in following step-by-step directions.
Best for: Practicing following directions and fine motor skills.
Time to make and test: 10 minutes.
How to make it:
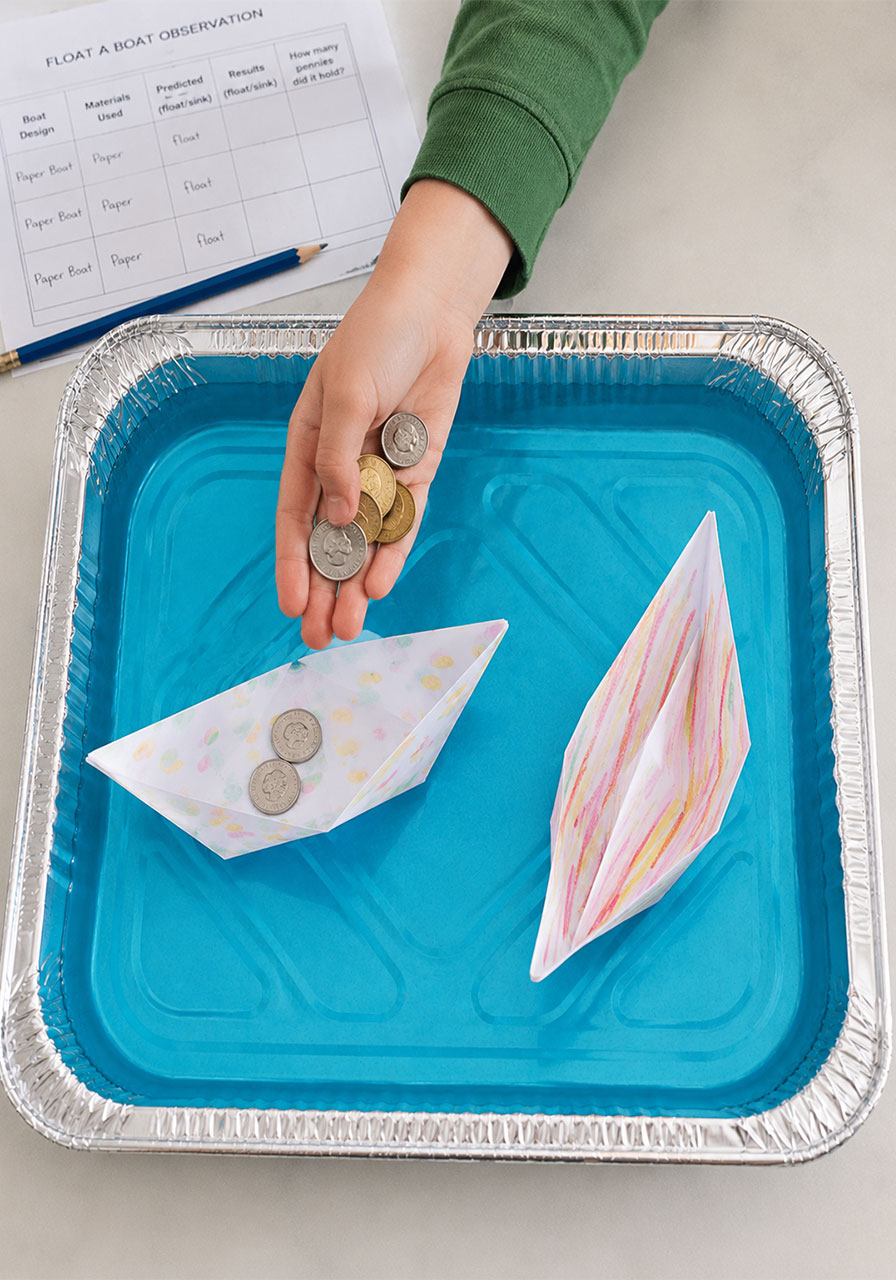
1. Take a standard sheet of printer paper and fold it into a classic paper boat shape. There are plenty of simple video tutorials if your child hasn’t folded one before.
2. Let kids color or decorate the paper before or after folding.
3. Gently set the boat in the water.
4. Add coins slowly to the center, one at a time.
Paper boats float surprisingly well at first, for the same reason foil does: they’re light. Just know that paper is a one-time-use boat. Once it gets soggy, it’s done, so this is a great point to talk about which materials can be reused and which ones can’t.
Pro Tip: Have kids test a paper boat and a foil boat side by side with the same number of coins. It’s a simple, direct comparison that makes the “lightweight materials float better” concept click immediately.
4. Magnetic Tile Boats: A Fun Fail
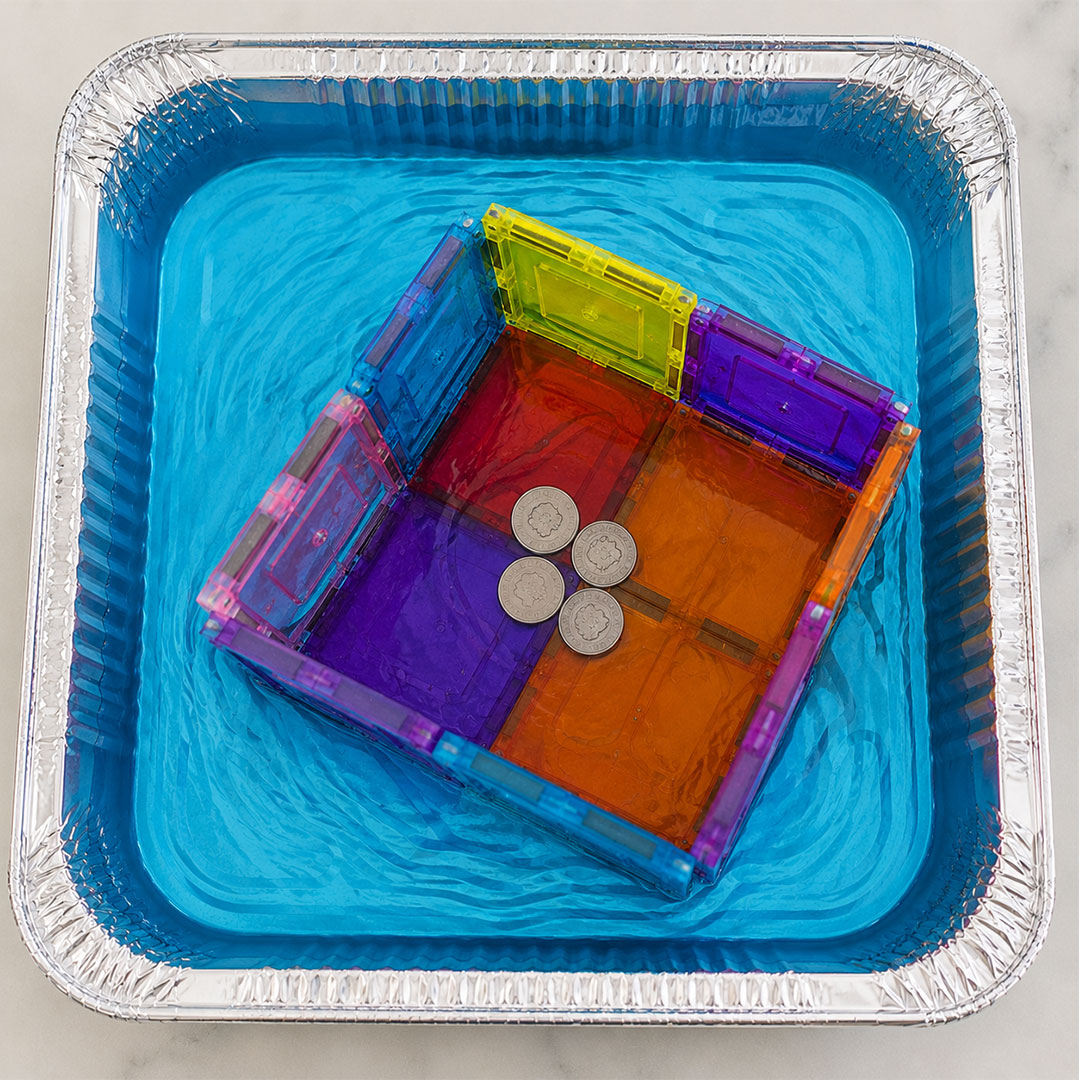
Not every experiment needs to succeed to be worth doing, and this is a great example. We tried building a boat out of magnetic building tiles, and it failed.
The tiles left small gaps at the seams, and water crept in right away. The structure sank before we could even add a single coin.
This is actually a valuable teaching moment. Ask your kids why they think it sank. Guide them toward the idea that even a small gap is enough to let water in and sink a boat. It’s the same principle that applies to real ships and their watertight seals.
Pro Tip: Use this as a prediction exercise. Before testing, ask kids to guess whether the magnetic tile boat will float, and why. Then test it and compare their prediction to what actually happened.
5. Recyclable Material Boats
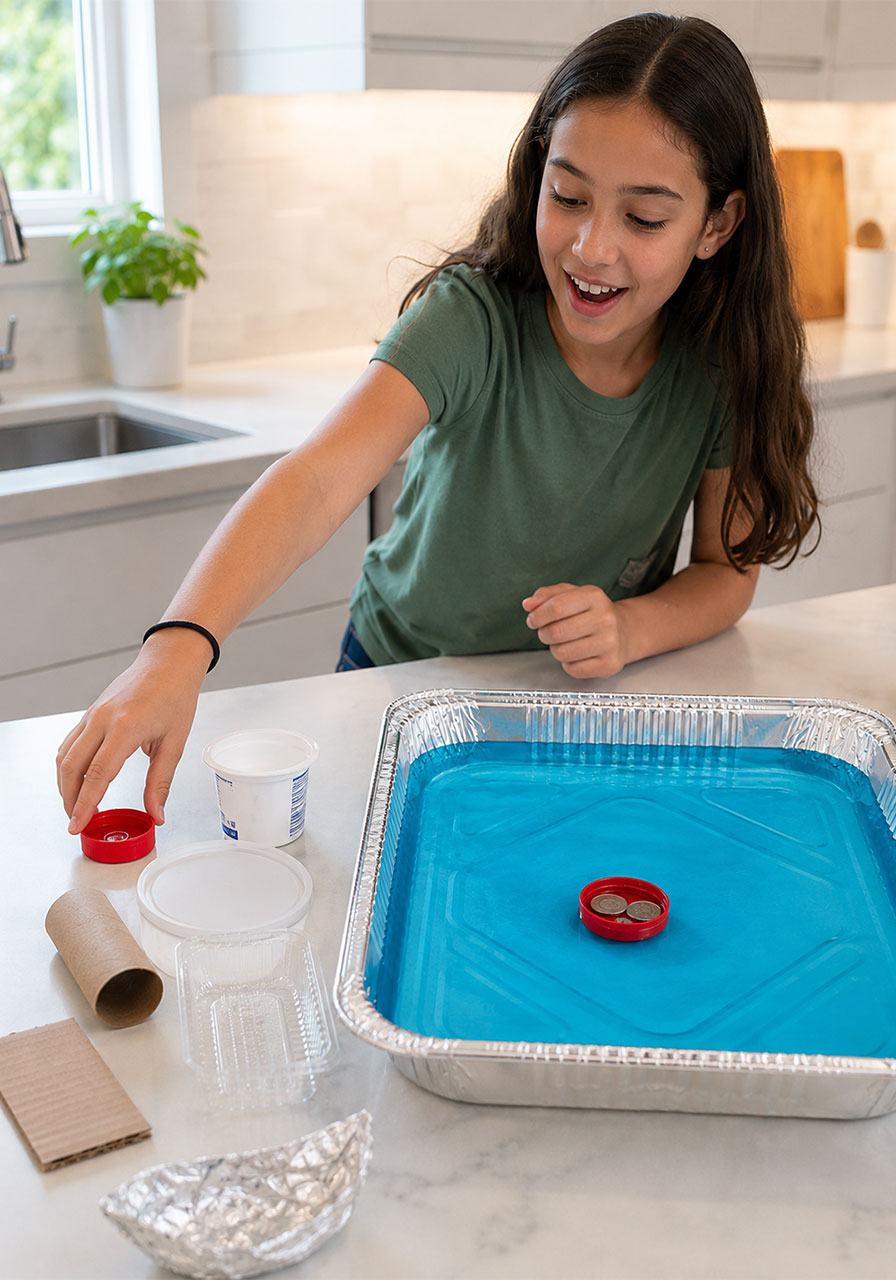
For an extra layer of fun, send kids on a mini scavenger hunt around the house or classroom to find recyclable materials to test. Bottle caps, plastic containers, cardboard scraps, and yogurt cups all work well.
Best for: Extending the activity or adding an eco-friendly angle.
Time: 15-20 minutes, including the hunt.
How to do it:
1. Have kids collect a small pile of clean, dry recyclable items.
2. Test each item in the water one at a time, without any coins first, to see if it floats at all.
3. For any item that floats, start adding coins to see how much weight it can hold.
4. Record which materials floated and which sank right away.
This step is a great way to talk about recycling and reusing materials, while still keeping the science experiment going.
Recording Observations
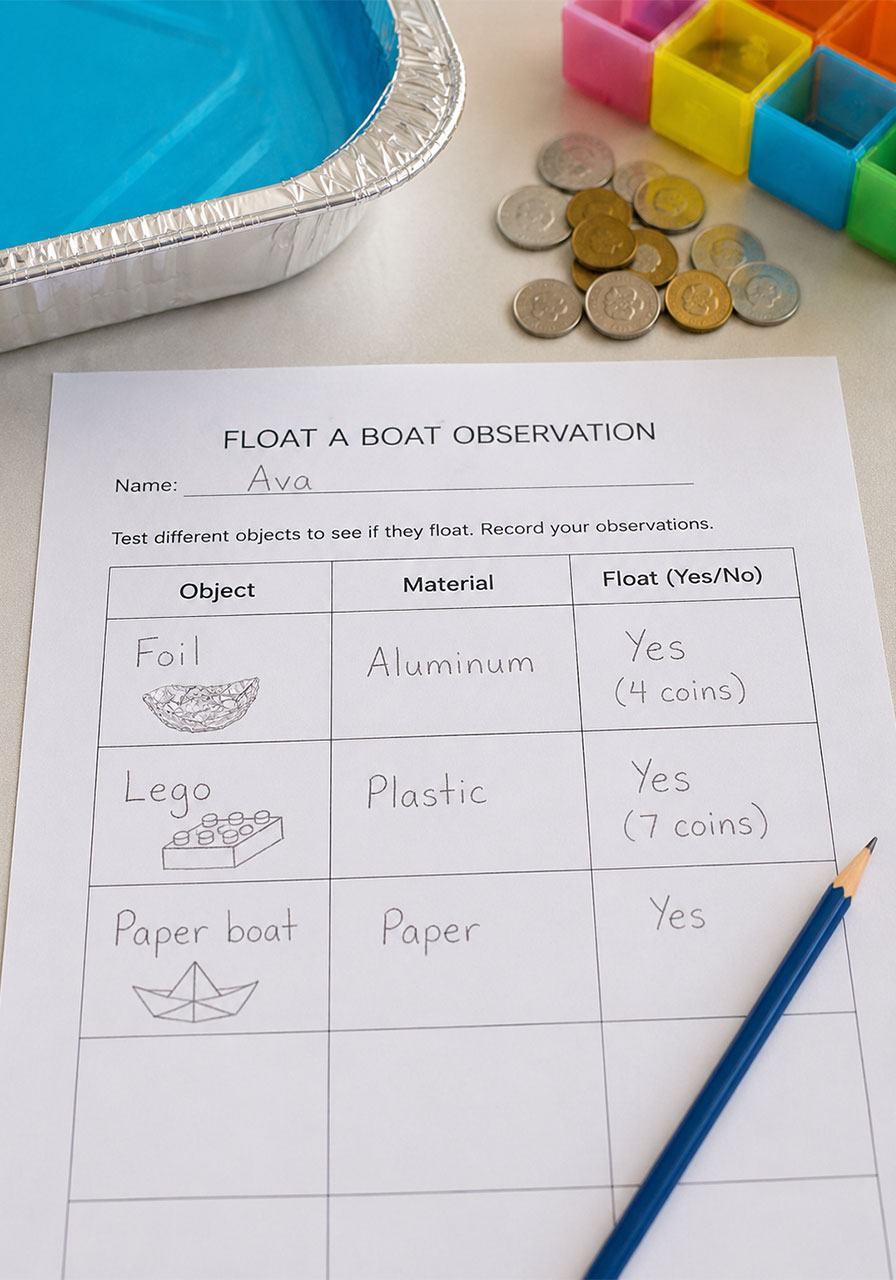
Once your boats are built, don’t skip this part. Recording observations is what turns “playing with boats in water” into an actual science experiment.
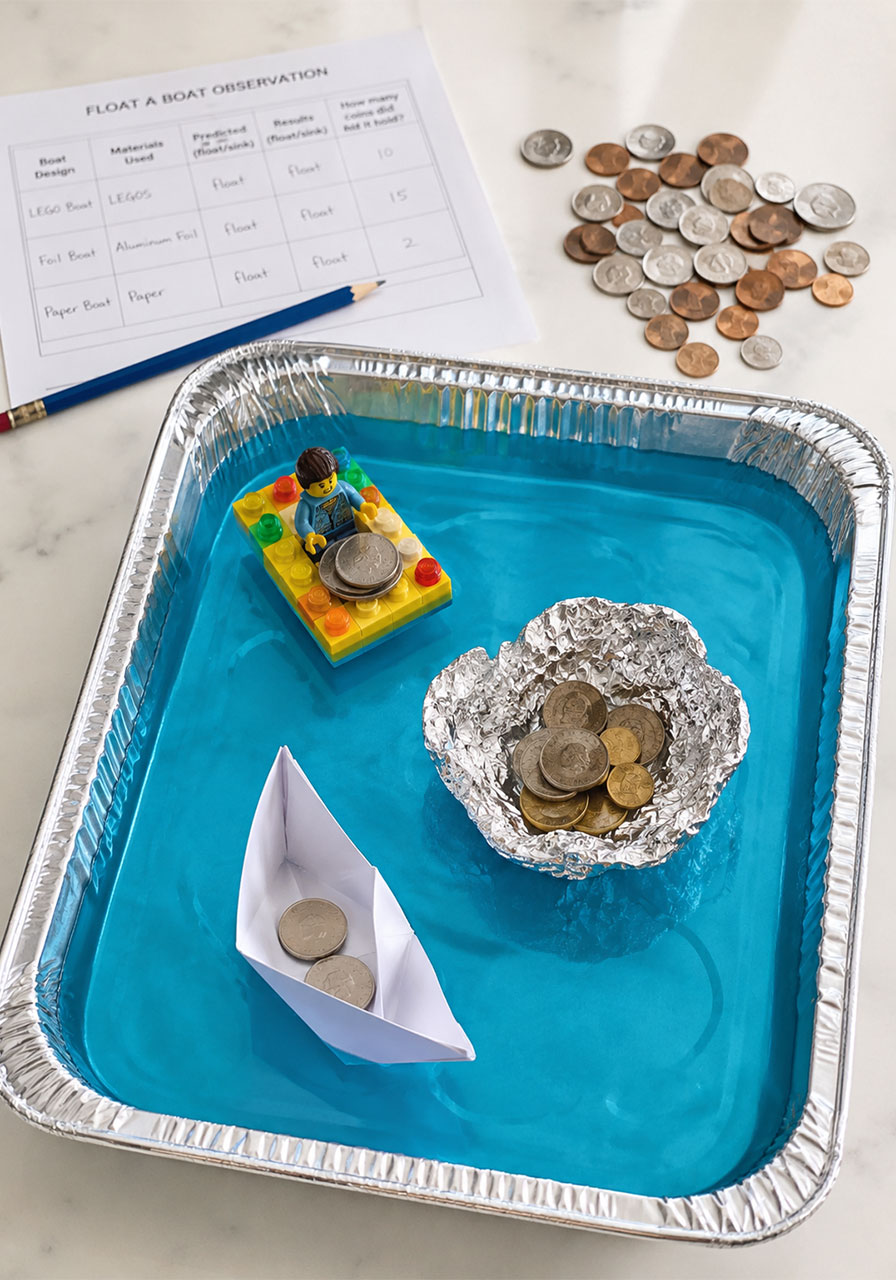
Grab our printable observation sheet and have kids fill it in as they test each boat. It gives them space to list the material, note whether it floated, and count how many coins it held before it sank.
There’s also a spot at the bottom for kids to draw and label a diagram of their favorite raft. This is a great way to add a little writing and drawing practice into the activity without it feeling like a worksheet.
Questions to Ask While Kids Test Their Boats
Keep the conversation going while the boats are in the water. A few good questions to ask:
- How many coins do you think this boat can hold before it sinks?
- Why do you think this material floats better than that one?
- What would happen if we made the boat bigger? Smaller?
- Which boat would you trust the most if it needed to carry something important?
These questions push kids to think like real scientists and engineers, making predictions before they test and explaining their reasoning afterward.
What We Learned From This Experiment
After testing every boat, a few clear patterns showed up. Smaller boats with solid, intact borders held the most coins overall. Lightweight materials like foil and paper floated easily but weren’t very durable. LEGO boats were sturdy and reusable, but any gaps in the sides caused them to sink fast. Anything with visible seams or gaps, like the magnetic tiles, let water in almost immediately.
These are the exact same principles that apply to real boat design, which makes this such a great entry point into engineering concepts for young kids.
Tips for Using This in a Classroom Setting
If you’re a teacher planning this for a group, a few small adjustments make it run smoothly.
Set up stations with different tubs of water so multiple small groups can test at the same time. Give each group the same starting number of coins so results are easy to compare across the room. Have each group present their results at the end and explain why they think their boat performed the way it did.
This turns a simple activity into a full lesson with a built-in discussion and presentation component.
Frequently Asked Questions
What age group is this activity best for?
This works well for preschool through early elementary kids. Younger kids can focus on building and floating, while older kids can dig deeper into the coin counting and observation recording.
Do I need special science supplies?
No. Everything in this activity uses common household or classroom materials like foil, paper, LEGO, and coins.
How long does the whole activity take?
Plan for about 45 minutes to an hour if you want to try all five boat types and fill out the observation sheet. It can easily be split across two shorter sessions too.
Can this be done at home without a classroom setup?
Yes. A kitchen table, a foil tray or baking dish, and a small pile of coins are all you need.
More STEM and Party Activity Ideas
If your kids loved this floating boat challenge, they’ll likely enjoy other simple, hands-on STEM activities using everyday materials. Keep this one in your back pocket for a rainy day, a classroom science center, or even a fun addition to a kids’ party activity table.
Because the best learning happens when kids don’t even realize they’re learning.
