
Planning a camping trip with kids and wondering how to keep them entertained from sunrise to sunset? You’ve come to the right place! We’ve rounded up the most creative, kid-approved camping activities that transform an ordinary outdoor adventure into an unforgettable experience. These aren’t just ideas – they’re tested, tried-and-true activities that’ll have your kids begging to go camping again (and again).
Whether you’re camping in the backyard or deep in the wilderness, these activities require minimal prep and deliver maximum fun. Let’s dive into the ultimate camping entertainment guide that’ll make you the coolest camping parent ever.
1. Glow Stick Bowling
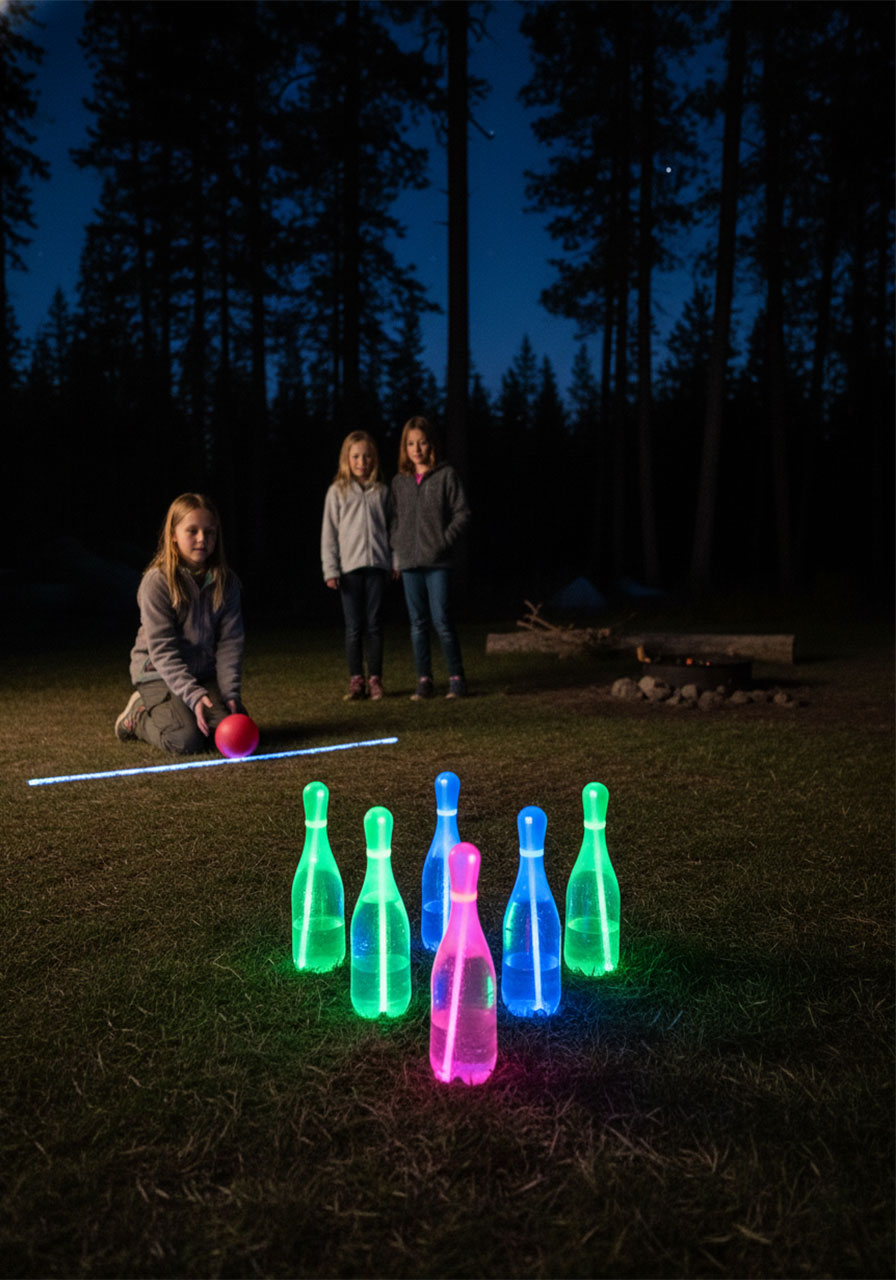
Best for: Kids ages 5+, nighttime fun, groups of all sizes
Time to Set Up: 5 minutes
Turn ordinary plastic bottles into the coolest nighttime bowling alley your kids have ever seen!
What You’ll Need:
- 6-10 empty plastic bottles (water or soda bottles work perfectly)
- Glow sticks (one for each bottle)
- Water
- A small ball
How to Set It Up:
1. Fill each plastic bottle about halfway with water to give them some weight and stability.
2. Crack and activate a glow stick, then drop one inside each bottle. The water will amplify the glow effect – it looks absolutely magical in the dark!
3. Arrange your glowing bottles in a triangle formation (just like regular bowling pins) on flat ground.
4. Mark a starting line about 10 feet away from the pins.
5. Take turns rolling the ball to knock down as many glowing pins as possible.
6. Keep score or just play for fun – either way, kids will be mesmerized by the glowing pins lighting up the night!
Pro Tip: Use different colored glow sticks in each bottle for an even more spectacular light show. You can also assign point values to different colors to make the game more challenging for older kids!

2. Spooky Sheet Ghosts
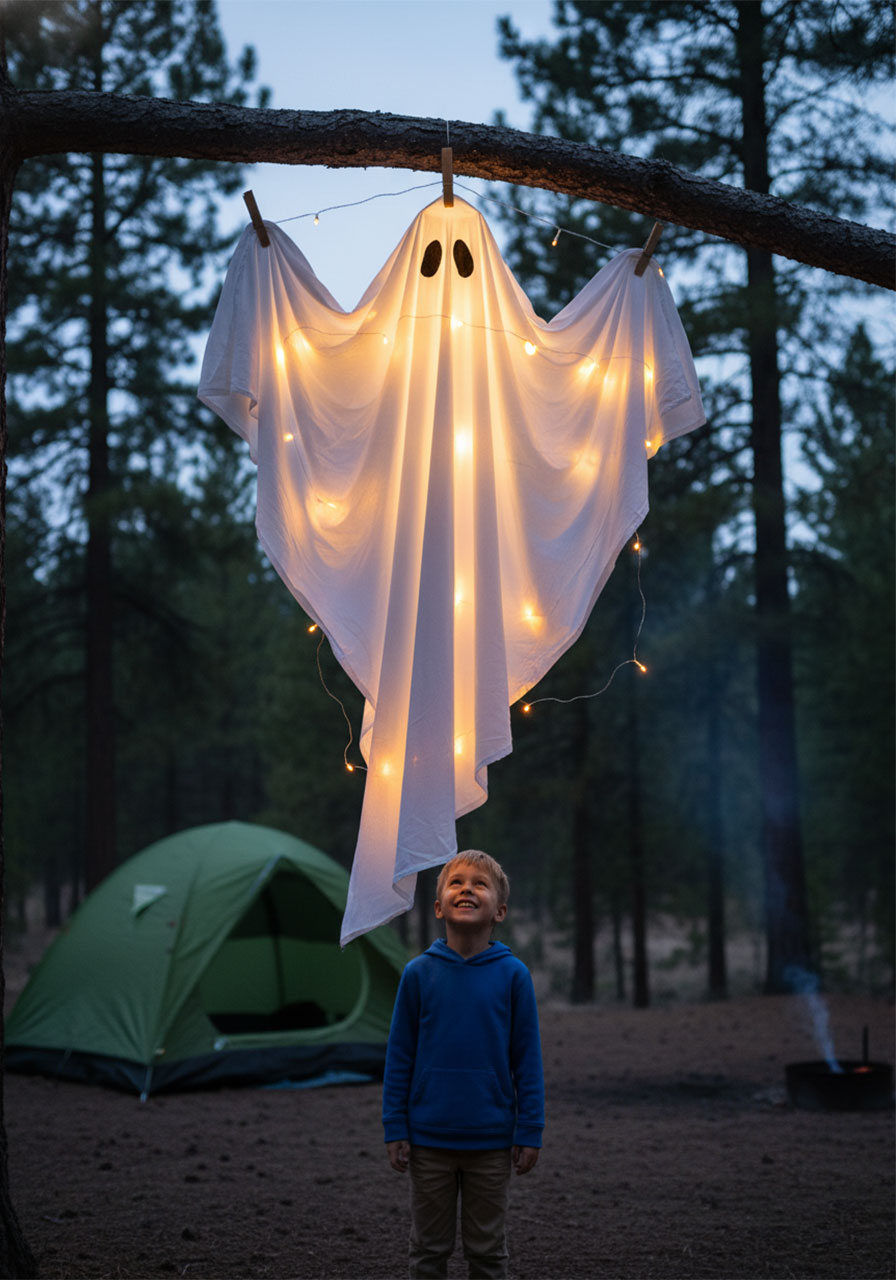
Best for: Kids ages 4+, nighttime storytelling, creating magical camp atmosphere
Time to Create: 10 minutes
Transform your campsite into a hauntingly beautiful ghost village that’ll enchant (not scare!) your little campers.
What You’ll Need:
- An old white sheet or pillowcase
- Battery-operated string lights (the kind you’d use for the holidays)
- Scissors
- Permanent marker (optional)
How to Create Your Ghost:
1. Drape the sheet over a branch, tent pole, or makeshift stand to create the ghost’s body shape.
2. Cut out two eye holes near the top of the sheet where the “face” would be. Make them friendly and round for a cute ghost, or keep them simple.
3. String your battery-operated lights inside and underneath the sheet, letting them peek through the fabric to create an eerie glow.
4. Optional: Draw a simple face or decorative touches on the sheet with a permanent marker before hanging it up.
5. Arrange multiple ghosts around your campsite for a magical nighttime atmosphere that’s perfect for telling ghost stories (the friendly kind, of course!).
Pro Tip: Place the ghosts at different heights throughout your campsite – some hanging from trees, others draped over camp chairs. When the sun goes down and those lights start glowing, you’ve created pure camping magic!
3. DIY Reading Lamps
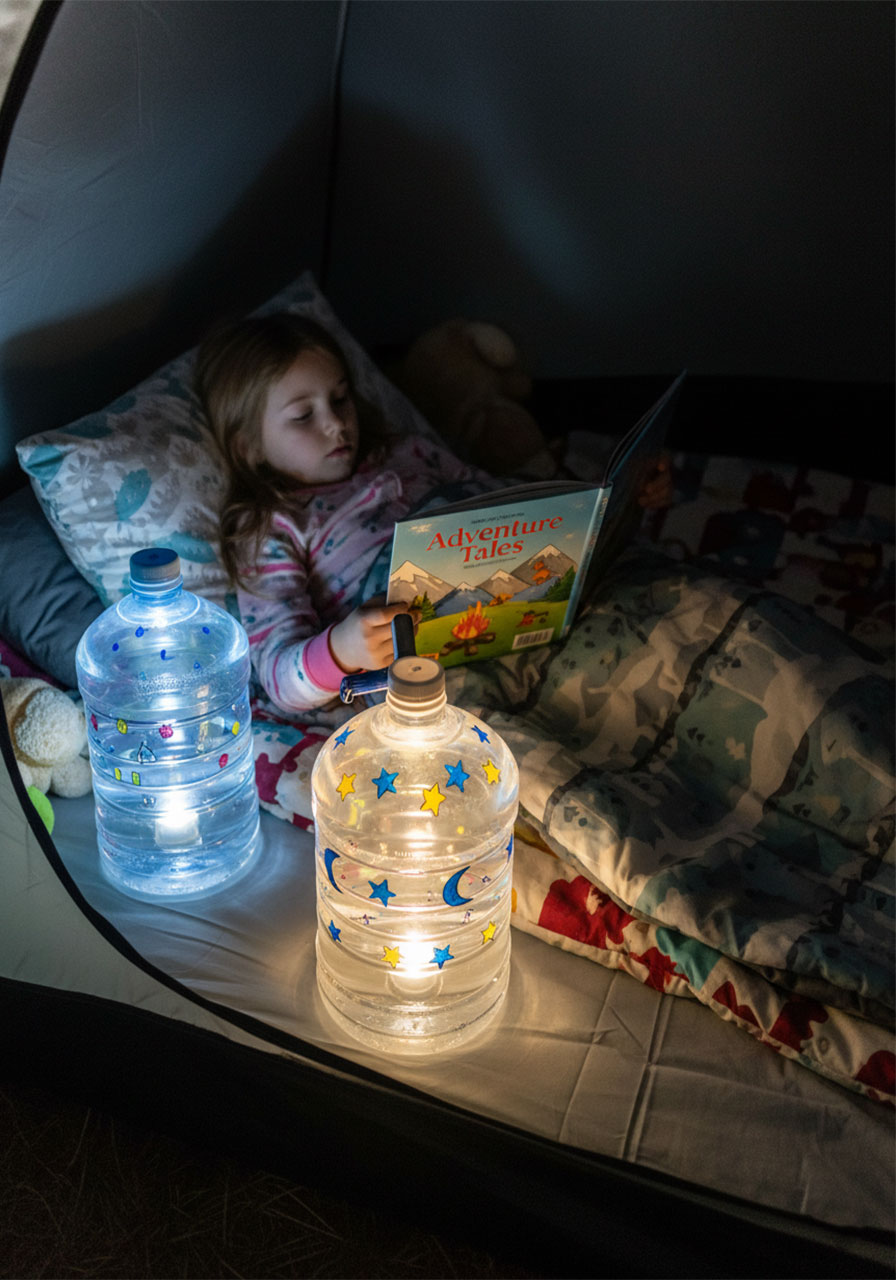
Best for: Kids ages 6+, quiet time activities, bedtime reading
Time to Create: 15 minutes
Who says camping means giving up bedtime stories? Create personalized reading lamps that turn your tent into the coziest reading nook ever.
What You’ll Need:
- Empty plastic bottles (clear water bottles work best)
- Water
- Washable markers or paint pens
- Small flashlight or headlamp (one per lamp)
How to Make Your Reading Lamp:
1. Clean and dry your plastic bottles thoroughly.
2. Let kids decorate the outside of their bottles with markers or paint pens – stars, nature scenes, their names, whatever sparks their creativity!
3. Fill each bottle about three-quarters full with water. The water will diffuse and amplify the light beautifully.
4. When reading time arrives, place a flashlight or headlamp behind the bottle (facing toward the decorated side). The light will shine through the water and create a soft, ambient reading light.
5. Position the lamp safely in the tent where it won’t get knocked over, and enjoy your cozy reading time!
Pro Tip: Make these at home before your trip so they’re ready to use right away. You can also add a few drops of glow-in-the-dark paint to the water for an extra-special effect!
4. Reading Hammock Paradise
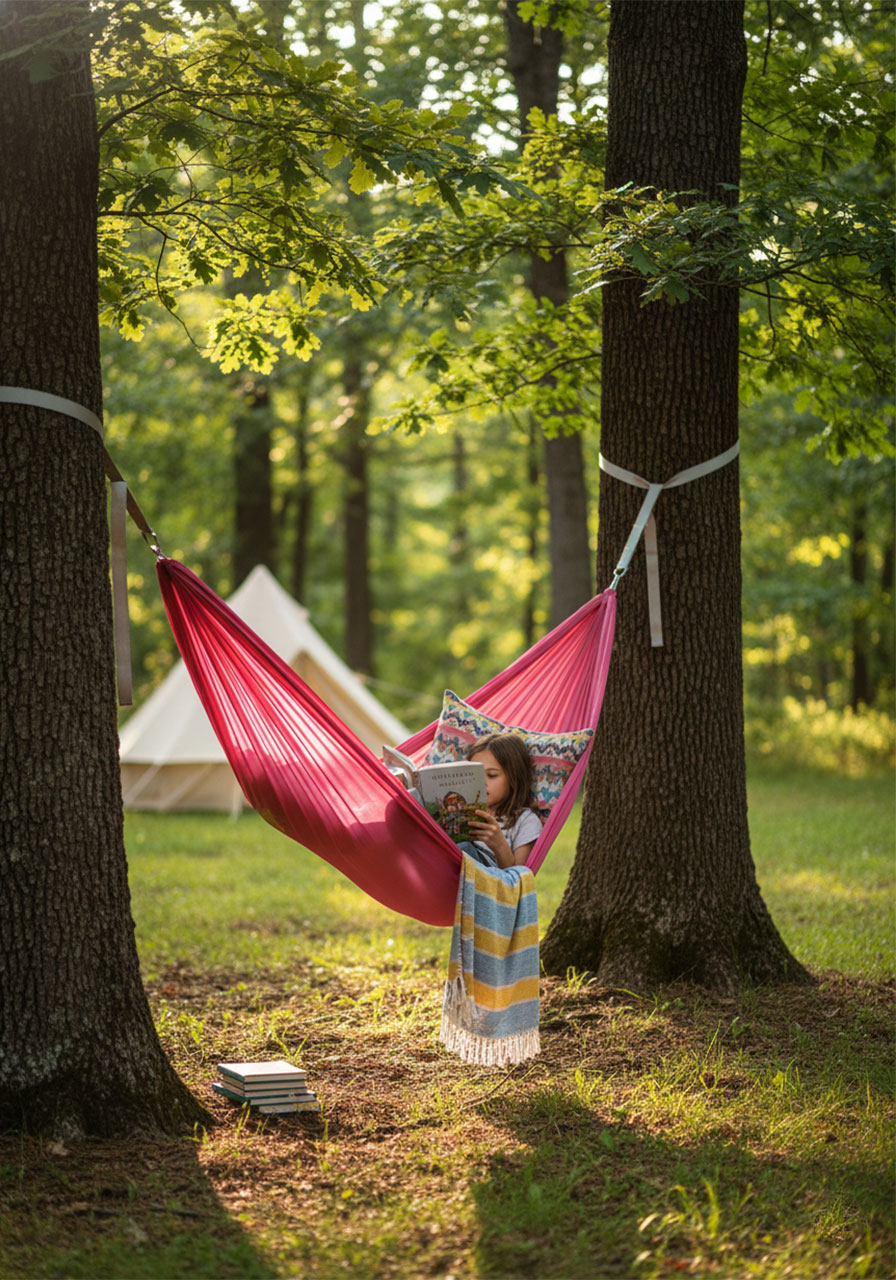
Best for: Kids ages 5+, quiet time, creating cozy reading nooks
Time to Set Up: 10 minutes
Create the ultimate outdoor reading retreat that’ll have kids actually asking for reading time.
What You’ll Need:
- Lightweight hammock or large piece of fabric
- Rope or straps for hanging
- Books and favorite reading materials
- Pillows and blankets (optional but recommended!)
How to Create the Perfect Reading Spot:
1. Find two sturdy trees spaced about 10-15 feet apart with strong, healthy branches or trunks.
2. Securely attach your hammock or fabric between the trees using tree-safe straps (never wrap rope directly around tree bark – it can damage the tree).
3. Test the hammock’s strength before letting kids climb in by sitting in it yourself.
4. Add pillows, blankets, and books to create the coziest outdoor reading nook imaginable.
5. Let kids take turns enjoying their elevated reading experience! Set a timer if you have multiple kids waiting for their turn.
Pro Tip: Hang the hammock low to the ground for younger children, and always supervise. For bonus points, clip books to the hammock or nearby branches using clothespins so they’re always within reach!
5. Kite Retrieval Challenge
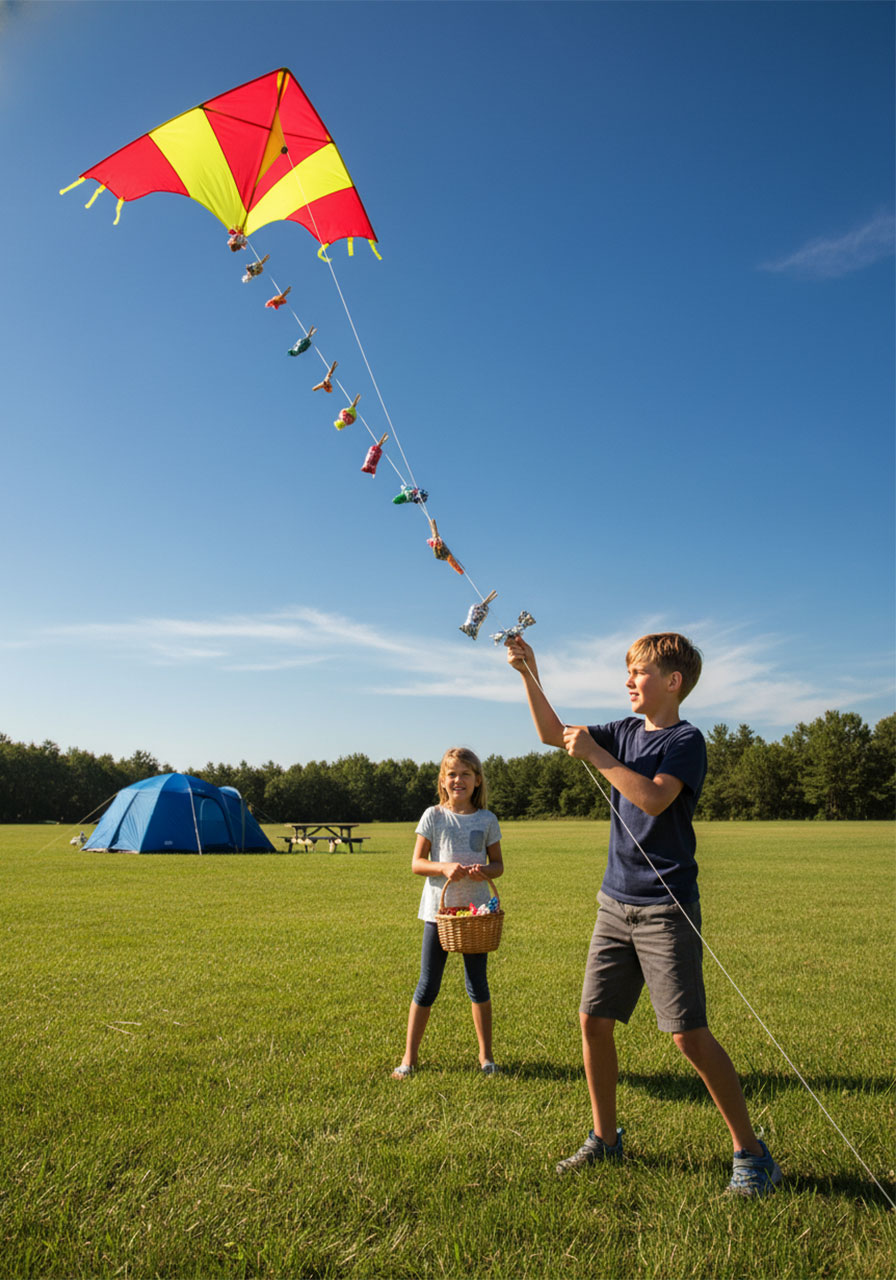
Best for: Kids ages 7+, windy days, teaching problem-solving
Time to Play: 30+ minutes
This activity combines the thrill of kite flying with an exciting retrieval challenge that’ll have kids racing through the campsite!
What You’ll Need:
- Homemade or store-bought kites
- String or kite line
- Small prizes or treasures (toys, treats, nature finds)
- Clothespins or clips
How to Play:
1. Before flying, attach small prizes to the kite string at various intervals using clothespins – space them every few feet along the line.
2. Launch your kites and let them soar! Kids can take turns controlling the kite.
3. When it’s time to bring the kite down, here’s where the challenge begins: As kids reel in the kite, they must collect each prize from the string as it comes within reach.
4. The challenge: Don’t let the kite touch the ground, and don’t miss any prizes! Kids work together or compete to see who can successfully retrieve all their treasures.
5. Bonus round: Hide the retrieved treasures around the campsite for a scavenger hunt later!
Pro Tip: On calmer days, you can turn this into a “fishing” game by lowering the kite string into different “zones” where kids try to clip on prizes without touching the kite!
6. Den Building Kit
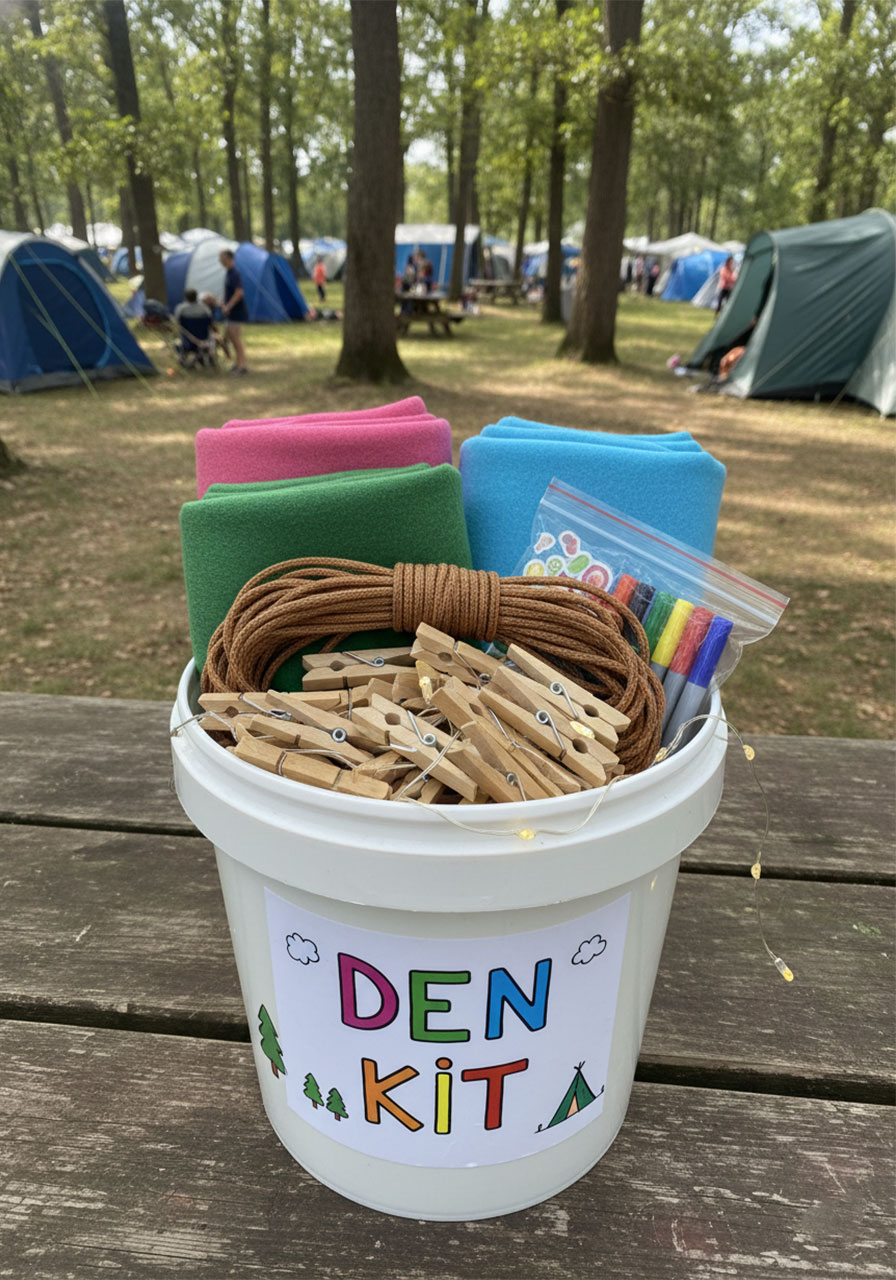
Best for: Kids ages 5+, creative play, all-day entertainment
Setup Time: 5 minutes (then hours of fun!)
Give kids the tools to create their own magical hideaway and watch their imaginations soar!
What You’ll Need:
- Large blankets or sheets
- Clothespins or clips
- Rope or string
- Flashlights or battery-operated lights
- Optional: pillows, favorite toys, snacks
How to Build an Epic Den:
1. Pack all supplies in an easy-to-carry container or bucket so kids can transport their den kit anywhere around the campsite.
2. Help kids identify a good den location – between trees, against a picnic table, using tent poles as support, or draped over low branches.
3. Let kids take the lead in construction! They can drape blankets, secure them with clothespins, and create their perfect hideaway.
4. Add the finishing touches: String up lights inside for ambiance, arrange pillows for comfort, and stock the den with books or quiet activities.
5. Respect den time! Once it’s built, this becomes their special space for reading, playing, or just relaxing.
Pro Tip: Challenge kids to build different types of dens throughout your camping trip – a reading den, a lookout fort, a spy headquarters. Each design encourages different types of imaginative play!
7. Woodland Trip Wire Course
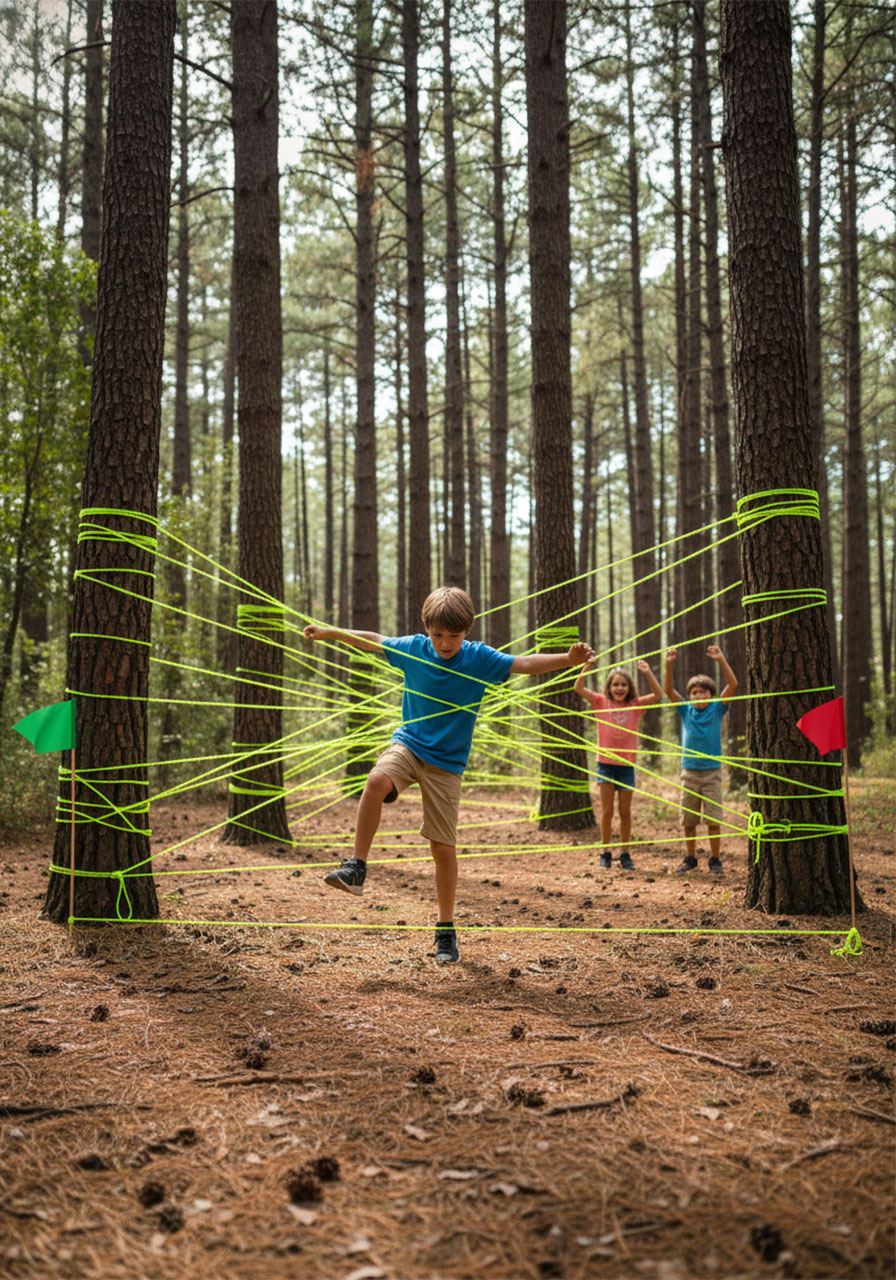
Best for: Kids ages 8+, active play, coordination challenges
Time to Set Up: 20 minutes
Create an exciting outdoor obstacle course that’ll have kids channeling their inner adventurer!
What You’ll Need:
- Roll of string or yarn (brightly colored works best)
- Trees or poles as anchor points
- Optional: bells or noise-makers
How to Create Your Course:
1. Select a wooded area or section of your campsite with multiple trees, bushes, or natural obstacles.
2. String your yarn or rope between trees at various heights – some at ankle level, some at waist height, some stretched diagonally.
3. Create a web-like pattern that kids must navigate through without touching any strings. The more complex, the more challenging!
4. Set clear start and finish points.
5. Optional challenge: Tie small bells to some of the strings – if they ring, that’s a “penalty” or the player must start over!
How to Play:
- Time each player as they navigate the course
- Keep score based on how many strings they touch
- Add variations: Blindfold challenges, crawling only, or carrying an object through the course
Pro Tip: Make this even more exciting by creating a spy mission storyline – kids are agents navigating a laser security system! For younger kids, make the gaps wider and add fewer strings.
8. Creative Frisbee Hacks
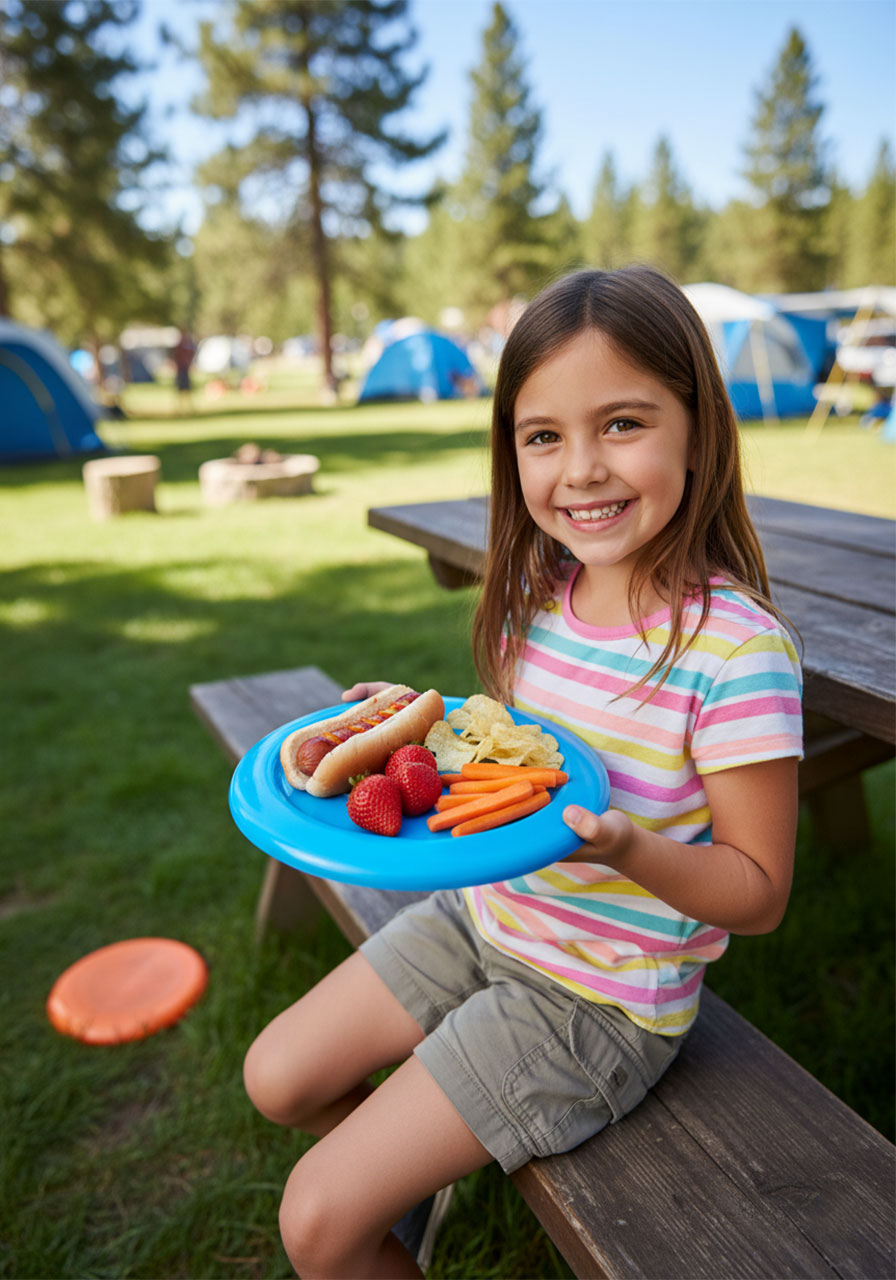
Best for: Kids ages 6+, mealtime fun, rainy day backup
Time to Try: Instant!
When you run out of camping plates (or just want to make mealtime more fun), your trusty frisbee becomes the ultimate multi-tool!
What You’ll Need:
- Clean frisbees (one per person)
- Your camp meals
- Napkins
Creative Frisbee Uses:
1. Emergency Plate: Flip a clean frisbee upside down and use it as a plate for hot dogs, s’mores ingredients, or camp snacks. The raised edge keeps everything contained!
2. Snack Serving Tray: Use frisbees to serve chips, fruit, or trail mix during outdoor game time – they’re unbreakable and easy to carry.
3. Water Dish for Pets: Your camping dog will appreciate a frisbee-turned-water-bowl during hikes.
4. Rain Hat: In a pinch, hold a frisbee over your head as a quirky emergency rain shield (yes, really – kids think this is hilarious!).
5. After the meal, rinse it off and you’re ready for an impromptu frisbee game!
Pro Tip: Bring a few extra frisbees and designate specific ones for “plates” and others for “play” to keep things hygienic. Younger kids can also use them as “sample trays” to try new camp foods!
9. Nighttime Glow Swingball
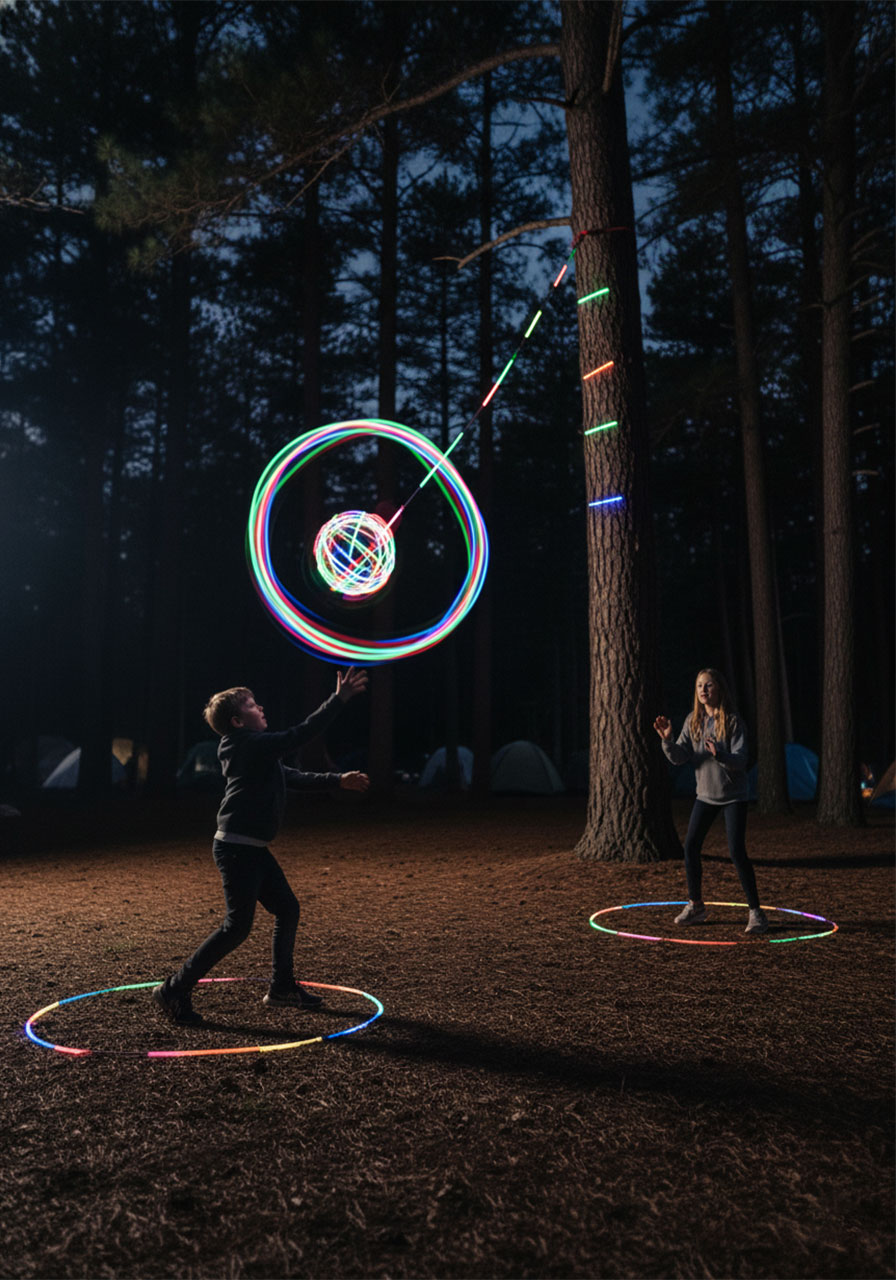
Best for: Kids ages 7+, evening activities, groups
Time to Set Up: 10 minutes
Transform an ordinary backyard game into a mesmerizing nighttime activity that kids will talk about for weeks!
What You’ll Need:
- Glow sticks (multiple colors)
- String or swingball equipment
- A tetherball or soft ball
- Tape
- Pole or tree branch for setup
How to Create Glow Swingball:
1. Attach glow sticks to your ball by taping them securely around the entire surface. Use multiple colors for maximum visual impact!
2. If you have swingball equipment, set it up as normal. If not, tie a rope to a tree branch and attach your glowing ball at a height kids can reach.
3. Make the string glow too by taping glow sticks along its length every foot or so.
4. Mark playing positions with glow sticks on the ground so players know where to stand.
5. Play standard swingball rules: Players take turns hitting the glowing ball, trying to wind it around the pole in their direction. First one to completely wrap it wins!
Pro Tip: The darker it is, the more spectacular this looks! Take photos – the glowing trails created by the moving ball make for amazing camping memories.
10. Tin Can Marshmallow Roaster
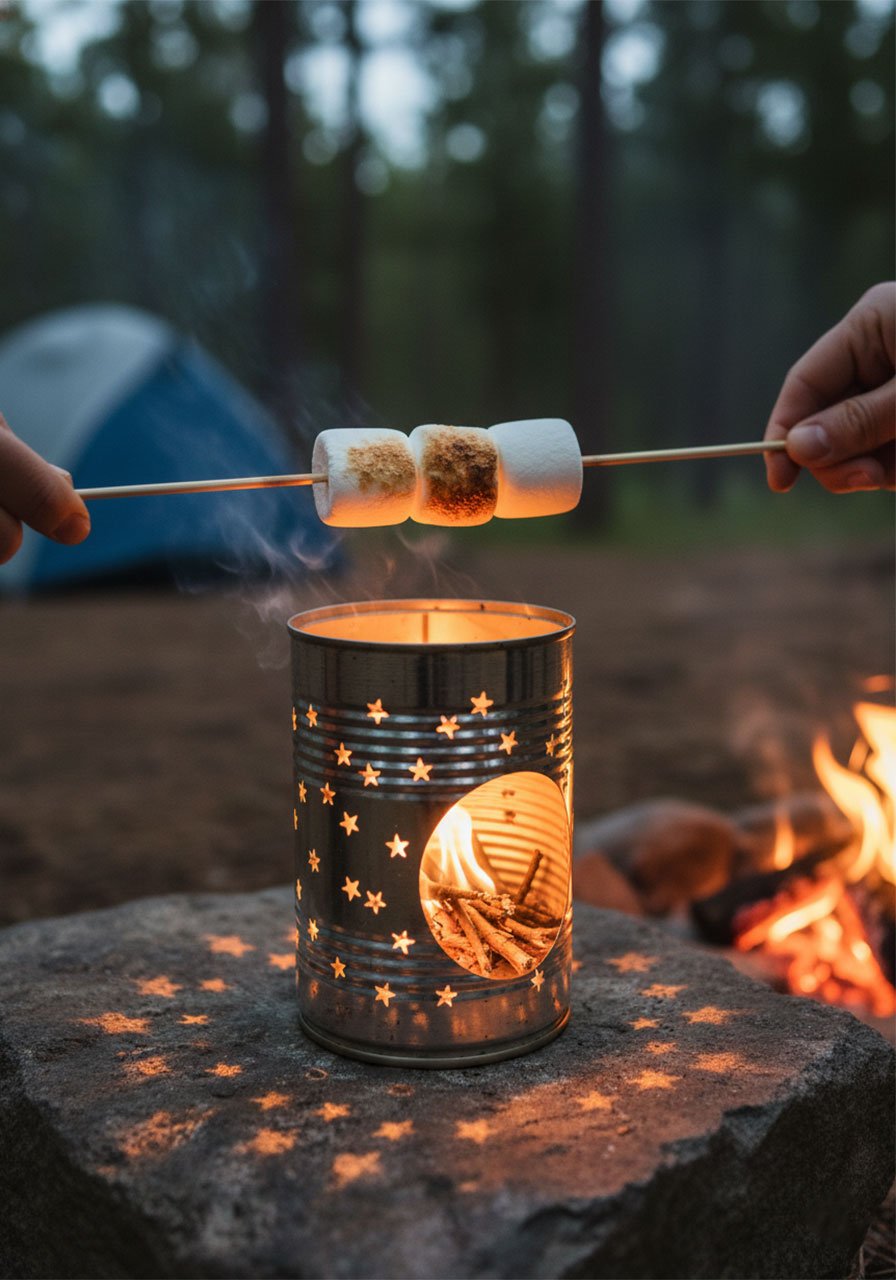
Best for: Kids ages 9+ (with supervision), campfire time, making memories
Time to Create: 15 minutes
Build the coolest DIY campfire tool and roast marshmallows like a camping pro!
What You’ll Need:
- Empty tin can (soup or vegetable can works great)
- Can opener
- Hammer and nail (or drill with small bit)
- Stick or marshmallow roasting fork
- Sandpaper (to smooth rough edges)
How to Make Your Marshmallow Roaster:
1. Thoroughly clean and dry your tin can, removing all labels.
2. Use the can opener to completely remove the top AND bottom of the can so you’re left with a metal cylinder.
3. Carefully smooth any sharp edges with sandpaper – safety first!
4. Use a hammer and nail to punch small holes around the can in a pattern (stars, spirals, your initials – get creative!). These holes let smoke escape and create a cool light pattern at night.
5. Thread several twigs or small sticks through the bottom holes to create a basket inside the can for holding your fire starter.
6. When you’re ready to roast, light your twig “fire” inside the can and place marshmallows on sticks through the top. The controlled flame makes perfect marshmallows every time!
Pro Tip: Make several of these and have a marshmallow-roasting station where multiple kids can roast at once. The glowing holes create beautiful patterns in the dark – it’s functional AND decorative!
Fun Variation: Use your creation as a personal campfire lantern by placing a tea light inside instead of twigs!
11. Outdoor LEGO Playstation

Best for: Kids ages 4+, quiet play time, unleashing creativity
Time to Set Up: 5 minutes
Who says LEGO is just for indoors? Create an outdoor building station that combines construction fun with nature!
What You’ll Need:
- Container or bucket of LEGO bricks
- Picnic table, flat rock, or portable table
- Optional: nature items for incorporating into builds (leaves, small rocks, pinecones)
How to Create Your Outdoor Building Station:
1. Choose a shaded, flat spot at your campsite – a picnic table is perfect, but a large flat rock or camping table works too.
2. Attach LEGO base plates to your surface with removable tape if the surface allows, or just lay them flat.
3. Set out your LEGO bricks in the container nearby for easy access.
4. Challenge kids to build nature-inspired creations: trees, campsites, animals, or even recreate your actual camping setup in LEGO form!
5. Encourage incorporation of natural materials – use real leaves as trees, small pebbles as landscape features, or twigs as flagpoles.
Building Challenges to Try:
- Build the tallest tower that won’t blow over in the breeze
- Create a LEGO campfire with surrounding chairs
- Design a miniature version of your tent
- Construct a vehicle that could drive on the campground terrain
Pro Tip: Bring a waterproof container and secure lid so LEGO can be easily stored if weather changes. This activity is perfect for early morning while breakfast is cooking or during the afternoon heat!
12. Paper Bag Luminaries
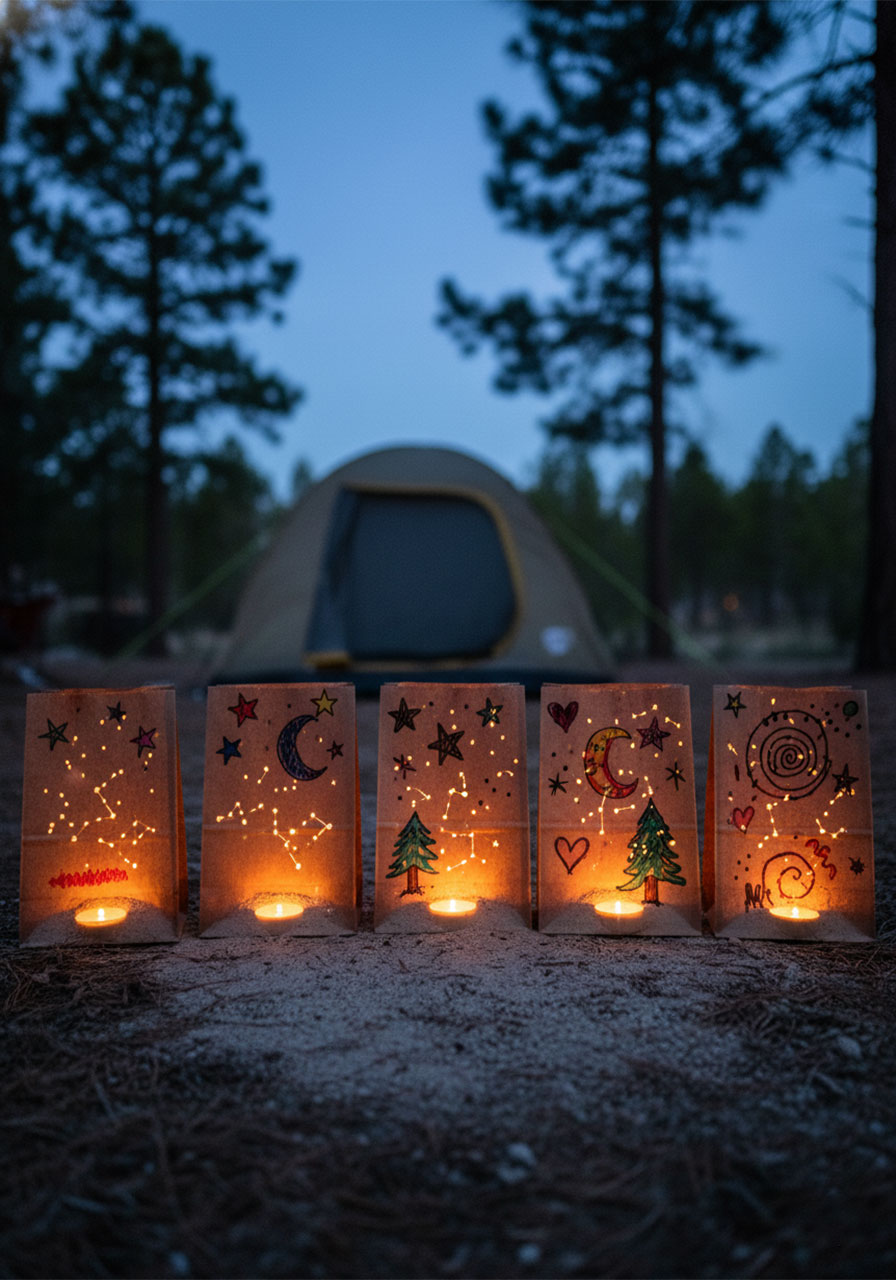
Best for: Kids ages 5+, evening ambiance, craft time
Time to Create: 20-30 minutes (plus drying time if using paint)
Transform simple paper bags into glowing works of art that’ll light up your campsite like a fairy tale!
What You’ll Need:
- Brown or white paper lunch bags
- Hole punch or scissors
- Markers, crayons, or paint
- Sand or small pebbles (for weight)
- Battery-operated tea lights or glow sticks (NEVER use real candles)
How to Create Your Luminaries:
1. Let kids decorate their paper bags with markers, crayons, or paint. Nature themes work beautifully – stars, moons, trees, animals, or abstract patterns.
2. Once decorations are dry, use a hole punch to create patterns in the bags. Simple designs like rows of holes, star patterns, or random punches all look magical when lit.
3. For more intricate designs, fold the bag and cut shapes (hearts, stars, circles) with scissors – kids can plan their own patterns or follow templates.
4. Fill the bottom of each bag with about 2 inches of sand or pebbles to weigh them down and prevent tipping.
5. Place a battery-operated tea light or glow stick inside each bag (never use real candles – fire hazard!).
6. Line your luminaries along your campsite path, around your tent, or on the picnic table for gorgeous ambient lighting.
Pro Tip: Make these at home before your trip so they’re ready to display immediately. White bags show the light best, but brown bags give a rustic, earthy glow. For extra durability, spray completed bags with waterproof sealant!
13. Rainbow Lantern Magic
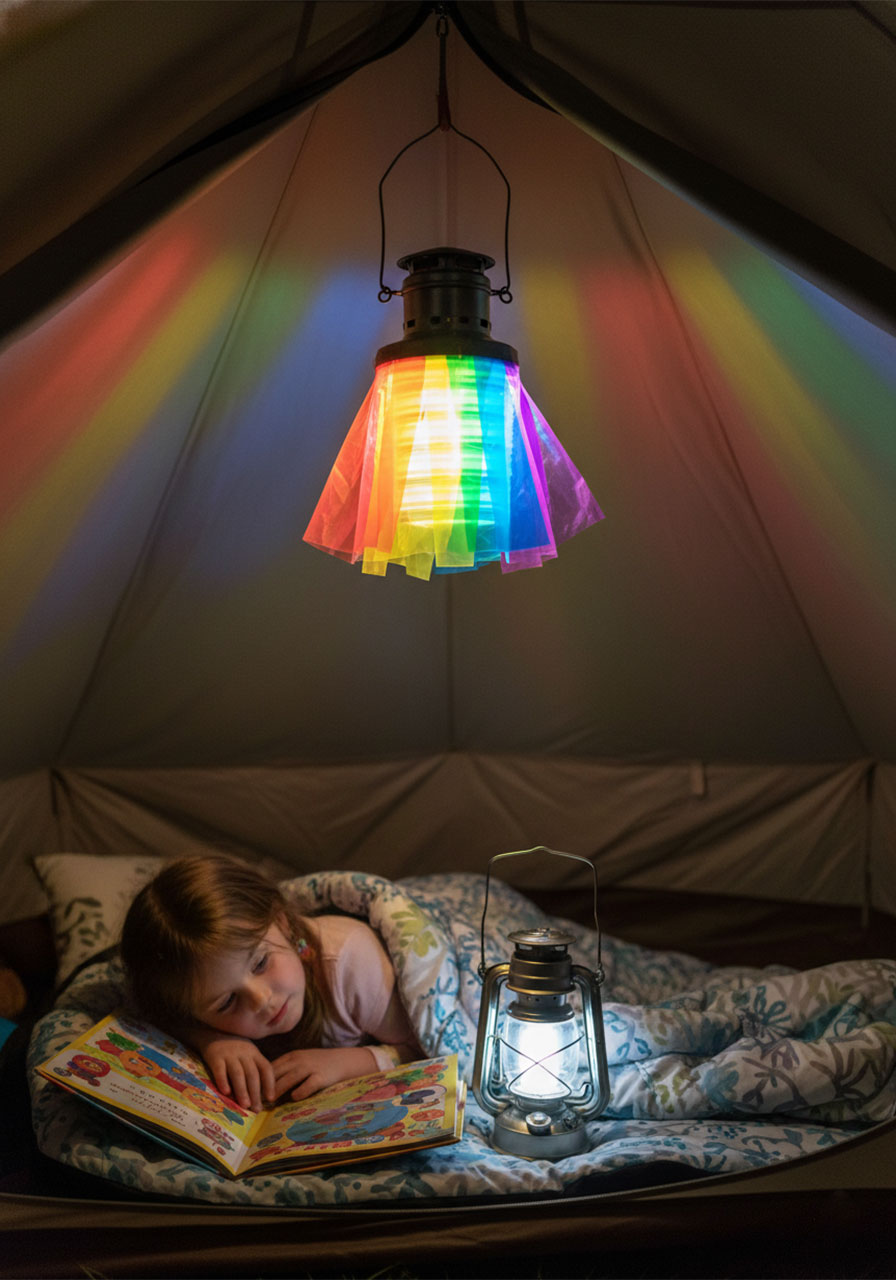
Best for: Kids ages 4+, tent decoration, nighttime ambiance
Time to Create: 15 minutes
Turn an ordinary lantern into a magical rainbow light show that transforms your tent into the coziest space in the campground!
What You’ll Need:
- Battery-operated lantern or camping lantern
- Colored cellophane or transparent colored paper (multiple colors)
- Scissors
- Tape or rubber bands
- Optional: permanent markers for decorating
How to Create Your Rainbow Lantern:
1. Cut your colored cellophane into sections that will wrap around your lantern. You can use one color or create sections of different colors.
2. Let kids decorate the cellophane with permanent markers if desired – add stars, swirls, their name, or nature designs.
3. Wrap the colored cellophane around your lantern, securing it with tape or rubber bands. Make sure not to cover any ventilation holes or battery compartments!
4. Create patterns: Alternate colors, overlap sheets for new color combinations, or do a rainbow gradient effect.
5. Turn on your lantern in the tent after dark and watch the magical colored light fill the space!
Color Ideas to Try:
- Red and yellow together create an orange “campfire” glow
- Blue and green make a calming underwater effect
- Multiple colors create a rainbow disco effect
- Single colors set different moods (blue = calm, red = adventure)
Pro Tip: Make one for each tent or sleeping bag area so each kid has their personal reading light. These also make fantastic “night lights” for younger campers who might be nervous sleeping in the dark outdoors!
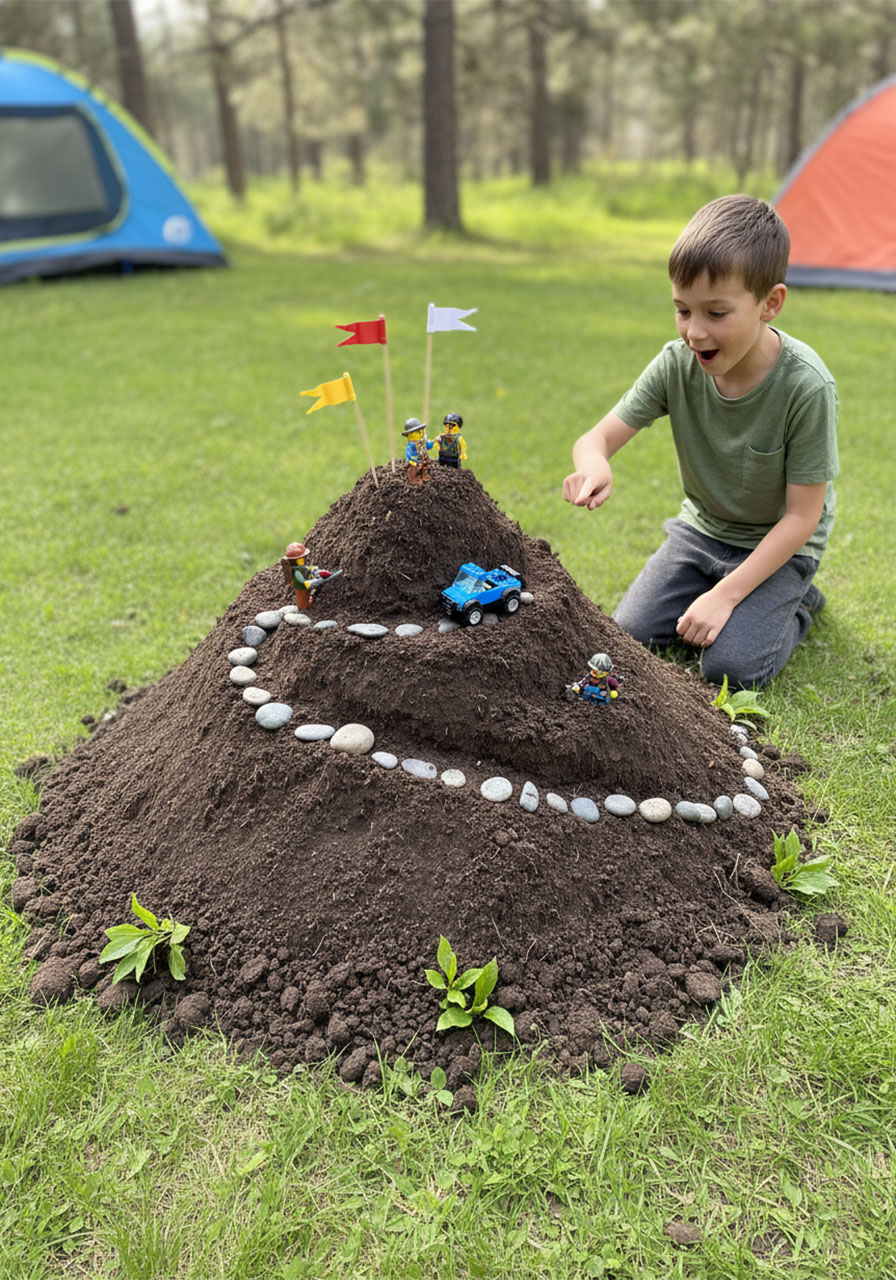
14. Mountain Building Challenge
Best for: Kids ages 5+, creative outdoor play, keeping kids entertained during camp setup
Time to Play: 30+ minutes
Turn an ordinary molehill (or dirt pile) into an engineering challenge that’ll keep kids busy while you set up camp!
What You’ll Need:
- Small dirt mound or pile (often found around campsites, or make your own)
- Small sticks for flagpoles
- Paper or fabric scraps for flags
- Toy figures (LEGO people, toy cars, action figures)
- Small pebbles or rocks
- Imagination!
How to Build Your Mountain:
1. Find or create a dirt mound in a designated play area of your campsite (check with campground rules first!).
2. Challenge kids to transform it into a mountain scene: Add winding roads made from pressed-down dirt, create plateaus, dig tunnels, or build viewing platforms.
3. Use small rocks to mark trails or create stairs up the mountain.
4. Plant stick-and-paper flags at the summit like real mountain climbers.
5. Add toy figures climbing the mountain, toy cars driving the roads, or create a whole miniature mountain village.
6. Tell the story of who lives on this mountain and what adventures they’re having!
Creative Additions:
- Use leaves as trees
- Create a lake or river with a small container of water
- Build bridges with twigs
- Add “snow” to the peak using white pebbles
Pro Tip: Take before and after photos of your mountain creation! This activity can evolve throughout your entire camping trip as kids add new features each day.
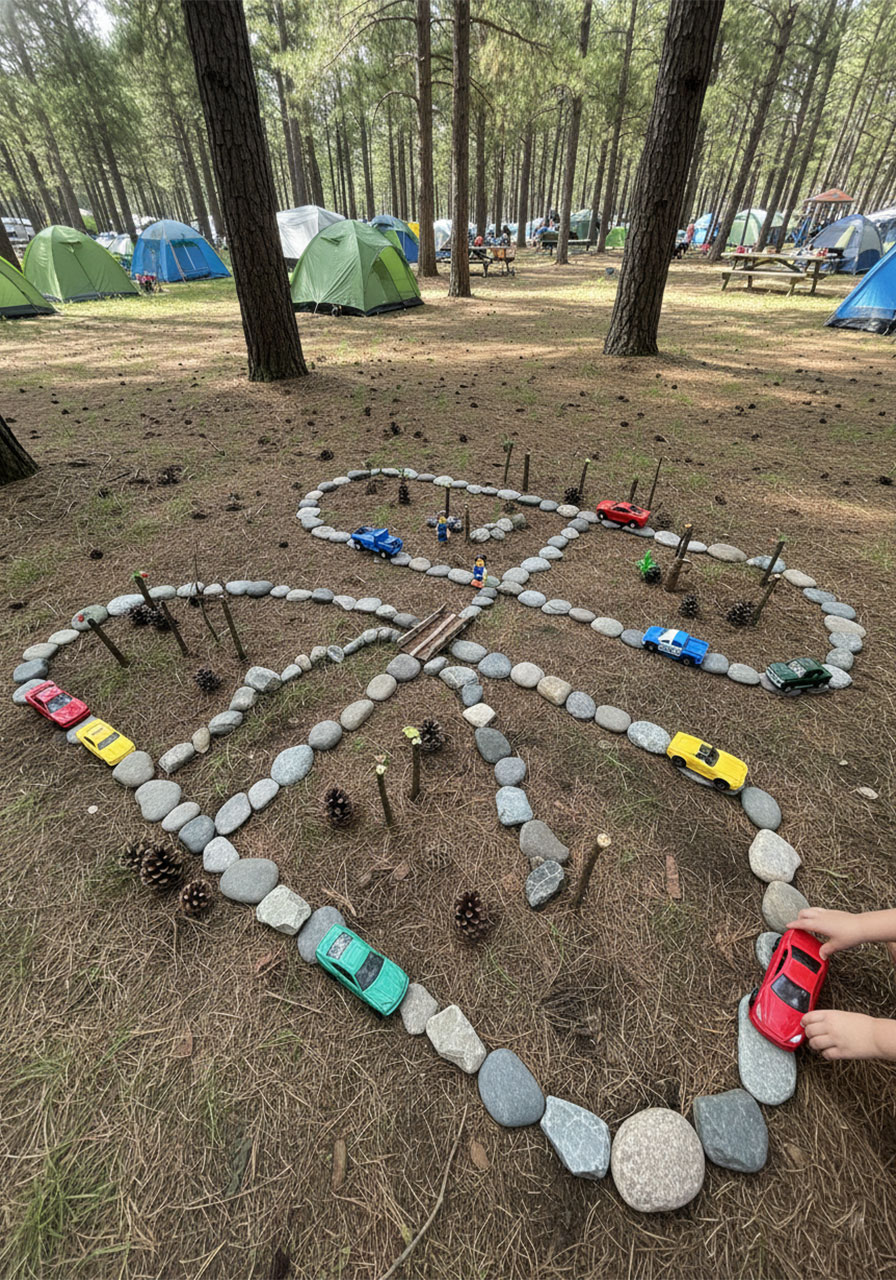
15. Adventurous Rock Roads
Best for: Kids ages 6+, creative play, develops fine motor skills
Time to Create: 30+ minutes
Transform ordinary rocks and pebbles into an intricate road system that sparks hours of imaginative play!
What You’ll Need:
- Smooth, flat rocks and pebbles of various sizes
- Chalk or washable markers (for decorating rocks)
- Small toy cars, trucks, or action figures
- Sticks, leaves, and other natural materials
- Optional: water for “rivers” or small containers for “lakes”
How to Build Your Rock Road System:
1. Help kids select a flat area on dirt, sand, or even on a large piece of cardboard.
2. Use rocks to outline roads, highways, and paths. Flat rocks work best – arrange them side by side to create “paved” roads, or use them as markers for dirt paths.
3. Decorate special rocks with chalk to create road signs, buildings, or landmarks.
4. Build intersections, roundabouts, bridges (use sticks laid across two rock piles), and tunnels (arrange larger rocks in an arch).
5. Add scenery with natural materials: Stick “trees” along the roads, leaf “bushes”, twig “fences”, or pinecone “buildings”.
6. Create destinations: A rock parking lot, a stick-built gas station, a campground (of course!), or a nature park.
7. Drive toy vehicles along the roads and create adventures!
Story Ideas to Inspire Play:
- Emergency rescue mission through the mountains
- Delivery truck bringing supplies to remote campsites
- Race cars competing on winding mountain roads
- Adventure seeking hidden treasure at road’s end
Pro Tip: Challenge kids to build roads that incorporate the natural terrain – roads that go uphill, around trees, or follow the natural curves of the land. This teaches them about how real roads are engineered!
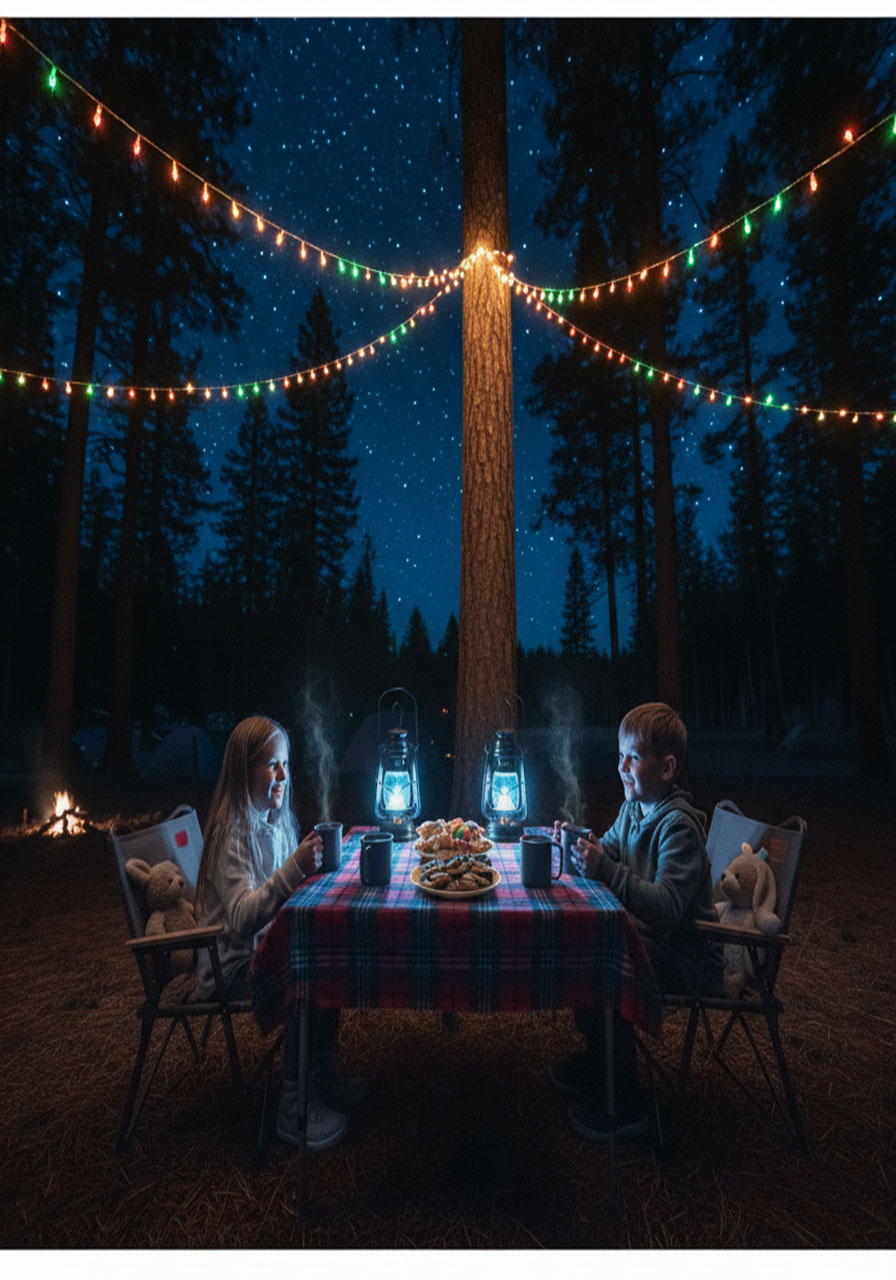
16. Nighttime Garden Tea Party
Best for: Kids ages 5+, evening wind-down activity, magical experiences
Time to Set Up: 15 minutes
Create an enchanting nighttime tea party under the stars that feels like stepping into a fairy tale!
What You’ll Need:
- Camping table or blanket on the ground
- Glow sticks, string lights, or battery-operated lanterns
- Cups, plates, and utensils
- Hot cocoa, juice, or herbal tea
- Camping snacks or simple treats
- Optional: flashlights for ambiance
How to Create Your Magical Tea Party:
1. Set up your “garden” dining area after dark in a designated spot near your campsite.
2. Create magical lighting: Arrange glow sticks around the perimeter, hang string lights overhead if possible, or place lanterns in the center of your setup.
3. Lay out your “table” – this could be a camping table covered with a blanket or simply a blanket spread on the ground with cushions.
4. Place flashlights or headlamps strategically to create dramatic uplighting on nearby trees or plants.
5. Prepare warm drinks (hot cocoa is always a hit!) and simple treats like cookies, crackers with cheese, or fruit.
6. Encourage storytelling, stargazing conversation, or nature sounds observation while you sip and snack.
7. Optional: Give the party a theme – teddy bear picnic, explorer’s feast, or wizard gathering!
Pro Tip: Time your tea party for right after sunset so kids can watch the world transform from day to night while they eat. The gradual change in light makes the glow sticks and lanterns even more magical! This is also a perfect wind-down activity before bedtime.
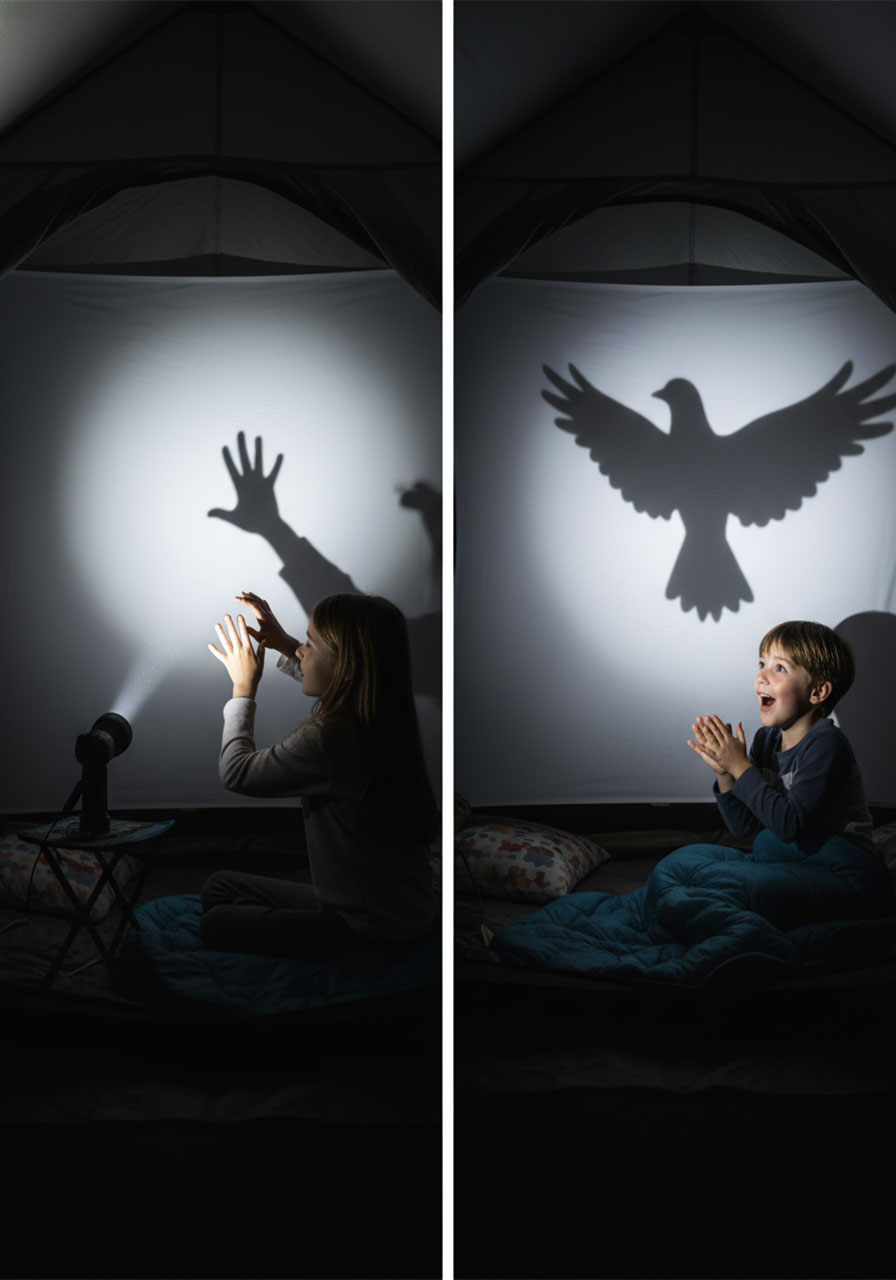
17. Shadow Play Theater
Best for: Kids ages 5+, evening entertainment, rainy day tent activity
Time to Set Up: 10 minutes
Transform your tent into a magical shadow puppet theater that’ll entertain the whole family!
What You’ll Need:
- White or light-colored sheet or tent wall
- Bright flashlight or camping lantern
- Your hands (and creativity!)
- Optional: cardboard cutouts for puppet shapes
How to Create Your Shadow Theater:
1. Hang a white sheet inside your tent or use your tent wall as your screen (light-colored tents work best).
2. Position your light source (flashlight or lantern) about 3-4 feet behind the performers, pointed at the sheet.
3. Performers stand between the light and the sheet, making their shadow appear on the “screen”.
4. The audience sits on the other side of the sheet to watch the shadow show!
5. Start with simple shapes: Classic shadow puppets include dogs, birds, butterflies, and rabbits using just your hands.
6. Progress to shadow charades: Act out camping activities, animals you’ve seen, or tell stories entirely in shadow form.
7. Get creative: Use props like sticks, cups, or even toys to create shadow scenes.
Shadow Puppet Ideas:
- Camping adventure story with a flashlight “campfire”
- Animal encounters from your trip
- Silly skits that make everyone laugh
- Retell familiar stories like The Three Little Pigs
Pro Tip: The closer your hands are to the light, the bigger (and blurrier) the shadow. Closer to the sheet creates sharp, detailed shadows. Experiment with distance to create size changes in your shadow stories!
18. Picnic Jar Creations

Best for: Kids ages 6+, meal prep activity, teaching food presentation
Time to Create: 15 minutes
Turn simple camping meals into Instagram-worthy creations that make eating healthy fun!
What You’ll Need:
- Clear mason jars or plastic containers with lids (reusable!)
- Variety of camping foods (cut veggies, fruits, crackers, cheese, deli meat)
- Small containers for dressings or dips
- Decorative fabric and ribbon for jar lids
- Labels or markers
How to Create Beautiful Picnic Jars:
1. Let kids choose their jar fillings from the available camping foods.
2. Layer foods in rainbow or pattern arrangements – this makes even picky eaters excited to eat! For example:
- Bottom layer: cherry tomatoes or berries
- Middle layer: cheese cubes or crackers
- Top layer: cucumber slices or grapes
3. For salad jars, put dressing at the bottom, then layer from hardest to softest: carrots, cucumbers, cheese, lettuce on top.
4. Decorate the jar lids with fabric circles secured with rubber bands or ribbon – makes them feel special!
5. Add personalized labels with each camper’s name.
6. Store in cooler until adventure time! These are perfect for hikes, lakeside lunches, or picnic table meals.
Picnic Jar Ideas:
- Rainbow Salad: Layered veggies in color order
- Trail Mix Parfait: Alternating layers of granola, dried fruit, nuts, and chocolate chips
- Snack Stack: Crackers, cheese, and deli meat with mustard in a separate tiny container
- Fruit Salad Spectacular: Mixed fresh fruit with a drizzle of honey
Pro Tip: Have kids prepare their picnic jars the night before for the next day’s adventure. It teaches meal planning and makes them more invested in eating healthy camping foods!
19. Camping Den Kit Bucket

Best for: Kids ages 5+, all-day entertainment, independent play
Time to Assemble: 10 minutes at home before the trip
Create a portable adventure kit that gives kids everything they need to build their dream camping hideaway!
What You’ll Pack in Your Den Kit:
- Large bucket or storage container (doubles as a carrying case and building material!)
- 2-3 lightweight blankets or sheets in various sizes
- 20+ clothespins or large clips
- 50 feet of rope or string (pre-cut into manageable lengths)
- Battery-operated fairy lights or camping lantern
- Fabric or paper to create “windows” and decorations
- Optional: Glow sticks, small flags, nature identification guide
How to Use Your Den Kit:
1. Hand kids the bucket and let their imagination run wild! The bucket itself can become a table, stool, or supply storage inside their den.
2. Kids can create different den styles:
- Tent style: Drape a blanket over a rope tied between two trees
- Canopy style: Hang a sheet from multiple overhead points creating a ceiling
- Wall addition: Attach fabric to existing structures like your RV, tent, or picnic table
- Fort style: Use the bucket, logs, and sticks as “walls” and drape blankets over the top
3. Secure everything with clothespins to nearby branches, tent poles, camping furniture, or rope lines.
4. Add the magic: String lights inside, create windows with fabric panels, mark the entrance with a special flag.
5. Stock the den with books, quiet toys, or snacks for the ultimate hideaway experience.
Den Building Challenges:
- Build a different style den each day of your trip
- Create a “den neighborhood” if you have multiple kids
- Build a den that can withstand wind (engineering challenge!)
- Incorporate natural materials into the design
Pro Tip: Include a laminated “Den Building Ideas” card in your kit with simple diagrams of different den styles. This gives kids inspiration without requiring adult help – promoting independent play while you handle camp tasks!
20. Nighttime Glow Swingball Tournament
Best for: Ages 8+, evening energy burn, competitive fun
Time to Set Up: 15 minutes
Host an epic nighttime tournament that combines classic tetherball with mesmerizing glow-in-the-dark magic!
What You’ll Need:
- Tetherball pole or sturdy tree branch
- Soft ball or tetherball
- Multiple glow sticks (different colors for teams)
- Rope
- Tape
- Optional: glow-in-the-dark spray paint for the ball
How to Set Up Your Glow Tournament:
1. Wrap glow sticks around your ball using tape, creating a glowing sphere. Use multiple colors for a rainbow effect!
2. Mark the pole or rope attachment point with glow sticks so players can see the center reference point.
3. Create a glowing boundary line on the ground using glow sticks to mark each player’s territory.
4. Tape glow sticks along the rope from ball to pole for visual effect (and to make it easier to see in the dark).
5. Establish teams or play one-on-one: Different colored glow sticks can represent different teams or players.
Tournament Rules:
1. Standard tetherball rules apply: Players hit the ball in opposite directions, trying to wrap the rope completely around the pole in their direction.
2. First to five points wins the round – win a point by successfully wrapping the ball, or when your opponent misses or fouls.
3. Create a tournament bracket if you have multiple players – winner stays on the court!
4. Special glow rule: If the ball stops glowing (glow sticks die), take a time-out to refresh them!
Pro Tip: Have a “championship belt” made from glow sticks for the reigning champion to wear! This game is perfect for burning off energy right before bedtime while creating incredible photo opportunities.
21. Lilo Surfing on Grass Hills
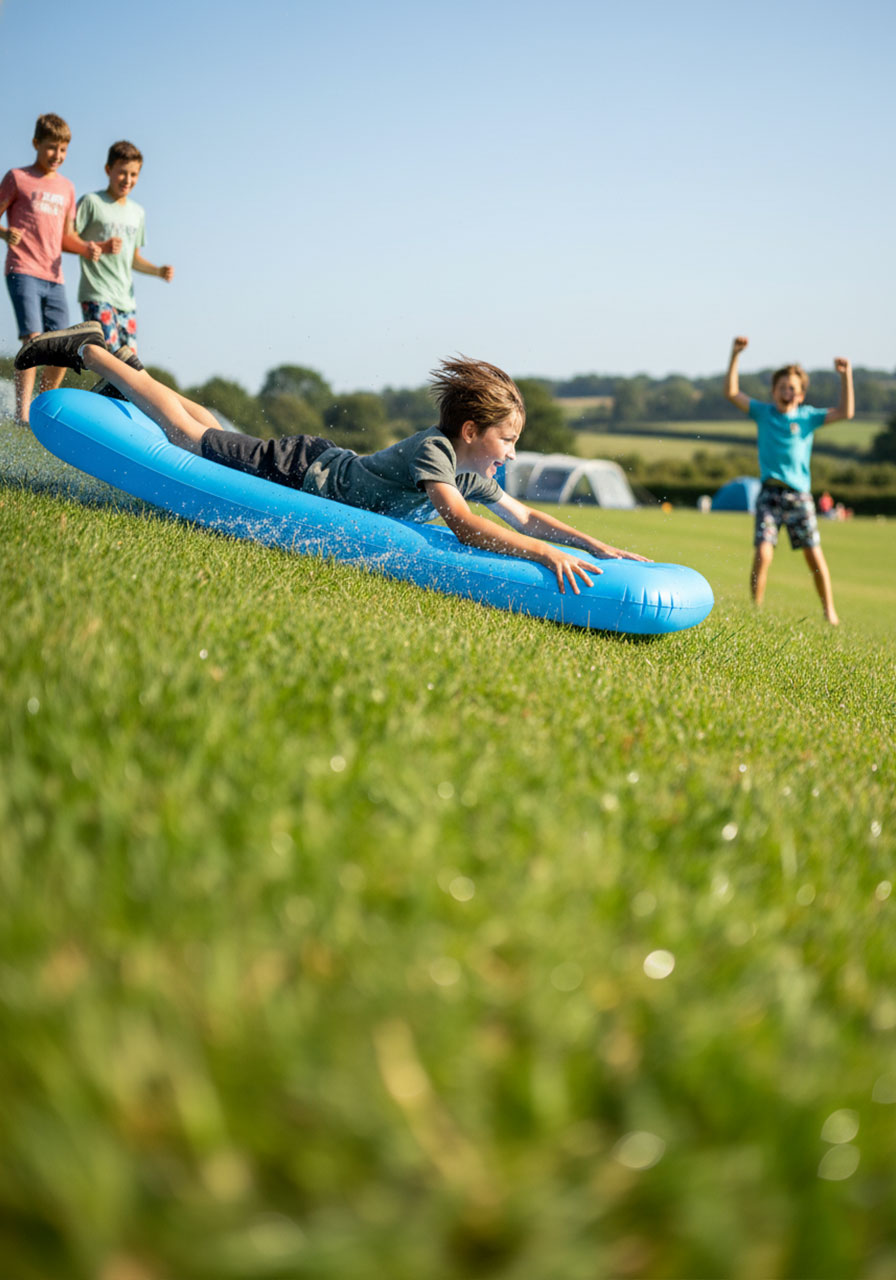
Best for: Kids ages 7+, active play, slopes or hills
Time needed: Hours of fun!
Transform an inflatable pool float into the ultimate grass surfing machine!
What You’ll Need:
- Inflatable air mattress or pool float (lilo)
- Grassy hill or slope
- Optional: Water spray bottle to make the grass slightly slippery
How to Lilo Surf:
1. Find a safe grassy hill without rocks, roots, or obstacles.
2. Inflate your lilo completely so it’s firm and smooth.
3. Position yourself on the lilo at the top of the hill – lying on your stomach like a surfer!
4. Push off and ride the hill! Steer by shifting your weight side to side.
5. Race against friends or time each ride to see who goes fastest!
Pro Tip: This works even better after morning dew or light rain when grass is slightly damp. Always scout the hill first to ensure it’s safe – no hidden holes or obstacles!
22. Shadow Charades Theater
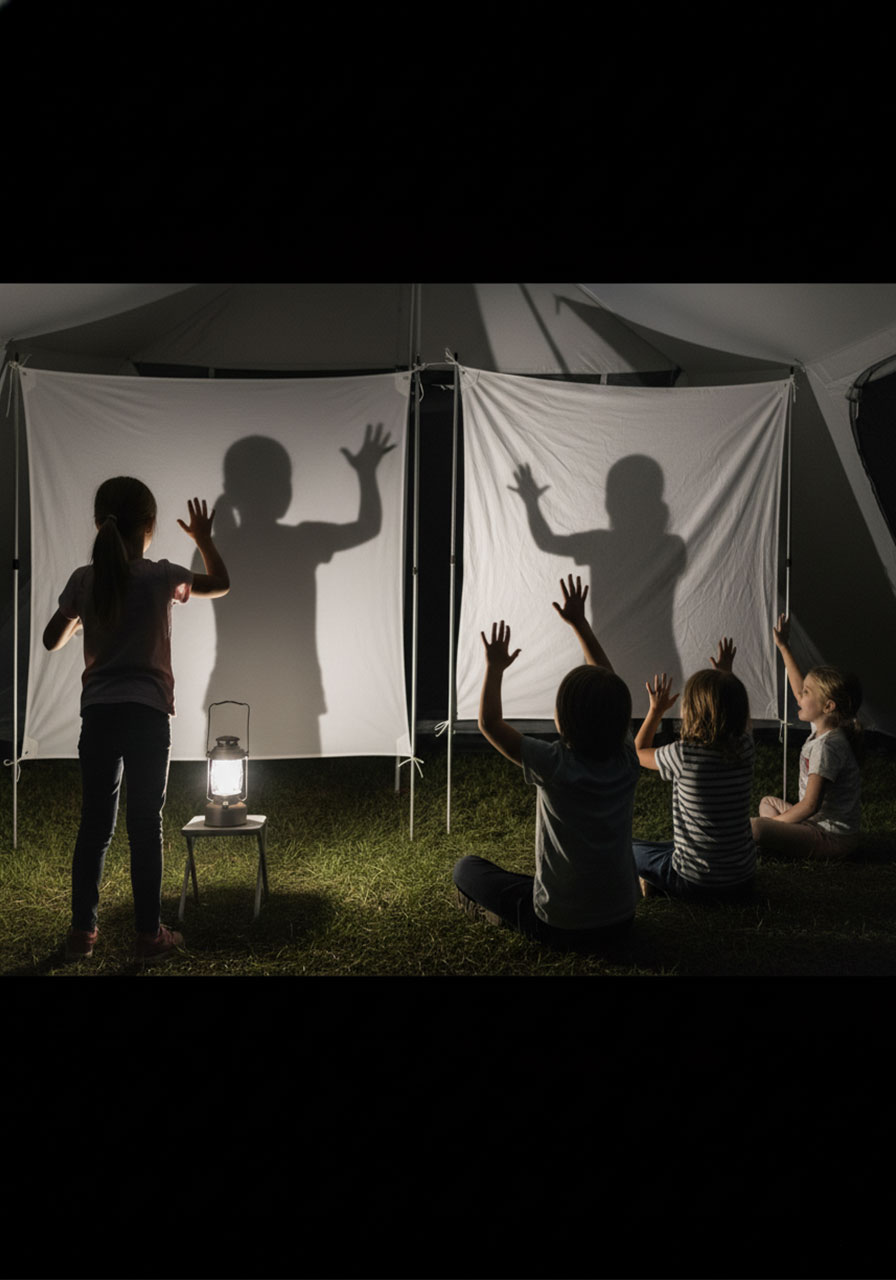
Best for: Kids ages 5+, evening entertainment, creative expression
Time to Play: 30+ minutes
Take shadow puppets to the next level with this hilarious camping game that’ll have everyone in stitches!
What You’ll Need:
- White sheet or light-colored tent wall
- Bright flashlight or camping lantern
- Your imagination (and maybe some silly props!)
How to Play Shadow Charades:
1. Set up your shadow screen by hanging a white sheet inside or outside your tent, or simply use a light-colored tent wall as your backdrop.
2. Position your light source 3-4 feet behind where performers will stand, aimed directly at the sheet.
3. Divide into teams or play individually. One person performs while others guess!
4. The performer stands between the light and sheet, creating their shadow on the screen for the audience on the other side.
5. Act out camping activities, animals, or silly scenarios using only your shadow! No talking allowed – pure silent performance.
6. The audience shouts out guesses until someone gets it right!
Shadow Charades Ideas:
- Roasting marshmallows
- Bear encounter
- Setting up a tent
- Catching fish
- Getting attacked by mosquitoes
- Starting a campfire
- Sleeping in a sleeping bag
Pro Tip: Create a list of camping-themed challenges ahead of time and put them in a hat. Players draw randomly to keep the game exciting! The more dramatic and exaggerated your movements, the better – shadows make everything look hilarious!
23. Toy Zip Line Adventure
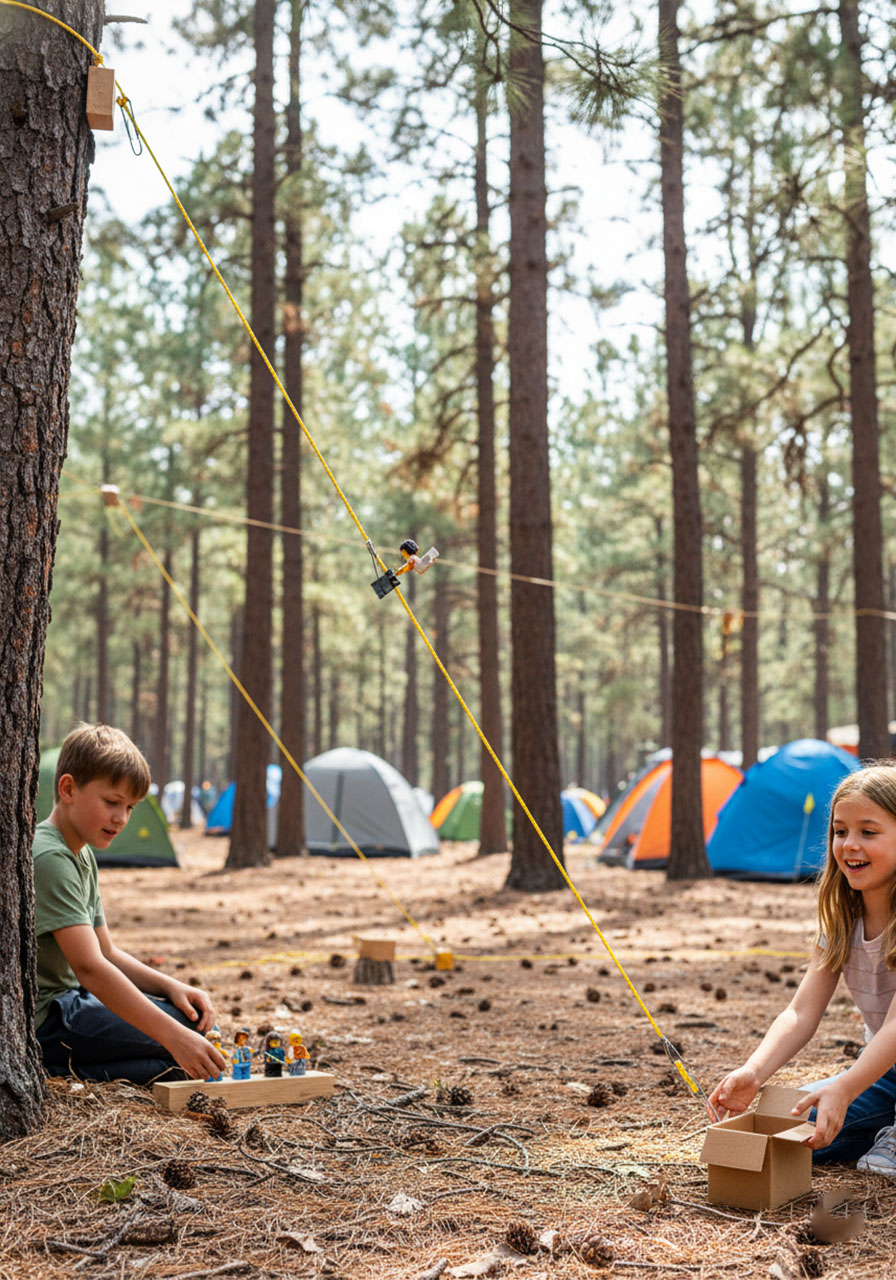
Best for: Kids ages 6+, engineering fun, small toy adventures
Time to Set Up: 15 minutes
Create an epic zip line course for action figures and toys that’ll keep kids entertained for hours!
What You’ll Need:
- Strong string or thin rope (at least 15-20 feet)
- Paper clips or small carabiners
- Small toys (LEGO figures, action figures, small dolls)
- Two anchor points (trees, tent poles, picnic tables)
How to Build Your Toy Zip Line:
1. Find two anchor points at different heights – a tree branch and a lower tent pole work perfectly. The higher end should be at least 3-4 feet higher than the lower end for good zip speed!
2. Tie your string securely to the higher anchor point, making sure the knot is tight and won’t slip.
3. Stretch the string to your lower anchor point and tie it firmly, creating a taut diagonal line. Test it by pulling – it should be tight enough not to sag too much.
4. Create toy harnesses using paper clips: Unfold a paper clip into an S-shape or use small carabiners. Clip one end to your toy (around the waist or shoulders) and the other to the zip line.
5. Send your toys on adventures! Release them from the top and watch them zoom down the line.
6. Create multiple zip lines at different angles and heights for a whole adventure course!
Epic Zip Line Challenges:
- Race two toys side-by-side on parallel zip lines
- Create a rescue mission – one toy saves another
- Design obstacle courses where toys must zip across gaps
- Set up “stations” along the zip line route
Pro Tip: Experiment with different weights and positions on your toys to see which zips fastest! Kids can also create elaborate backstories – their LEGO explorer is crossing a dangerous canyon or their action figure is escaping from danger!
24. DIY Fabric Swing & Hammock

Best for: Kids ages 4+, relaxation time, outdoor comfort
Time to Set Up: 20 minutes
Transform simple fabric into the coziest outdoor swing that becomes every kid’s favorite camping spot!
What You’ll Need:
- Large piece of sturdy fabric (old sheet, beach towel, or canvas – about 4-6 feet long)
- Strong rope (at least 20 feet total)
- Two sturdy trees spaced 8-12 feet apart
- Optional: carabiners for easy adjustment
How to Create Your Fabric Swing:
1. Select your fabric based on what type of swing you want:
- Traditional swing: Use a rectangular piece about 2×3 feet
- Hammock style: Use a larger sheet or beach towel (4×6 feet)
2. Lay your fabric flat and gather each short end tightly.
3. Tie rope securely around each gathered end, creating a “bundle” that won’t slip. Leave at least 8-10 feet of rope on each side.
4. Find two healthy, sturdy trees (at least 8 inches in diameter) positioned the right distance apart.
5. Wrap the ropes around each tree at the desired height – lower for small kids, higher for older ones. Use tree-safe straps if you have them to protect the bark!
6. Tie secure knots (double knots or bowline knots work best) and test the swing thoroughly before letting kids use it.
7. Adjust the height and tension until the swing is at a comfortable level.
Safety Check:
- Always test with adult weight first
- Check knots regularly throughout your trip
- Supervise young children
- Choose trees with no dead branches overhead
Pro Tip: Create multiple swing styles – a low hammock for reading, a higher swing for pumping legs, and a wrap-style swing for spinning! Kids can also help decorate their swing area with nature finds like flower chains or leaf garlands.
25. Moth Attractor House
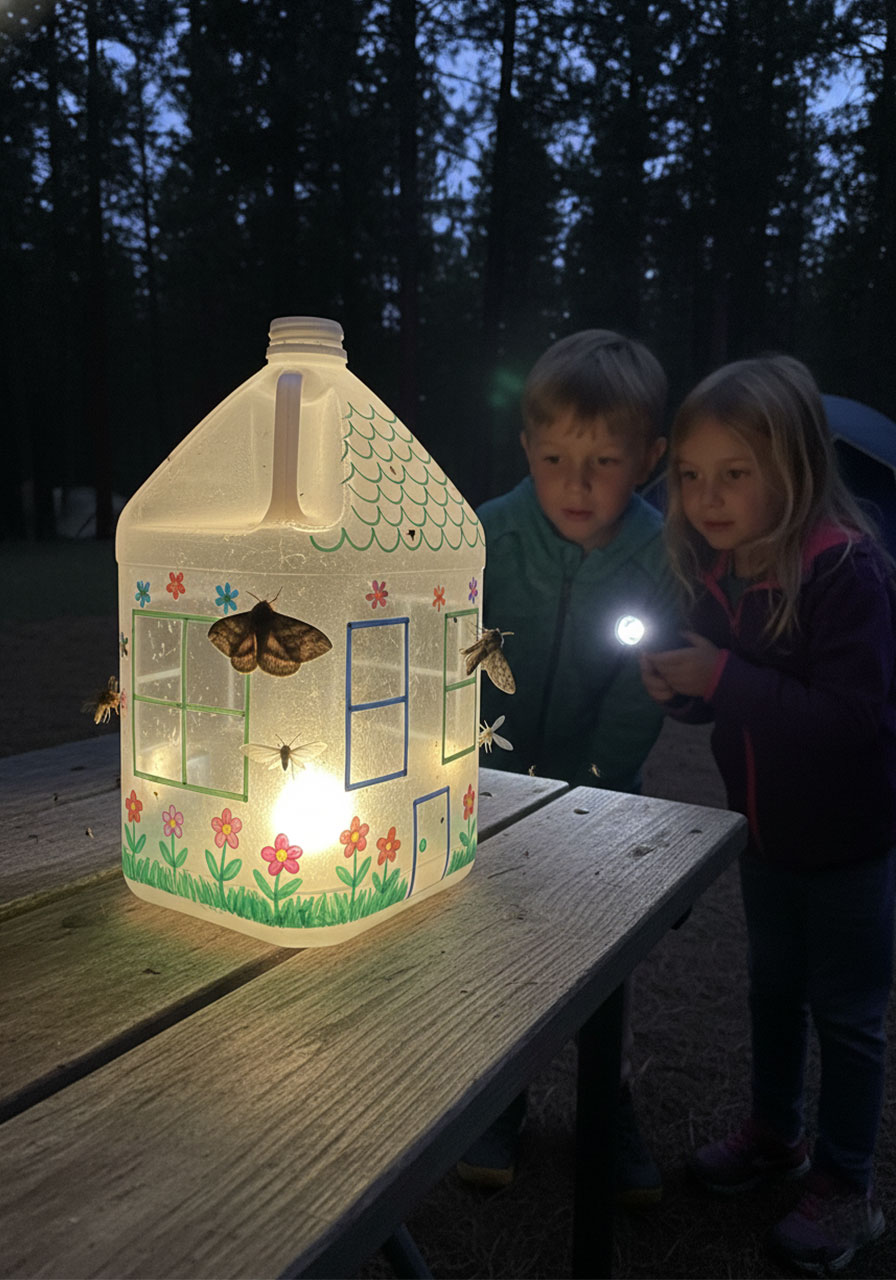
Best for: Kids ages 6+, nature observation, nighttime science
Time to Create: 20 minutes
Build a glowing attraction center that brings nighttime nature right to your campsite for incredible insect observation!
What You’ll Need:
- Clean plastic milk jug or large water bottle
- Permanent markers for decorating
- Scissors or craft knife (adult use only)
- Battery-operated light or glow stick
- Optional: white sheet or paper to enhance glow
How to Build Your Moth House:
1. Clean and dry your plastic jug thoroughly, removing all labels.
2. Use permanent markers to decorate the jug like a little house – draw windows, doors, roof tiles, even landscaping! Get creative with designs.
3. Cut window openings in your drawn windows (adults should do this). Make them large enough for insects to fly through – about 2-3 inches wide.
4. Optional: Tape white paper or fabric inside behind the windows to make the light more visible and attractive to moths.
5. Place a battery-operated light or glow stick inside the jug and replace the cap.
6. Set your moth house on a table or hang it from a tree branch after dark.
7. Watch from a distance as moths and other nighttime insects are attracted to your creation!
What You’ll Observe:
- Different types of moths in various sizes and patterns
- Other night-flying insects attracted to light
- How insects navigate toward light sources
- Peak visiting hours (usually just after sunset)
Learning Moment: Explain to kids that insects use moonlight for navigation, which is why artificial lights can confuse them. This is called “phototaxis” – the tendency of organisms to move toward or away from light!
Pro Tip: Place your moth house 20-30 feet from your sleeping area to enjoy the show without inviting all the bugs into your tent! Bring a nature identification guide or use an app to identify your nighttime visitors together.
26. Tree Climbing Ladder Challenge

Best for: Kids ages 7+, active play, building confidence
Time to Set Up: 30 minutes
Supervision Required: ALWAYS
Turn an ordinary climbing tree into an adventure challenge that builds strength and confidence!
What You’ll Need:
- Hammer
- Bag of sturdy nails (at least 3 inches long)
- Wooden blocks or thick sticks (about 6-8 inches long, 2 inches thick)
- A climbing tree with sturdy trunk and branches
- Adult supervision at all times
How to Create Your Climbing Ladder:
1. Select the perfect tree: Look for a healthy tree with a thick trunk (at least 12 inches diameter), sturdy lower branches, and no signs of disease or dead wood.
2. Map out your ladder route from bottom to top, planning where each “rung” will go. Space them about 12-15 inches apart vertically.
3. Adults only: Carefully hammer wooden blocks or thick sticks into the tree trunk at a slight upward angle (this creates a sturdier step and better grip).
4. Test each step thoroughly before allowing kids to climb. It should support full adult weight without wobbling.
5. Create clear climbing rules:
- Only one climber at a time
- Always have an adult spotter
- Never climb higher than you’re comfortable with
- Three-point contact rule (always keep three limbs on the tree)
6. Set a “highest safe point” mark based on each child’s age and ability.
Safety Rules:
- Adult supervision required 100% of the time
- Check weather – never climb in rain or wind
- Inspect all steps before each use
- Set firm height limits
- Clear area below of rocks or obstacles
Pro Tip: Challenge kids to different climbing goals rather than just “highest” – fastest time to a certain branch, climbing with eyes closed to a low point (with spotter!), or ringing a bell you’ve attached to a branch. This keeps the focus on skill-building rather than dangerous height competitions!
Environmental Note: If you’re concerned about harming trees, use rope steps or removable climbing holds designed for trees instead of nails.
27. Outdoor Art Station on Trees
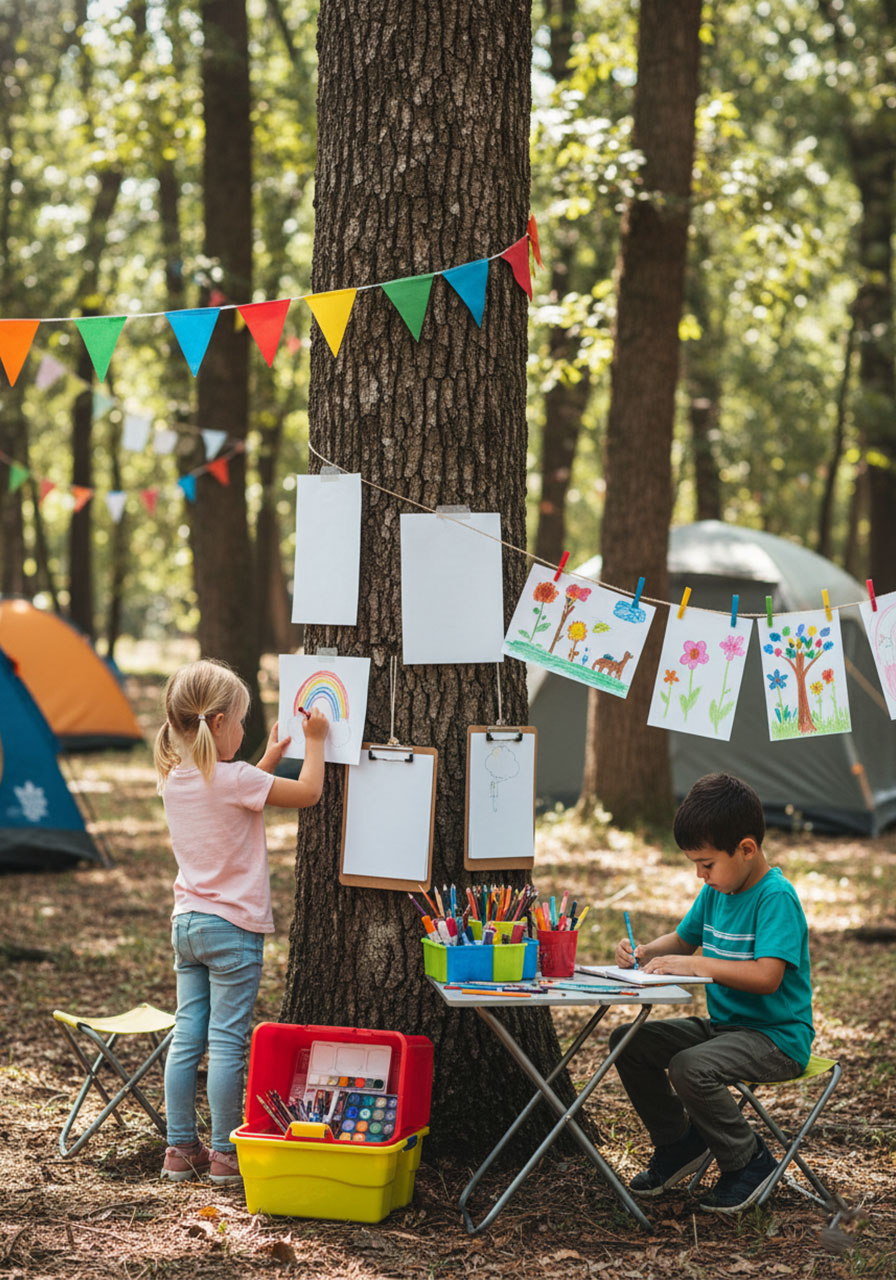
Best for: Kids ages 4+, creative time, quiet entertainment
Time to Set Up: 15 minutes
Transform a tree into a complete art studio that brings creativity outdoors in the most magical way!
What You’ll Need:
- Paper (various sizes – drawing paper, construction paper, newsprint)
- Tape or thumbtacks
- String for hanging (create a “gallery line”)
- Art supplies (markers, crayons, colored pencils, watercolors)
- Storage containers or caddies for supplies
- Small decorative bunting or flags
- Optional: clipboards for easier drawing
How to Create Your Tree Art Station:
1. Choose a tree with a relatively smooth section of trunk at kid-height (about 3-4 feet from ground).
2. String your decorative bunting around the tree to mark it as the official “Art Station” – this makes it feel special!
3. Tape or tack paper directly to the tree trunk as “canvases”. Use multiple sheets at different heights for multiple artists.
4. Hang clipboards from branches using string for portable drawing surfaces.
5. Set up supply stations at the tree’s base:
- Container of markers and crayons
- Small folding table or flat board for watercolors
- Paper storage in a dry container
- “Finished art” collection spot
6. Create a gallery line by stringing rope between two trees where kids can hang their completed artwork with clothespins.
7. Optional stations to add:
- “Envelope station” where kids can write and mail letters to family
- “Make-up station” with washable face paint (like shown in image)
- “Design station” with stencils and stamps
Art Challenge Ideas:
- Draw what you see in nature around you
- Create a camping adventure comic strip
- Design your dream campsite
- Make nature-inspired patterns
- Draw portraits of camping buddies
Pro Tip: Include a “Nature Integration Challenge” where kids must incorporate actual nature items into their art – pressing leaves onto paintings, gluing bark pieces, or using grass as “paint brushes”. This connects their creativity directly to the environment!
Final Camping Wisdom
With these 27 incredible camping activities in your arsenal, you’re fully equipped to create the most memorable outdoor adventure your family has ever experienced! From glowing nighttime magic to daytime creative play, from nature observation to engineering challenges – there’s something here for every type of kid and every kind of camping trip.
Remember, the best camping memories aren’t made from elaborate plans or expensive gear. They’re made from simple activities, creative thinking, and quality time together in nature. These activities work whether you’re at a full-service campground or deep in the wilderness, in perfect weather or drizzly conditions.
So pack your supplies, round up the kids, and get ready to become the legendary camping parent who always has the best ideas! Your next camping trip is about to become the one your kids talk about all year long.
Happy camping, adventure seekers!
More Kid’s Party Ideas to Keep the Fun Rolling:
25 All-Time Best Documentaries for Kids (and Parents Who Don’t Want to Fall Asleep)
11 Epic Card Games for Kids (with One Simple Card Deck) That’ll Keep Them Entertained for Hours
How to Build an Epic LEGO Plinko Board (That Actually Works!)
7 Epic Spring Minute to Win It Games That’ll Make Your Party Bloom
27 Circle Time Ideas for Toddlers and Preschoolers That Actually Work
How to Make Fluffy Pet Rocks: The Cutest DIY Craft That’ll Have Kids Obsessed
