
Who this is for: Parents looking for a sweet, low-mess Mother’s Day gift idea – and teachers who need a classroom craft that actually looks impressive. Best of all? These flowers are made almost entirely from coffee filters and cost pennies to make.
The first time I set these out at a kids’ craft table, every single adult in the room did a double-take. “Wait – are those real?” No, they’re coffee filters. And yes, your kids can make them. That’s the magic of this craft.
These DIY coffee filter flowers look just like full, lush peonies. They’re beautiful enough to display on a shelf or give as a heartfelt gift, yet simple enough for little hands to help with. Whether you’re prepping a Mother’s Day surprise at home or planning a whole classroom bouquet, this tutorial walks you through every step – no experience needed.

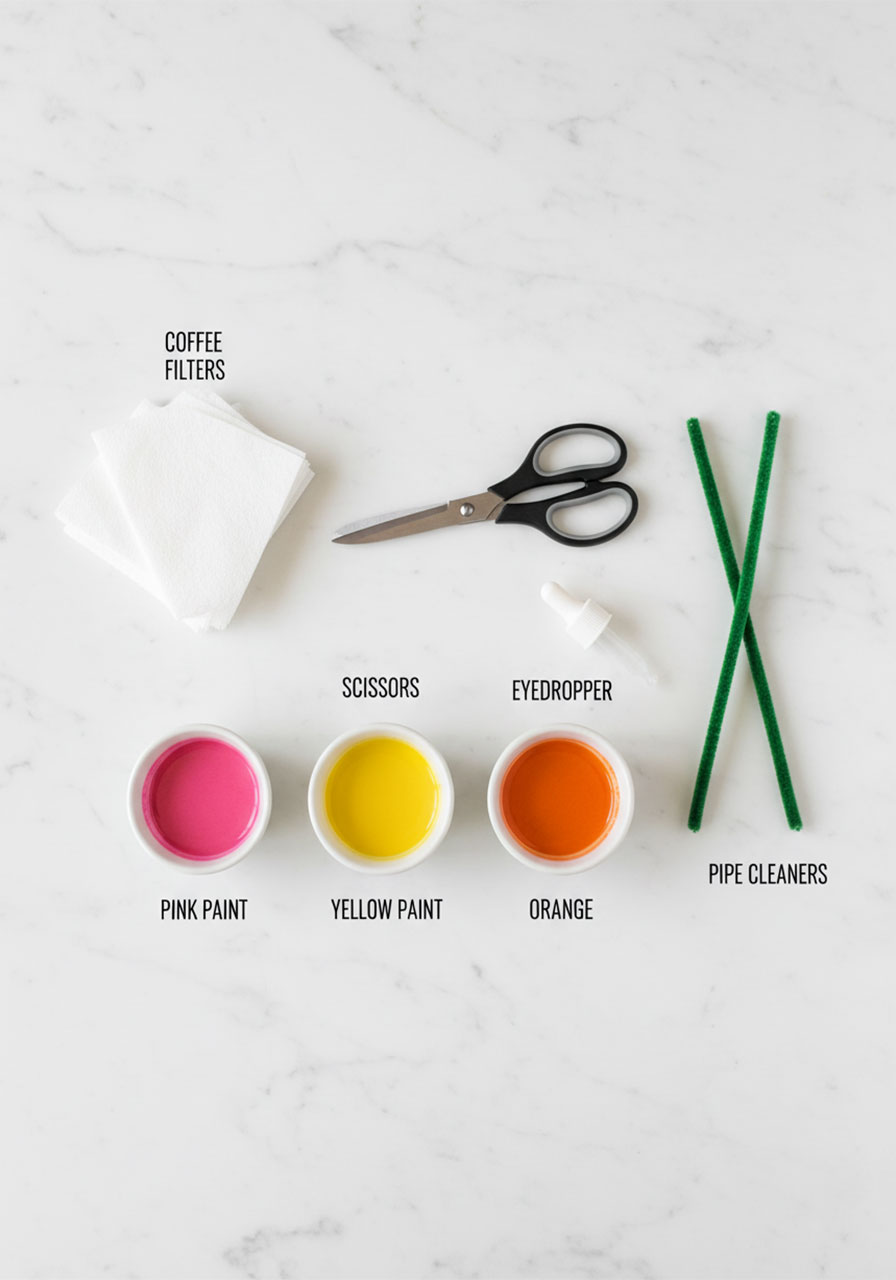
What You’ll Need
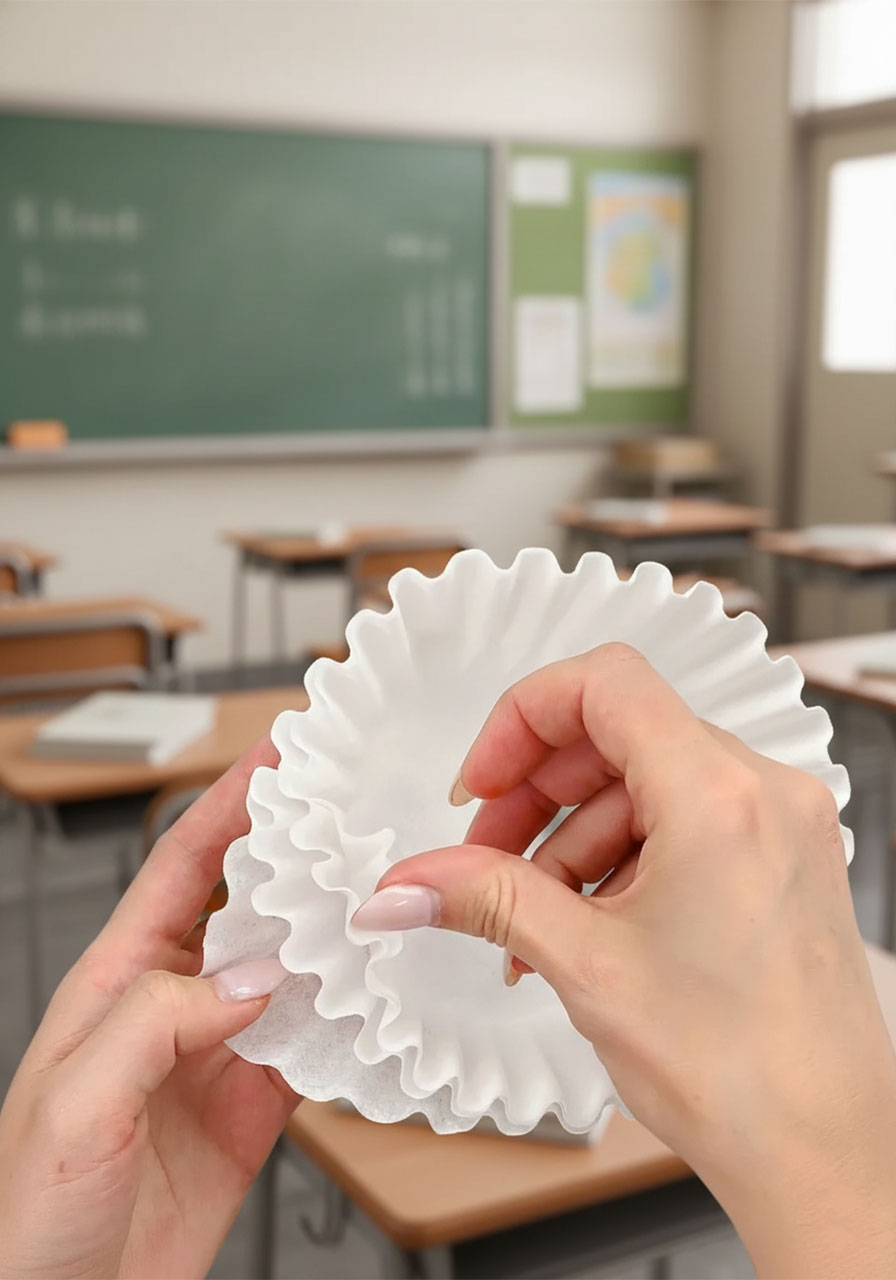
4 basket-style coffee filters per flower (the flat-bottomed, wide kind – not cone-shaped)
Liquid watercolor paint – at least 2 colors (pink/red + yellow works beautifully)
Water
Small bowls or cups (one per color)
An eye dropper or pipette
Scissors
1 green pipe cleaner per flower
A baking tray (to work on – keeps the mess contained!)
🛒 Supply note: Liquid watercolor paint is the clear winner here – it soaks through all 4 stacked coffee filters at once, giving you those gorgeous dark edges and rich color variations. You can find it at craft stores or on Amazon. Regular food coloring diluted in water also works in a pinch!


How to Make Coffee Filter Flowers – Step by Step
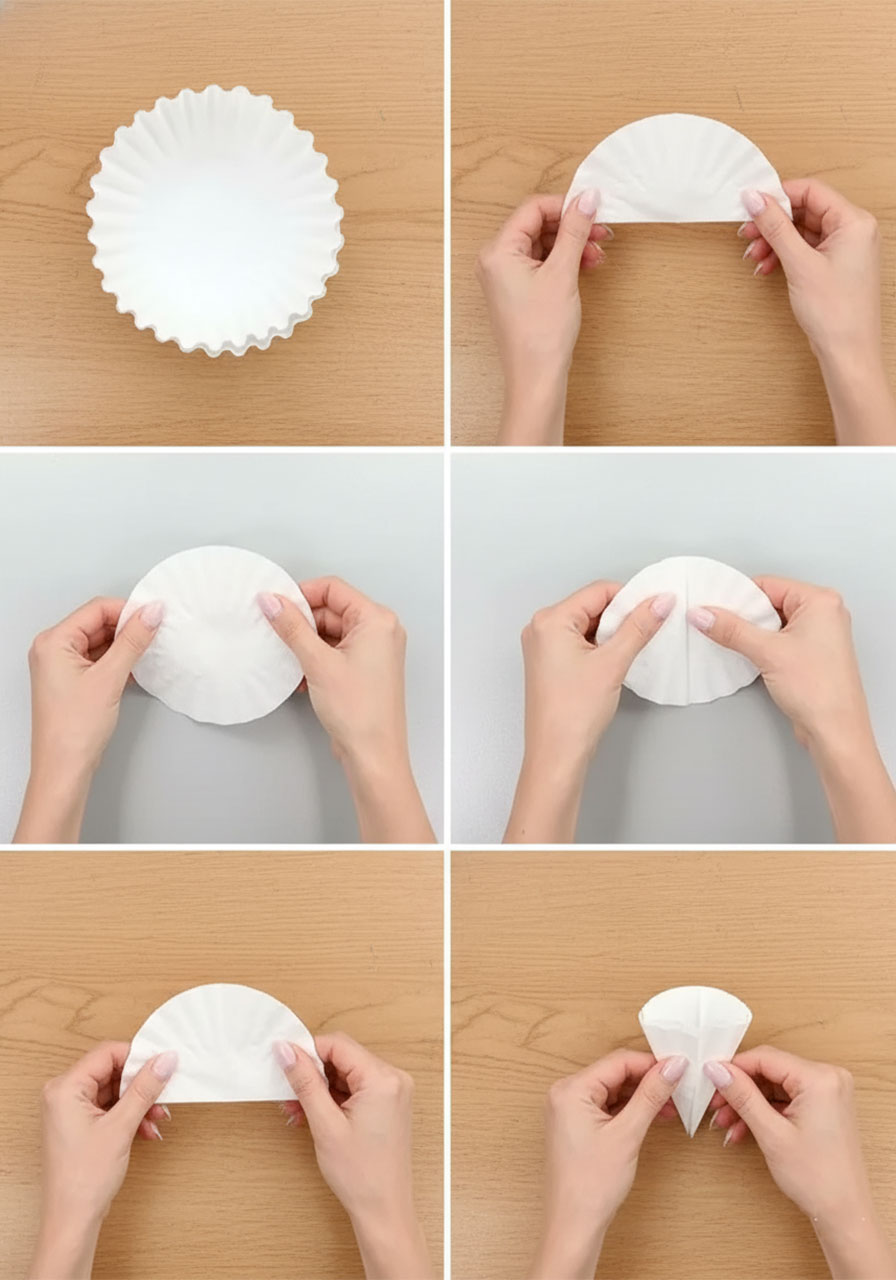
Step 1 – Stack and Fold Your Coffee Filters
Stack all 4 coffee filters together in a neat pile. Now fold the whole stack in half, then in half again, and one more time – so you end up with a small wedge shape (like a thick slice of pie).
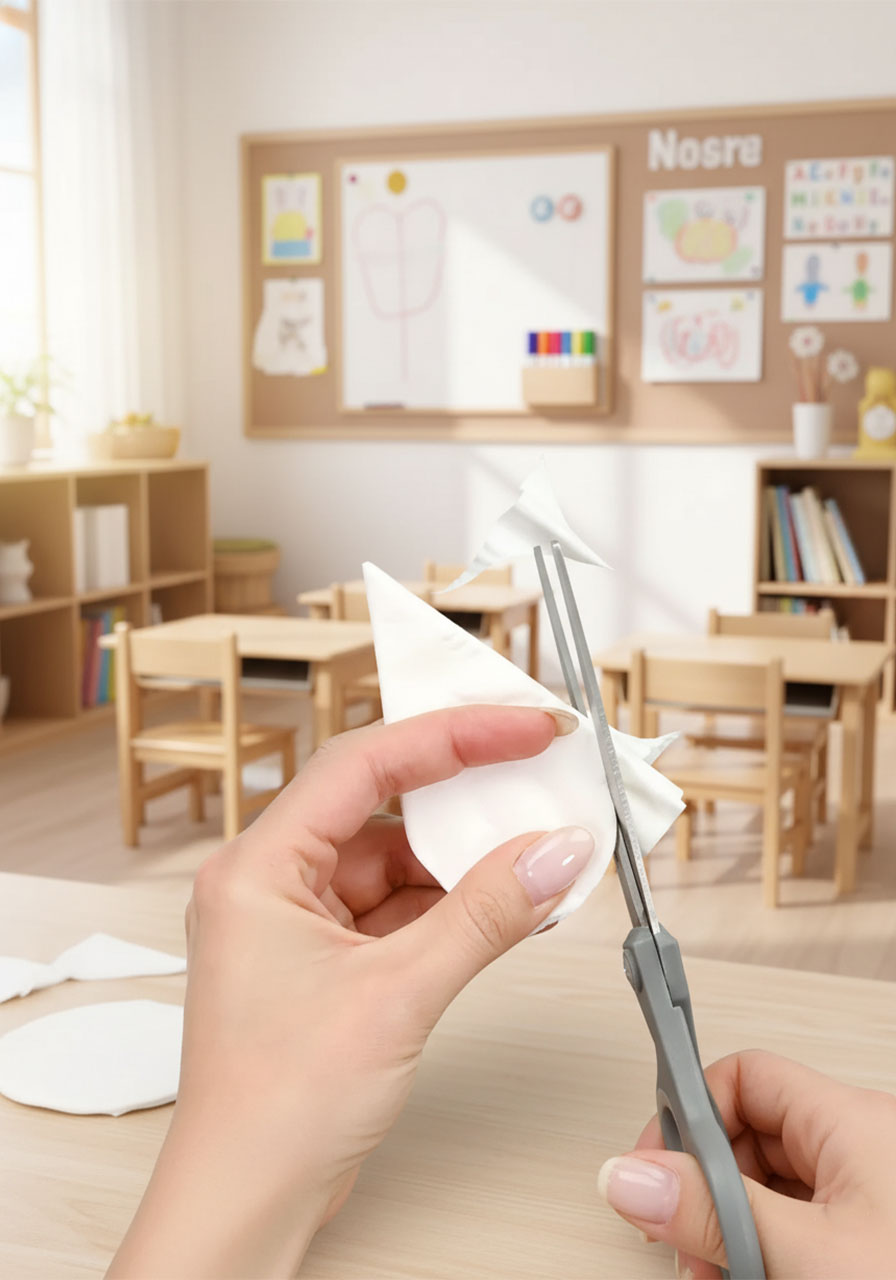
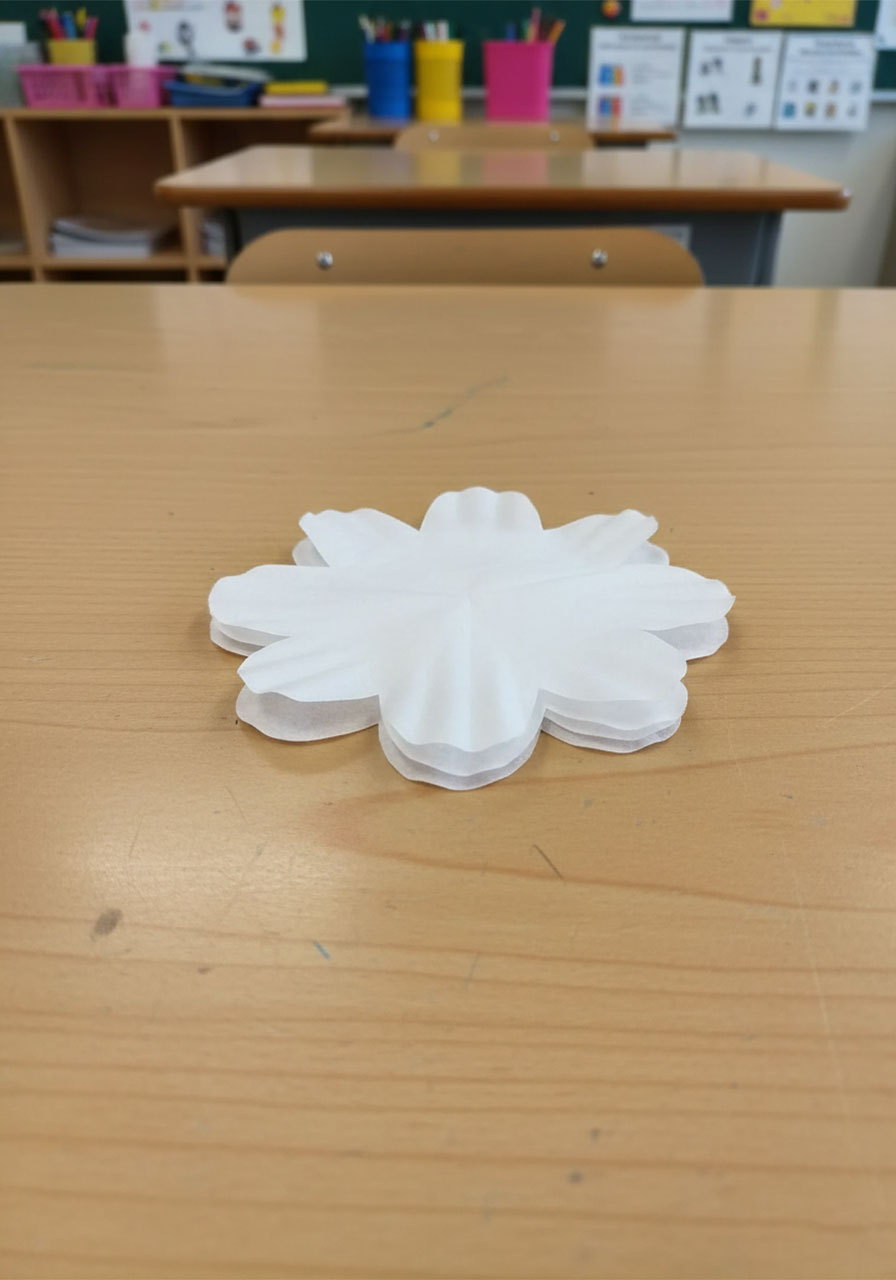
Using your scissors, cut a rounded petal curve across the wide outer edge of the wedge. This is what creates those beautiful petal shapes when you unfold everything. Aim for a smooth, gently rounded cut – not pointed or straight.
Unfold all the coffee filters and lay the stack flat on your baking tray. Use your hands to gently press them down so they lie as flat as possible.
✏️ Pro Tip for Teachers: Pre-fold and pre-cut the coffee filters for younger kids (K–2). Let them take over from the painting step – it’s way more fun for little ones, and the results look just as beautiful!
Step 2 – Mix Your Colors
Add about 2 tablespoons of water to each small bowl. Then squeeze in your watercolor paint – roughly 10 drops for yellow, 2 drops of red to make a soft pink, and 4 drops for orange. Feel free to make your own color combo!
Stir gently to mix. Your paint water should look richly colored – not just a faint tint.


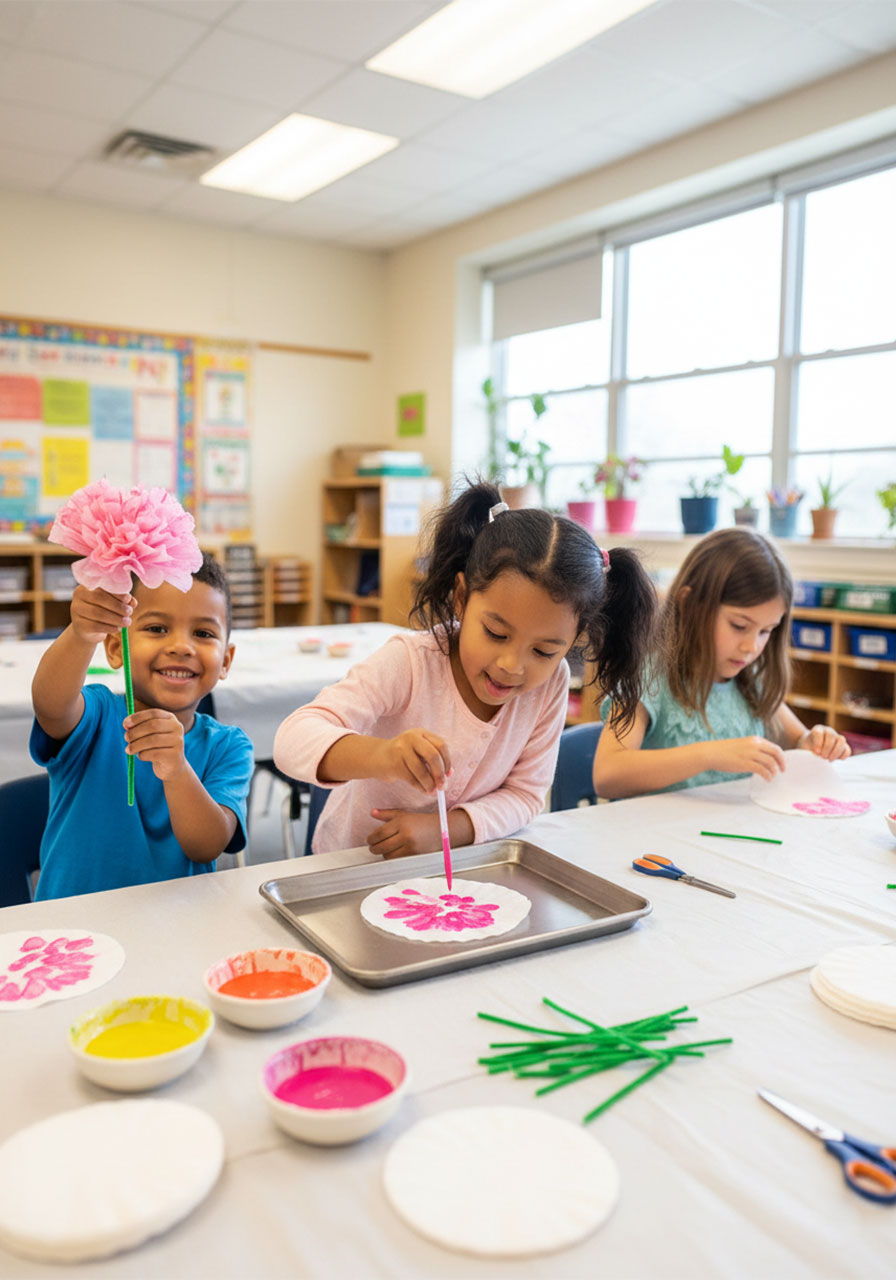
Step 3 – Paint the Flowers
This is the most satisfying step – and kids absolutely love it.
1. Use your eye dropper to drop yellow paint into the very center of your stacked coffee filters. Let it spread outward naturally.
2. Switch to your pink or red and drop the second color onto the outer petals. The colors will bleed toward each other in the most beautiful way.
3. Keep going with a third color if you’d like – orange on the tips adds an amazing sunset effect.
Here’s the secret to those gorgeous dark edges: the paint concentrates at the cut edges of the petals as it dries. The darker your outer color, the more dramatic the effect!


Step 4 – Dry the Coffee Filters
Let the painted filters dry completely before moving on – this is key. If they’re still damp when you shape them, they’ll tear.
Air dry: About 3–5 hours laid flat, or about 1.5 hours if you drape them over a cup or mason jar (this actually speeds things up a lot!)
Sunny day shortcut: Set them outside in the sun – about 30 minutes. Just watch for wind!
Oven method: 20 minutes at 130°F. Only use this option if your oven goes that low – higher temperatures will damage the filters.
✏️ Classroom Tip: Paint the coffee filters the day before your craft session and let them dry overnight. That way, kids jump straight to the shaping step – which is pure magic.

Step 5 – Shape the Flower
Once your coffee filters are fully dry, it’s time to turn them into a flower!
1. Separate your 4 coffee filters into two pairs – 2 filters in each hand.
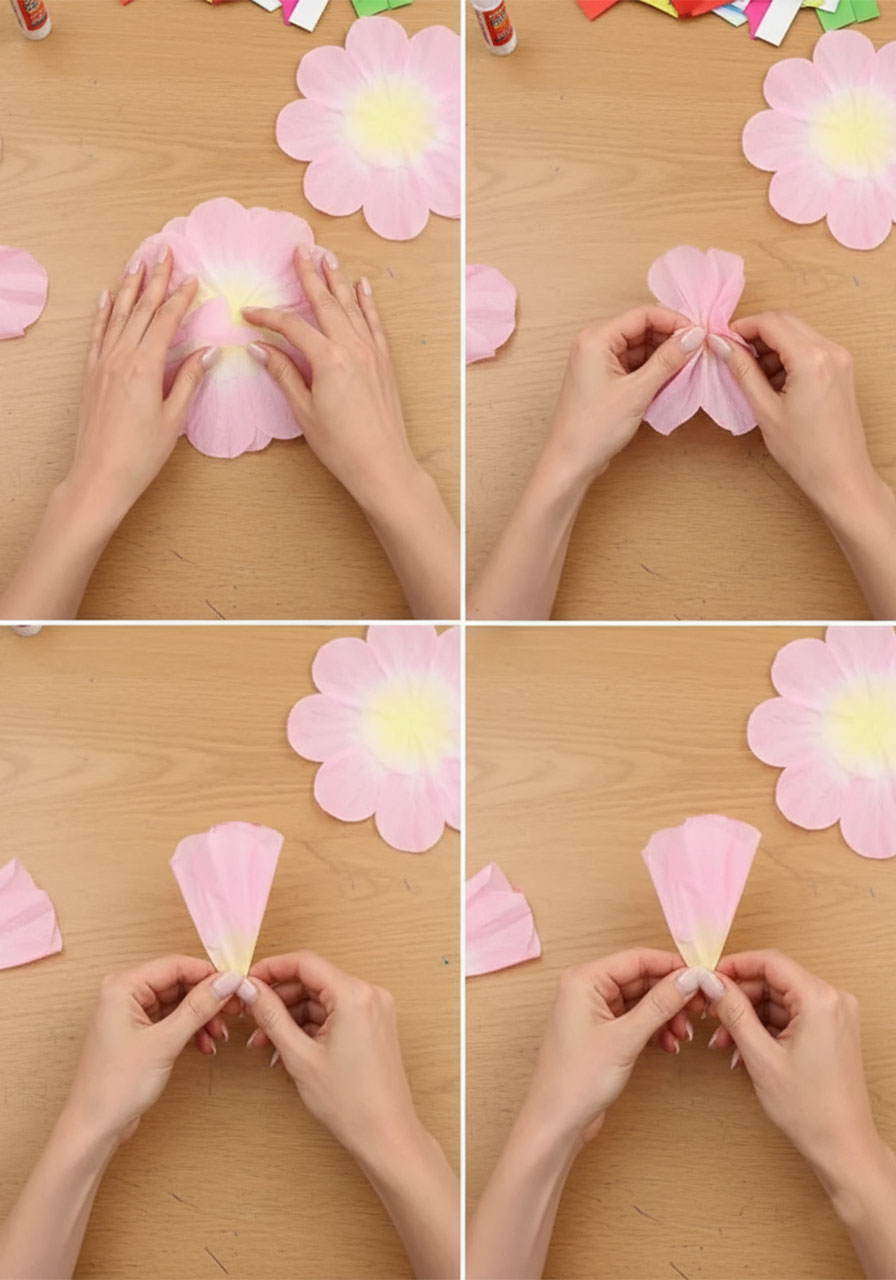
2. Take one pair and slightly offset the top filter so the petals don’t perfectly overlap. This staggered look gives the flower that full, lush peony shape.
3. Place your finger in the center of the pair, then scrunch and pinch the filters downward around your finger, gathering everything toward the bottom to form a bud shape. Give the base a gentle twist to hold it together.
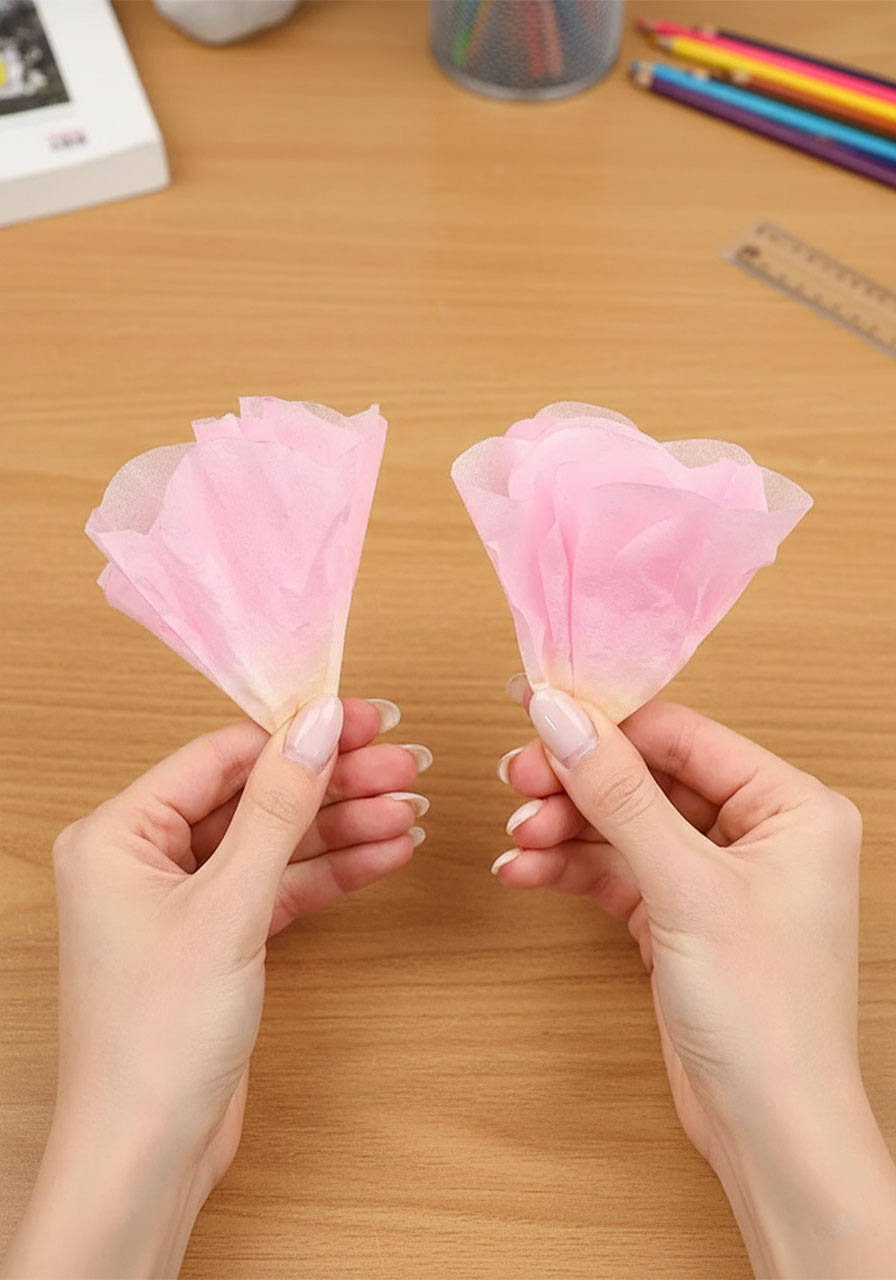
4. Repeat with the second pair of filters.
5. Now hold both gathered bundles together, bases touching, so the petals fan out all around. Pinch the combined base tightly – this is the center of your flower!
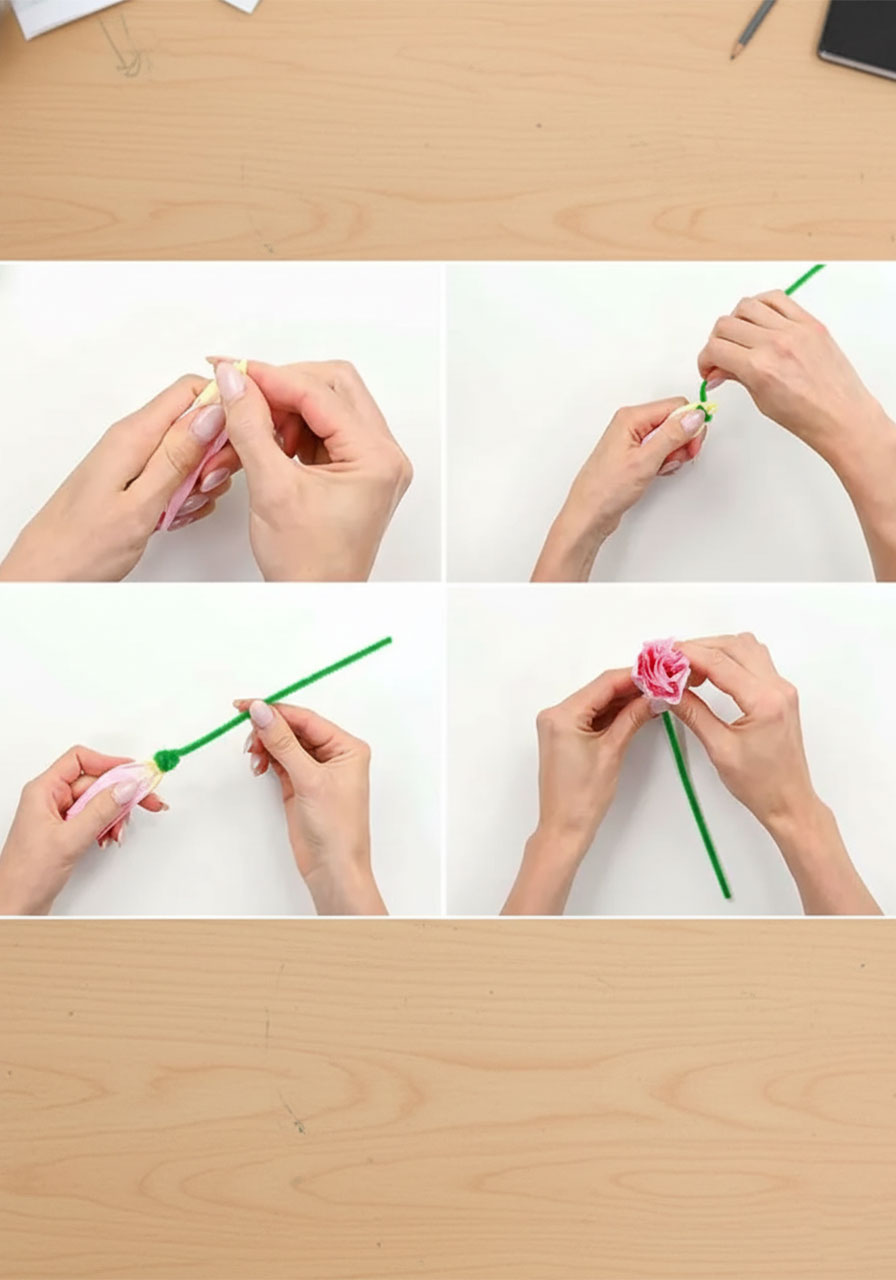
Step 6 – Attach the Stem
1. Hold your flower base firmly in one hand. With the other, position the tip of a green pipe cleaner against the bottom point of the gathered filters, about half an inch from the very bottom.
2. Wrap the pipe cleaner tightly around the base in a tight spiral, working your way down until the entire gathered base is wrapped and secure. Leave the rest of the pipe cleaner straight – that’s your stem!
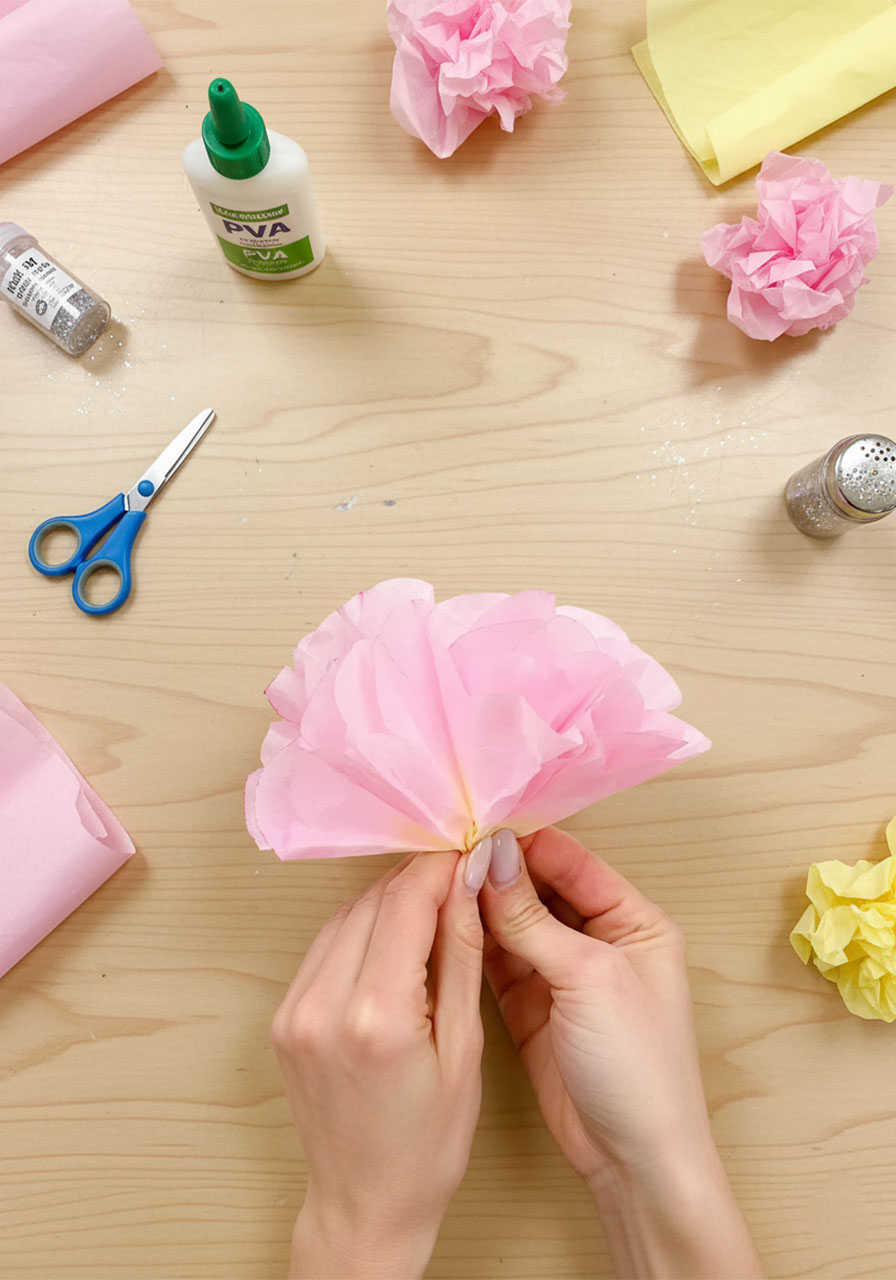
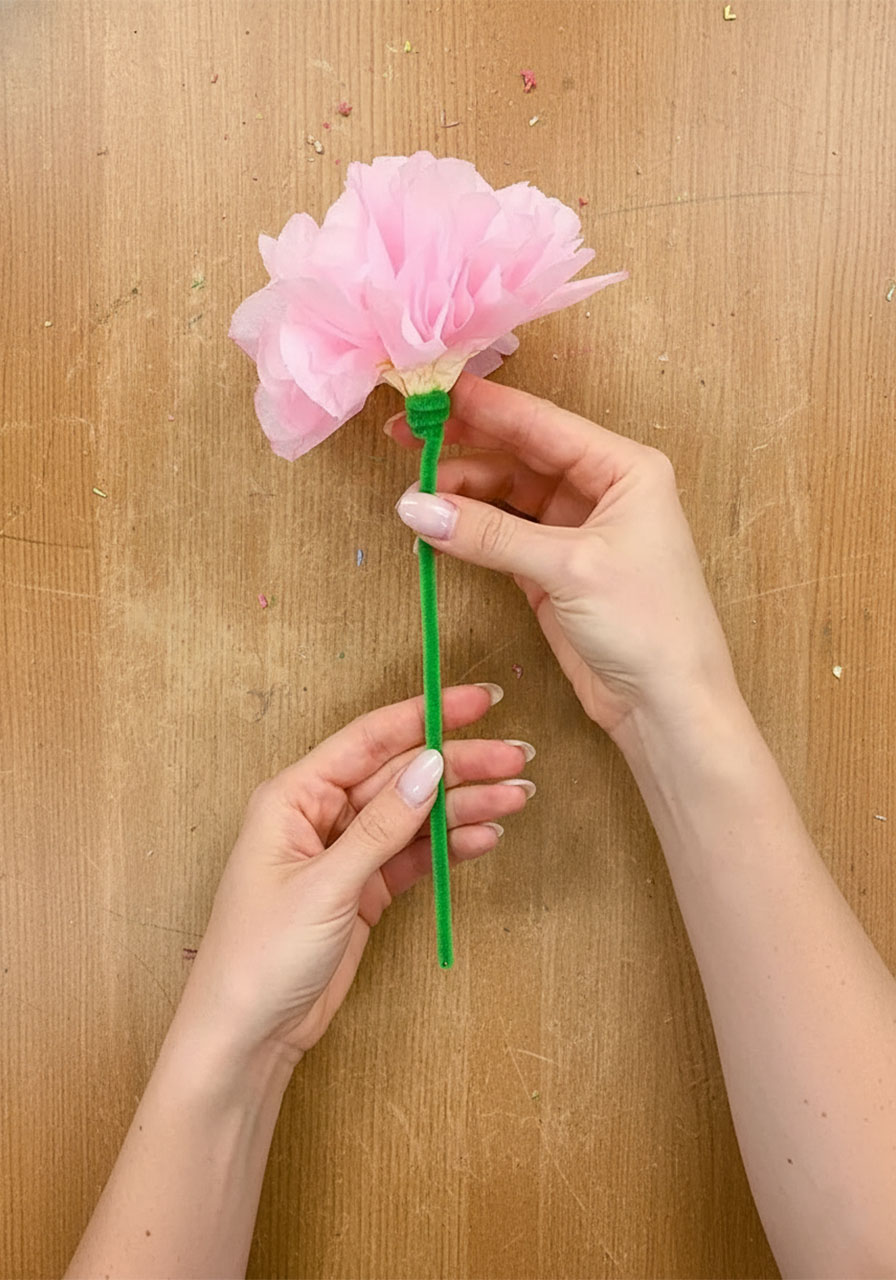
3. Now the fun part: gently pull the individual layers of coffee filter upward one by one, working from the outside in. Shape the petals outward and slightly curl them back, just like a real flower opening up.
✏️ Pro Tip: Don’t rush the shaping step! The more time you spend gently separating and curling each layer, the fuller and more gorgeous your flower will look. Think of it like coaxing a flower to bloom.
Fun Variations to Try
Washable markers: Color the filters with washable markers, then use an eye dropper to add water – the colors bleed in the most beautiful way and create especially dark, dramatic edges. This works best with 2 filters at a time.
Two-color ombre: Use just two colors – one light, one dark – for a sophisticated gradient effect that looks stunning in a vase.
Mini flowers for younger kids: Use only 2 coffee filters per flower instead of 4. The blooms are smaller and simpler to shape, but still adorable!
Realistic stems: Swap the pipe cleaner for floral wire wrapped in green floral tape for a more polished, gift-worthy look.
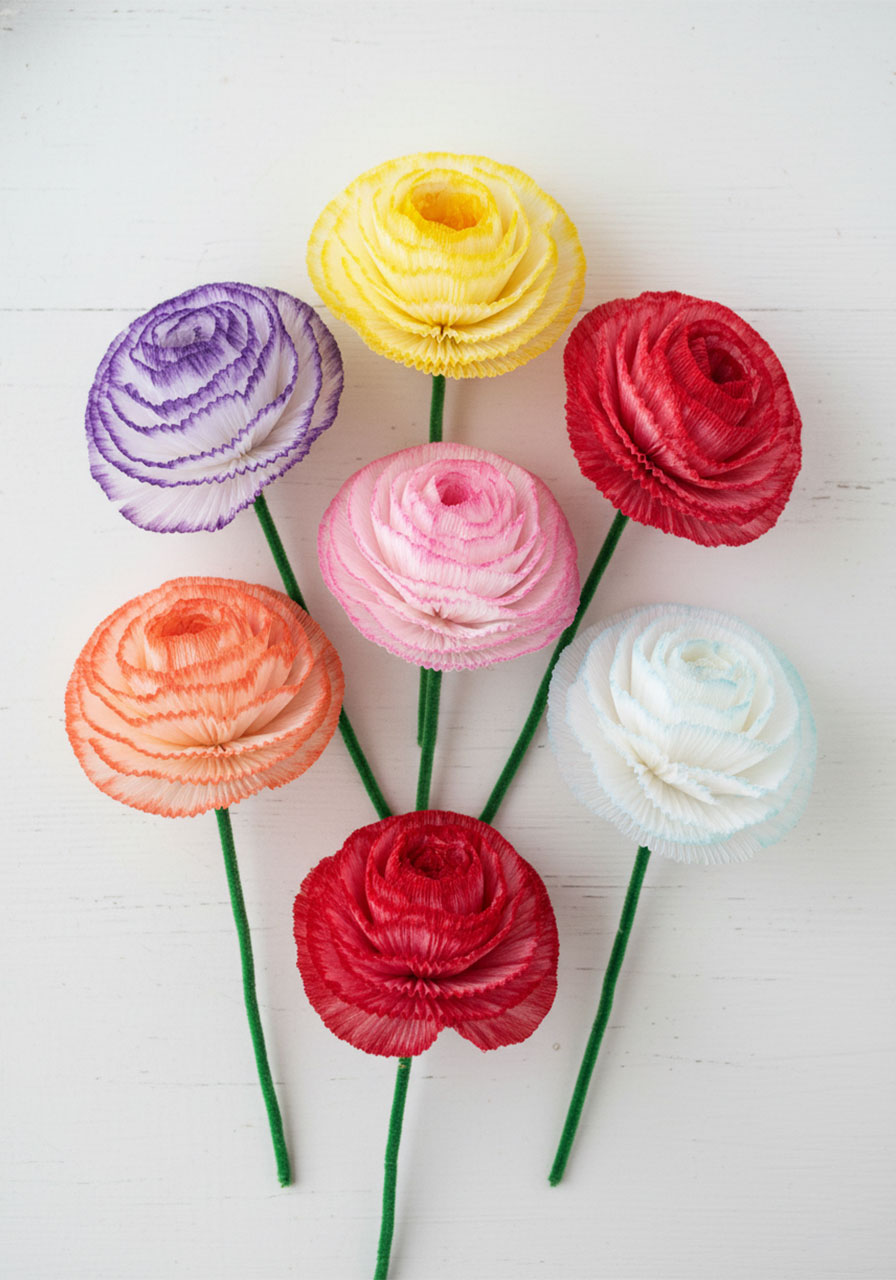
How to Display Your Coffee Filter Flowers
A mason jar makes the perfect vase – affordable, charming, and it shows off those green pipe cleaner stems beautifully. Make a whole bouquet of 5–7 flowers in different shades of pink, peach, and lavender for a stunning Mother’s Day centerpiece.
These flowers also make a wonderful classroom display. Imagine a whole wall of colorful blooms with each child’s name on a leaf – instant spring bulletin board!

Frequently Asked Questions
Do I have to use liquid watercolor paint?
Nope! Liquid food coloring diluted in a little water works well – just expect the color to look more flat and even (less variation between light and dark areas). Washable markers with a few drops of water give the most vivid, dramatic results, especially those dark petal edges. They just take a bit more time since you can only color 2 filters at a time.
How do I get those beautiful dark edges on the petals?
Two secrets: First, cut the petal shape before you paint. The paint concentrates at the cut edges as it dries, creating that stunning defined border. Second, use a darker color on the outer petals – deeper pinks and reds make the most striking edges.
What if I don’t have pipe cleaners?
Floral wire wrapped in green floral tape is a great substitute and actually looks more realistic. Both are available at any craft store.
How can I dry the filters faster?
Draping the wet filters over the rim of a mason jar or drinking glass cuts the drying time almost in half – down to about 1.5 hours. A sunny spot outside takes about 30 minutes. The oven at 130°F takes about 20 minutes, but only use this if your oven actually goes that low.
Can younger kids (preschool/kindergarten) do this craft?
Absolutely – with a little prep help from you! Pre-fold and cut the filters ahead of time, and let little ones do the painting and basic shaping. Use only 2 coffee filters per flower for easier handling. The painting step especially is a total hit with young kids – they love watching the colors spread and blend.
There’s something really special about watching a child hand their parent a bouquet of flowers they made themselves. With these coffee filter flowers, that gift goes from sweet to genuinely stunning – and the whole process is half the fun. Happy crafting! 🌸
More Mother’s Day Ideas to Keep the Fun Rolling:
30+ Mother’s Day Crafts for Kids of All Ages
Mother’s Day Flower Pot Craft: The Cutest Preschool Gift Mom Will Actually Keep
The Cutest DIY Mother’s Day Gift Ever: A Kid’s Handprint Flower Mug
How to Make a Shrinky Dinks Flower Handprint Keychain for Mother’s Day
Salt Dough Flower Magnets: The Cutest Mother’s Day Gift Kids Can Actually Make
5 Heartwarming Mother’s Day Craft Ideas Grandma Will Absolutely Treasure