
Forget the store-bought card. This adorable paper flower pot craft is the gift that makes moms and grandmas tear up – in the best way possible.
Here’s the thing about fresh flowers: they’re gorgeous for about a week, and then you’re watching them slowly droop on the counter feeling vaguely guilty. This Mother’s Day flower pot craft? It stays beautiful forever – and it comes with a sweet hidden message inside that Mom won’t discover until she unties the bow.
Whether you’re a parent setting this up at the kitchen table or a teacher organizing it as a classroom project, this craft is the sweet spot: simple enough for little hands, special enough to make Mom (or Grandma!) genuinely emotional. I’ve seen kids as young as five put these together with just a little guidance – and the look on Mom’s face when she opens that card? Completely priceless.
Best for: Kids ages 4 and up, classroom crafts, home projects, Mother’s Day, Grandparent gifts
Time to Make: 30 – 45 minutes
Difficulty: Easy – great for kids with adult guidance

What You’ll Need
Brown kraft cardstock (8.5″ x 11″) – this becomes your flower pot card
Colored cardstock in red, pink, or purple (8.5″ x 11″) – for the tulip petals
White cardstock (8.5″ x 11″) – for the message tag
Green craft sticks (pre-painted, or plain wood sticks you paint green) – the flower stems
Elmer’s Extra Strength glue stick or Tacky Glue
3/8″ ribbon – about 26 inches per card (pink, red, or white all look adorable)
Hole punch
Scissors
Markers – for the personal message inside
🌿 Pro Tip for Teachers: If you’re making these as a class project, prep the flower pot shapes and petal cutouts in advance. Set up an assembly-line station so kids can jump straight to the fun folding and gluing steps – it keeps things moving and mess at a minimum!


How to Make the Mother’s Day Flower Pot Craft – Step by Step
Step 1: Cut Out All Your Shapes
You’ll need three shapes from your cardstock: a flower pot shape from the brown kraft paper, teardrop-shaped petals (nine per card) from your colored paper, and a small rectangular tag from white cardstock.
To make the flower pot, draw or trace a simple pot shape – a trapezoid body with a wider rectangular rim across the top – onto the brown kraft paper and cut it out. You’ll make two identical pots (front and back of the card), so cut them at the same time by folding the paper in half before cutting. For the petals, draw nine teardrop shapes roughly 3–4 inches tall onto your colored cardstock and cut them all out.
✂️ Pro Tip: Stack two or three sheets of colored paper and cut multiple petals at once. Nine petals per card adds up fast – this shortcut is a game-changer if you’re making more than one!

Step 2: Fold the Pot to Create Your Card
Take your two flower pot shapes and place them back-to-back, then fold along the center to create a card that opens and closes. The front of the card will eventually show the “Happy Mother’s Day!” tag, and the inside will hold your personal message. Set this aside for now.
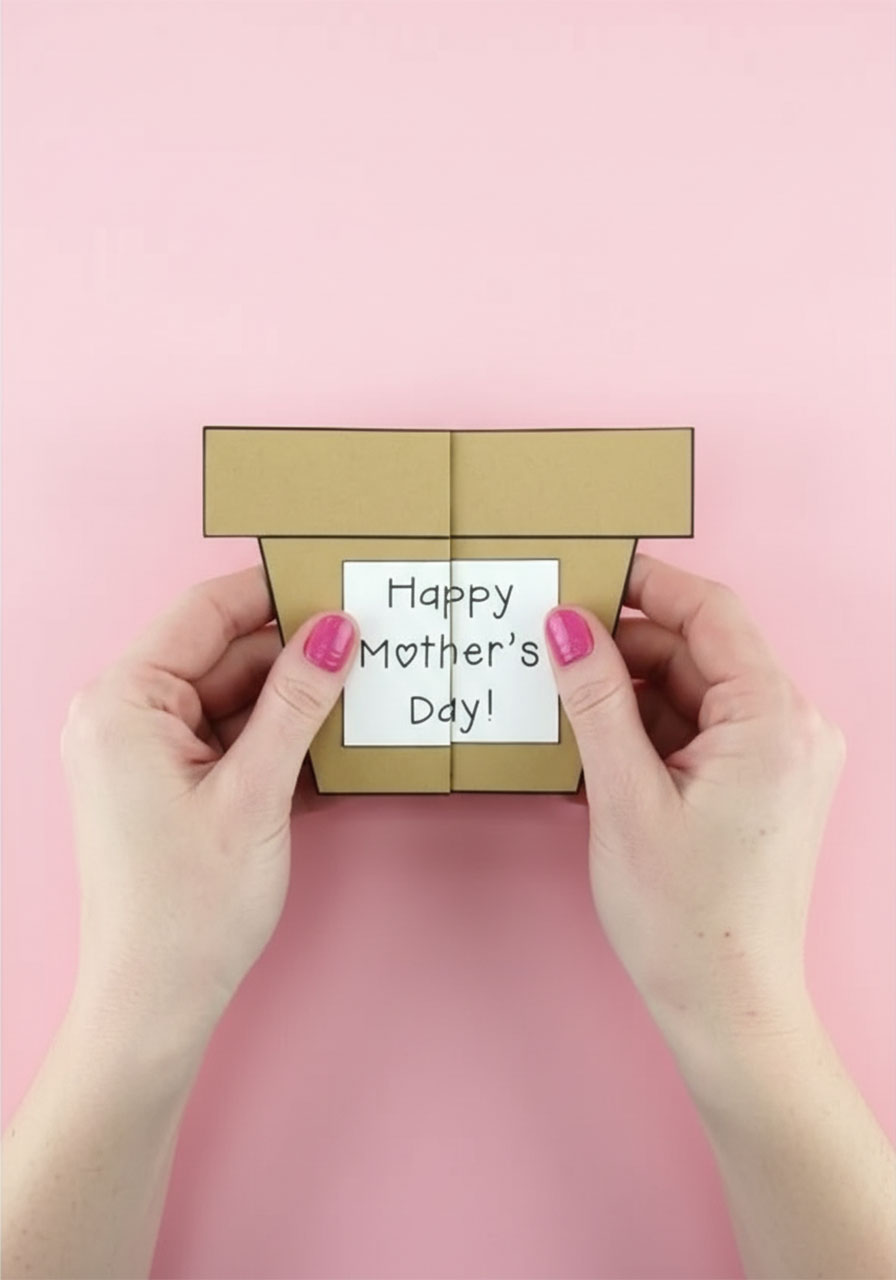
Step 3: Attach the Tag to the Front
Write or stamp “Happy Mother’s Day!” on your white cardstock tag, then glue it to the front of the flower pot card, centered in the lower half of the pot shape. This is the face of your gift – make it neat and cheerful!
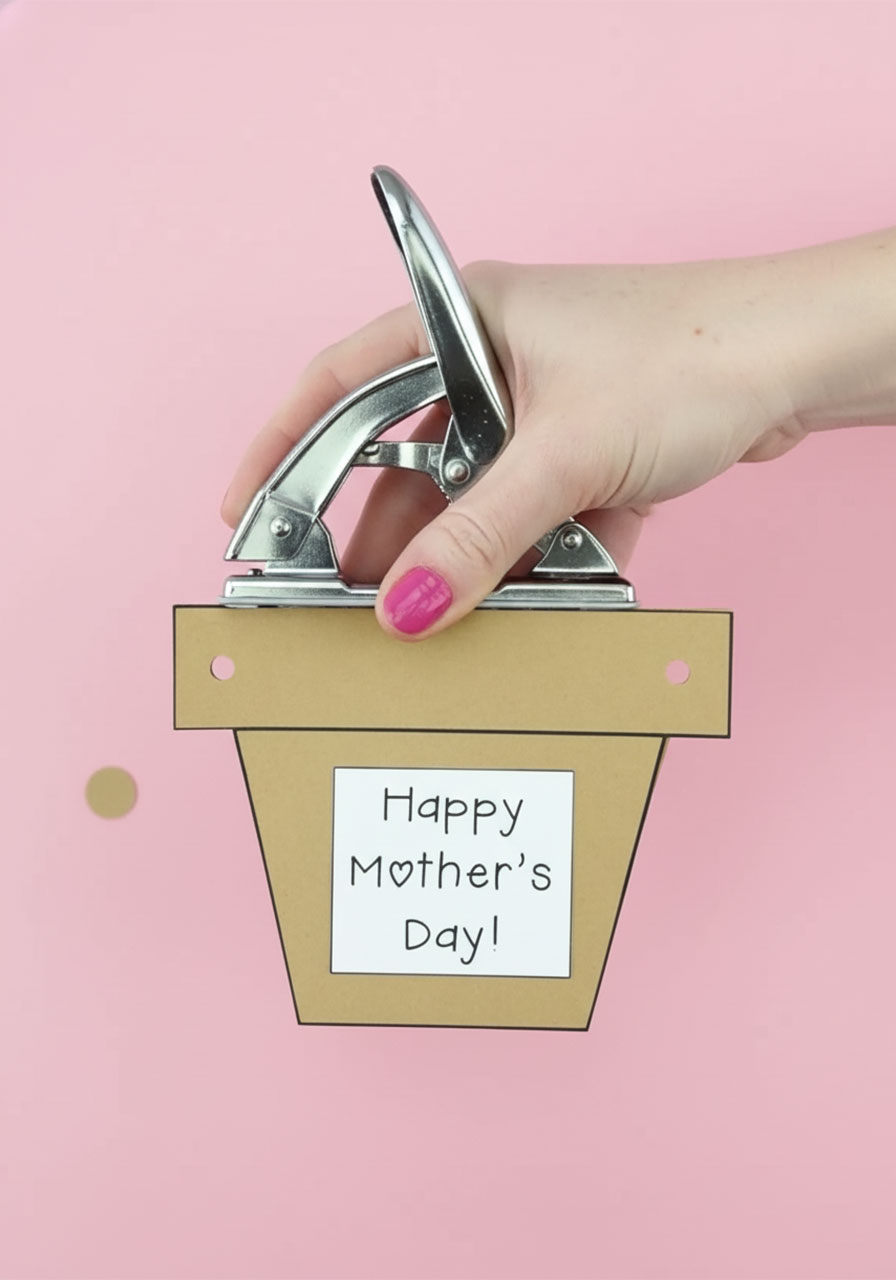
Step 4: Punch the Ribbon Holes
Using your hole punch, punch one hole on each side of the flower pot rim (the wide rectangular strip at the top of the pot). These two holes are where your ribbon will thread through to hold the card closed – so make sure they’re evenly placed, one on the left side and one on the right side of the rim.
Step 5: Build Your Tulip Flowers
This is the step kids absolutely love – and it’s easier than it looks! Here’s how each tulip comes together:
1. Take one petal and leave it flat (this is the back petal).
2. Fold two more petals in half lengthwise, so they form a “wing” shape.
3. Add glue to the left and right edges of your flat petal.
4. Press one folded petal onto each glued edge, with the folds facing toward each other in the middle – this creates a realistic 3D tulip bloom!
5. Repeat to make three tulips total.
🌸 Fun Variation: Mix two colors of petals to make bi-color tulips – a pink back petal with purple folded sides looks absolutely stunning and gives the bouquet a more “florist” feel!

Step 6: Attach the Tulips to Their Stems
Add a dab of glue to the top of each green craft stick, then press a tulip bloom onto it firmly. Hold for 10–15 seconds until it sets. Let all three dry completely before moving to the next step – if you rush this part, the flowers will flop over when you stand the card up.
💡 Pro Tip: Don’t have green craft sticks? No problem! Grab plain wooden craft sticks and paint them green. Let them dry fully before gluing on the flowers.
Step 7: Glue the Flowers Inside the Card
Open the flower pot card flat. Apply glue to the back (the craft stick side) of each flower stem. Position the three flower stems inside the card so that the stems point down toward the bottom of the pot and the blooms peek up above the rim. Press firmly and let dry.
When the card is closed, the stems should be hidden inside – and when Mom opens it, three beautiful paper tulips spring up out of the pot like a real bouquet. It’s genuinely magical to watch.

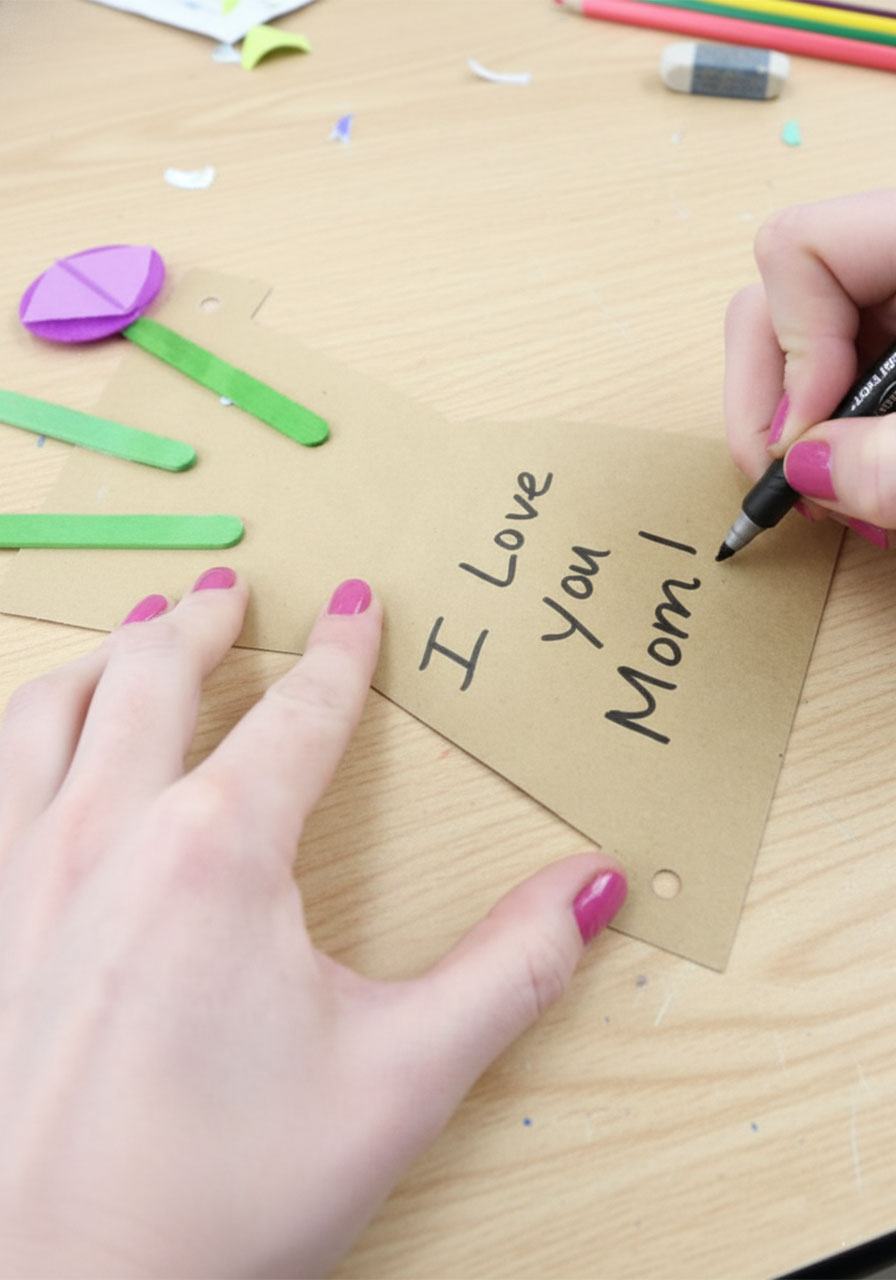
Step 8: Write a Personal Message Inside
Open the card and use a marker to write a heartfelt message on the inside bottom of the pot – right below where the stems are glued. “I love you, Mom!” is a classic, but encourage kids to write something personal. Even a wobbly “You’re the best Mommy” in a five-year-old’s handwriting will make Mom cry happy tears every single time.
Step 9: Thread the Ribbon and Tie the Bow
Close the card. Cut a 26-inch length of ribbon. Thread one end through the left hole in the pot rim, from the back to the front, and thread the other end through the right hole the same way. Pull both ends to the front and tie them together in a big, beautiful bow across the front of the pot rim.
This ribbon bow does double duty – it keeps the card closed so the surprise inside stays hidden, AND it makes the finished craft look like a wrapped gift. So cute!

Your Flower Pot Card Is Ready to Gift! 🌷
When it’s time to give the gift, coach your little one to tell Mom or Grandma: “You have to untie the bow first!” Watching her face light up as she opens the pot and finds both the tulips AND the hidden message inside is the whole point – and trust me, that moment does not disappoint.
These cards look absolutely stunning displayed on a shelf or windowsill long after Mother’s Day is over. Mom won’t want to tuck this one into a drawer – it’s too pretty to hide.

🎨 More Fun Variations:
Father’s Day version: Swap the colors to blue and yellow, change the tag to “Happy Father’s Day!” and you’ve got an equally adorable dad gift.
Grandparent’s Day: Have kids make one for Grandma AND Grandpa – a matching set looks gorgeous together.
Classroom gift exchange: Make a batch in three different colors (red, pink, purple) so each child’s card is uniquely theirs.
With this flower pot craft in your back pocket, you’ve got a Mother’s Day gift that’s personal, beautiful, and completely from the heart – exactly the kind of thing that ends up on the mantle for years. Because the best gifts aren’t bought; they’re made with tiny hands and a whole lot of love.
More Mother’s Day Ideas to Keep the Fun Rolling:
30+ Mother’s Day Crafts for Kids of All Ages
Easy Coffee Filter Flowers – The Prettiest Mother’s Day Craft for Kids and Classrooms
Mother’s Day Flower Pot Craft: The Cutest Preschool Gift Mom Will Actually Keep
The Cutest DIY Mother’s Day Gift Ever: A Kid’s Handprint Flower Mug
How to Make a Shrinky Dinks Flower Handprint Keychain for Mother’s Day
Salt Dough Flower Magnets: The Cutest Mother’s Day Gift Kids Can Actually Make
5 Heartwarming Mother’s Day Craft Ideas Grandma Will Absolutely Treasure