
Craft · Father’s Day · Kids Activities · Under 30 Minutes
⚾ Why you’ll love this craft: This isn’t just a card – it’s a pop-up keepsake with a secret photo reveal that’ll make Dad’s jaw drop. Kids do most of the work, and it takes under 30 minutes. That’s a win-win.
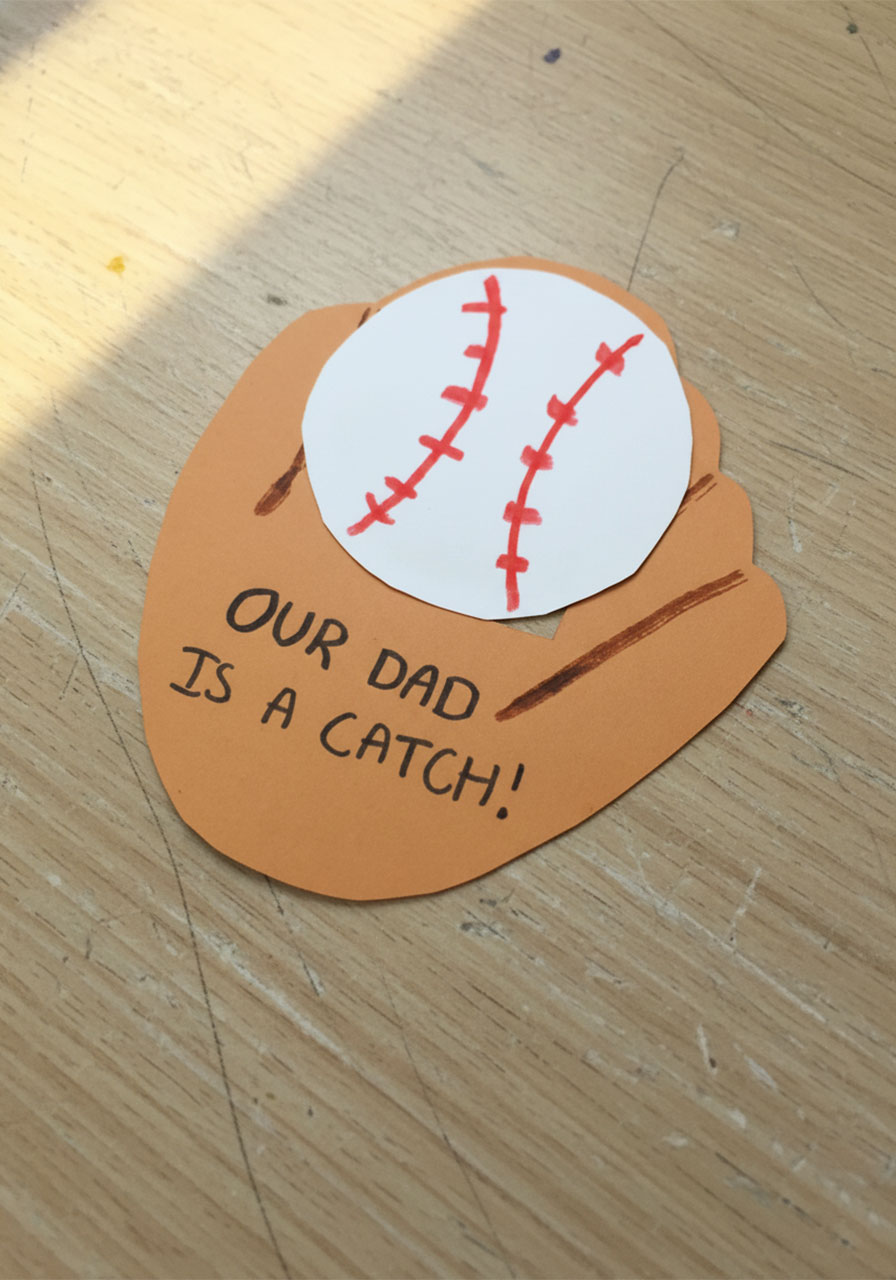
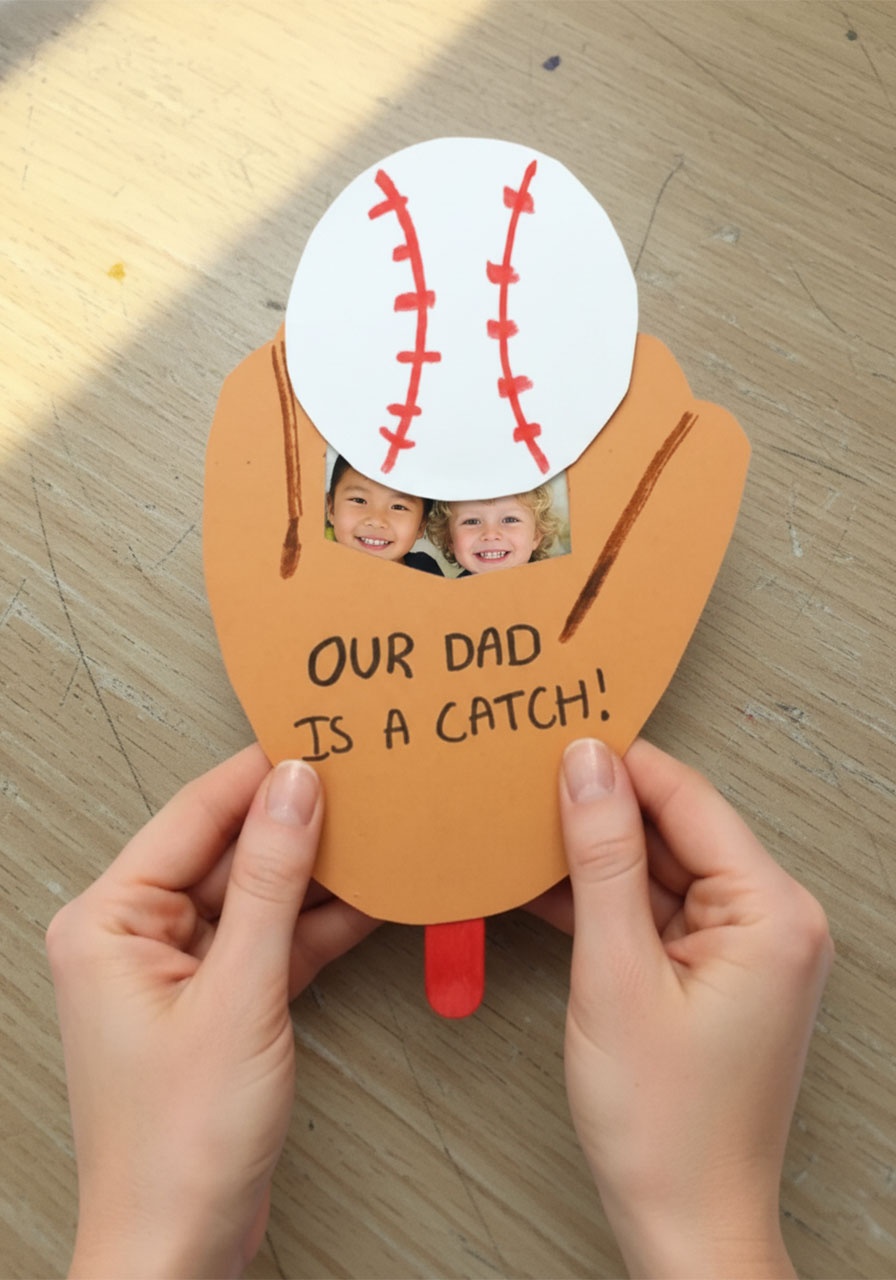
Still searching for a Father’s Day gift that feels personal, looks impressive, and won’t eat up your whole weekend? This baseball glove pop-up card is exactly that – and then some. Push the craft stick up, and a hidden photo of the kids pops out like a ball launching out of a glove. Dad will absolutely love it.
Whether your kids are in preschool or middle school, this is a craft they can genuinely be proud of. And the best part? It doubles as a displayable keepsake Dad will actually keep on his desk (not hide in a drawer).
Bonus: This works just as well as a birthday card for any baseball-loving dad, coach, or grandpa in your life!
What Makes This Card So Special
Most handmade cards get one look and end up in a pile. This one gets played with. The pop-up mechanism – a craft stick that slides through a slit in the glove – hides your child’s photo behind a baseball until Dad pushes it up. The reaction when he realizes the baseball is actually a frame for a photo of his favorite people? Priceless every single time.
It’s interactive, personal, and completely kid-made. Teachers love this one for classroom Father’s Day projects too – it’s easy to scale for a whole class and uses supplies most craft closets already have.
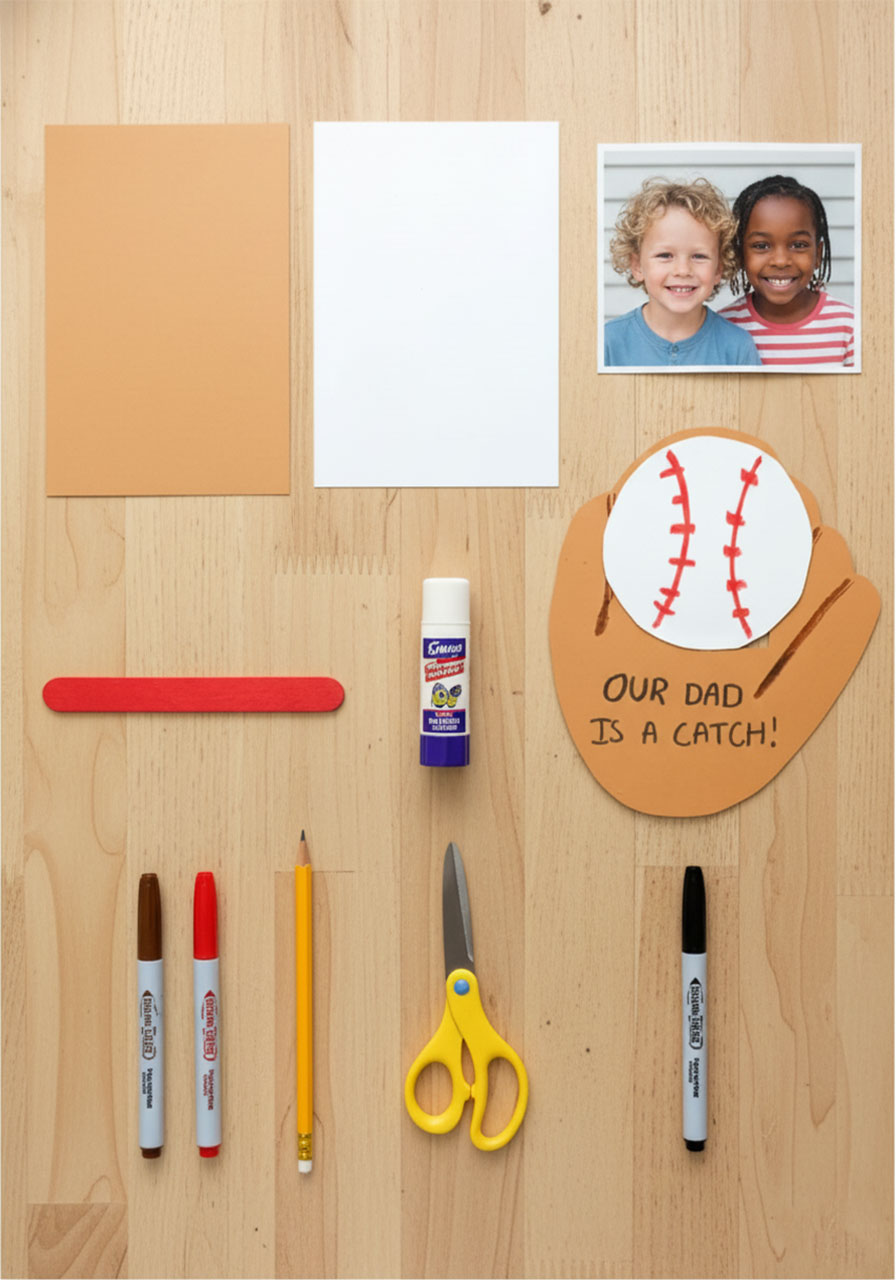
🛒 What You’ll Need
Our printable baseball glove pattern (see below)
Brown card stock (for the glove)
White card stock (for the baseball)
1 jumbo wooden craft stick
A printed photo of your child or children
Glue stick
Scissors
Paint markers or markers in red and brown
Pencil
💡 Teacher Tip: For classroom use, print the pattern in bulk ahead of time and pre-cut the glove shapes for younger kids. Let them focus on the fun part – decorating and assembling!

How to Make It: Step-by-Step Instructions
Step 1 – Print & Cut Your Pattern
Download and print the baseball glove pattern. Trace the pieces onto your card stock – brown for the glove body, white for the baseball circle – and cut them out carefully. The pattern includes a stopper tab too, so don’t skip that piece!
Step 2 – Cut the Photo Slit
Use scissors to cut a horizontal slit across the middle of the glove, right where the dotted line is marked on the pattern. This is the slot your craft stick and photo will slide through, so make sure it’s wide enough to move smoothly – but not so wide that it’s loose.
💡 Pro Tip: Use a craft knife or pointed scissors for a clean, straight slit. A jagged opening makes the pop-up harder to slide and less polished-looking.
Step 3 – Decorate the Glove & Baseball
Now comes the fun part! Let your kids draw the baseball’s signature red stitching lines on the white circle. On the glove, add brown marker details like finger lines and pocket shading to make it look realistic.
Write a fun message on the front of the glove – “Our Dad Is a Catch!” is an all-time crowd-pleaser, but get creative. “World’s Best Coach,” “You’re a Grand Slam, Dad!” – anything goes!
💡 Teacher Tip: For younger kids, pre-draw the stitching lines lightly in pencil and let them trace over with red marker. It keeps the craft looking clean even with little hands.
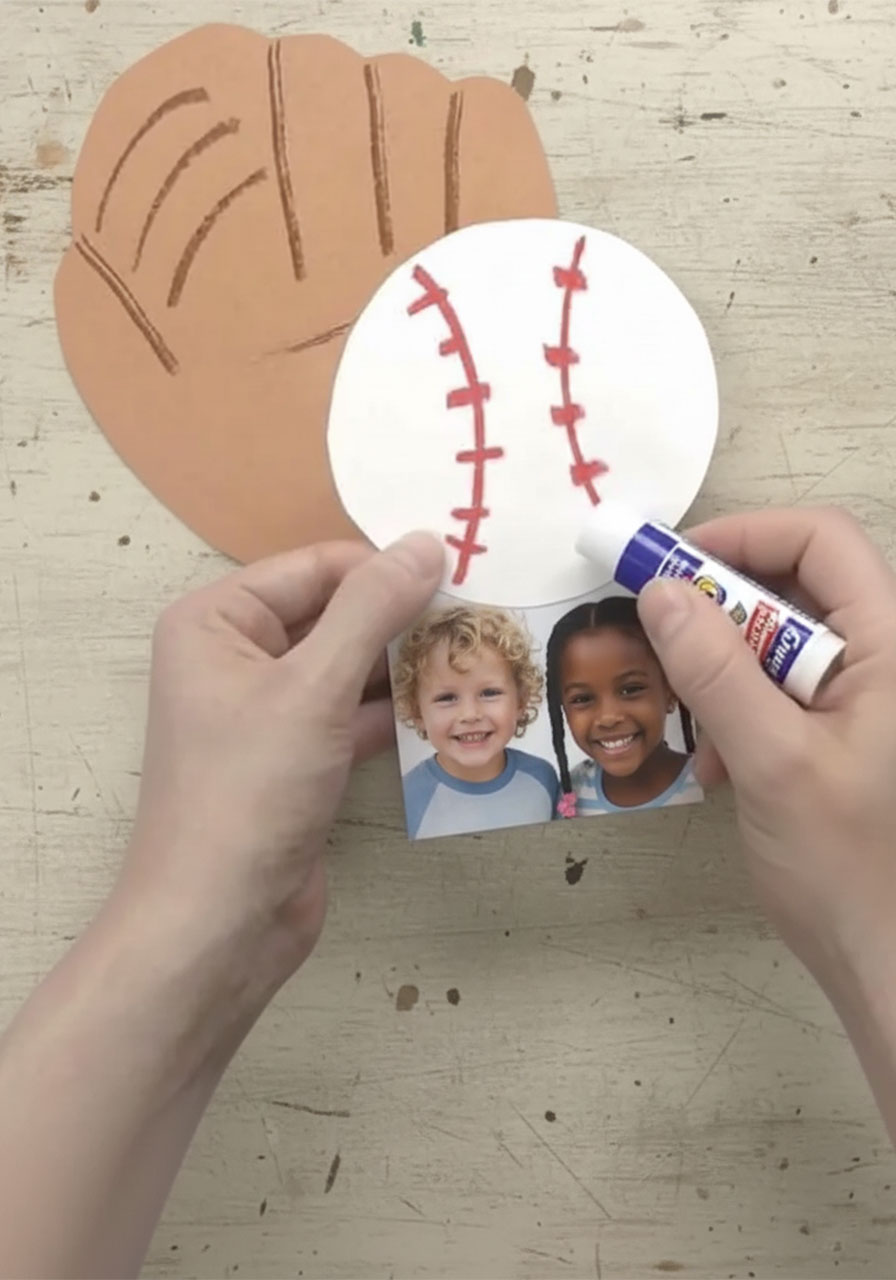
Step 4 – Prep the Photo Pop-Up
Trim your photo so it’s slightly narrower than the baseball circle. Then glue the top edge of the photo to the bottom edge of the baseball, so the baseball overlaps the front of the photo by about ¼ to ½ inch. This is your reveal mechanism – the baseball “hides” the faces until Dad pushes it up.
Step 5 – Attach the Craft Stick
Flip the baseball-and-photo piece over. Apply glue down the back of the photo, then press the jumbo craft stick firmly against it – centered, running vertically. Leave about 2 inches of the stick poking out below the photo. Let it dry completely before the next step.
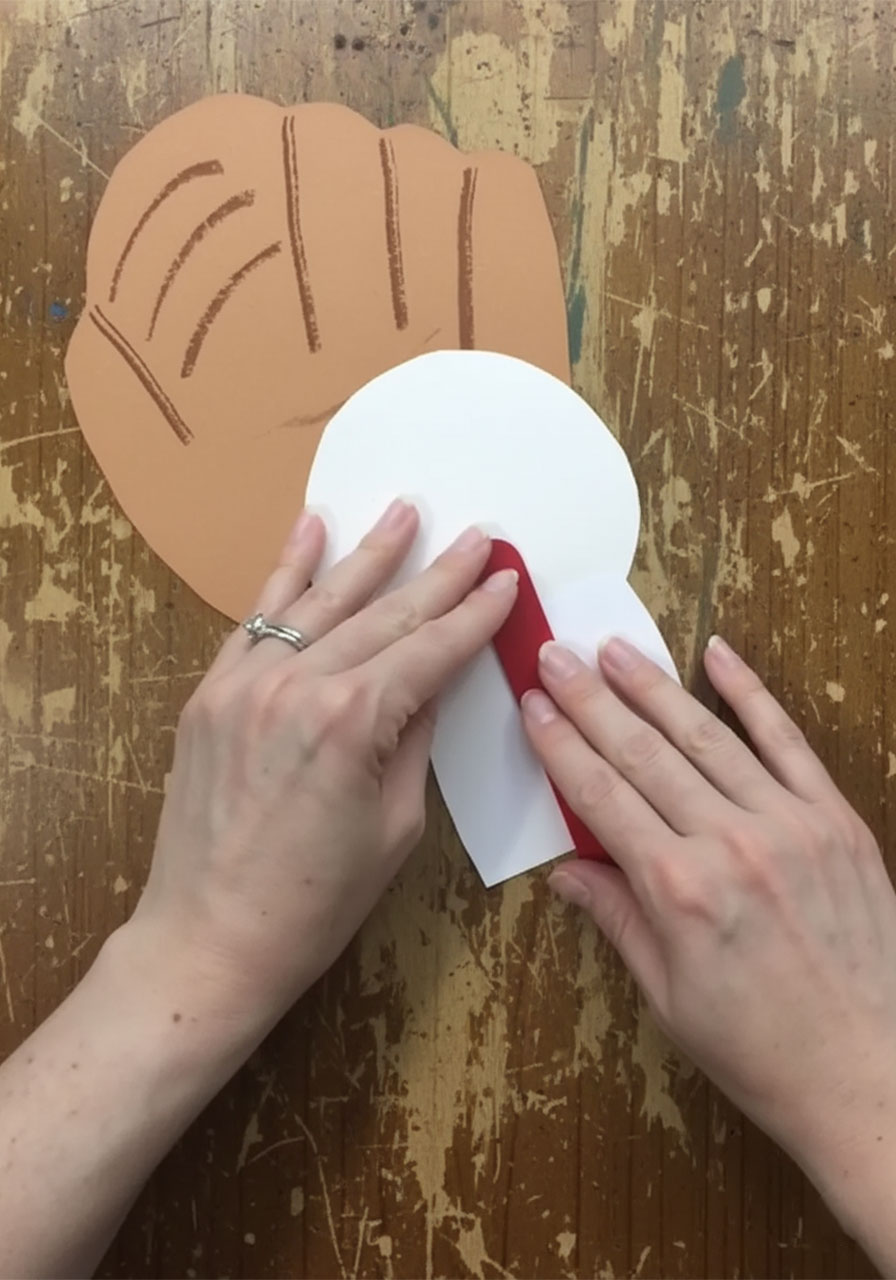
Step 6 – Thread It Through the Glove
Slide the craft stick up through the slit in the glove from the back. The baseball should sit nicely in the pocket of the glove, hiding the photo underneath. The stick should poke out the bottom of the card.
Step 7 – Secure the Stopper Tab
Flip the whole card over to the back. You’ll see the photo sitting in the slit. Glue the small stopper tab horizontally across the bottom edges of the back of the photo. This little tab is what keeps the pop-up from sliding all the way out when Dad pulls the stick – so don’t skip it!
Let the glue dry fully, then flip back to the front.
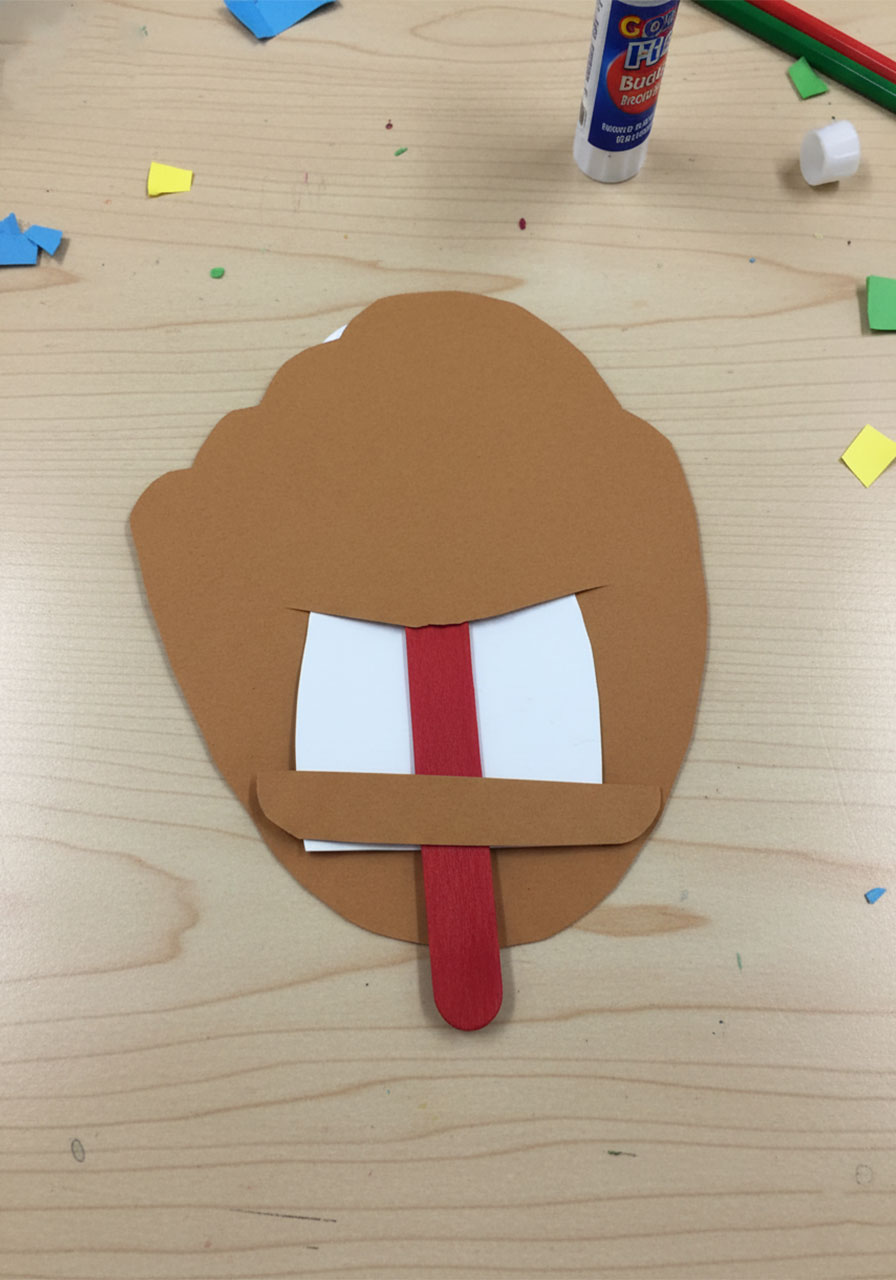
Step 8 – Final Touches
Add any finishing touches to the front – more color, extra detail, a handwritten message. Then you’re done! When Dad pushes the craft stick up from the bottom, the baseball rises up… and his kids’ smiling faces appear. Cue the happy tears.
How to Use This in the Classroom
This craft is a classroom favorite for a reason – it’s structured enough to manage with a big group, but creative enough that every card looks unique. Here’s how to make it run smoothly:
Pre-cut the glove shapes before class for K–2 students to save time and frustration.
Send a note home a week early asking parents to send in a printed 4×4″ photo of their child for the pop-up.
Use a center rotation system – one station for cutting, one for decorating, one for assembly – to keep things organized.
Display the finished cards before sending them home to celebrate the kids’ work!
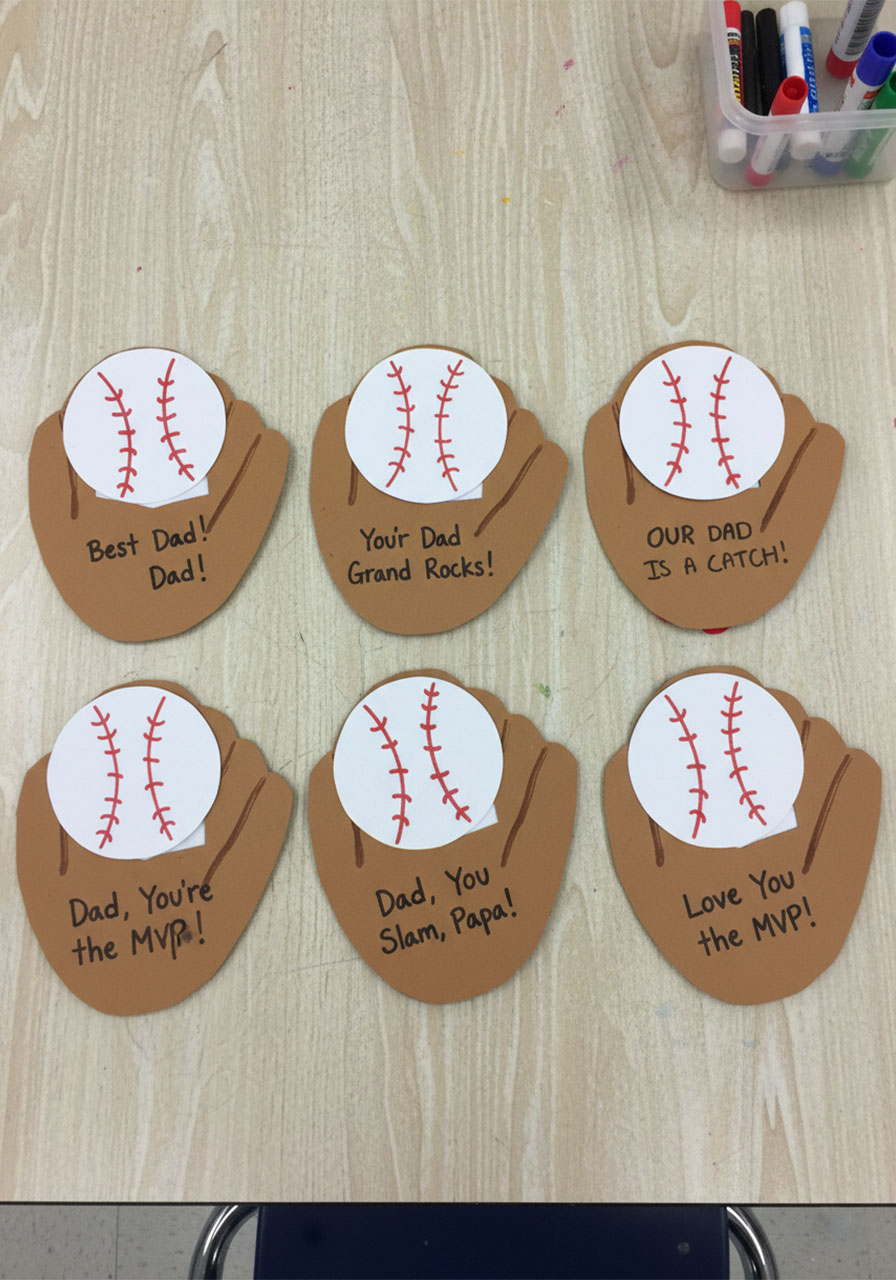
⚾ Fun Variation – Team Colors! Does Dad root hard for a specific team? Swap the generic brown card stock for card stock in his team’s colors and decorate the baseball with the team logo. Suddenly this goes from cute craft to ultimate fan gift.
Frequently Asked Questions
What age is this craft appropriate for?
This works well for kids ages 4 and up with adult help on the cutting steps. Kids 7+ can complete most of it independently. The assembly is satisfying and not too fiddly – even impatient little crafters will stay engaged.
Can I use a regular photo printer for the photo?
Yes! A standard 4×6″ print from a home printer or photo kiosk works perfectly. Just trim it down to fit slightly narrower than your baseball circle before gluing.
What if I don’t have a jumbo craft stick?
A regular popsicle stick works in a pinch – just note it’s narrower, so the pop-up won’t feel as sturdy. You could also use a folded strip of card stock as a DIY handle.
Can this be made the night before Father’s Day?
Absolutely – it takes about 30 minutes from start to finish. Just make sure to let the glue dry fully before handing it over (about 20–30 minutes after assembly).
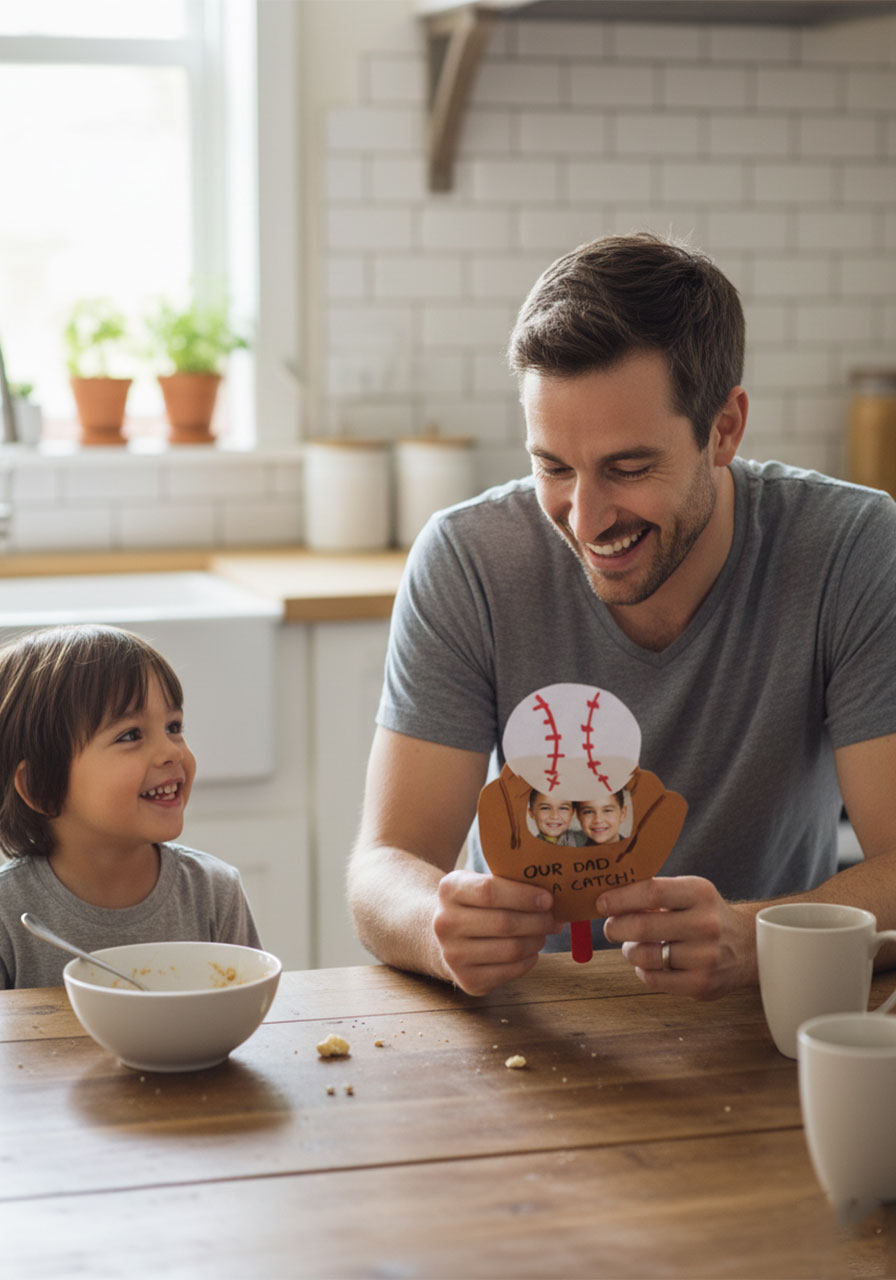
This baseball glove pop-up card is one of those rare crafts that looks like you spent hours on it but actually comes together in under 30 minutes. The interactive photo reveal makes it genuinely fun to give – and even more fun for Dad to show off. Whether it’s sitting on his desk at work or stuck to the fridge at home, this card is going to last way longer than a store-bought one ever would.
Get the printable pattern, gather your supplies, and get ready to knock it out of the park. 🎉
More Father’s Day Ideas to Keep the Fun Rolling:
10 Reasons to Make This Colorful Father’s Day Popsicle Stick Wall Hanging With Your Kids
A “Corny” Father’s Day: How to Make a Pop-Up “Pop-Corn” Card for Dad
How to Make a DIY #1 Dad Award Ribbon for Father’s Day (Kids Will Love This!)
Make Dad Feel Like Royalty: The “Dad, You Are My King!” DIY Pull-String Father’s Day Card
The Cutest 5-Minute Father’s Day Gift Wrap Trick (That Looks Like You Tried Super Hard)
The Cutest Father’s Day Craft Kids Can Make: A Handprint Trophy
