
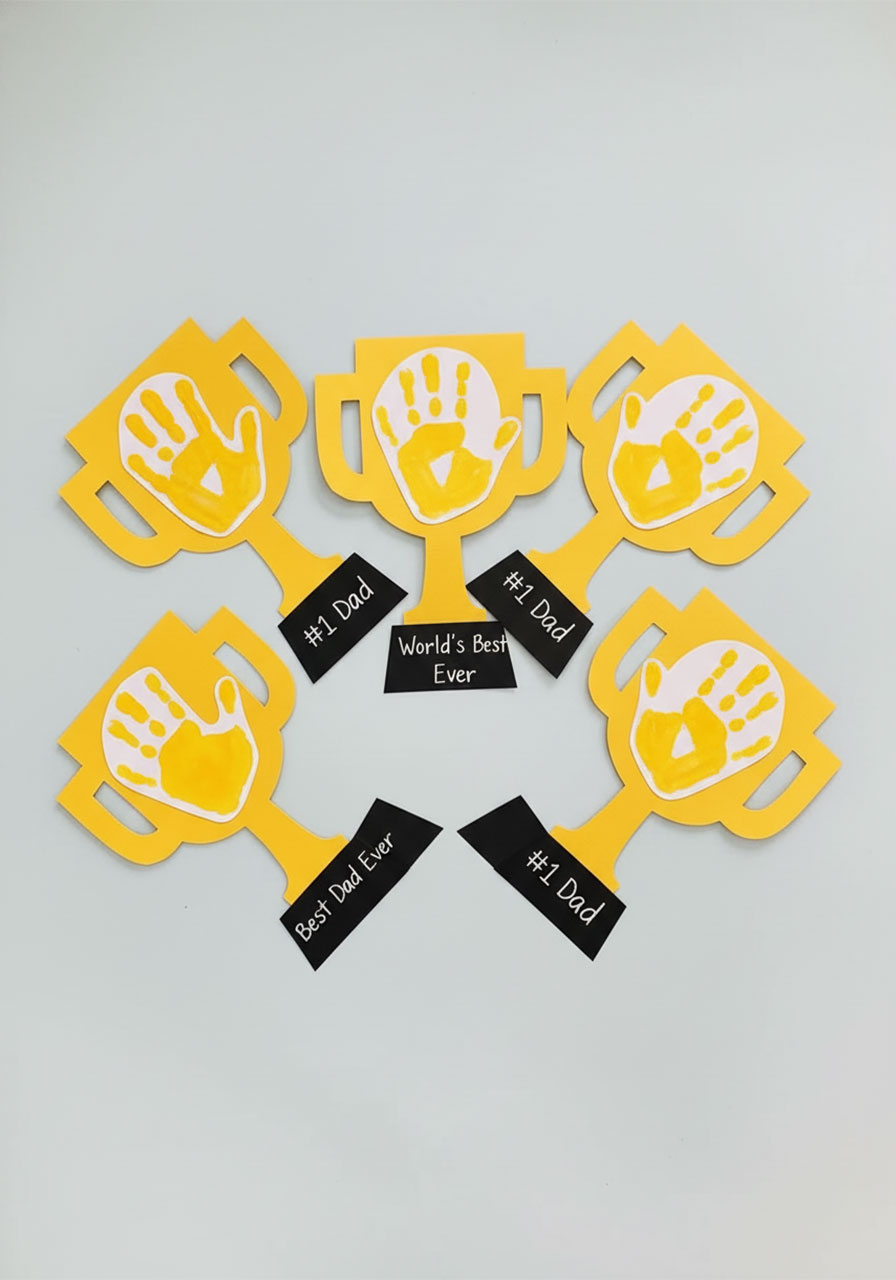
Want a Father’s Day gift that’s equal parts adorable, personal, and ridiculously easy to pull off – even with little ones? This handprint trophy is exactly that. It looks like something you’d frame and keep forever (because, honestly, you will), and the whole thing comes together in under an hour.
The best part? The trophy base is actually a little card that opens up to reveal a secret message inside. Dad, Grandpa, or Uncle will absolutely love it – and your kids will feel like total superstars handing it over.
This works beautifully as a classroom craft or a quick at-home project. Either way, get ready for some serious heart-melting moments.
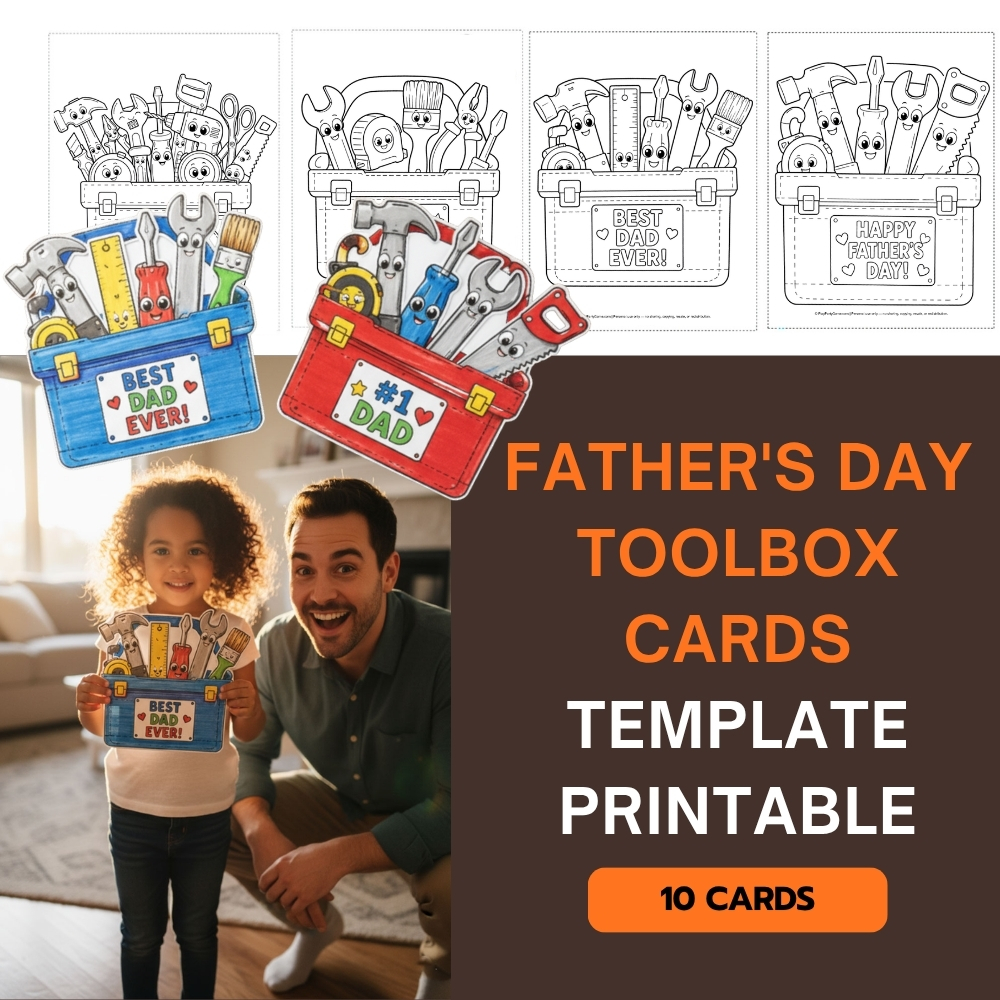
What You’ll Need
Cardstock – yellow (for the trophy), black (for the base/card), and white (for the handprint background)
Yellow non-toxic tempera or acrylic paint
Medium-sized paintbrush
Scissors
Glue stick
White paint pen or white chalk marker – for writing on the black base. A white colored pencil or white crayon works too if that’s what you have on hand.
A pen or marker for writing inside the card
Wet wipes or a small towel nearby (trust us on this one)
No white paint pen? No problem! Just swap the black cardstock base for white cardstock and use a regular black marker instead.

How to Make a Handprint Trophy
Step 1: Make the Handprints
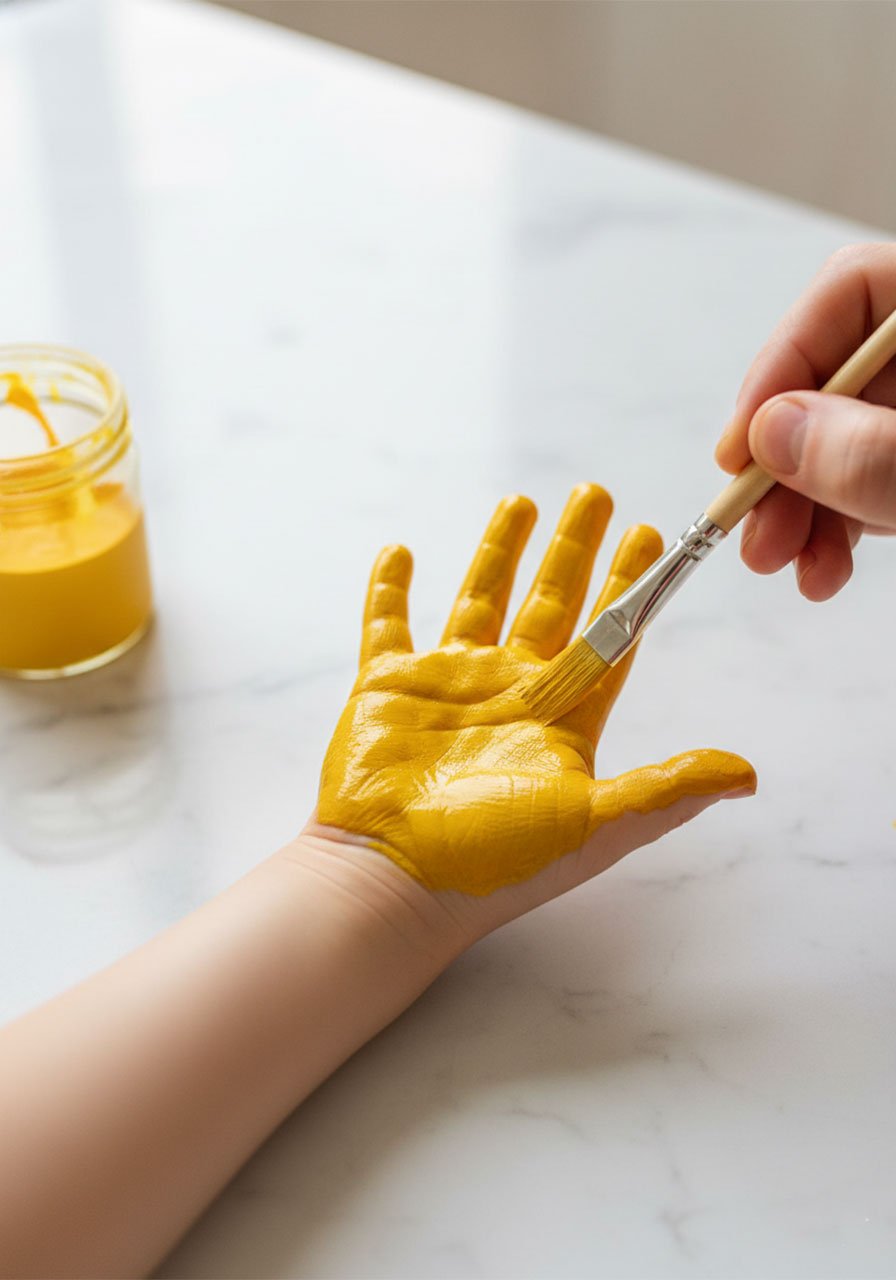
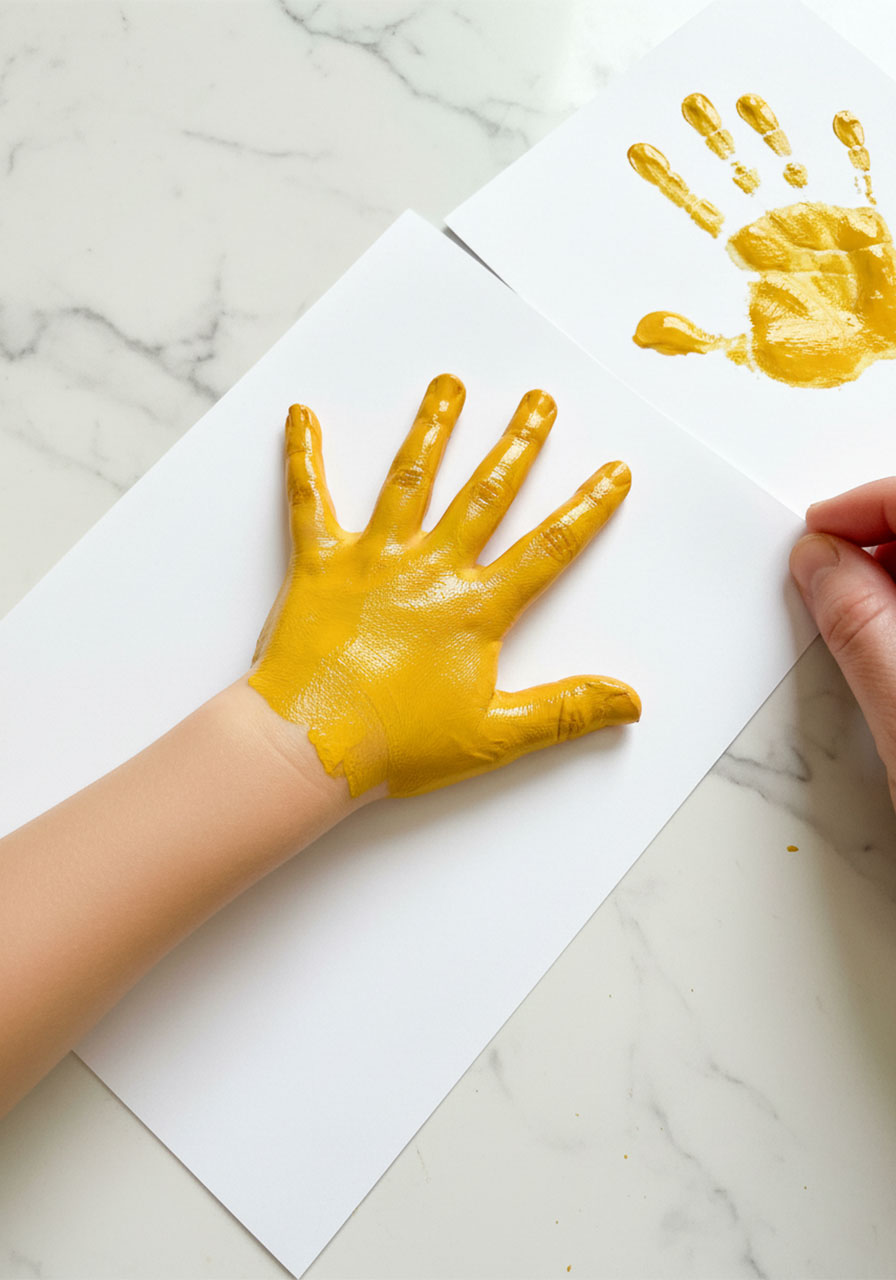
1. Use a paintbrush to apply a generous, even coat of yellow paint to your child’s palm and fingers.
2. Carefully guide their hand down onto a piece of white cardstock, pressing each finger down firmly. Hold it steady for a few seconds before lifting.
3. Gently peel their hand straight up off the paper – don’t drag or you’ll smear it!
4. Repeat to make a few extra prints. It’s always smart to have backups in case one smudges.
5. Wash their hands right away with warm soapy water. Pro move: have a wet wipe ready to get the bulk of the paint off first.
6. Let the handprints dry completely before moving on.
Pro Tip: Make 2–3 handprints right away while the paint is fresh. Drying time is the only wait in this craft, so knocking out extras upfront means you’re not re-painting hands later!
Step 2: Draw and Cut Out the Trophy
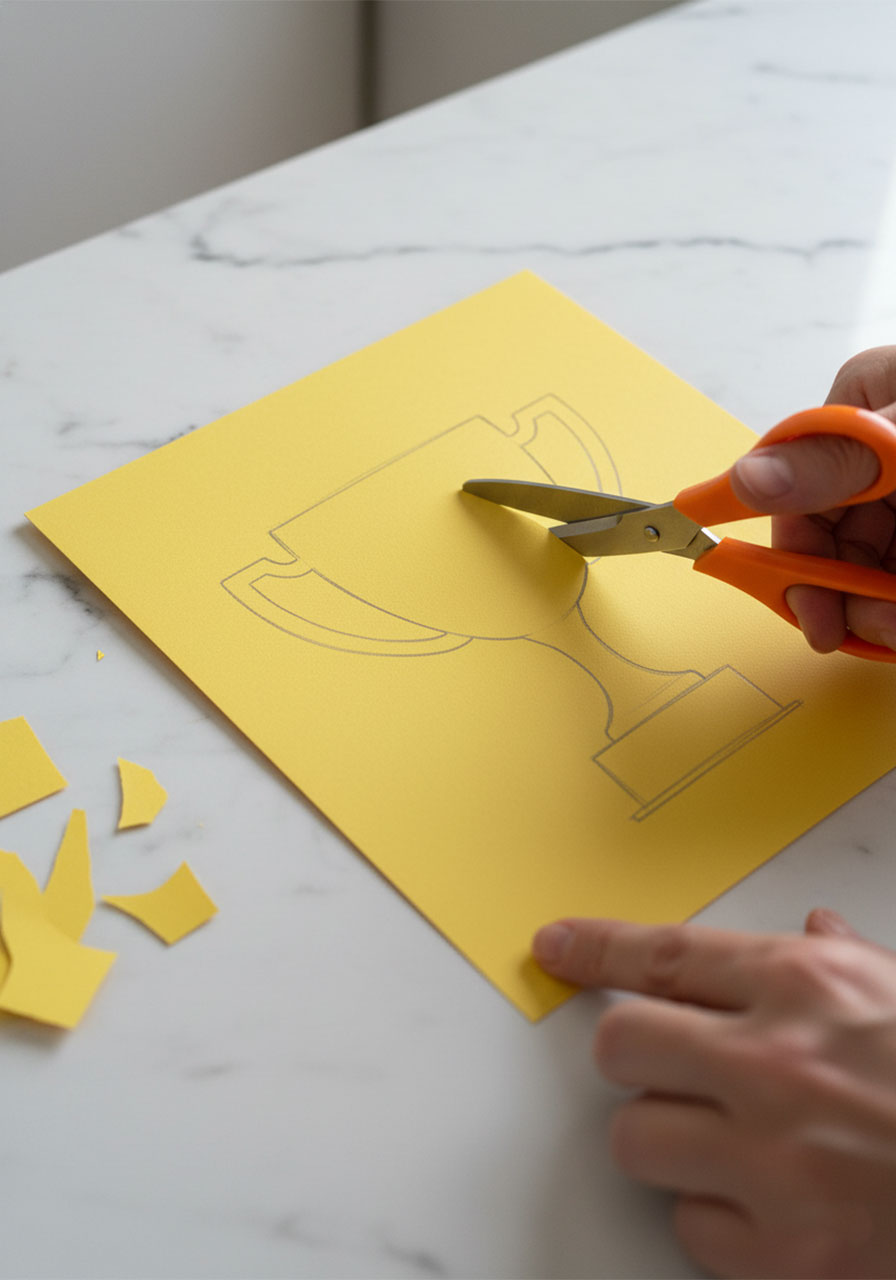
1. Draw a trophy shape onto yellow cardstock. Think classic award trophy: a wide cup at the top, two small handles on the sides, a narrow stem, and a rectangular base at the bottom. Sketch it first in pencil – no pressure to be perfect!
2. Cut out the trophy shape with scissors.
3. To cut out the handle holes: gently fold the paper near the handle area and make a small snip to create an opening, then slip your scissors inside and carefully cut around the handle shape. Take it slow – these tiny curved cuts are the trickiest part!
Size check: Once you’ve drawn your trophy, hold it up next to the dried handprint before cutting. Make sure the handprint will fit comfortably in the cup area between the handles. If you’re working with older kids’ bigger hands, just draw the trophy a bit wider.
Step 3: Cut Out the Handprint
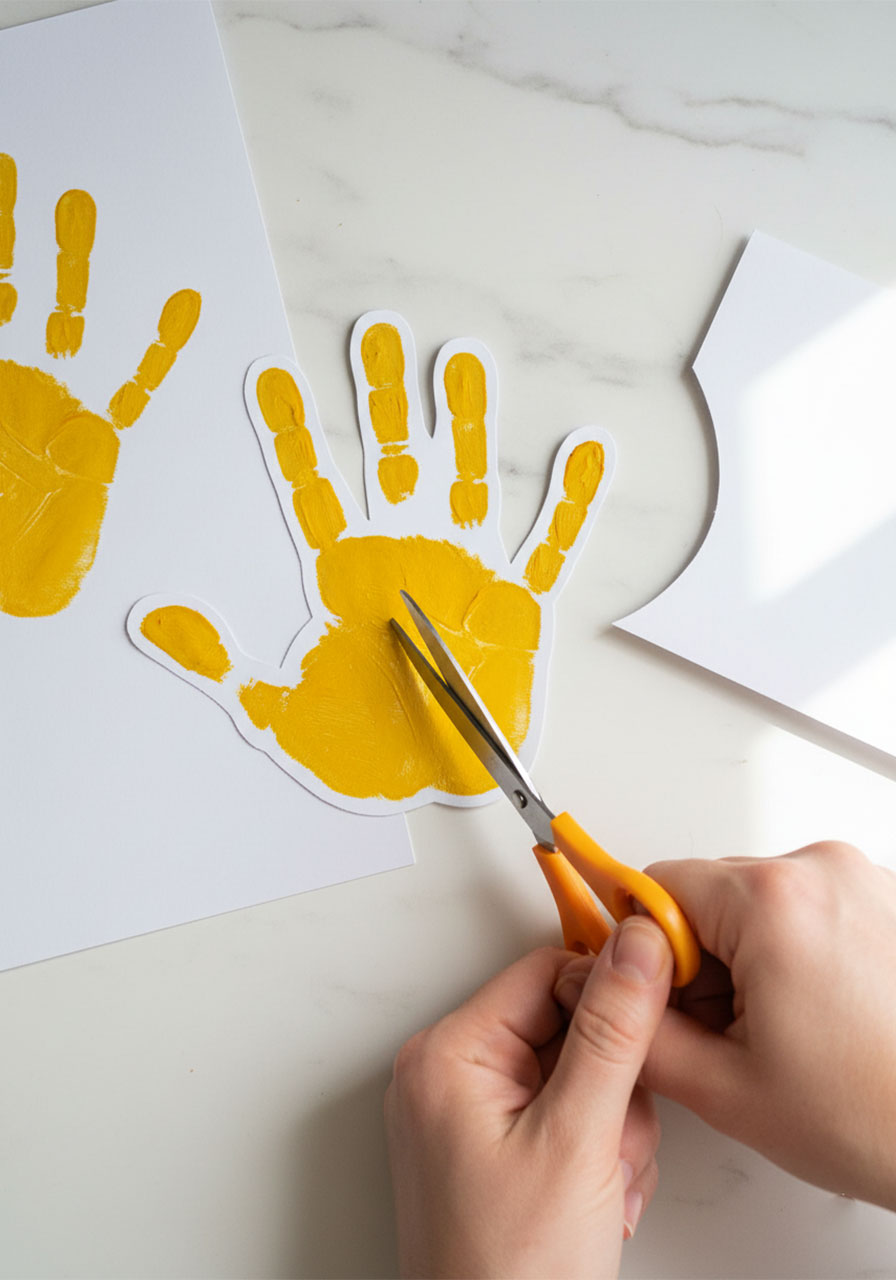
1. Choose your best handprint from the batch.
2. Cut around it carefully, leaving a small white border all the way around – about ¼ inch. That white outline is what makes the handprint pop against the yellow trophy!
Step 4: Glue the Handprint to the Trophy
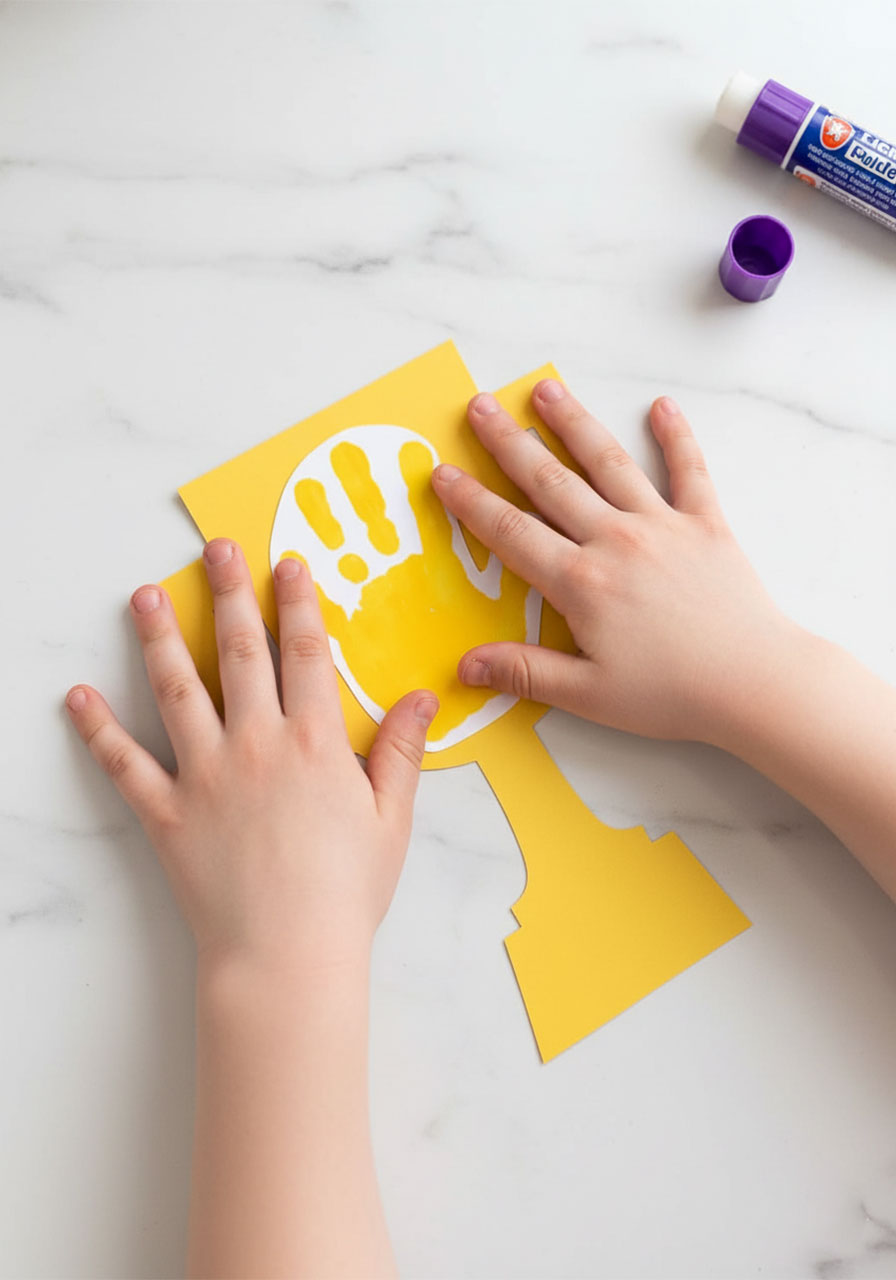
1. Apply glue to the back of the cut-out handprint.
2. Center it on the trophy cup and press down firmly. Hold for a few seconds to make sure it sticks.
Step 5: Make the Trophy Base (the Secret Card!)
This is where it gets really fun. The base isn’t just decoration – it’s a little folding card with a hidden message inside.
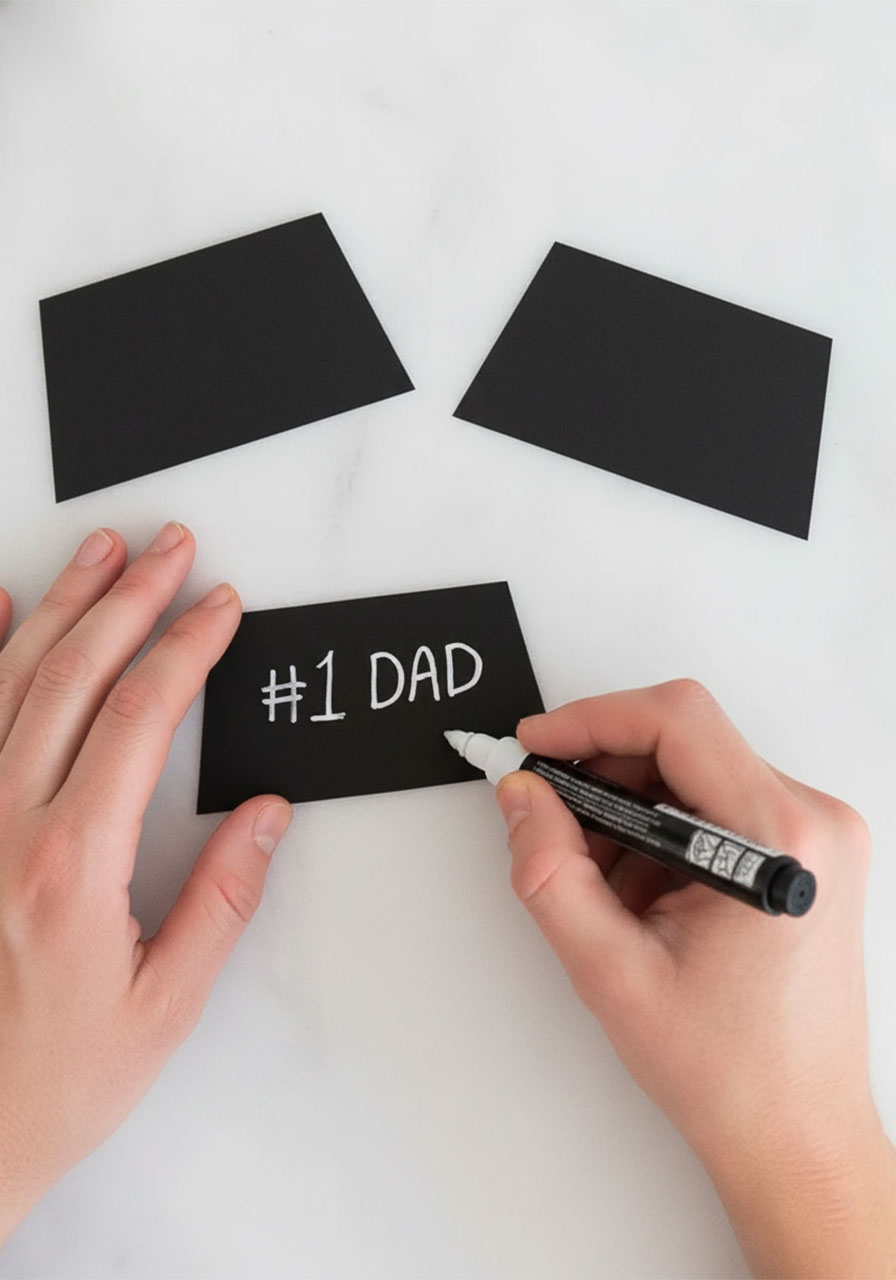
1. Cut two identical trapezoid shapes from black cardstock – wider at the top, slightly narrower at the bottom, like a classic trophy pedestal. Cut both the same size.
2. On one piece (the front), use your white paint pen to write a short, punchy message. Some crowd favorites: #1 Dad, Best Dad Ever, World’s Best Dad.
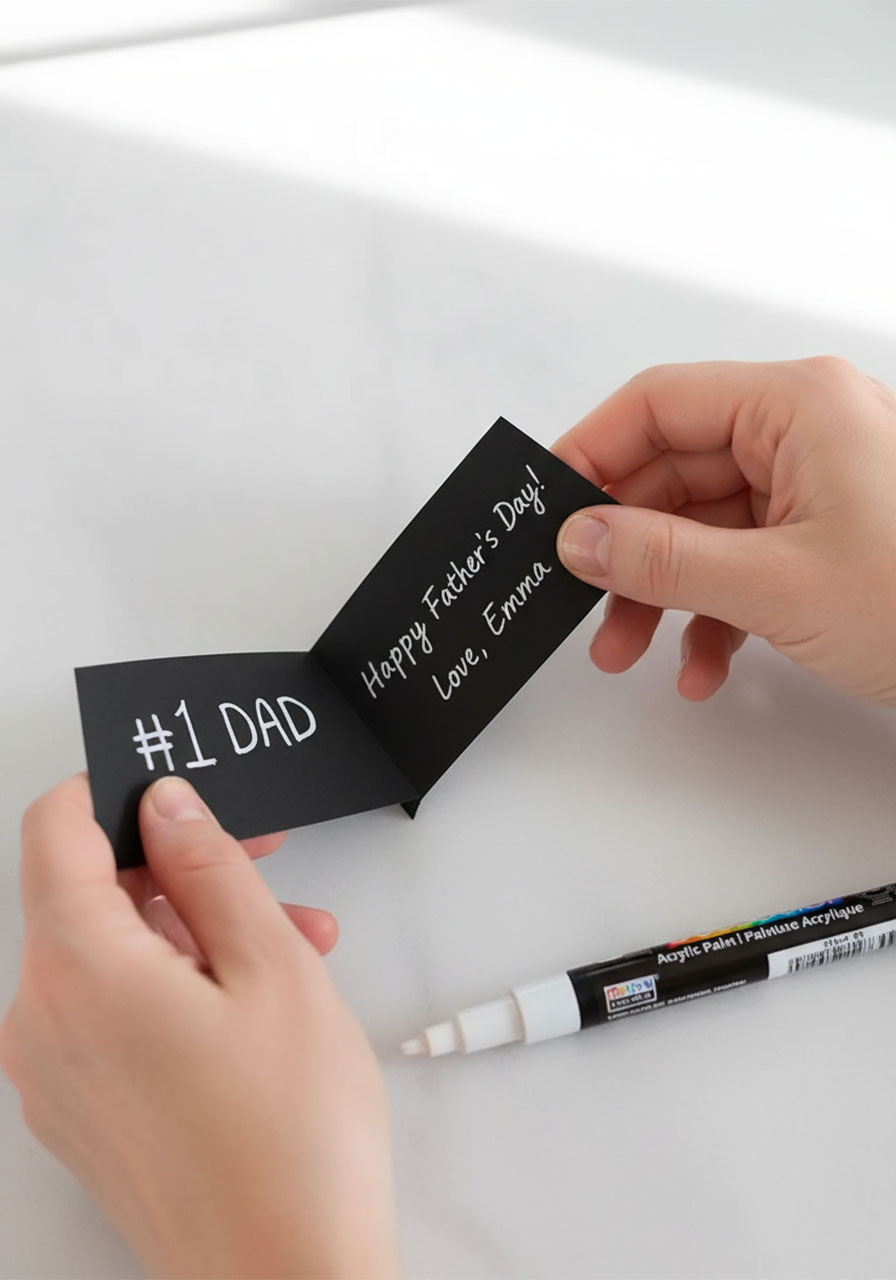
3. Take the blank piece (the inside) and apply a thin line of glue – about ½ inch wide – along the left edge only.
4. Press the front piece on top, aligning the left edges. You’re essentially creating a little book that opens from the right.
5. Once dry, gently fold the card open and crease it so it opens and closes easily.
6. Inside, write a personal Father’s Day message with your pen or marker.
Don’t forget: Write your child’s name and the date somewhere on the craft – either inside the card or on the back of the trophy. These little details are pure gold when you look back at it years from now.
Step 6: Attach the Base to the Trophy
1. Apply glue to the back of the trophy base card.
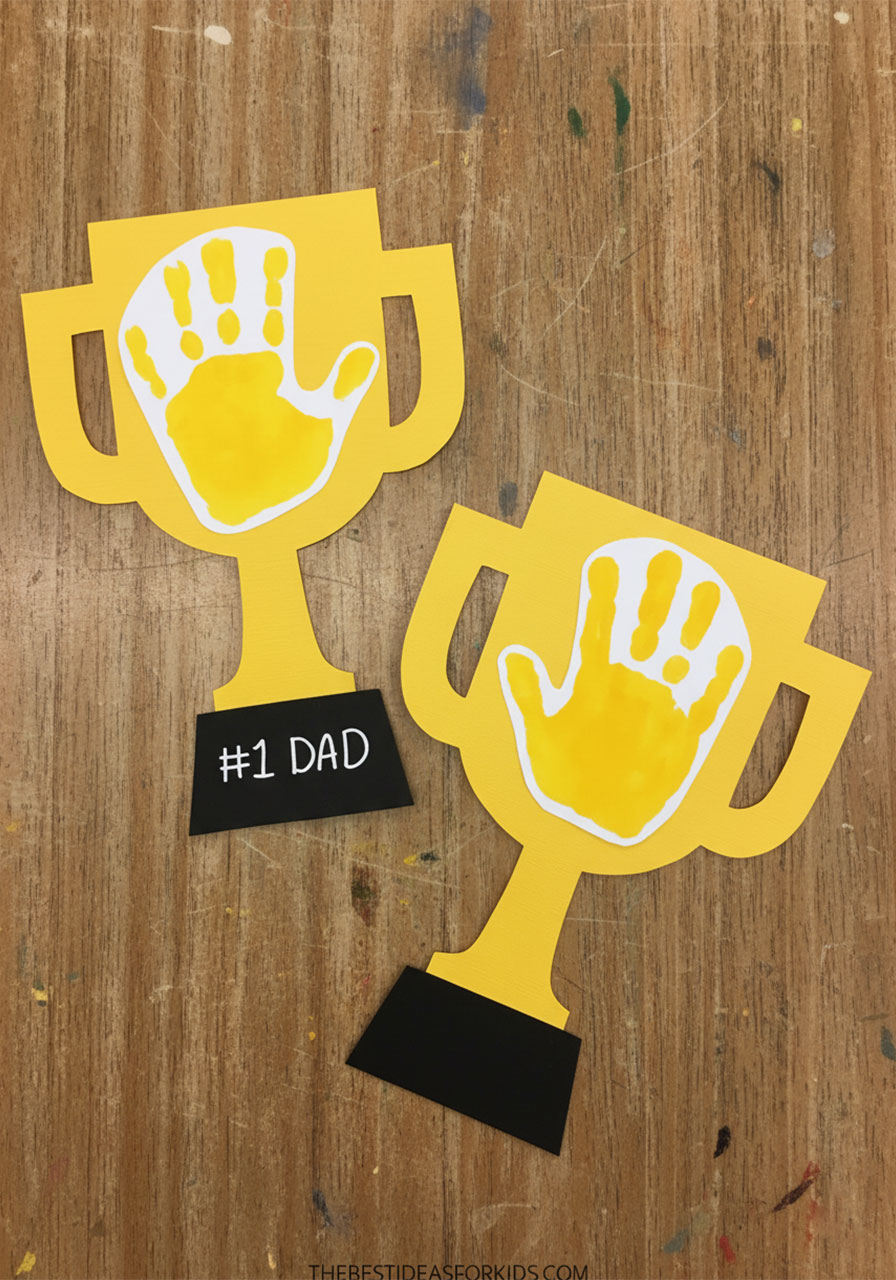
2. Stick it to the bottom of the yellow trophy shape, centered underneath the stem.
3. Press firmly and let it set. Your trophy is complete!
Fun Message Ideas for the Trophy Base
Go beyond the classics and make it personal! Here are some ideas that’ll really make Dad (or Grandpa) laugh:
- #1 Fisherman
- BBQ King
- World’s Best Pasta Sauce Maker
- Champion Bedtime Story Reader
- Best Dance Move Dad
- World’s Best Nap Buddy
- Master of the Grill
The more specific and silly, the more he’ll love it. Think about what Dad is actually known for in your house – that’s your gold right there.
Tips for Teachers & Group Crafts
Doing this as a class project? Here’s how to make it run smoothly with a group:
Set up a “painting station” with one adult managing the handprinting. It goes much faster and cleaner that way.
Do the handprints on Day 1 and let them dry overnight. Cut and assemble on Day 2.
Pre-cut the trophy shapes ahead of time if you’re working with younger kids (Pre-K through 1st grade). Let older kids do their own cutting.
Have each child dictate or write their message for the inside of the card – it makes the keepsake even more meaningful.
Keep a stack of wet wipes at every table. You’ll thank yourself later.
Class variation: Skip the secret card base with very young kids and just glue a simple black rectangle to the bottom. Write the message on the front – done! Simpler but still totally adorable.
Why This Craft Is a Total Winner
This isn’t just a cute project – it’s the kind of gift that actually gets kept. The combination of a child’s handprint (which captures that exact tiny hand at that exact age) plus a personalized message makes it genuinely special, not just another piece of artwork.
Dads, grandpas, and uncles absolutely light up when they open that little card and see the message inside. It’s simple, it’s heartfelt, and it takes almost no supplies. That’s a winning combination every time.
Happy crafting – and Happy Father’s Day! 🏆
More Father’s Day Ideas to Keep the Fun Rolling:
10 Reasons to Make This Colorful Father’s Day Popsicle Stick Wall Hanging With Your Kids
A “Corny” Father’s Day: How to Make a Pop-Up “Pop-Corn” Card for Dad
How to Make a DIY #1 Dad Award Ribbon for Father’s Day (Kids Will Love This!)
Make Dad Feel Like Royalty: The “Dad, You Are My King!” DIY Pull-String Father’s Day Card
The Cutest 5-Minute Father’s Day Gift Wrap Trick (That Looks Like You Tried Super Hard)
Grand Slam Pop-Up: The 3D Baseball Father’s Day Card Your Kids Can Actually Make
