What if we told you that the secret to the most stunning 4th of July kids’ craft is sitting right in your kitchen drawer?
That’s right – a plain old fork.
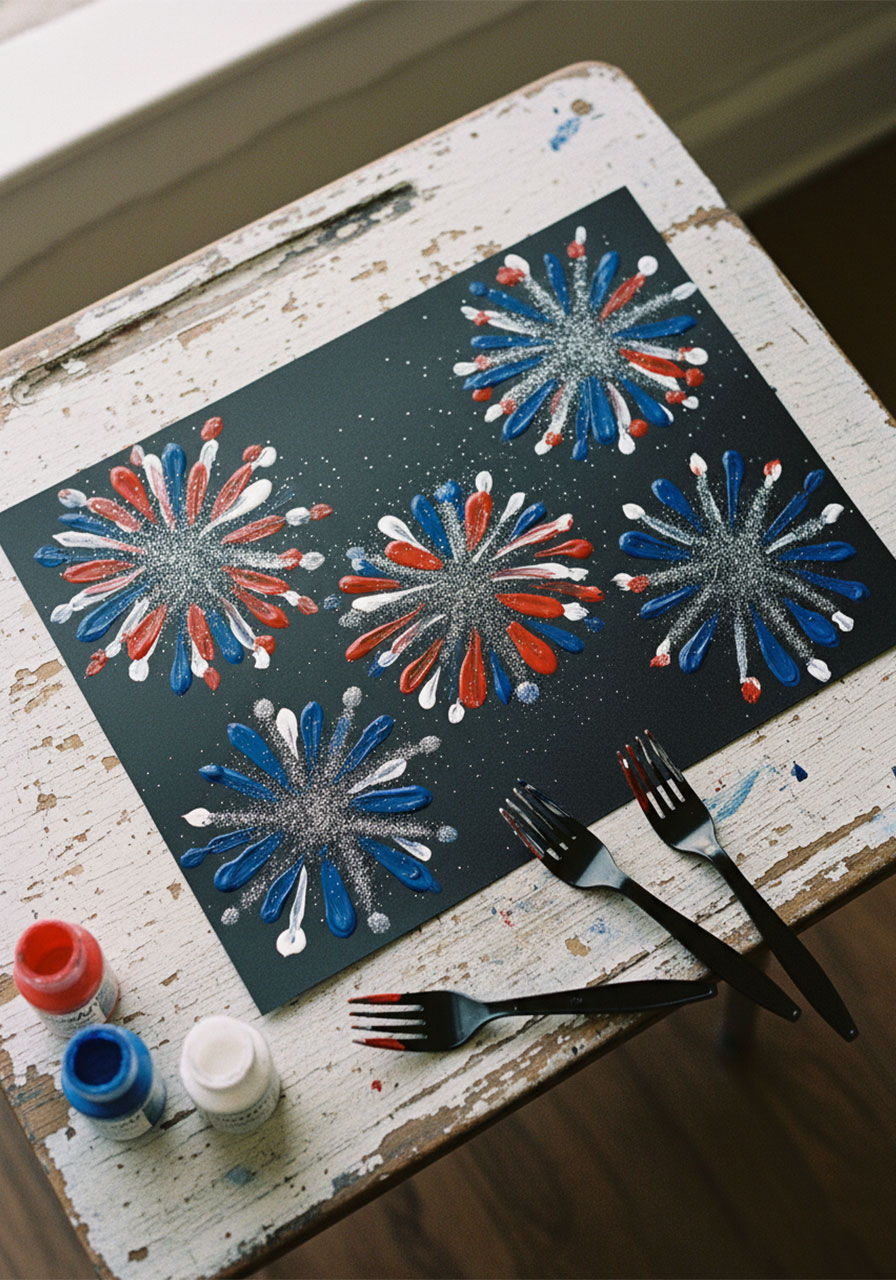
This fork painted fireworks craft is one of those rare activities that looks incredibly impressive but is almost shockingly easy to pull off. Kids stamp paint onto black paper using the back of a fork, building up gorgeous layers of red, white, and blue until the whole page looks like a real fireworks show exploding across a night sky.
No fancy brushes. No art skills required. Just paint, forks, and a whole lot of fun.
Whether you’re a parent looking for a rainy afternoon project, a teacher planning a holiday art class, or someone trying to keep kids entertained before the real fireworks begin – this one is a guaranteed winner.
Let’s dive in!

Why Kids (and Adults!) Love This Craft
Before we get into the how-to, here’s why this craft works so well in real life.
First, it’s satisfying in that deeply primal way that stamping and printing activities always are. There’s something incredibly gratifying about dipping a fork in paint and watching a firework burst appear instantly on the paper.
Second, every single piece comes out looking different. No two kids will make the same fireworks – which means zero comparison stress and maximum pride in their own creation.
Third, it grows with the child. A toddler can do a simplified one-color version. An older kid can master the layering technique for a truly spectacular result. Even grown-ups tend to get competitive over who made the best firework (speaking from experience here).
And finally? The finished art looks genuinely beautiful. These aren’t “refrigerator quality only” pieces. They look like something you’d frame.


What You’ll Need
Grab these simple supplies before you get started. You probably already have most of them at home!
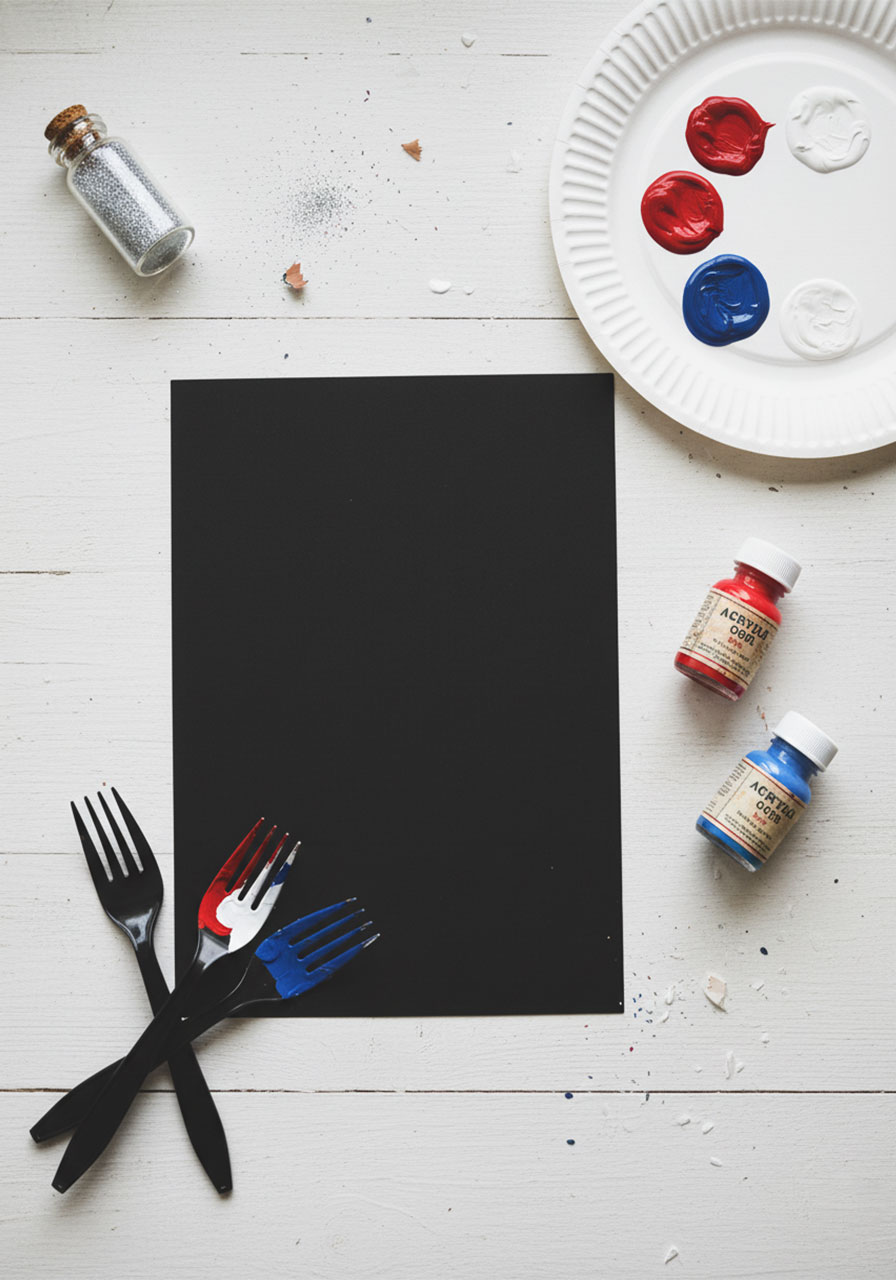
Materials:
Red acrylic or tempera paint
Blue acrylic or tempera paint
White acrylic or tempera paint
Black cardstock or black construction paper
Fine silver glitter
Equipment:
3 plastic forks (one per color – this makes it so much easier!)
A paper plate to use as your paint palette
Pro Tip on Paint: Acrylic paint gives the most vibrant, bold colors on black paper and dries quickly – great for impatient little artists! Tempera paint is a fantastic choice for younger kids since it’s washable and non-toxic. Either one works beautifully.
Pro Tip on Paper: Black cardstock is the dream choice here. It’s thick enough to hold the paint without warping, and the dark background makes the red, white, and blue colors absolutely pop – just like real fireworks against a night sky. Regular printer paper or construction paper will work in a pinch, but may warp a little as the paint dries.
Pro Tip on Forks: Use a separate fork for each paint color so your colors stay crisp. If using plastic forks, give them a gentle press test first – some thin ones can snap under pressure. Medium-weight plastic forks are your best bet. Of course, metal dinner forks work perfectly too!
How to Make Fork Painted Fireworks – Step by Step
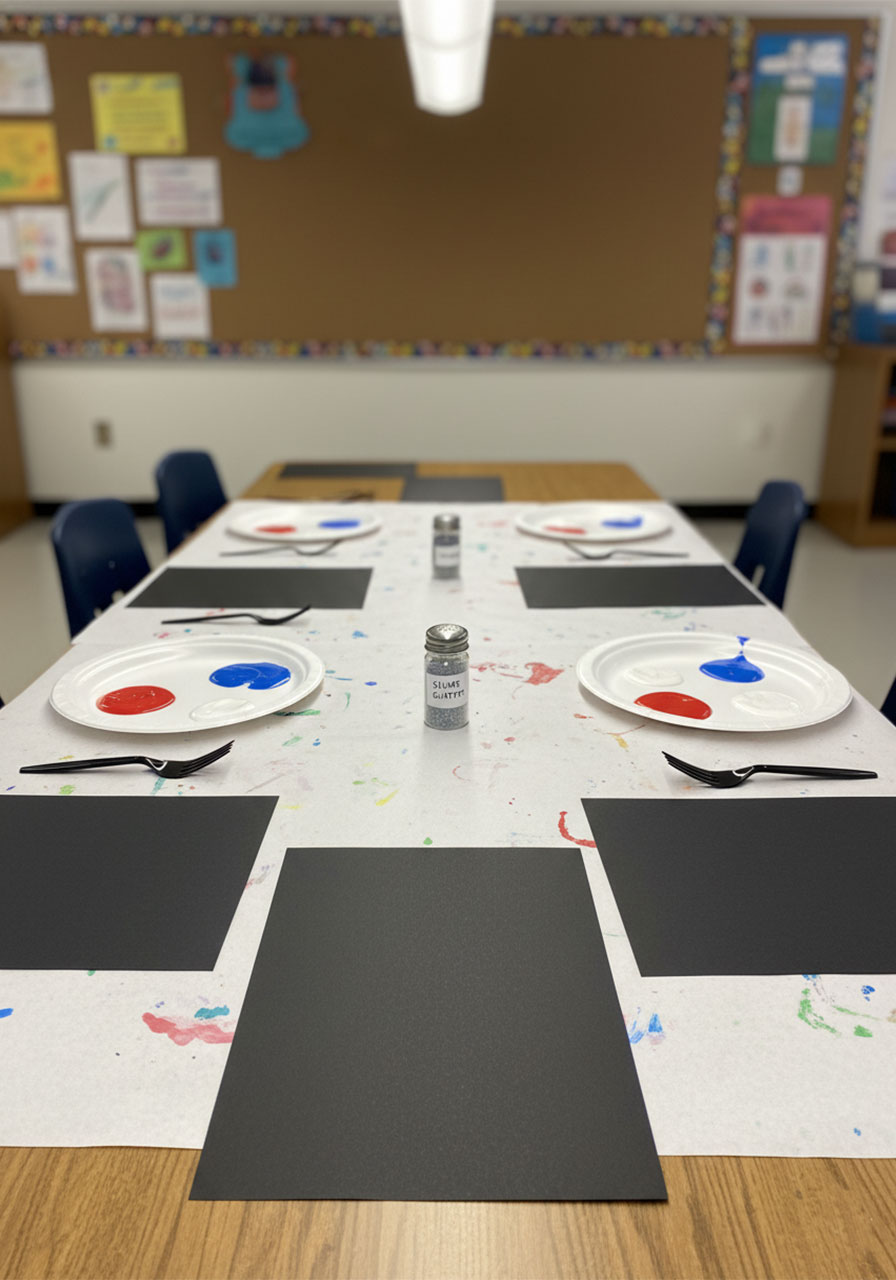
Step 1: Set Up Your Paint Palette
Squeeze a generous blob of red, blue, and white paint onto your paper plate, keeping the colors spaced apart so they don’t bleed into each other.
You want enough paint that your fork tines get fully coated – a thin, stingy layer won’t give you that satisfying firework burst effect.
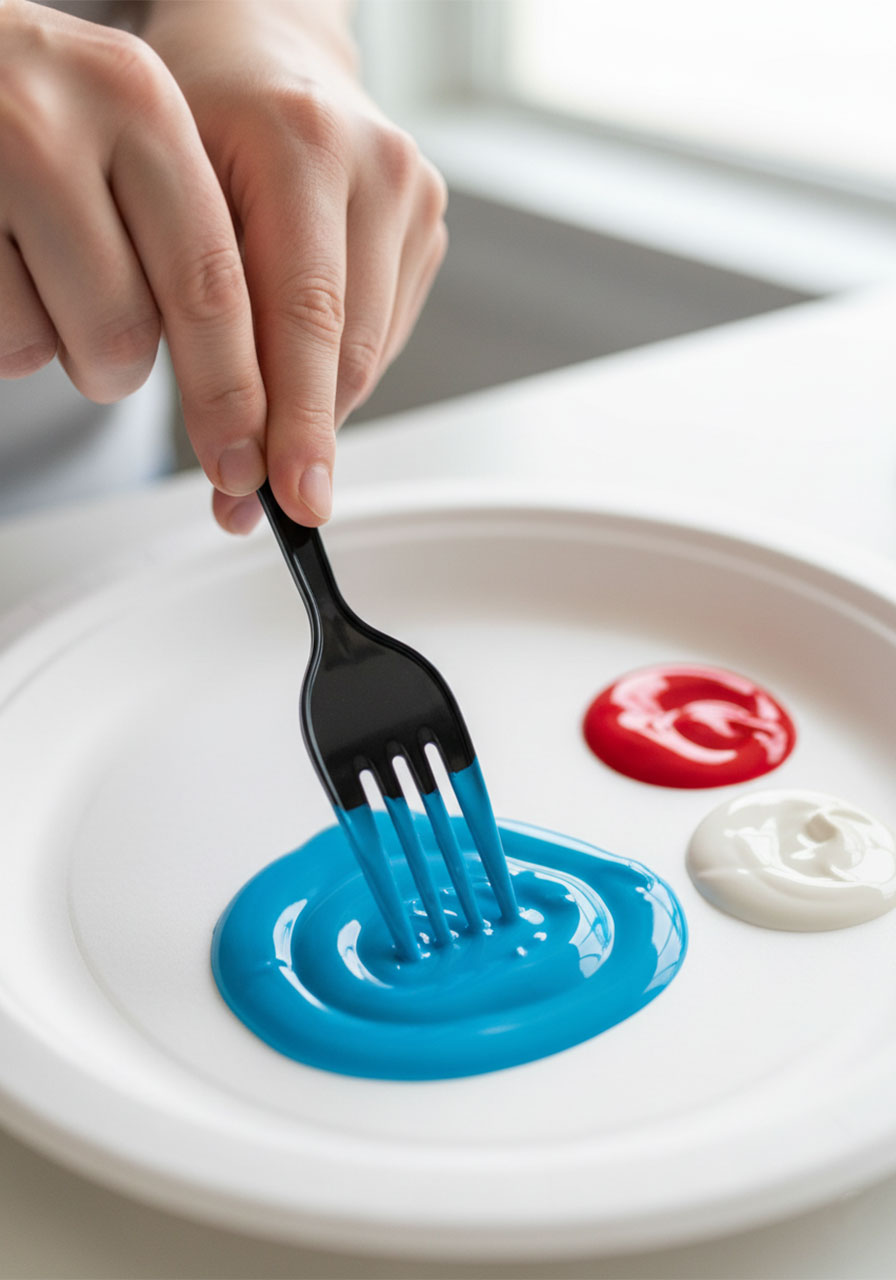
Step 2: Load Your Fork
Dip the back (bottom) of a fork into your first color – we love starting with blue!
Rock the fork gently back and forth in the paint until the back of all four tines are evenly coated. You want a solid, even layer of paint, not dripping globs.
This part is genuinely fun to watch kids figure out. Some immediately rock the fork like pros. Others stab it in enthusiastically and end up with paint everywhere – which honestly also leads to great art.
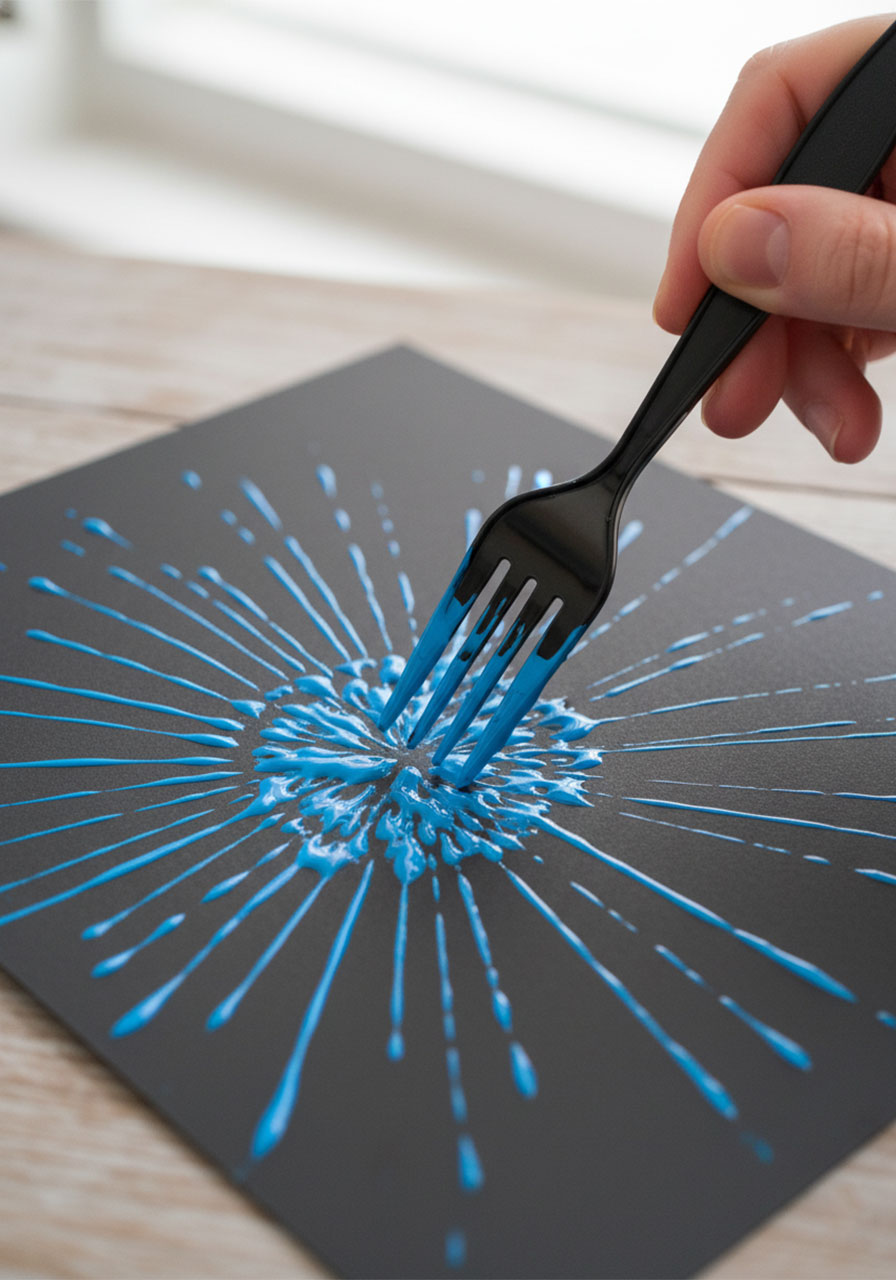
Step 3: Make Your First Firework Layer
Press the loaded fork firmly onto your black paper, then lift it straight up. That’s your first “burst” mark!
Rotate the fork slightly and stamp again nearby, aiming around an imaginary circle in the center. Keep rotating and stamping – each stamp going outward from that central point – until you’ve built a ring of burst marks all the way around.
This creates the base shape of your firework.
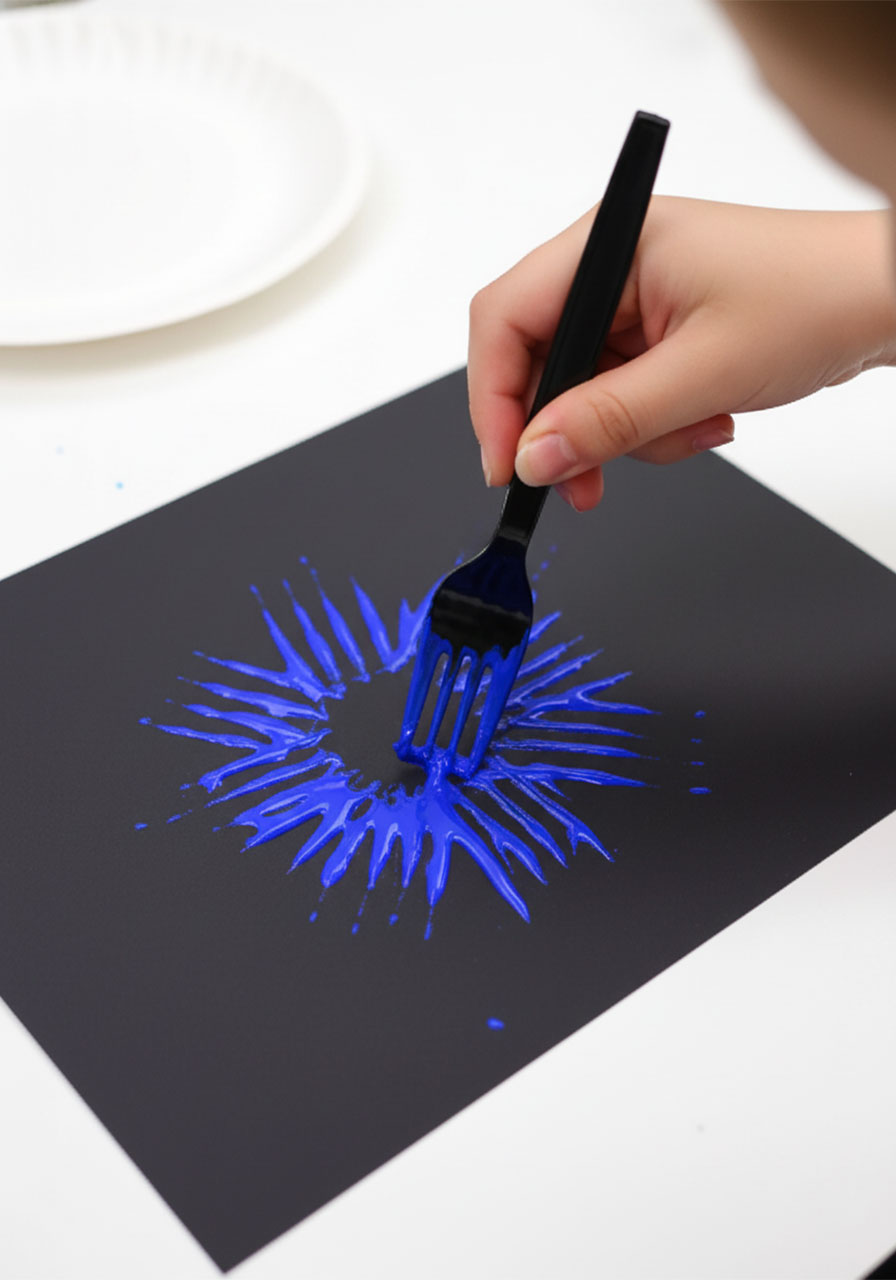
Now, for the outer rays: re-dip the fork, and this time drag the fork outward from the center rather than just stamping. These longer drag marks create the streaking “tail” effect that makes fireworks look like they’re exploding outward.
You may need to re-dip a few times. That’s totally normal!
Step 4: Fill the Page with Fireworks
Keep going! Switch to red and build 1-2 red fireworks in different spots on the page.
We recommend leaving a little breathing room between fireworks – they’ll get bigger as you add more layers, and you don’t want them to completely overlap yet.
A standard sheet of black cardstock can comfortably fit about 4 fireworks total. We did 2 blue-based and 2 red-based, which looks gorgeous once the white layer goes on top.
Step 5: Let the First Layer Dry
This is the hardest part for kids: waiting!
Give the first layer about 15 minutes to dry before adding the next color. If you’re working with acrylic paint, it might dry even faster – give it a gentle touch test in an inconspicuous spot.
Impatient? That’s okay! If you skip the drying time, the colors will blend together a little where they overlap. It still looks beautiful – just a bit more swirled and painterly. Totally up to you and your level of patience (or your kids’ level of patience, more realistically).
Step 6: Add the White Layer
Now comes the magic moment.
Load a clean fork with white paint and stamp a layer of white fireworks directly on top of your blue and red ones.
Important: For this layer, stamp only – don’t drag. The white stamped marks create a bright, sparkling center burst that really makes the fireworks glow.
Watch your kids’ faces when they see how the white transforms the whole piece. It’s one of those great “wow” moments in the project.
Let this layer dry too before moving on.

Step 7: Add the Final Color Layer
Almost there! Add a third and final layer of paint.
Stamp blue on top of the red and white fireworks.
Stamp red on top of the blue and white fireworks.
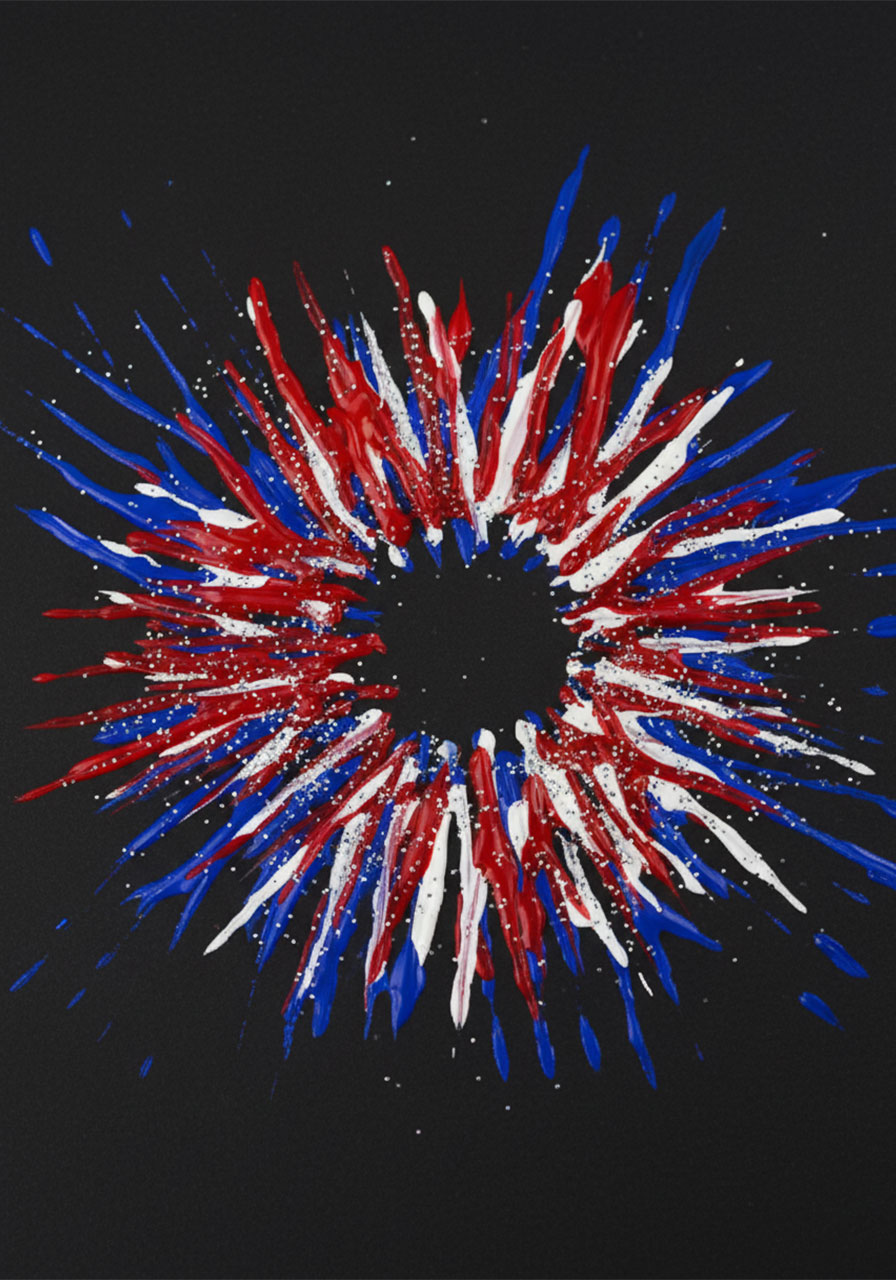
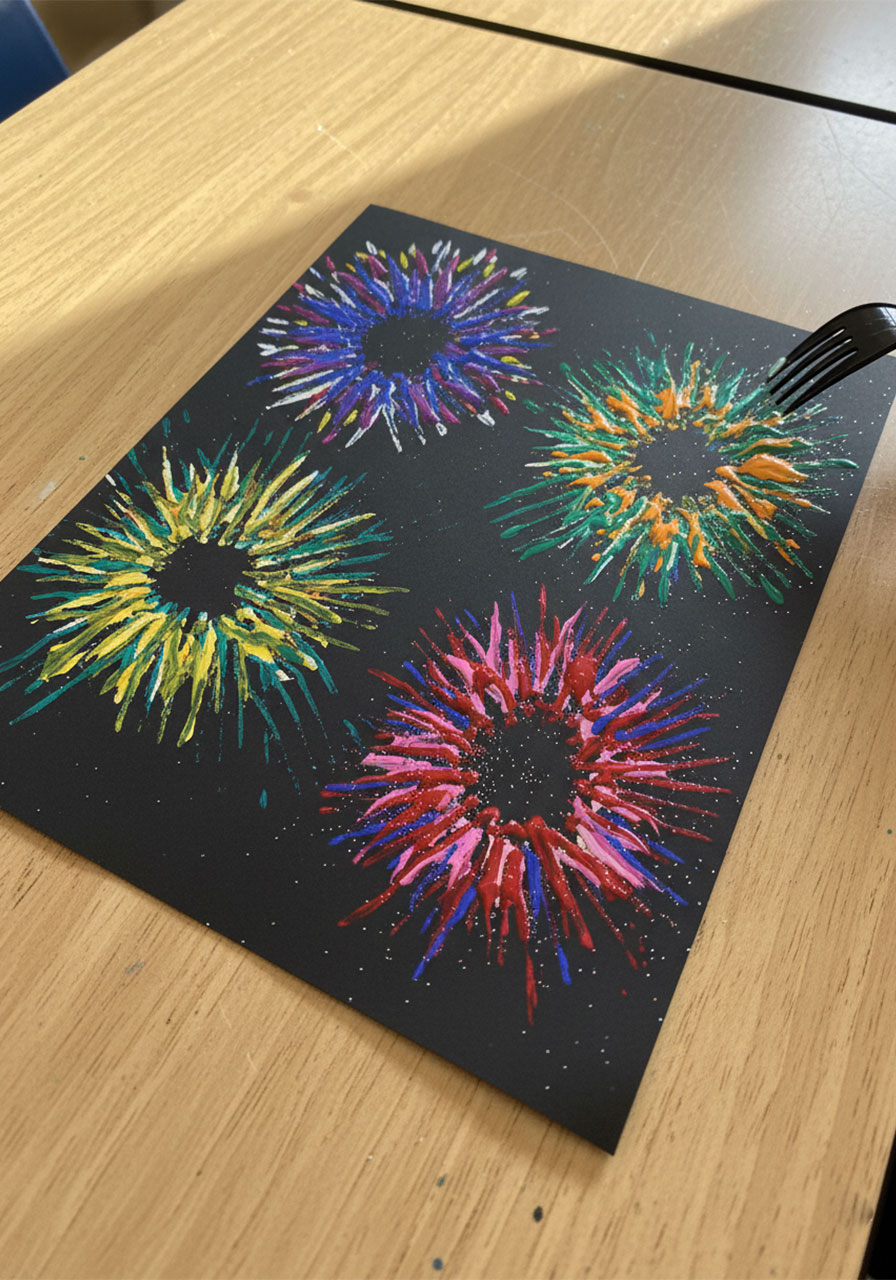
By now, each firework is becoming a beautiful, layered explosion of all three colors – exactly like a real patriotic firework bursting in the sky.
Step 8: Add the Glitter!
Here’s the finishing touch that takes this craft from great to absolutely spectacular.
While the final layer of paint is still wet, sprinkle fine silver glitter generously over all the fireworks.
Then carefully tilt the paper over a tray or garbage can and shake off the excess. The glitter will stick to the wet paint and dry in place, leaving a beautiful sparkle effect.
When it catches the light? Pure magic.

Step 9: Let It Dry Completely
Set your masterpiece flat to dry. If you used a baking sheet underneath to catch glitter (great idea, by the way!), you can leave it right there.
Once fully dry, the paint will be solid and the glitter will be permanently set.
Stand back and admire the fireworks show you just created!
Frequently Asked Questions
What’s the best paint to use for this craft?
Both acrylic and tempera paint work well. Acrylic paint gives you the most vivid, saturated colors and dries quickly. Tempera paint is the go-to choice for younger kids and classrooms because it’s non-toxic and washes off hands and clothes easily. Either one will give you great results!
What you want to avoid is watercolor or very thin liquid paint – it won’t stick to the fork tines properly and the colors won’t be opaque enough to show up on black paper.
Can I use white paper instead of black paper?
You can! But here’s the thing – the black paper is a huge part of what makes this craft so stunning. It mimics the night sky, and the colors pop beautifully against it.
If you use white paper, skip the white paint entirely since it won’t show up. Try silver or metallic paint instead for the middle layer. The fireworks will still look fun and colorful, just with a different feel.
Do I have to use plastic forks?
Nope! Regular metal dinner forks work perfectly. If you’re using plastic forks, just make sure they’re medium-weight – very flimsy ones can snap when you press them on the paper.
One fun hack: save and wash plastic forks from picnics, takeout meals, or BBQs and repurpose them for this craft. You’ll feel great about giving them a second life before recycling!
How do I keep the glitter from getting everywhere?
Work over a tray or baking sheet to catch any falling glitter as you sprinkle. After shaking off the excess glitter, carefully fold the tray and funnel the glitter back into the bottle for next time.
Still going to end up with glitter on your table? Yes, absolutely. That’s just the glitter tax, and it’s worth it.
How long does the whole craft take?
Active crafting time is about 20–30 minutes. Factor in drying time between layers (about 15 minutes each), and you’re looking at roughly an hour to 90 minutes from start to finish.
This makes it a perfect afternoon activity – especially on the days before the 4th of July when kids are buzzing with excitement and need somewhere to channel that energy!
What age is this craft best for?
We’d say ages 4 and up can tackle this with some adult help. Younger kids will need guidance on the stamping motion and layering technique, but they’ll absolutely love the process.
Kids ages 6 and up can likely manage most of the steps fairly independently. And honestly? Teens and adults get really into it too. Don’t be surprised if you end up making your own page alongside the kids.
Tips for Teachers: Doing This Craft in a Classroom
This craft is absolutely classroom-friendly with a little bit of prep. Here’s how to make it smooth and stress-free:
Pre-portion the paint. Squeeze paint onto individual paper plates ahead of time so kids can get straight to crafting without waiting.
Use tempera paint. It’s washable, non-toxic, and cleans up easily from surfaces and clothing.
Assign one fork per color per student. Label forks with color-coded stickers to avoid mix-ups.
Set up a drying station. Have a designated spot where kids can lay their paper flat to dry between layers – a long table covered with newspaper works great.
Skip the glitter if needed. The fireworks look gorgeous without it! If glitter isn’t an option in your classroom, the layered paint effect stands completely on its own.
Make it a display. A whole wall of finished fork-painted fireworks makes an absolutely stunning classroom or hallway display for Independence Day.
Fun Variations to Try
Once you’ve mastered the classic red, white, and blue version, here are some fun ways to mix it up!
Rainbow Fireworks: Ditch the patriotic palette and go full rainbow! Let kids choose any colors they love for a wildly colorful, celebratory piece.
Galaxy Fireworks: Use purple, teal, and gold paint on black paper for a deep space, otherworldly look. Add gold glitter for extra drama.
New Year’s Eve Version: Gold, silver, and white on black paper with lots of silver glitter makes a gorgeous New Year’s craft.
Mini Fireworks Cards: Use smaller paper and make tiny fireworks to turn into 4th of July cards or gift tags. So cute!
Diwali or Bonfire Night Version: Warm colors – orange, yellow, red, and gold – look spectacular as “festival of lights” fireworks. This works beautifully as a cross-cultural art project.
What to Do with the Finished Art
Don’t just stuff these in a backpack and forget about them – these are genuinely frame-worthy pieces!
Here are some ideas for what to do with your finished fork-painted fireworks:
Frame them and use as 4th of July décor around the house
String them up as a fireworks bunting for a party backdrop
Use as wrapping paper for Independence Day gifts
Display as a class art show for parents
Give as homemade 4th of July cards to grandparents or neighbors
Photograph and turn into a custom phone case or print (services like Shutterfly make this easy!)
Ready to Light Up the Night?
There you have it – everything you need to pull off this show-stopping 4th of July craft with your kids or your class.
The fork painted fireworks craft is one of those activities that delivers maximum wow for minimal effort, and that’s exactly why we love it. By the end, kids have a stunning piece of art they made entirely themselves – and that pride on their faces? That’s the best part.
So grab those forks, lay out some paint, and get ready for your own little fireworks show – right at the kitchen table.
Happy crafting, and happy 4th of July! 🎆
More 4th of July Ideas to Keep the Fun Rolling:
Straw Stamped Paper Plate 4th of July Craft (Easy & So Festive!)
5 Easy Steps to Make the Cutest Fourth of July Windsocks for Kids
Egg Carton Memorial Day Poppy Wreath (A Meaningful Craft Kids Will Love)
Easy Patriotic Paper Plate Hat Craft for Fourth of July
Cotton Ball Stamped Star: The Easiest 4th of July Craft for Kids (That Actually Looks Amazing)