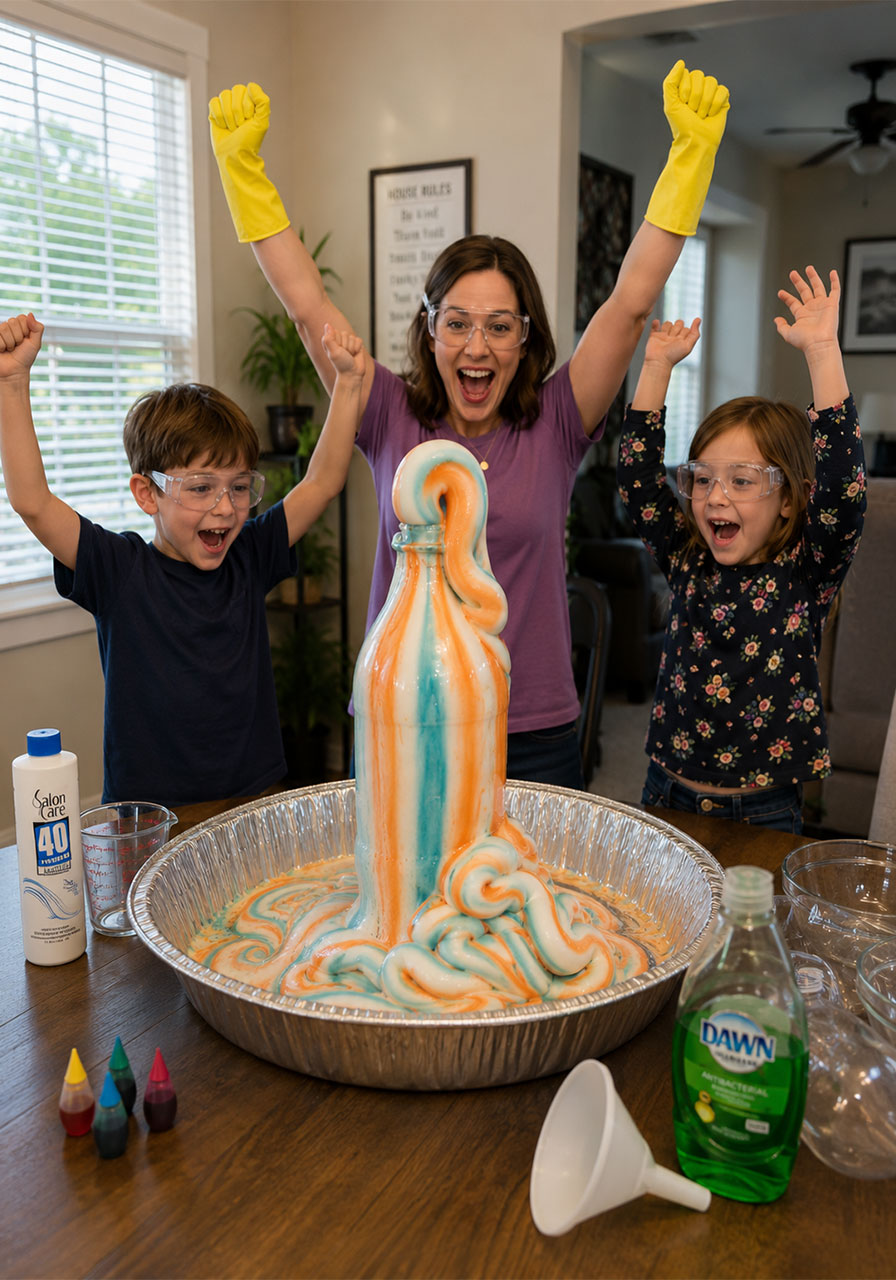
If you’ve ever needed a science activity that turns “I’m bored” into “do it again!” in about ten seconds flat, this is it. Elephant toothpaste is hands-down one of the most requested STEM experiments for kids, and once you see that giant tower of foam erupt out of a bottle, you’ll understand exactly why.
This activity has been a favorite in our house for years, and it’s just as popular in classrooms, homeschool groups, and birthday parties. It looks impressive, it teaches real chemistry, and it only takes about 15 minutes from start to finish.
Below, you’ll find everything you need: the full materials list, foolproof step-by-step instructions, the science explanation behind the reaction, safety guidelines, and answers to the most common questions parents and teachers ask before trying this at home.
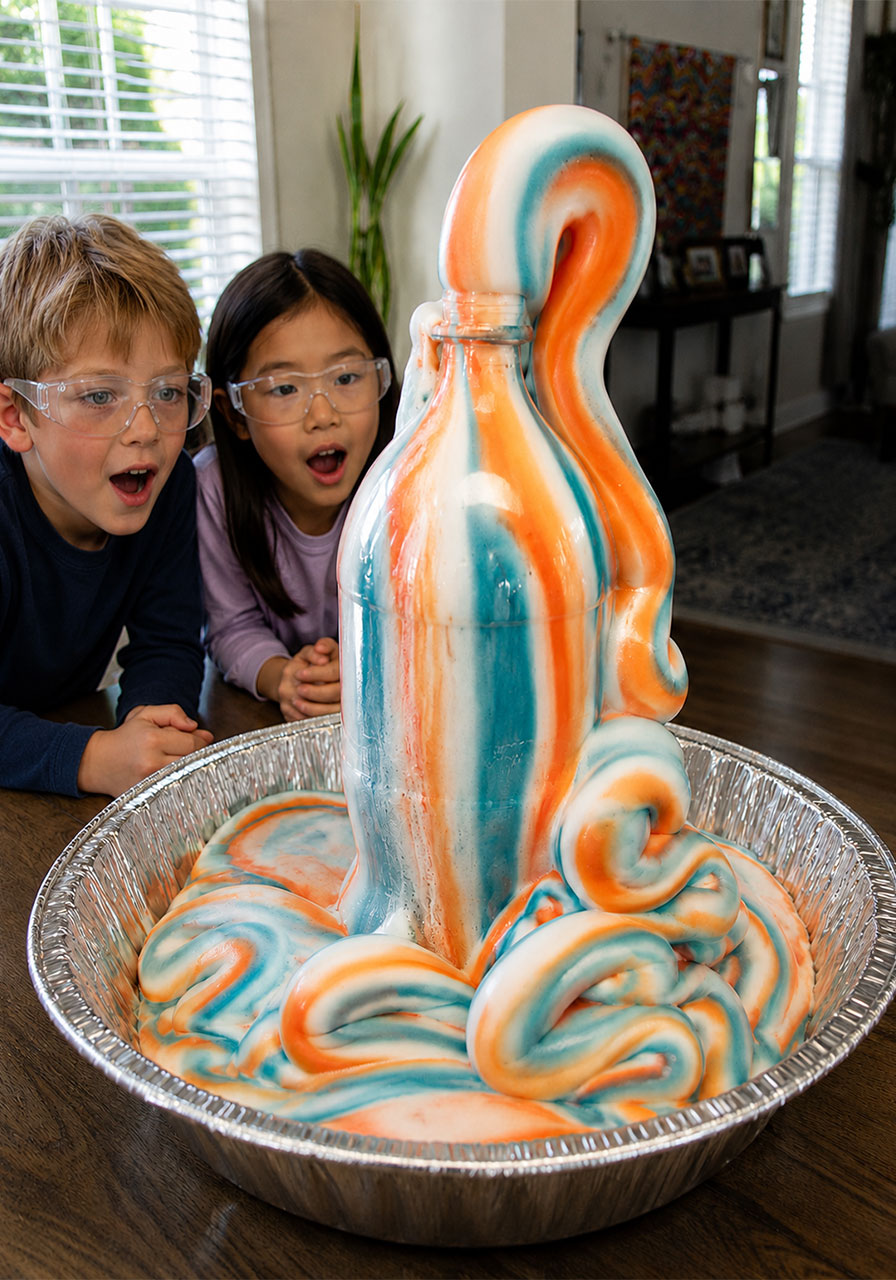
Why This Experiment Is a Go-To for Parents and Teachers
This experiment made headlines when Miss America 2020, Camille Schrier, performed an elaborate version of it as her talent on stage. She holds a biochemistry degree and is pursuing her doctorate in pharmacy, and she chose this exact reaction because it’s visual, exciting, and genuinely teaches real science in under a minute.
That’s really the heart of why this activity works so well for kids. It’s simple enough for a preschooler to watch and understand, but the chemistry behind it is real enough to hold up in a college lecture. That combination is rare, and it’s exactly what makes elephant toothpaste such a reliable hit for any age group.
Whether you’re planning a classroom demo, a homeschool science lesson, or a fun weekend activity with your own kids, this one delivers a big reaction with minimal effort on your part.

What You’ll Need
Most of these supplies are things you already have at home, and the rest are inexpensive and easy to find.
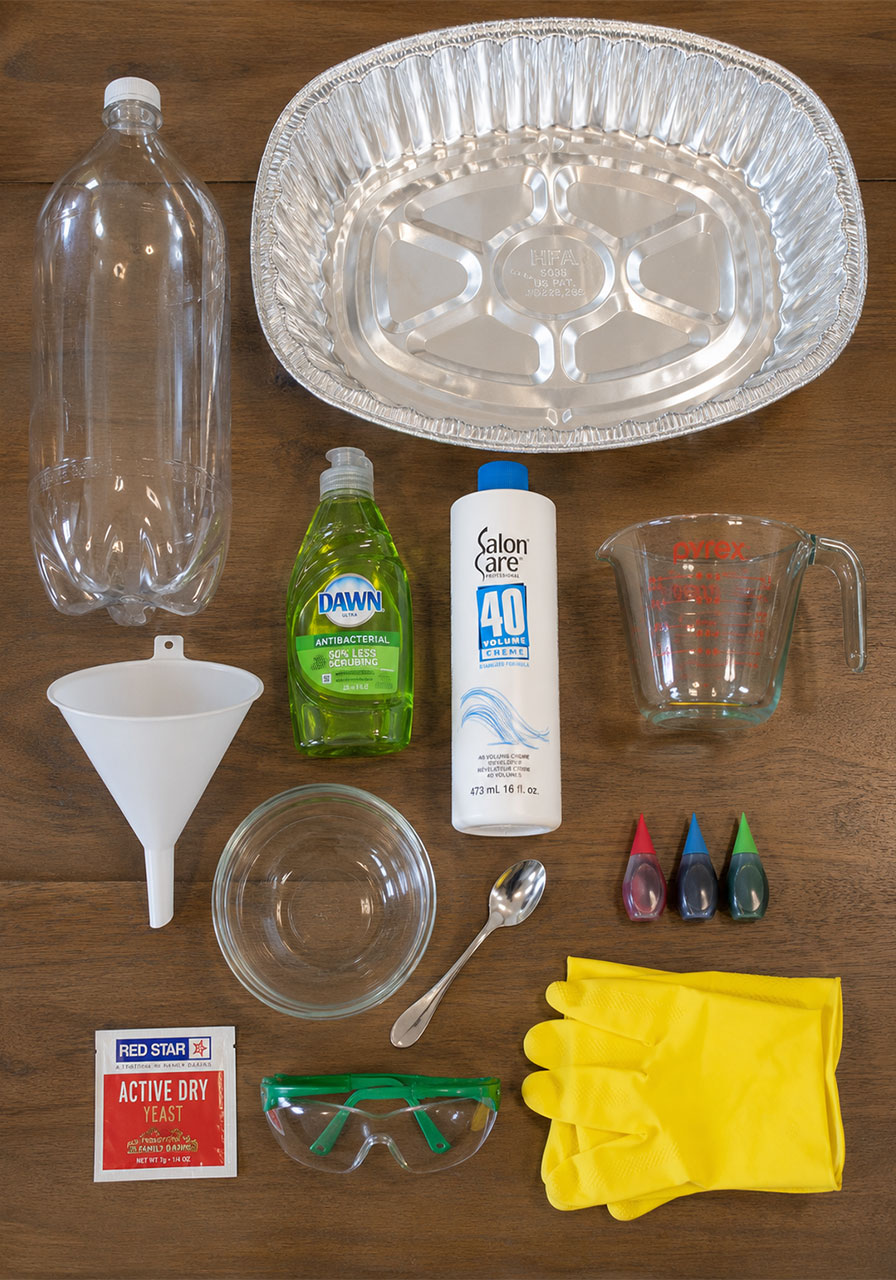
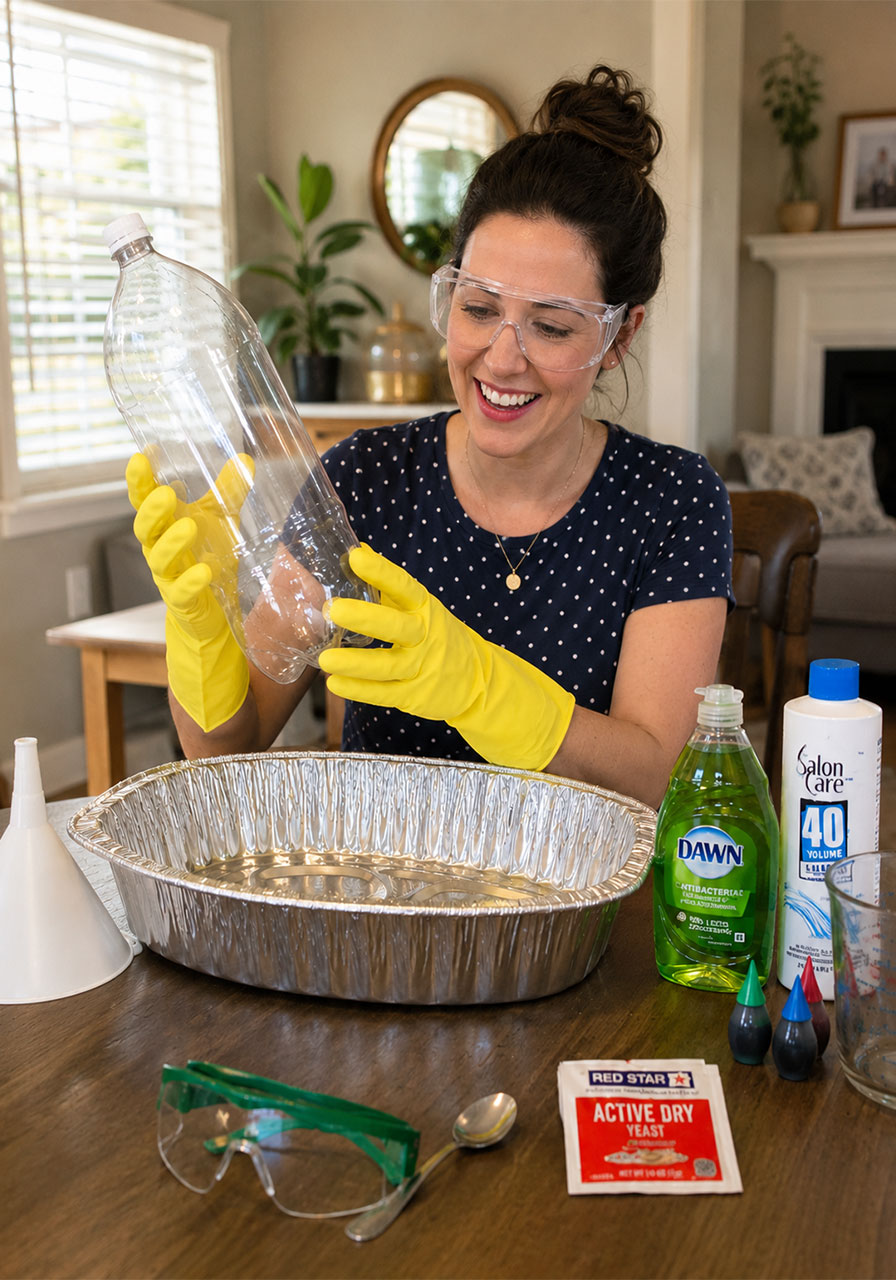
- One empty plastic 2-liter bottle (a 2L bottle works better than a 1L bottle for a bigger reaction)
- Food coloring (optional, but it makes the foam look like real striped toothpaste)
- Dish soap
- 4 oz (1/2 cup) of 40 volume clear developer, which is 12% hydrogen peroxide (find this at a beauty supply store or online, not the 3% hydrogen peroxide from your medicine cabinet)
- A funnel
- One packet (1/2 tablespoon) of active dry yeast
- 4 oz (1/2 cup) of very warm water
- A small bowl
- A spoon
- A large disposable roasting pan, or a plastic tarp for easy cleanup
- Safety goggles
- Plastic or rubber gloves
A quick but important note here: this experiment only works well with the stronger 12% hydrogen peroxide solution, not the small brown bottle of 3% peroxide sold at pharmacies. The 12% version is what gives you that dramatic, towering foam.
How to Play… We Mean, How to Do It
Follow these steps in order, and you’ll get a foolproof, impressive reaction every single time.
Step 1: Set Up Your Space
Do this experiment outside on a patio or grass that you can easily hose down afterward, or set it up indoors inside a large disposable roasting pan. Either option keeps cleanup quick and painless.
Step 2: Gear Up
Put on your gloves and safety goggles before you touch the hydrogen peroxide. This step matters, so don’t skip it, even if the kids are eager to jump straight to the fun part.
Step 3: Add the Dish Soap
Squirt a few pumps of dish soap into the bottom of the empty bottle.
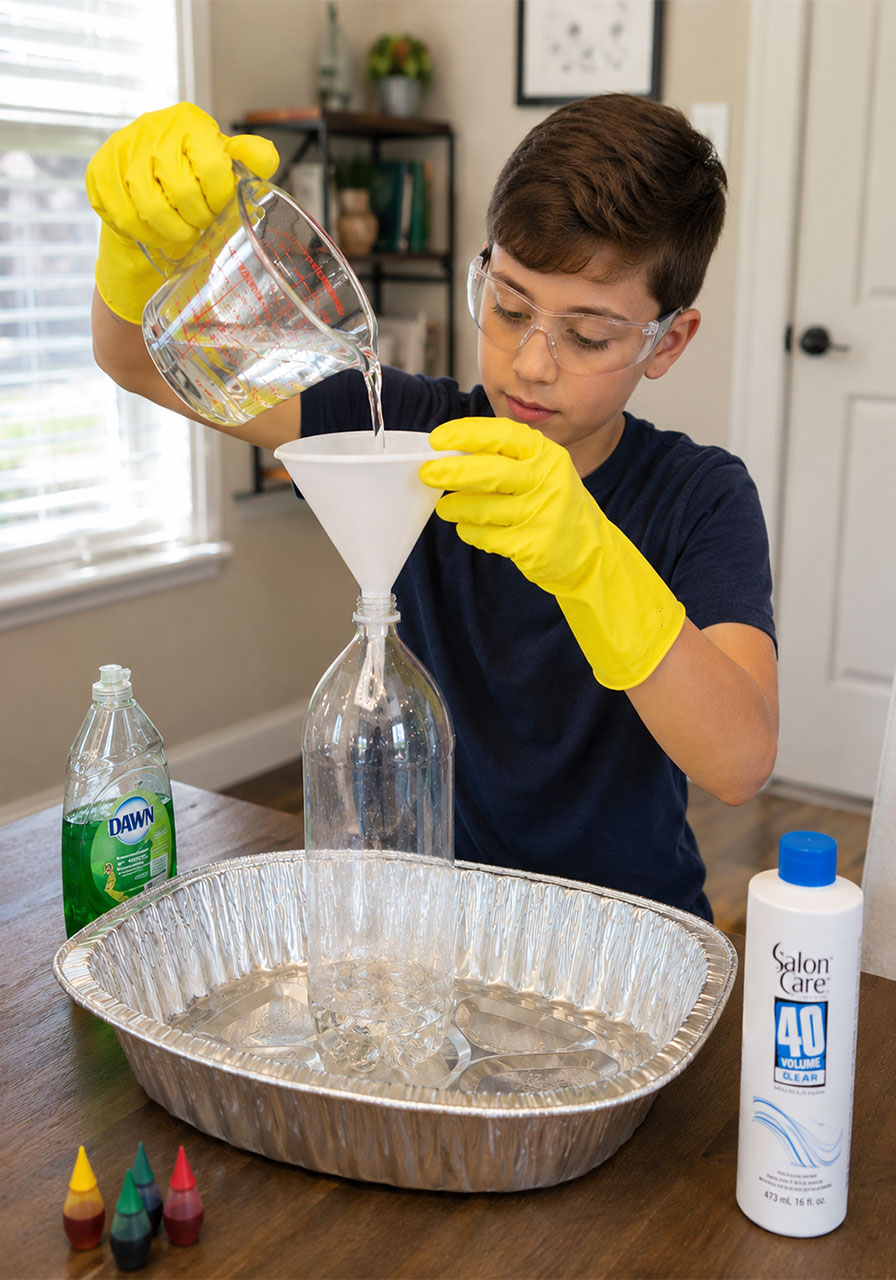
Step 4: Measure and Add the Hydrogen Peroxide
Measure out 1/2 cup of the 40 volume clear developer (12% hydrogen peroxide). Using a funnel, pour it carefully into the bottle to avoid spills, then give the bottle a gentle swirl to mix the soap and peroxide together.
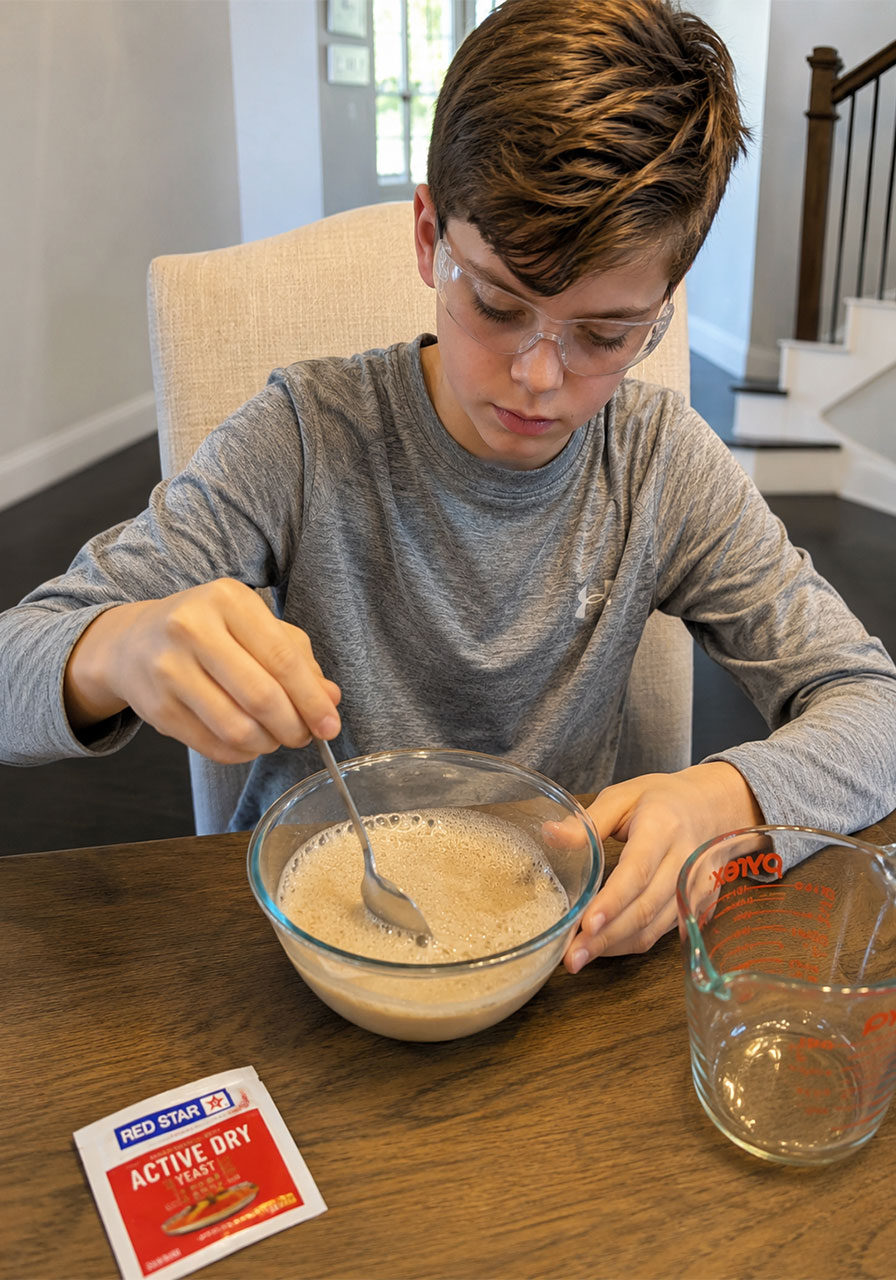
Step 5: Mix the Yeast
In a small bowl, combine 1/2 cup of very warm water with the packet of active dry yeast. Stir until it’s fully dissolved. This is a great step to hand off to your kids since there’s zero risk involved.
Make sure the water is warm, not hot. Water that’s too hot will kill the yeast before it has a chance to work, and that’s the number one reason this experiment sometimes fails to fizz.
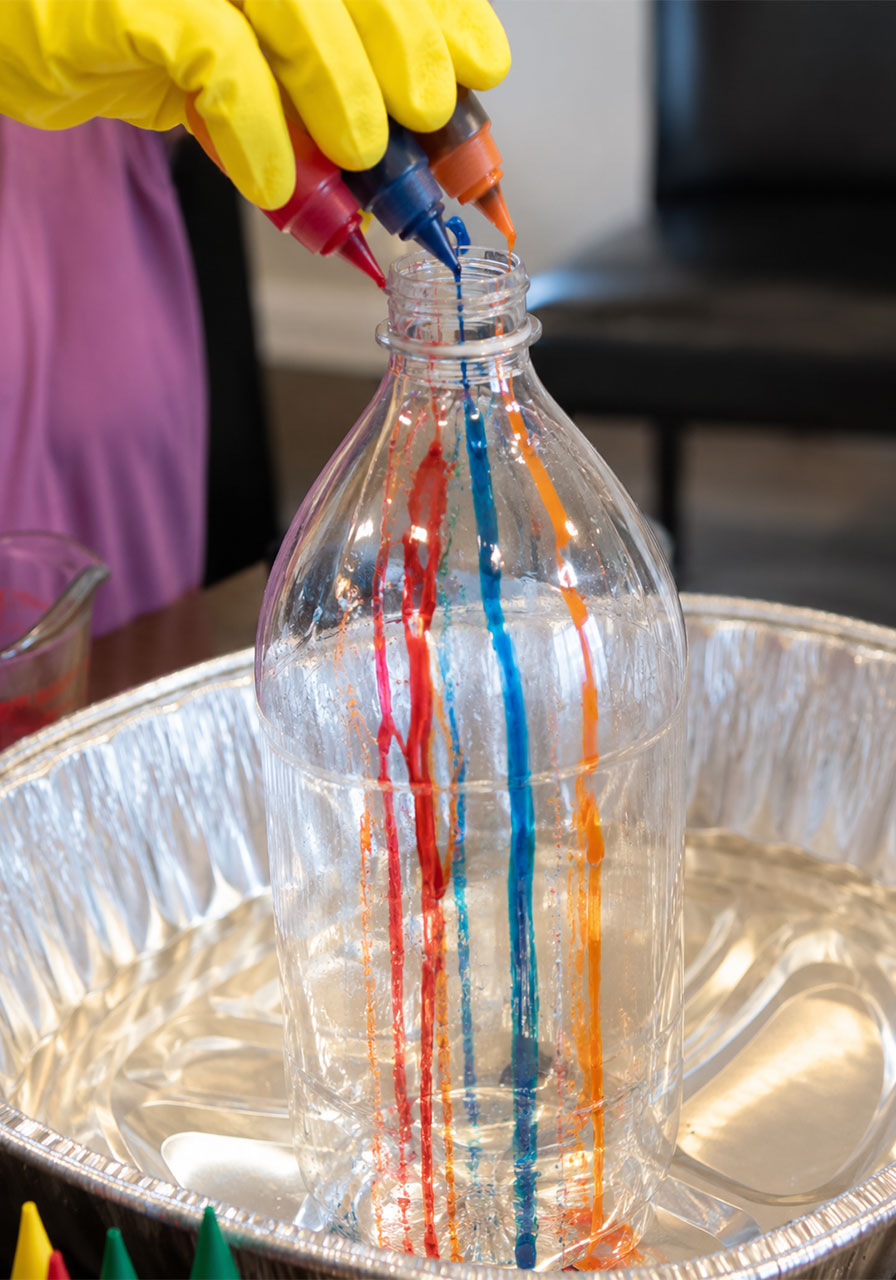
Step 6: Add the Food Coloring
Tilt the bottle and squirt food coloring in a stream down the inside wall. Rotate the bottle and repeat with a few different colors. This step is what creates those signature stripes in your finished foam.
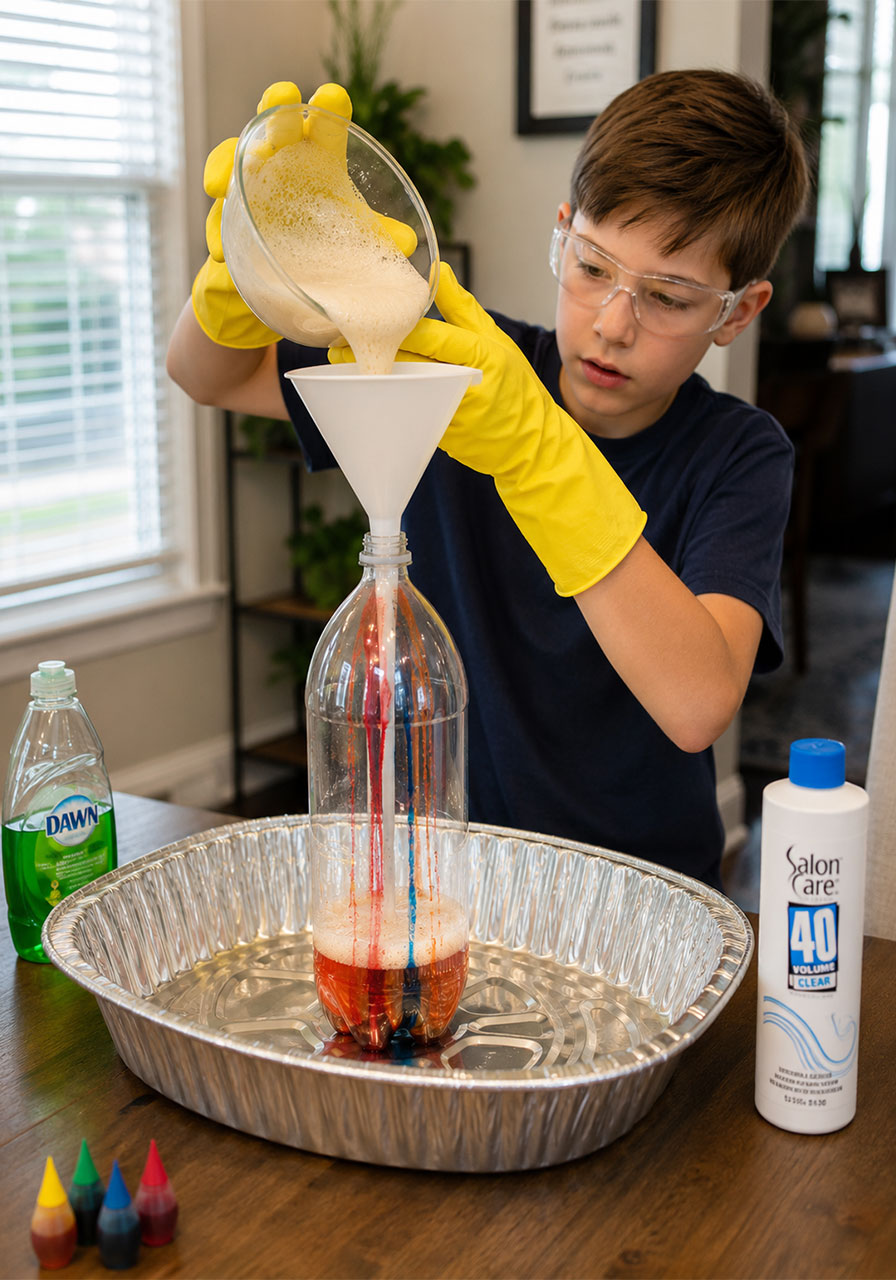
Step 7: Combine and Watch the Magic
Using the funnel, pour your yeast mixture into the bottle. Remove the funnel quickly and step back, because the reaction starts almost immediately and the foam will rise fast.
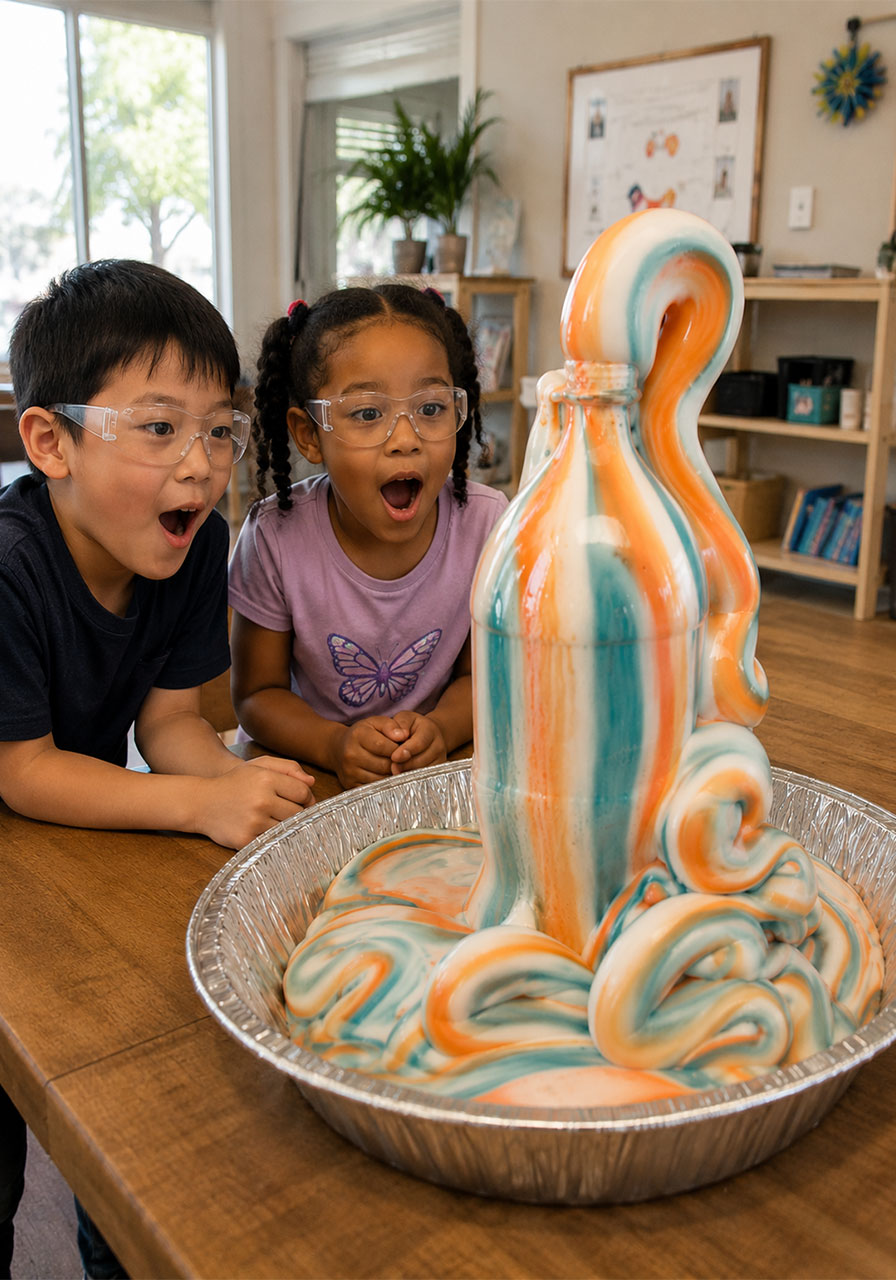
Step 8: Let It Cool, Then Explore
The foam is genuinely hot right after the reaction, so resist the urge to touch it right away. Wait a few minutes for it to cool, and then you and your kids can safely explore the foam with gloves on.
Step 9: Clean Up
Once you’re done, everything can be washed down the sink or tossed in the trash. Keep your gloves on until cleanup is finished, and don’t leave the yeast mixture sitting around too long, since it will start to smell.
Pro Tip: Before doing this in front of a group, whether that’s a classroom or a birthday party, always do a practice run first. That way you can confirm your peroxide concentration is strong enough and your yeast is fresh, so there are no surprises on the big day.
The Science Behind Elephant Toothpaste (Perfect for Teaching Moments)
This reaction is a great, hands-on way to introduce kids to two important scientific concepts: catalysts and exothermic reactions.
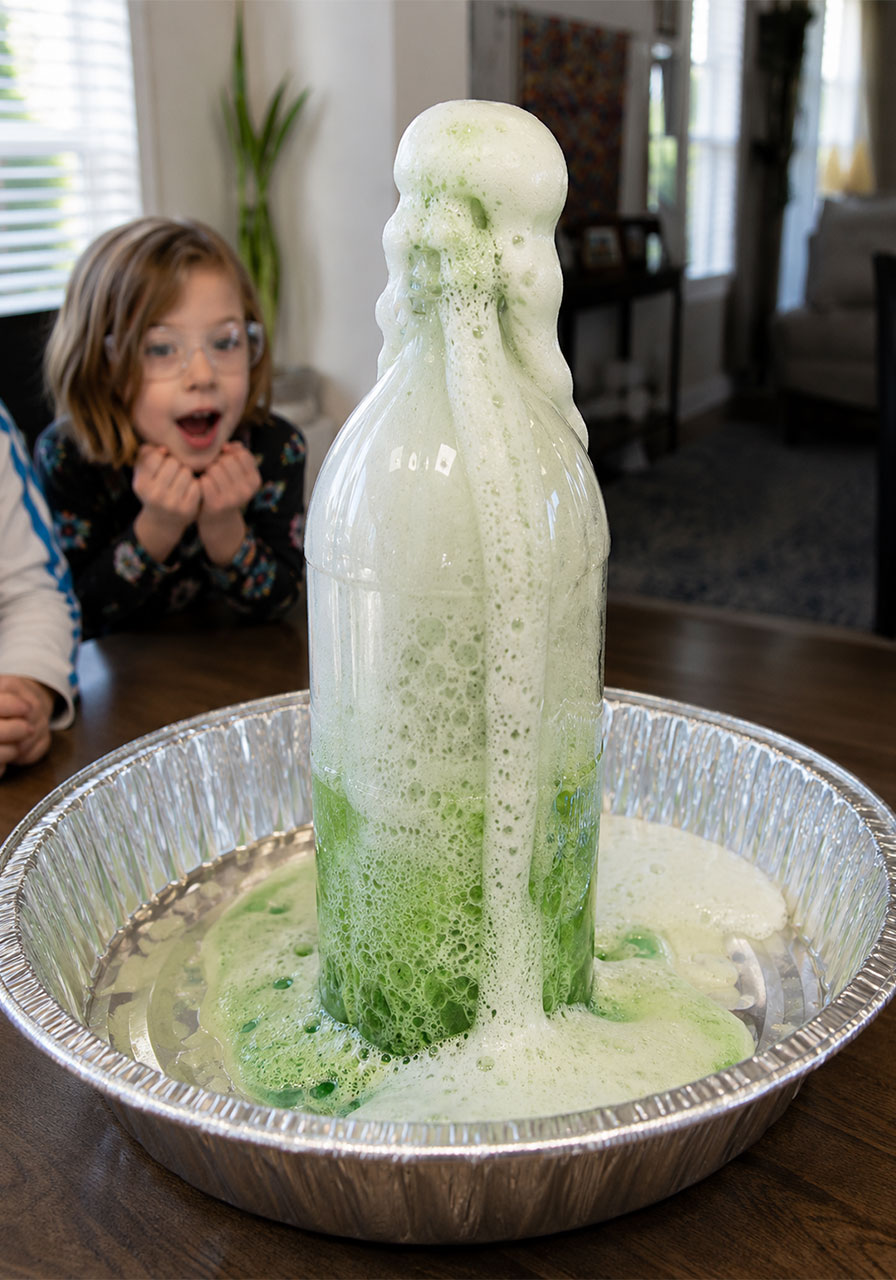
The yeast in this experiment acts as a catalyst, meaning it speeds up a reaction that would otherwise happen very slowly. Here, the yeast helps release oxygen molecules from the hydrogen peroxide (H2O2), breaking it down into water (H2O) and oxygen (O2). As that oxygen escapes, it gets trapped by the dish soap, and that’s what creates all that foamy bubble action.
This reaction is also exothermic, which means it releases heat as it happens. That’s exactly why the foam comes out warm, and it’s a simple, memorable way to show kids that some chemical reactions actually produce their own heat.
If you’re using this for a classroom lesson, this is a natural spot to introduce vocabulary words like catalyst, exothermic, and decomposition, all wrapped inside an experiment kids will actually remember.
Why It’s Called “Elephant” Toothpaste
No, this isn’t the toothpaste zookeepers actually use on elephants. The name comes from the fact that the foam looks a lot like a giant tube of striped toothpaste as it expands out of the bottle, especially once you add the food coloring. It’s just big enough for an elephant, which makes for a genuinely fun name for kids to repeat.
Safety Guidelines You Should Not Skip
This experiment is safe to do at home or in a classroom as long as you follow a few important precautions.
- Always wear safety goggles and rubber or plastic gloves while handling the hydrogen peroxide
- The 40 volume (12%) hydrogen peroxide solution can cause skin or eye irritation, so avoid direct contact
- Do not touch the foam immediately after the reaction. Wait a few minutes for it to cool before anyone touches it, even with gloves on
- If hydrogen peroxide or the foam touches bare skin, wash the area with soap and water right away
- Keep young children from handling the hydrogen peroxide bottle directly
- Clean up immediately after the experiment so curious little ones can’t get into leftover materials
This is best done as an adult-led demonstration, with kids observing closely and joining in on the safe steps, like mixing the yeast or adding food coloring.
Troubleshooting: What to Do If Your Reaction Doesn’t Work
Every once in a while, this experiment doesn’t produce the big, dramatic foam you’re expecting, and it’s almost always due to one of these fixable issues.
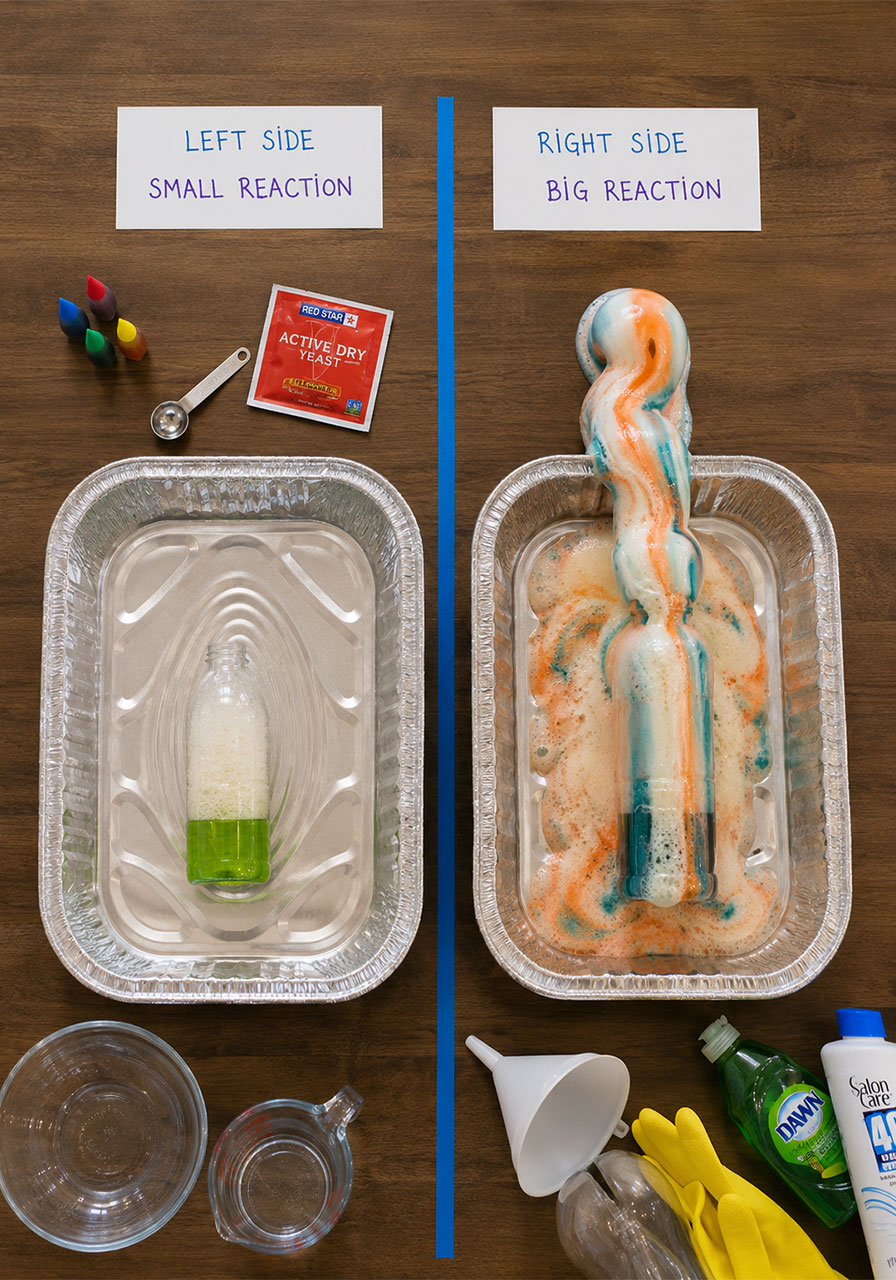
Your peroxide concentration is too weak. This experiment needs 40 volume clear developer, which is 12% hydrogen peroxide. The small brown bottle from your medicine cabinet is only 3%, and it will produce a much smaller reaction, if any at all.
Your developer is the wrong type. Make sure you’re using clear developer, not creme developer. Creme developer has a thicker consistency and does not react the same way.
Your yeast didn’t activate. Yeast needs warm water to activate, not hot and not cold. If your yeast mixture doesn’t get foamy and bubbly after stirring, it likely didn’t activate properly, and your reaction will be weak as a result.
You didn’t test it beforehand. If you’re planning to do this in front of a classroom or at a party, always run through it once at home first. This lets you confirm your ingredients are working and gives you a chance to work out any kinks before showing it to a group.
Fun Variations to Try
Once you’ve nailed the basic version, here are a few easy ways to switch things up for repeat performances.
- Use multiple bottles side by side, each with a different color, for a rainbow effect across your table
- Try a taller bottle for an even bigger foam tower
- Let kids predict how tall the foam will get before you start, then measure it afterward for a fun mini science lesson in estimation
- Reuse the same bottle for multiple demonstrations. Just rinse it out and shake out the excess water between uses
Frequently Asked Questions
Can I use instant yeast instead of active dry yeast?
Active dry yeast is the tested and recommended option. Instant yeast has not been specifically tested for this experiment, so results may vary if you swap it in.
Can I use potassium iodide instead of yeast?
Some versions of this experiment use potassium iodide as the catalyst instead of yeast. Yeast is recommended here because it’s easy to find, affordable, and safe for kids to handle directly.
Can I reuse the same bottle for multiple demonstrations?
Yes. Simply rinse the bottle out and shake out any leftover water between each use.
Is this safe for young children to help with?
Yes, with adult supervision. Kids can safely help with steps like mixing the yeast and water or adding food coloring. Handling the hydrogen peroxide and pouring the final mixture should be done by an adult.
Bring the Wow Factor to Your Next Science Lesson or Party
Elephant toothpaste checks every box you want in a STEM activity: it’s simple to set up, it’s genuinely exciting to watch, and it teaches real chemistry concepts that stick with kids long after the foam settles. Whether you’re a teacher looking for a memorable classroom demo or a parent hoping to turn an ordinary afternoon into a science adventure, this one is guaranteed to deliver.
Gather your supplies, run through it once for practice, and get ready to hear “again, again!” the moment the foam starts to rise.