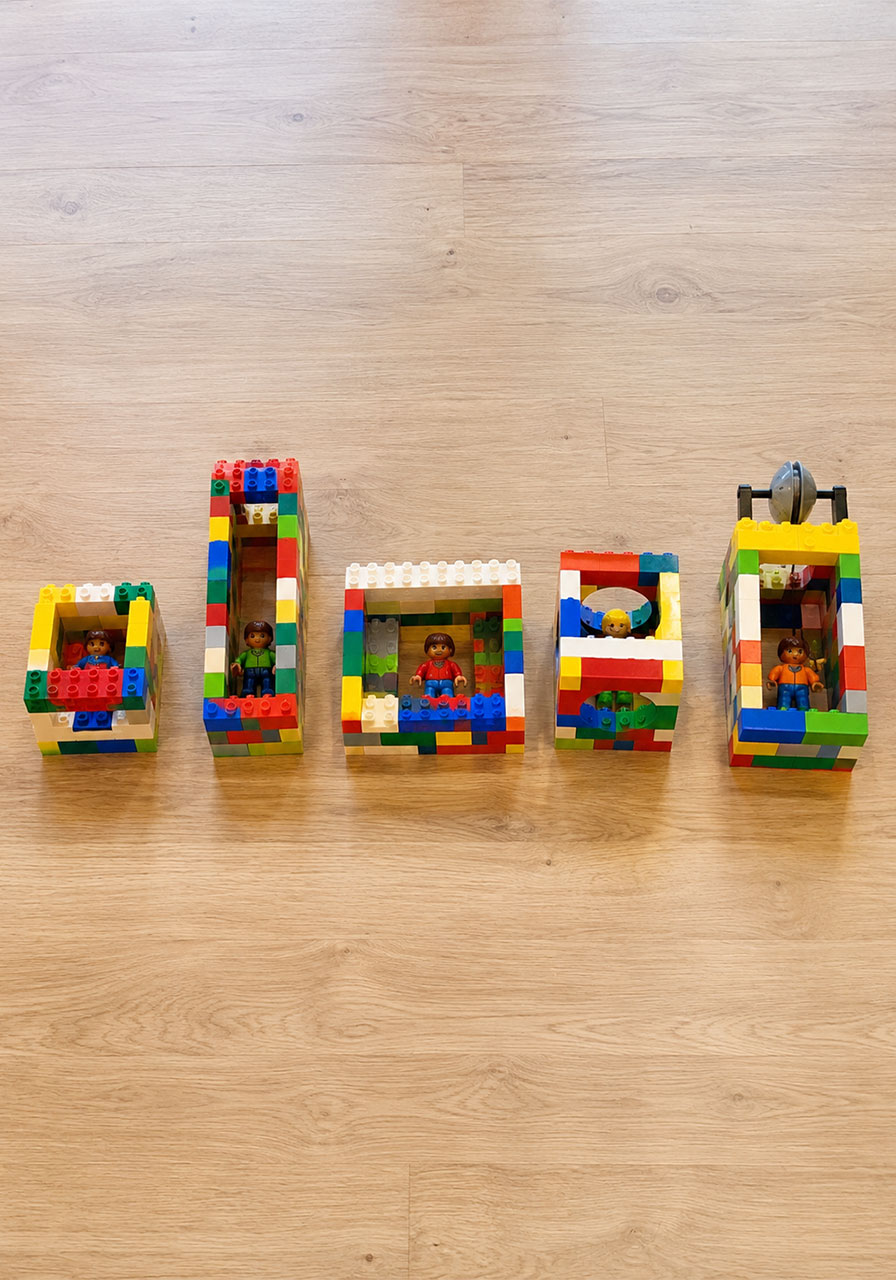
Picture this: your kids are glued to a screen, and you need a fix – fast, cheap, and actually educational. Enter the LEGO zip line.
This one activity checks every box. It’s hands-on. It’s endlessly customizable. And it sneaks in real physics lessons without your kids ever feeling like they’re “doing school.”
I first thought of this idea after watching my own kids zip line through the trees in France last summer. My 3-year-old and 5-year-old were flying through the air, and I was having quiet heart attacks the whole time. They loved every second of it.
So when I brought home a bin of LEGO bricks and said, “Let’s build our own zip line,” they were hooked before I even finished the sentence.
Here’s what makes this activity so brilliant: there is no single “right” way to build it. Every kid designs their own version of the cage, and every version teaches something different. After an hour and a half of nonstop building, we had lost count of how many designs we’d tested.
Whether you’re a parent looking for a rainy-day project or a teacher planning a hands-on STEM lesson, this activity delivers. Let’s build one.
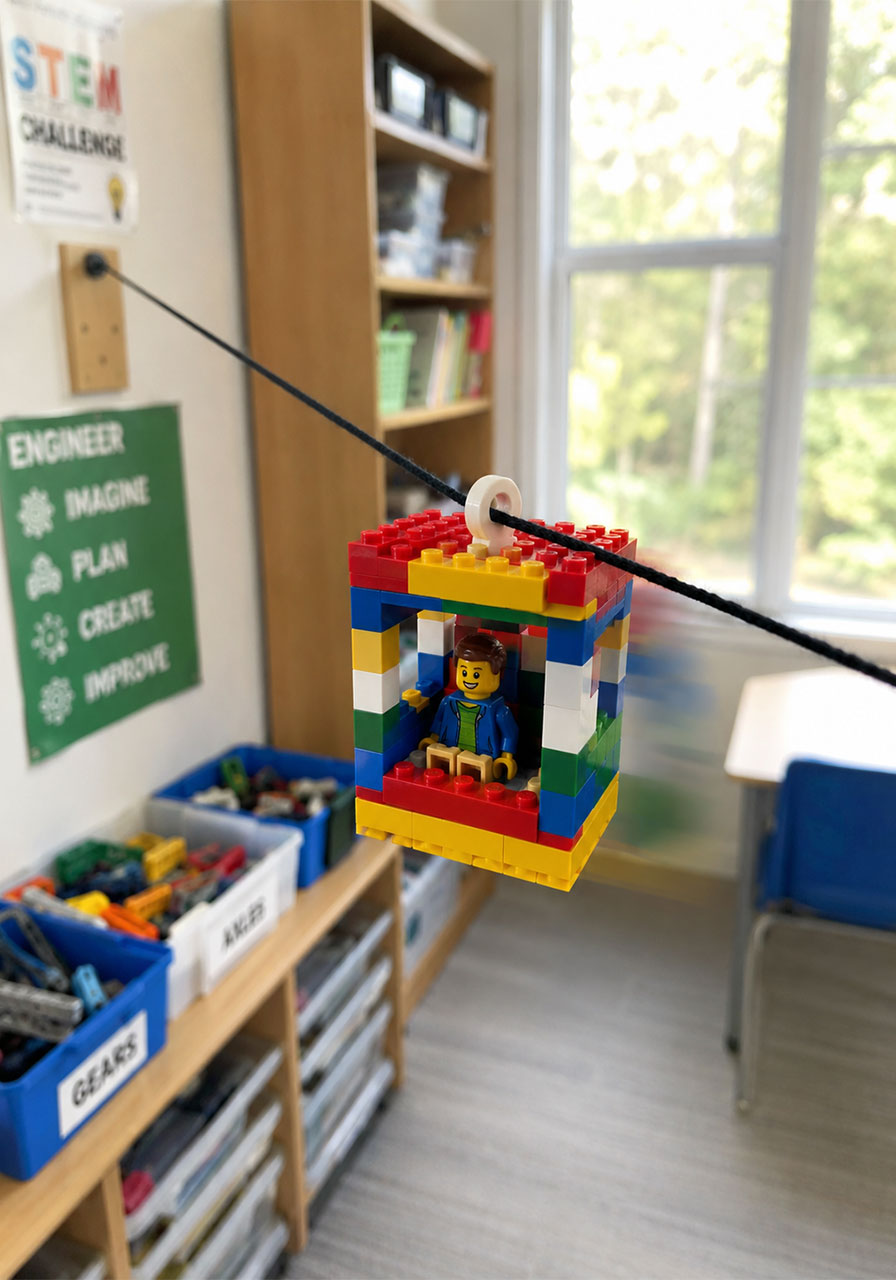
What You’ll Need
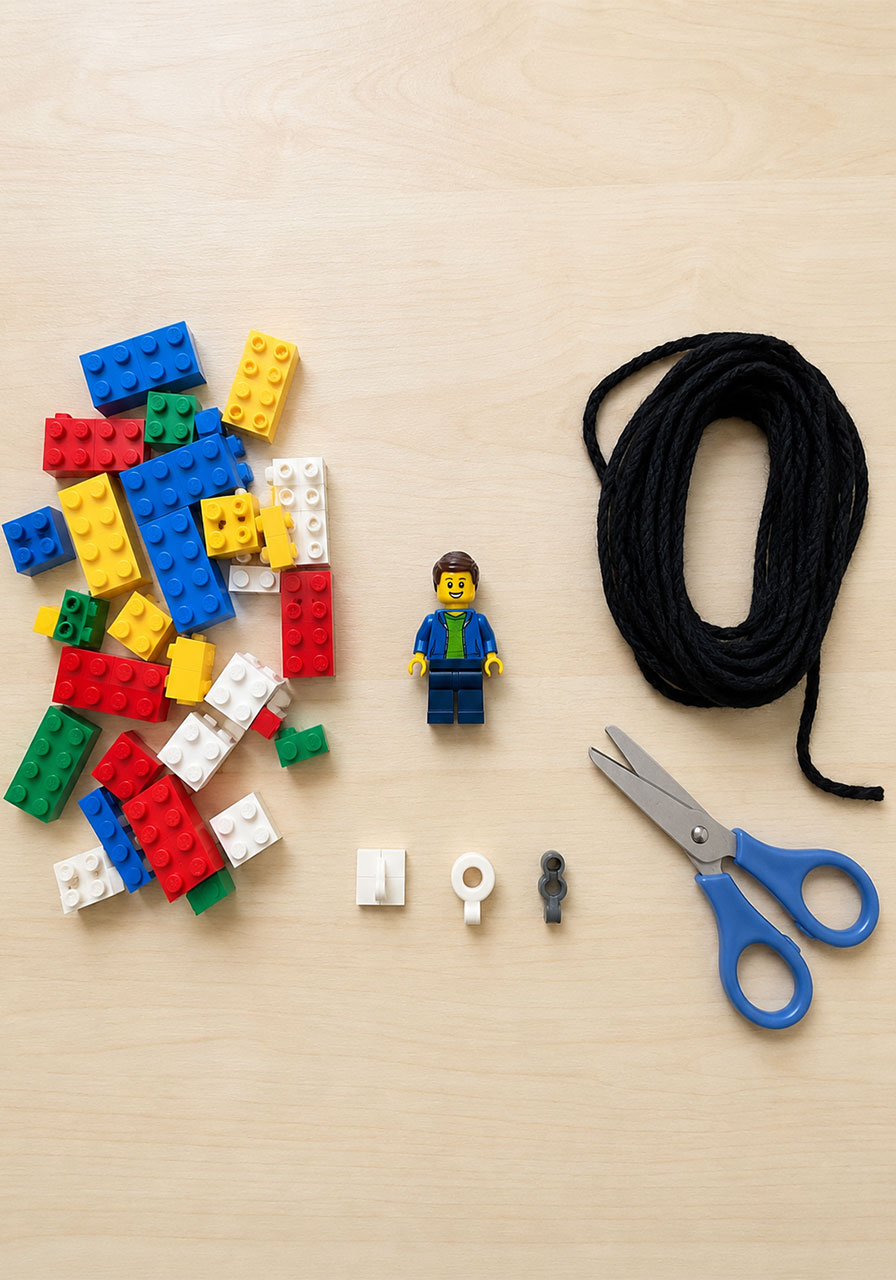
LEGO bricks (any size, any color – this is a great way to use up loose pieces)
1 LEGO minifigure
A piece of thick string or yarn (about 6-10 feet works well)
A stationary anchor point, like a doorknob, chair back, or stair railing

Best For
Age Range: 4 and up (younger siblings can help hold the string or send the cage down the line)
Group Size: Works for 1 child or a whole classroom, with each kid or team building their own cage
Setting: Home, classroom, homeschool co-op, or STEM club
Time Needed: 30 minutes for a first build, but most kids will happily experiment for an hour or more
How to Build Your LEGO Zip Line
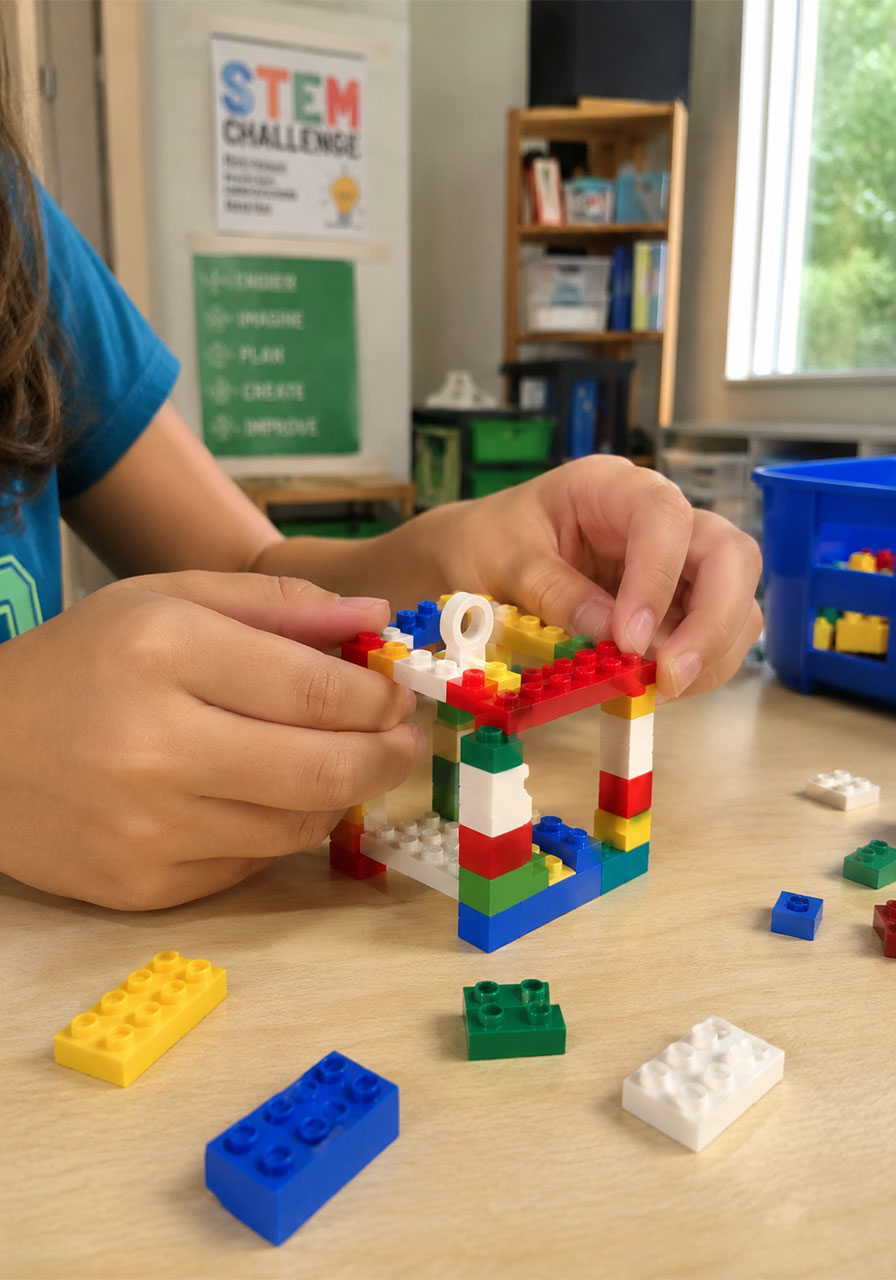
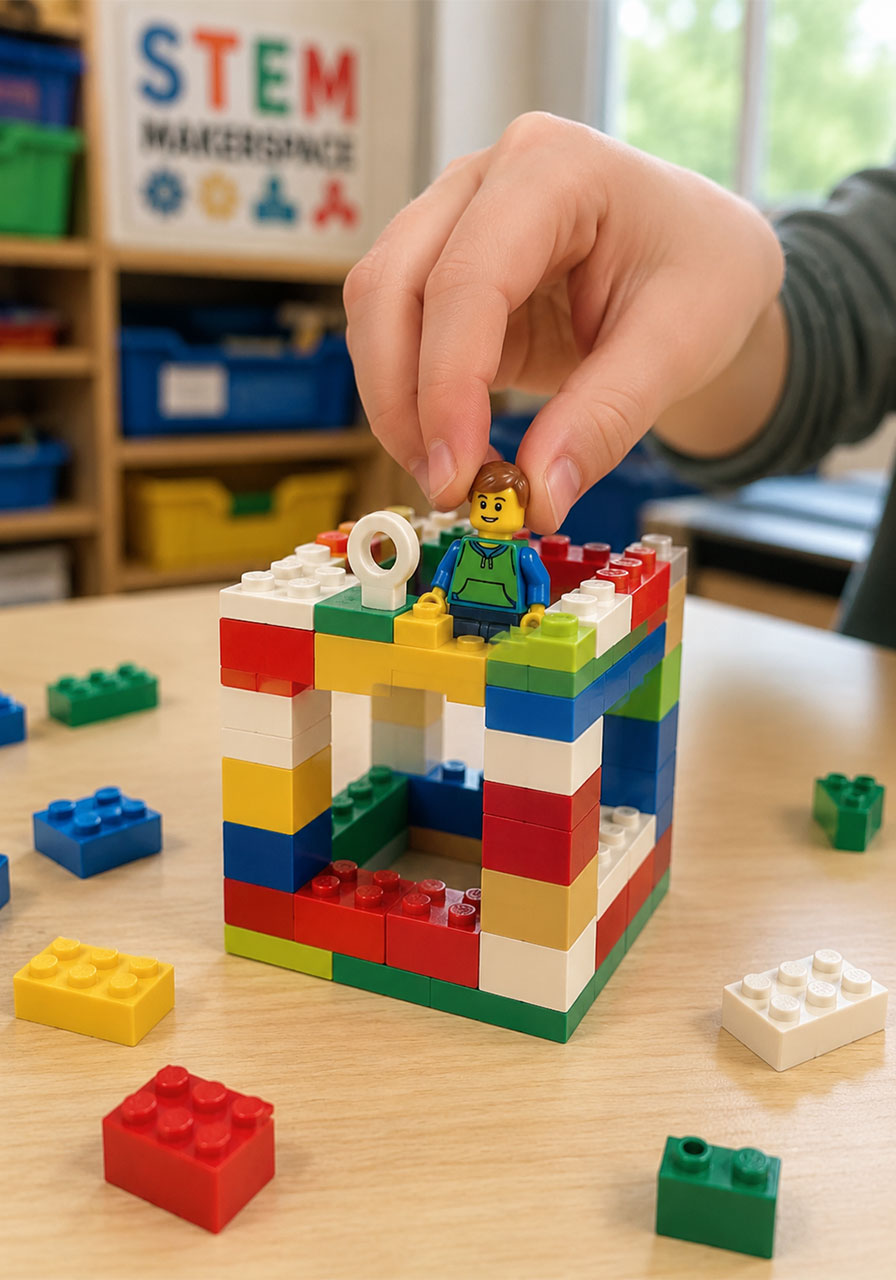
1. Build the cage.
Construct a small LEGO structure that can hold your minifigure snugly. Leave an open hole at the top where the zip line string will pass through.
2. Load the minifigure.
Place your minifigure inside the cage. This is the passenger who’s about to take the ride of their life.
3. Anchor your string.
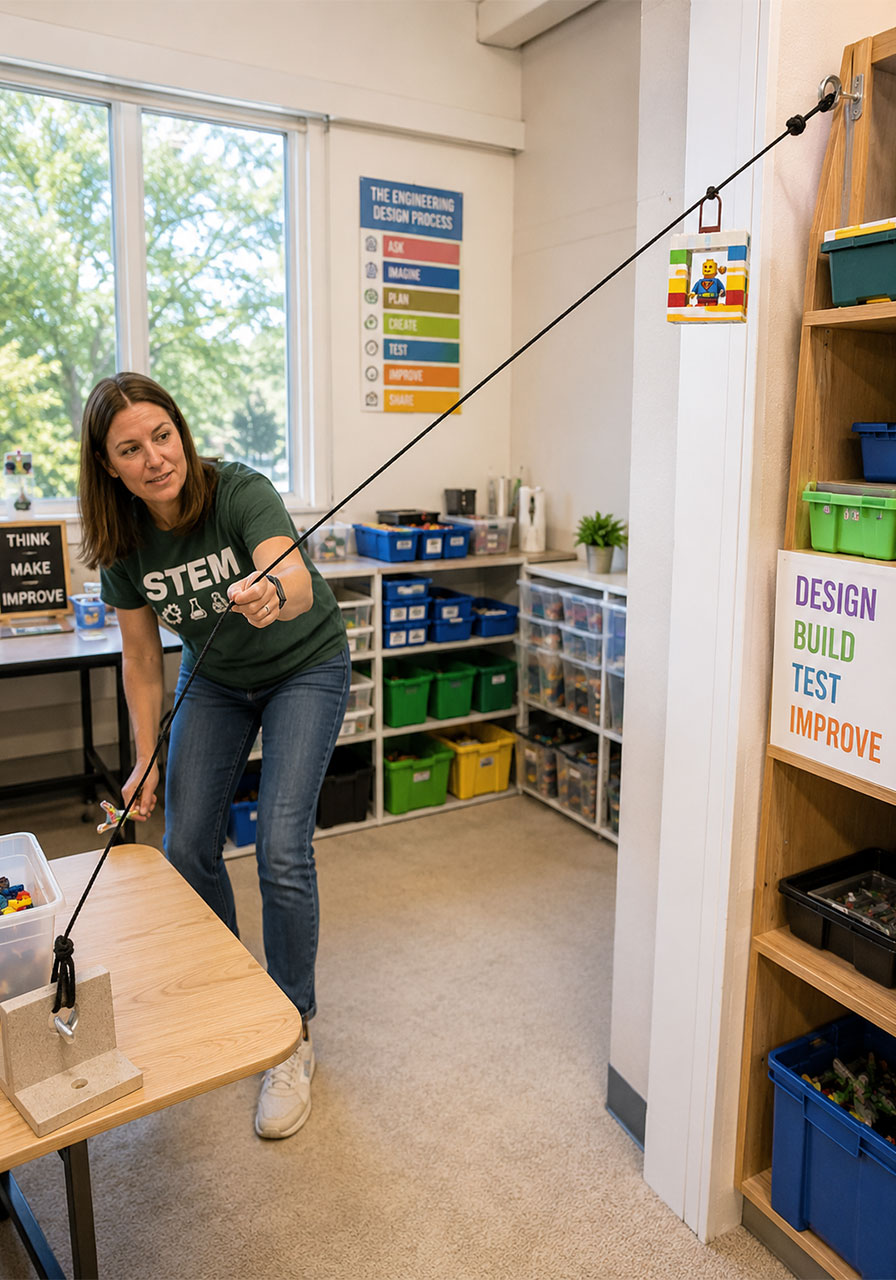
Tie one end of the string to something sturdy and elevated, like a doorknob, a chair back, or the top of a stair railing.
4. Thread the line.
Feed the loose end of the string through the hole at the top of your cage.
5. Create the slope.
Pull the string taut and hold the loose end lower than the anchor point, so the line runs downhill.
6. Position the cage.
Slide the cage all the way up to the highest point of the string, right next to the anchor.
7. Release and watch.
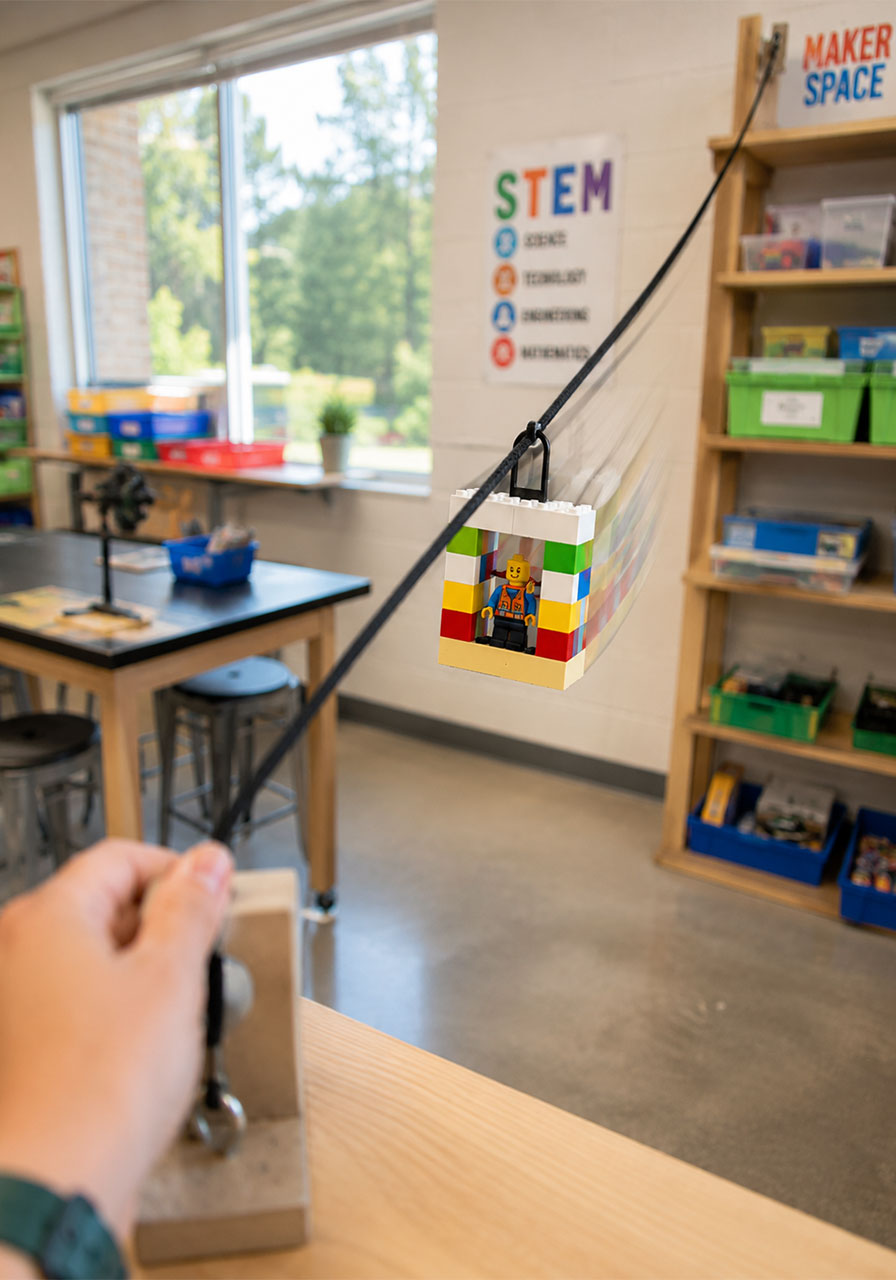
Let go of the cage and watch it zip down the line to the finish!
That’s it. Your first zip line is built and tested. Now here’s where the real learning begins.
The Science Behind the LEGO Zip Line
This activity looks simple, but it’s secretly a full physics lesson. As your kids test different cage designs, use these five concepts to spark discussion.
Gravity
Ask your child: why does the cage slide down instead of up? Gravity is the force pulling every object on the zip line toward the ground. It’s the reason the cage always travels downhill, never uphill on its own.
Friction
Ask your child: why do some cages glide smoothly while others stick and stall? Friction happens when two surfaces rub against each other. On a zip line, friction between the cage’s hole and the string works against motion, slowing the cage down.
Slope
Ask your child: how can you make the exact same cage go faster or slower without changing it at all? Slope describes how steep the string is. Lower the end of the string and the slope gets steeper. Raise it, and the slope flattens out.
Speed
Ask your child: how fast did the cage travel this time compared to last time? Speed measures how quickly an object covers distance. Timing each run with a stopwatch turns this into an easy, hands-on speed experiment.
Weight
Ask your child: does a heavier cage go faster or slower than a lighter one? Weight is the force gravity exerts on an object. More weight often means more speed, but friction and design can change that outcome, which makes for a great experiment.
Experiments to Try
Once the basic zip line is working, the real fun starts. Here are experiments we tried, plus a few extra ideas worth testing.
Change the slope. Make the string steeper. Did the cage speed up or slow down?
Stretch the distance. Make the zip line longer and set it at a gentle slope. How did that change the ride?
Add weight. Stack a few extra bricks onto the bottom of the cage. Did the added weight make it faster or slower?
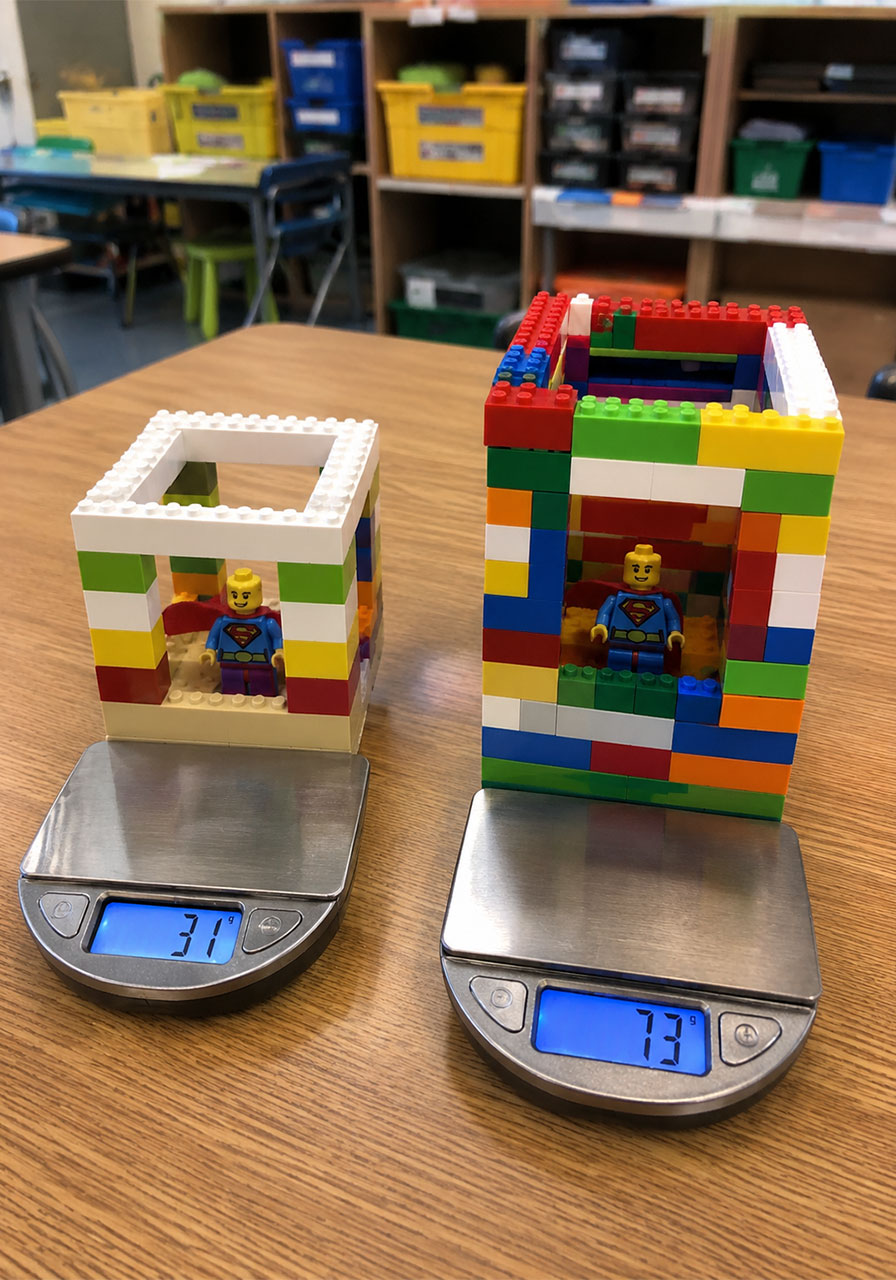
Go wide. Build an extra-wide cage and see how it handles the trip down the line.
Swap the hole shape. Try a round LEGO piece instead of a flat one for the hole the string passes through. Does it slide more smoothly?
Adjust the tension. Pull the string tighter, then looser. How does tension change the cage’s speed and stability?
Add a pulley. If you have a LEGO wheel large enough to thread the string through, try building it into the top of the cage as a pulley. It’s a great way to introduce a new mechanical concept.
Race two designs. Build two different cages and send them down side-by-side zip lines. Which one wins, and why?
Before every test, pause and ask your child to make a prediction. “Do you think it will go faster or slower this time?” This one question turns a fun activity into a genuine science experiment, and it builds critical thinking skills without your child even noticing.
Pro Tip
Keep a simple chart on paper or a whiteboard. List each design change in one column and the result in the next. This turns your zip line experiments into a real data collection activity, which is a fantastic bonus lesson for any parent or teacher looking to add a bit more academic rigor.
Troubleshooting Common Issues
If your zip line isn’t working quite right, these quick fixes should help.
The cage won’t move at all. Your string is probably not taut enough, or the slope is too flat. Pull the string tighter and lower the end point to increase the slope.
The cage gets stuck partway down. Check the hole where the string passes through. If it’s too tight or rough, the friction may be too high. Try a smoother or slightly larger LEGO piece for the opening.
The cage falls apart mid-ride. Reinforce the connection points with extra bricks, and make sure the minifigure isn’t wedged in a way that puts pressure on the walls.
The string keeps slipping off the anchor. Wrap the string around the anchor point a few extra times, or tie it with a double knot for a more secure hold.
Classroom Tips for Teachers
This activity works beautifully in a classroom setting, especially for STEM stations, science fair prep, or an engineering design unit.
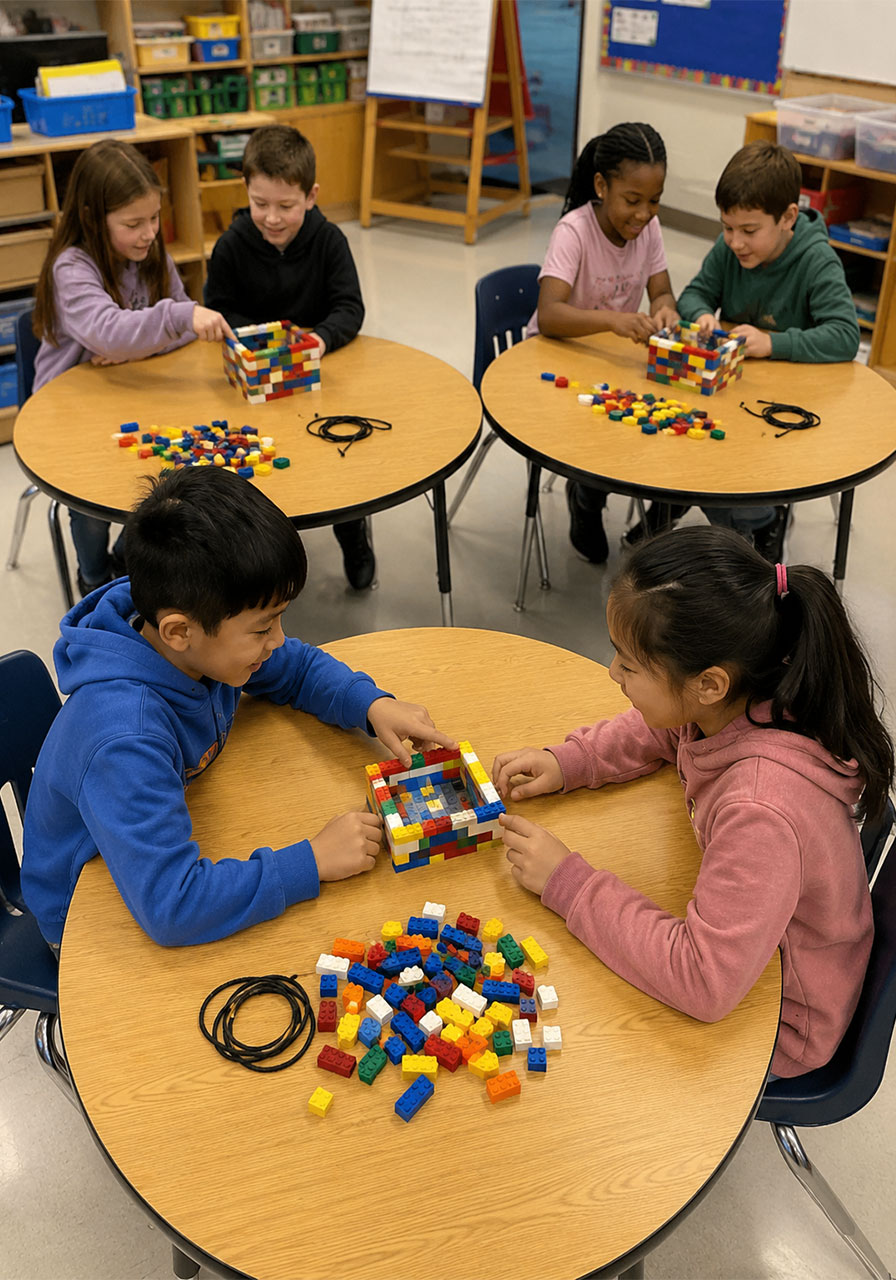
Split students into small teams and give each team the same amount of LEGO bricks and one piece of string. Challenge them to build the fastest cage, the most stable cage, or the cage that can carry the most extra “cargo” bricks.
Afterward, have each team present their design and explain the choices they made. This adds a public speaking and engineering-reflection component to the activity, which pairs well with most elementary science standards around forces and motion.
For an easy assessment tool, hand out a simple worksheet where students record their predictions, their results, and one thing they’d change if they built the cage again.
Safety Notes
Always supervise younger children around string or yarn, since it can be a choking or tangling hazard for toddlers and babies. Keep the zip line height low enough that nothing sits directly above a walking path where someone could trip.
Small LEGO pieces are also a choking hazard for children under 3, so this activity is best suited for kids ages 4 and up, with adult supervision for younger siblings who want to watch or help.
Frequently Asked Questions
What age is this LEGO zip line activity best for?
Kids as young as 4 can build simple cages with guidance, while kids 6 and up can typically design and test independently. Even toddlers can join in by helping hold the string.
Do I need special LEGO pieces?
No. Any basic LEGO bricks work, and this is actually one of the best ways to use up spare or mismatched pieces sitting in the bottom of the bin.
Can this be done without LEGO minifigures?
Yes. Any small LEGO piece can act as the “passenger” if you don’t have a minifigure on hand.
How do I make the zip line go faster?
Increase the slope by lowering the end of the string, reduce friction with a smoother hole opening, or add a small amount of weight to the cage.
Is this activity messy?
Not at all. Aside from loose LEGO pieces, there’s no glue, paint, or cleanup involved, which makes it a great low-mess option for classrooms and living rooms alike.
Final Thoughts
The LEGO zip line activity proves that some of the best STEM lessons don’t need a kit, a worksheet, or a screen. All it takes is a handful of bricks, a piece of string, and a little curiosity.
My son built more cage designs than I could count, testing and rebuilding each time something didn’t work quite right. My daughter, too young to build a solid cage on her own, still had a blast holding the string and sending each design down the line.
That’s the beauty of this activity. Every child, at every age, has a way to join in. Try it out, and don’t be surprised if “one more try” turns into an entire afternoon of engineering, testing, and laughter.