
Got a sunny afternoon and a curious kid on your hands? You’re about to turn both into a hands-on science lesson they won’t forget.
This paper plate sundial is one of the easiest STEM activities you can pull off with stuff you already have in your kitchen drawer. No special kits, no confusing instructions, no stress.
Just a paper plate, a pencil, and a little bit of sunshine.
By the end of this activity, your child will have built a working clock powered entirely by the sun. They’ll practice telling time, watch the Earth’s rotation in action, and get a real “aha!” science moment, all before lunch.
This one is kid-friendly and simple enough for kids to do mostly on their own, with just a little help from an adult for the setup.
It’s perfect for summer break, homeschool science units, or a rainy-day-turned-sunny-day surprise.
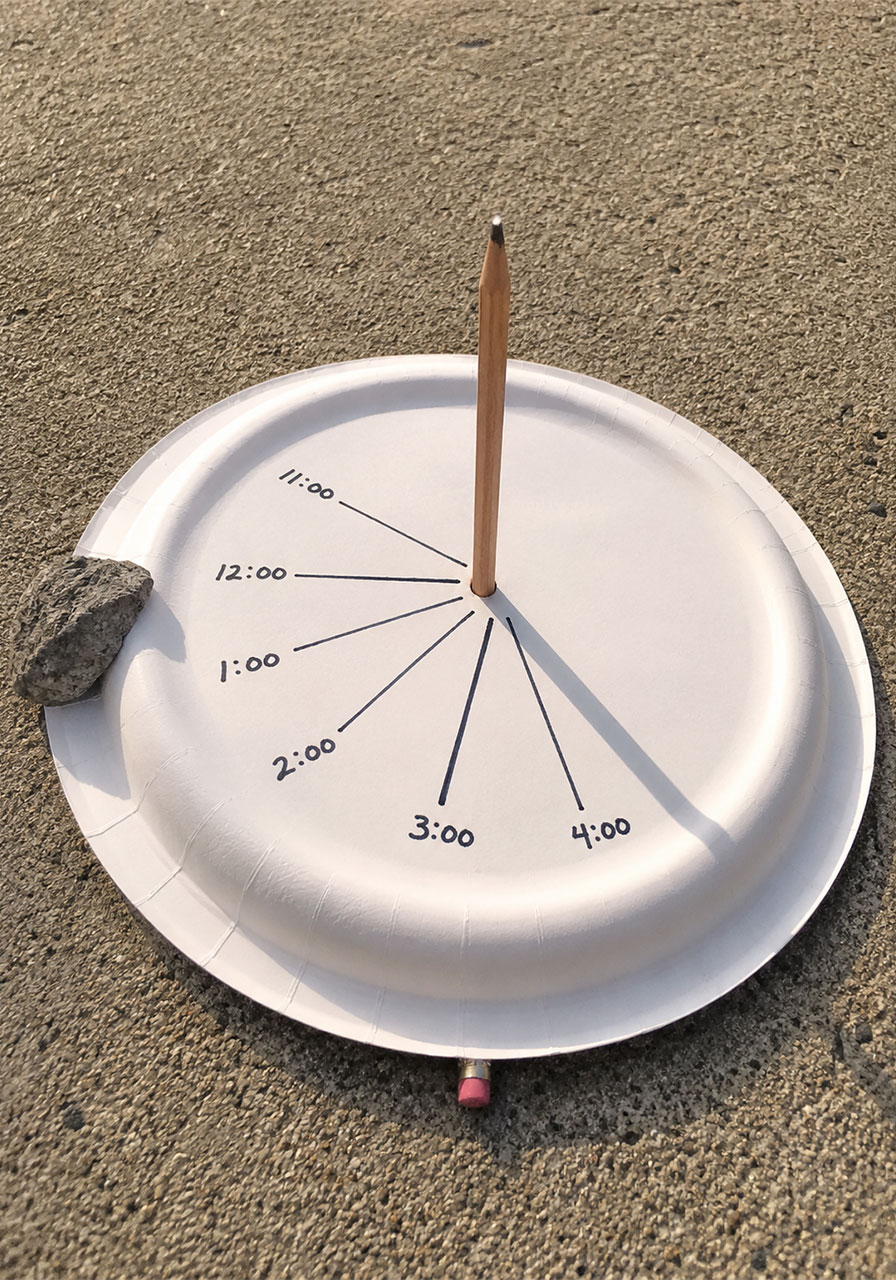
Why This Activity Works So Well
Before clocks and watches existed, people told time by watching the sun.
They noticed the sun’s position in the sky changes throughout the day. As it moves, it casts a shadow that shifts in length and direction.
Ancient civilizations used this simple idea to build sundials, and you can recreate the exact same concept with a paper plate.
This activity gives kids a front-row seat to real astronomy. They’re not just memorizing a fact from a textbook. They’re watching the Earth’s rotation happen in real time, right in their own backyard.
It also sneaks in some low-key math and writing practice, since kids will be reading a clock and labeling their sundial by hand.

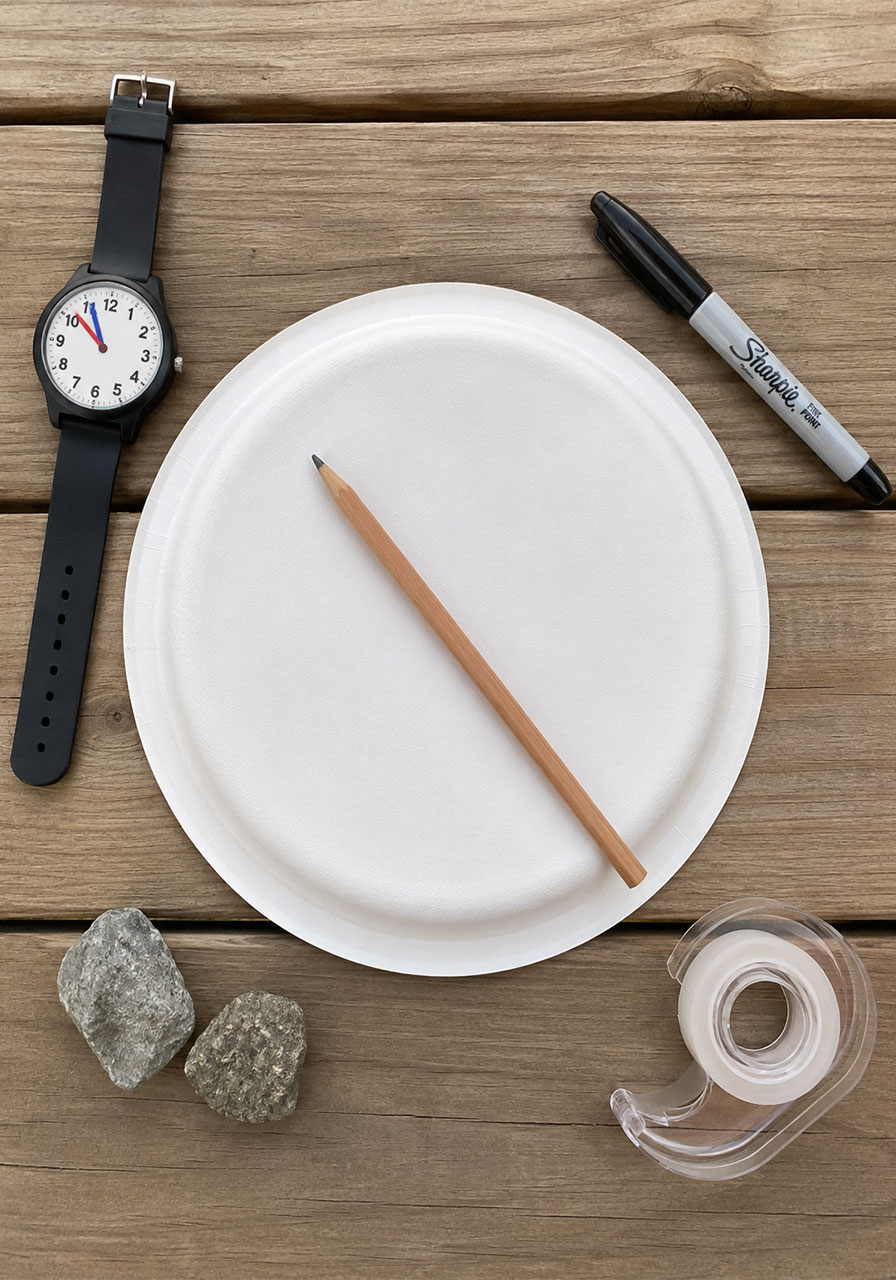
What You’ll Need
1 sturdy paper plate
1 sharpened pencil
Permanent marker
A watch or clock
Tape
A small rock or two (optional, for weighing down the plate)
Best for: Kids ages 5 and up, classrooms, homeschool science units, and summer learning at home.
Time needed: About 5 minutes to set up, then a few minutes each hour throughout the day to mark it.
How to Make Your Paper Plate Sundial
Follow these steps in order. Getting the pencil centered and steady is the key to making this work, so don’t rush that part.
1. Use the point of your pencil to poke a hole in the very center of the paper plate. Keep the hole as small as possible. A snug fit keeps the pencil stable and standing straight.
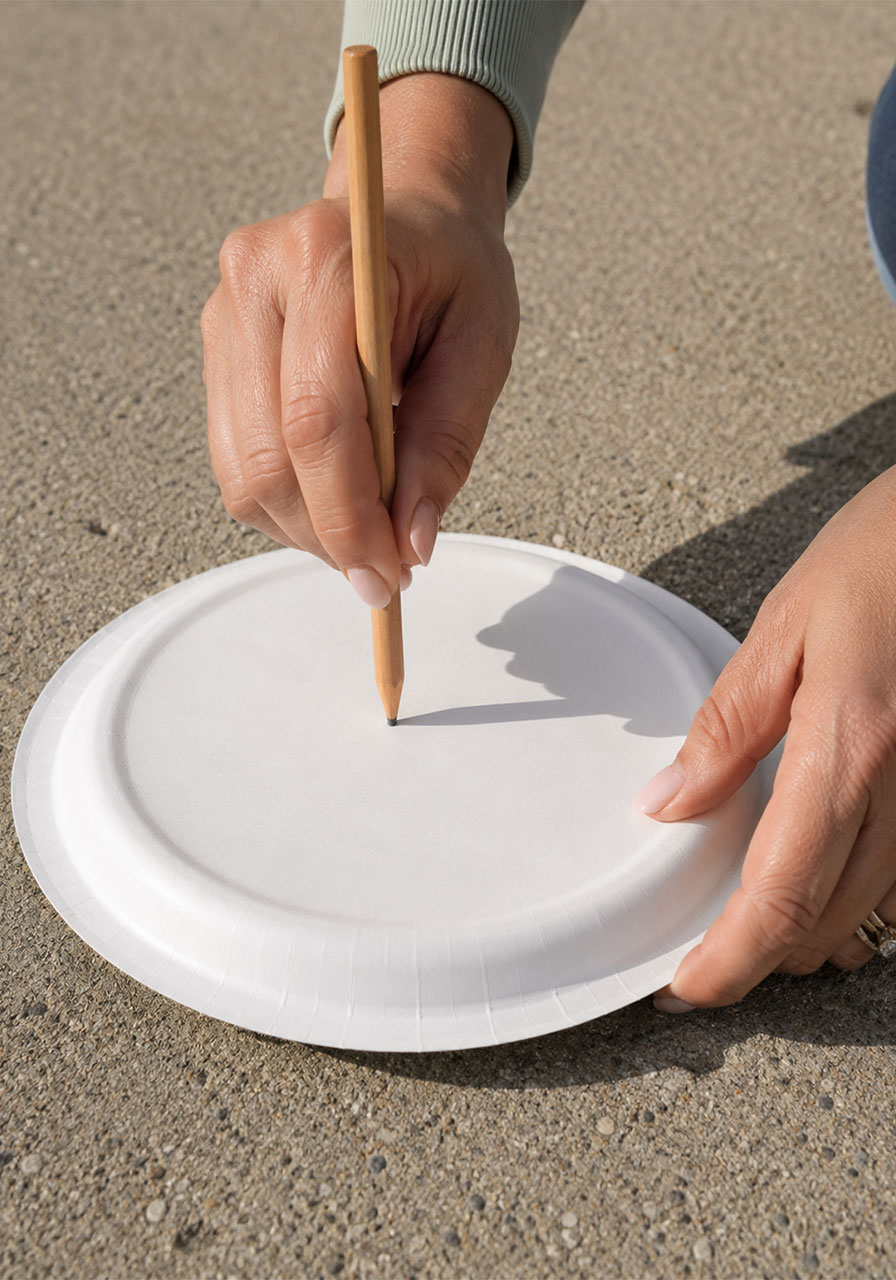
2. Push the pencil through the hole so the eraser end rests on the ground beneath the plate, and the pointed end sticks straight up above the plate.
3. Use a small piece of tape to secure the pencil in place. You want it standing straight up and down, perfectly perpendicular to the plate. If it leans, your shadow lines won’t be accurate.
4. Check the time before you head outside. Try to start right before the top of an hour, like 10:55, so you’re ready to make your first mark the moment the clock strikes the hour.
5. Take your sundial outside and set it in a flat, open spot that gets full sun all day. A driveway, patio, or open patch of yard works great.
6. Weigh down the plate so it doesn’t blow away. A couple of small rocks on the edge of the plate work perfectly, or you can tape the rim directly to the ground.
7. At the top of each hour, head back outside with your permanent marker. Trace a line directly along the pencil’s shadow, starting from the base of the pencil and extending out to the tip of the shadow.
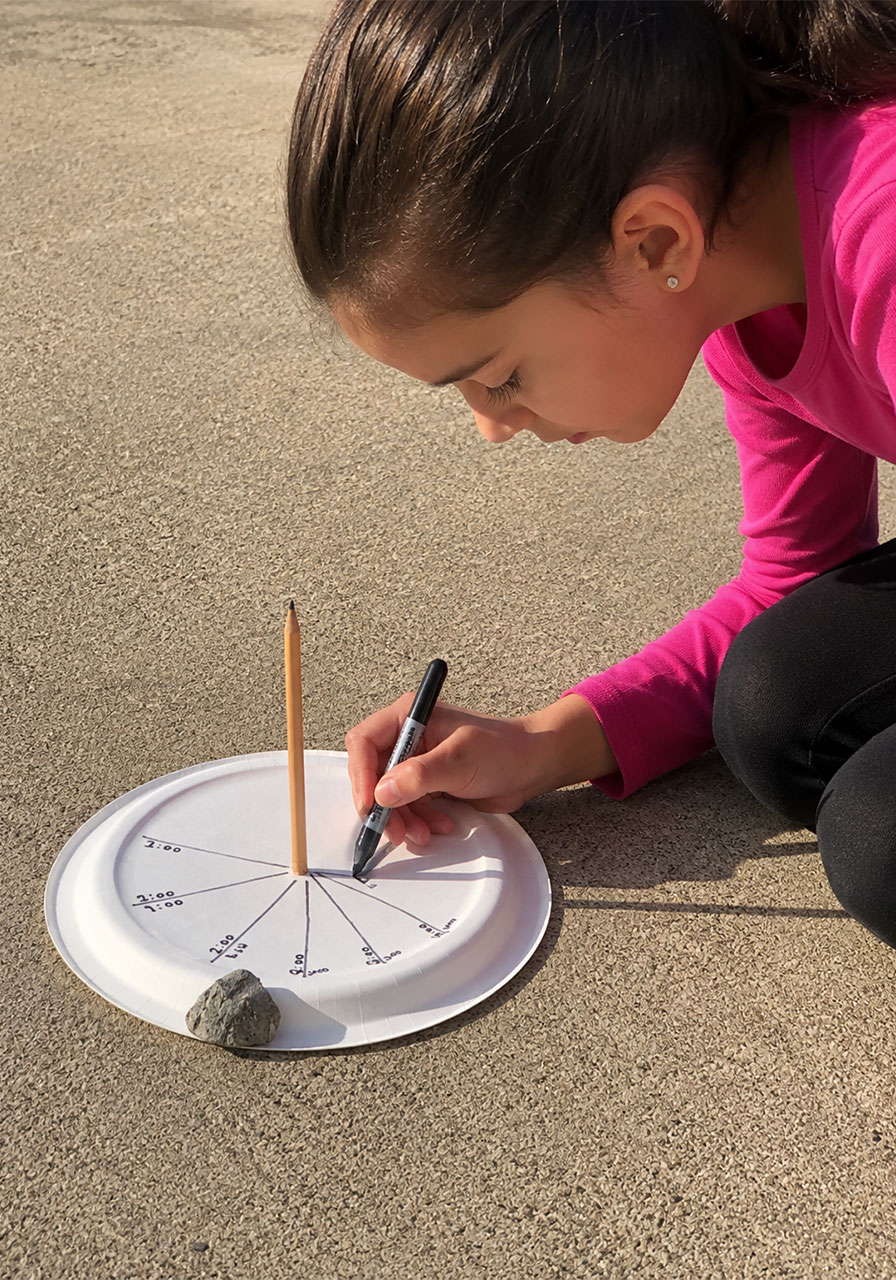
8. Write the time right next to the line you just drew, like “12:00” or “1:00.”
9. Repeat this every hour for as many hours as you can. The more hours you track, the more complete and impressive your sundial becomes.
10. If the weather cooperates, leave your sundial outside overnight and test its accuracy again the next day.
That’s it. No complicated tools, no confusing measurements. Just watch, trace, and label.
The Science Behind It: How a Sundial Actually Works
Here’s where the real learning kicks in, and it’s genuinely fascinating once kids see it play out with their own eyes.
The sun isn’t actually moving across the sky. The Earth is slowly spinning on its axis, which makes the sun appear to move from our point of view.
As the Earth rotates throughout the day, the angle of sunlight hitting your pencil changes. That change in angle is exactly what causes the shadow on your sundial to shift position hour by hour.
Here’s the part that really impresses kids: the sun is in roughly the same spot in the sky at the same time every day. That’s why a homemade sundial can be surprisingly accurate, even though it’s made from a paper plate and a pencil.
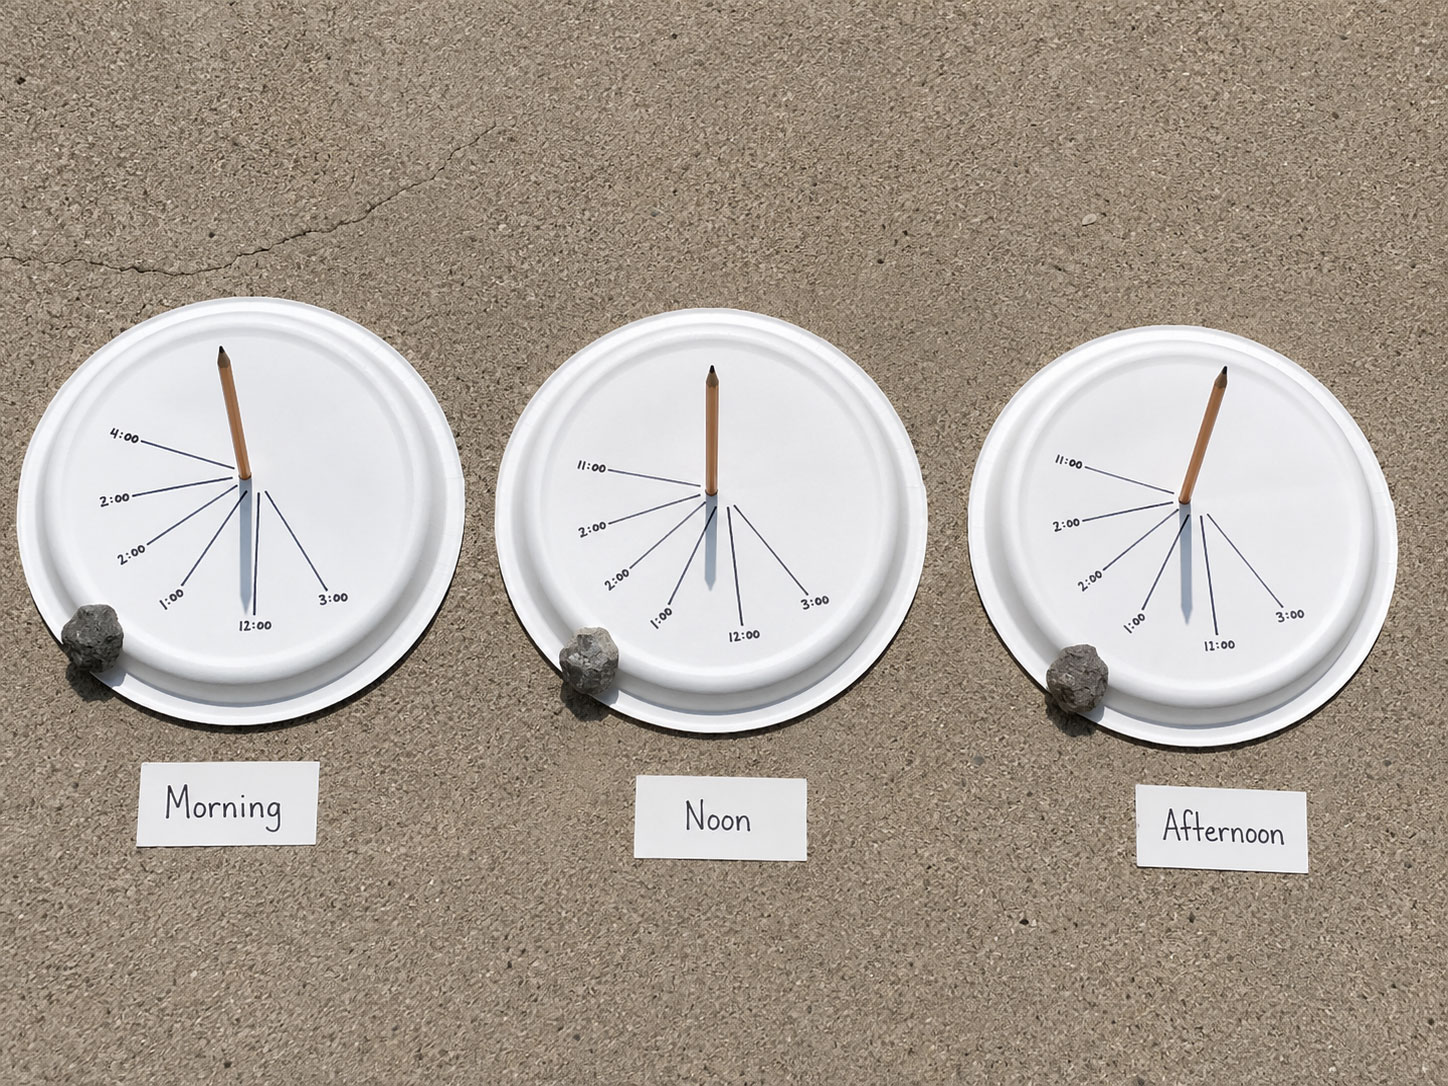
Kids will also notice something interesting about the shadow’s length, not just its direction.
In the morning, the shadow starts out longer and gradually gets shorter as noon approaches. Once the sun passes its highest point in the sky, the pattern flips, and the shadow starts stretching longer again through the afternoon.
This is a great moment to pause and ask your child what they predict will happen next. Will the shadow keep shrinking? Will it stay the same? Letting them guess before checking builds real scientific thinking, not just observation.
Pro Tip
Pick a spot for your sundial that stays in full sun the entire day, away from trees, fences, or buildings that might cast shade during certain hours. Even partial shade for 20 minutes can throw off your shadow lines and confuse the pattern.
Fun Variations to Try
Once your paper plate sundial is a hit, here are a couple of ways to take the learning further.
Build a permanent outdoor sundial. Stick a sturdy stick into the ground in your garden or play area. Use rocks to mark the hours around it, just like you did with the marker on the paper plate. You can even write the times directly on the rocks with permanent marker. It’s a fun, lasting addition to a backyard science corner.
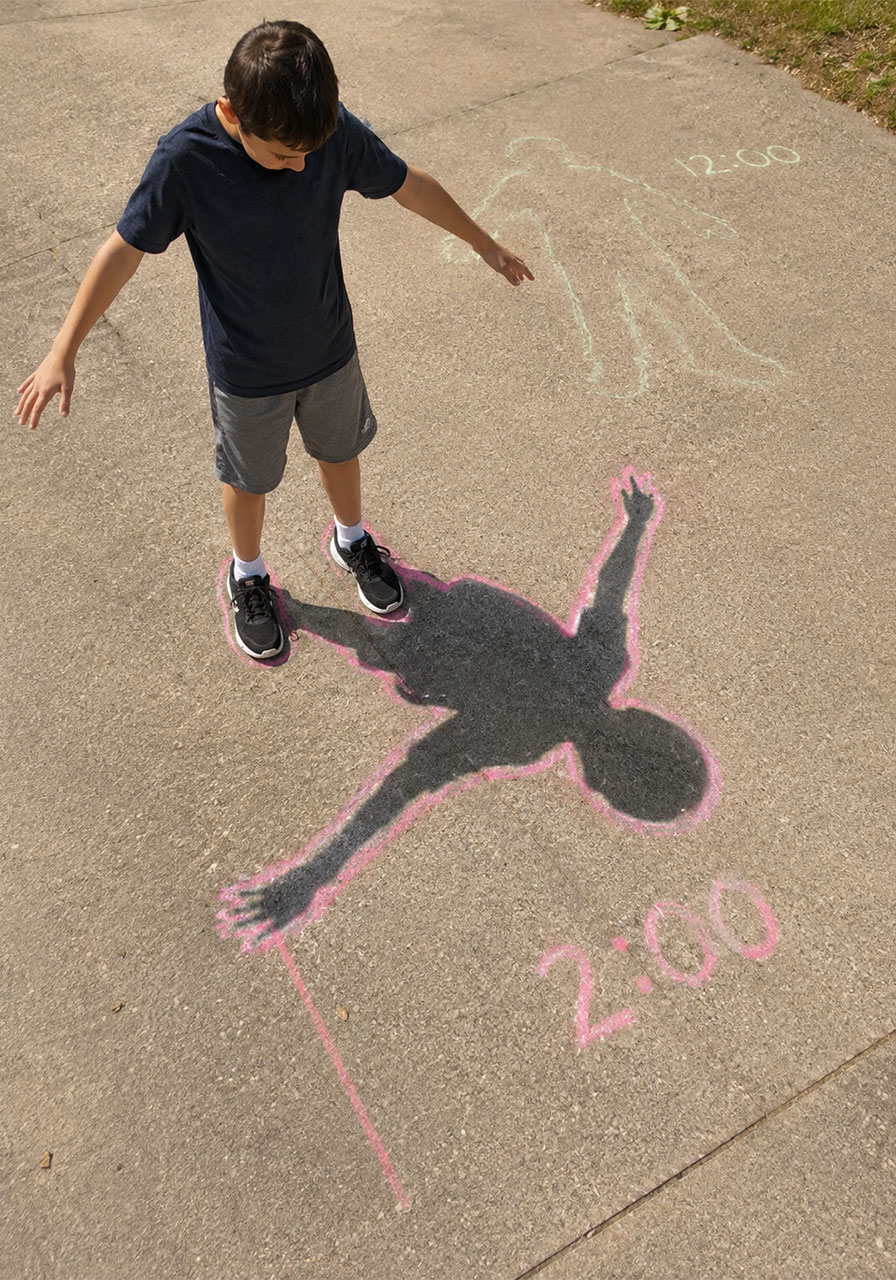
Try a human sundial. Head out to the driveway or a sidewalk and have someone trace your shadow with sidewalk chalk. Write the time next to it. Come back to that exact same spot later in the day and trace your shadow again. Kids love seeing how much their own shadow changes shape and direction throughout the day, using their own body as the sundial.
Why This Is a Go-To STEM Activity
This project checks every box teachers and parents look for in a great STEM activity. It’s cheap, it uses materials you already have at home, and it teaches a real scientific concept through direct, hands-on observation.
It also naturally builds in patience and observation skills, since kids have to return to their sundial hour after hour to see the results unfold. That’s a valuable lesson in itself, especially in a world of instant answers.
Best of all, it turns an ordinary sunny day into a full afternoon of learning, without a single worksheet in sight.
Keep this one in your back pocket for summer break, homeschool science days, or any afternoon when you need a simple, screen-free activity that actually teaches something real.
