
Your yard is the first thing trick-or-treaters see and the last thing they’ll talk about on the walk home. That’s a lot of pressure for a front porch.
The good news? You don’t need a professional haunted house budget to pull off a seriously spooky display. With a little planning, some dollar-store finds, and the ideas below, your house can be the one everyone’s kids beg to visit.
We rounded up 17 of the best DIY Halloween yard decorations out there, from classic jack-o’-lantern upgrades to glowing graveyards. Every idea comes with what you’ll need, exactly how to make it, and a pro tip to take it up a notch. Start planning now so you’re not scrambling on October 30th.
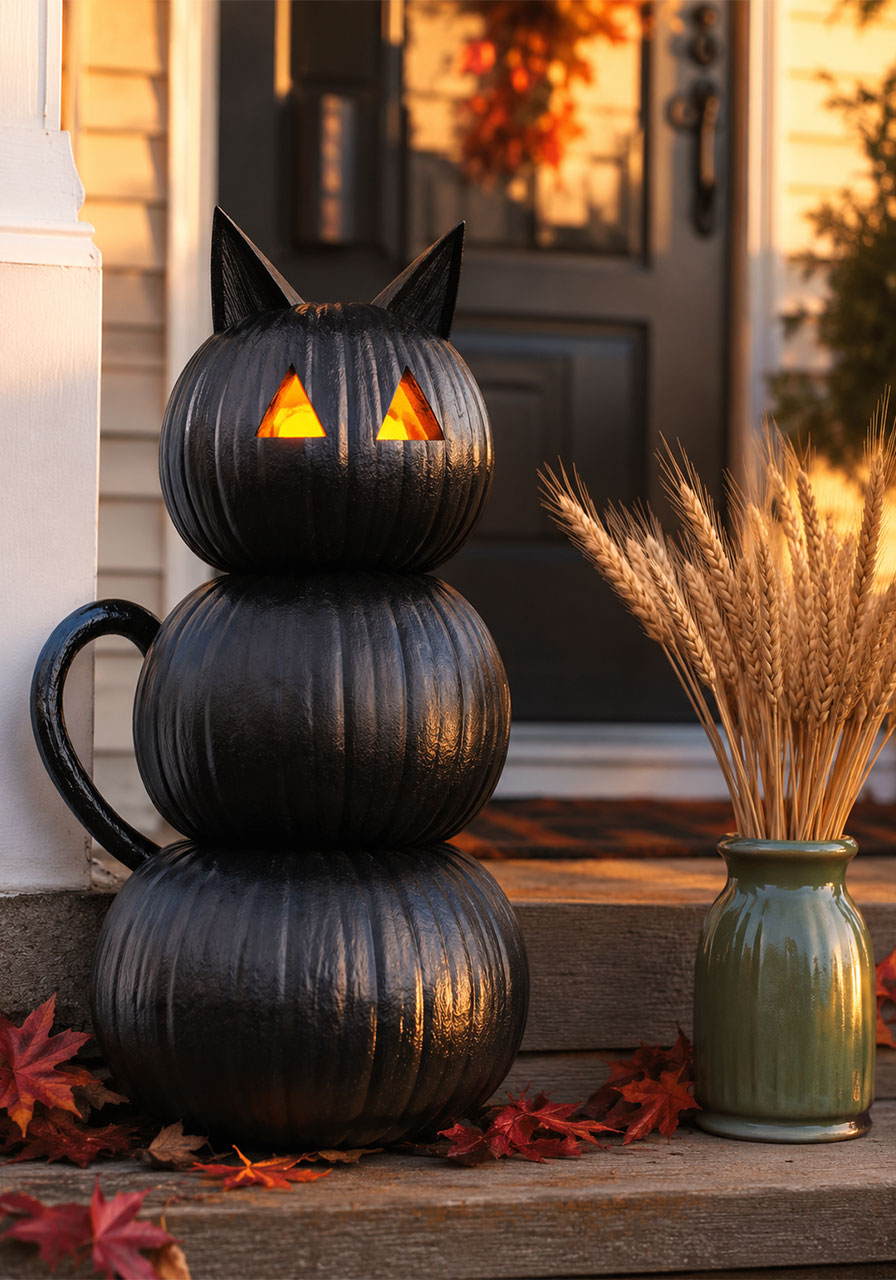
1. Pumpkin Kitty Cats
Skip the same old jack-o’-lantern face this year. With a few clean cuts and a can of black spray paint, you can turn plain pumpkins into a family of spooky black cats stacked right on your porch steps.
This one is a guaranteed showstopper because it’s unexpected. Nobody expects pumpkins to look like cats, so it stops trick-or-treaters in their tracks every time.
Best For: Front porches, pumpkin-carving traditions, families with kids
Prep Time: 1-2 hours per pumpkin
Skill Level: Easy to moderate
What You’ll Need:
- Pumpkins in a few different sizes
- Black spray paint (matte finish works best)
- Sharp carving knife
- Orange or yellow paint or LED tea lights for the eyes
How to Make It:
1. Carve triangle ears into the top of one pumpkin so it can sit like a cat’s head.
2. Carve two triangle eye shapes and a small nose for the face.
3. Paint the entire pumpkin black and let it dry completely.
4. Add orange paint or a battery tea light behind the eyes for that glowing effect.
5. Stack a headless pumpkin body underneath, then stack a smaller “kitten” version beside it.
Pro Tip: Use battery-operated tea lights instead of real candles behind the eyes so your cats can glow safely all night long, no relighting required.

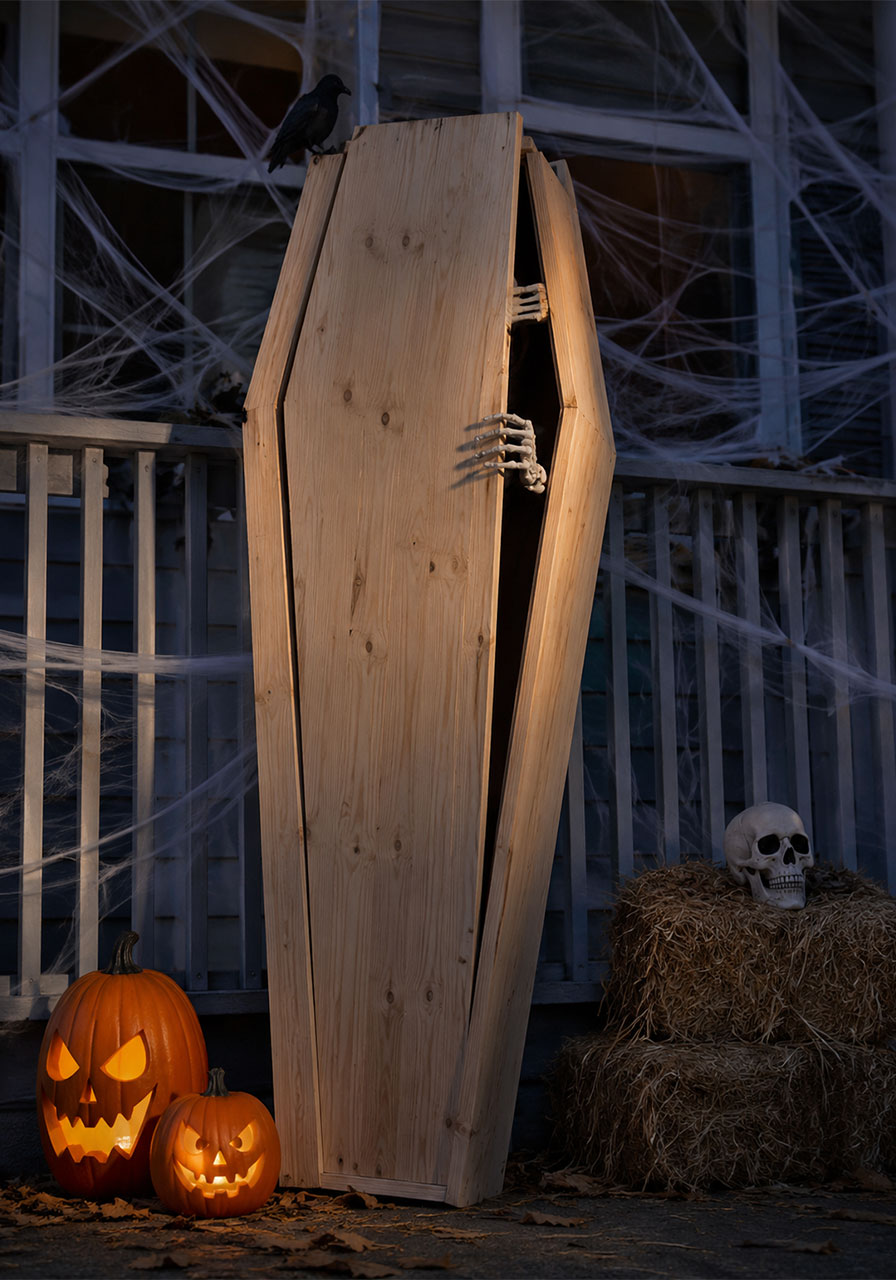
2. Bring Out Your Dead: DIY Coffin
Nothing says “welcome to my haunted house” quite like a full-size wooden coffin propped up on your porch. It’s dramatic, it’s memorable, and honestly, it’s easier to build than you’d think.
This project takes some basic woodworking skills, but the payoff is huge. A homemade coffin instantly becomes the centerpiece of your entire display.
Best For: Front yards and porches with space to spare, DIYers who enjoy a weekend project
Prep Time: A full weekend
Skill Level: Moderate to advanced
What You’ll Need:
- Plywood or fence boards
- Wood screws and a drill
- Saw (circular or jigsaw)
- Wood stain or paint
- Optional: fake skeleton hand, crow, or fog machine for staging
How to Make It:
1. Cut your boards into the classic hexagonal coffin shape, wider at the shoulders and narrower at the feet.
2. Screw the side panels together to form the box, then attach a bottom panel.
3. Sand any rough edges and stain or paint the wood for a weathered, aged look.
4. Prop the coffin upright against your porch railing or a sturdy stand.
5. Add finishing touches like a skeleton hand reaching out or a perched crow on top.
Pro Tip: Angle the coffin slightly forward and add a fog machine at the base for an eerie mist effect that pools around the bottom.
3. Make-Your-Own Tombstones
When you make your own tombstones, you get to write the epitaphs. That’s half the fun. Turn your front lawn into a realistic mini graveyard with foam headboards you carve yourself.
This is one of the most budget-friendly ways to fill a large yard with atmosphere, and every tombstone can be totally different.
Best For: Large front lawns, groups who love collaborative crafting
Prep Time: 30-45 minutes per tombstone
Skill Level: Easy

What You’ll Need:
- Foam insulation board
- Utility knife
- Gray spray paint and black spray paint
- Wooden stakes for support
- Marker for sketching designs
How to Make It:
1. Sketch a tombstone shape and any epitaph or design directly onto the foam board with marker.
2. Carve out the edges with a utility knife, then carve grooves for the lettering and designs.
3. Spray the whole tombstone gray, then dry-brush black paint into the grooves for an aged stone look.
4. Attach wooden stakes to the back for easy staking into the ground.
5. Arrange your tombstones in clusters across the lawn for a realistic cemetery layout.
Pro Tip: Sprinkle a little dirt or dried leaves at the base of each tombstone so they look like they’ve been there for years.
4. Pumpkins A-Glow
Glow-in-the-dark paint turns ordinary pumpkins into after-dark showstoppers, no carving knife required. This is especially great if you’ve got little ones who want to help decorate without any sharp tools involved.
Under a black light, these pumpkins practically vibrate with color, making them one of the most photographed decorations on the block.
Best For: Families with young kids, no-carve pumpkin fans
Prep Time: 20-30 minutes per pumpkin
Skill Level: Easy

What You’ll Need:
- Pumpkins (real or plastic)
- Glow-in-the-dark or blacklight-reactive paint
- Paintbrushes
- A black light for display
How to Make It:
1. Wipe your pumpkins clean and let them dry fully before painting.
2. Paint lines radiating out from the stem for a striped effect, or try dots, spirals, or a crackle pattern.
3. Let each layer dry before adding a second coat for brighter glow.
4. Set your pumpkins near a black light once the sun goes down.
Pro Tip: Plastic pumpkins let you reuse this decoration year after year, so it’s worth the extra few dollars if you plan on making this a Halloween tradition.
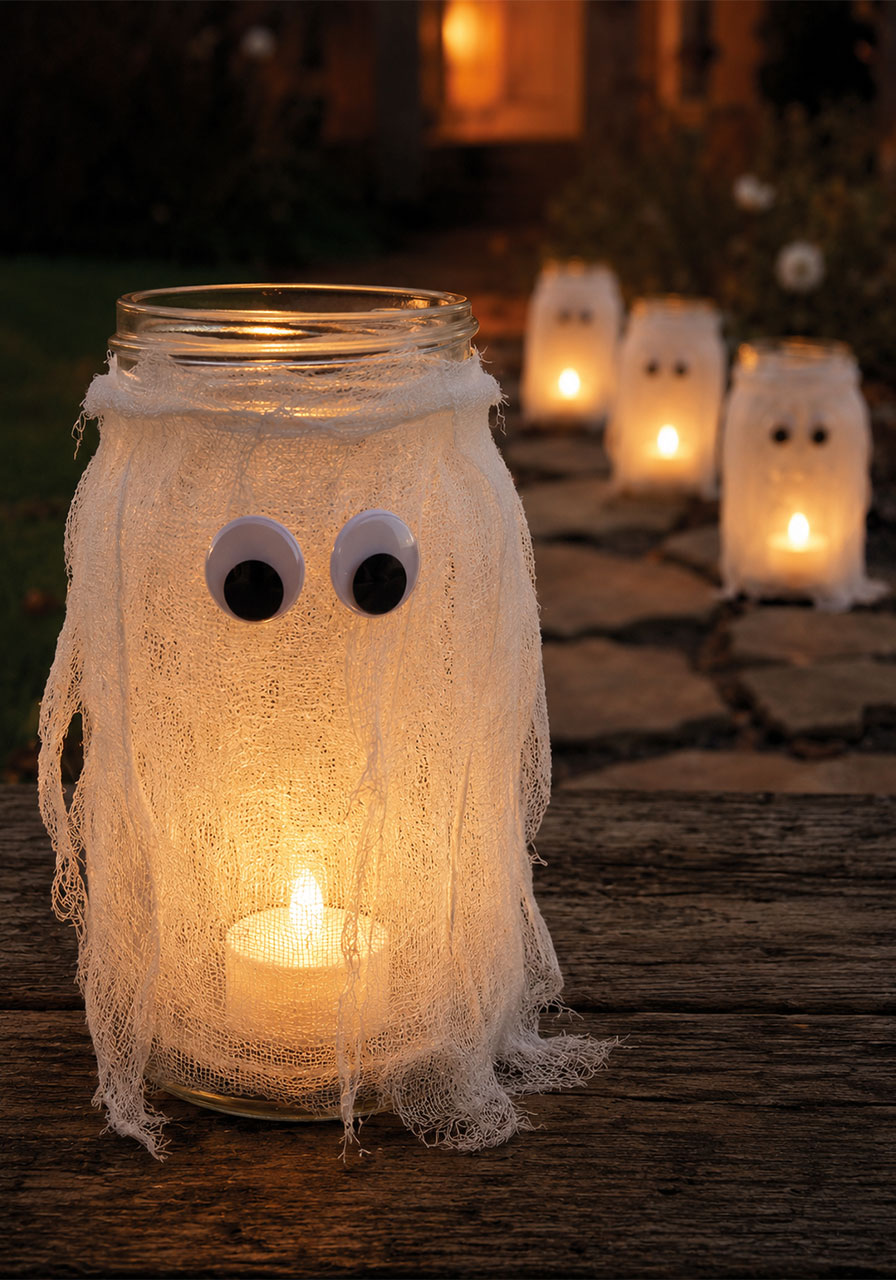
5. Ghostly Mason Jar Luminaries
Wrap a plain mason jar in cheesecloth, add a couple of googly eyes, and suddenly you’ve got the cutest little ghost this side of the graveyard. Line your walkway with a few of these and you’ve got instant charm.
This project is quick, cheap, and forgiving, which makes it perfect if you’re short on time but still want your yard to feel finished.
Best For: Walkways, porch steps, budget-conscious decorators
Prep Time: 10-15 minutes per jar
Skill Level: Easy
What You’ll Need:
- Mason jars
- Cheesecloth or gauze
- Googly eyes and glue
- Battery tea lights or fairy lights
How to Make It:
1. Wrap the cheesecloth around the jar, leaving the top open for the light.
2. Secure loose ends with a dab of glue so the wrap stays put.
3. Glue on two googly eyes wherever you’d like the ghost’s face.
4. Drop in a battery tea light and set the jars along your path.
Pro Tip: Fray the edges of the cheesecloth a bit for a wispier, more ghostlike texture instead of a clean wrap.
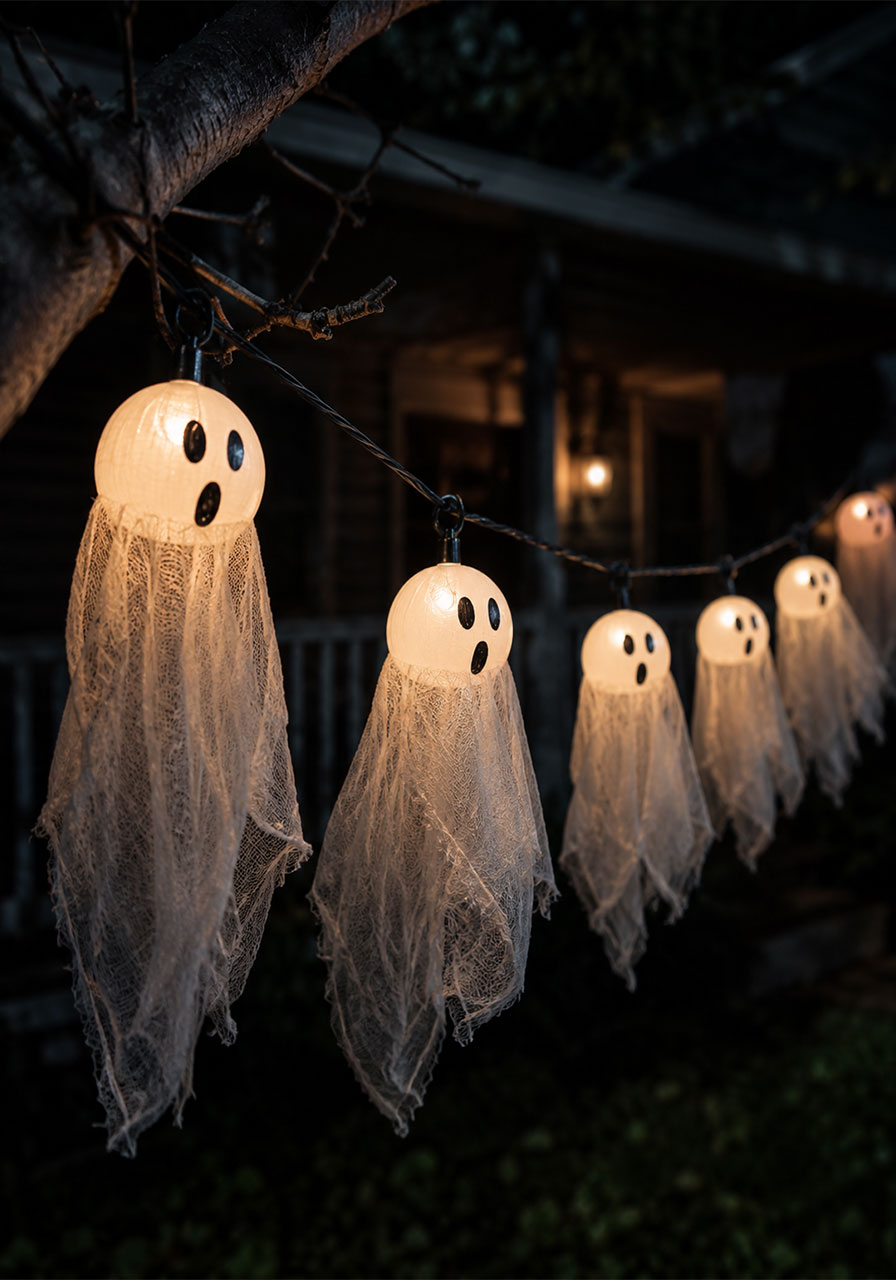
6. Ping Pong Ball Ghost Lights
These tiny glowing ghosts are made from ping pong balls wrapped in gauze, strung together on a light strand. Hang them from a tree or porch railing for a soft, spooky glow that’s still totally kid-friendly.
They’re small, but a whole cluster of them together creates real magic, especially once it gets dark.
Best For: Trees, porches, string light upgrades
Prep Time: 1-2 hours for a full strand
Skill Level: Easy
What You’ll Need:
- String lights (battery or plug-in)
- Ping pong balls
- Cheesecloth or thin gauze
- Fine-tip black marker
How to Make It:
1. Poke a small hole in each ping pong ball big enough to fit over a single light bulb.
2. Push each ball onto a bulb on your light strand.
3. Draw a simple ghost face on each ball with your marker.
4. Drape strips of gauze over each ball to look like a flowing ghost body.
5. Hang the finished strand from a tree branch, porch beam, or railing.
Pro Tip: Use LED lights instead of incandescent bulbs so the ping pong balls don’t get warm enough to warp over a long night of glowing.
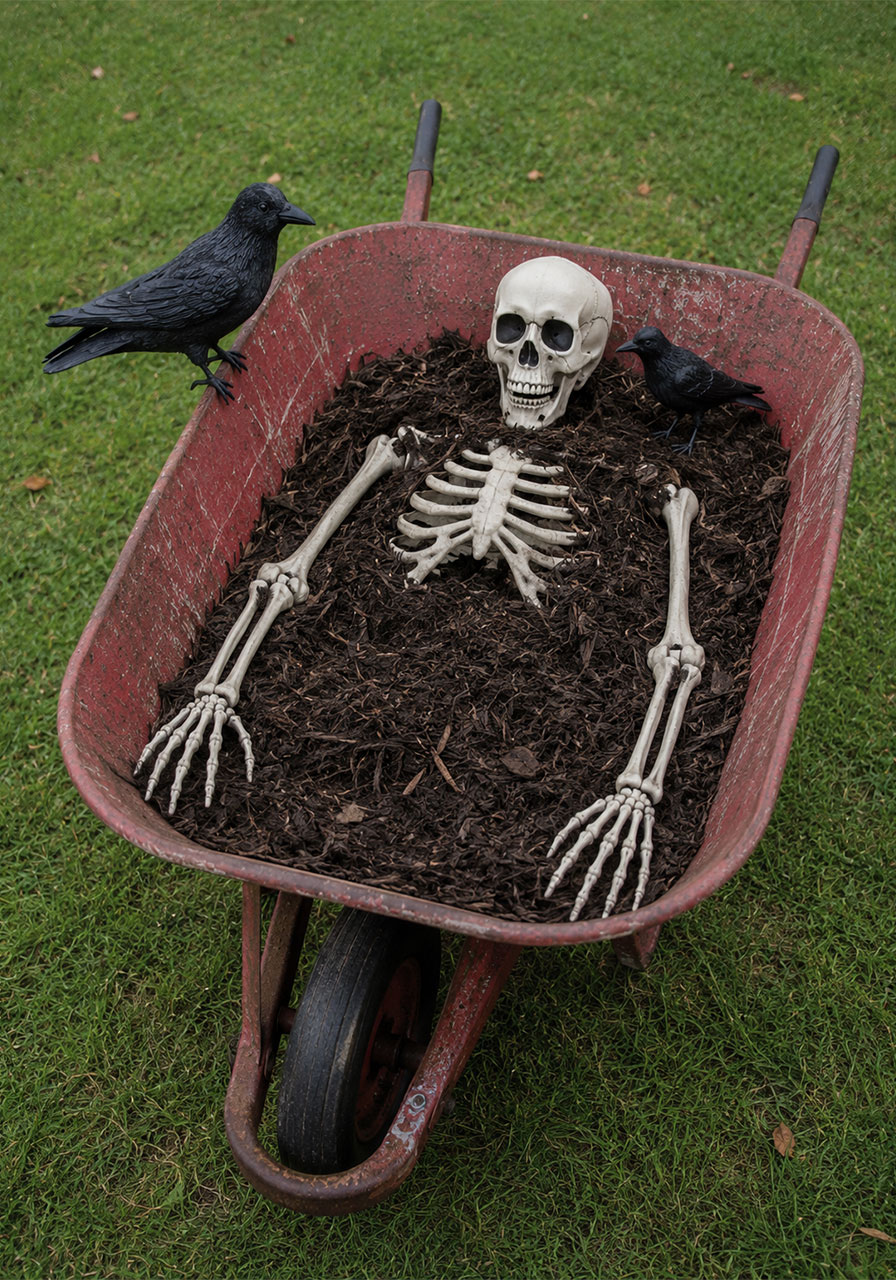
7. Deathly Wheelbarrow Gravesite
Don’t want to dig up your actual lawn to make a gravesite? This trick gives you all the eerie payoff with zero digging. A plastic skeleton “buried” in mulch inside an old wheelbarrow looks unsettlingly real.
It’s one of the easiest big-impact ideas on this list, and it works in almost any size yard.
Best For: Small yards, renters, anyone who doesn’t want to touch their lawn
Prep Time: 20 minutes
Skill Level: Easy
What You’ll Need:
- An old or inexpensive wheelbarrow
- A plastic skeleton
- Bagged mulch or dark potting soil
- Optional: a fake crow or skull for staging
How to Make It:
1. Fill the wheelbarrow with a layer of mulch or dark soil.
2. Arrange the skeleton so it’s partially buried, with a hand or skull poking through.
3. Cover the rest of the body loosely with more mulch.
4. Add a perched crow or a skull nearby to complete the scene.
Pro Tip: Position the wheelbarrow near your front walkway so it’s one of the first things guests notice as they approach.
8. Spider Egg Nests
These creepy-crawly nests look horrifyingly real, and that’s exactly the point. Made from pantyhose and stuffed with polyester filling, a few plastic spiders crawling out completes the illusion.
They’re inexpensive to make and pack a serious “ick factor” that trick-or-treaters won’t forget.
Best For: Porch ceilings, tree branches, anyone who loves a good scare
Prep Time: 15-20 minutes per nest
Skill Level: Easy

What You’ll Need:
- White or cream pantyhose
- Polyester fiberfill stuffing
- Plastic spiders
- Twine or fishing line for hanging
How to Make It:
1. Stuff the toe of the pantyhose with fiberfill until it forms a rounded, egg-sac shape.
2. Tie off the stuffed section and trim the excess fabric.
3. Stretch and pull the fibers slightly so it looks webby and textured.
4. Tuck plastic spiders into the folds and onto the surface of the nest.
5. Hang from a porch ceiling or tree branch using twine or fishing line.
Pro Tip: Make a few nests in different sizes and cluster them together for a spider colony effect that looks way more unsettling than just one.
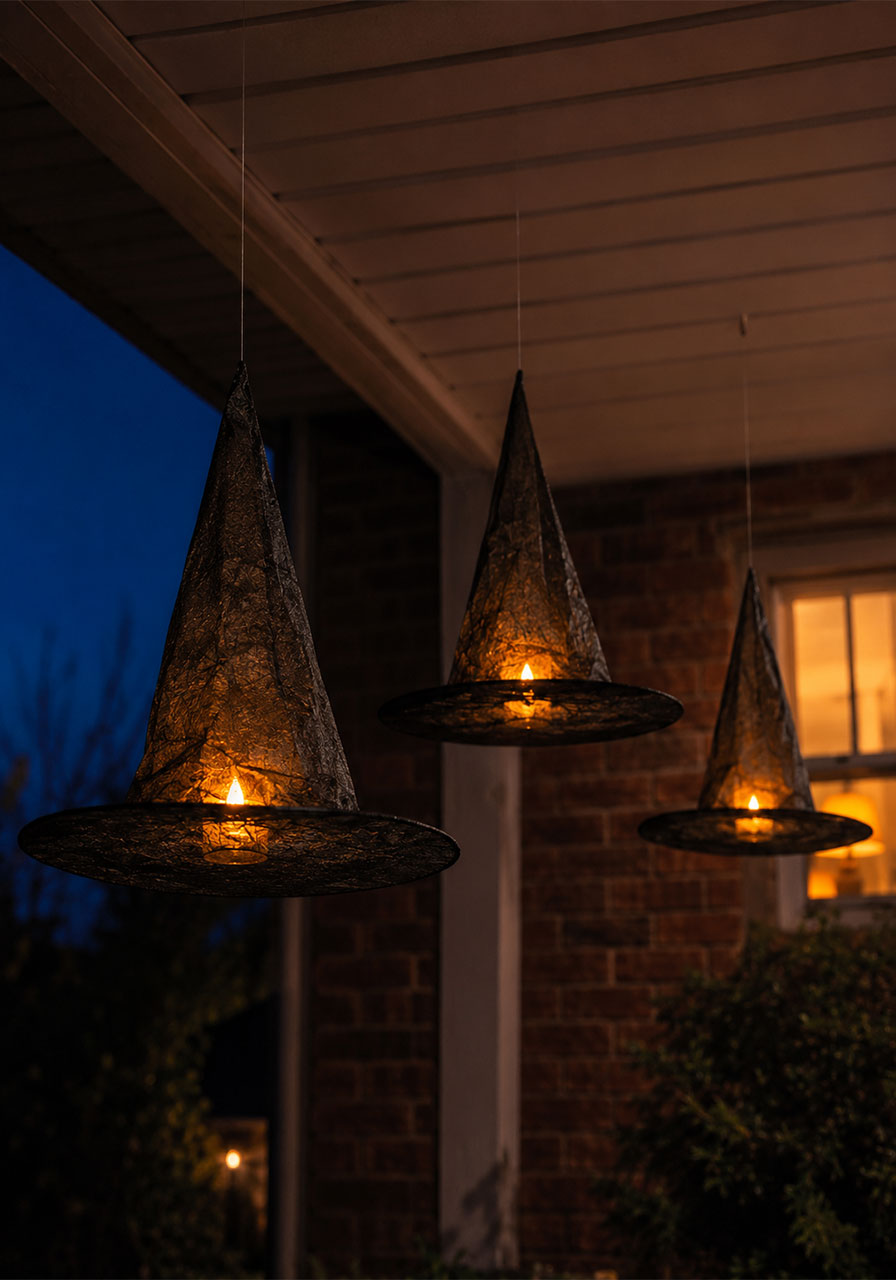
9. Floating Witch Hat Luminaries
Dollar-store witch hats become something magical when you suspend them with fishing line and light them from below. From a distance, it genuinely looks like invisible witches are floating through your yard.
This is one of those ideas that photographs beautifully and gets guests asking, “wait, how did you do that?”
Best For: Covered porches, trellises, tree branches
Prep Time: 30-45 minutes
Skill Level: Easy
What You’ll Need:
- Dollar-store witch hats (a few of them)
- Fishing line
- Battery-operated candles or tea lights
- Hooks or nails for hanging
How to Make It:
1. Poke a small hole through the top point of each witch hat and thread fishing line through.
2. Hang each hat from your porch ceiling, a tree branch, or a trellis at varying heights.
3. Place a battery-operated candle inside each hat, resting on the brim.
4. Adjust the height of each hat so they appear to float at different levels.
Pro Tip: Use fishing line instead of string. It’s nearly invisible in photos, which is what makes the floating effect look so convincing.
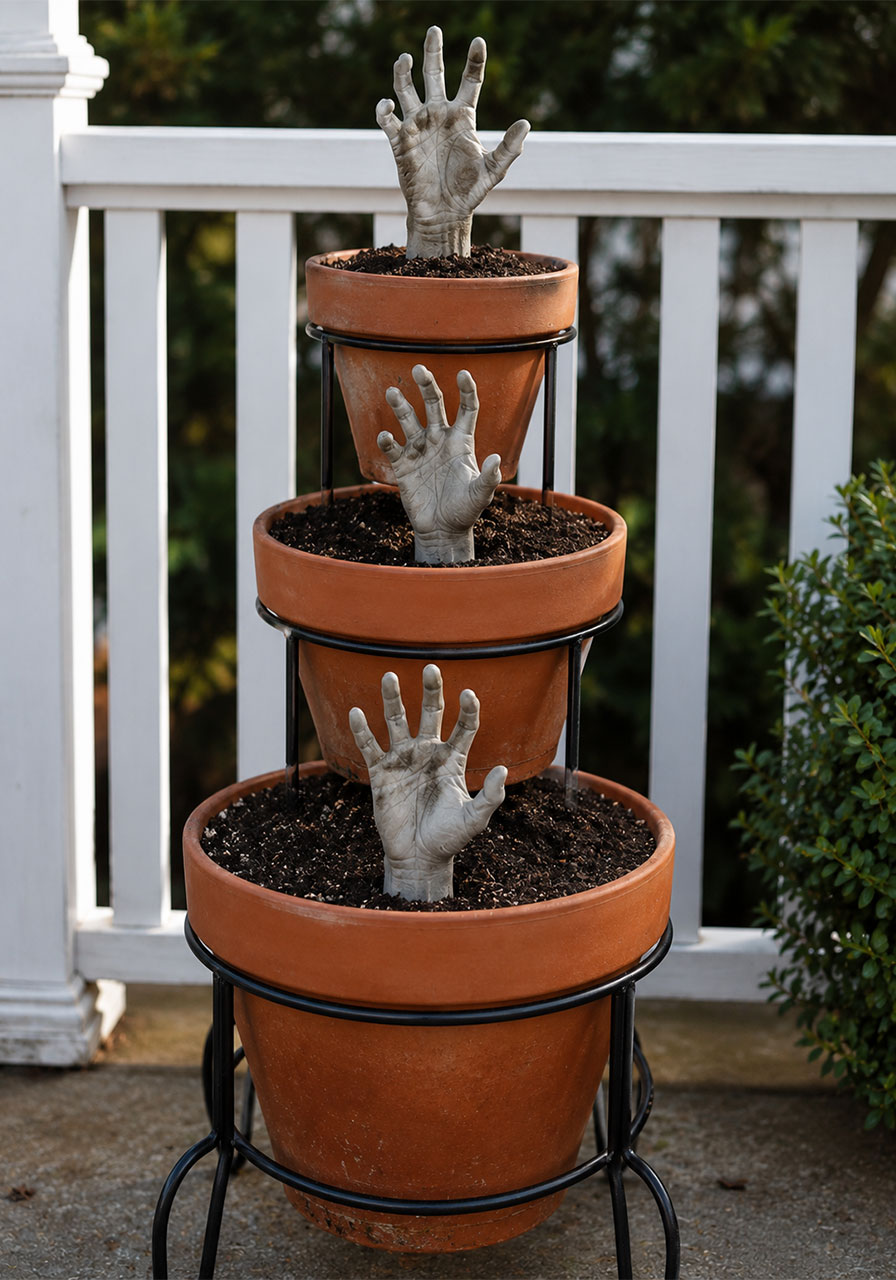
10. Tower of “Thing” Planters
Inspired by the Addams Family’s disembodied helper, this creepy tower stacks dollar-store severed hands reaching out of dirt-filled clay pots. Stack a few pots of different sizes and you’ve got a genuinely unsettling little garden feature.
It’s an easy weekend project that reuses items you might already have, and it’s endlessly customizable.
Best For: Porch corners, flower bed accents
Prep Time: 30-40 minutes
Skill Level: Easy
What You’ll Need:
- Clay or plastic pots in graduated sizes
- Potting soil or dark mulch
- Dollar-store plastic severed hands
- Optional: red paint for a “bloody” effect, glowing eyes for extra detail
How to Make It:
1. Stack your pots from largest on the bottom to smallest on top, or place them on a plant stand.
2. Fill each pot with soil or dark mulch.
3. Push a plastic hand into each pot so it looks like it’s reaching up out of the dirt.
4. Add a touch of red paint near the wrist for a gruesome finishing touch.
Pro Tip: Mix in other body parts like feet or fingers poking out at different pots for an even creepier, more chaotic effect.
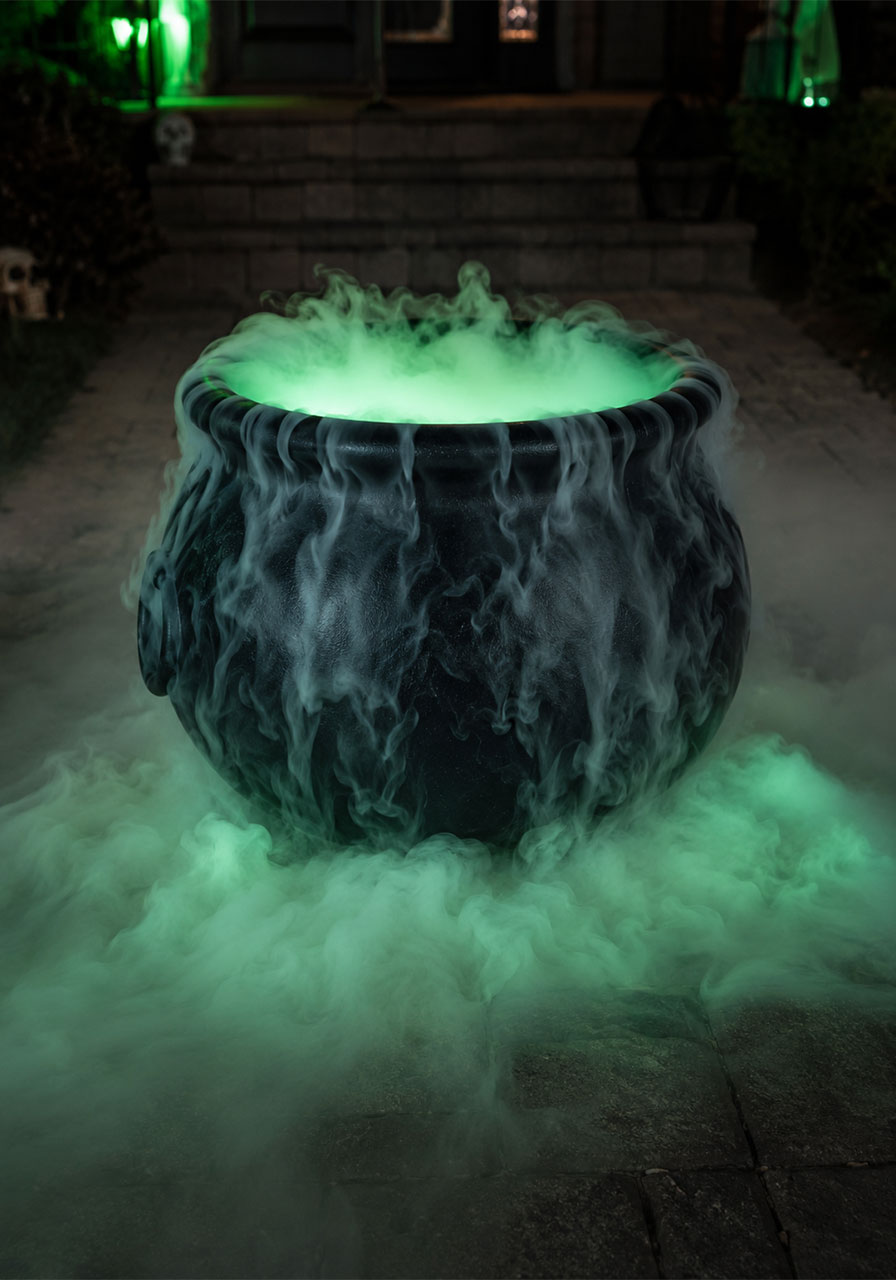
11. Bubbling Fog Cauldron
A cauldron billowing with eerie green fog is the kind of detail that makes your yard feel like a real Halloween movie set. It’s simpler to pull off than it looks, and the effect is dramatic every single time.
This is a great centerpiece for your front walkway or the base of your porch steps.
Best For: Front walkways, porch steps, dramatic entrances
Prep Time: 15 minutes to set up
Skill Level: Easy
What You’ll Need:
- A plastic cauldron (or a large dark bucket)
- A small fogger machine or dry ice
- Water
- Optional: green food coloring or glow sticks for color
How to Make It:
1. Fill your cauldron about two-thirds full with warm water.
2. Add a few drops of green food coloring if you want a tinted glow.
3. Add dry ice pieces or place a small fogger inside, following the product’s safety instructions.
4. Watch the fog spill over the sides of the cauldron for that classic bubbling potion look.
Pro Tip: If using dry ice, always handle it with gloves and keep it out of reach of kids and pets. It causes burns on bare skin.
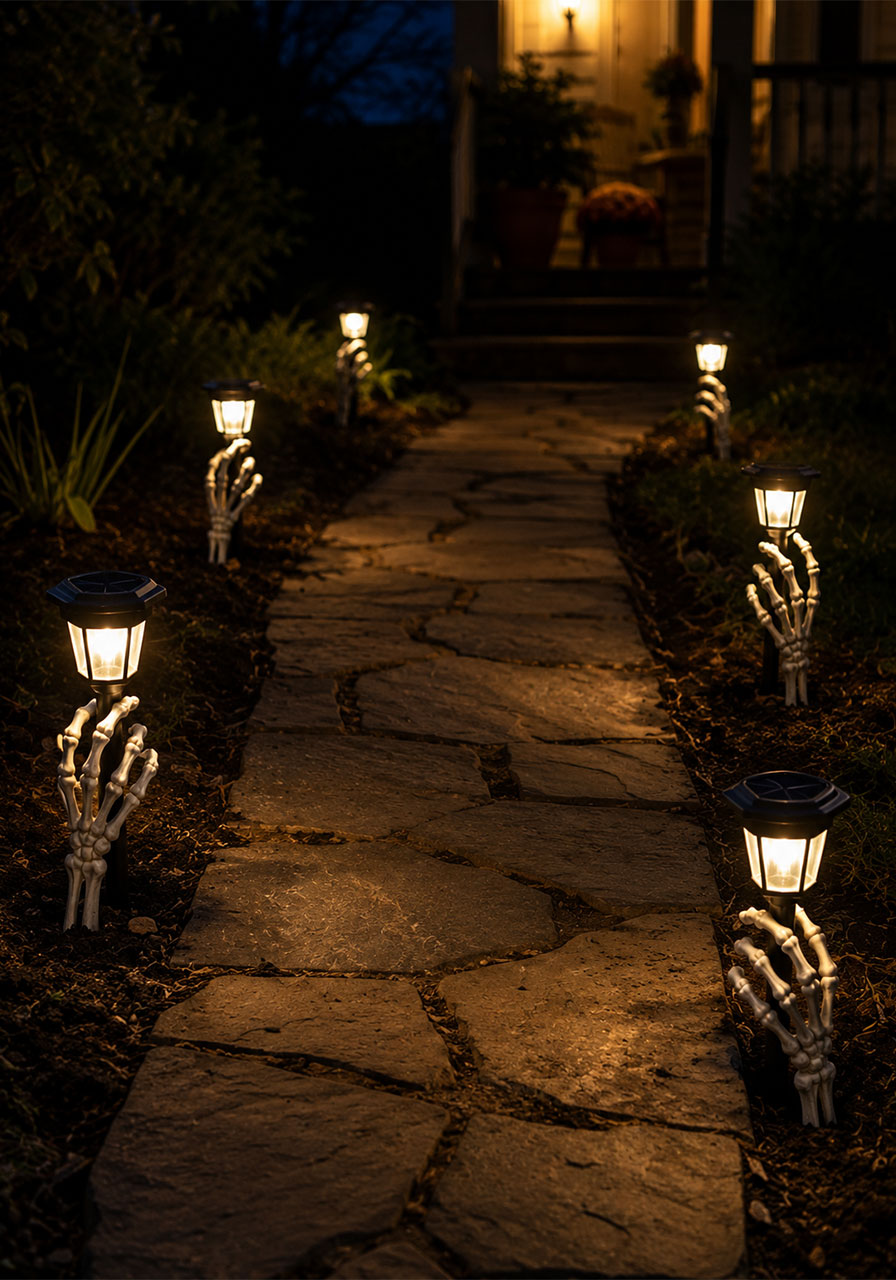
12. Skeleton Pathway Lights
Instead of plain solar path lights, plant a row of small plastic skeleton hands or arms along your walkway, each one gripping a glow stick or tucked beside a light. It turns a boring path into a genuinely creepy approach.
Guests have to walk right past them to reach your door, which makes this one of the most immersive ideas on the list.
Best For: Front walkways, driveways
Prep Time: 20-30 minutes
Skill Level: Easy
What You’ll Need:
- Small plastic skeleton hands or arms
- Solar path lights or glow sticks
- Garden stakes (if your hands don’t already have them)
How to Make It:
1. Stake or push each skeleton hand into the ground along the edge of your walkway.
2. Space them evenly, about 2-3 feet apart on each side.
3. Place a solar light or glow stick next to or inside each hand.
4. Angle a few hands as if they’re “reaching” toward the path for extra drama.
Pro Tip: Alternate the height and angle of each hand instead of lining them up perfectly straight. It looks far more chaotic and unsettling.
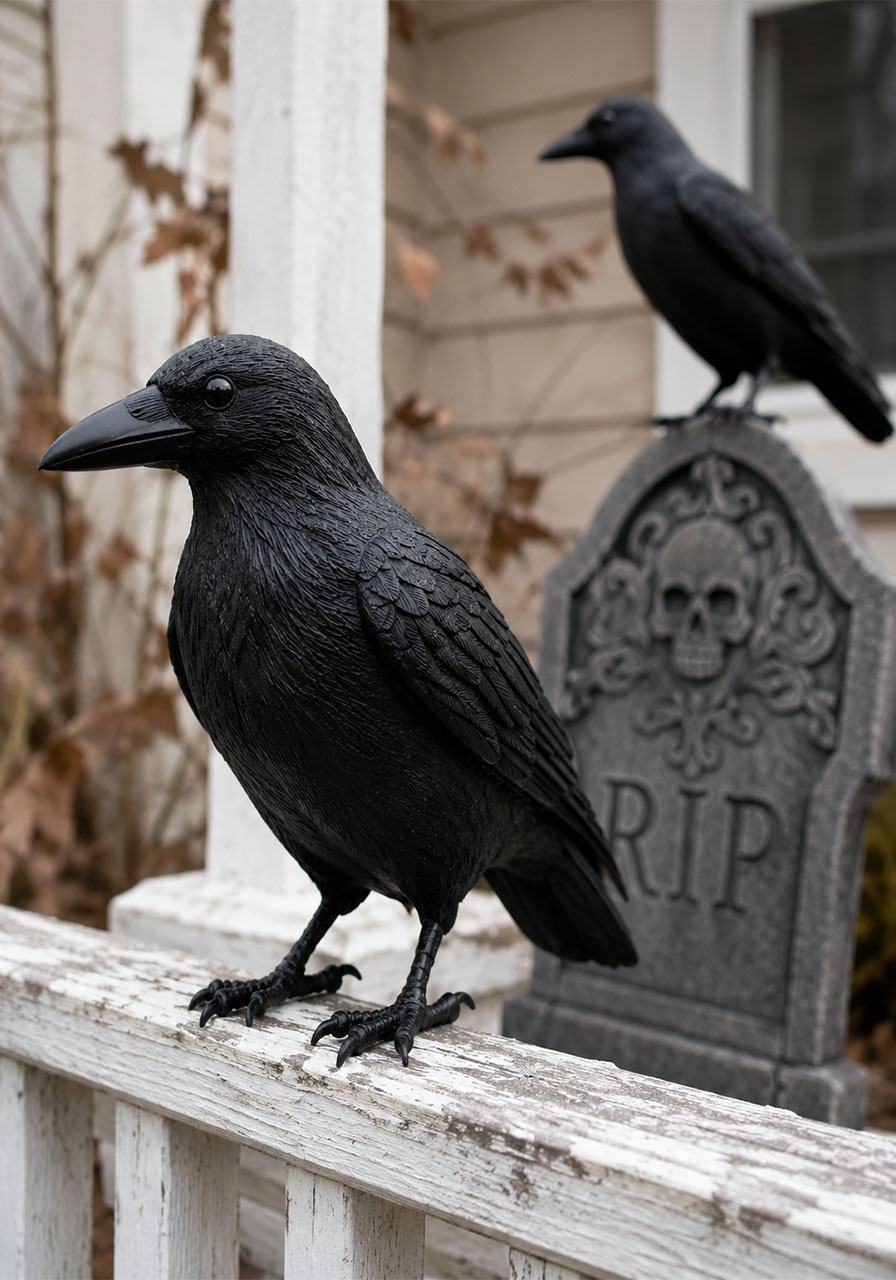
13. Perched Crow Collection
A few realistic fake crows perched around your yard is a small detail that does a lot of heavy lifting. Set them on your mailbox, porch railing, or a bare tree branch for instant, low-effort atmosphere.
This is the easiest idea on the entire list, and it’s a great one to combine with almost everything else here.
Best For: Any yard, any budget, last-minute decorators
Prep Time: 5 minutes
Skill Level: Easy
What You’ll Need:
- Fake crows (usually sold in sets)
- Zip ties or wire, if you want to secure them in windy areas
How to Make It:
1. Perch each crow on a railing, mailbox, tombstone, or tree branch.
2. Secure with a zip tie or wire if your yard tends to get windy.
3. Cluster two or three together for a more ominous “murder of crows” effect.
Pro Tip: Place one crow directly on top of your coffin or tombstones from earlier ideas on this list to tie the whole display together.
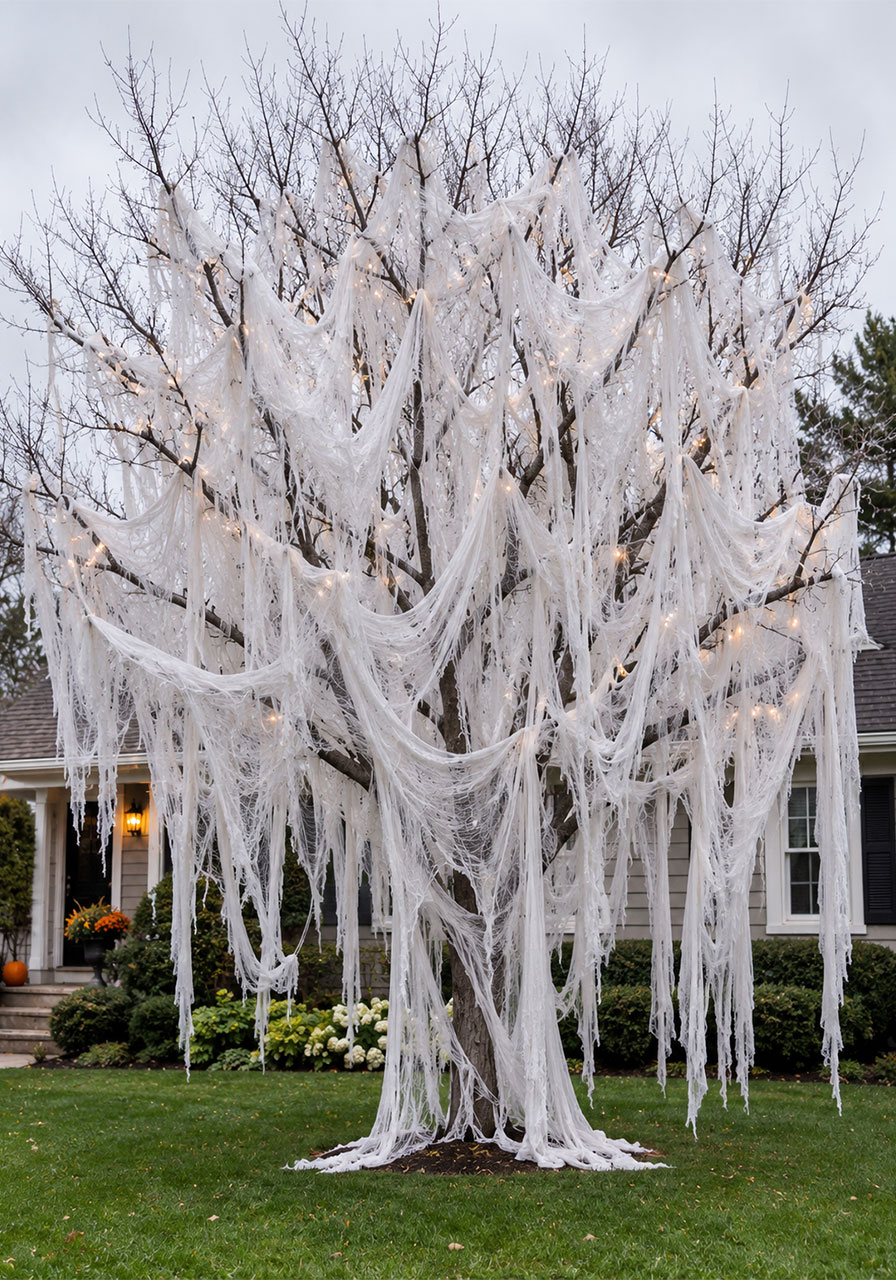
14. Cheesecloth Ghost Tree
Wrap a bare tree or shrub in stretched cheesecloth and you’ve got an entire ghostly figure without buying a single prop. It’s dramatic, it’s cheap, and it uses a spot in your yard you might not have thought to decorate.
This works especially well on a tree that’s already lost its leaves for fall.
Best For: Bare trees, shrubs, large yards
Prep Time: 30-45 minutes
Skill Level: Easy
What You’ll Need:
- Cheesecloth (several yards, depending on tree size)
- Scissors
- Battery-operated white lights (optional)
How to Make It:
1. Drape cheesecloth over the tree’s branches, letting it hang loosely rather than pulling it tight.
2. Stretch and pull sections of the fabric to create a wispy, uneven texture.
3. Tuck a few strands of white lights underneath before your final layer for a soft glow at night.
4. Trim any pieces dragging on the ground so they don’t get wet or dirty.
Pro Tip: Stagger a few of the ping pong ball ghosts from idea #6 into the branches for extra faces peeking out of the fabric.
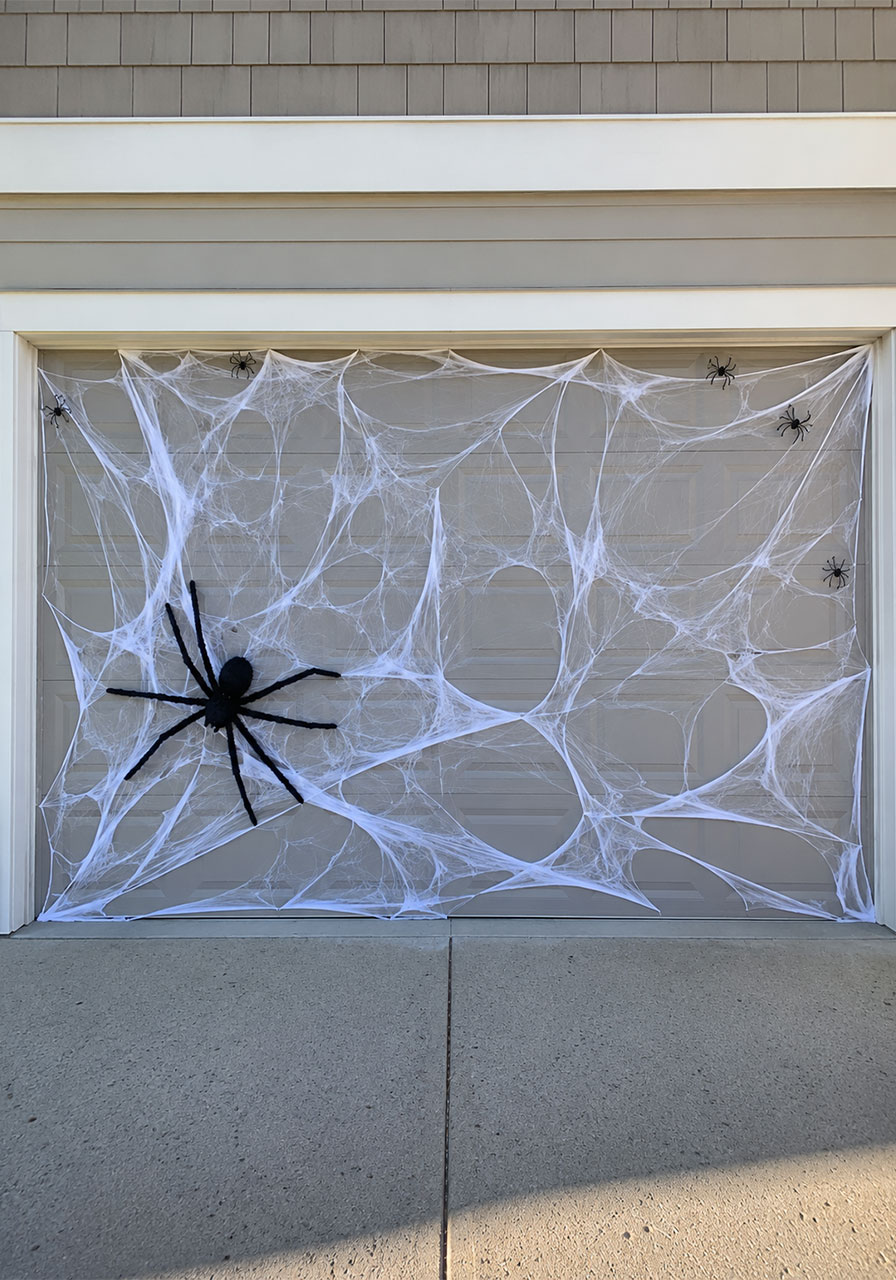
15. Giant Glowing Spider Web
A massive spider web stretched across your garage, porch, or front bushes is an instant classic for a reason. Add a giant fake spider in the center and you’ve got one of the most photographed spots on your block.
This is one of the easiest ways to fill a big empty wall or porch space fast.
Best For: Garage doors, large porch walls, bushes
Prep Time: 30 minutes
Skill Level: Easy
What You’ll Need:
- Stretchable spider web decoration (widely sold around Halloween)
- A large fake spider
- Push pins or tape for mounting
How to Make It:
1. Stretch the web material apart gently until it covers your desired area.
2. Pin or tape the corners securely so it doesn’t sag or blow away.
3. Pull a few extra strands loose for texture and depth.
4. Position the giant spider in the center or along one edge of the web.
Pro Tip: Tuck a few small plastic spiders into the corners of the web for kids to spot up close, in addition to the big centerpiece spider.
16. Motion-Sensor Sound Effects
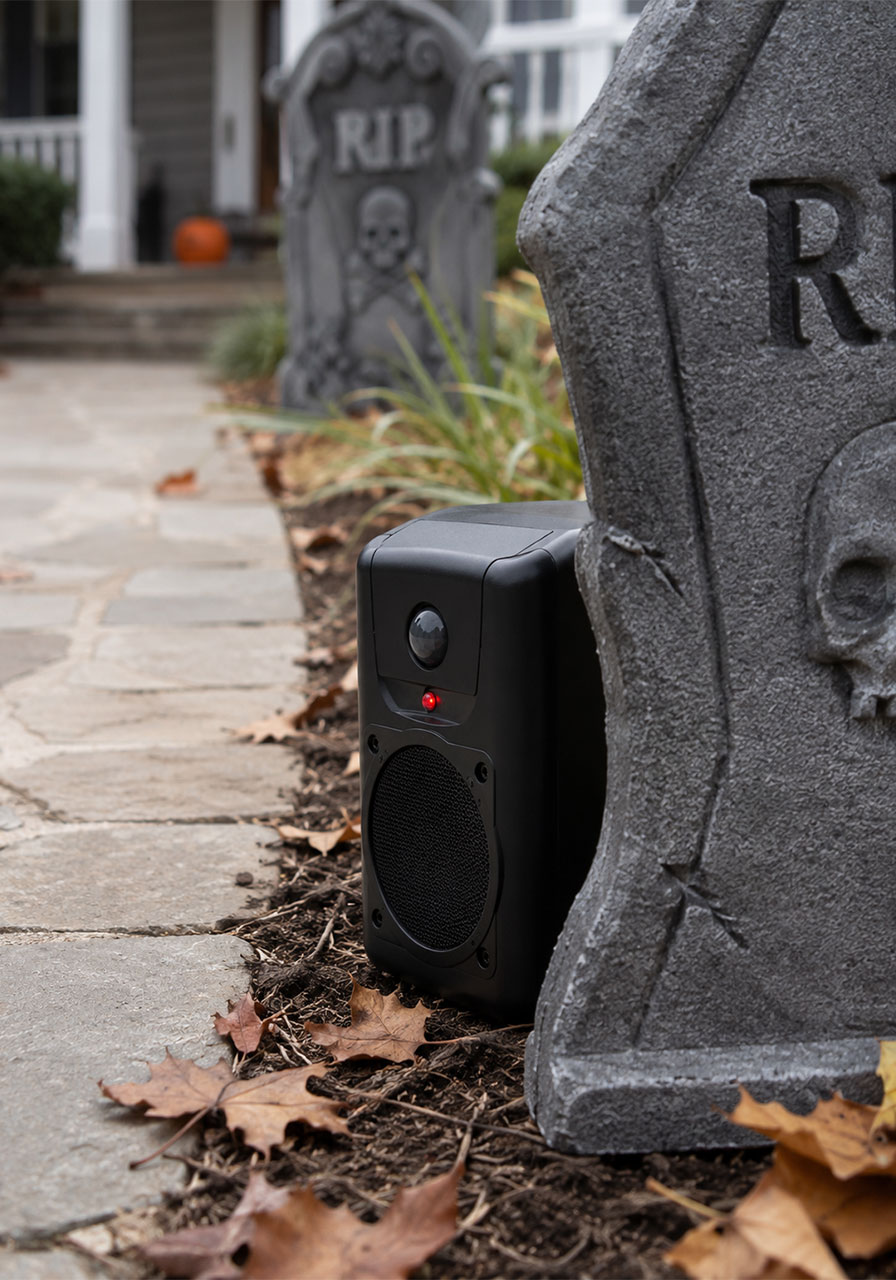
Sometimes the scariest part of a haunted yard isn’t what guests see, it’s what they hear. A hidden motion-sensor speaker that triggers creaking, moaning, or cackling sounds as guests approach adds a layer no visual decoration can match.
Pair this with any of the ideas above for a display that feels genuinely alive.
Best For: Walkways, porch entrances, anyone who wants next-level scares
Prep Time: 15 minutes
Skill Level: Easy
What You’ll Need:
- A motion-activated Halloween sound prop (widely available online and in stores)
- Batteries
- A hidden spot to tuck the speaker, like inside a bush or behind a tombstone
How to Make It:
1. Choose a spot along your walkway where guests will naturally pass close by.
2. Tuck the speaker behind a decoration so it’s hidden from view.
3. Test the motion sensor’s range and adjust its placement as needed.
4. Set fresh batteries the week of Halloween so it doesn’t die mid-scare on the big night.
Pro Tip: Hide it behind your tombstones or coffin from ideas #2 and #3 so the sound seems to come from the props themselves.
17. Balloon Ghost Garland
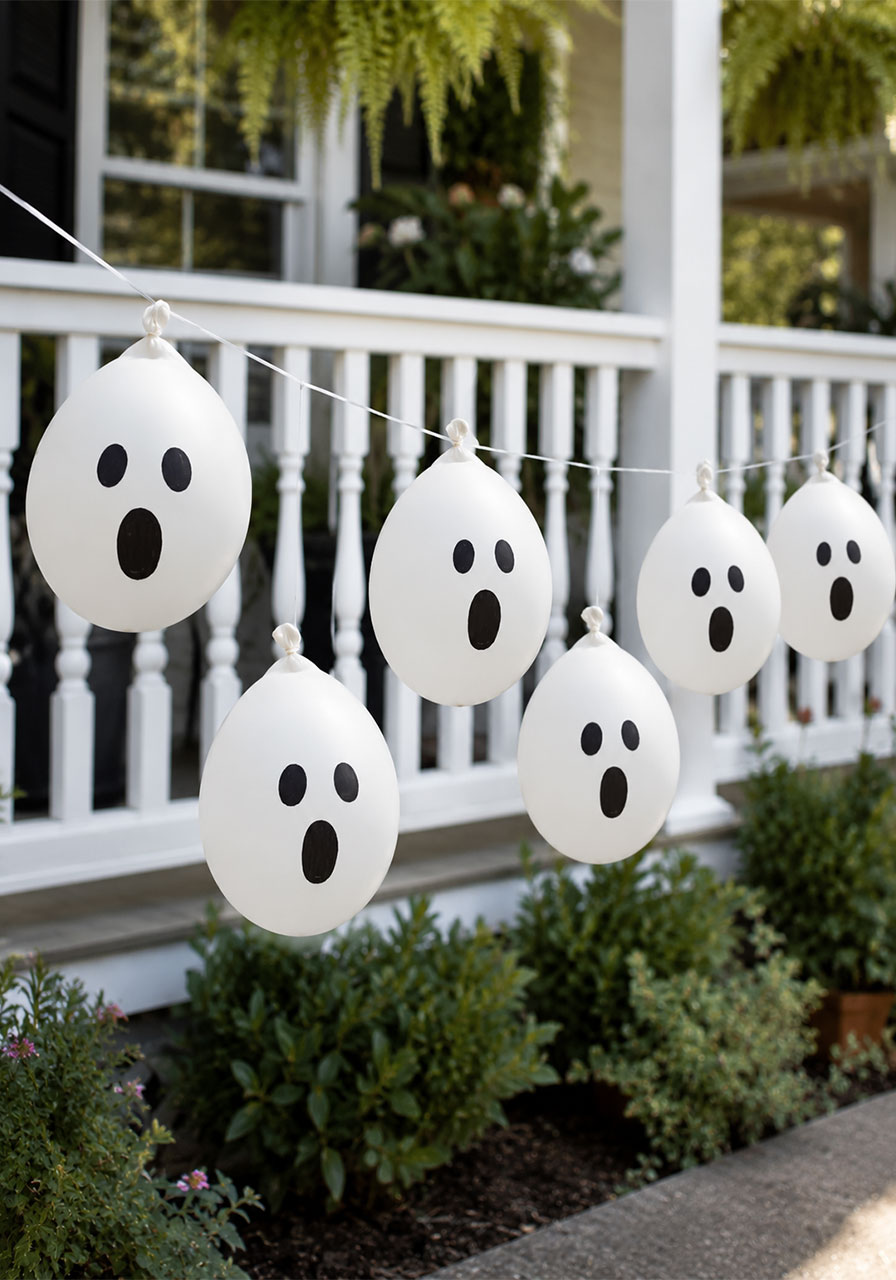
This one is perfect if you need a big, budget-friendly display fast. White balloons with simple ghost faces drawn on, strung together into a garland, look adorable during the day and eerie once lit up at night.
It’s also one of the few ideas on this list that’s genuinely easy to make with kids.
Best For: Porches, railings, family crafting activities
Prep Time: 45 minutes to an hour
Skill Level: Easy
What You’ll Need:
- White balloons
- Black marker
- String or fishing line
- Tape
How to Make It:
1. Blow up each balloon and tie it off.
2. Draw a simple ghost face on each one with the black marker.
3. Tie the balloons at varying lengths along a length of string or fishing line.
4. Hang the finished garland along your porch railing or across your front window.
Pro Tip: Balloons deflate over a few days, so blow these up the weekend before Halloween rather than weeks in advance.
Start Planning Your Haunted Yard Today
You don’t need to tackle all 17 of these ideas to have the best-decorated yard on the block. Pick a handful that fit your space, your budget, and your time, and build from there.
The key is starting early. Many of these projects, like the coffin or the tombstones, take a weekend or two to finish properly, so give yourself plenty of time before the big night arrives.
Because the best Halloween yards aren’t the ones with the biggest budget. They’re the ones with the most creativity, and a little planning ahead goes a long way toward pulling off something unforgettable.
