
If your idea of a jack-o’-lantern starts and ends with two triangle eyes and a jagged grin, get ready to have your mind (and your porch) blown. This list is packed with ideas that go way beyond the basic carve-and-light routine – some are dazzling, some are downright delicious, and a few even sneak in some real STEM learning while your kids or students think they’re just having fun.
Whether you’re a parent looking for a weekend project, or a teacher hunting for a hands-on Halloween activity that actually teaches something, you’re covered. We’ve organized everything into three easy-to-browse sections: Decor Ideas, Edible Ideas, and brand-new Bonus STEM Ideas made especially for classrooms and curious kids.
Pick a few that fit your crowd, and you’re on your way to a jack-o’-lantern display that’s the talk of the neighborhood – or the star of your classroom’s fall unit.
Jack-O’-Lantern Decor Ideas
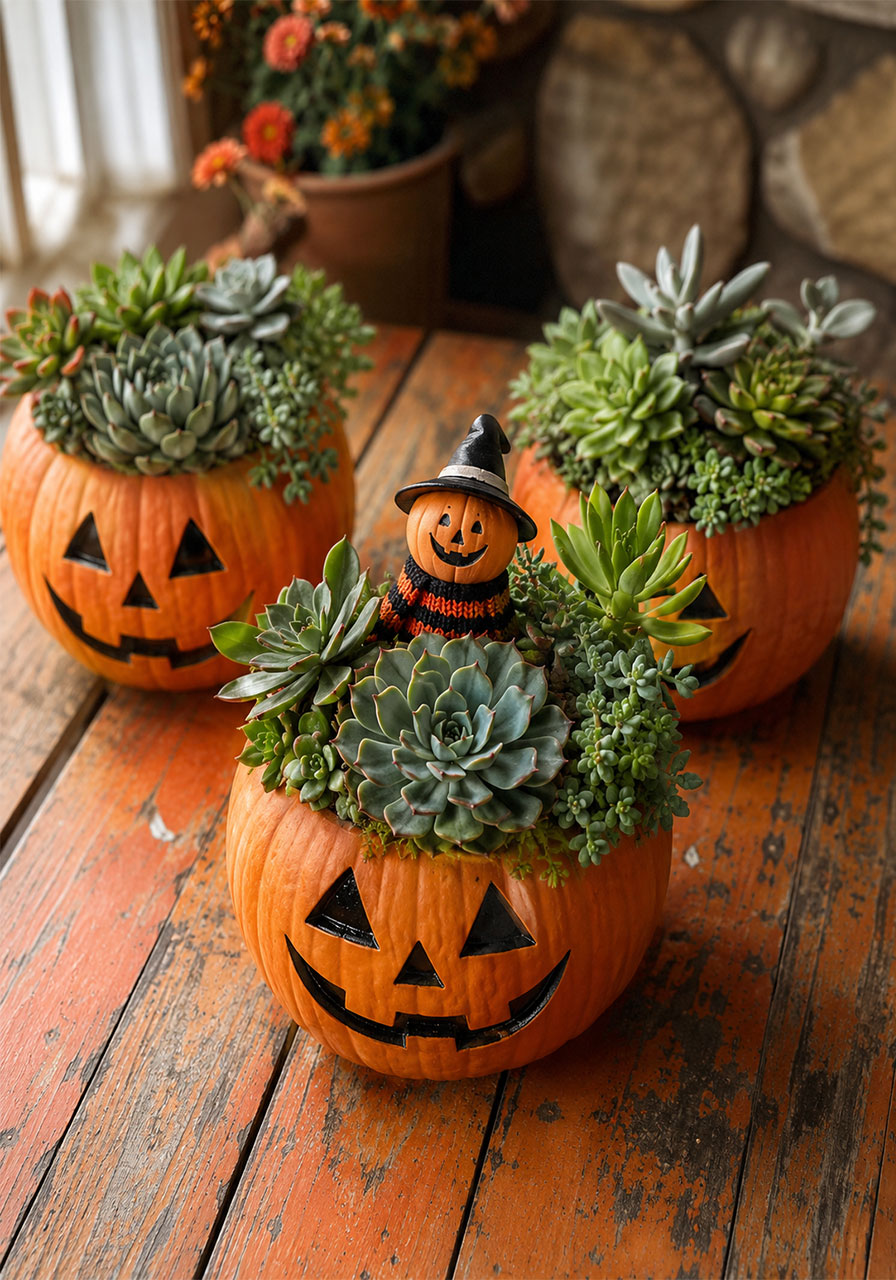
1. Succulent-Planted Pumpkins
This idea flips the whole “jack-o’-lantern” concept on its head – instead of fire, you get life. Hollowed-out mini pumpkins become planters for tiny succulents, and a few pumpkin-shaped figurines peeking out on top add a playful, handmade touch.
Best for: Tabletop centerpieces, classroom windowsills, families who want a low-mess, no-candle option.
Time to Make: 20-30 minutes.
Difficulty: Easy.
What You’ll Need:
- Small pumpkins or gourds
- A spoon or melon baller (for hollowing)
- Potting soil
- 2-3 small succulent cuttings per pumpkin
How to Make It:
1. Cut off the top of each pumpkin and scoop out the seeds and flesh, just like you would for carving.
2. Fill the hollow shell about two-thirds full with potting soil.
3. Nestle your succulents into the soil, packing gently around the roots.
4. Water lightly and place on a tray, since pumpkins will soften over time.
Pro Tip: This is a fantastic beginner gardening lesson – talk about how plants get water and nutrients from soil while you plant together.
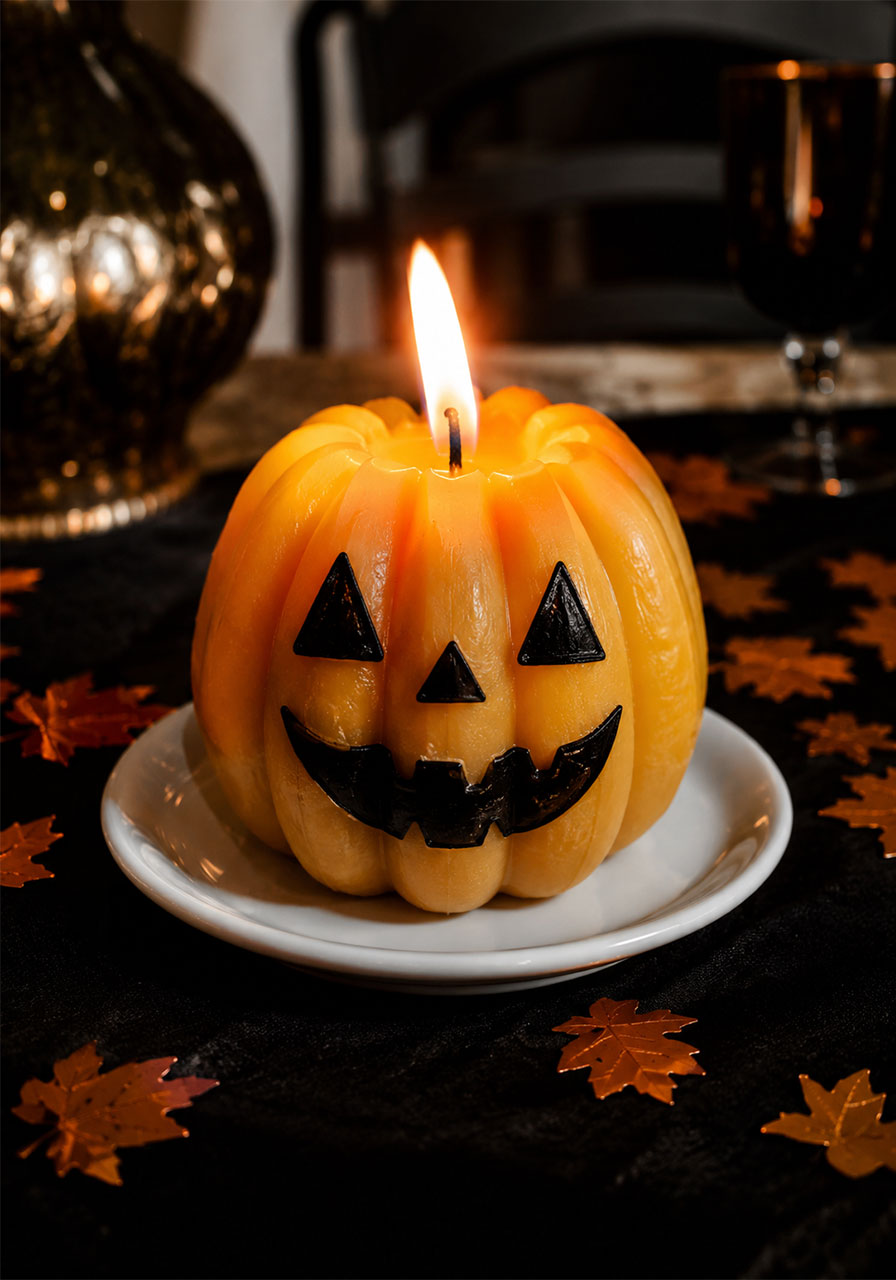
2. Candle-Shaped Jack-O’-Lantern
Why carve a pumpkin when the pumpkin can BE the candle? This idea uses a wax candle molded into a ridged jack-o’-lantern shape, with a painted-on face that glows warm and cozy once lit.
Best for: Dinner tables, mantels, anyone who wants glow without the mess of carving.
Time to Make: 5 minutes (using a pre-made candle) or a weekend if pouring your own.
Difficulty: Easy.
What You’ll Need:
- A pumpkin-shaped wax candle (pre-made, or a pumpkin candle mold plus wax if making your own)
- Black paint or a fine-tip permanent marker
- A small plate
How to Make It:
1. Set your candle on a plate to catch any drips.
2. Paint or draw a jack-o’-lantern face onto the candle’s surface.
3. Let the paint dry fully before lighting.
4. Light the wick and enjoy the glow through the painted face.
Pro Tip: Never leave a lit candle unattended, and keep it away from curtains or paper decorations.
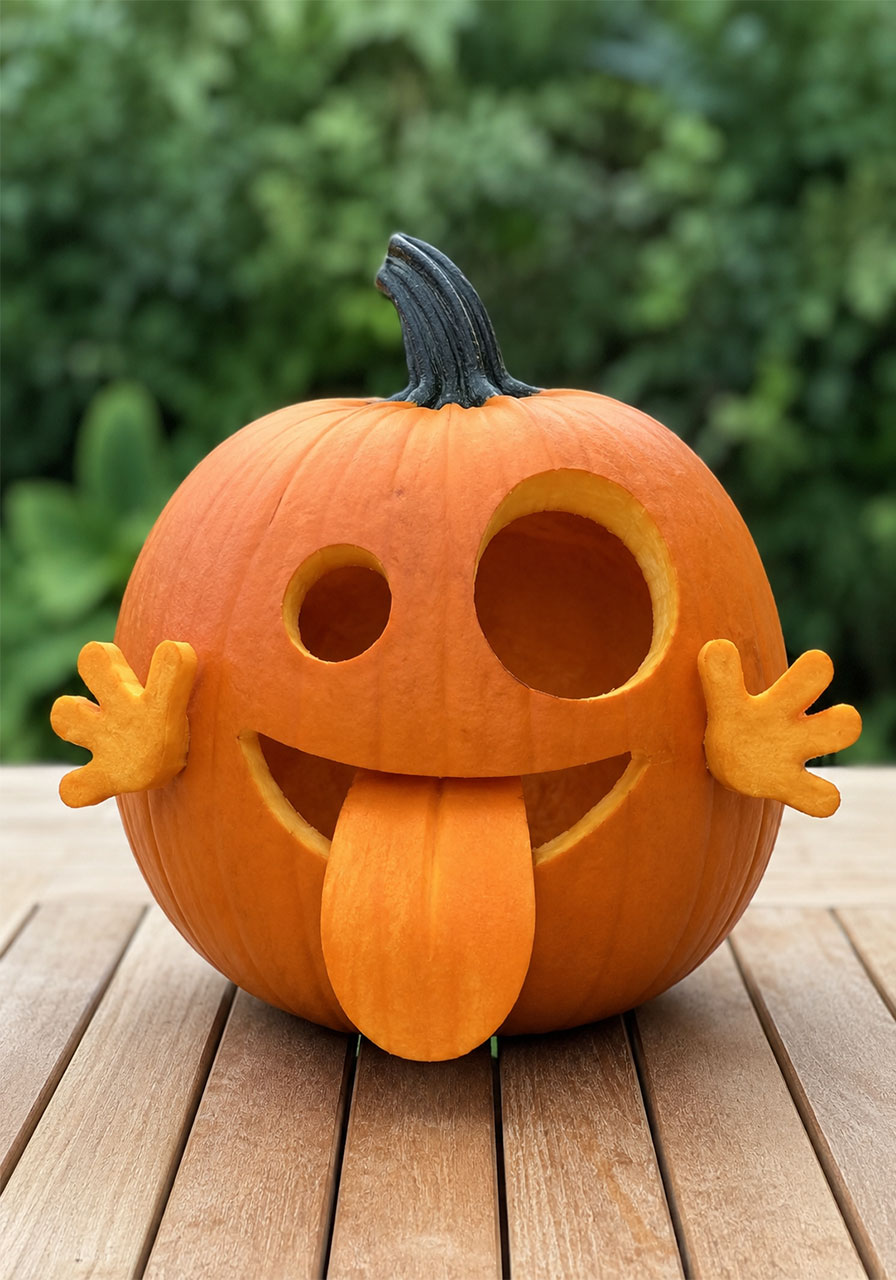
3. Ghost Emoji Pumpkin
Trade the classic scowl for something a little more friendly. One big round eye and a playful tongue turn your pumpkin into a recognizable, giggle-worthy emoji face instead of a spooky one.
Best for: Front steps, kids’ parties, anyone who wants Halloween without the scare factor.
Time to Make: 15-20 minutes.
Difficulty: Easy.
What You’ll Need:
- A pumpkin
- A carving knife or pumpkin carving tool
- A marker for sketching the design first
How to Make It:
1. Sketch one large circle eye, one small circle eye, and a rounded tongue shape onto the pumpkin with marker.
2. Carve out the two eyes.
3. Carve the tongue shape so it hangs out of a simple curved mouth line.
4. Add a candle or LED light inside for evening display.
Pro Tip: This is a great “starter carve” for younger kids since the shapes are big, round, and forgiving.
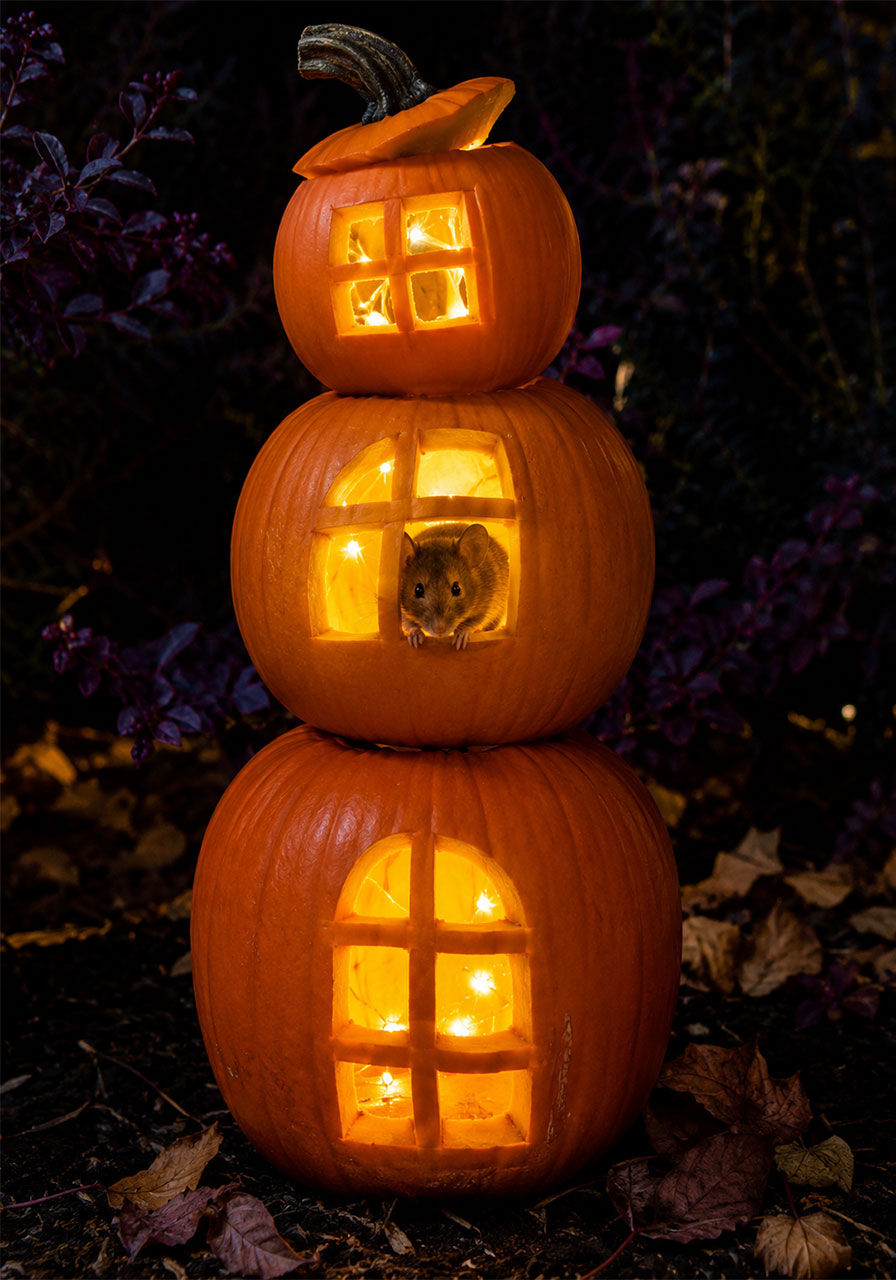
4. Stacked Pumpkin Tower
Why settle for one glowing pumpkin when you can build a whole glowing tower? Stack three pumpkins, carve a window into each, and pop a light inside – suddenly you’ve got a tiny, magical lantern house.
Best for: Garden displays, front porches, families who like a bigger statement piece.
Time to Make: 45-60 minutes.
Difficulty: Moderate.
What You’ll Need:
- 3 pumpkins in graduated sizes (large, medium, small)
- A carving knife
- String lights or battery tea lights
- A sturdy flat surface or stone base
How to Make It:
1. Hollow out all three pumpkins and carve a simple window shape into each.
2. Stack the largest pumpkin on the bottom, medium in the middle, and smallest on top.
3. Slide lights into each section through the carved windows.
4. Adjust stacking so each pumpkin sits stably before lighting up for the evening.
STEM Tip: Talk about balance and center of gravity while stacking – why does the biggest pumpkin need to go on the bottom?
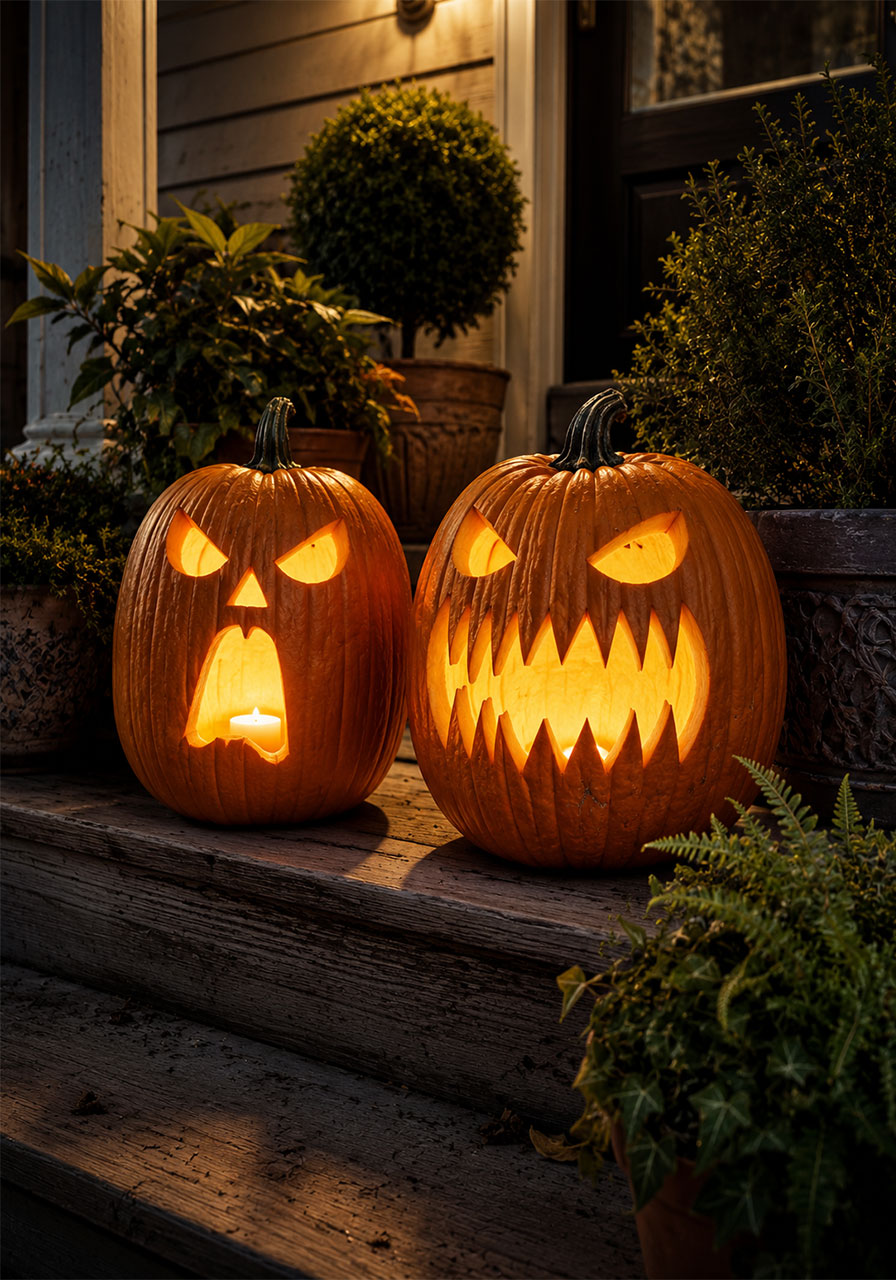
5. Fierce Guardian Faces
Sometimes a jack-o’-lantern needs to look like it means business. Slanted eyes, jagged mouths, and sharp fangs turn a regular pumpkin into a porch guardian that lets trick-or-treaters know your house is all-in on Halloween.
Best for: Front porches, older kids and teens, anyone who wants a dramatic look.
Time to Make: 30 minutes.
Difficulty: Moderate.
What You’ll Need:
- A pumpkin
- A carving knife and small serrated saw for teeth
- A marker for sketching
How to Make It:
1. Sketch angled, slanted eyes and a wide, jagged mouth line.
2. Carve the eyes first, keeping the angles sharp.
3. Carve the mouth, leaving small triangular points for fangs.
4. Surround the finished pumpkin with greenery for extra contrast at night.
Pro Tip: Carve the fangs last – they’re the most delicate part and easiest to break if you carve them too early.
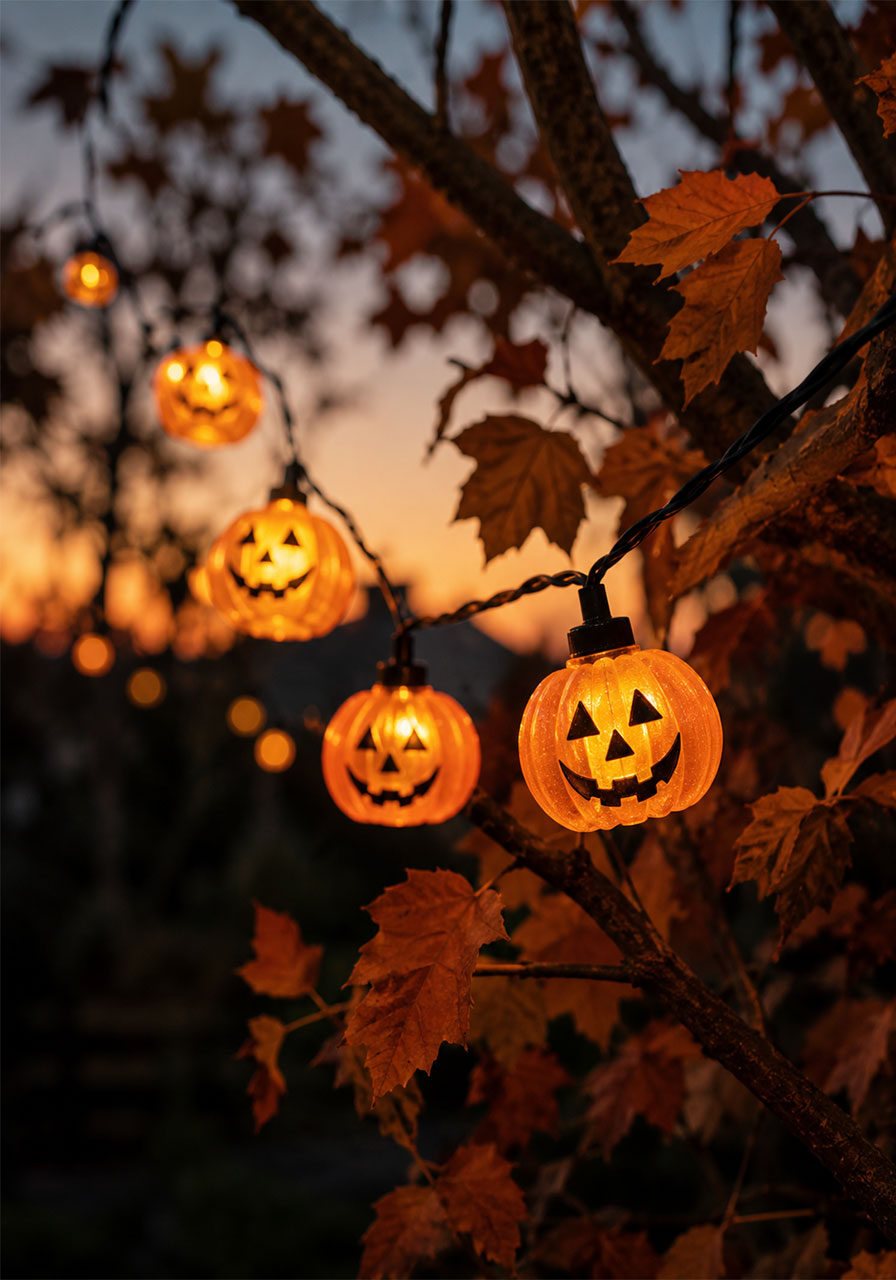
6. Jack-O’-Lantern Fairy Light Strings
Skip the knife entirely. Small pumpkin-shaped bulbs strung along a light cord create a soft, magical glow when draped over branches or railings at dusk.
Best for: Porches, gardens, no-mess decorating.
Time to Make: 10 minutes.
Difficulty: Easy.
What You’ll Need:
- A string of pumpkin-shaped fairy lights
- Outdoor outlet or battery pack, depending on the light set
How to Make It:
1. Choose a spot with branches, railings, or shrubs to drape the lights across.
2. Wrap the string gently so the pumpkin bulbs face outward.
3. Secure any loose ends with garden twist ties.
4. Plug in or switch on at dusk for a warm glow.
STEM Tip: If you’re using battery-powered lights, this is a simple, safe way to talk about basic electrical circuits with kids.
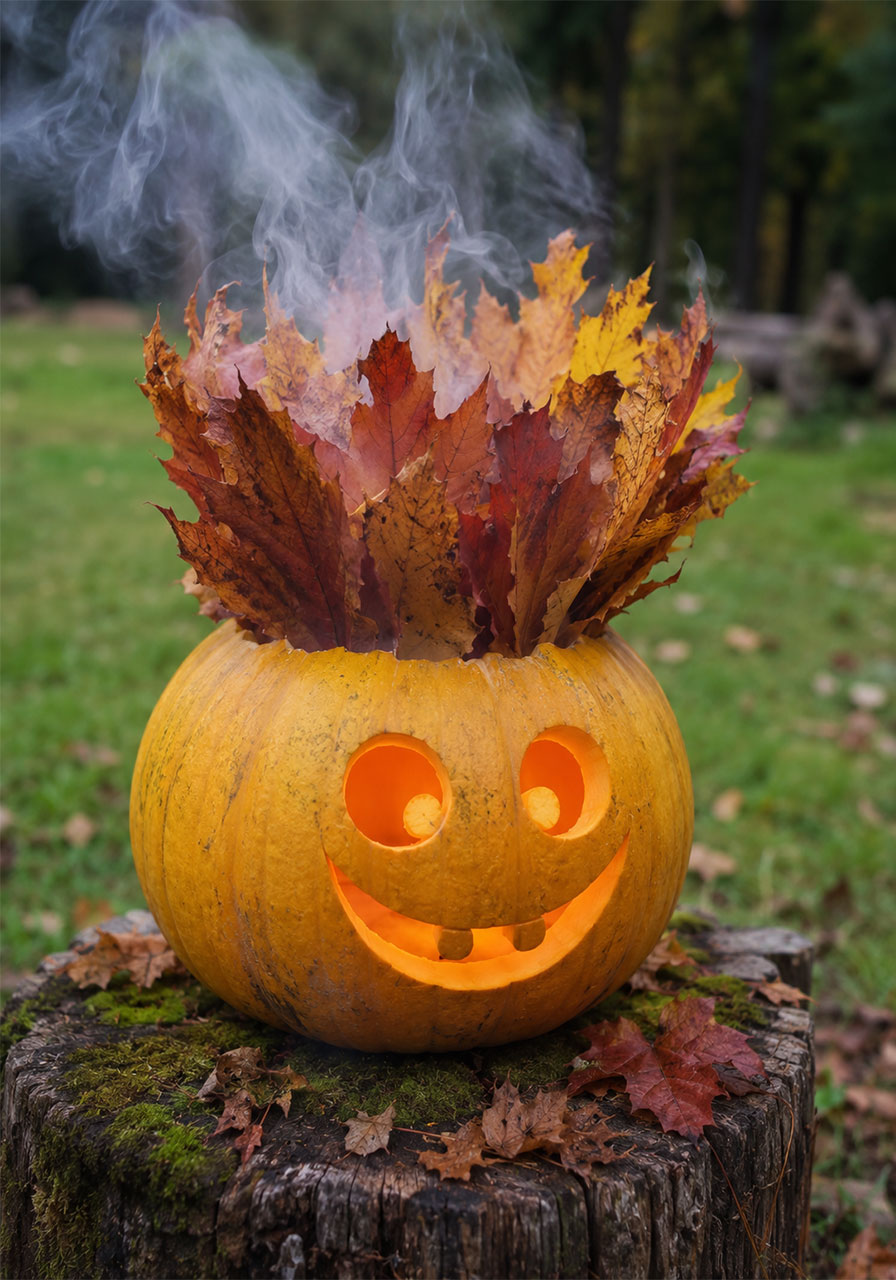
7. Leaf-Crowned Smoking Pumpkin
This one plays with a bit of stagecraft. A carved grin sits below round eyes, with smoke curling up like the pumpkin is quietly breathing, while a burst of maple leaves stands in for a lid.
Best for: Outdoor tree stumps or garden displays.
Time to Make: 20 minutes.
Difficulty: Moderate.
What You’ll Need:
- A pumpkin
- A carving knife
- A bundle of dried maple leaves
- A dry ice or fog-effect insert (optional, for smoke)
How to Make It:
1. Carve a simple face with round eyes and a curved mouth.
2. Cut off the top instead of removing the stem entirely, leaving an opening.
3. Arrange a bundle of maple leaves standing upright in the opening.
4. Add a dry-ice fog element inside if you want the “smoking” effect, following safe handling instructions.
Pro Tip: Skip the dry ice around young kids – the leaf crown alone still looks stunning without it.
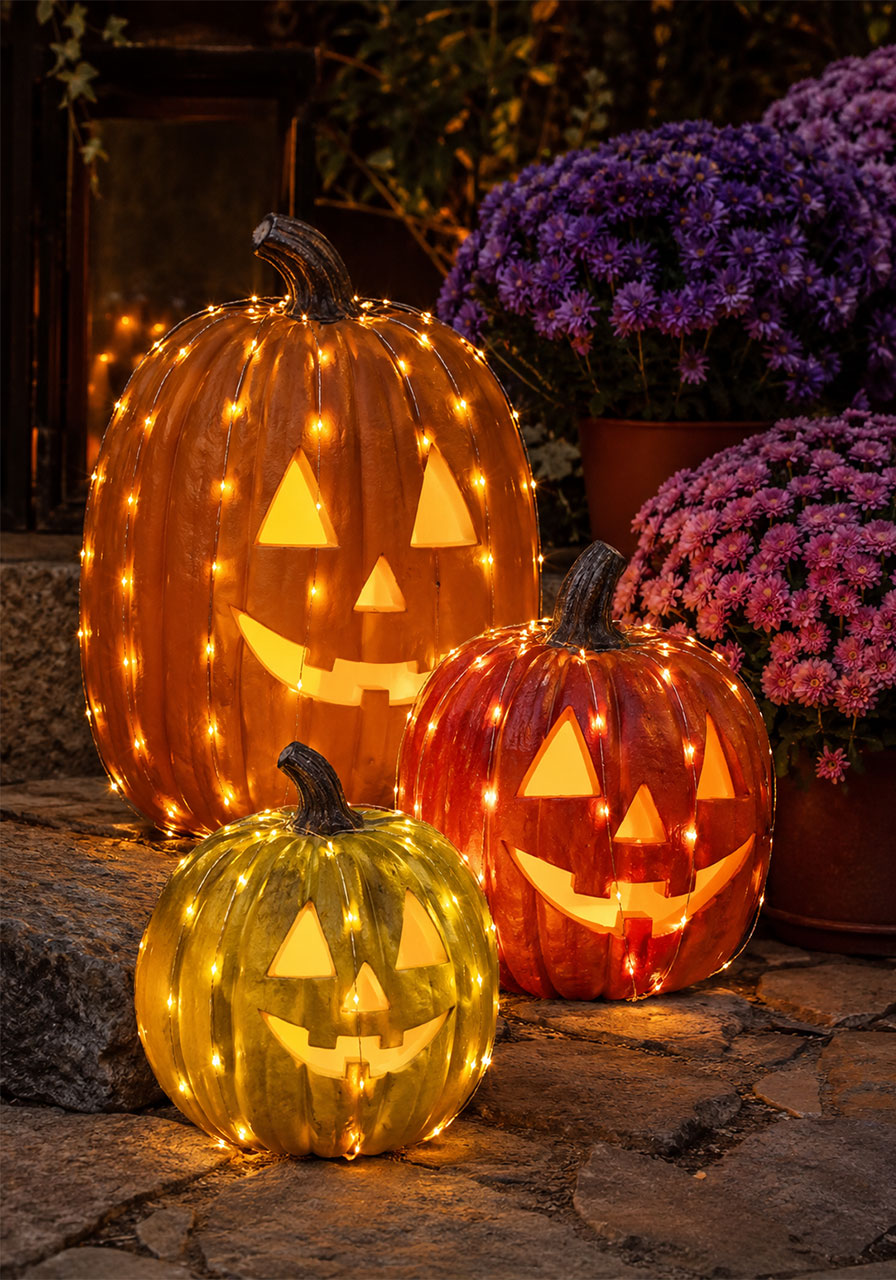
8. Fairy-Light-Wrapped Jack-O’-Lanterns
Instead of carving deeper or painting more, simply wrap your carved pumpkins in strands of tiny fairy lights. The glow travels across every ridge and multiplies the sparkle after dark.
Best for: Front steps, patios, anyone wanting extra sparkle with minimal effort.
Time to Make: 10-15 minutes per pumpkin.
Difficulty: Easy.
What You’ll Need:
- Carved or faux pumpkins
- Battery-operated fairy light strands
How to Make It:
1. Carve your pumpkin faces as usual, or use faux pumpkins for a reusable option.
2. Starting at the stem, wrap the fairy lights around the pumpkin in a loose net pattern.
3. Tuck the battery pack underneath or behind the pumpkin.
4. Turn on at dusk for a glowing, sparkly finish.
Pro Tip: Group two or three different-colored light strands together for a warmer, layered glow.
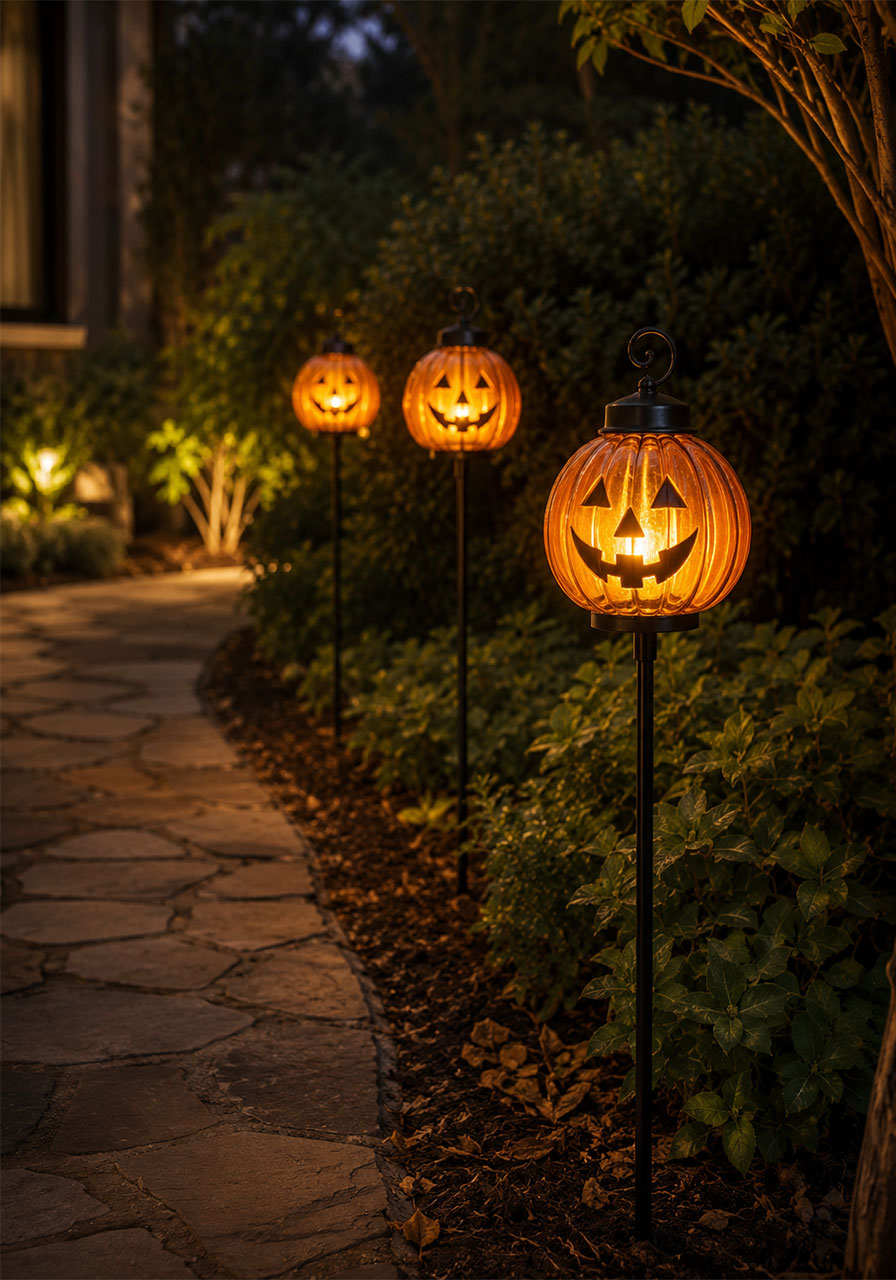
9. Glowing Pathway Pumpkin Stakes
Turn an ordinary walkway into a dramatic entrance. Pumpkin-shaped lanterns on garden stakes glow like old-fashioned streetlamps lining your path.
Best for: Driveways, garden paths, big Halloween parties.
Time to Make: 15 minutes for setup.
Difficulty: Easy.
What You’ll Need:
- Pumpkin lantern stakes (durable plastic or resin, with internal bulbs)
- Extra stakes or ground anchors if your path is uneven
How to Make It:
1. Push each stake firmly into the ground along your path, spacing them evenly.
2. Angle each pumpkin so its glow faces the walkway.
3. Switch on all lights at dusk.
4. Check batteries or connections partway through the evening if hosting a long party.
Pro Tip: Space the stakes about 3 feet apart for the most even, continuous glow.
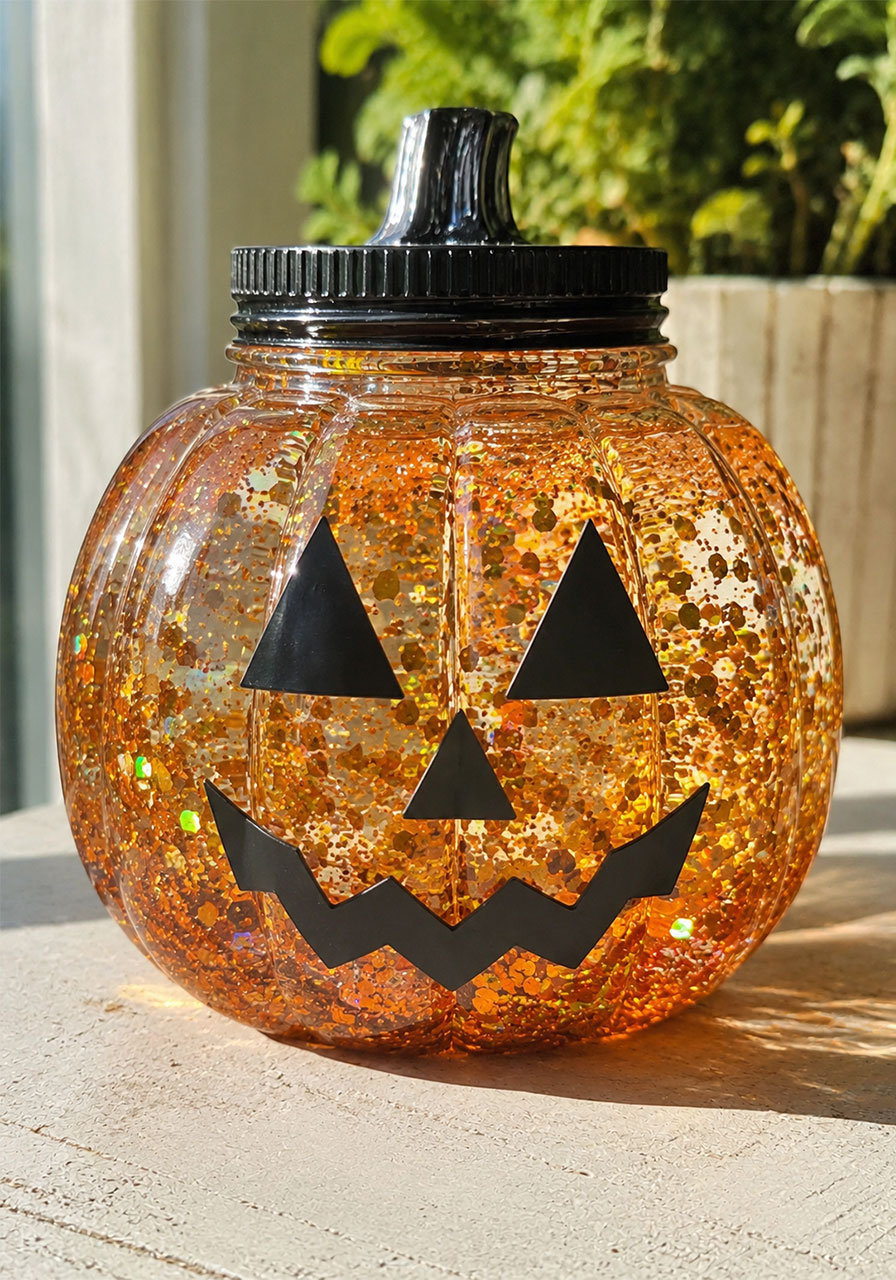
10. Glitter-Filled Lantern Jar
This is a no-carving, no-mess centerpiece that still delivers major sparkle. A clear pumpkin-shaped container filled with glittery water or holographic flakes creates a shimmering lantern by day and a soft glow by night.
Best for: Classroom desks, tabletop centerpieces, non-carving households.
Time to Make: 10 minutes.
Difficulty: Easy.
What You’ll Need:
- A clear plastic pumpkin-shaped container
- Fine glitter or holographic flakes
- Water (or leave dry for a shake-and-swirl effect)
- Black vinyl or tape for the face
How to Make It:
1. Fill the container with water and a generous scoop of glitter or flakes.
2. Seal the lid tightly.
3. Cut simple triangle eyes and a mouth from black vinyl or tape and stick them onto the outside.
4. Place where sunlight or a nearby candle can catch the sparkle.
STEM Tip: Watch how the glitter settles at different speeds – a fun, gentle intro to density for younger learners.
11. Wearable Pumpkin Head Mask
This idea takes “jack-o’-lantern” literally. A giant pumpkin carved into a bold face becomes a wearable mask or helmet, giving you an unforgettable, theatrical costume.
Best for: Costume parties, photo ops, older teens and adults.
Time to Make: 45-60 minutes.
Difficulty: Advanced.

What You’ll Need:
- An extra-large pumpkin
- A carving saw or serrated knife
- A padded liner or helmet insert for comfort and safety
How to Make It:
1. Hollow out the pumpkin fully, leaving the walls as thin as safely possible.
2. Carve large eye holes for visibility and a dramatic mouth shape.
3. Fit a padded liner inside so the pumpkin rests comfortably on the head.
4. Test the fit and visibility indoors before wearing it outside.
Pro Tip: Have a spotter nearby whenever someone is wearing this – visibility is limited, so safety comes first.
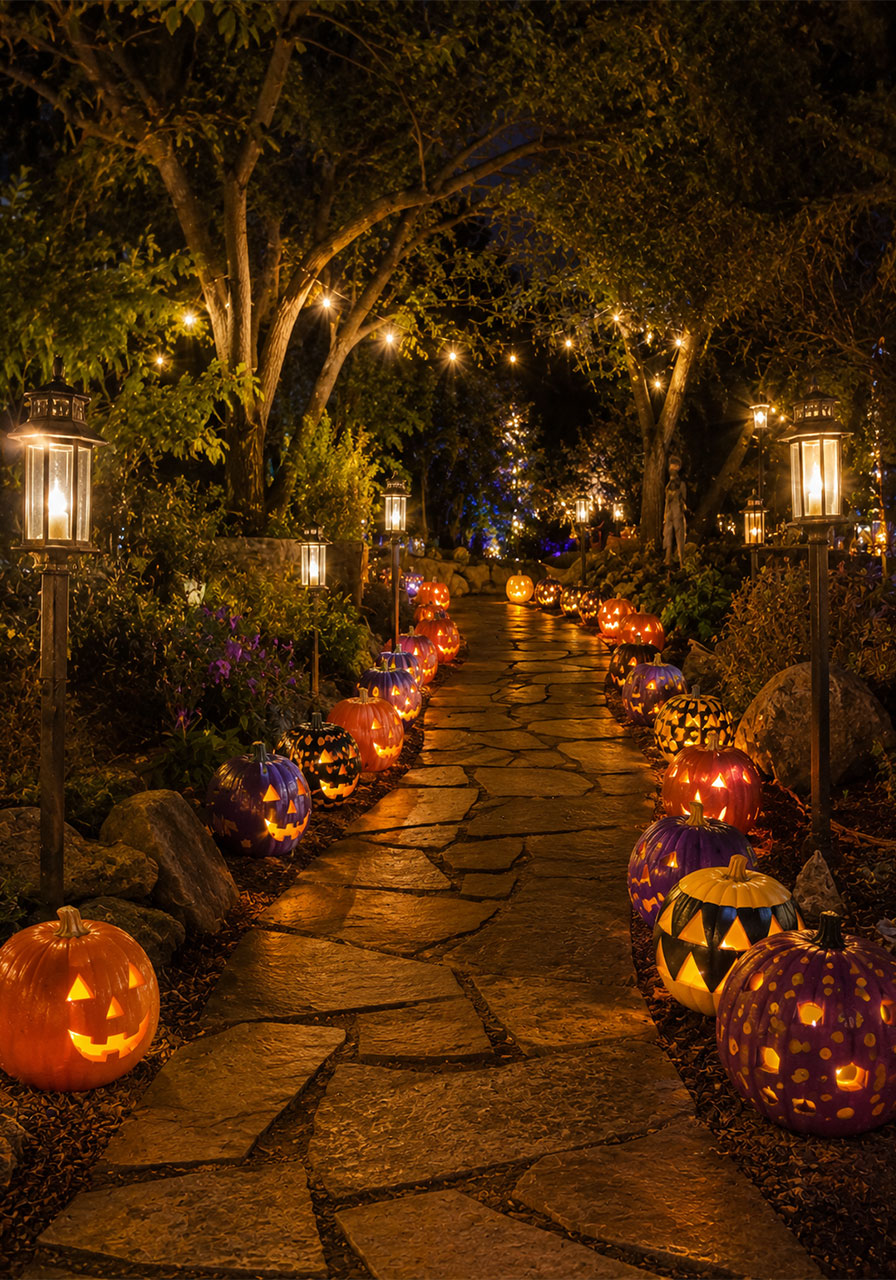
12. Painted Pumpkin Walkway (Avenue of Lanterns)
Line both sides of your driveway or garden path with a mix of carved and painted pumpkins. Varying the faces, colors, and light sources creates a glowing corridor that’s a huge payoff for parties.
Best for: Big Halloween gatherings, trick-or-treat night, whole-family projects.
Time to Make: A weekend, if painting a large batch.
Difficulty: Moderate.
What You’ll Need:
- 10 or more pumpkins, real or faux
- Acrylic paint in assorted colors
- Battery tea lights or LED strands
How to Make It:
1. Paint a variety of patterns and faces onto each pumpkin, letting each dry fully.
2. Space them evenly along both sides of your path.
3. Add a light source to each – candles, LEDs, or battery tea lights all work.
4. Step back at dusk and adjust spacing for the most even glow.
Pro Tip: Assign each family member or student a pumpkin to paint – the variety of styles is part of the charm.
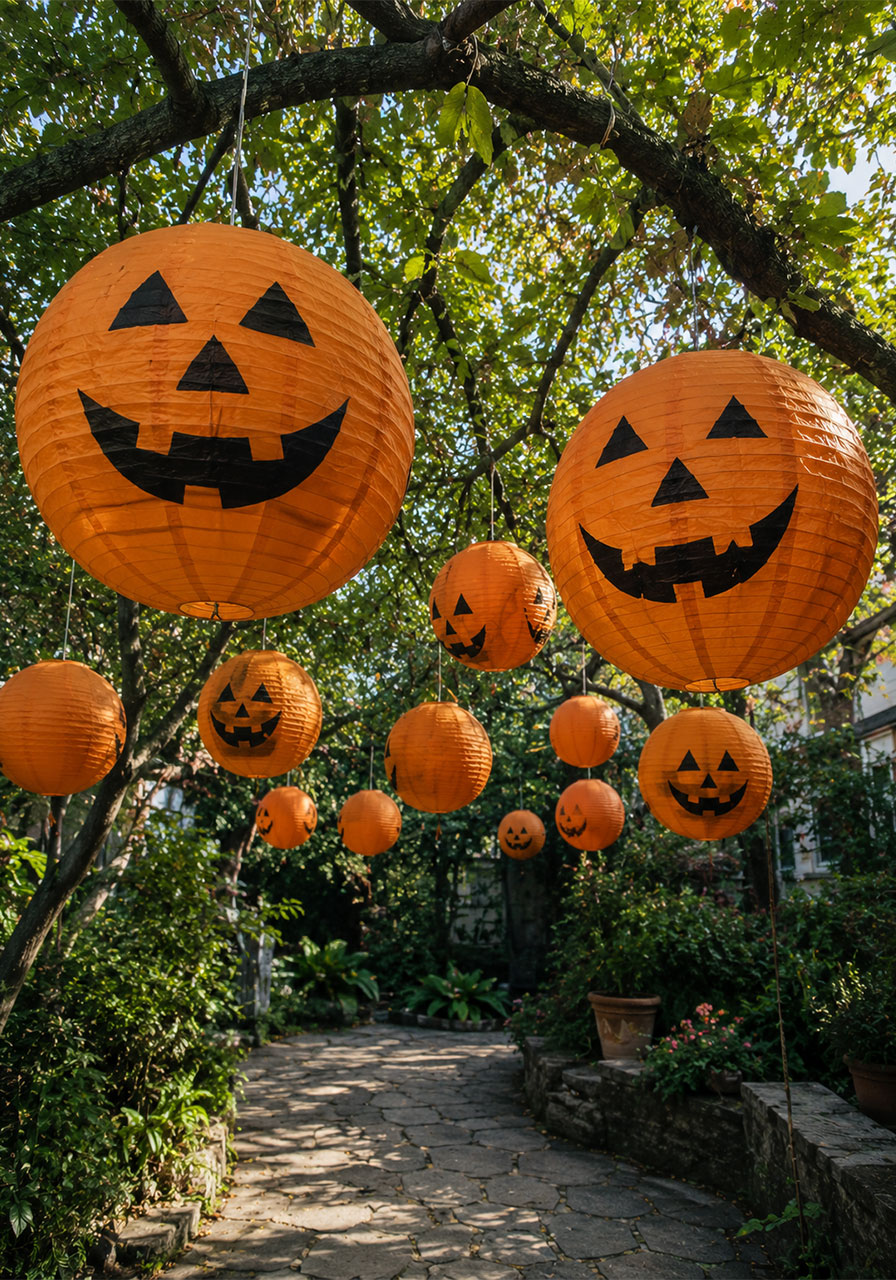
13. Hanging Paper Lantern Faces
Suspend large orange paper lanterns overhead and paint on jack-o’-lantern faces. As the wind moves them, they sway and seem to float above your space.
Best for: Patios, tents, tree branches, lightweight decorating.
Time to Make: 30 minutes for a batch.
Difficulty: Easy.
What You’ll Need:
- Orange paper lanterns in assorted sizes
- Black paint or black paper cut-outs for faces
- String or fishing line for hanging
How to Make It:
1. Paint or glue on triangle eyes and a jagged mouth to each lantern.
2. Let everything dry completely before hanging.
3. Tie string to the top of each lantern.
4. Hang from branches or overhead beams at varying heights for a layered look.
Pro Tip: Mix lantern sizes – a few large ones with a cluster of smaller ones underneath looks much more dynamic than uniform rows.
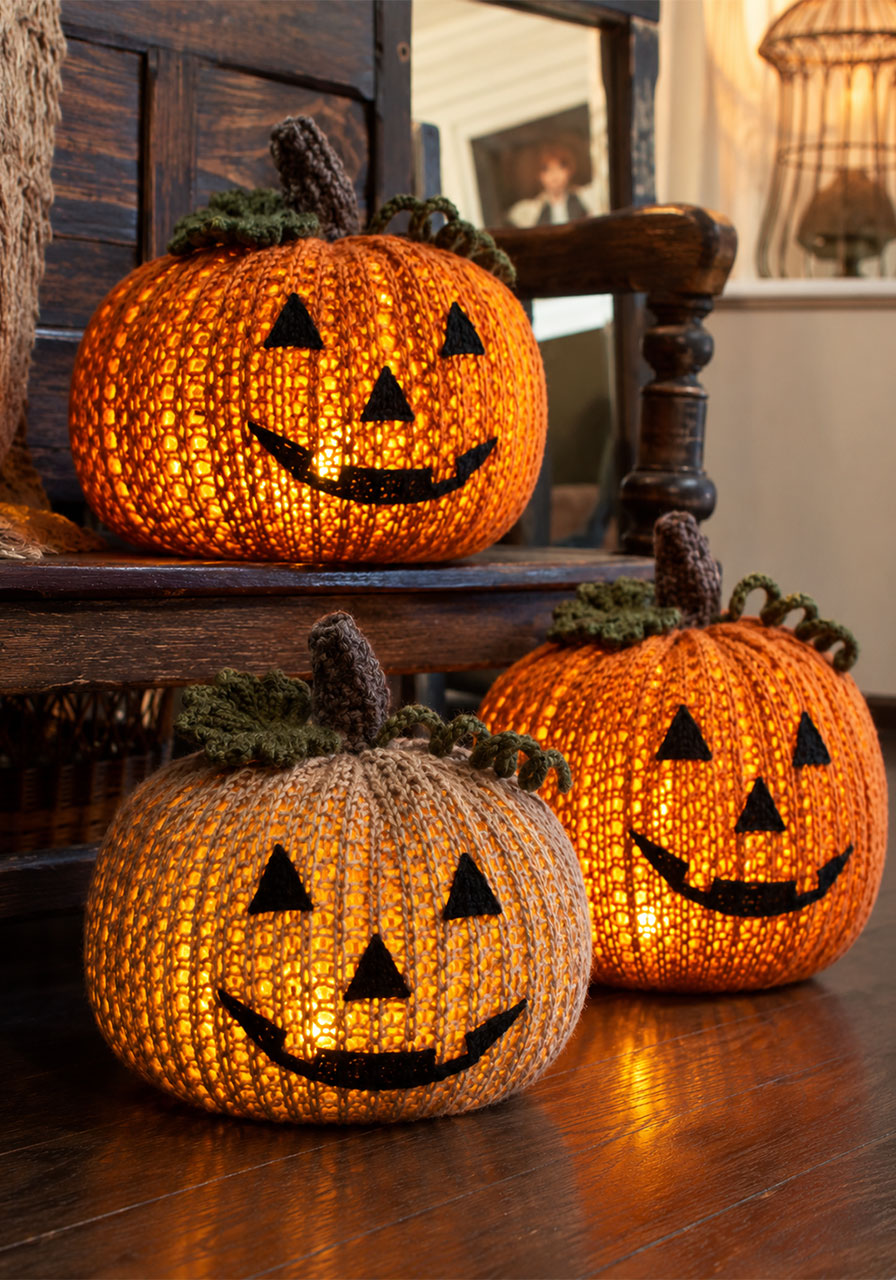
14. Knitted or Yarn-Wrapped Glow Pumpkins
Cover LED-lit pumpkins with knitted or crocheted sleeves for a soft, cozy glow. It’s a handmade, textile twist on the classic lantern shape.
Best for: Indoor decor, cozy autumn displays, craft-loving families.
Time to Make: Varies (30 minutes if using pre-made covers).
Difficulty: Easy to Moderate.
What You’ll Need:
- Foam or plastic pumpkin bases with LED lights inside
- Knitted or crocheted pumpkin covers (store-bought or handmade)
How to Make It:
1. Slide the knitted cover over each lit pumpkin base.
2. Adjust the fabric so the glow shows through evenly.
3. Add a simple embroidered face if desired.
4. Arrange in clusters on stairs, shelves, or entryways.
Pro Tip: Use LED lights only with fabric covers – never a real flame.
15. Mason Jar Jack-O’-Lanterns
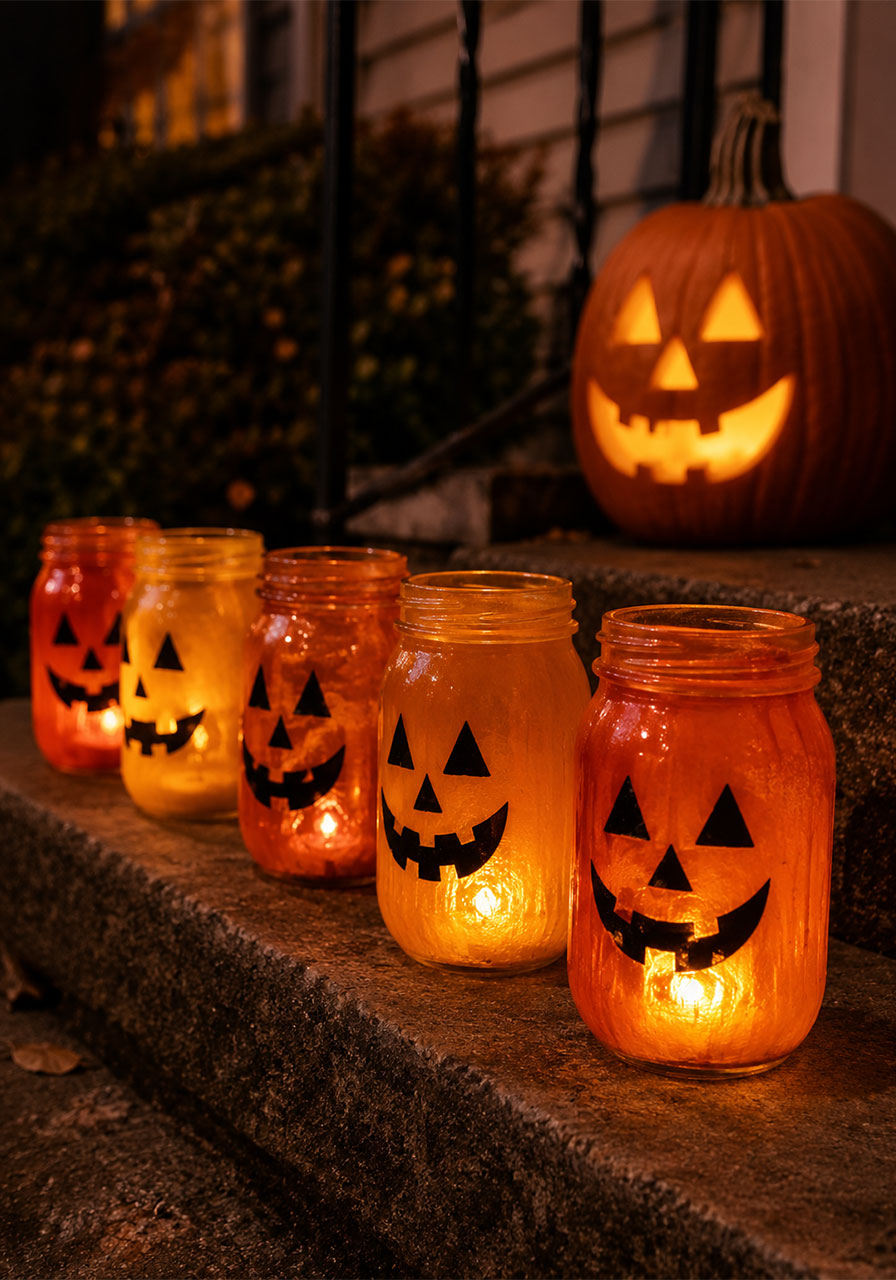
Paint mason jars in rich orange, add black cut-out faces, and drop a tea light inside. Lined up along steps or windowsills, they capture the jack-o’-lantern look without taking up much space.
Best for: Steps, shelves, windowsills, reusable year after year.
Time to Make: 20 minutes plus drying time.
Difficulty: Easy.
What You’ll Need:
- Mason jars
- Orange glass paint
- Black vinyl or tape for faces
- Battery tea lights
How to Make It:
1. Paint the outside of each jar in orange, leaving it to dry fully.
2. Cut simple triangle and jagged-mouth shapes from black vinyl and stick them onto the jars.
3. Drop a battery tea light inside each jar.
4. Line them up along steps or a windowsill for a warm glow.
Pro Tip: Store these carefully after Halloween – since they’re reusable, you’ll save yourself a project next year.
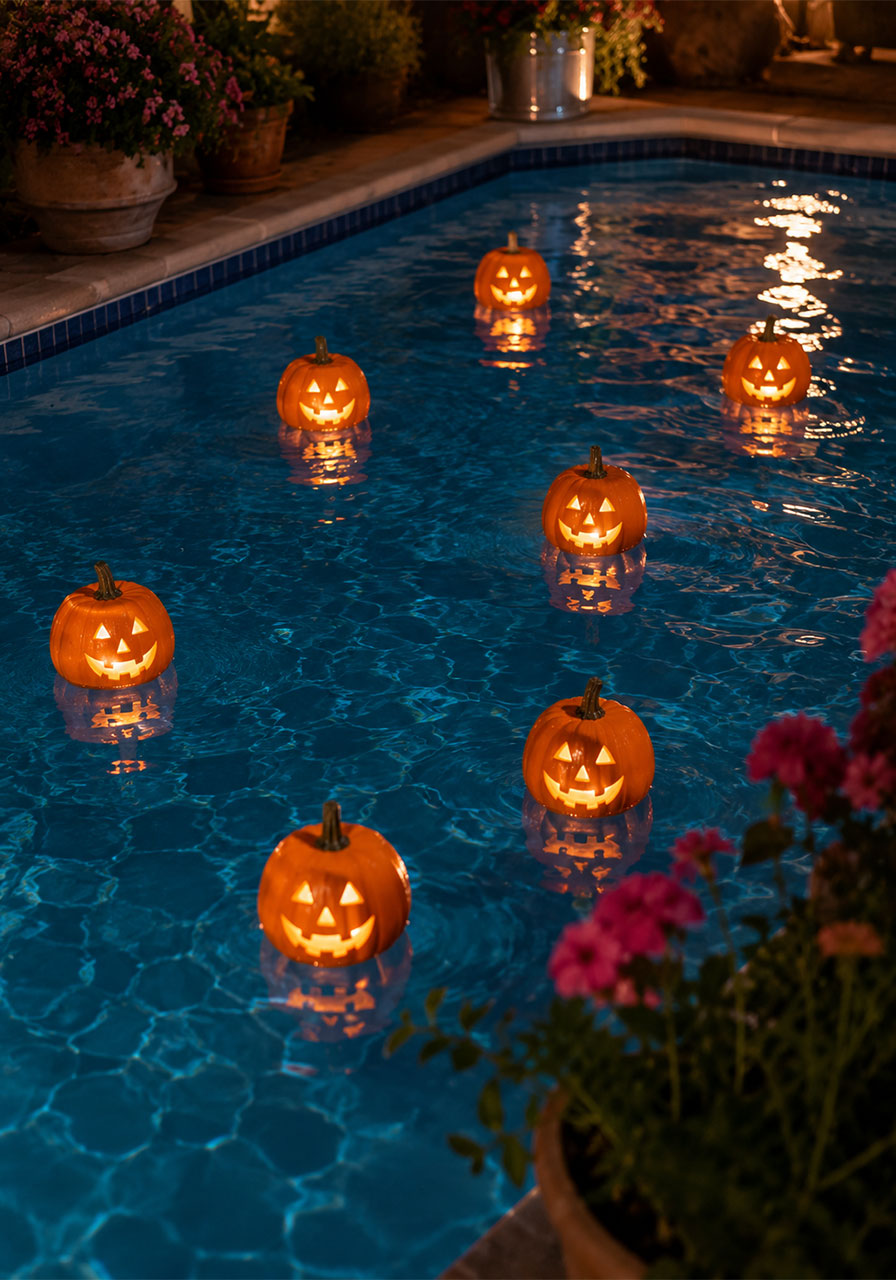
16. Floating Pool Lanterns
Place lightweight, hollow jack-o’-lanterns into a pool or pond. Their reflections ripple across the water at night, making them look like ghostly little boats.
Best for: Backyard pool parties, pond-side decorating.
Time to Make: 10 minutes.
Difficulty: Easy.
What You’ll Need:
- Lightweight foam or plastic pumpkins with LED lights inside
- A pool, pond, or large water basin
How to Make It:
1. Make sure each pumpkin is watertight and lightweight enough to float.
2. Turn on the internal LED lights.
3. Gently place them onto the water’s surface.
4. Adjust spacing so they drift naturally without clustering.
STEM Tip: This is a great, hands-on way to talk about buoyancy – ask kids why a hollow pumpkin floats while a solid one wouldn’t.
17. Balloon Jack-O’-Lantern Cluster
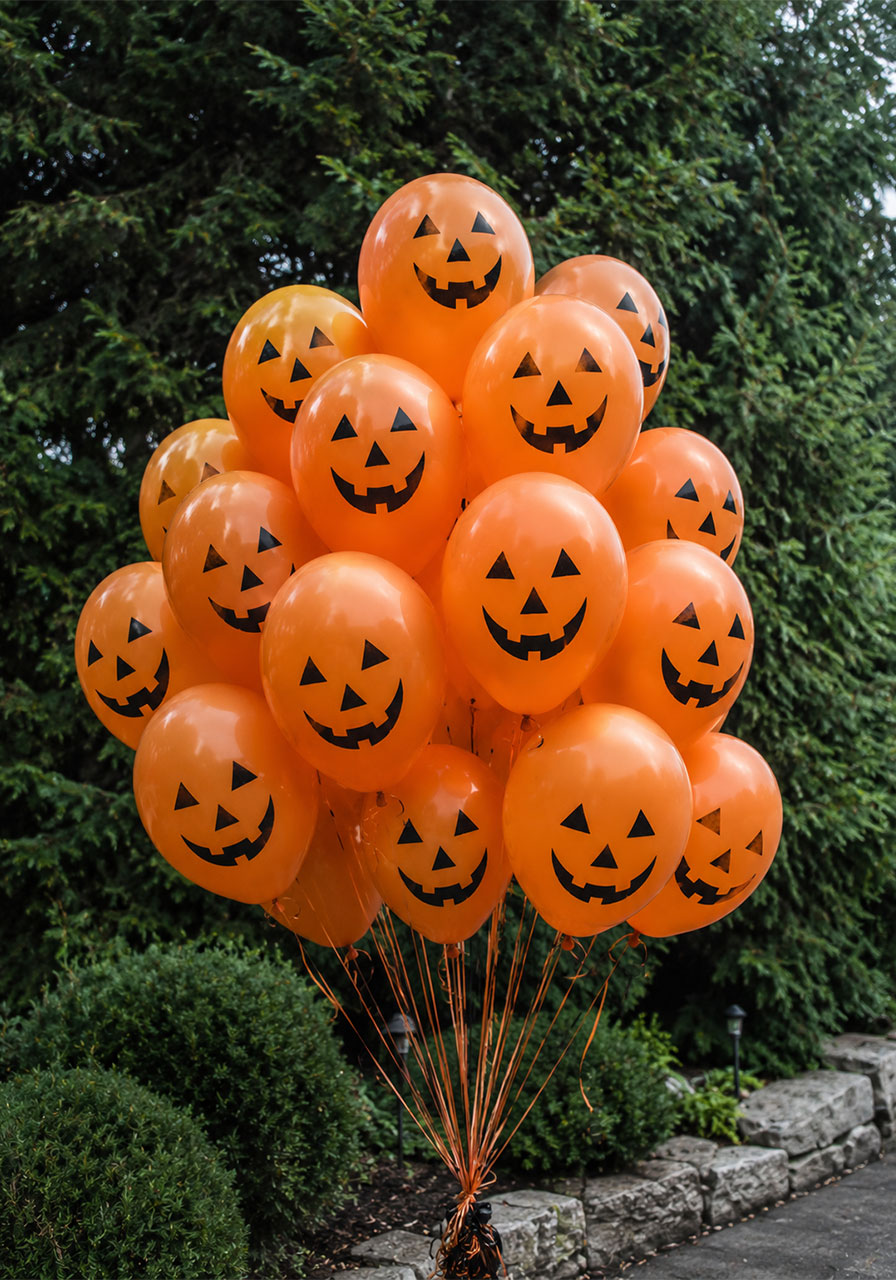
Fill orange balloons with helium and draw on jack-o’-lantern faces. Tethered in a cluster or drifting under a ceiling, they create a playful, floating pumpkin garden without any carving at all.
Best for: Parties, classrooms, quick last-minute decorating.
Time to Make: 20 minutes.
Difficulty: Easy.
What You’ll Need:
- Orange balloons
- Helium tank or pump
- Black permanent marker
- Ribbon for tethering
How to Make It:
1. Inflate balloons with helium and tie them off.
2. Draw a simple jack-o’-lantern face on each with permanent marker.
3. Gather several balloons together and tie their ribbons in one bundle.
4. Anchor the bundle to a weight or tether it to furniture so it doesn’t float away.
STEM Tip: A perfect chance to talk about why helium balloons float – helium is lighter than the air around us.
18. Fabric or Stuffed Pumpkin Lanterns
Use stuffed fabric pumpkins with cut-out or appliqué faces, and insert small LED candles so they glow softly through the material. It’s a safe, reusable alternative to carved gourds.
Best for: Stairs, shelves, kids’ rooms, families with young children.
Time to Make: 15 minutes (using pre-made fabric pumpkins).
Difficulty: Easy.
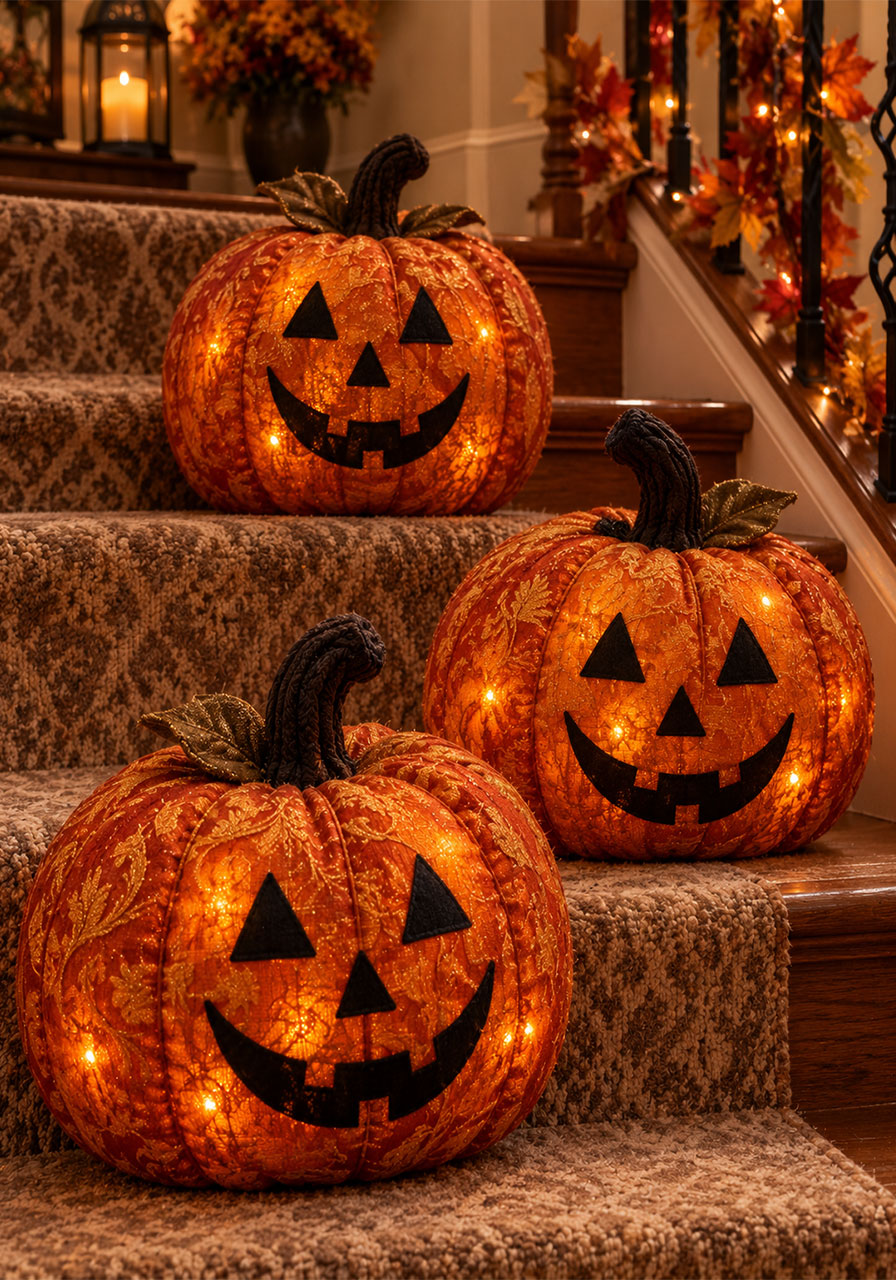
What You’ll Need:
- Fabric or stuffed pumpkins with a face cut-out or appliqué
- Small battery LED candles
How to Make It:
1. Tuck a battery LED candle inside each fabric pumpkin.
2. Position the pumpkin so the light shows softly through the face design.
3. Arrange on stairs, shelves, or nightstands.
4. Turn off during the day and switch on each evening.
Pro Tip: These are perfect for a young child’s room since there’s no flame, no glass, and no sharp edges at all.

Edible Jack-O’-Lantern Ideas
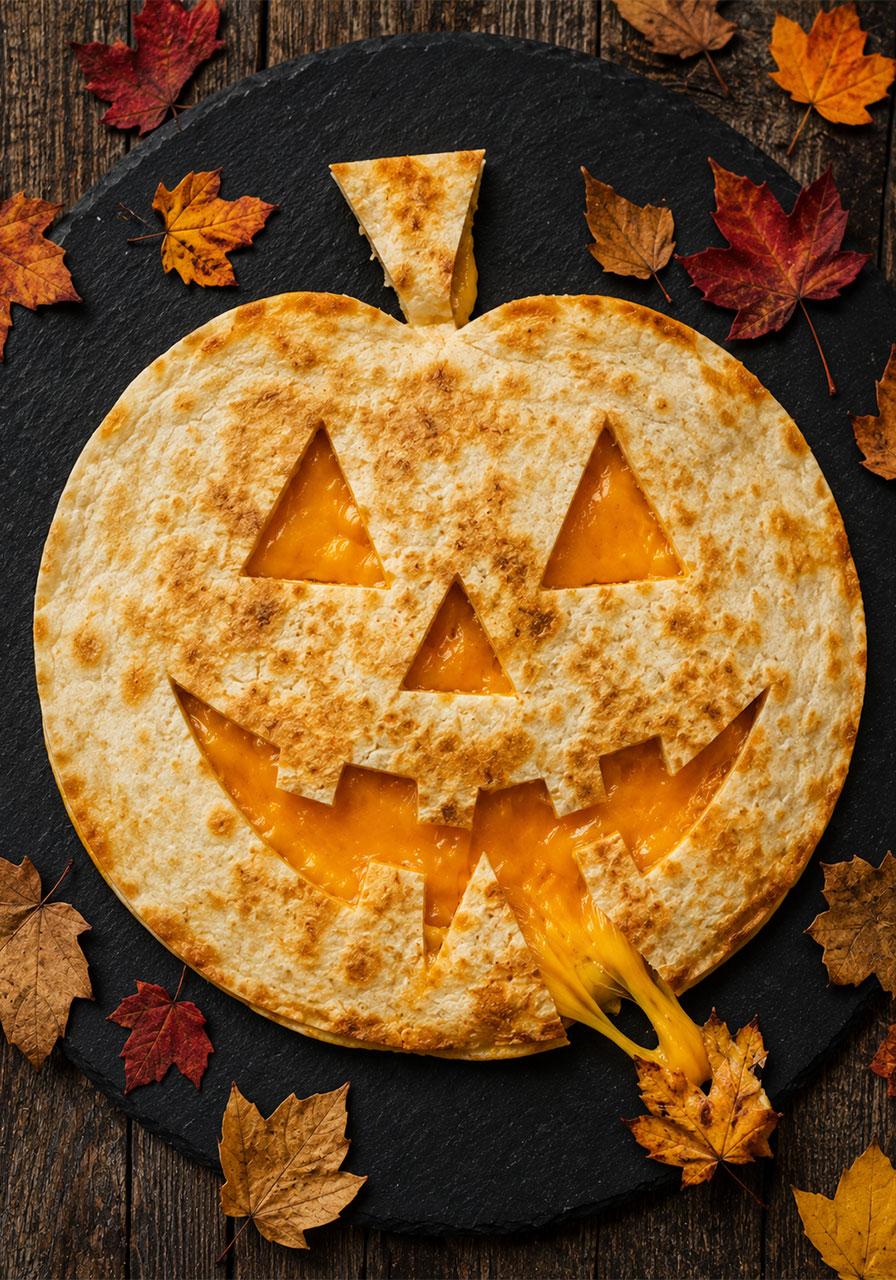
19. Pumpkin Face Quesadilla
Dinner gets a fun disguise here. A quesadilla is shaped into a pumpkin with triangle eyes and a crooked, cheesy grin.
Best for: Family dinners, quick weeknight fun, no-carving-kit-required households.
Time to Make: 10 minutes.
Difficulty: Easy.
What You’ll Need:
- Large flour tortillas
- Shredded cheese
- A small paring knife
How to Make It:
1. Fill a tortilla with cheese, top with a second tortilla, and cook until golden on both sides.
2. Once cooled slightly, cut the edges into a rounded pumpkin shape.
3. Cut triangle eyes and a jagged mouth out of the top layer only, revealing the melted cheese underneath.
4. Serve warm with a side of salsa or guacamole.
Pro Tip: Let quesadillas cool for a minute before cutting the face – it makes clean cuts much easier.
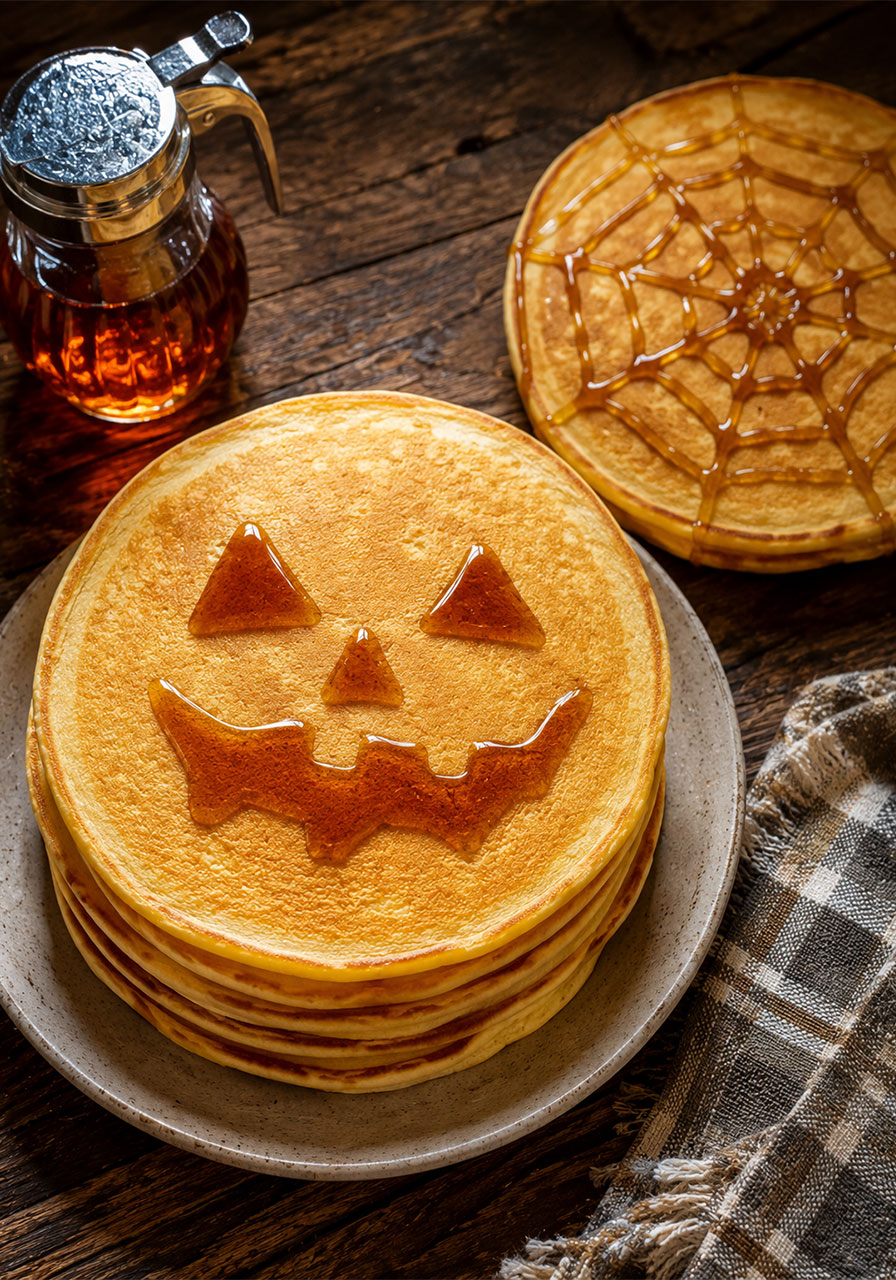
20. Pumpkin-Face Pancakes
A quiet, gentle nod to Halloween that’s perfect for breakfast. Syrup gets drawn into a spider web on one pancake and a jack-o’-lantern face on another.
Best for: Halloween morning breakfasts, classroom pancake parties.
Time to Make: 15 minutes.
Difficulty: Easy.
What You’ll Need:
- Pancake batter
- Maple syrup in a squeeze bottle
How to Make It:
1. Cook pancakes as usual and plate them warm.
2. Use the syrup bottle to draw triangle eyes and a jagged mouth directly on top.
3. On a second pancake, draw a simple spider web pattern.
4. Serve immediately while the syrup is still glossy.
Pro Tip: Warm the syrup slightly first so it flows smoothly for cleaner lines.
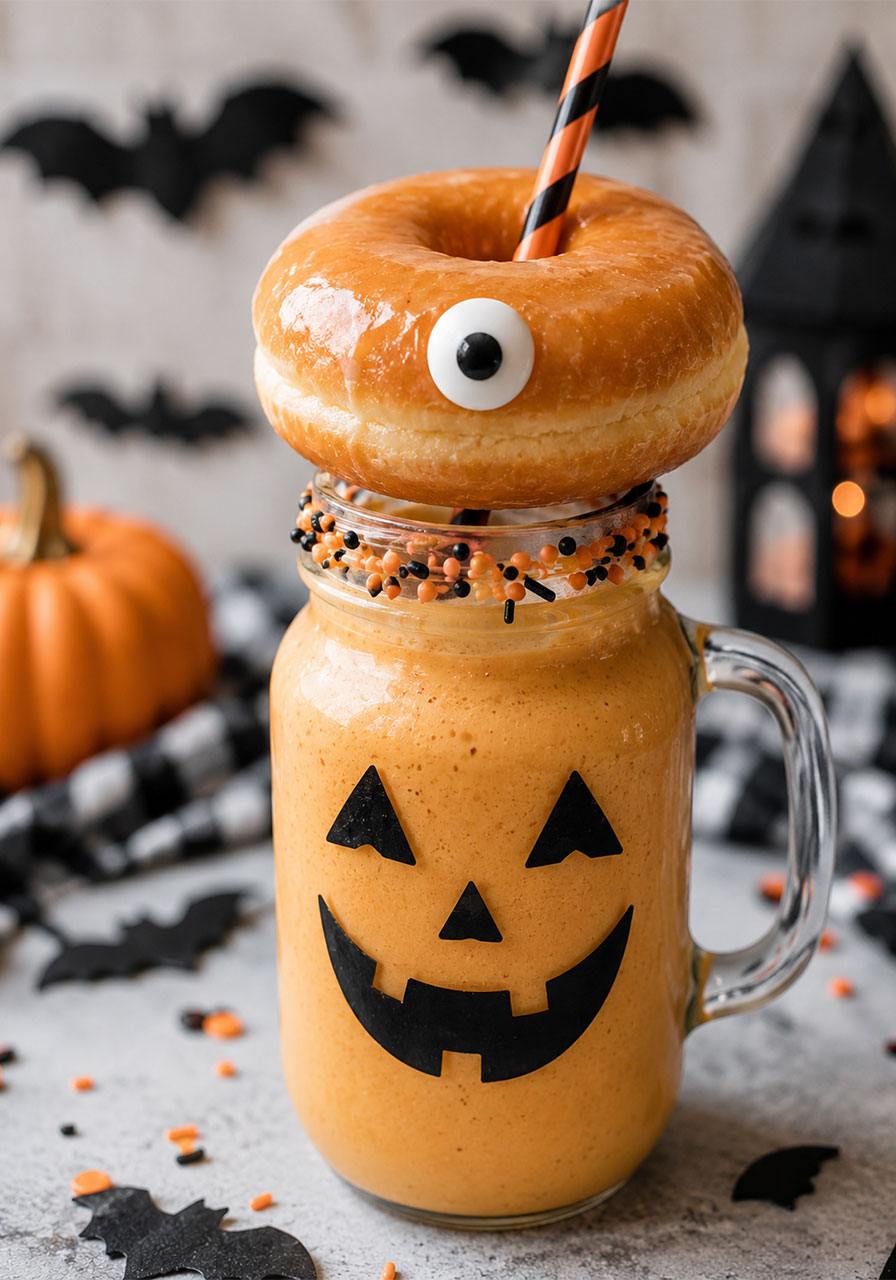
21. Milkshake in a Jack-O’-Lantern Jar
A milkshake becomes a showpiece dessert here. Decorate a glass jar with a black pumpkin face, top the drink with a donut, and add a candy eyeball for full effect.
Best for: Halloween parties, birthday treats, dessert-table centerpieces.
Time to Make: 15 minutes.
Difficulty: Easy.
What You’ll Need:
- A mason jar or milkshake glass
- Black vinyl or tape for the face
- Your favorite milkshake
- A donut and a candy eyeball for topping
How to Make It:
1. Stick a jack-o’-lantern face onto the outside of your glass.
2. Pour in the milkshake, leaving room at the top.
3. Balance a donut on top as a “lid.”
4. Press a candy eyeball onto the donut and serve immediately.
Pro Tip: Chill the glass beforehand so your milkshake stays thick and doesn’t melt too fast.
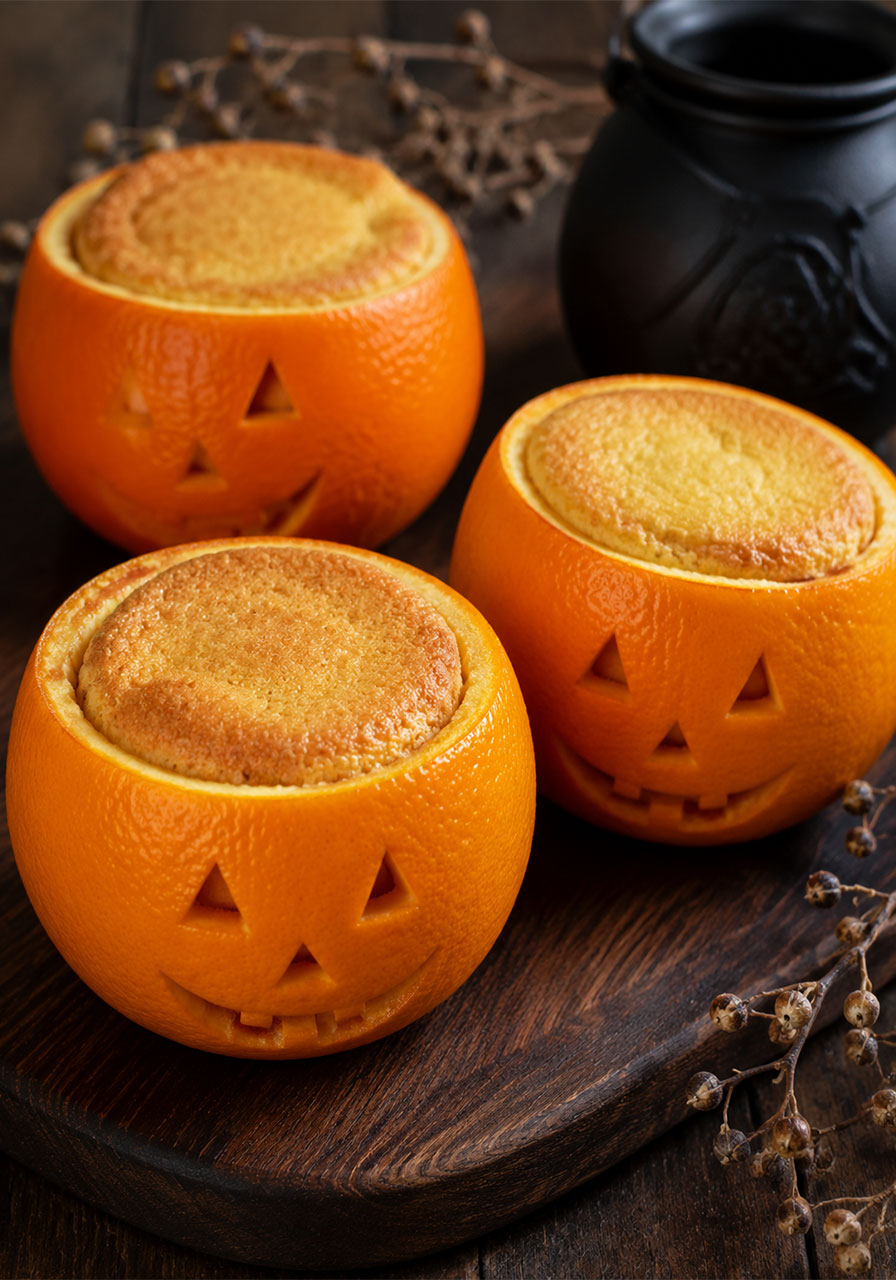
22. Orange-Shell Citrus Cakes
Fruit shells stand in for pumpkins here. Small cakes bake right inside hollowed oranges, with lantern faces cut into the sides for a dessert that doubles as décor.
Best for: Dinner parties, dessert tables, make-ahead treats.
Time to Make: 45 minutes.
Difficulty: Moderate.
What You’ll Need:
- Oranges
- Your favorite cake batter
- A small paring knife
How to Make It:
1. Slice the tops off oranges and hollow out the fruit, saving the juice for another use.
2. Fill each orange shell about two-thirds full with cake batter.
3. Bake on a tray until the cake rises and sets, following your batter’s baking time.
4. Once cooled slightly, carve a simple face into the side of each orange shell.
Pro Tip: Bake these on a lined tray – the shells can leak a little as they bake.
23. Jack-O’-Lantern Donuts
Turn plain donuts into edible jack-o’-lanterns using orange, brown, and chocolate icing along with candy eyes and stitched-on mouths.
Best for: Bake sales, classroom treats, party favors.
Time to Make: 20 minutes.
Difficulty: Easy.

What You’ll Need:
- Plain donuts
- Orange and chocolate icing
- Candy eyes
- A piping bag or toothpick for detail work
How to Make It:
1. Coat each donut with orange icing and let it set slightly.
2. Pipe on a chocolate-icing mouth with small stitch marks.
3. Press candy eyes onto the icing while it’s still soft enough to stick.
4. Let everything set before serving.
Pro Tip: Let the base icing firm up for a few minutes before adding details, or the decorations will slide.
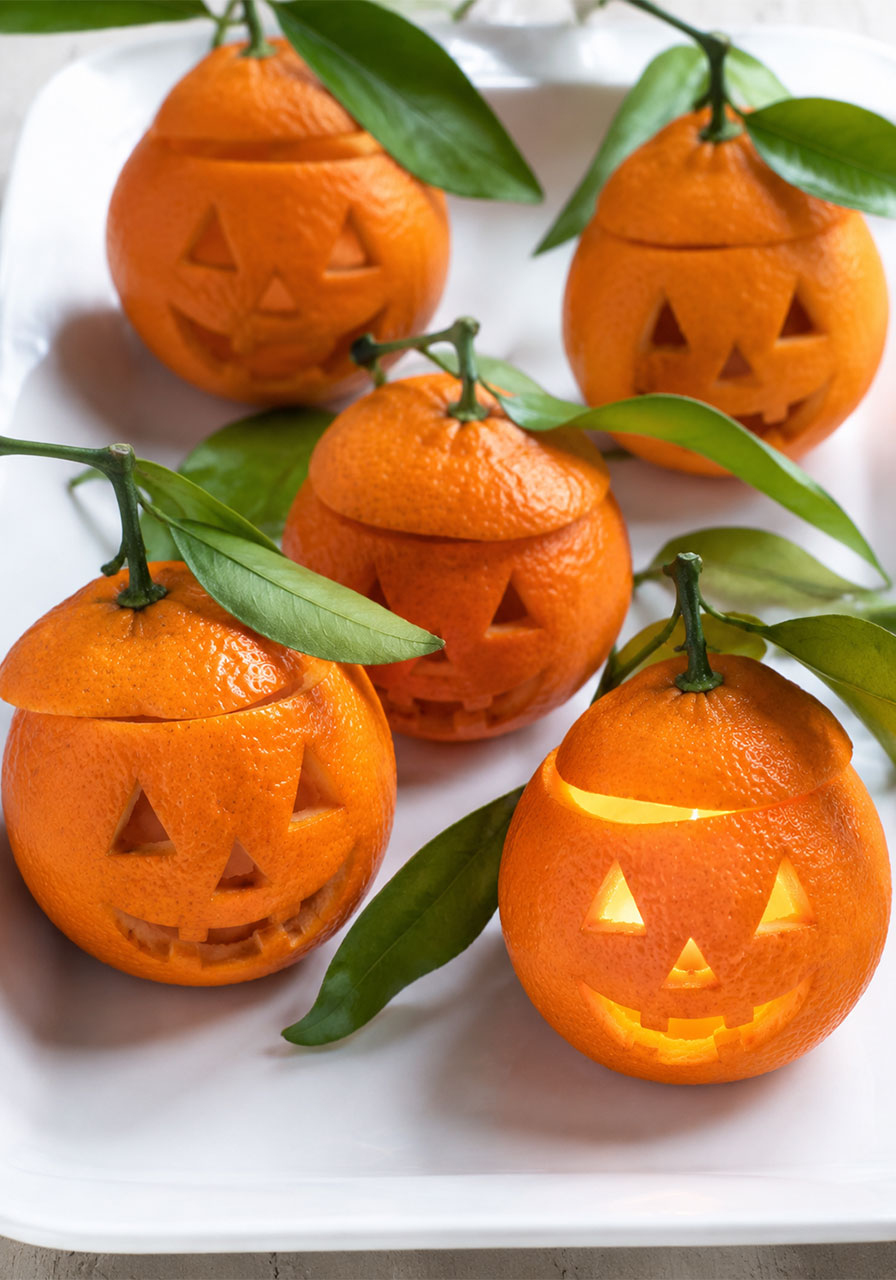
24. Mini Tangerine Lanterns
Small spaces call for small jack-o’-lanterns. Hollow out tangerines, carve tiny faces, and slip a small light inside – or leave them plain for a citrusy snack tray.
Best for: Party trays, bar setups, bite-sized decorating.
Time to Make: 15 minutes.
Difficulty: Easy.
What You’ll Need:
- Tangerines with leafy tops if possible
- A small paring knife
- Tiny battery lights (optional)
How to Make It:
1. Slice off the top of each tangerine and gently hollow it out.
2. Carve a small triangle-eyed face into the peel.
3. Insert a tiny battery light if you want them to glow.
4. Arrange on a serving tray with the leafy tops intact for color.
Pro Tip: Save the scooped-out tangerine flesh for a fruit salad – nothing goes to waste.
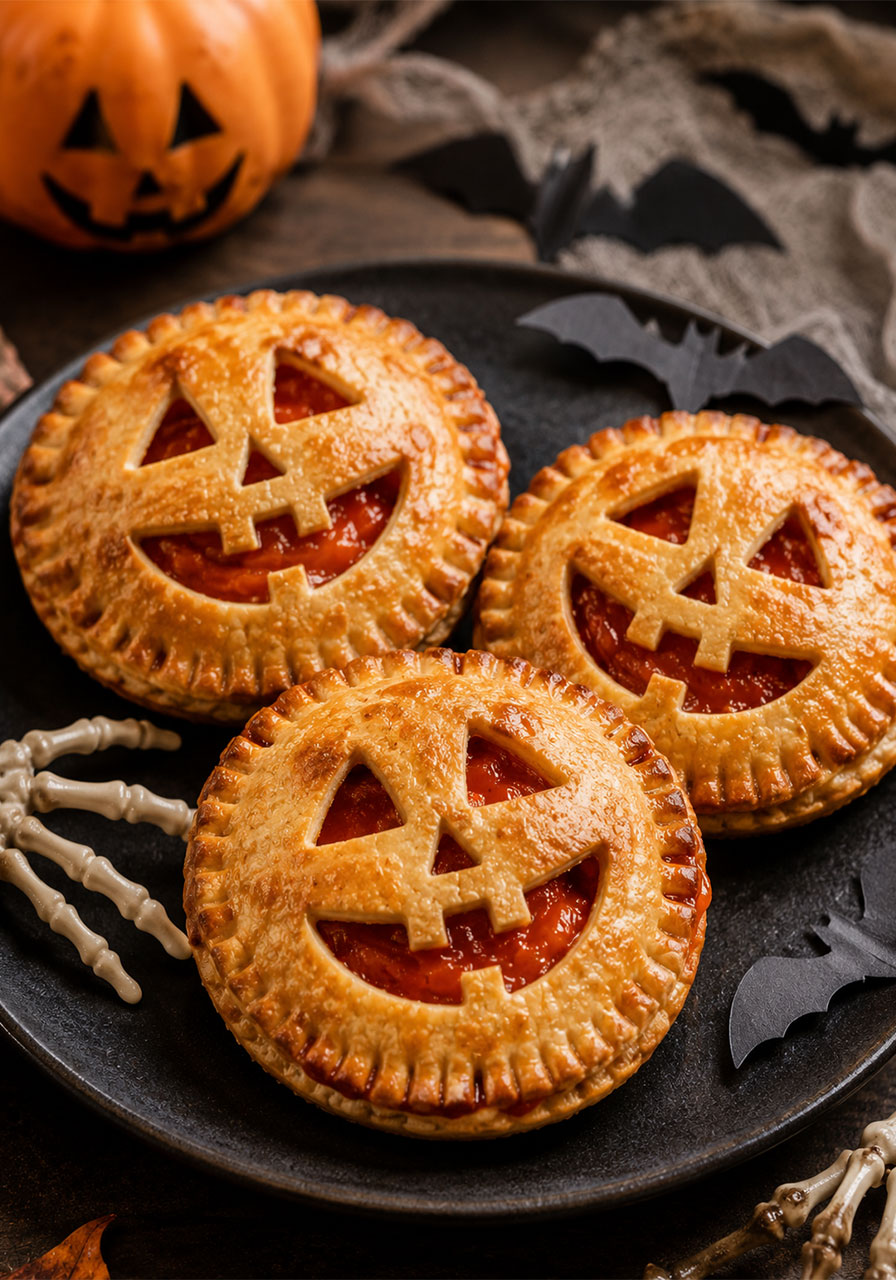
25. Mini Pumpkin Pies
The first impression is golden pastry – until you spot the jack-o’-lantern eyes and mouth cut into the crust, letting red filling peek through underneath.
Best for: Fall dessert tables, classroom treats, quick seasonal baking.
Time to Make: 30 minutes plus baking time.
Difficulty: Moderate.
What You’ll Need:
- Mini pie crusts and your favorite filling
- A small cutting tool for the face
How to Make It:
1. Fill each mini pie shell with your filling of choice.
2. Cut triangle eyes and a jagged mouth into the top crust before baking.
3. Bake according to your recipe’s instructions until golden.
4. Let cool slightly so the cut-out face and filling color show clearly.
Pro Tip: Cut the face into the crust before baking, not after – it bakes cleaner and looks much more polished.
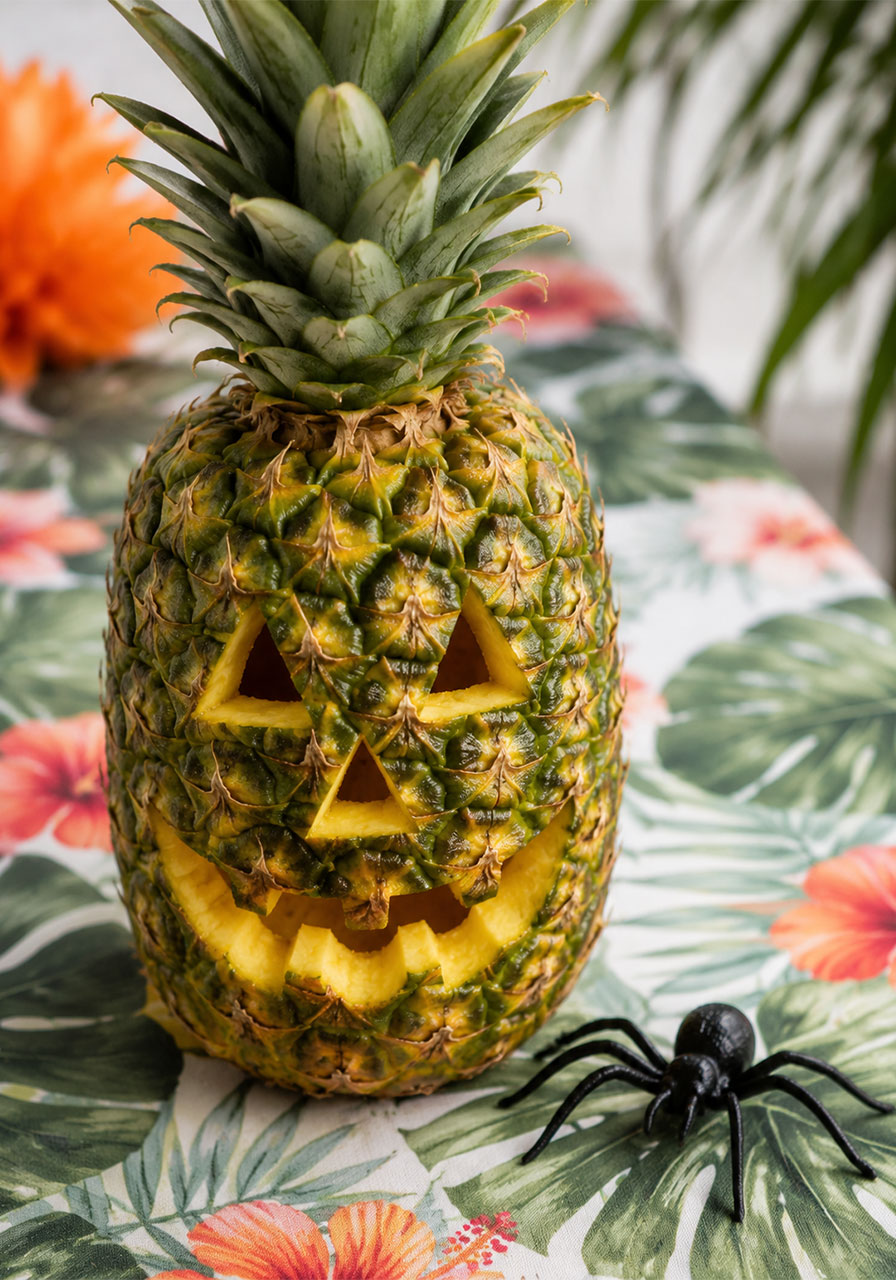
26. Pineapple Jack-O’-Lantern
Surprise your guests by swapping the usual pumpkin for a pineapple. Carved eyes and a mouth in the rind, paired with the leafy green top, flip the tradition on its head while still reading as pure Halloween.
Best for: Tropical-themed parties, unexpected centerpieces.
Time to Make: 15 minutes.
Difficulty: Easy.
What You’ll Need:
- A pineapple with its green top intact
- A small paring knife
How to Make It:
1. Carve triangle eyes and a jagged mouth directly into the pineapple’s rind.
2. Keep the leafy top on for height and drama.
3. Set it upright on a serving tray or table.
4. Add a small fake spider or tropical drink nearby to complete the look.
Pro Tip: Score lightly first with a marker so your cuts stay even.
27. Drinks That Wear Faces
No pumpkins needed here – just glasses tinted orange with a creamy top, decorated with dark jack-o’-lantern expressions on the glass itself.
Best for: Halloween mocktail or cocktail hour, adult party décor.
Time to Make: 10 minutes.
Difficulty: Easy.

What You’ll Need:
- Clear glasses
- Orange drink mix or juice
- Black vinyl or tape for faces
- Whipped cream for topping
How to Make It:
1. Stick a simple jack-o’-lantern face onto the outside of each glass.
2. Pour in your orange drink, leaving room at the top.
3. Add a creamy whipped topping.
4. Scatter candy corn or pretzels around the glasses for extra texture.
Pro Tip: Chill your glasses beforehand for a frostier, more dramatic presentation.
28. Coffee With a Secret in the Foam
Slip the lantern theme into your morning coffee. A cinnamon stencil creates a subtle pumpkin face right on the foam, quick and photo-ready.
Best for: Cafés, home coffee bars, subtle seasonal touches.
Time to Make: 5 minutes.
Difficulty: Easy.

What You’ll Need:
- Steamed milk with foam
- Ground cinnamon
- A simple pumpkin-face stencil (paper works fine)
How to Make It:
1. Steam your milk until it has a good layer of foam.
2. Hold the stencil over the foam.
3. Dust cinnamon lightly over the stencil.
4. Remove the stencil carefully to reveal the design.
Pro Tip: Make sure the foam is fresh and thick before stenciling, or the design won’t hold.
29. Burger Bun Jack-O’-Lantern
The bun comes first, then the surprise. Carved like a miniature pumpkin with triangular eyes and topped with a green pepper “stem,” it hides a classic cheeseburger underneath.
Best for: Halloween cookouts, savory party food, older kids and teens.
Time to Make: 15 minutes.
Difficulty: Moderate.

What You’ll Need:
- Burger buns
- Orange food coloring or egg wash tint
- A small green pepper for the stem
- Your favorite burger fixings
How to Make It:
1. Tint the burger bun orange using food coloring in an egg wash, brushed on before baking or toasting.
2. Cut a small triangle-eyed face into the top of the bun.
3. Top with a small piece of green pepper to mimic a pumpkin stem.
4. Assemble your burger as usual and serve.
Pro Tip: Toast the bun lightly after tinting to help set the color.
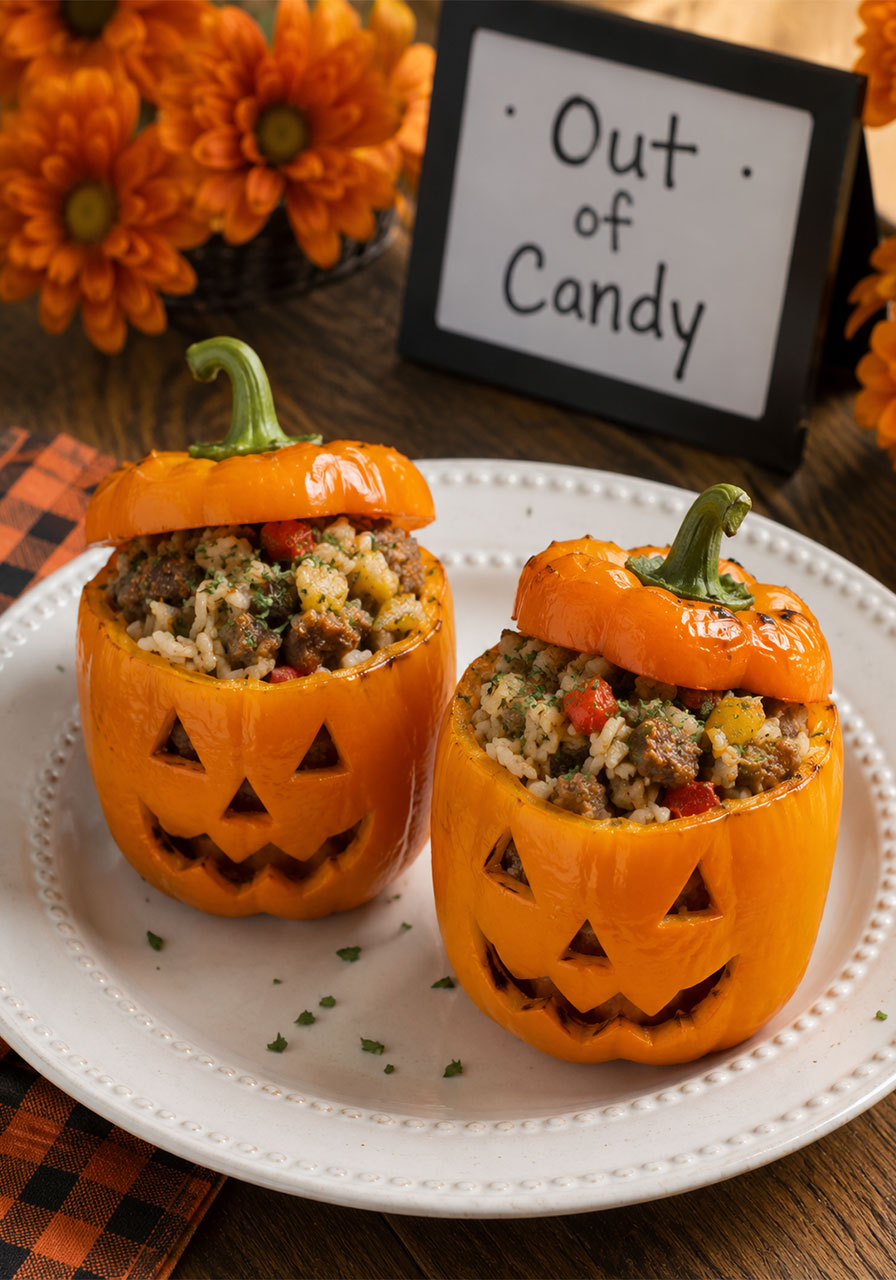
30. Stuffed Pepper Jack-O’-Lanterns
Vegetables make a perfect stand-in here. Orange bell peppers carved with jagged faces and filled with rich stuffing bring Halloween spirit to an actual meal.
Best for: Family dinners, healthier party options.
Time to Make: 40 minutes.
Difficulty: Moderate.
What You’ll Need:
- Orange bell peppers
- Your favorite stuffing recipe
- A small paring knife
How to Make It:
1. Slice off the tops of the peppers and remove the seeds and membrane.
2. Carve a jagged jack-o’-lantern face into each pepper’s side.
3. Fill with your stuffing mixture.
4. Bake according to your stuffing recipe until the peppers soften.
Pro Tip: Carve the face before stuffing – it’s much easier to see and cut cleanly on an empty pepper.
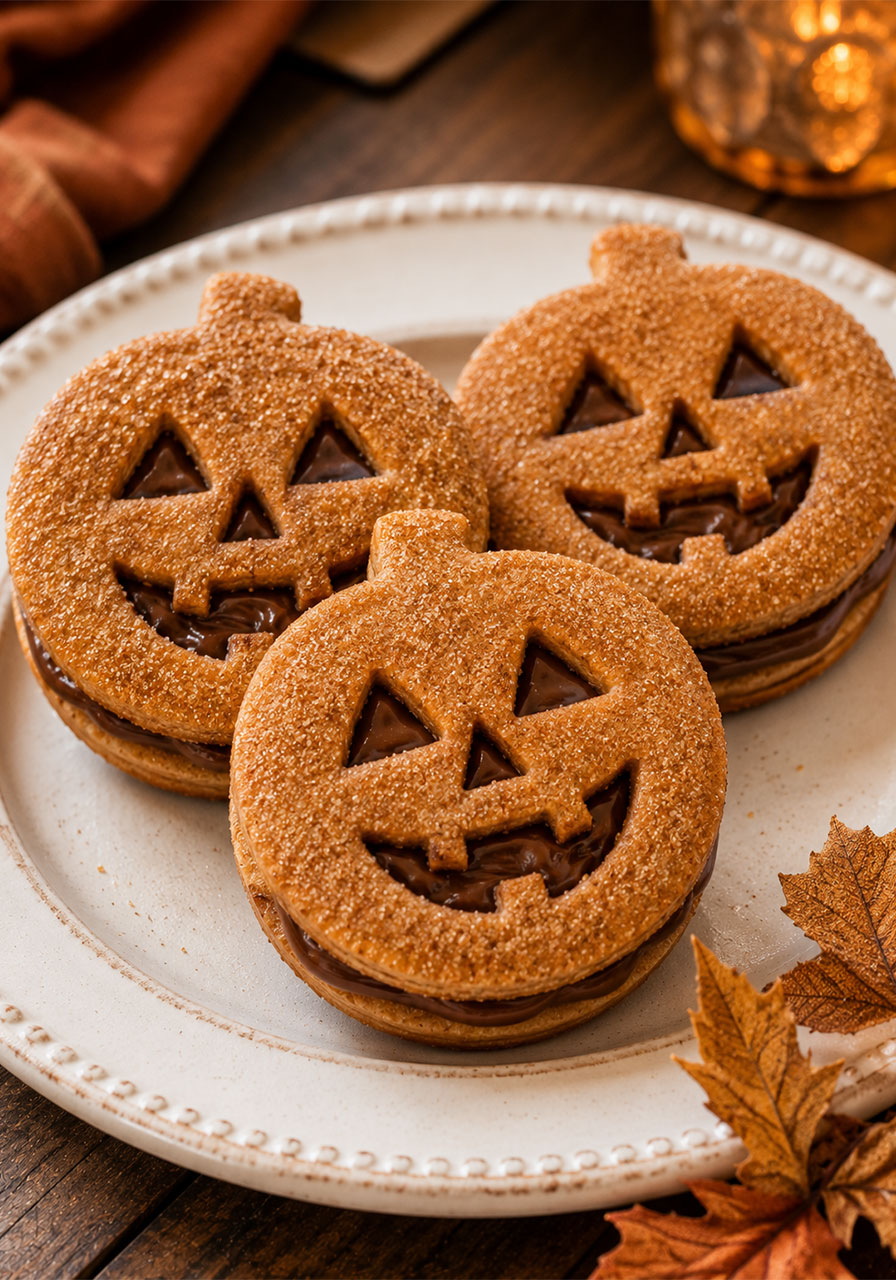
31. Cinnamon Sugar Sandwich Cookies
Not every jack-o’-lantern needs a knife and a candle. Pumpkin-shaped cookies with cut-out faces filled with glossy chocolate hazelnut spread turn a simple sandwich cookie into a small edible Halloween sculpture.
Best for: Bake sales, classroom parties, make-ahead treats.
Time to Make: 30 minutes plus baking and cooling time.
Difficulty: Moderate.
What You’ll Need:
- Pumpkin-shaped cookie cutters
- Cinnamon sugar cookie dough
- Chocolate hazelnut spread
How to Make It:
1. Cut out pumpkin-shaped cookies from your dough.
2. Cut a simple triangle-eyed face into half of the cookies before baking.
3. Bake all cookies according to your recipe, then let cool completely.
4. Spread chocolate hazelnut spread onto a plain cookie and top with a face cookie to sandwich them together.
Pro Tip: Cut the faces before baking, not after – the edges bake cleaner and hold their shape.
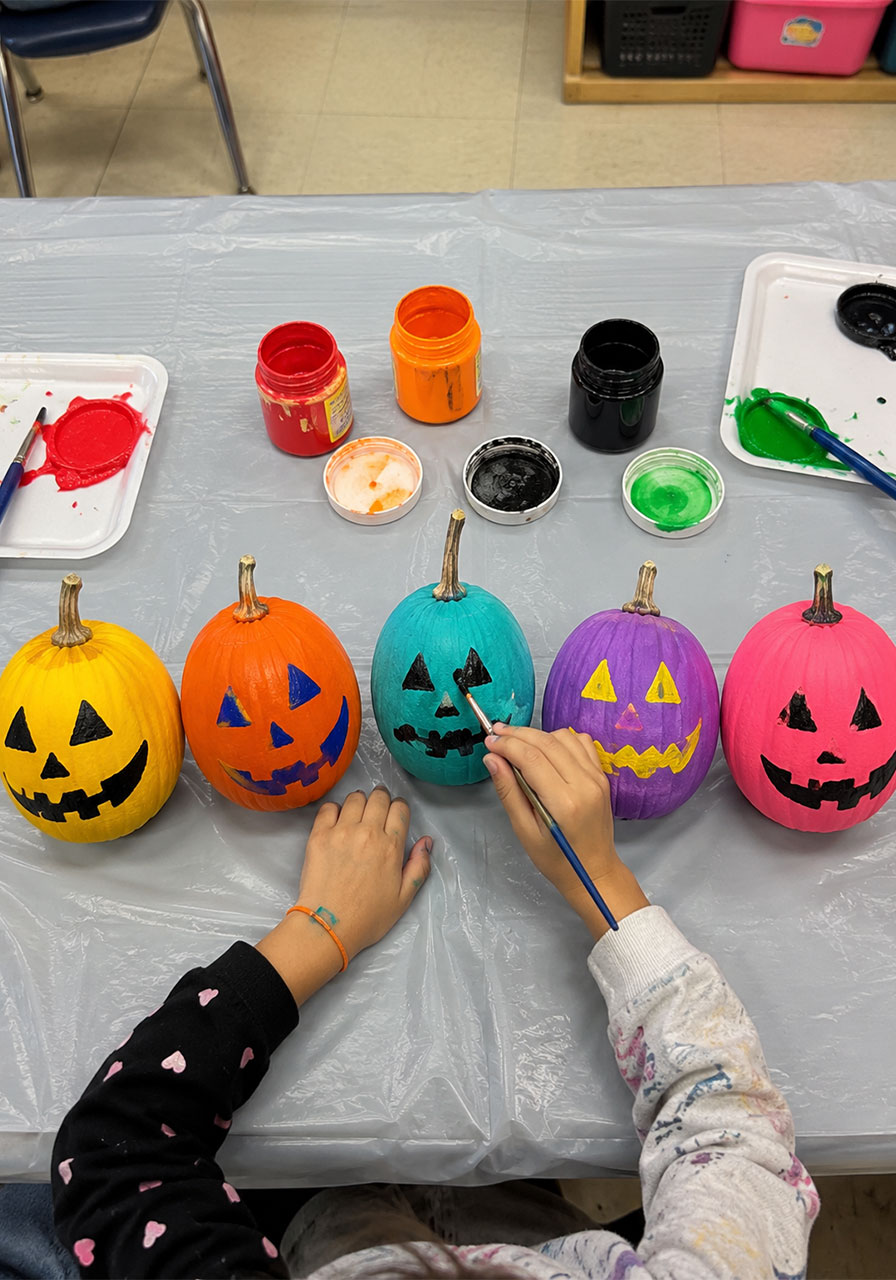
32. No-Carve Paint-a-Face Pumpkins
Perfect for younger students or anyone who wants Halloween fun without a single sharp edge. Kids paint their own jack-o’-lantern faces directly onto the pumpkin, which means total creative freedom and zero safety concerns.
Best for: Preschool and elementary classrooms, young kids, big groups.
Time to Make: 20-30 minutes.
Difficulty: Easy.
What You’ll Need:
- Small pumpkins, one per child
- Acrylic paint and paintbrushes
- Newspaper or a plastic tablecloth for easy cleanup
How to Make It:
1. Cover your workspace and set out paints and brushes.
2. Give each child a pumpkin and let them design their own face.
3. Let the paint dry fully before handling or displaying.
4. Line them up on a windowsill or shelf for a colorful classroom display.
Pro Tip: This activity doubles as a lesson on primary and secondary colors – let kids mix their own shades of orange, green, and black.
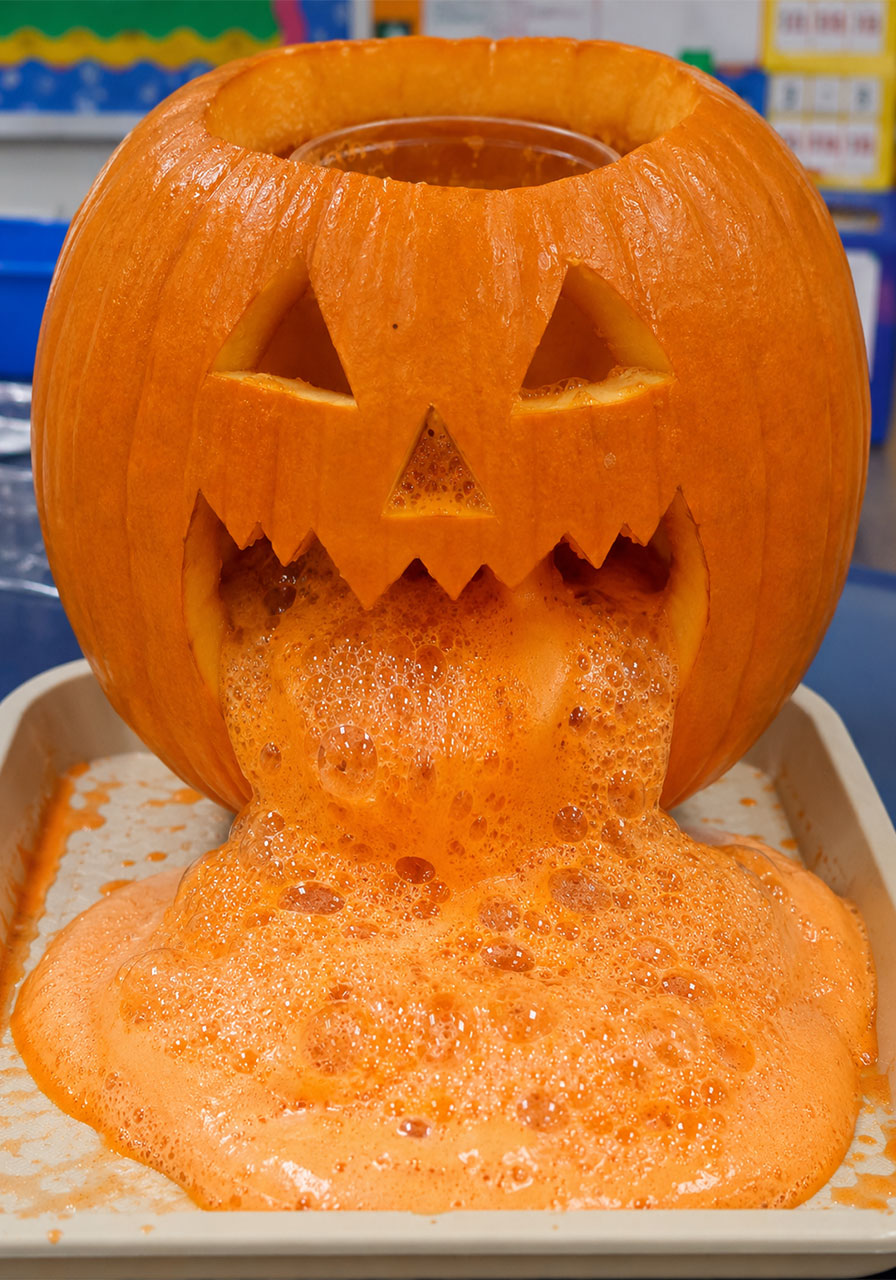
33. Baking Soda “Erupting” Jack-O’-Lantern
This idea turns your pumpkin into a hands-on chemistry lab. A hidden reaction between baking soda and vinegar sends orange “lava” bubbling out of the carved mouth, giving kids a front-row seat to a real chemical reaction.
Best for: Classroom science lessons, STEM night activities, curious kids of all ages.
Time to Make: 20 minutes to set up, then reusable for multiple reactions.
Difficulty: Easy.
What You’ll Need:
- A carved pumpkin with a wide-open mouth
- A small cup or container to fit inside the pumpkin’s cavity
- Baking soda
- Vinegar
- Orange food coloring and a small squirt of dish soap
How to Make It:
1. Place a small cup inside the hollowed pumpkin, positioned near the carved mouth.
2. Add a few spoonfuls of baking soda to the cup.
3. Mix vinegar with a drop of food coloring and a squirt of dish soap in a separate container.
4. Pour the vinegar mixture into the cup and watch the fizzy “lava” bubble out through the mouth.
STEM Tip: Explain that this bubbling reaction happens because baking soda (a base) and vinegar (an acid) react to release carbon dioxide gas – the same basic reaction behind a classic volcano project.
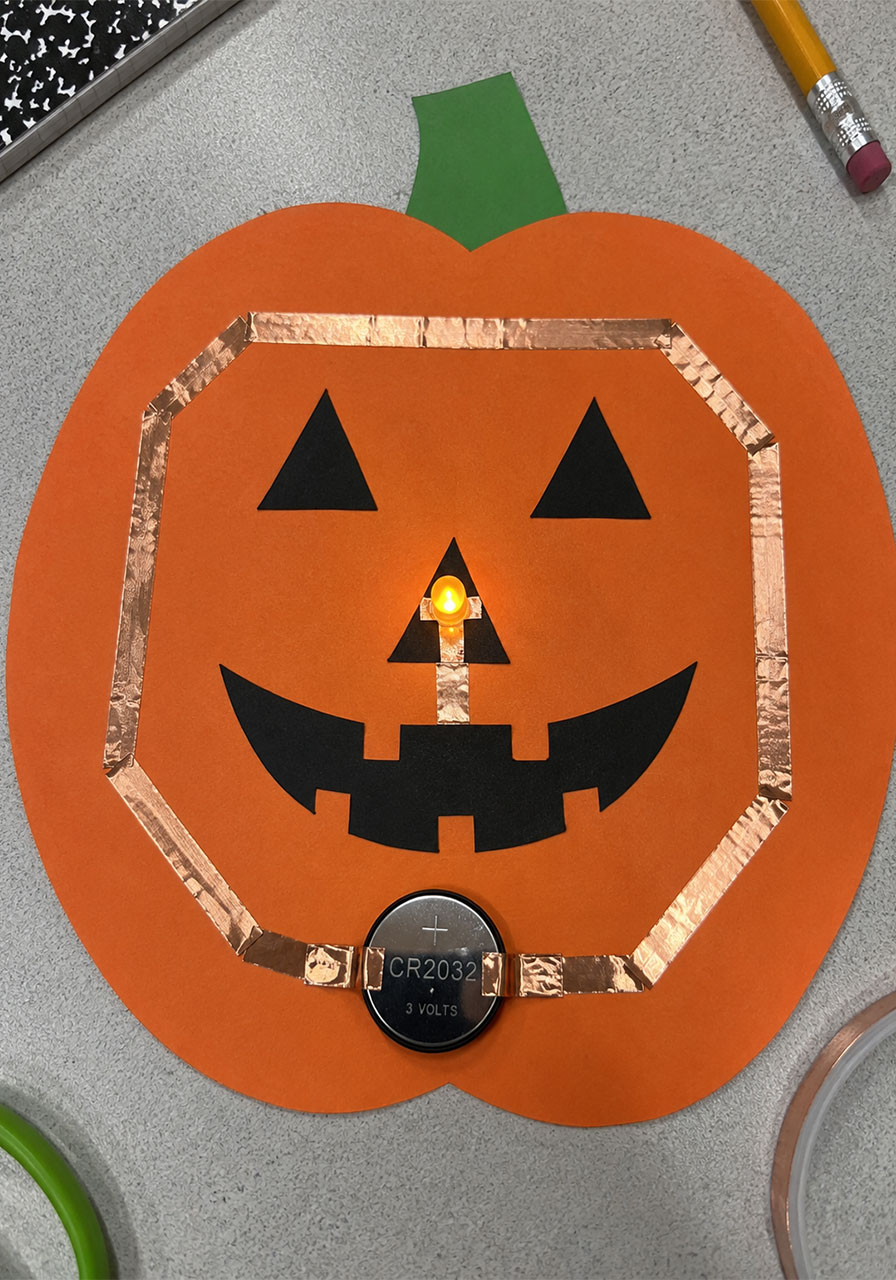
34. Paper Circuit LED Jack-O’-Lantern
Give your pumpkin a glow that kids actually helped build. This idea uses a simple paper circuit with a coin-cell battery and a small LED light to illuminate the carved face – no soldering, no wires, just copper tape and curiosity.
Best for: Upper elementary and middle school STEM lessons, hands-on electronics intro.
Time to Make: 30-40 minutes.
Difficulty: Moderate.
What You’ll Need:
- A paper pumpkin cutout or a real hollowed pumpkin with a flat interior surface
- Copper conductive tape
- A small LED light
- A 3V coin-cell battery
How to Make It:
1. Lay out a simple circuit path using copper tape, leaving a small gap for the LED.
2. Insert the LED’s legs into the circuit, making sure the longer leg connects to the positive side.
3. Tape the battery in place at the end of the circuit, completing the loop.
4. Fold or place the completed circuit behind the pumpkin’s carved face so the light shines through.
STEM Tip: This is a hands-on way to teach the basics of a closed circuit – if the LED doesn’t light up, it’s a great troubleshooting moment to check the connections and battery orientation together.
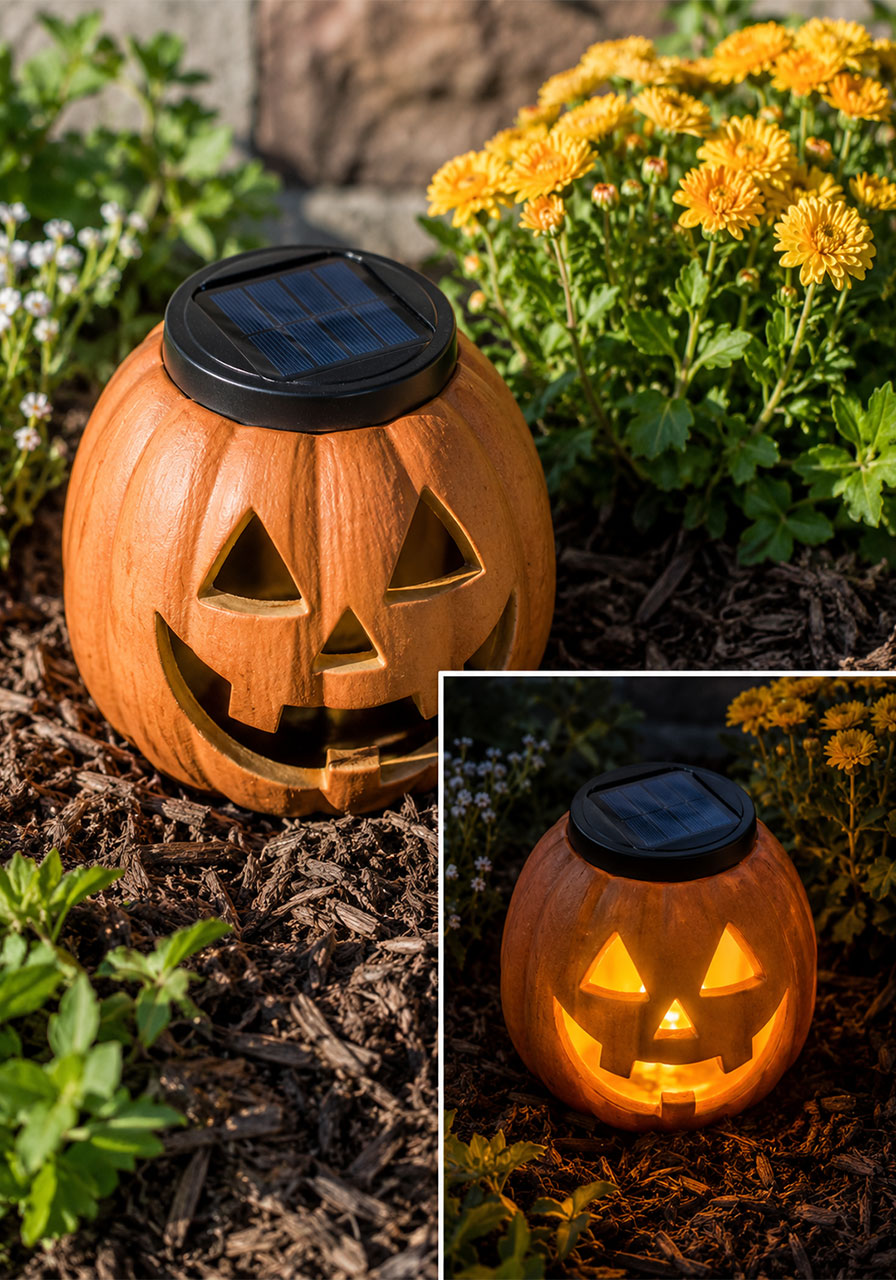
35. Solar-Powered Glow Pumpkins
Take the classic glowing pumpkin and give it a renewable-energy twist. A small solar panel charges a battery during the day, so your jack-o’-lantern lights up automatically once the sun goes down – no cords, no candles.
Best for: Outdoor classroom gardens, sustainability lessons, eco-conscious families.
Time to Make: 15 minutes for setup.
Difficulty: Easy.
What You’ll Need:
- A small solar garden light or solar LED insert
- A hollowed pumpkin or faux pumpkin shell
How to Make It:
1. Place the solar light or panel where it will get direct sunlight during the day, either on top of the pumpkin or nearby with a wire feeding inside.
2. Insert the LED portion into the hollowed pumpkin.
3. Leave it in place through the day to charge.
4. Watch it glow automatically once it gets dark outside.
STEM Tip: Use this as a jumping-off point to talk about how solar panels convert sunlight into stored energy – ask kids to predict how bright the glow will be after a cloudy day versus a sunny one.
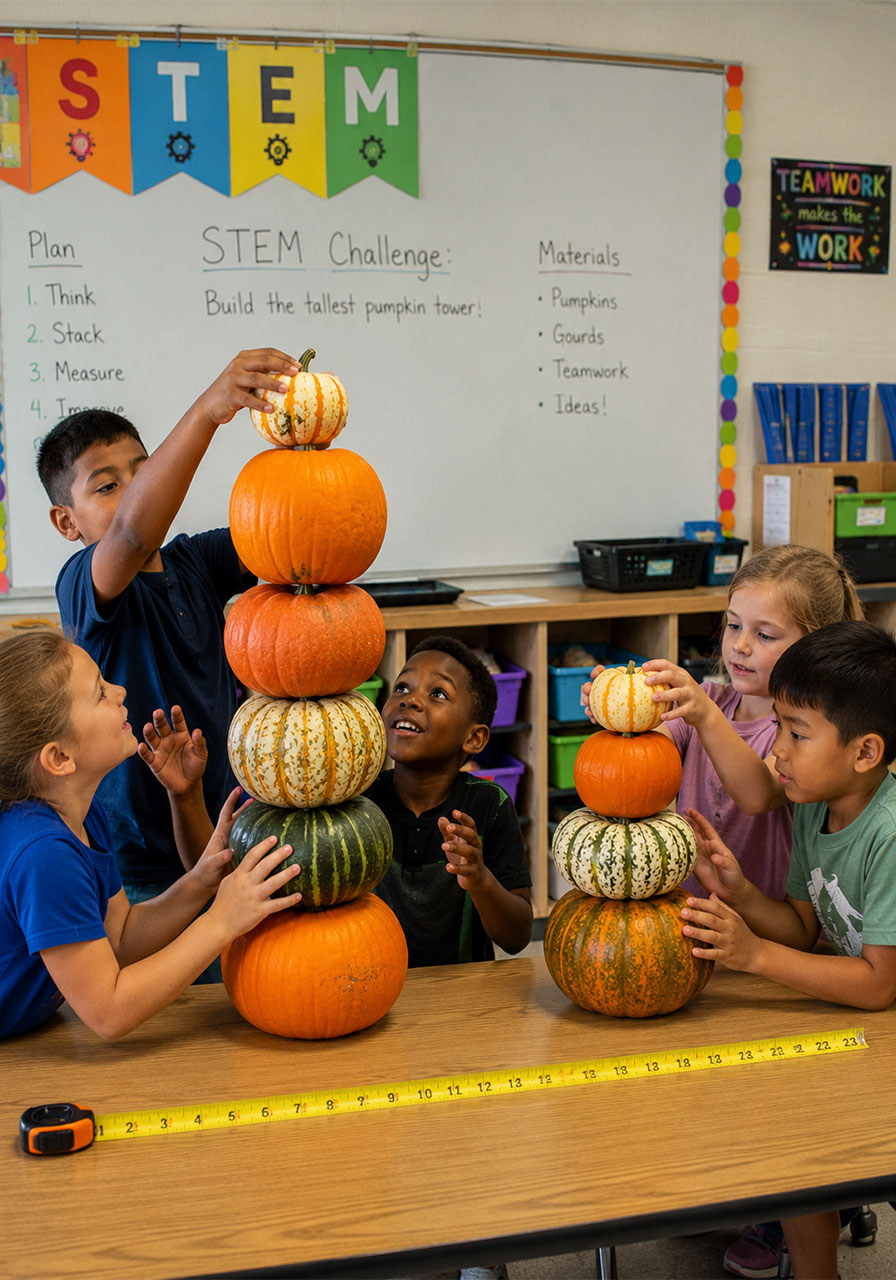
36. Pumpkin Engineering Challenge: Stacking Tower Contest
Turn pumpkin stacking into a friendly competition. Teams design and build the tallest, most stable pumpkin tower they can, testing their understanding of balance, weight distribution, and structural design.
Best for: Classroom STEM challenges, group projects, team-building activities.
Time to Make: 30-45 minutes.
Difficulty: Moderate.
What You’ll Need:
- Several pumpkins or gourds per team, in varying sizes
- A flat, sturdy base or table per team
- A measuring tape
How to Make It:
1. Divide students or family members into small teams.
2. Give each team the same set of pumpkins and a time limit to build the tallest stable tower.
3. Measure each tower’s height once time is up, checking that it can stand unsupported for at least 10 seconds.
4. Award a prize for the tallest stable structure, and discuss what design choices worked best.
STEM Tip: Afterward, ask teams to explain why they placed their largest pumpkin where they did – it’s a natural lead-in to a conversation about center of gravity and structural engineering.
Bringing It All Together
With this many ideas in your back pocket, you’re ready to build a jack-o’-lantern display that’s beautiful, fun, and – if you pick a few of the bonus ideas – genuinely educational too. Mix a handful of decor ideas for the porch, a couple of edible ideas for the party table, and one or two STEM projects for the classroom or family science night.
Because the best Halloween displays are the ones that get everyone involved, laughing, and maybe even learning something new along the way.
