
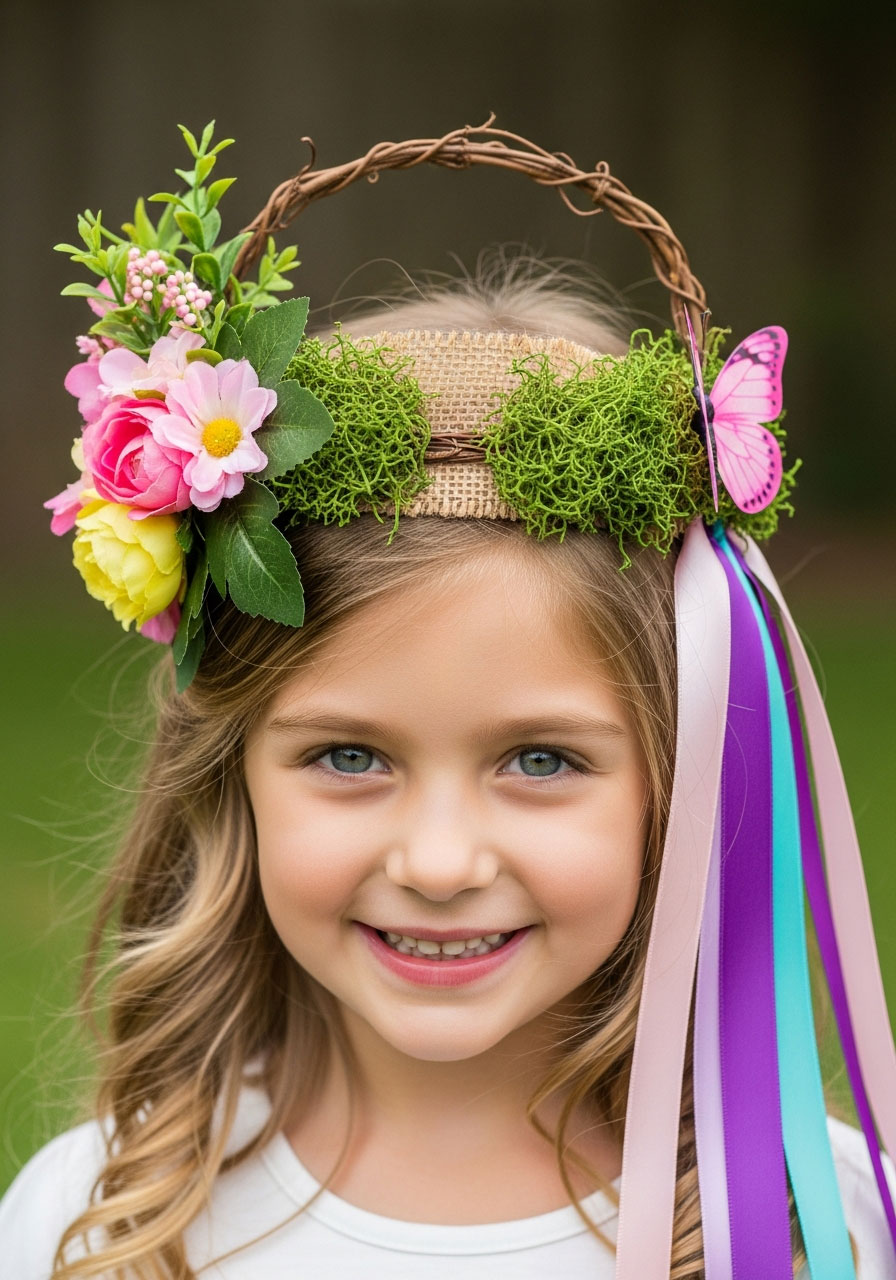
Looking for a party craft that’ll have your tiny guests squealing with delight? These DIY Woodland Fairy Crowns are about to become your secret weapon for throwing an enchanted birthday bash that parents will still be talking about weeks later.
I’ll never forget the moment my granddaughter Addison slipped on her fairy crown for the first time – her eyes went wide, and she literally started twirling around the room like she’d just discovered actual magic. That’s the power of a well-crafted party prop, my friends.
Here’s the best part: these crowns look like they came straight from an enchanted forest, but they’re surprisingly simple to make. Whether you’re crafting for one special birthday girl or an entire woodland fairy brigade, I’m walking you through exactly how to create these showstopping accessories that double as party favors your guests will actually keep.

Why These Fairy Crowns Are Perfect for Your Party
Best for: Woodland fairy parties, garden tea parties, princess birthdays, or any celebration that needs a sprinkle of magic
Time to Make: 20-30 minutes per crown (once you get in the groove, you’ll speed up!)
Difficulty Level: Intermediate – you’ll need basic crafting skills, but nothing fancy
These crowns hit that sweet spot between “impressive” and “actually doable”. They’re sturdy enough to survive an afternoon of fairy tag, beautiful enough for all those birthday photos, and personal enough that each little guest feels special. Plus, they work for kids ages 3-10 with just minor size adjustments.

What You’ll Need to Make 12 Fairy Crowns
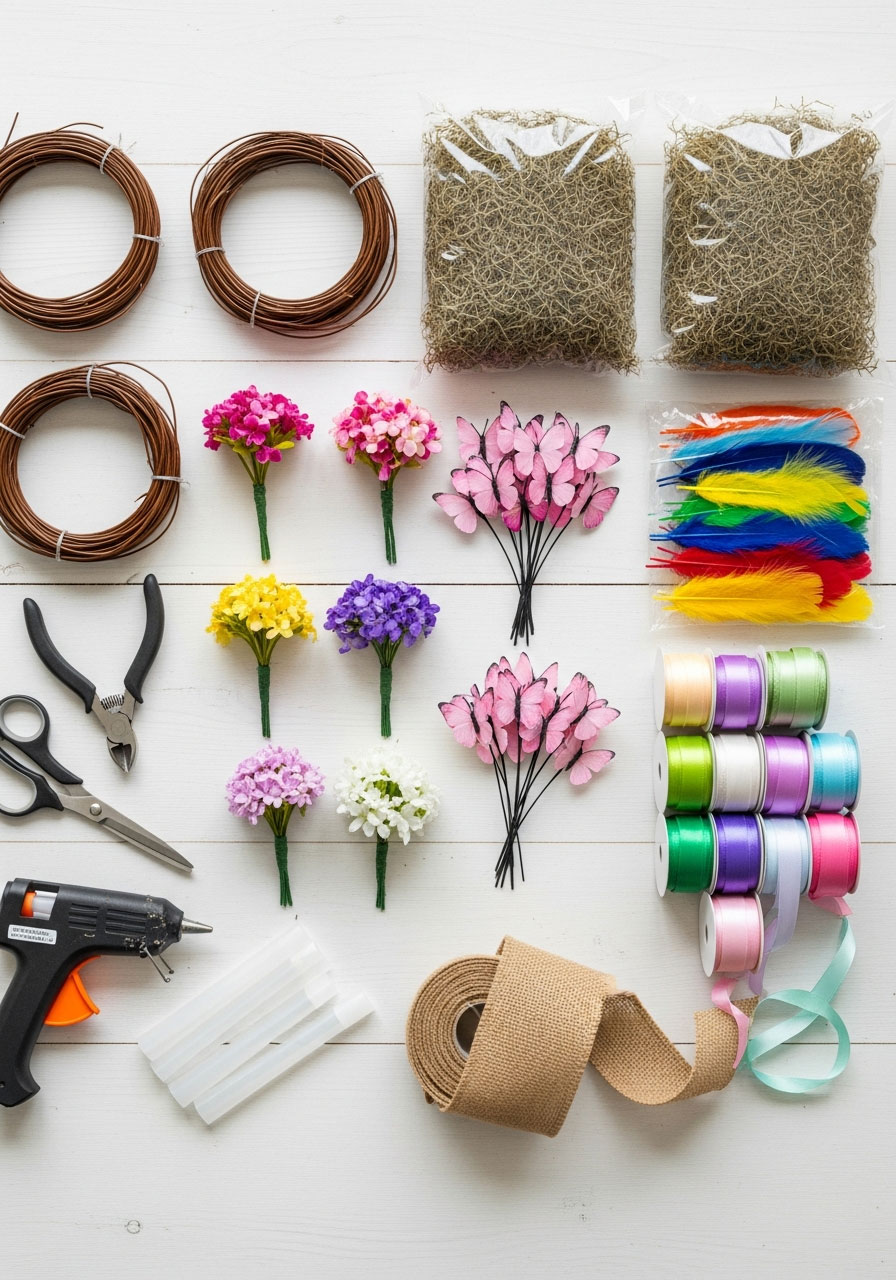
Basic Craft Tools:
- Wire cutters
- Scissors
- Quick-drying tacky glue OR a low-temp glue gun with glue sticks (trust me, the glue gun makes this so much faster)
Crown Supplies:
- 3 packages of brown grapevine wire
- 6 bouquets of artificial flower picks in assorted colors (Dollar Store finds work perfectly!)
- 3 bouquets of butterfly picks (another Dollar Store win)
- 2-3 packages of Spanish moss
- 1 package of colorful dyed feathers
- Burlap ribbon or strips of burlap material (about 1 inch wide)
- ¼-inch satin ribbon in various colors (3 coordinating colors per crown looks gorgeous)
- Optional: Artificial green leaf garland for extra woodland vibes
Pro Tip: If you’re only making 1-2 crowns, grab just one package of each supply. The list above gave me enough materials for 12 crowns with some leftovers – perfect for fixing any last-minute oops moments.
Pirate Birthday Scavenger Hunt for Kids Printable
Instant Pirate Adventure: Download, print, and play in 15 minutes! No stress – just instant, unforgettable fun for kids ages 4-12
Indoor Party Lifesaver: Perfect for apartments & houses. Keep 1-10 kids wildly entertained for 45 minutes with clever rhyming clues
A Treasured Memory: Watch your birthday child become the hero of an epic story. Includes a thrilling intro and congratulatory treasure letter
Fun That Secretly Teaches: Kids race to solve riddles while building reading, problem-solving, and teamwork skills. Fun with a hidden purpose!

Indoor Birthday Scavenger Hunt Printable for Kids – 12 challenges
Your 15-Minute Party Hero: Instantly download, print, and hide. Get 1-2 hours of immersive, screen-free fun with 12 unique puzzles. Stress-free entertainment, guaranteed
More Than a Hunt – It’s a “”Cake Bandit”” Adventure! Kids don’t just find clues; they solve the mystery of the stolen cake! This engaging storyline creates a memorable birthday mission
Ultimate Indoor Party Lifesaver: Perfect for bad weather or small spaces. Keeps kids ages 4-10+ happily challenged with picture matching, mazes, and secret codes
Fun That Secretly Builds Genius: Laughter meets learning! These 12 clever challenges boost problem-solving, teamwork, and critical thinking skills without the kids even noticing

Difficult Birthday Scavenger Hunt Printable for Adults – The Oracle’s Birthday Prophecy
Forget Boring Parties. Unleash the Oracle: Transform a birthday into an epic mystery with 30 brain-teasing riddles, ciphers, and challenges. Customize the perfect adventure for your guests
Be the Host of the Most Memorable Party: Provide the clever, shared activity that gets everyone laughing and collaborating. It’s the highlight that guests will talk about for years
Sophisticated Fun, Zero Effort: Just download, pick your 10 favorite clues from 30 options, and hide them. Get a complete, themed adventure without the stress of planning from scratch
Challenge Adult Minds with “The Prophecy”: Move beyond simple games. This hunt features logic puzzles, cryptic ciphers, and hilarious dares designed specifically to engage and thrill adults

Happy Birthday Decorations
Everything in one box = party stress solved – Banner, honeycomb balls, swirls, and garland all coordinated. No last-minute runs to three different stores at 9 PM the night before.
Photo-ready in 15 minutes – Easy assembly means you spend less time wrestling with decorations and more time enjoying the birthday person’s reaction. Looks expensive, sets up fast.
Reusable = smart money – Quality materials hold up through the party AND pack away for next year. Stop buying flimsy decorations that rip before cake time.
Saves you $50+ vs. party store prices – Get the complete coordinated look without the markup. Guests think you hired a decorator; you paid a fraction of the cost.
How to Build Your Fairy Crown Base
The foundation is everything, so let’s nail this part first.
Step 1: Get the Perfect Fit
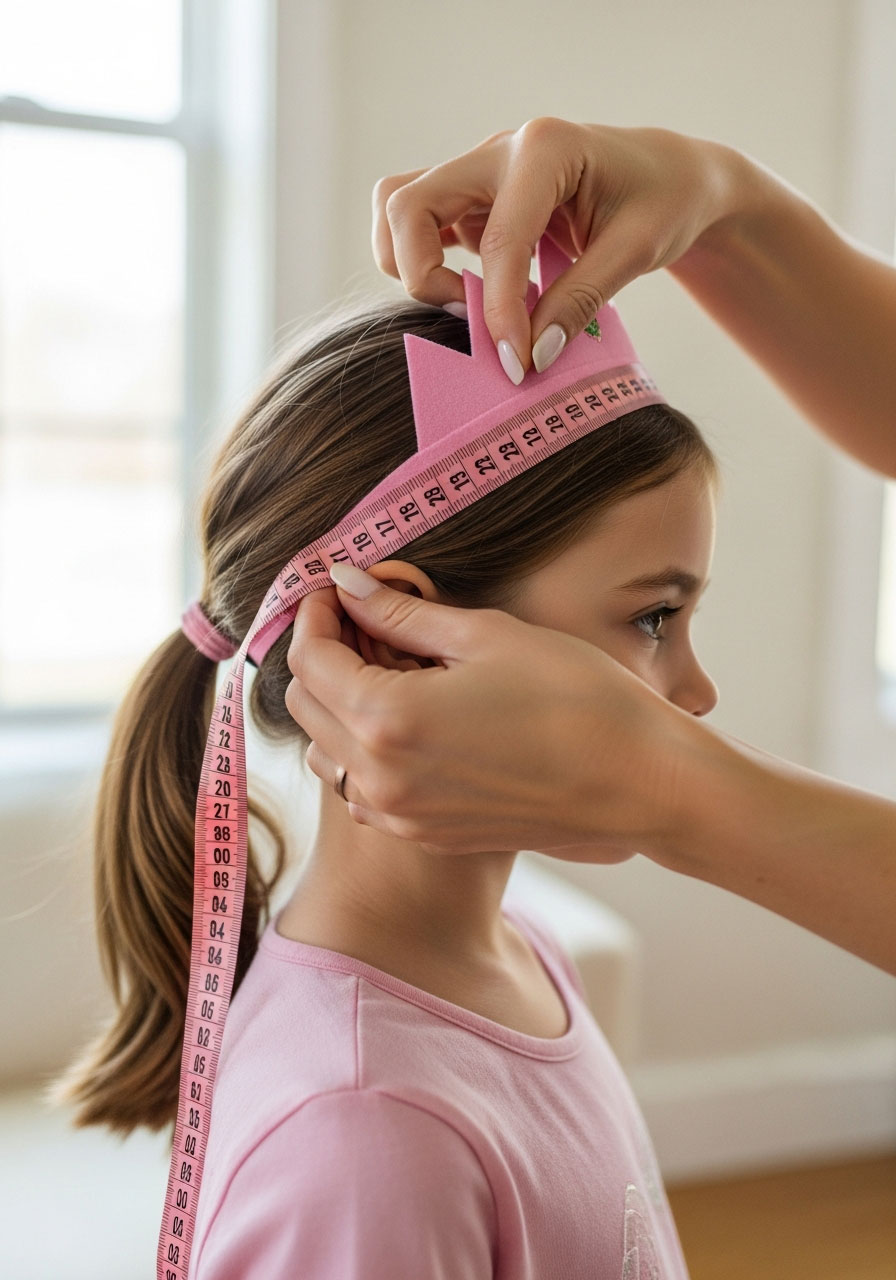
Measure each child’s head using a soft measuring tape or ribbon. Here’s what worked for me: I measured my youngest granddaughter (age 3) and my oldest (age 7), and the difference was only about an inch. Since most party guests were around 4 years old, I used the birthday girl’s measurements for the majority of the crowns.
Wrap the ribbon around your child’s head where the crown will sit, then add 2-3 inches to allow for the wire overlap and securing.
Step 2: Create the Wire Base
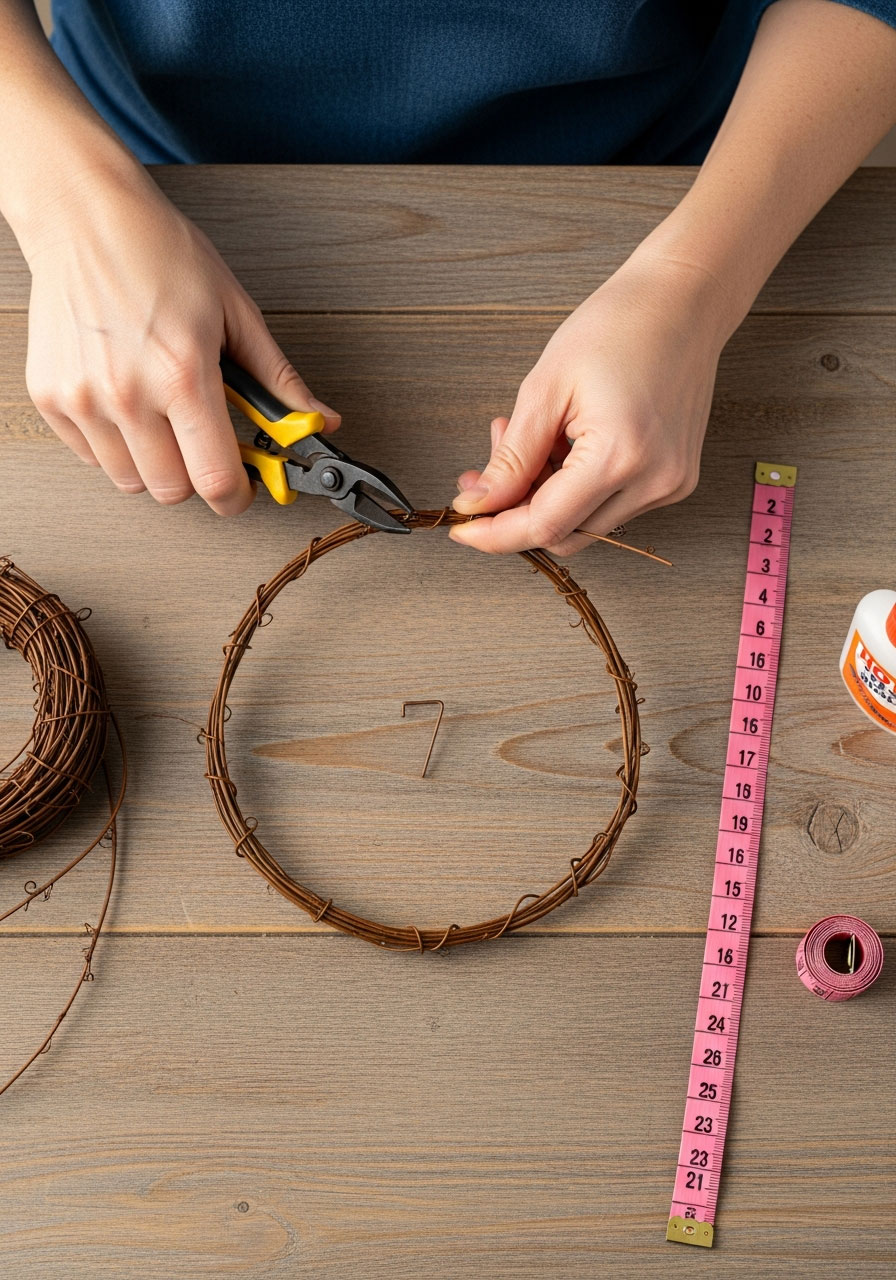
Unroll your grapevine wire and create a circle matching your ribbon measurement. Cut the wire to 3 times the length you need – this gives you enough to wrap it around itself for strength.
Twist the end piece of wire around the circle to secure it, then tuck the sharp end inward so it won’t scratch delicate fairy skin. (A tiny dab of hot glue over any sharp edges adds extra safety.)
Wrap the wire around the circle two more times to create a sturdy, triple-layered base. When you’re happy with the structure, cut the wire from the bolt and tuck the end securely into the crown.
Pro Tip: Found small grapevine wreaths at the craft store? If they’re the right size, skip the wire-wrapping step entirely and use those as your base. I couldn’t find any that worked for little heads, but if you can, it’ll save you time!
How to Transform Your Crown Into Woodland Magic
Now comes the fun part – let’s make these crowns absolutely enchanting.
Step 3: Wrap with Burlap
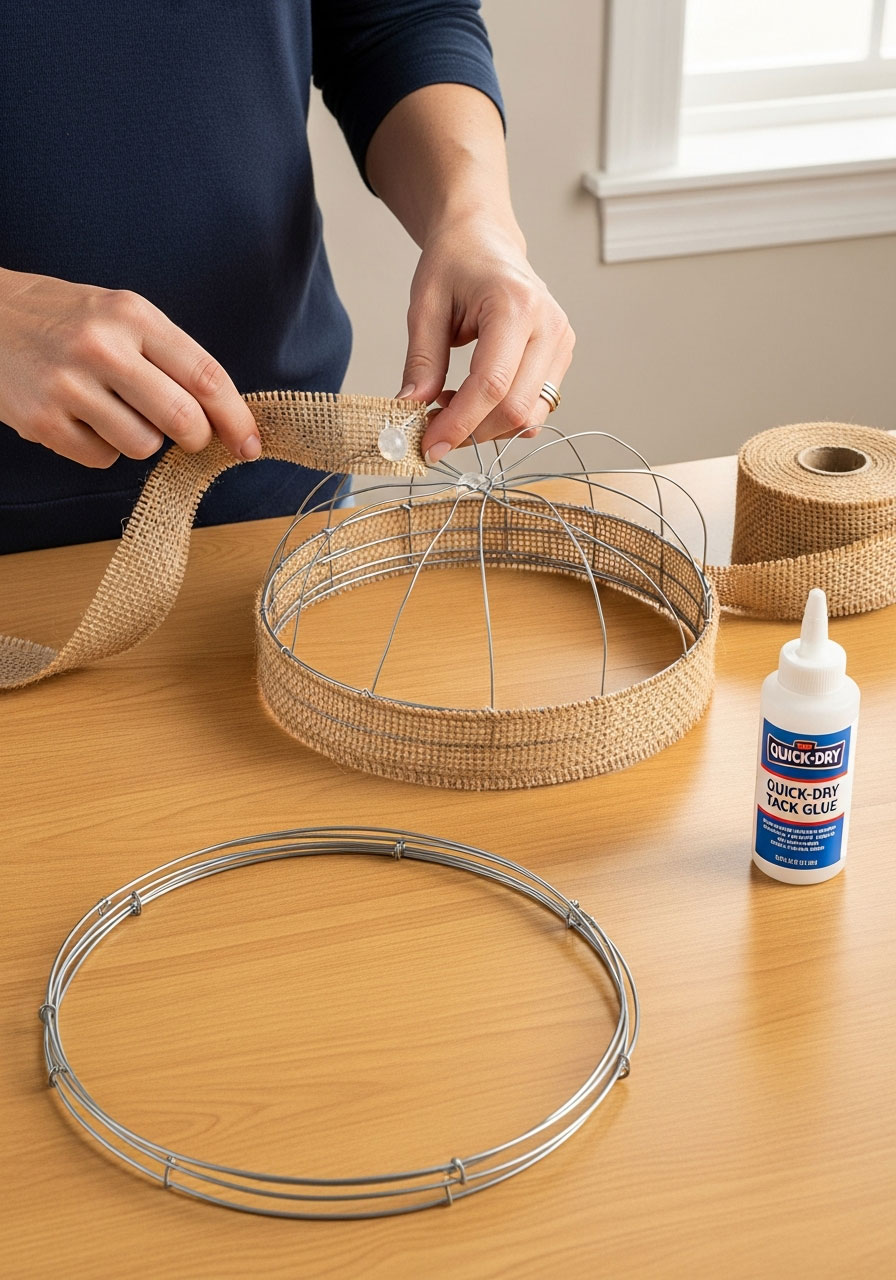
I couldn’t find narrow burlap ribbon, so I bought wide ribbon and cut 1-inch strips. (This actually gave me more control over the rustic look!)
Secure one end of the burlap to the wire base with a dab of glue, then loosely twist it around the entire crown frame. Don’t pull it too tight – you want that natural, woodland texture to show through. Let the glue dry completely before moving on.
Step 4: Add the Spanish Moss Layer
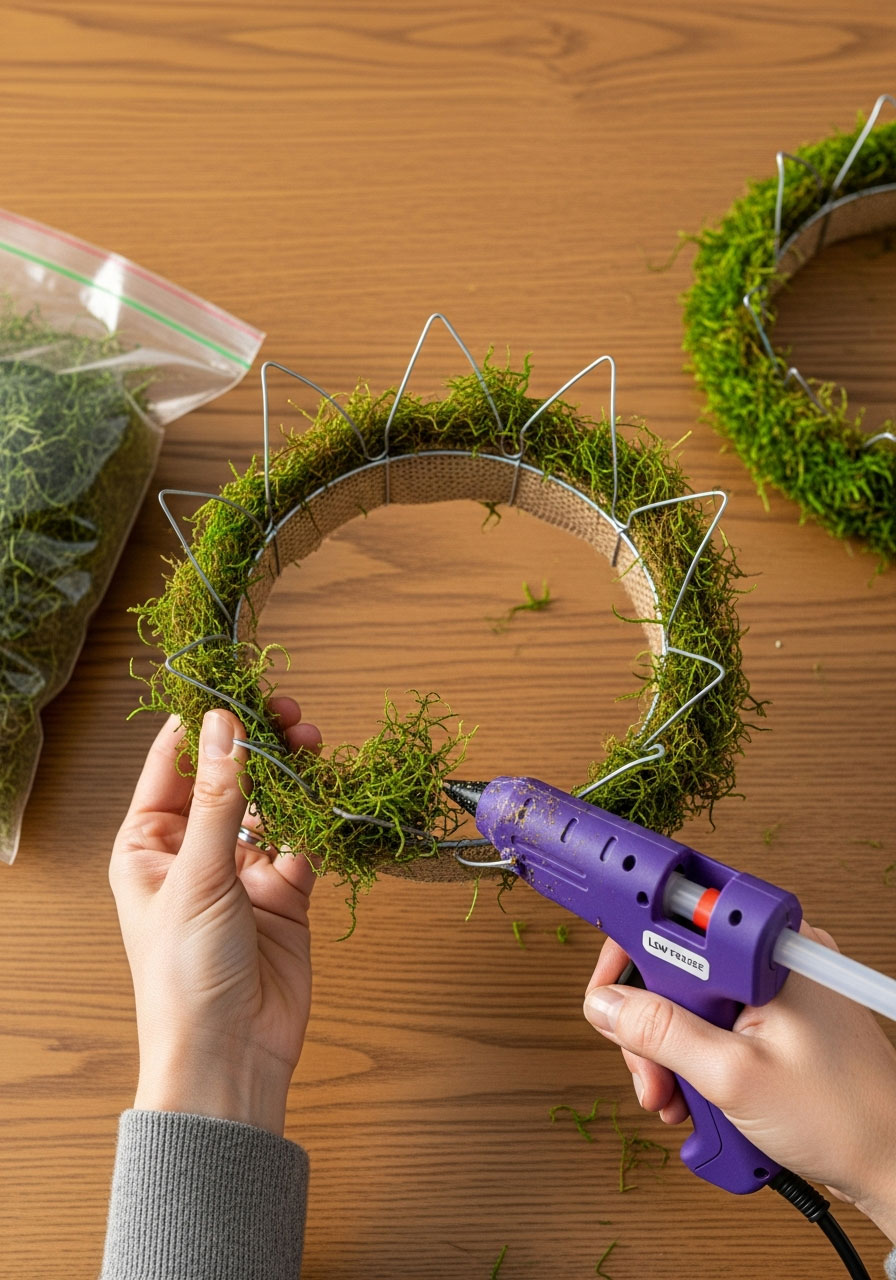
Here’s where your crown starts looking legit magical. Wrap Spanish moss around the entire crown, focusing on the back side of the wire frame. This creates that authentic “just picked from the enchanted forest” vibe.
Switch to your glue gun here if you haven’t already – the instant drying time is a game-changer when you’re making multiple crowns.
Step 5: Create Those Dreamy Ribbon Tails
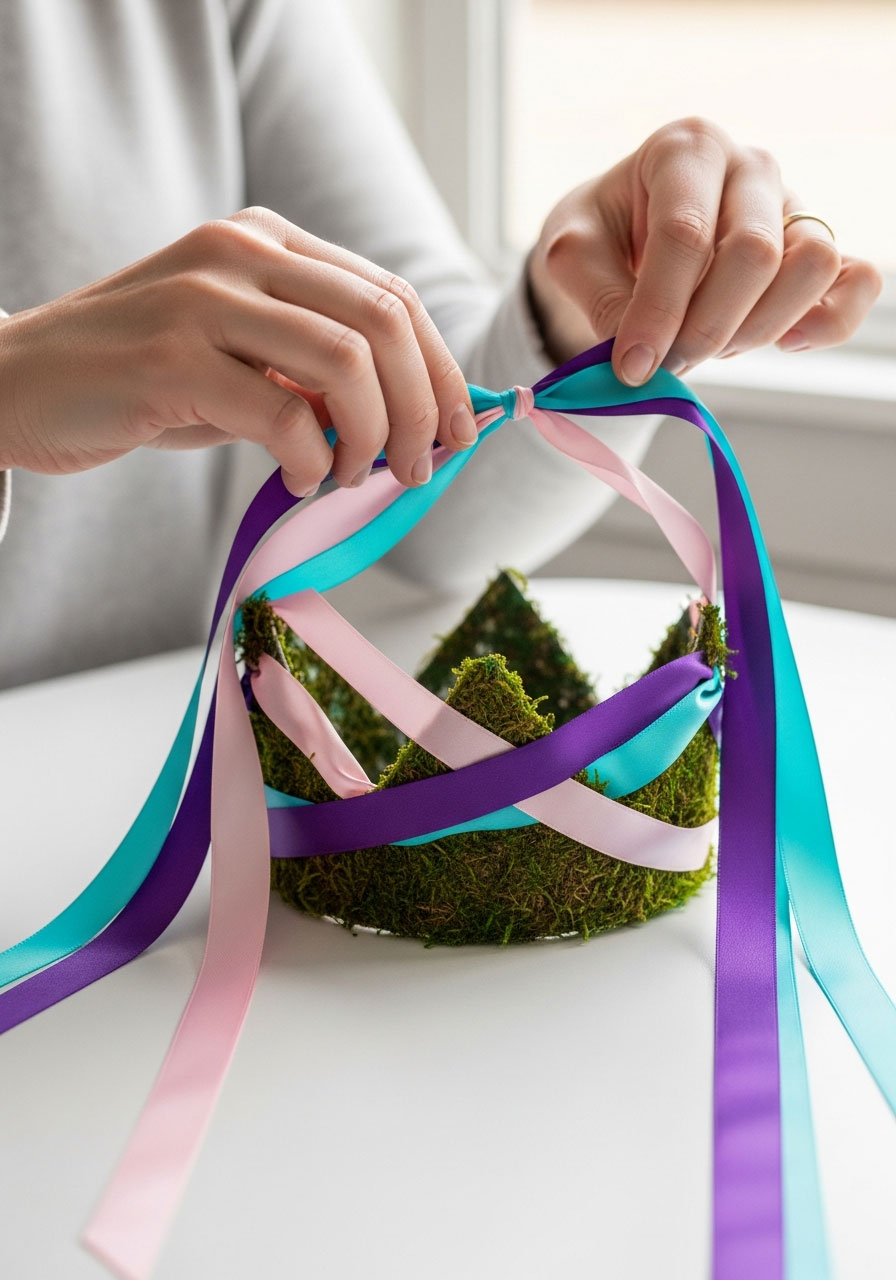
Grab three coordinating colors of satin ribbon (I love mixing soft pinks, purples, and greens for woodland fairies). Cut about 3 feet of each color.
Wrap the ribbons together around the crown, leaving about 6 inches hanging off the back at each end to create flowing tails. These ribbons trailing down the back of each fairy’s head? Pure magic in photos.
Tie the ribbons in a knot at the back to secure them in place.
Step 6: Embellish to Your Heart’s Content
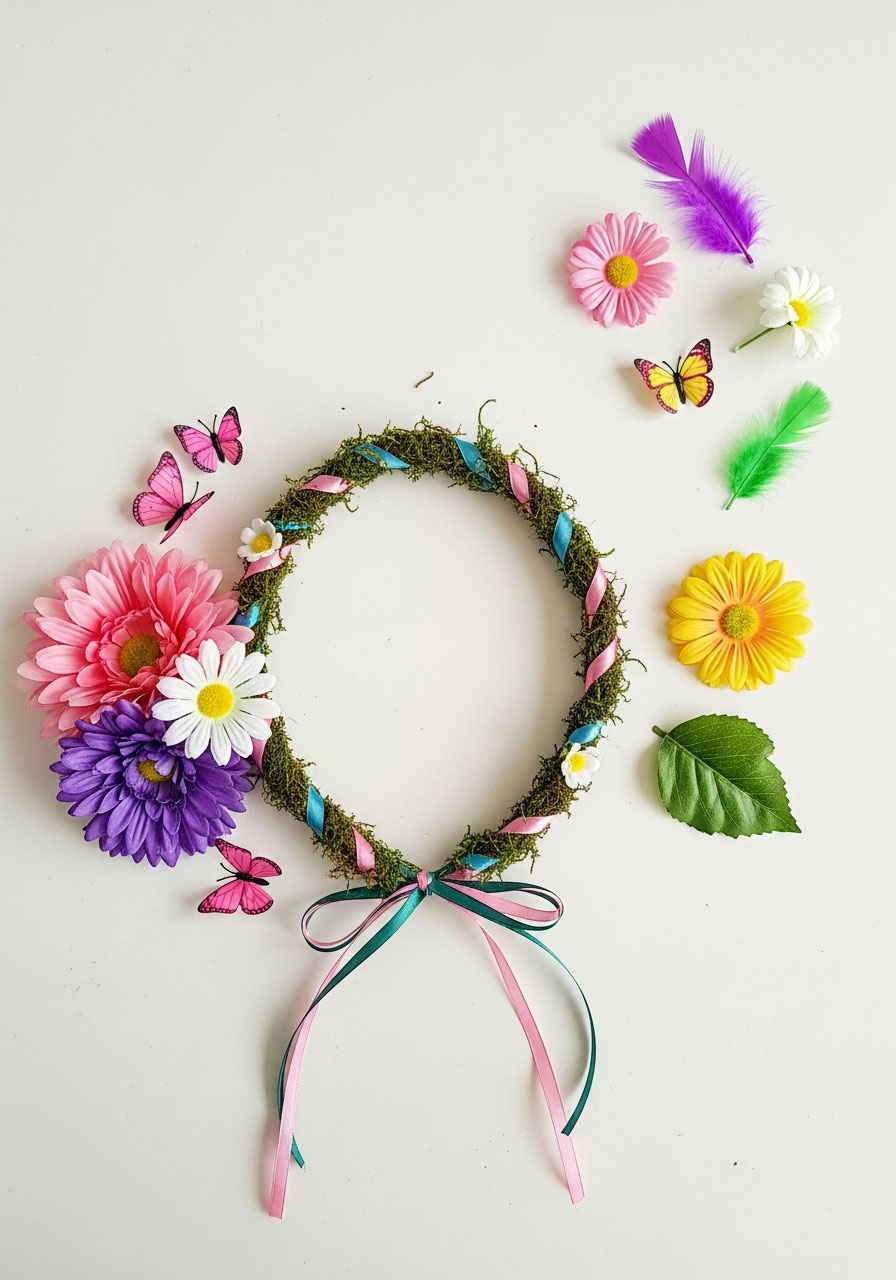
This is where your creativity gets to run wild! Arrange your flowers, butterflies, feathers, and leaves around the crown BEFORE gluing anything down. Play around with different combinations until you find a look that makes you smile.
Once you’ve got your perfect arrangement, secure each piece with hot glue. I like to cluster flowers on one side of the crown with a butterfly or two, then scatter a few smaller elements around the rest for balance.
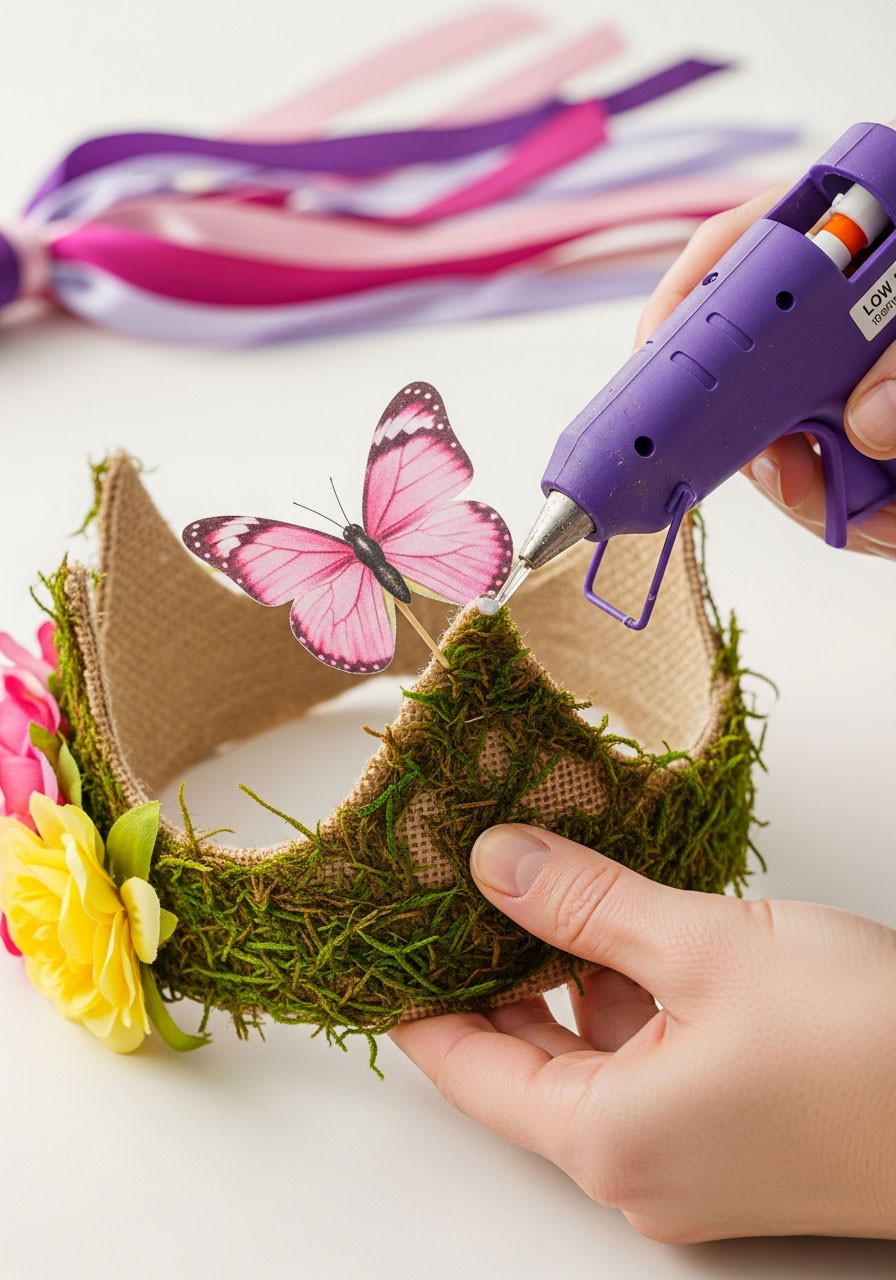
Fun Variation: Let older kids (ages 6+) help decorate their own crowns! Set up a crafting station with all the embellishments and let them customize their fairy style. Just pre-make the bases and ribbon-wrapped frames ahead of time.
Make-Ahead Tips for Party Day Success
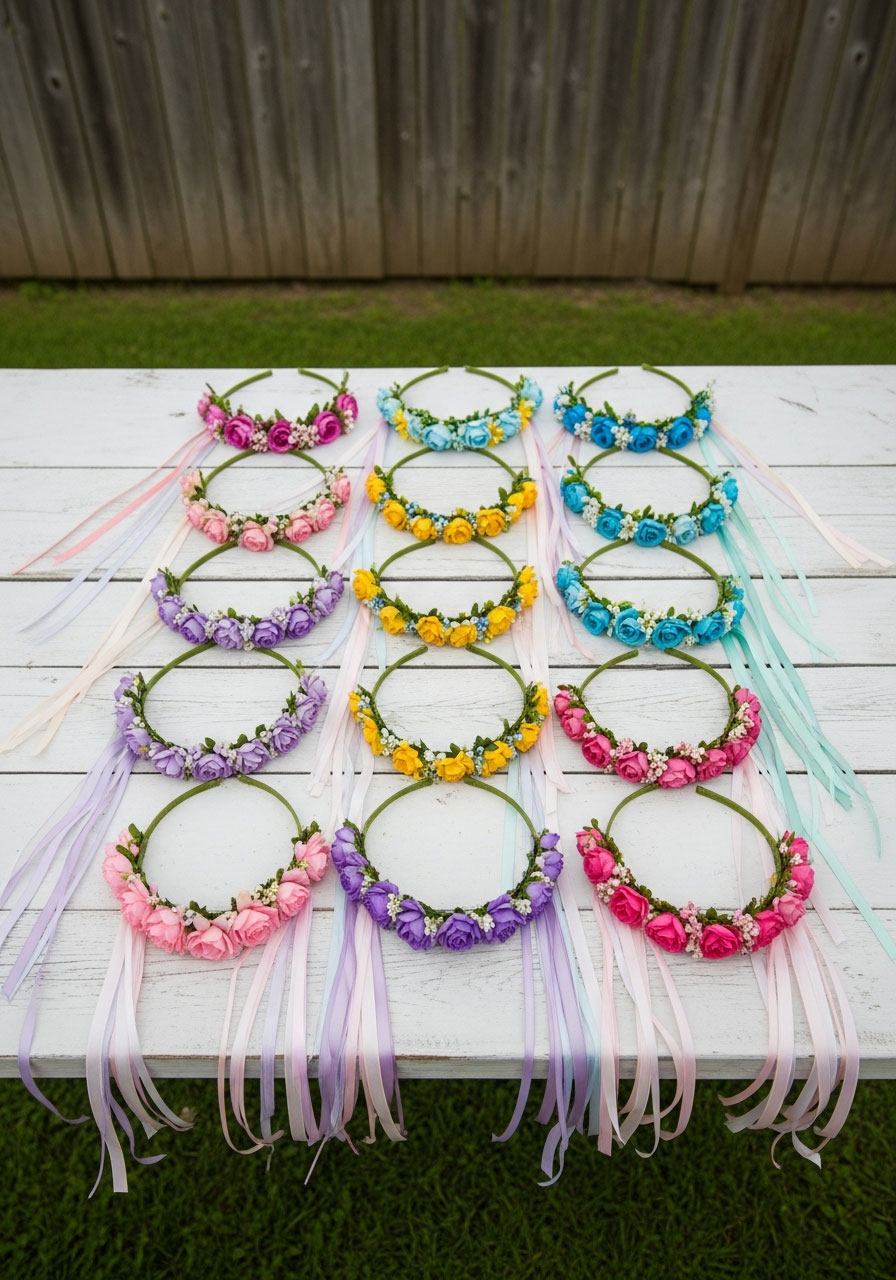
Timeline for 12 Crowns:
- 2-3 days before: Make all the wire bases and wrap with burlap
- 1 day before: Add moss and ribbons
- Morning of party: Attach final embellishments (or make this the party activity!)
Pro Tip: Store finished crowns in a large box or hang them on a decorative branch “crown tree” as party decor. The kids will be SO excited when they see their crowns displayed like precious treasures!
What Makes These Crowns Party-Perfect
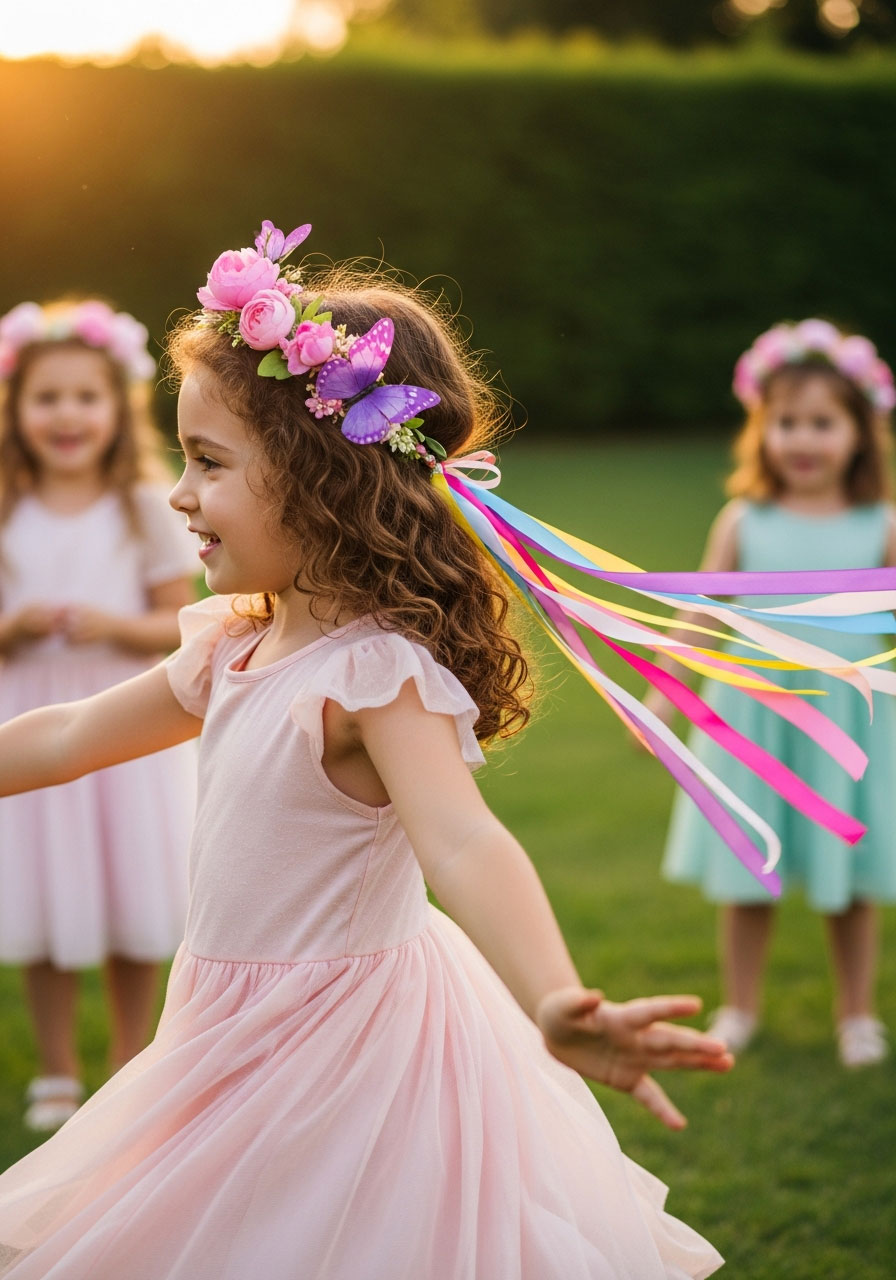
When Addison and her friends wore these crowns, something magical happened – shy kids started dancing, imaginations went into overdrive, and suddenly everyone was casting spells and granting wishes. These aren’t just craft projects; they’re confidence boosters wrapped in ribbon and flowers.
The best part? Unlike those flimsy paper crowns that fall apart after five minutes, these woodland beauties are sturdy enough to become dress-up box favorites long after the party ends. I’ve seen my granddaughters pull theirs out for tea parties, backyard adventures, and “just because it’s Tuesday” occasions.
Pair these crowns with:
- DIY Fairy Dust Glitter Gel for party favors (seriously, the moms loved this as much as the kids!)
- Woodland fairy wands (use the same flowers and ribbons for a coordinated look)
- A fairy garden tea party setup with mini cupcake stands decorated like mushrooms
With these DIY Woodland Fairy Crowns in your party-planning arsenal, you’re not just throwing a birthday party – you’re creating an enchanted experience that’ll make you the hero of the day. Because the best parties are the ones where every little guest gets to feel like magic is real.
Ready to make some fairy magic happen? Grab your supplies and let’s get crafting!
More Birthday Party Ideas to Keep the Fun Rolling:
40+ Magical Harry Potter Birthday Games That’ll Cast a Spell on Your Party
25 Best Mermaid Birthday Party Ideas That’ll Make a Splash
Some Bunny Is One: The Ultimate 1st Birthday Party Theme
35 Fun Pokemon Birthday Party Ideas for Kids
24 Construction Birthday Party Ideas That’ll Have Kids Ready to Build Some Fun
15 Epic Super Mario Birthday Party DIY Crafts
The Ultimate Alice in Wonderland First Birthday Party Ideas.
30+ Sparkling Fun Unicorn Birthday Party Ideas That’ll Make Your Party Absolutely Magical
10 Adorable Hello Kitty Birthday Party Decor Ideas
7 Fun & Easy Party Craft Ideas for an Unforgettable Teen Girl Birthday
20+ Donut Birthday Party Ideas (Games, Decor & Recipes!)
As an Amazon Associate, we may earn a commission from qualifying purchases at no additional cost to you.
