
Ready to host a gathering that’ll have your guests talking about your hot cocoa bar for weeks? Whether you’re planning a cozy winter get-together, a holiday celebration, a wedding reception, or a casual family hangout, a thoughtfully designed cocoa bar is your secret weapon for creating an unforgettable experience. With the right mix of delicious toppings, eye-catching décor, and practical presentation, you’ll transform any space into a warm, inviting cocoa haven that makes everyone feel like they’re at a luxury resort—not your kitchen counter.
We’ve curated 49 actionable, creative ideas that’ll help you design a cocoa bar that’s both Instagram-worthy and genuinely fun. Let’s dive in and get ready to become the host with the most.
1. The Classic Hot Cocoa Station with DIY Flavor Combinations

Why it’s great: This is the foundation of every amazing cocoa bar. Instead of just offering plain hot cocoa, create a “build-your-own” experience where guests mix and match flavors to customize their perfect cup.
What You’ll Need:
- Large thermal dispenser or slow cooker with hot cocoa
- Small bowls with flavor add-ins (vanilla extract, cinnamon, espresso powder, peppermint syrup, caramel sauce)
- Spoons or droppers for easy dispensing
- Instruction card listing flavor combos
How to Set It Up:
- Fill your thermal dispenser with high-quality hot cocoa (homemade or premium mix).
- Arrange small bowls of flavor boosters around the main station.
- Create a laminated “flavor guide” suggesting combinations like “Minty Dream” (cocoa + peppermint + whipped cream) or “Espresso Kick” (cocoa + espresso powder + cinnamon).
- Let guests become cocoa mixologists!
Pro Tip: Label each flavor add-in with fun names like “Peppermint Paradise” or “Caramel Cascade” to encourage guests to experiment.

Indoor Christmas Scavenger Hunt Printable for Kids
25 ready-made clues = zero stress for you – Just print, hide, and watch kids stay engaged for hours while you actually enjoy your coffee
Instant download, works today – Get it in minutes, print on regular paper, create Christmas magic in under 15 minutes of setup
Saves Christmas on bad weather days – Perfect indoor activity when kids are bouncing off walls and you need them happily occupied
One purchase, use it every year – Blank templates let you customize for different ages or create new versions as kids grow

Outdoor Christmas Scavenger Hunt Printable for Kids
Gets kids outside and active – Burns energy while solving 25 riddles and challenges around the yard (lifesaver when they’re hyped on holiday sugar)
Instant download, 15-minute setup – Print, hide clues, done. Perfect last-minute activity that looks like you planned for weeks
Works with your yard decorations – Turns your Christmas lights and lawn decor into part of the adventure kids will beg to do again
Reusable every year – Blank templates let you customize for different ages or add new challenges as kids grow
Difficult Christmas Scavenger Hunt Printable for Adults – Twelve Days of Christmas
Actually challenging puzzles for adults – 30 clever clues including ciphers, logic puzzles, and cryptic riddles that will genuinely stump your smartest friends
Print and play in minutes – Download, print, hide. Setup takes less time than wrapping gifts, but creates hours of laughter and memories
Flexible for any group – Pick 12 clues for a quick adventure or all 30 for an epic night. Customize with blank cards for personal inside jokes

2. Topping Bar Extravaganza with 12+ Toppings
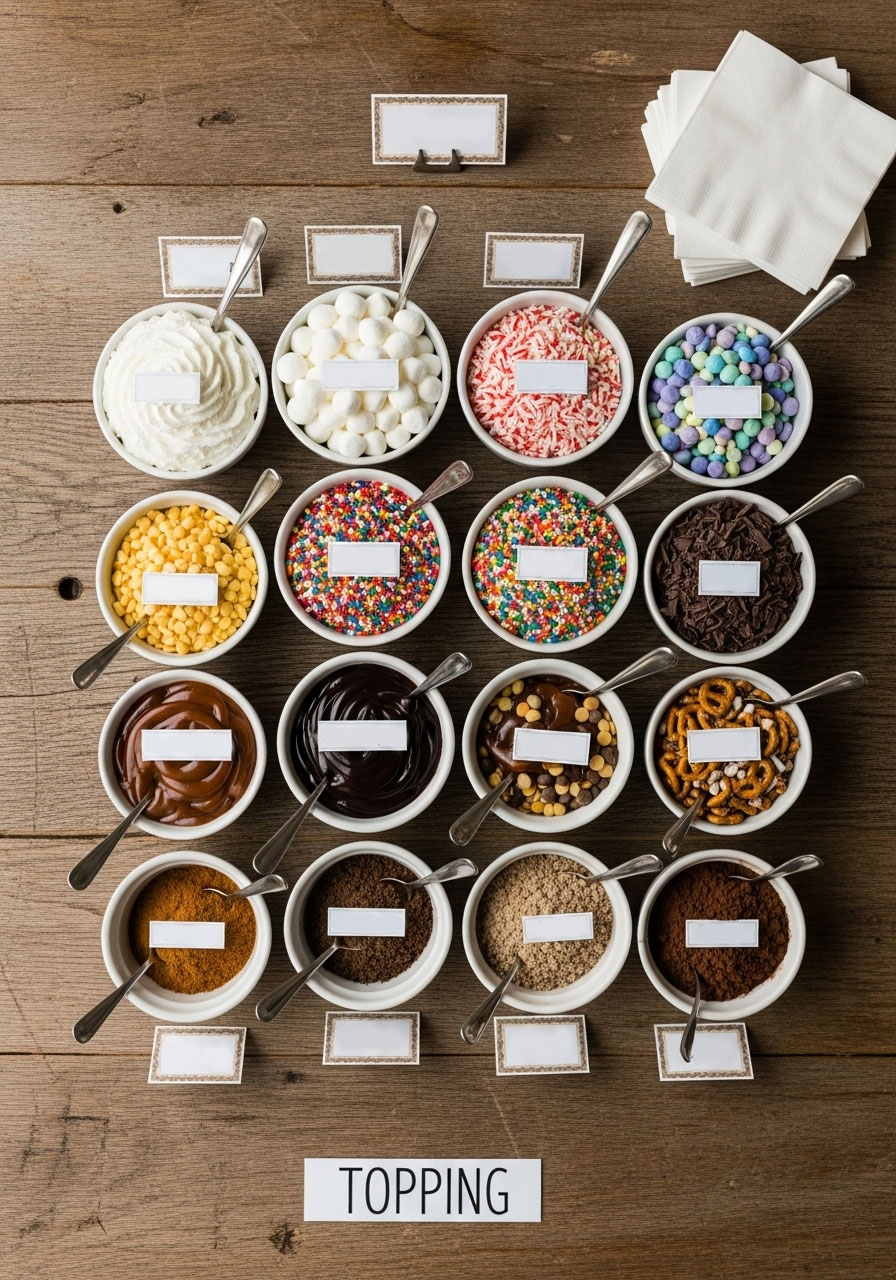
Why it’s great: The toppings are where the magic happens. Give guests options, and they’ll feel like they’re at a luxury coffee shop, not your living room.
What You’ll Need:
- Small bowls or mason jars for each topping
- Whipped cream, marshmallows, crushed candy canes, chocolate shavings, sprinkles, caramel drizzle, chocolate syrup, cinnamon, nutmeg, mini cookies, pretzel bits, chopped nuts, cocoa powder
- Small spoons or scoops
How to Set It Up:
- Arrange toppings in a visually appealing line-up at the end of your cocoa bar.
- Use varying heights and colors for visual interest.
- Place small spoons next to each topping for easy serving.
- Provide napkins nearby for spill protection.
Pro Tip: Group toppings by color or category (creamy, crunchy, sweet) so guests can navigate like pros.
3. Whipped Cream Bar with Flavored Options
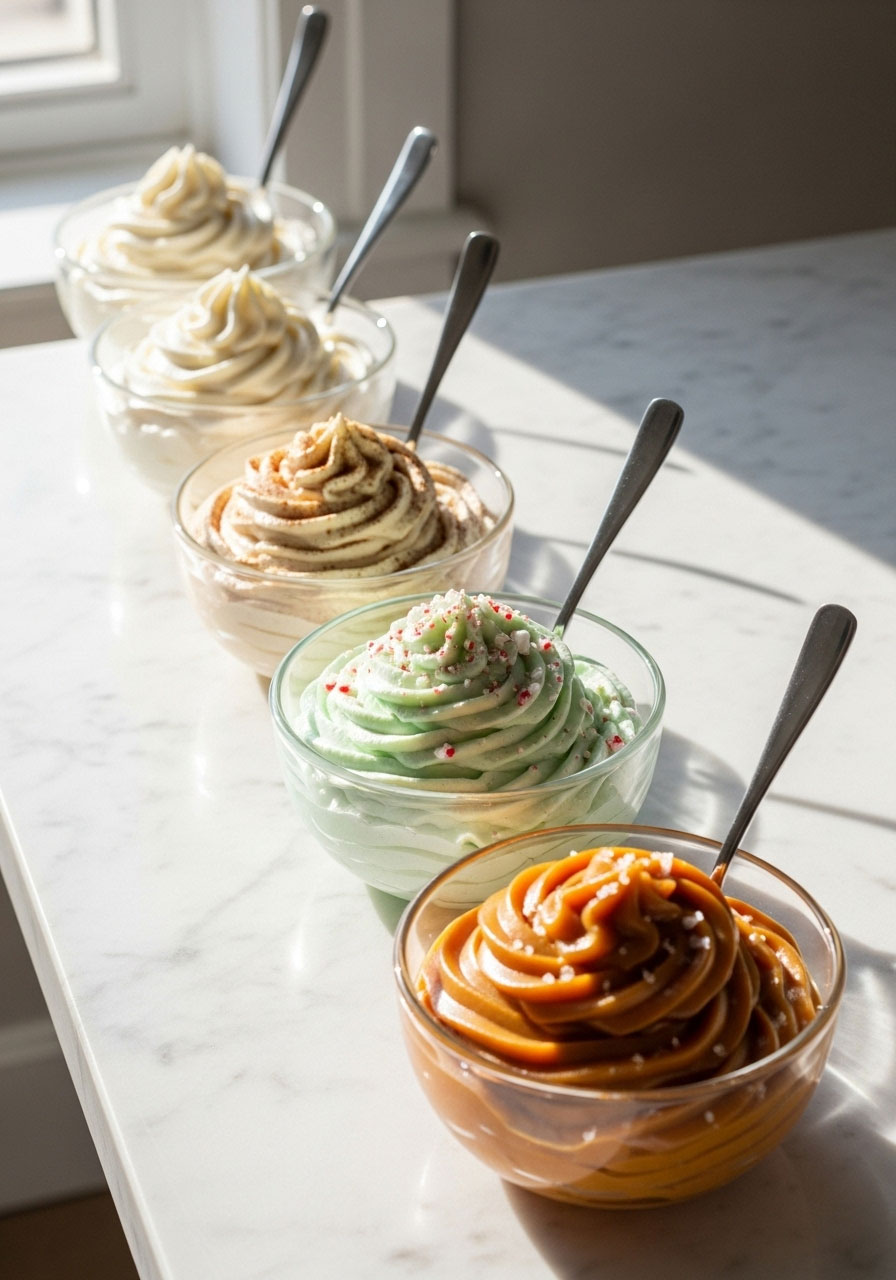
Why it’s great: Whipped cream is the crowning glory of any cocoa cup. Offer multiple varieties, and guests will feel spoiled.
What You’ll Need:
- Fresh whipped cream (plain)
- Flavored variations: vanilla whipped cream, cinnamon whipped cream, peppermint whipped cream, salted caramel whipped cream
- Clear bowls or small serving containers
- Large spoons for easy serving
How to Set It Up:
- Make or buy 2-3 flavored whipped cream options in advance.
- Display each variety in its own bowl with a small label identifying the flavor.
- Keep a backup plain whipped cream nearby.
- Arrange in order of mildest to most indulgent flavor.
Pro Tip: Make homemade whipped cream the day before, and add flavoring just before guests arrive for maximum freshness and wow factor.
4. Candy Cane Crushing Station

Why it’s great: Crushed candy canes add both crunch and festive flair. Making them fresh gives guests a sense of participation and excitement.
What You’ll Need:
- Plenty of candy canes (buy extras!)
- Food processor or blender (or a hammer and ziplock bag for hands-on fun)
- Small bowl for crushed candy cane display
- Spoon for serving
How to Set It Up:
- Before guests arrive, crush some candy canes for immediate use.
- Set up a “crushing station” where adventurous guests can pulverize their own candy canes for extra fun.
- Keep pre-crushed candy canes in a nearby bowl for those who prefer convenience.
- Label both options clearly.
Pro Tip: Crush candy canes just before guests arrive to keep them crispy and fresh. No one wants soggy peppermint!
5. Rustic Wooden Serving Tray as Your Bar Base

Why it’s great: A beautiful wooden tray anchors your entire cocoa bar and instantly elevates the aesthetic from “casual” to “curated”.
What You’ll Need:
- Large wooden serving tray (farmhouse style works beautifully)
- Cocoa mugs, bowls with toppings, and décor elements
- Optional: small wooden risers for varying heights
How to Set It Up:
- Choose a tray large enough to hold your main cocoa dispenser plus 5-6 topping bowls.
- Arrange items with visual balance – taller items toward the back, smaller bowls toward the front.
- Add decorative elements (pine branches, fairy lights, candles) to frame the display.
- Leave some breathing room so it doesn’t look cluttered.
Pro Tip: Personalize your wooden tray with a custom engraving like “Warm Wishes” or your family name for a keepsake-quality look.
6. Tiered Tray Display for Maximum Impact

Why it’s great: A tiered tray draws the eye and makes your cocoa bar feel like a professional décor installation, not just snacks on a table.
What You’ll Need:
- 2-3 tiered serving trays (wood or metal)
- Toppings and décor items in varying sizes
- Small risers or stands (optional, for additional height variation)
How to Set It Up:
- Place your tallest décor element (like a “Hot Cocoa Bar” sign) on the top tier.
- Arrange toppings across all three tiers, mixing colors and textures.
- Add mini faux marshmallows, pinecones, or holiday ornaments for visual appeal.
- Ensure items are stable and won’t tip over.
Pro Tip: Odd numbers look more visually appealing than even numbers – aim for 3 or 5 main focal points across your tiers.
7. Custom Wooden Sign with Fun Sayings

Why it’s great: A witty, personalized sign sets the tone and makes your bar feel intentional and special.
What You’ll Need:
- Wooden sign (pre-made or DIY with wood and paint)
- Paint, markers, or vinyl lettering
- Suggested sayings: “Warm Wishes”, “Baby, It’s Cold Outside”, “Tis the Season to Be Cozy”, “Warm Hearts Start Here”, or personalized options like “[Your Family Name]’s Cocoa Corner”
How to Set It Up:
- Create or purchase a sign that complements your décor style.
- Position it as the focal point above or beside your cocoa station.
- Ensure it’s clearly visible from across the room.
- Light it gently with overhead lighting or a small accent lamp for drama.
Pro Tip: Make signs reversible or seasonal so you can reuse them for different occasions – Christmas one side, Valentine’s Day on the other.
8. Personalized Mugs as Keepsake Gifts

Why it’s great: Send guests home with a memory. Personalized mugs make your cocoa bar feel like a premium experience and give guests something tangible to remember the event.
What You’ll Need:
- Plain ceramic mugs (in bulk from craft stores)
- Paint pens, vinyl decals, or heat-transfer supplies
- Personalization ideas: guest names, event date, custom designs, funny sayings
How to Set It Up:
- Prepare mugs ahead of time with names or designs.
- Arrange them on a dedicated shelf or table labeled “Take Home Your Mug!”
- Guests use their personalized mug throughout the event.
- They leave with a lasting keepsake.
Pro Tip: If personalizing feels like too much, offer plain mugs in fun colors or shapes, and let guests write their names with a paint pen during the party.
9. Chocolate Shaving Bar with Multiple Varieties

Why it’s great: Fresh chocolate shavings add elegance and a decadent touch that makes guests feel like they’re at a luxury hotel.
What You’ll Need:
- Dark chocolate bars, milk chocolate bars, and white chocolate bars
- Vegetable peeler or microplane grater
- Small bowls for each chocolate type
- Spoons for serving
How to Set It Up:
- Shave fresh chocolate into small bowls just before guests arrive.
- Label each bowl by chocolate type.
- Keep extra chocolate bars nearby for re-shaving if needed.
- Display at eye level so guests notice this premium touch.
Pro Tip: Slightly soften chocolate at room temperature for easier shaving, or chill it for finer, crispier shavings depending on the look you want.
10. Hot Cocoa Bar Menu Card (Laminated or on Chalkboard)

Why it’s great: A menu card – whether printed, handwritten, or on a chalkboard – guides guests and adds a café-quality touch to your setup.
What You’ll Need:
- Cardstock or poster board
- Markers or calligraphy pen
- Laminating sheets (optional)
- Suggested menu items: “Classic Cocoa”, “Minty Dream”, “Espresso Kick”, “Salted Caramel Bliss”, “Cinnamon Swirl”
How to Set It Up:
- Write or print a fun, creative menu listing 5-7 cocoa variations.
- Include brief descriptions (“A peppermint lover’s dream with crushed candy canes and vanilla whipped cream”).
- Laminate or protect with clear tape for durability.
- Position at the front of your bar where it’s easy to read.
Pro Tip: Add fun emojis or small illustrations to make your menu feel playful and inviting, not corporate.
11. Marshmallow Toppings in Multiple Sizes

Why it’s great: Marshmallows are the marshmallow equivalent of a no-brainer. Offering multiple sizes – jumbo, mini, flavored – gives guests choices and visual interest.
What You’ll Need:
- Jumbo marshmallows
- Mini marshmallows
- Flavored marshmallows (vanilla, cinnamon, peppermint if available)
- Small bowls or jars
How to Set It Up:
- Arrange marshmallows in separate bowls or small mason jars.
- Stack or pile them for visual height and appeal.
- Label each variety.
- Place near the main cocoa dispenser so guests grab them first.
Pro Tip: Toast marshmallows lightly with a kitchen torch just before serving for a gourmet touch that’ll make guests say “wow”.
12. Caramel Drizzle Station

Why it’s great: Caramel takes cocoa from good to unforgettable. A dedicated drizzle station with multiple caramel options feels luxe and indulgent.
What You’ll Need:
- Salted caramel sauce
- Regular caramel sauce
- Caramel drizzle bottles (for easy application)
- Small spoons or applicator sticks
- Optional: homemade salted caramel recipe
How to Set It Up:
- Pour caramel into drizzle bottles for easy application.
- Offer both regular and salted caramel for variety.
- Place drizzle bottles at the end of your topping line so guests add them last.
- Provide a small tray or napkins underneath to catch drips.
Pro Tip: Slightly warm caramel sauce before serving so it drizzles smoothly – cold caramel gets sticky and difficult to work with.
13. Chalkboard or Whiteboard Sign for Daily Specials
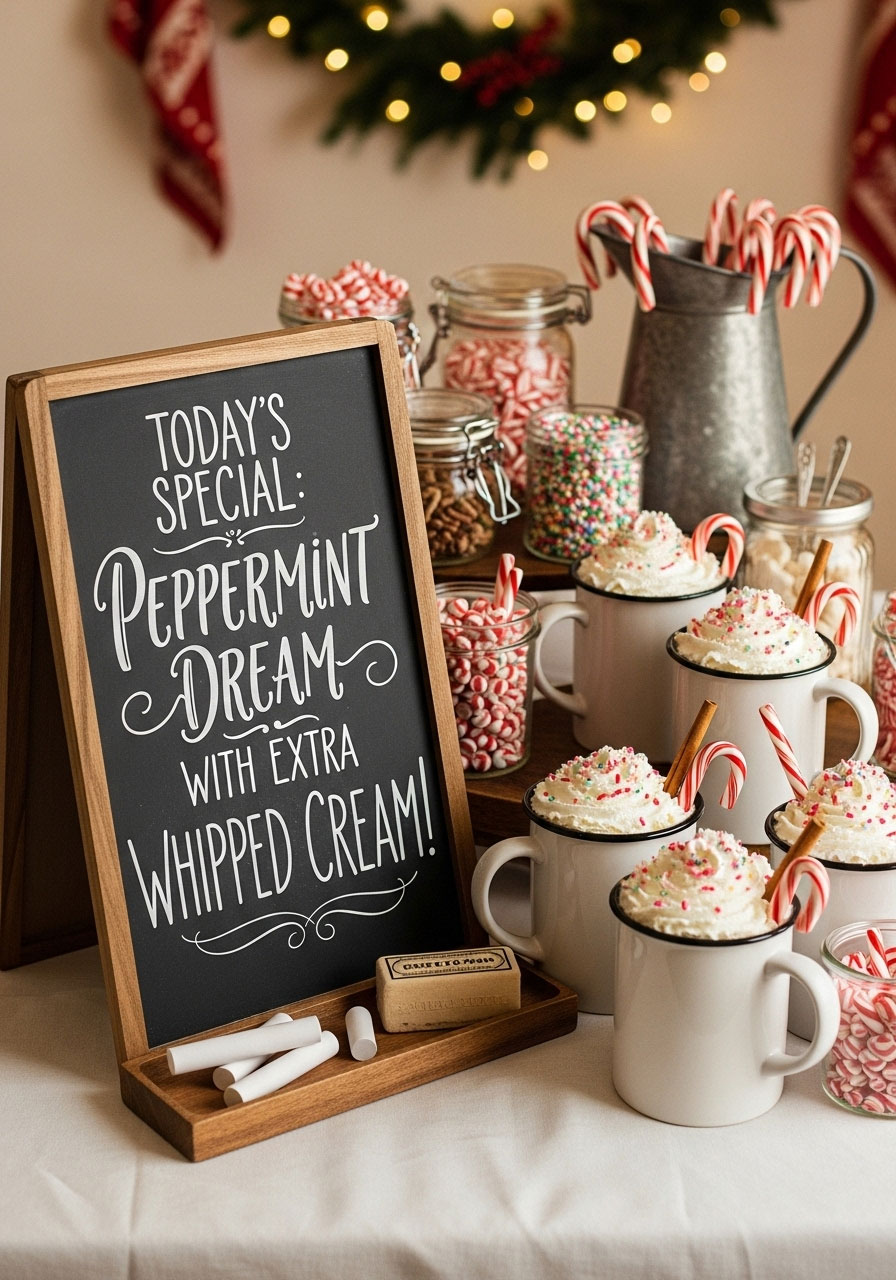
Why it’s great: A changeable sign makes your cocoa bar feel like it’s evolving and fresh, even if you host multiple events or keep the bar up throughout the season.
What You’ll Need:
- Chalkboard or whiteboard
- Chalk markers or dry-erase markers
- “Daily Special” cocoa ideas (rotate them!)
How to Set It Up:
- Create a simple chalkboard display near your cocoa bar.
- Write a featured flavor or combo for the day.
- Change it up if you’re hosting multiple days or occasions.
- Example: “Monday’s Special: Peppermint Dream with Extra Whipped Cream!”
Pro Tip: Leave a marker out so guests can add their own reviews or favorite combos – it’s interactive and fun.
14. Cinnamon Stick Stirrers as Functional Décor

Why it’s great: Cinnamon sticks serve double duty: they look beautiful and add spice to every sip.
What You’ll Need:
- Dried cinnamon sticks (buy in bulk)
- Tall glass or jar to hold them upright
- Optional: tie with twine or ribbon
How to Set It Up:
- Bundle cinnamon sticks together and tie with rustic twine or ribbon.
- Place in a tall jar or vase near the cocoa dispenser.
- Guests grab one as they fill their mugs.
- The cinnamon infuses the cocoa as they stir.
Pro Tip: Soak cinnamon sticks in warm water for 30 minutes before the event to make them slightly pliable and easier to grip.
15. Nutmeg Powder with a Decorative Shaker

Why it’s great: A sprinkle of nutmeg adds warmth, spice, and an old-fashioned, cozy vibe that screams “I care about details”.
What You’ll Need:
- Ground nutmeg (or freshly grated if you’re feeling fancy)
- Decorative shaker jar or container with perforations
- Small spoon (optional)
How to Set It Up:
- Fill your shaker with nutmeg.
- Place it at the end of your topping line.
- Label it clearly so guests know what it is.
- Provide a small spoon nearby for those who prefer to sprinkle carefully.
Pro Tip: Freshly grated nutmeg has a much more potent, delicious flavor than pre-ground. Grate it fresh the morning of your event for maximum aroma and taste.
16. Sprinkles Bar with Holiday and Fun Varieties

Why it’s great: Sprinkles appeal to all ages and add playful color and texture to every cup.
What You’ll Need:
- Holiday sprinkles (red, green, white)
- Rainbow sprinkles
- Pearl sprinkles or nonpareils
- Chocolate sprinkles
- Small bowls or shaker containers
How to Set It Up:
- Arrange sprinkles in small bowls or shaker containers.
- Group by color or type for easy browsing.
- Use clear containers so guests see all the options.
- Place toward the end of your topping line for a fun finishing touch.
Pro Tip: Store sprinkles in airtight containers away from humidity so they stay crispy and vibrant, not clumpy.
17. Chocolate Syrup Drizzle Bottles
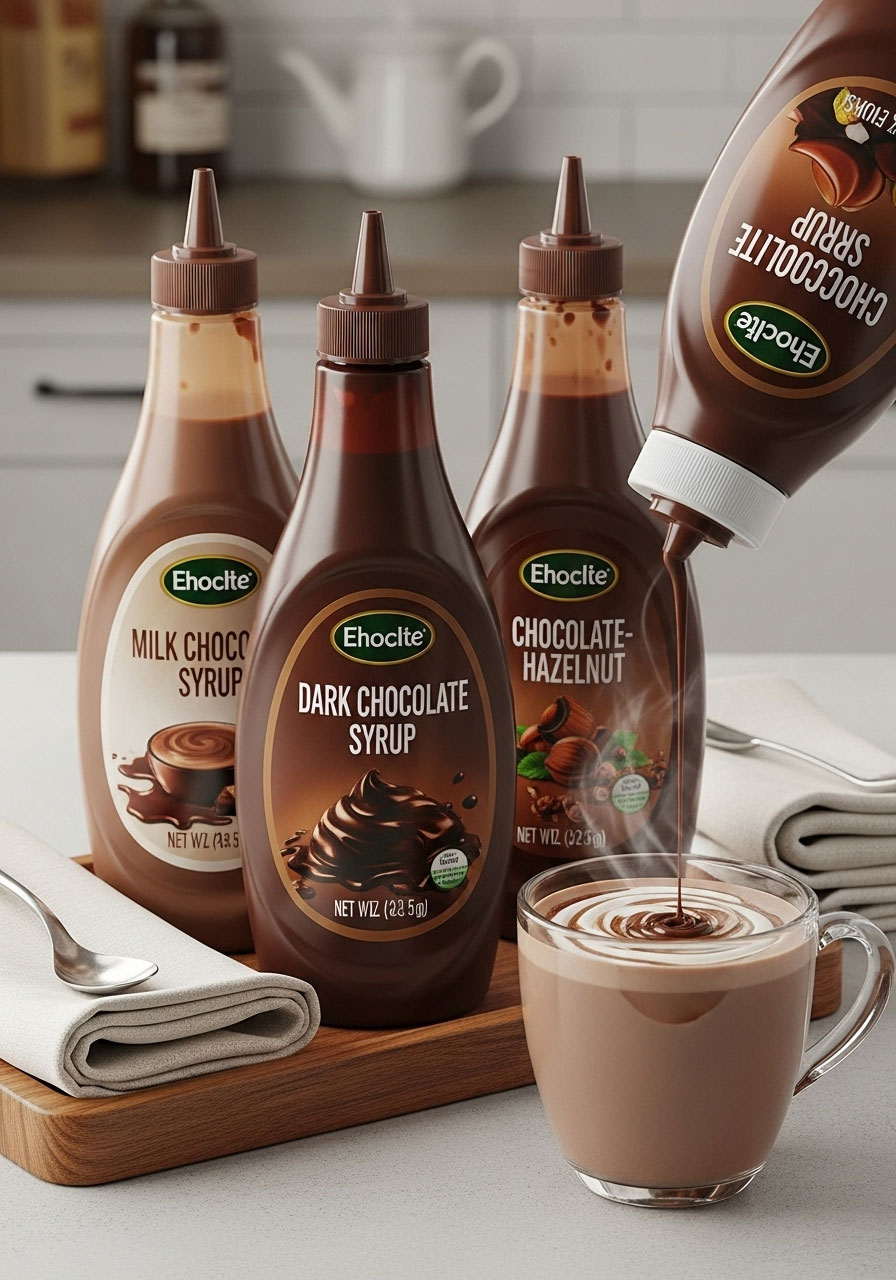
Why it’s great: Chocolate syrup is the ultimate cocoa accessory – it adds richness, sweetness, and visual appeal.
What You’ll Need:
- Chocolate syrup (store-bought or homemade)
- Squeeze bottles for easy application
- Optional: mix in a little hot cocoa for extra chocolate flavor
How to Set It Up:
- Pour chocolate syrup into squeeze bottles.
- Place at the topping station for easy drizzling.
- Offer both milk and dark chocolate syrup if possible.
- Keep napkins nearby!
Pro Tip: Warm syrup slightly before serving so it flows smoothly and sticks to the whipped cream beautifully.
18. Mini Cookie Toppings (Biscotti, Pirouettes, Shortbread)

Why it’s great: Cookies add crunch, texture, and a gourmet bakery feel to your cocoa bar.
What You’ll Need:
- Mini biscotti pieces
- Pirouette cookies (rolled wafers)
- Shortbread pieces
- Ginger snaps
- Small bowls for each type
How to Set It Up:
- Break larger cookies into bite-sized pieces or buy pre-sized minis.
- Arrange in small bowls.
- Label each variety.
- Place where guests can grab them as a topping or eat on the side.
Pro Tip: Offer a mix of sweet and slightly savory cookies (like ginger snaps) so guests have contrasting flavor options.
19. Pretzel Bits for a Sweet-and-Salty Twist

Why it’s great: Pretzels add unexpected crunch and that irresistible sweet-and-salty combo that elevates your cocoa bar from ordinary to innovative.
What You’ll Need:
- Pretzel pieces or pretzel thins
- Small bowl
- Optional: chocolate-covered pretzel bits for extra decadence
How to Set It Up:
- Break pretzels into bite-sized pieces.
- Place in a small bowl or jar.
- Label clearly so guests know it’s there.
- Position near the end of your topping line for a fun surprise element.
Pro Tip: Offer both regular and chocolate-covered pretzels so guests can choose their adventure level.
20. Crushed Candy Cane Pieces (Pre-Crushed for Convenience)

Why it’s great: Pre-crushed candy canes eliminate the mess while maintaining the festive crunch factor.
What You’ll Need:
- Candy canes (crushed beforehand)
- Small jar or bowl with a tight-fitting lid
- Spoon for serving
How to Set It Up:
- Crush candy canes in a food processor a day or two before your event.
- Store in an airtight container.
- Scoop into a display bowl just before guests arrive.
- Keep the backup container nearby for refilling.
Pro Tip: Crush candy canes while they’re still in the wrapper to keep things tidy, then transfer to your display bowl.
21. Festive Napkins with Hot Cocoa Themes
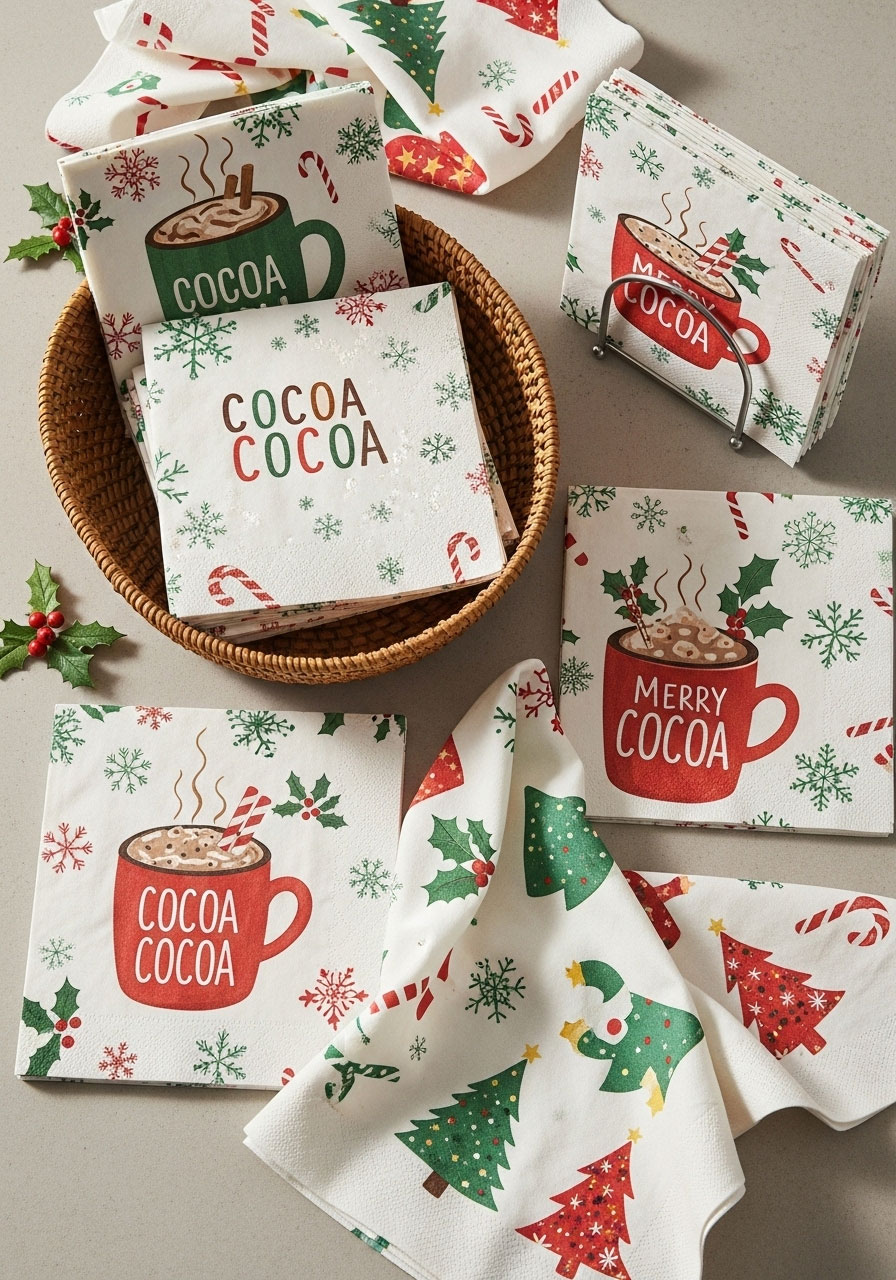
Why it’s great: Thematic napkins are a small detail that screams “I planned this!” and add visual cohesion to your bar.
What You’ll Need:
- Holiday-themed napkins with cocoa, winter, or seasonal prints
- Small napkin holder or basket
- Placement at the front and back of your station
How to Set It Up:
- Select napkins that match your cocoa bar’s color scheme or theme.
- Fold them neatly in a basket or dispenser.
- Place multiple napkin stations around your cocoa bar – one at the front and one at the back.
- Consider personalized napkins with your family name or event date for extra flair.
Pro Tip: Linen napkins look more elegant than paper for a truly upscale vibe, but paper is more practical. Choose what fits your event style!
22. Festive String Lights or Fairy Lights Around the Bar

Why it’s great: Soft, twinkling lights create ambiance, warmth, and an Instagram-worthy moment that makes your cocoa bar feel magical.
What You’ll Need:
- Battery-operated string lights or fairy lights
- Clips or adhesive hooks
- Optional: warm white LEDs for a cozy glow
How to Set It Up:
- Drape string lights around the perimeter of your cocoa bar table or shelving.
- Use battery-operated lights for safety and convenience.
- Test them before guests arrive.
- Adjust lighting so it’s visible but not overwhelming.
Pro Tip: Use warm white lights (2700K or lower) instead of cool white for a genuinely cozy, inviting atmosphere.
23. Pinecones and Greenery for Rustic Décor

Why it’s great: Natural elements like pinecones and evergreen branches add texture, warmth, and a “I’m so put-together” aesthetic without requiring much effort.
What You’ll Need:
- Fresh or faux pinecones
- Evergreen branches or garland
- Small vases or containers (optional)
- Floral foam (if using branches)
How to Set It Up:
- Arrange pinecones and branches around your cocoa bar in natural clusters.
- Mix real and faux elements if needed for budget and durability.
- Tuck them around the base, sides, or behind your main display.
- Add small battery-operated lights if desired.
Pro Tip: Collect real pinecones from your yard or a local park and let them dry for a week before using – they’ll look beautiful and natural.
24. Red and White Color Scheme with Candy Cane Accents

Why it’s great: A cohesive color palette ties your entire cocoa bar together and creates visual harmony that feels intentional and curated.
What You’ll Need:
- Red and white tablecloth or runner
- Candy cane decorations (real or faux)
- Red and white bowls for toppings
- White mugs or red mugs as options
How to Set It Up:
- Start with a solid red or white table base.
- Layer on a contrasting runner or second cloth.
- Use red and white serving bowls to match.
- Scatter candy canes or candy cane-shaped décor throughout.
- Tie everything together with a cohesive ribbon or trim.
Pro Tip: Add one accent color (gold, silver, or navy) to break up red and white and prevent it from feeling too stark or “too Christmas-y”.
25. Wooden Spoon Stirrers with Labels or Stamps

Why it’s great: Labeled wooden spoons are functional, charming, and add a DIY artisanal touch.
What You’ll Need:
- Wooden spoons (small dessert or coffee-sized)
- Wood-burning tool or paint markers
- Custom stamps with your initials or event name
- Bundle with twine
How to Set It Up:
- Personalize spoons with initials, dates, or fun sayings like “Warm Wishes”.
- Bundle several together with twine or ribbon.
- Place in a jar or cup near the cocoa dispenser.
- Guests use them as stirrers and can take them home as keepsakes.
Pro Tip: Make spoon personalization an activity – guests can write their own names with paint markers for extra engagement.
26. Tiered Candy Display with Gumdrops, Licorice, and Chocolates

Why it’s great: Offering a variety of candy toppings appeals to different tastes and makes your bar feel abundant and generous.
What You’ll Need:
- Gumdrops (festive colors)
- Red licorice pieces or candy sticks
- Chocolate-covered pretzels or chocolate chips
- Mini candy jars or bowls arranged on tiered display
How to Set It Up:
- Arrange candies in small individual bowls.
- Place on a tiered display for height and visual interest.
- Label each candy type.
- Group by color or type for easy browsing.
- Refill throughout the event.
Pro Tip: Offer a scoop in each candy bowl so guests don’t use their hands directly – more hygienic and looks more professional.
27. Hot Cocoa Bar Vintage Sign Aesthetic

Why it’s great: A vintage-styled sign transports guests back in time and adds nostalgic charm to your setup.
What You’ll Need:
- Vintage-looking sign (new but designed to look old)
- Rustic lettering or distressed wood
- Sayings like “Hot Cocoa Bar Est. 2024” or “Warm Hearts Start Here”
- Weathered metal frame (optional)
How to Set It Up:
- Create or purchase a sign with vintage lettering and weathered aesthetics.
- Position it as the visual anchor of your cocoa bar.
- Lean it against a backdrop or hang it on the wall.
- Use soft lighting to highlight it.
Pro Tip: DIY a vintage look using stain, paint, or wood-burning techniques on a new wooden board for authenticity on a budget.
28. Mason Jar Serving Containers for Toppings

Why it’s great: Mason jars are charming, functional, and scream “handmade” and “thoughtfully curated”.
What You’ll Need:
- Clear glass mason jars (quart and pint sizes)
- Chalkboard labels or tags
- String or twine
- Toppings: marshmallows, sprinkles, crushed candy canes, cocoa powder
How to Set It Up:
- Fill mason jars with various toppings.
- Label each jar with a chalkboard tag or hand-written label.
- Arrange jars in a line or staggered pattern.
- Tie a small twine bow around each jar for extra charm.
Pro Tip: Use clear jars so guests can see the colors and textures of the toppings – it’s visually inviting and helps them decide what they want.
29. Personalized Cocoa Kits as Party Favors

Why it’s great: Pre-packaged cocoa kits send guests home with a piece of your event and make them feel special and valued.
What You’ll Need:
- Small gift bags or boxes
- Instant hot cocoa packets or homemade cocoa mix
- Marshmallows in small bags
- Candy cane stirrers
- Labels with “From [Your Name]’s Hot Cocoa Bar” or event date
How to Set It Up:
- Assemble kits days before your event.
- Include a small cocoa packet, marshmallows, and a stirrer in each bag.
- Label beautifully with a personalized tag.
- Display them at the end of your cocoa bar as “Take One Home!”
- Guests grab one as they leave.
Pro Tip: Tie each kit with a ribbon and add a small thank-you card for an extra thoughtful touch.
30. Cocoa Powder Bar for Dusting and Flavoring

Why it’s great: High-quality cocoa powder adds depth of flavor and visual richness to every cup, plus it looks super professional.
What You’ll Need:
- Unsweetened cocoa powder (and optionally, Dutch cocoa for deeper flavor)
- Decorative shaker container
- Small spoon
- Optional: flavor-infused cocoa powders (cinnamon-cocoa, chili-cocoa)
How to Set It Up:
- Pour cocoa powder into a decorative shaker or container.
- Place at the end of your topping line as a finishing touch.
- Provide a small spoon for those who want to control the amount.
- Label clearly.
Pro Tip: Offer both regular and Dutch cocoa – Dutch cocoa has a deeper, richer flavor that cocoa connoisseurs will appreciate.
31. Hot Cocoa Bar with Mug Warmer Station

Why it’s great: A mug warmer keeps cocoa at the perfect temperature throughout your event, ensuring no guest has a lukewarm cup.
What You’ll Need:
- Large mug warmer or warming tray
- Backup mugs prepped with cocoa
- Heat source (electrical)
How to Set It Up:
- Set up a warming tray next to your main cocoa dispenser.
- Keep 3-4 mugs pre-filled with hot cocoa on the warmer.
- This prevents lines when guests want refills.
- Keep the warmer plugged in and stable on your table.
Pro Tip: Place the warmer on a trivet or heat-safe surface to protect your table from damage.
32. Customizable Cocoa Bar with Mix-and-Match Bases
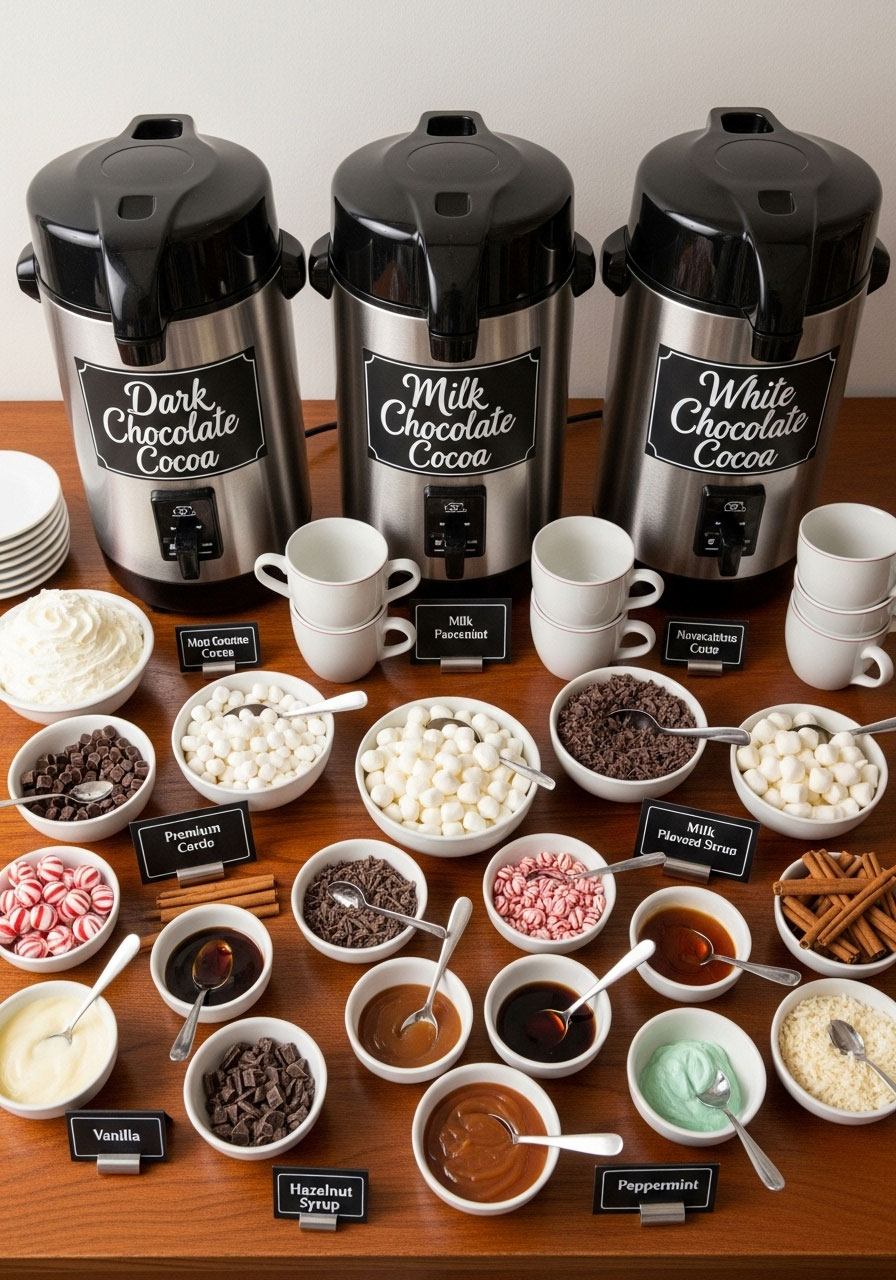
Why it’s great: Offering different cocoa bases (dark chocolate, milk chocolate, white chocolate) makes your bar feel luxe and accommodating.
What You’ll Need:
- Dark chocolate cocoa mix
- Milk chocolate cocoa mix
- White chocolate cocoa mix
- Three separate thermal dispensers or slow cookers
- Labels for each base
How to Set It Up:
- Prepare three different cocoa bases in separate dispensers.
- Label each clearly by type.
- Arrange them in a row.
- Guests can choose their preferred base, then customize with toppings.
Pro Tip: Make white chocolate cocoa slightly less sweet than the others since white chocolate is naturally sweeter.
33. Beverages Beyond Cocoa (Coffee, Tea, Hot Apple Cider)

Why it’s great: Not everyone wants cocoa, and offering alternatives shows thoughtfulness and inclusivity.
What You’ll Need:
- Coffee (regular and decaf)
- Tea (herbal, black, green varieties)
- Hot apple cider
- Additional thermal dispensers
- Cups appropriate for each beverage
How to Set It Up:
- Set up separate stations for coffee, tea, and cider.
- Clearly label each.
- Use the same topping bar for all beverages so guests can customize as desired.
- Stock additional cups near each beverage.
Pro Tip: Keep coffee and cider near each other since they pair well with similar toppings (cinnamon, caramel).
34. Handwritten Place Cards for Each Topping

Why it’s great: Handwritten labels feel personal, charming, and make your bar feel intentionally designed rather than haphazard.
What You’ll Need:
- Cardstock or kraft paper
- Calligraphy pen or nice markers
- Small easel or toothpick stands
- Creative topping names
How to Set It Up:
- Write topping names in beautiful script on small cards.
- Use creative names: “Crushed Dreams” (candy canes), “Fluffy Clouds” (marshmallows), “Chocolate Heaven” (chocolate shavings).
- Stand each card in front of its corresponding topping using a small easel or toothpick.
- Ensure names are clearly readable.
Pro Tip: Use consistent handwriting style and ink color across all labels for a cohesive, polished look.
35. Holiday-Themed Garland Backdrop

Why it’s great: A decorated backdrop frames your cocoa bar beautifully and creates a photo-worthy moment for guests.
What You’ll Need:
- Garland (fresh, faux greenery, or beaded)
- Ribbon in coordinating colors
- Ornaments or seasonal décor
- Command hooks or tape (if renting)
How to Set It Up:
- Hang garland on the wall or structure behind your cocoa bar.
- Weave ribbon through the garland.
- Tuck ornaments or bells into the garland at intervals.
- Ensure it’s secure and won’t fall.
- Step back and admire – your cocoa bar is now Instagram-worthy!
Pro Tip: Use a mix of textures and colors in your garland (matte and shiny, green and gold, etc.) for more visual interest.
36. Whipped Cream Dispenser with Canned Whipped Cream Backup
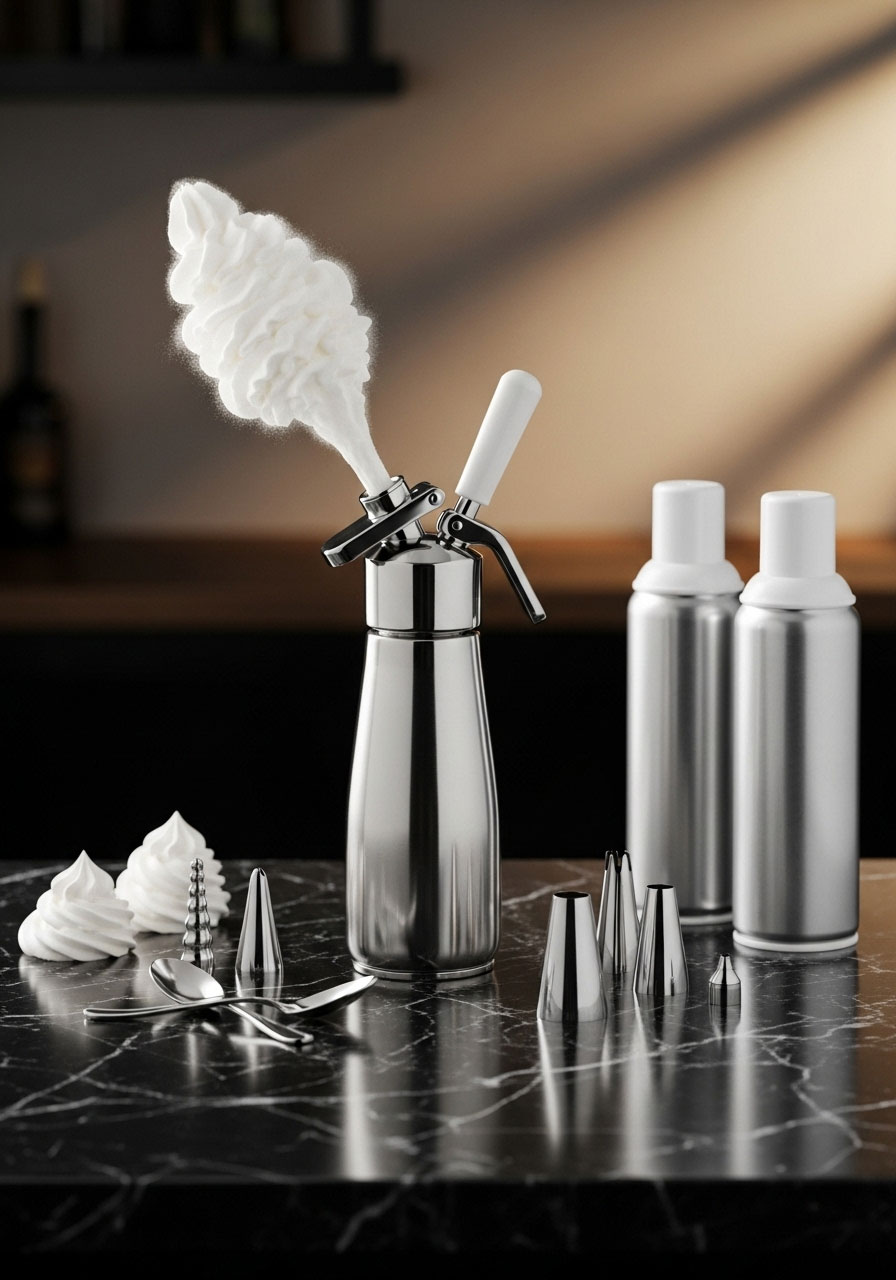
Why it’s great: A whipped cream dispenser feels fancy and professional, with a backup for when supplies run low.
What You’ll Need:
- Whipped cream dispenser (manual or electric)
- Heavy cream and nitrous oxide cartridges
- Canned whipped cream as backup
- Spoons or dispensing tips
How to Set It Up:
- Prepare your whipped cream dispenser according to instructions.
- Display it prominently at your topping station.
- Keep canned whipped cream nearby as backup.
- Train one guest or designate one person to help dispense if it’s complicated.
Pro Tip: Add a touch of vanilla extract or a teaspoon of sugar to homemade whipped cream before dispensing for a gourmet touch.
37. Cocoa Bar with a “Create Your Own Flavor” Challenge

Why it’s great: Turning cocoa customization into a friendly challenge makes the experience interactive, fun, and memorable.
What You’ll Need:
- Flavor add-in ingredients (all your toppings and syrups)
- Small cards with prompts like “Create the Most Decadent Cup”, “Invent a New Flavor”, or “Build the Tallest Tower of Toppings”
- Optional: small prizes for winners (gift cards, cocoa kits, festive mugs)
- Ballot box or judging method
How to Set It Up:
- Create challenge cards with different cocoa-building tasks.
- Guests pull a card and craft their cocoa accordingly.
- Display finished creations on a designated table for “judging”.
- Vote for winners by popular vote or designate yourself as judge.
- Award small prizes to the winners.
Pro Tip: Make it low-pressure and fun – the goal is laughter and creativity, not competition.
38. Vintage Recipe Cards with Homemade Cocoa Mix Instructions

Why it’s great: Sharing a homemade cocoa recipe feels generous and gives guests a way to recreate the magic at home.
What You’ll Need:
- Vintage-style recipe cards (or cardstock)
- Printed or handwritten recipe for homemade cocoa mix
- Optional: small bag of your cocoa mix with a ribbon and card attached
How to Set It Up:
- Design and print vintage-style recipe cards with your favorite cocoa mix recipe.
- Include ingredients, instructions, and storage tips.
- Display cards in a small holder near the end of your bar.
- Guests can grab one as a memento.
- Optional: offer small bags of your cocoa mix with the recipe attached.
Pro Tip: Include a personal note like “Made with love by [Your Name]” to make it extra special.
39. Candied Ginger or Crystallized Flowers as Premium Toppings

Why it’s great: Unusual, elegant toppings like candied ginger or crystallized flowers elevate your cocoa bar from “nice” to “seriously impressive”.
What You’ll Need:
- Candied ginger pieces
- Crystallized violets or rose petals (food-grade)
- Candied citrus peel
- Small bowls or jars
- Spoons for serving
How to Set It Up:
- Display these premium toppings prominently but separately from basic toppings.
- Label clearly so guests know they’re there.
- Offer them at the end of your topping line as an “optional luxury”.
- Use small spoons to encourage mindful portions.
Pro Tip: These toppings have strong flavors – a little goes a long way. Encourage guests to use sparingly for maximum flavor impact.
40. Cocoa Bar Themed Around a Movie or Book Character

Why it’s great: A themed bar makes your event feel unique, memorable, and perfectly tailored to your guests’ interests.
What You’ll Need:
- Movie/book quotes or imagery
- Color scheme matching the theme
- Thematic décor (quotes on signs, character figurines, themed colors)
- Themed topping names referencing the character or story
How to Set It Up:
- Choose a theme (e.g., “Frozen Hot Cocoa Bar”, “Winnie the Pooh Cocoa Corner”, “Elf’s Hot Chocolate Headquarters”).
- Decorate accordingly with colors, quotes, and imagery.
- Name cocoa flavors after characters or scenes.
- Play thematic music softly in the background.
Pro Tip: This works especially well for kids’ parties or themed adult gatherings like holiday movie marathons.
41. Double Boiler Method for Homemade Hot Cocoa Base

Why it’s great: Homemade cocoa from scratch tastes infinitely better than mixes and shows guests you care about quality.
What You’ll Need:
- Double boiler or heavy-bottomed pot
- High-quality cocoa powder
- Whole milk and cream
- Sugar or sweetener
- Vanilla extract
- Thermal dispenser for keeping it hot
How to Set It Up:
- Make your cocoa base using a double boiler method (melting chocolate and cocoa together gently).
- Whisk in cream and milk for richness.
- Keep warm in a thermal dispenser all event long.
- Guests serve themselves or you can ladle it for them.
Pro Tip: Make your cocoa base 30 minutes before guests arrive so it has time to develop flavor and reach the perfect temperature.
42. Sugar-Free and Dairy-Free Options

Why it’s great: Offering inclusive options ensures all guests – regardless of dietary restrictions – feel welcome and can enjoy the cocoa bar.
What You’ll Need:
- Sugar-free cocoa mix or sweetener
- Dairy-free milk (almond, oat, coconut)
- Dairy-free whipped cream
- Clear labeling for allergens
How to Set It Up:
- Set up a separate small thermal dispenser with sugar-free cocoa or keep a sugar-free option alongside regular cocoa.
- Label it clearly.
- Stock dairy-free milk alternatives nearby.
- Provide dairy-free whipped cream option.
- Ask guests about dietary restrictions when setting up.
Pro Tip: Make sure dairy-free toppings (whipped cream, marshmallows) are clearly labeled so guests with allergies can enjoy them too.
43. Flavor-Infused Syrups (Lavender, Earl Grey, Hazelnut)

Why it’s great: Sophisticated, homemade syrups take your cocoa bar from standard to chef-level gourmet.
What You’ll Need:
- Simple syrup base (sugar and water)
- Flavoring ingredients: dried lavender, Earl Grey tea, hazelnut extract, almond extract, peppermint extract
- Small bottles or jars for display
- Labels identifying each flavor
How to Set It Up:
- Make 2-3 specialty syrups a day or two before your event.
- Strain and transfer to attractive jars or bottles.
- Display them prominently at your topping station.
- Label with the flavor and suggested use (“Lavender Syrup – a sophisticated twist”).
- Include small spoons for easy measuring.
Pro Tip: Make lavender syrup by steeping dried lavender in simple syrup for 2-3 hours, then straining. It’s elegant and unexpected.
44. Cocoa Bar with Custom Family Name or Event Signage

Why it’s great: Personalized signage makes guests feel like this bar was created specifically for them and makes the event feel more meaningful.
What You’ll Need:
- Custom sign with family name, event name, or date
- Wood or metal base
- Paint, vinyl lettering, or calligraphy
- Lighting to highlight the sign
How to Set It Up:
- Create or commission a sign with your family name or event details.
- Position it as the focal point above or beside your bar.
- Light it subtly from above or use a small accent lamp.
- Ensure it’s visible in photos.
Pro Tip: Keep the sign after the event – it becomes a cherished decoration for future gatherings and a lasting memory of the occasion.
45. Hot Cocoa Bar for Different Times of Day (Morning, Evening, Late Night)

Why it’s great: Adjusting your cocoa bar throughout an event keeps it fresh, relevant, and gives guests a reason to visit multiple times.
What You’ll Need:
- Morning option: lighter toppings, espresso powder for coffee cocoa
- Evening option: classic marshmallows and candy canes
- Late-night option: indulgent toppings like chocolate shavings and salted caramel
- Signage indicating the current “shift”
How to Set It Up:
- Refresh your topping display and cocoa base at different points in your event.
- Change the flavor of the day or feature a new topping.
- Update your chalkboard sign to reflect the change.
- Make an announcement so guests know something new is available.
Pro Tip: This works especially well for all-day events, open houses, or extended holiday gatherings.
46. Cocoa Bar Photography Station with a Branded Backdrop
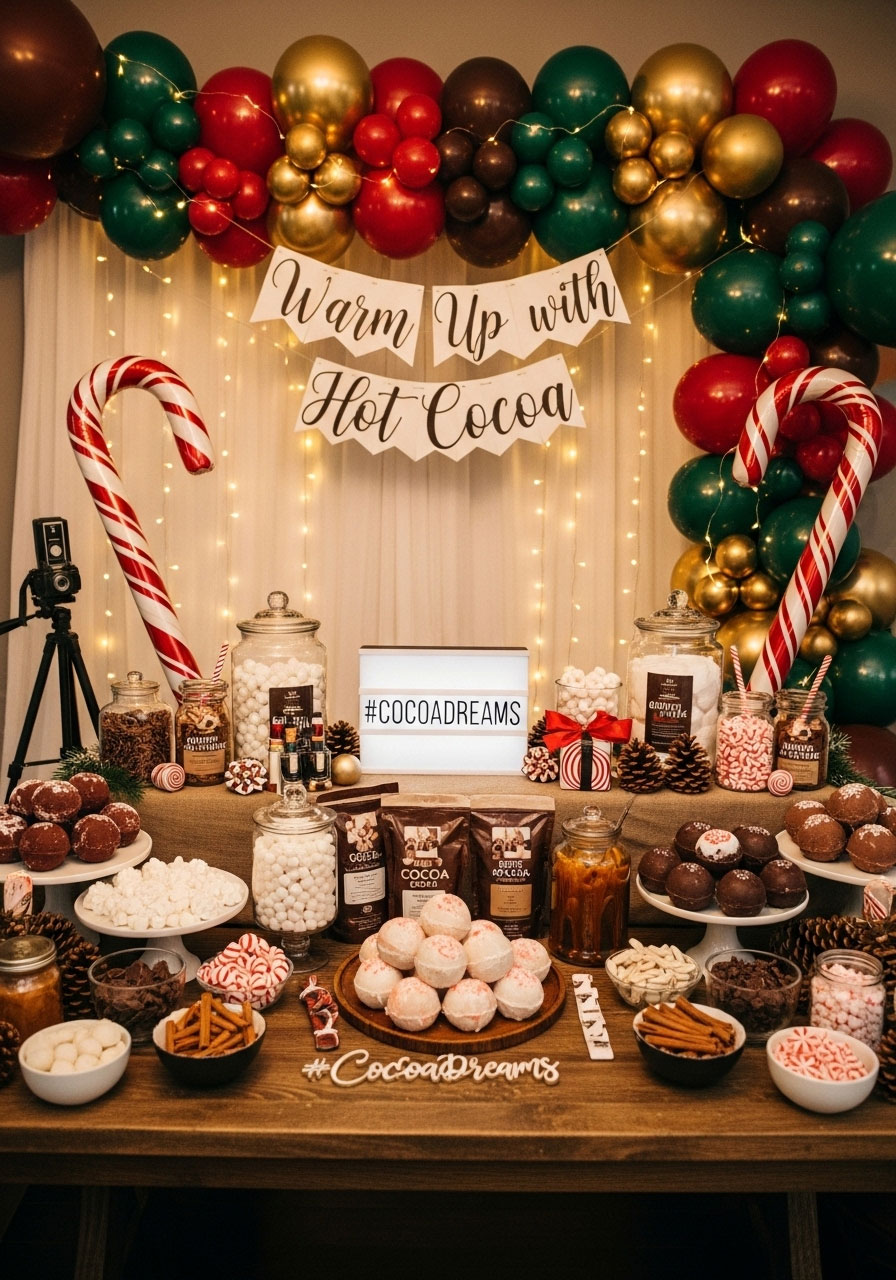
Why it’s great: A dedicated photo area with a beautiful backdrop encourages guests to share your cocoa bar on social media, extending your event’s reach and creating lasting memories.
What You’ll Need:
- Backdrop (balloon garland, fabric, or custom banner)
- Branded hashtag or watermark sign
- Lighting (natural or supplemental)
- Optional: designated phone holder or tripod
- Props (oversized candy canes, festive hats, cocoa-themed props)
How to Set It Up:
- Create a cohesive backdrop near your cocoa bar using fabric, garland, or a custom banner.
- Position it so the cocoa bar is visible in photos.
- Add soft lighting from above or the side.
- Create a branded hashtag sign (“Tag us @YourFamily #CocoaBar2025”).
- Optional: set up a small tripod with your phone for easy group photos.
Pro Tip: Use warm lighting (soft white bulbs or golden hour light) to make photos look warm, inviting, and delicious.
47. Cocoa Bar Etiquette Card for Friendly Reminders

Why it’s great: A gentle, witty reminder card keeps your bar clean and organized while maintaining a fun, lighthearted tone.
What You’ll Need:
- Cardstock or poster board
- Markers or calligraphy pen
- Friendly reminders: “Scoop responsibly”, “Share the wealth”, “One topping per scoop”, “Napkins are your friend”
How to Set It Up:
- Create a small, decorative card with friendly cocoa bar “etiquette” reminders.
- Position it near the start of your topping line.
- Keep the tone playful and humorous, not bossy.
- Example: “Pro Tip: One marshmallow scoop = less cleanup, more fun!”
Pro Tip: Laminate the card so it lasts through multiple events or seasons.
48. Vintage Cocoa Tins or Ceramic Canisters as Display Elements

Why it’s great: Beautiful canisters serve as both functional storage and charming décor that reinforces the rustic, curated aesthetic.
What You’ll Need:
- Vintage-looking cocoa tins or ceramic canisters
- Dry ingredients: cocoa powder, instant cocoa packets, cinnamon sticks
- Labels or vintage-style tags
How to Set It Up:
- Fill canisters with cocoa powder, cinnamon sticks, or other dry toppings.
- Display them prominently around your cocoa bar.
- Mix and match sizes and styles for visual interest.
- Label each canister.
- Use them as both décor and functional storage.
Pro Tip: Source vintage or vintage-styled canisters from thrift stores or online for an authentic farmhouse feel.
49. Cocoa Bar Thank-You Notes as Parting Gifts

Why it’s great: A handwritten thank-you note accompanying guests as they leave creates a lasting emotional connection and shows genuine gratitude.
What You’ll Need:
- Thank-you cards (matching your event theme)
- Pen for personal messages
- Optional: attach a small treat or cocoa kit to each note
- Display basket at exit point
How to Set It Up:
- Write personal thank-you notes ahead of time or write them as guests leave.
- Include a heartfelt message thanking them for joining your cocoa bar celebration.
- Optional: include a small cocoa packet or candy cane attached with ribbon.
- Place them on a small table near the exit so guests grab one as they leave.
- Follow up with an email or call referencing the note.
Pro Tip: Handwritten notes feel infinitely more special than printed ones – the effort matters and guests will remember it.
Ready to Host the Ultimate Hot Cocoa Bar Experience?
With these 49 ideas in your back pocket, you now have everything you need to create a hot cocoa bar that’ll have your guests talking about your event for weeks (or months). Whether you’re planning an intimate winter gathering, a holiday celebration, a wedding reception, or a casual family get-together, you can mix and match these ideas to design a cocoa experience that perfectly fits your vibe and your crowd.
Start with the foundations: a thermal dispenser of quality cocoa, at least 8-10 delicious toppings, and a beautiful display. Then layer on décor, personalization, and those special touches that turn a simple cocoa bar into an unforgettable moment. Your guests will feel the love, the thoughtfulness, and the fun you poured into creating this experience.
So grab your favorite mug, start planning, and get ready to become the host with the most. Your hot cocoa bar awaits, and it’s going to be absolutely epic.
More Christmas Party Ideas to Keep the Fun Rolling:
25 Best Christmas Gift Exchange Games to Make Your Holiday Party Unforgettable
100+ Best Outdoor DIY Christmas Decorations to Make Your Home the Talk of the Neighborhood
30 Cheap DIY Christmas Gifts That Look Expensive
100+ Best Christmas Games for Large Family Gatherings That Create Unforgettable Memories
100+ DIY Christmas Gifts Your Friends and Family Will Actually Love
75+ Frugal Christmas Gift Basket Ideas That’ll Make You Look Like a Holiday Hero
50 Budget-Friendly Gifts for Coworkers (or Neighbors) This Christmas
109 Best DIY Christmas Centerpiece Ideas to Make Your Holiday Table Unforgettable
100 Epic Christmas Eve Box Ideas to Make December 24th Unforgettable
40 Gift Basket Ideas for Women That’ll Make You Look Like a Gift-Giving Genius
