
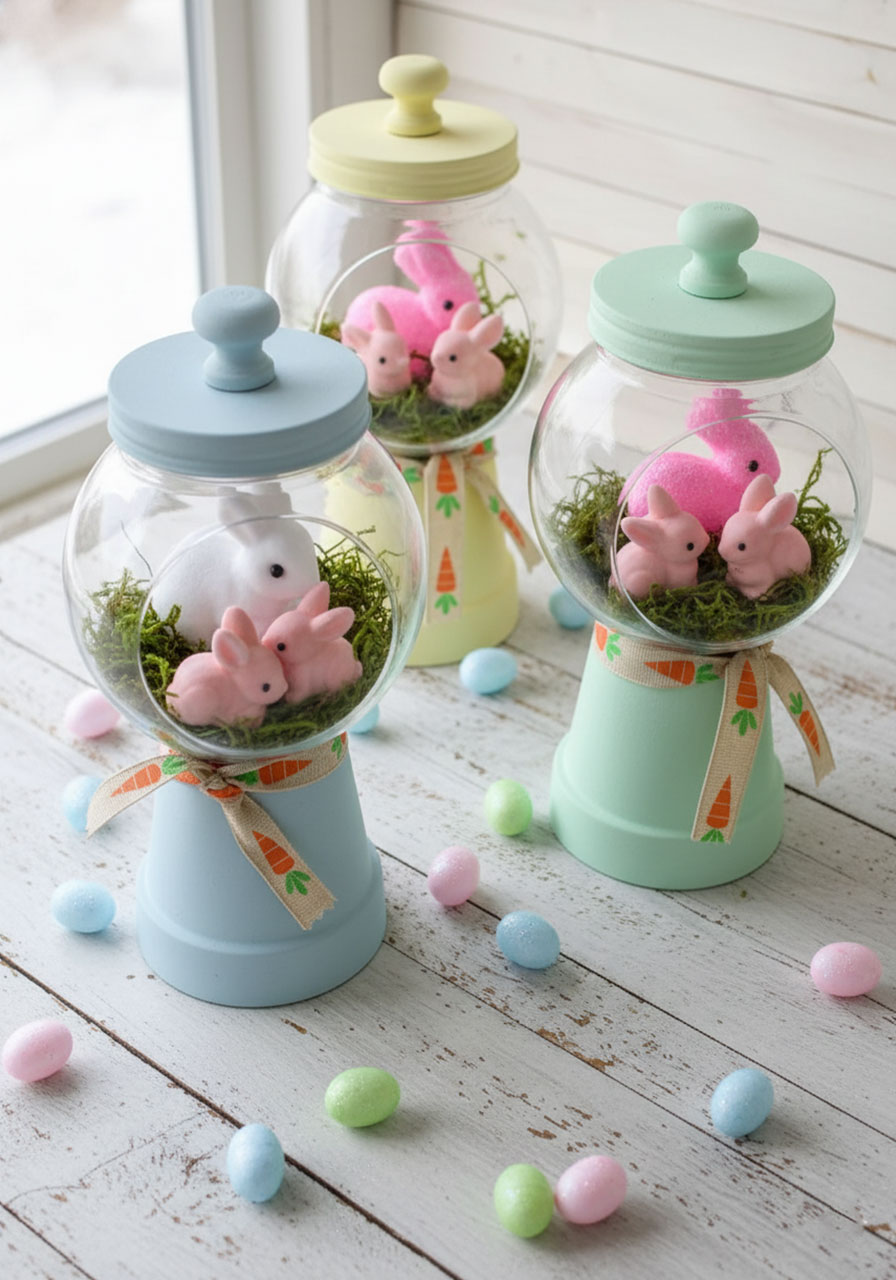
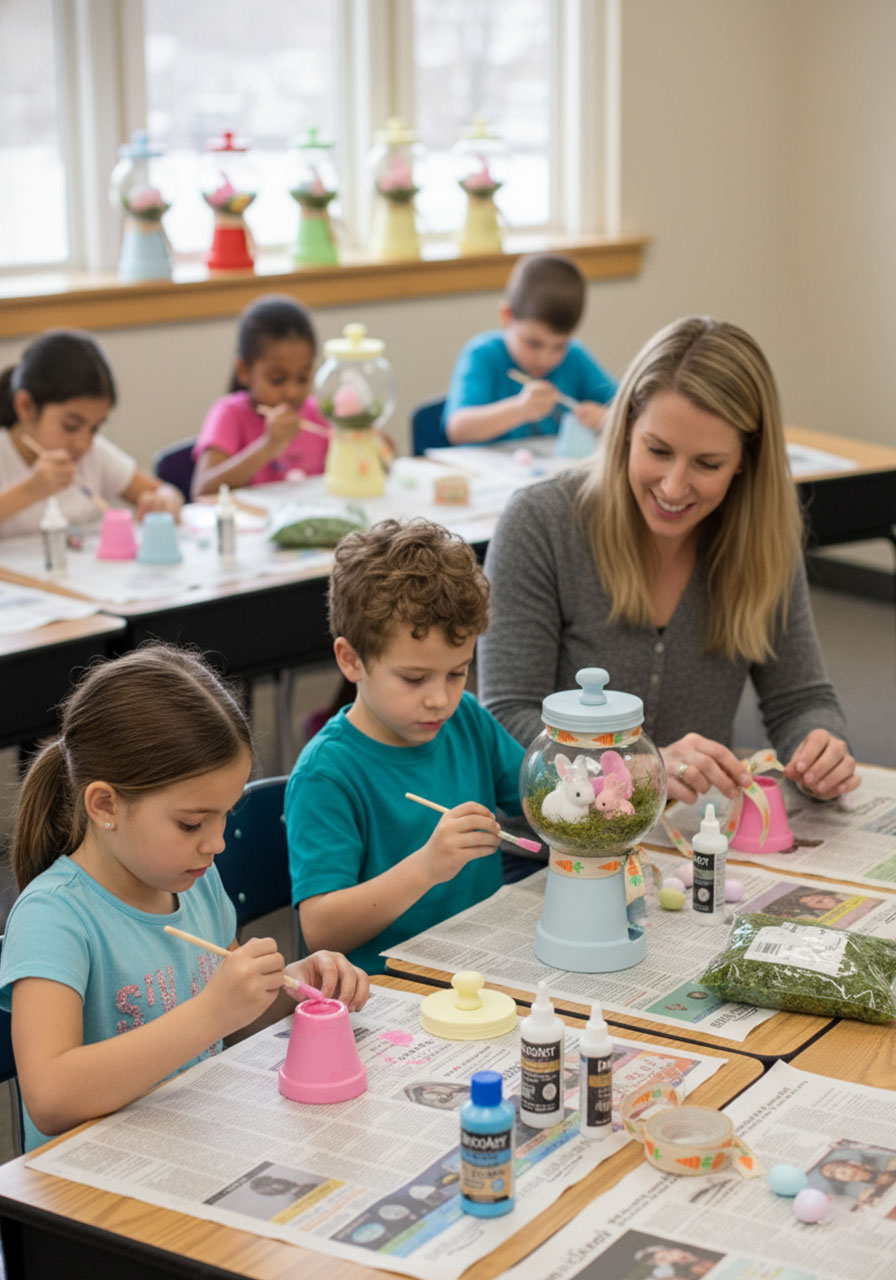
Get ready to turn your classroom or home into the most Instagram-worthy spring wonderland with this ridiculously cute (and crazy easy!) bunny gumball machine craft. Trust me – these little guys are about to become your new favorite Easter decoration, and your kids will be begging to make a whole bunny family!
Here’s the best part: you can whip up these charming spring decorations for about $6 each, using supplies you can grab at the dollar store. No fancy craft store runs required! These adorable “gumball machines” look like they came straight from a boutique, but they’re so simple that even craft newbies will nail it on the first try.
Whether you’re a teacher looking for a fun classroom project, a parent planning Easter activities, or simply someone who loves festive seasonal decor, this project checks all the boxes. It’s budget-friendly, kid-approved, and delivers that “wow, you made that?!” factor.
Why You’ll Love This Craft
Perfect for: Parents, teachers, Easter party planners, spring decor enthusiasts
Time to Complete: 20-30 minutes (plus drying time for paint)
Difficulty Level: Easy – seriously, if you can paint and glue, you’ve got this!
Budget: About $6 per bunny machine

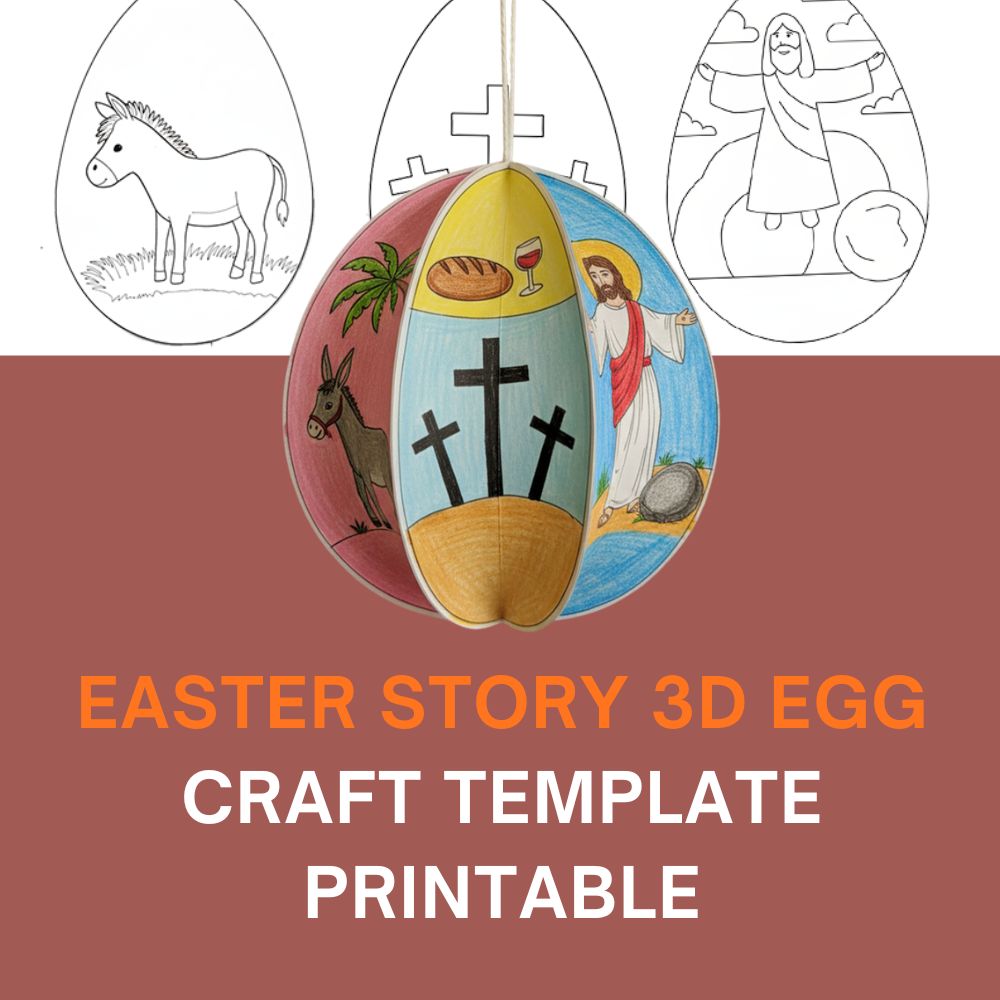
Easter Story 3D Egg Craft Template Printable | Resurrection Craft for Kids
🐴 Palm Sunday – Kids clearly understand Jesus entering Jerusalem as they color the donkey – turning a complex Bible moment into something simple and memorable.
🍞 Last Supper – The bread and wine panel helps you naturally introduce Jesus’ sacrifice and connect it to real-life church practices like communion.
✝️ The Cross – The crucifixion scene gives you a gentle, age-appropriate way to explain Jesus’ love and why His sacrifice matters.
⛰️ Empty Tomb – This panel captures kids’ attention with the biggest turning point – helping them grasp that Jesus defeated death.
🙏 Resurrection – Seeing Jesus alive again reinforces the full Easter message, giving kids a clear, lasting understanding of why we celebrate.

What You’ll Need
Here’s your shopping list – most of these you can snag at the dollar store or craft store:
Round candy jars (those fishbowl-style glass jars work perfectly!)
Mini terra cotta flower pots (2-3 inch diameter)
Wooden knobs (for the jar lids – these become the adorable little “tops”)
Acrylic paint in pastel spring colors (think baby blue, soft yellow, mint green, or blush pink)
Paintbrush and foam brush
Floral moss or decorative Easter grass
Foam Easter bunnies (find these in the Easter section at craft stores or dollar stores)
Strong adhesive glue (E6000 or similar – hot glue won’t cut it for this!)
Decorative ribbon (optional, but it adds such a sweet finishing touch!)
Hot glue gun and glue sticks (for the ribbon)
💡 Shopping Tip: Hit up your local dollar store first! You can usually find the candy jars, mini pots, foam bunnies, and moss there. Save the craft store for the wooden knobs and specialty ribbon if you want to get fancy.

How to Make Your Bunny Gumball Machines
Ready to dive in? Follow these foolproof steps, and you’ll have the cutest Easter decor in the neighborhood!
Step 1: Prep Your Materials
Gather all your supplies and set up your workspace. If you’re doing this with kids, lay down newspaper or a plastic tablecloth to catch any paint drips. Remove any labels from your candy jars and give everything a quick wipe-down to make sure your paint adheres nicely.
Step 2: Paint Party Time!
This is where the magic begins! Grab your acrylic paint and get ready to transform those plain terra cotta pots into spring masterpieces.
1. Paint the mini terra cotta pots in your chosen pastel color. Apply 2-3 thin coats for the best coverage, letting each coat dry completely between applications. (Patience pays off here!)
2. Paint the jar lids to match or coordinate with your pot color.
3. Paint the wooden knobs in a complementary color – these become the cute little “handles” on top of your gumball machine.
4. Let everything dry completely (usually 1-2 hours, or follow your paint’s instructions).
🎨 Pro Tip: Want to speed up the drying process? Use a hairdryer on the cool setting! Just keep it moving to avoid any weird texture issues. Also, painting the inside rim of the pot helps create a more polished, finished look.

Step 3: Create Your Bunny Scene
Now comes the fun part – decorating the inside of your jar!
1. Unscrew the lid from your candy jar and set it aside.
2. Add a layer of floral moss to the bottom of the jar. This creates that whimsical “spring meadow” vibe and gives your bunnies a soft place to sit.
3. Arrange your foam bunnies inside the jar. Get creative with positioning – you can have them facing different directions, or create a little bunny family scene. Mix sizes if you have them!
4. Once you’re happy with your arrangement, seal the jar with the lid.
💡 Creative Variation: Don’t stop at bunnies! Try foam chicks, butterflies, or even mini plastic Easter eggs for a different look. You could also add tiny silk flowers for extra spring charm!

Step 4: Assemble Your Gumball Machine
Here’s where your bunny jar transforms into an adorable “gumball machine”!
1. Apply your strong adhesive glue to the bottom rim of the flower pot. (Remember: hot glue won’t work here – you need something stronger like E6000 for glass and terra cotta!)
2. Carefully attach the glass jar to the bottom of the upside-down flower pot. The pot becomes the “base” of your gumball machine.
3. Press firmly and let it set according to your glue’s instructions (E6000 usually needs 24 hours for a full cure).
4. While you’re waiting, glue the wooden knob to the top of the jar lid to create that classic gumball machine “turn handle” look.
🔧 Pro Tip: Work on a protected surface and use just enough glue to create a strong bond without it squeezing out the sides. If you do get excess glue, wipe it away immediately with a damp cloth. For the best bond, let your gumball machine sit undisturbed for the full 24-hour cure time before handling or decorating further.

Step 5: Add the Finishing Touches
Almost done! Time to make your bunny gumball machine absolutely irresistible.
1. Tie a decorative ribbon around the “neck” where the jar meets the pot base. This covers the glue line and adds a pop of pattern and color!
2. Use hot glue to secure the ribbon bow in place so it doesn’t slip around.
3. Step back and admire your adorable creation!

Where to Display Your Bunny Gumball Machines
These cuties deserve prime real estate in your home or classroom! Here are some display ideas that’ll make them shine:
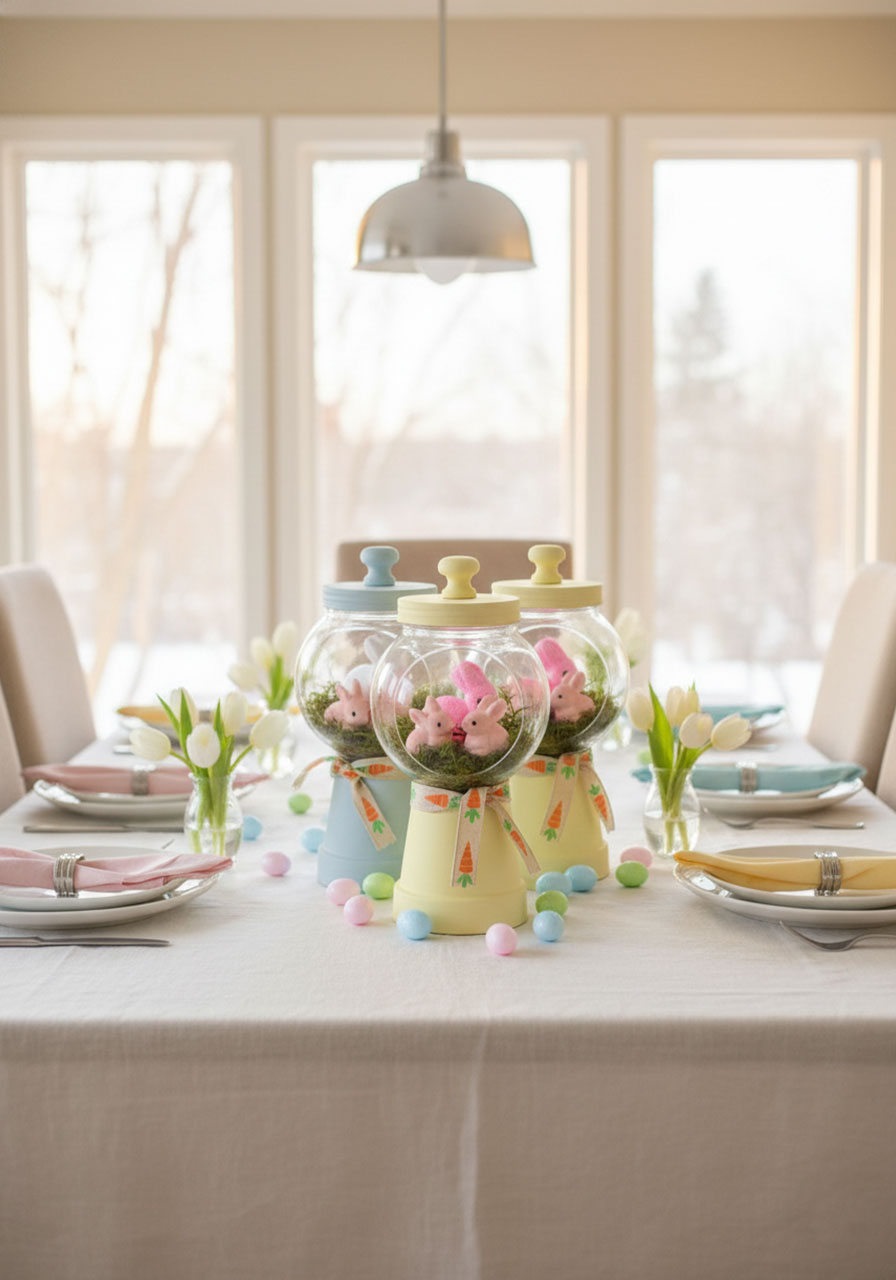
Easter table centerpiece: Cluster 2-3 machines in different colors down the center of your dining table
Mantel magic: Line them up on your fireplace mantel with some spring garland
Entry table welcome: Place one by your front door to greet guests with instant spring cheer
Classroom display: Set them on a shelf or windowsill to brighten up your learning space
Bookshelf styling: Tuck them between books for a playful pop of color
Brilliant Variations to Try
Once you’ve mastered the basic bunny machine, why stop there? Here are some fun twists to keep the creativity flowing:
The Classic Gumball Machine
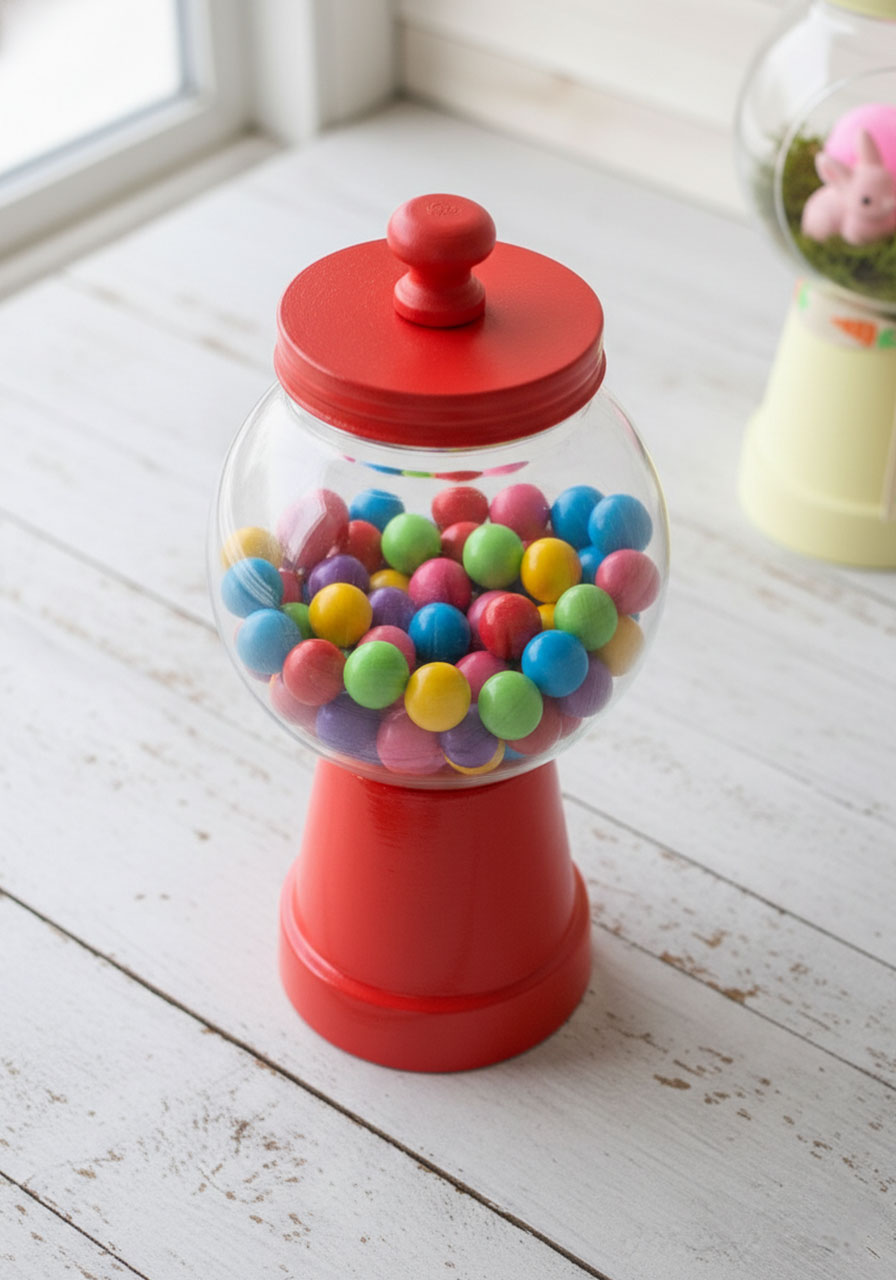
Want a year-round decoration? Paint your pot and lid in glossy red, skip the moss and bunnies, and fill the jar with colorful gumballs instead. Instant retro candy shop vibes!
Holiday Adaptations
Valentine’s Day: Pink and red colors, fill with conversation hearts
Halloween: Orange and black paint, fill with candy corn or plastic spiders
Christmas: Red and green, fill with mini ornaments or jingle bells
St. Patrick’s Day: Green paint with gold coins or shamrock confetti
Kid-Friendly Classroom Version
Turn this into a group project! Have each student paint their own pot in their favorite color and choose their own bunny arrangement. These make fantastic take-home crafts that parents will actually want to keep.
🌟 Teacher Pro Tip: Pre-paint the pots and lids before class if you’re short on time, then let kids focus on assembling and decorating. You could also turn this into a lesson about symmetry, color theory, or even the spring season and animal habitats!
Common Questions & Troubleshooting
Can I use hot glue for the jar-to-pot connection?
Short answer: nope! Hot glue doesn’t create a strong enough bond between glass and terra cotta. Save yourself the heartbreak of a broken bunny machine and invest in proper adhesive like E6000, Gorilla Glue, or another strong multi-surface adhesive. It’s worth the extra couple of dollars!
Where can I find foam bunnies?
Check the seasonal Easter section at craft stores (Michael’s, Hobby Lobby, Joann), dollar stores, or big-box retailers like Target and Walmart starting in late February through April. You can also find them year-round online on Amazon or Etsy.
Can I make these with kids?
Absolutely! This is a fantastic family or classroom project. Just keep in mind that younger kids might need help with the gluing steps (especially with the strong adhesive), and supervision is always a good idea. The painting and decorating parts are totally kid-friendly!
How do I store these after Easter?
Wrap each one carefully in bubble wrap or tissue paper and store in a sturdy box. They’re pretty durable once the glue is fully cured, but you want to protect that glass from any bumps or drops.
Final Thoughts: Your New Spring Tradition
There you have it – the easiest, most adorable Easter craft that looks like it took way more effort than it actually did! These bunny gumball machines are the perfect blend of cute, budget-friendly, and achievable, which in my book makes them absolute craft gold.
Whether you’re making just one for your entryway or creating a whole pastel army for your classroom, these little beauties bring instant spring cheer wherever they land. Plus, they’re so fun to customize that you might find yourself making them for every season and holiday. (Don’t say I didn’t warn you!)
So grab those dollar store supplies, put on some fun music, and get ready to create something adorable. Your Easter decor just got a serious upgrade, and your kids or students are going to love being part of the creative process. Happy crafting, and enjoy those bunny smiles!
More Easter Party Ideas to Keep the Fun Rolling:
8 Indoor Easter Egg Hunt Ideas That’ll Have Kids Begging for More
Easter Egg Rescue: The Fine Motor Activity That’ll Keep Kids Busy for Hours
Easter Story 3D Egg Craft – Teach Kids the Resurrection
Easter Sensory Bin: The Rainbow Rice Activity Kids Can’t Resist
Easter Peeps Game: The Hilarious Activity That’ll Have Kids Begging for More!
Toilet Paper Roll Bunny Craft: The Adorable Easter Activity Your Kids Will Beg to Make
30 Hilarious Easter Minute to Win It Games That’ll Have Everyone Cracking Up
12 Brilliant Easter Egg Hunt Ideas for Toddlers That Actually Work
